INFINITI Q60 COUPE 2018 Owner's Manual
Manufacturer: INFINITI, Model Year: 2018, Model line: Q60 COUPE, Model: INFINITI Q60 COUPE 2018Pages: 466, PDF Size: 2.48 MB
Page 171 of 466

3-30Pre-driving checks and adjustments
SPA2422A
Type A (if so equipped)
SPA2450
Type B (if so equipped)
Automatic anti-glare type
The inside mirror is designed so that it
automatically changes reflection according
to the intensity of the headlights of the
following vehicle.
The anti-glare system will be automatically
turned on when the ignition switch is placed
in the ON position.
The anti-glare system also operates for the
outside mirrors (if so equipped).
When the anti-glare system is turned on, the
indicator light
will illuminate and excessive
glare from the headlights of the vehicle
behind you will be reduced.
Type A (if so equipped): Push the
switchto make the inside mirror operate normally
and the indicator light will turn off. Push the
switchagain to turn the system on.
Type B (if so equipped): Push the “*” switch
to make the inside mirror operate nor-
mally. The indicator light will turn off. Push
the “I” switch
to turn the system on.
Do not allow any object to cover the sensors
or apply glass cleaner on them. Doing so
will reduce the sensitivity of the sensor,
resulting in improper operation.
For the compass (if so equipped) operation,
see “Compass” (P.2-9).
For the HomeLink
®Universal Transceiver (ifso equipped) operation, see “HomeLink
®
Universal Transceiver” (P.2-59).
OUTSIDE MIRRORS
WARNING
Objects viewed in the outside mirror on
the passenger side are closer than they
appear. Be careful when moving to the
right. Using only this mirror could cause
an accident. Use the inside mirror or
glance over your shoulder to properly
judge distances to other objects.
Page 172 of 466

JVP0246X
Adjusting outside mirrors
The outside mirror control switch is located
on the driver’s armrest.
The outside mirror will operate only when
the ignition switch is in the ACC or ON
position.
Move the switch
right or left to select the
right or left side mirror, then adjust using the
control switch
.
Defrosting outside mirrors
The outside mirrors will be heated when the
rear window defroster switch is operated.
SPA1829
Foldable outside mirrors
Fold the outside mirror by pushing it toward
the rear of the vehicle.
Reverse tilt-down feature (if so
equipped)
When backing up the vehicle, the right and
left outside mirrors will turn downward
automatically to provide better rear visibility.
1. Push the ignition switch to the ON
position.
2. Move the shift lever to the R (Reverse)
position.
3. Select the right or left side mirror by
operating the outside mirror controlswitch.
4. The outside mirror surface moves down-
ward.
When one of the following conditions has
occurred, the outside mirror surface will
return to its original position.
.The shift lever is moved to any position
other than R (Reverse).
.The outside mirror control switch is set to
the center position.
.The ignition switch is pushed to the OFF
position.
Automatic anti-glare (if so
equipped)
The outside mirrors are designed so that
they automatically change reflection ac-
cording to the intensity of the headlights of
the vehicle following you.
The anti-glare system will be automatically
turned on when the ignition switch is placed
in the ON position.
Pre-driving checks and adjustments3-31
Page 173 of 466

3-32Pre-driving checks and adjustments
SIC3869
VANITY MIRROR
To use the front vanity mirror, pull down the
sun visor and pull up the cover.The automatic drive positioner system has a
memory storage function.
JVP0462X
MEMORY STORAGE
Two positions for the driver’s seat, steering
column and outside mirrors can be stored in
the automatic drive positioner memory.
Follow these procedures to use the memory
system.
1. Adjust the driver’s seat, steering column
and outside mirrors to the desired posi-
tions by manually operating each adjust-
ing switch. For additional information,
see “Seats” (P.1-2), “Tilt/telescopic
steering” (P.3-27) and “Outside mirrors”
(P.3-30).
2. Push the SET switch and, within 5
seconds, push the memory switch (1 or
AUTOMATIC DRIVE POSITIONER
(if so equipped)
Page 174 of 466

2) fully for at least 1 second.
The indicator light for the pushed mem-
ory switch will stay on for approximately
5 seconds after pushing the switch.
When the memory is stored in the
memory switch (1 or 2), a buzzer will
sound.
If memory is stored in the same memory
switch, the previous memory will be
deleted.
Confirming memory storage
Push the SET switch. If the main memory
has not been stored, the indicator light will
come on for approximately 0.5 seconds.
When the memory has stored in position,
the indicator light will stay on for approxi-
mately 5 seconds.
Selecting the memorized position
1. Move the shift lever to the P (Park)
position.
2. Push the memory switch (1 or 2) fully for
at least 1 second.
The driver’s seat, steering column and
outside mirrors will move to the memor-
ized position with the indicator light
flashing, and then the light will stay on
for approximately 5 seconds.
Linking log-in function to a stored
memory position
The log-in function can be linked to a stored
memory position with the following proce-
dure.
1. Place the ignition switch in the ON
position while carrying an Intelligent
Key that was registered to the vehicle
with the log-in function. For more de-
tails, see “Log-in function” (P.3-15).
2. Adjust the position of the driver’s seat,
steering column and outside mirrors
manually. See “Seats” (P.1-2), “Tilt/tele-
scopic steering” (P.3-27) and “Outside
mirrors” (P.3-30).
3. Place the ignition switch in the OFF
position.
The next time you log in (selecting the user
on the display) after placing the ignition
switch in the ON position while carrying the
Intelligent Key, the system will automatically
adjust to the memorized driving position.
SYSTEM OPERATION
The automatic drive positioner system will
not work or will stop operating under the
following conditions:
.When the vehicle is moving.
.When any of the memory switches are
pushed while the automatic drive posi-tioner is operating.
.When the adjusting switch for the dri-
ver’s seat and steering column is turned
on while the automatic drive positioner is
operating.
.When the memory switch 1 or 2 is pushed
for less than 1 second.
.When the seat has already been moved
to the memorized position.
.When no seat position is stored in the
memory switch.
.While the walk-in function operates.
Pre-driving checks and adjustments3-33
Page 175 of 466

3-34Pre-driving checks and adjustments
MEMO
Page 176 of 466

4 Monitor, climate, audio, phone and voice re-
cognition systems
Infiniti InTouch Owner’s Manual................................... 4-2
Ventilators............................................................................ 4-2
Antenna ................................................................................ 4-3
Window antenna .......................................................... 4-3Satellite antenna......................................................... 4-3
Car phone or CB radio..................................................... 4-3
Page 177 of 466

4-2Monitor, climate, audio, phone and voice recognition systems
Refer to the Infiniti InTouch Owner’s Manual
that includes the following information.
.Infiniti InTouch
.Navigation system (if so equipped)
.Audio system
.Bluetooth
®Hands-Free Phone system
.Heater and air conditioner
.Viewing information
.Other settings
.Voice recognition (if so equipped)
.Monitor system
.Meter settings
.General system information
JVH0510X
Center ventilators
JVH0511X
Side ventilatorsOpen or close, and adjust the air flow
direction of ventilators.
: This symbol indicates that the ventilators
are closed.
: This symbol indicates that the ventilators
are open.
INFINITI INTOUCH OWNER’S MANUALVENTILATORS
Page 178 of 466

WINDOW ANTENNA
The antenna pattern is printed inside the
rear window.
CAUTION
.Do not place metalized film near the
rear window glass or attach any
metal parts to it. This may cause poor
reception or noise.
.When cleaning the inside of the rear
window, be careful not to scratch or
damage the rear window antenna.
Lightly wipe along the antenna with
a dampened soft cloth.
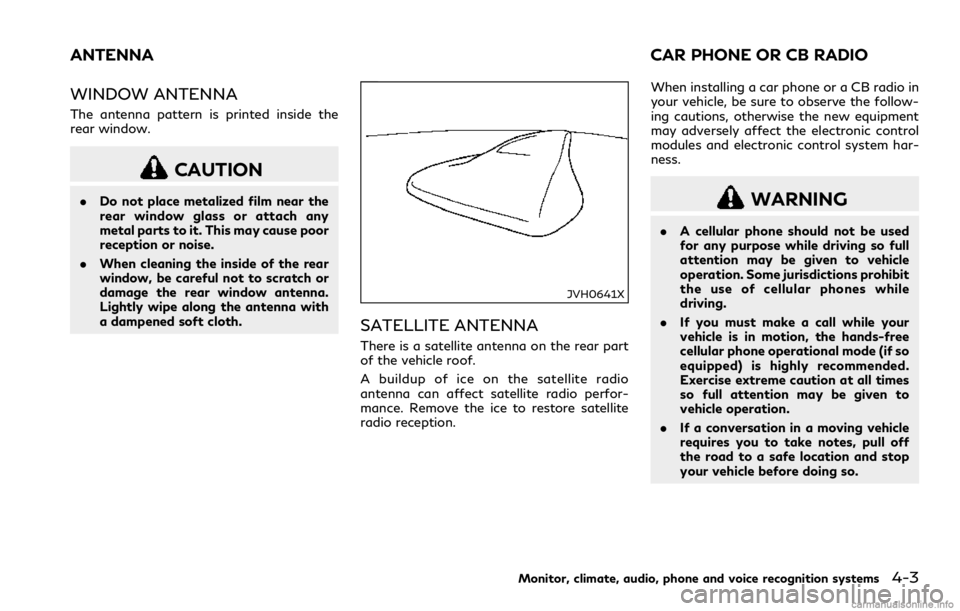
JVH0641X
SATELLITE ANTENNA
There is a satellite antenna on the rear part
of the vehicle roof.
A buildup of ice on the satellite radio
antenna can affect satellite radio perfor-
mance. Remove the ice to restore satellite
radio reception.When installing a car phone or a CB radio in
your vehicle, be sure to observe the follow-
ing cautions, otherwise the new equipment
may adversely affect the electronic control
modules and electronic control system har-
ness.
WARNING
.A cellular phone should not be used
for any purpose while driving so full
attention may be given to vehicle
operation. Some jurisdictions prohibit
the use of cellular phones while
driving.
.If you must make a call while your
vehicle is in motion, the hands-free
cellular phone operational mode (if so
equipped) is highly recommended.
Exercise extreme caution at all times
so full attention may be given to
vehicle operation.
.If a conversation in a moving vehicle
requires you to take notes, pull off
the road to a safe location and stop
your vehicle before doing so.
Monitor, climate, audio, phone and voice recognition systems4-3
ANTENNA CAR PHONE OR CB RADIO
Page 179 of 466

4-4Monitor, climate, audio, phone and voice recognition systems
CAUTION
.Keep the antenna as far away as
possible from the electronic control
modules.
.Keep the antenna wire more than 8 in
(20 cm) away from the electronic
control system harness. Do not route
the antenna wire next to any harness.
.Adjust the antenna standing-wave
ratio as recommended by the manu-
facturer.
.Connect the ground wire from the CB
radio chassis to the body.
.For details, it is recommended you
visit an INFINITI retailer.
Page 180 of 466

5 Starting and driving
Precautions when starting and driving........................ 5-4
Exhaust gas (carbon monoxide)............................... 5-4
Three-way catalyst...................................................... 5-5
Tire Pressure Monitoring System (TPMS) ............ 5-5
Avoiding collision and rollover.................................. 5-9
Off-road recovery ........................................................ 5-9
Rapid air pressure loss.............................................. 5-10
Drinking alcohol/drugs and driving....................... 5-10
Intelligent All-Wheel Drive (AWD) driving
safety precautions (AWD models)......................... 5-11
Push-button ignition switch ......................................... 5-11
Operating range for engine start function.......... 5-12
Push-button ignition switch operation................ 5-12
Push-button ignition switch positions ................. 5-13
Emergency engine shut off...................................... 5-13
Intelligent Key battery discharge........................... 5-14
Before starting the engine ............................................ 5-14
Starting the engine.......................................................... 5-15
Remote start (if so equipped) ................................. 5-15
Driving the vehicle ........................................................... 5-16
Automatic Transmission (AT).................................. 5-16
Parking brake.................................................................... 5-21
INFINITI Drive Mode Selector ..................................... 5-22
STANDARD mode...................................................... 5-22
SPORT+ mode (if so equipped) .............................. 5-23SPORT mode............................................................. 5-23
SNOW mode.............................................................. 5-23
ECO mode (if so equipped) ................................... 5-23
PERSONAL mode.................................................... 5-25
Active Lane Control (if so equipped)......................... 5-26
Active Lane Control operation............................. 5-28
Turning Active Lane Control ON/OFF.............. 5-29
How to enable/disable Active Lane Control.... 5-30
Active Lane Control limitations............................ 5-31
System temporarily unavailable ........................... 5-32
System malfunction................................................. 5-32
System maintenance ............................................... 5-33
Lane Departure Warning (LDW) system/Lane
Departure Prevention (LDP) (if so equipped).......... 5-34
LDW system operation........................................... 5-35
How to enable/disable the LDW system.......... 5-36
LDP system operation ............................................ 5-36
Turning the LDP system ON/OFF ..................... 5-37
How to enable/disable the LDP system ........... 5-38
LDW/LDP system limitations .............................. 5-38
System temporarily unavailable ........................... 5-39
System malfunction................................................ 5-40
System maintenance .............................................. 5-40
Blind Spot Warning (BSW) (if so equipped) ............ 5-41
BSW system operation........................................... 5-43