reset INFINITI Q70 HYBRID 2014 User Guide
[x] Cancel search | Manufacturer: INFINITI, Model Year: 2014, Model line: Q70 HYBRID, Model: INFINITI Q70 HYBRID 2014Pages: 522, PDF Size: 4.02 MB
Page 175 of 522

3-22Pre-driving checks and adjustments
SPA2832
LOOSE FUEL CAP warning
The LOOSE FUEL CAP warning appears on
the dot matrix liquid crystal display when
the fuel-filler cap is not tightened correctly
after the vehicle has been refueled. It may
take a few driving trips for the warning to
be displayed. To turn off the warning,
perform the following steps:
1. Remove and install the fuel-filler cap assoon as possible. (See “Fuel-filler cap”
(P.3-20).)
2. Tighten the fuel-filler cap until it clicks.
3. Push the reset switch
*Aon the right
side of the combination meter for about 1 second to turn off the LOOSE FUEL
CAP warning after tightening the fuel
cap.
WARNING
.
Do not adjust the steering wheel while
driving. You could lose control of your
vehicle and cause an accident.
. Do not adjust the steering wheel any
closer to you than is necessary for
proper steering operation and comfort.
The driver’s air bag inflates with great
force. If you are unrestrained, leaning
forward, sitting sideways or out of
position in any way, you are at greater
risk of injury or death in a crash. You
may also receive serious or fatal injuries
from the air bag if you are up against it
when it inflates. Always sit back against
the seatback and as far away as practical
from the steering wheel. Always use the
seat belts.
TILT/TELESCOPIC STEERING
Page 182 of 522
Linking Intelligent Key to a stored
memory position
The Intelligent Key can be linked to a
stored memory position with the following
procedure.
1. Follow the steps for storing a memoryposition.
2. While the indicator light for the memory switch being set is illuminated for 5
seconds, push the
button on the
Intelligent Key. If the indicator light
blinks, the Intelligent Key is linked to
that memory setting.
Push the ignition switch to the OFF posi-
tion, and then push the
button on the
Intelligent Key. The driver’s seat, steering
wheel and outside mirrors will move to the
memorized position.
Confirming memory storage
. Push the ignition switch to the ON
position and push the SET switch. If
the main memory has not been stored,
the indicator light will come on for
approximately 0.5 second. When the
memory has stored in position, the
indicator light will stay on for approxi-
mately 5 seconds. .
If the 12-volt battery cable is discon-
nected, or if the fuse opens, the
memory will be canceled. In this case,
reset the desired position using the
previous procedure.
. If optional Intelligent Keys are added to
your vehicle, the memory storage pro-
cedure to switch 1 or 2 and linking
Intelligent Key procedure to a stored
memory position should be performed
again for each Intelligent Key. For
additional Intelligent Key information,
see “Keys” (P.3-2).
Selecting the memorized position
1. Move the shift lever to the P (Park)
position.
2. Use one of the following methods to move the driver’ s seat, the outside
mirrors and the steering wheel.
.Push the memory switch (1 or 2) fully for at least 1 second.
.Within 45 seconds of opening thedriver’ s door, push the memory
switch (1 or 2) fully for at least 1
second.
The driver’s seat, steering column
and outside mirrors will move to the
memorized position with the indica-
tor light flashing, and then the light will stay on for approximately 5
seconds.
SETTING MEMORY FUNCTION
The status of the following settings can be
linked to the Intelligent Key and the
memorized settings can be available for
each Intelligent Key.
.
Climate control system
. Navigation system (if so equipped)
. Audio system
To use the memory function, lock the doors
with the Intelligent Key that is linked to the
settings.
To enable the memorized settings:
1. Carry the Intelligent Key that is linked to the settings, and unlock the doors by
pushing the driver’s door handle re-
quest switch or UNLOCK
button on
the Intelligent Key.
2. Push the ignition switch to the “ON”
position. “Connection with the key has
been done” will be displayed on the
screen and the memorized settings are
available (only when a new Intelligent
Key is used).
Pre-driving checks and adjustments3-29
Page 195 of 522
4-12Monitor, climate, audio, phone and voice recognition systems
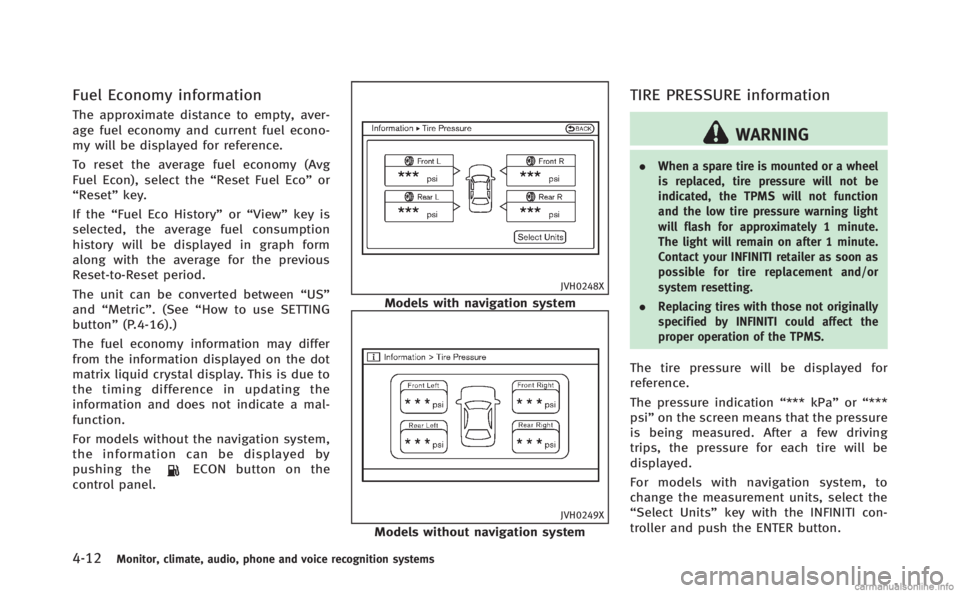
Fuel Economy information
The approximate distance to empty, aver-
age fuel economy and current fuel econo-
my will be displayed for reference.
To reset the average fuel economy (Avg
Fuel Econ), select the“Reset Fuel Eco”or
“Reset” key.
If the “Fuel Eco History” or“View” key is
selected, the average fuel consumption
history will be displayed in graph form
along with the average for the previous
Reset-to-Reset period.
The unit can be converted between “US”
and “Metric”. (See “How to use SETTING
button” (P.4-16).)
The fuel economy information may differ
from the information displayed on the dot
matrix liquid crystal display. This is due to
the timing difference in updating the
information and does not indicate a mal-
function.
For models without the navigation system,
the information can be displayed by
pushing the
ECON button on the
control panel.
JVH0248X
Models with navigation system
JVH0249X
Models without navigation system
TIRE PRESSURE information
WARNING
. When a spare tire is mounted or a wheel
is replaced, tire pressure will not be
indicated, the TPMS will not function
and the low tire pressure warning light
will flash for approximately 1 minute.
The light will remain on after 1 minute.
Contact your INFINITI retailer as soon as
possible for tire replacement and/or
system resetting.
. Replacing tires with those not originally
specified by INFINITI could affect the
proper operation of the TPMS.
The tire pressure will be displayed for
reference.
The pressure indication “*** kPa”or“***
psi ”on the screen means that the pressure
is being measured. After a few driving
trips, the pressure for each tire will be
displayed.
For models with navigation system, to
change the measurement units, select the
“Select Units” key with the INFINITI con-
troller and push the ENTER button.
Page 196 of 522
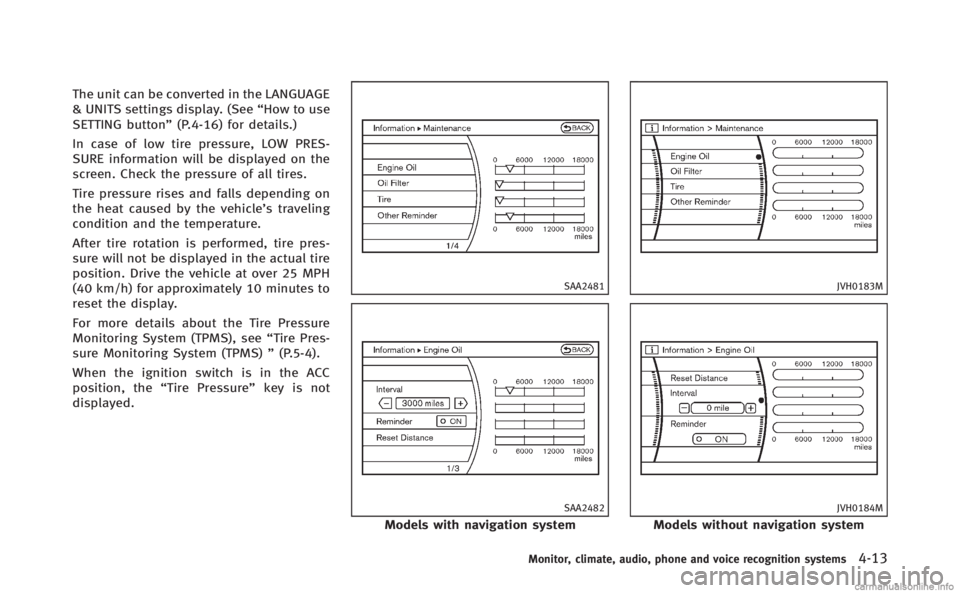
The unit can be converted in the LANGUAGE
& UNITS settings display. (See“How to use
SETTING button” (P.4-16) for details.)
In case of low tire pressure, LOW PRES-
SURE information will be displayed on the
screen. Check the pressure of all tires.
Tire pressure rises and falls depending on
the heat caused by the vehicle’s traveling
condition and the temperature.
After tire rotation is performed, tire pres-
sure will not be displayed in the actual tire
position. Drive the vehicle at over 25 MPH
(40 km/h) for approximately 10 minutes to
reset the display.
For more details about the Tire Pressure
Monitoring System (TPMS), see “Tire Pres-
sure Monitoring System (TPMS) ”(P.5-4).
When the ignition switch is in the ACC
position, the “Tire Pressure” key is not
displayed.
SAA2481
SAA2482
Models with navigation system
JVH0183M
JVH0184M
Models without navigation system
Monitor, climate, audio, phone and voice recognition systems4-13
Page 197 of 522

4-14Monitor, climate, audio, phone and voice recognition systems
Maintenance information
The maintenance intervals can be dis-
played for the engine oil, oil filter, tire
and other reminders.
To set a maintenance interval, select a
preferred item from the list.
You can also set to display a message to
remind you that the maintenance needs to
be performed.
For models with the navigation system,
select the“Others” key to show the
“Maintenance” key.
The following example shows how to set
the engine oil maintenance information.
Use the same steps to set the other
maintenance information.
1. Set the interval (mileage) of the main- tenance schedule. To determine the
recommended maintenance interval,
refer to your “INFINITI Service and
Maintenance Guide”.
2. To display the reminder automatically when the desired distance is reached,
select the “Reminder” key.
3. Reset the driving distance to the new maintenance schedule. 4. To return to the previous screen, push
the BACK button.
The unit can be converted between “US”
and “Metric”. (See “How to use SETTING
button” (P.4-16).)
SAA3003
Models with navigation system
SAA1611
Models without navigation system
Page 198 of 522

The Reminder will be automatically dis-
played when the specified distance has
been driven and every time the ignition
switch is pushed to the ACC or ON position.
The reminder will not appear while driving.
Select the“OK”key to hide the reminder
for the rest of the current drive.
To stop the reminder from appearing,
perform one of the following actions:
. Select the “Reset Distance” key.
. Deactivate the “Reminder”.
. Increase the “Interval”distance to be
more than the current distance being
tracked.
JVH0273M
Others information (models with
navigation system)
The Others information display will appear
when pushing the INFO button and select-
ing the “Others” key.
Map Update:
For the details of this item, see the
separate Navigation System Owner’s Man-
ual.
Navigation Version:
For the details of this item, see the
separate Navigation System Owner’s Man-
ual. When the ignition switch is in the ignition
position, the
“Navigation Version” key is
displayed after pushing the INFO button.
GPS Position:
For the details of this item, see the
separate Navigation System Owner’s Man-
ual.
Voice Recognition:
For the details of this item, see “INFINITI
Voice Recognition system (models with
navigation system)” (P.4-109).
Monitor, climate, audio, phone and voice recognition systems4-15
Page 237 of 522
4-54Monitor, climate, audio, phone and voice recognition systems
.An iPod nano®(1st Generation) may
remain in fast forward or rewind mode
if it is connected during a seek opera-
tion. In this case, please manually reset
the iPod
®.
. An iPod nano®(2nd Generation) will
continue to fast-forward or rewind if it
is disconnected during a seek opera-
tion.
. An incorrect song title may appear when
the Play Mode is changed while using
an iPod nano
®(2nd Generation)
. Audiobooks may not play in the same
order as they appear on an iPod
®.
. Large video files cause slow responses
in an iPod
®. The vehicle center display
may momentarily black out, but will
soon recover.
. If an iPod
®automatically selects large
video files while in the shuffle mode,
the vehicle center display may momen-
tarily black out, but will soon recover.
Compressed Audio Files (MP3/
WMA/AAC)
Explanation of terms:
. MP3 —MP3 is short for Moving Pictures
Experts Group Audio Layer 3. MP3 is
the most well known compressed digital audio file format. This format
allows for near
“CD quality”sound, but
at a fraction of the size of normal audio
files. MP3 conversion of an audio track
can reduce the file size by approxi-
mately a 10:1 ratio (Sampling: 44.1
kHz, Bit rate: 128 kbps) with virtually
no perceptible loss in quality. The
compression reduces certain parts of
sound that seem inaudible to most
people.
. WMA —Windows Media Audio (WMA) is
a compressed audio format created by
Microsoft as an alternative to MP3. The
WMA codec offers greater file compres-
sion than the MP3 codec, enabling
storage of more digital audio tracks in
the same amount of space when
compared to MP3s at the same level
of quality.
. AAC/M4A —Advanced Audio Coding
(AAC) is a lossy audio compression
format. Audio files that have been
encoded with AAC are generally smaller
in size and deliver a higher quality of
sound than MP3.
. Bit rate —Bit rate denotes the number
of bits per second used by a digital
music file. The size and quality of a compressed digital audio file is deter-
mined by the bit rate used when
encoding the file.
. Sampling frequency —Sampling fre-
quency is the rate at which the samples
of a signal are converted from analog to
digital (A/D conversion) per second.
. Multisession —Multisession is one of
the methods for writing data to media.
Writing data once to the media is called
a single session, and writing more than
once is called a multisession.
. ID3/WMA Tag —The ID3/WMA tag is the
part of the encoded MP3 or WMA file
that contains information about the
digital music file such as song title,
artist, album title, encoding bit rate,
track time duration, etc. ID3 tag in-
formation is displayed on the Album/
Artist/Track title line on the display.
* Windows
®and Windows Media®are
registered trademarks or trademarks of
Microsoft Corporation in the United States
of America and/or other countries.
Page 245 of 522

4-62Monitor, climate, audio, phone and voice recognition systems
SAA2957
FM-AM-SAT RADIO WITH COMPACT
DISC (CD) PLAYER
1. ON·OFF/VOLUME control knob
2. Radio CAT (category)/REW (rewind)button for SEEK/TRACK
3. Radio CAT(category)/FF (fast forward) button for SEEK/TRACK
4. FM·AM radio band select button
5. XM radio band select button
6. DISC·AUX selector button
7. RDM (random) RPT (repeat) play but- ton 8. Radio SCAN (tuning) button
9. DISC EJECT button
10. Radio tuning / MP3/WMA/AAC folder
selector / AUDIO control knob
11. Radio station preset buttons
No satellite radio reception is available
unless a SiriusXM Satellite Radio subscrip-
tion is active.
For all operation precautions, see “Audio
operation precautions” (P.4-48).
The satellite radio mode requires an active
SiriusXM Satellite Radio subscription. The
satellite radio is not available in Alaska,
Hawaii and Guam.
It may take some time to receive the
activation signal after subscribing the
SiriusXM Satellite Radio. After receiving
the activation signal, an available channel
list will be automatically updated in the
radio. Push the ignition switch from LOCK
to ACC to update the channel list.
Audio main operation
Head unit :
The auto loudness circuit enhances the low
and high frequency ranges automatically in
both radio reception and CD playback.
Page 247 of 522

4-64Monitor, climate, audio, phone and voice recognition systems
SEEK tuning/CATEGORY (CAT):
. For AM and FM radio
Push the SEEK button
orto
tune from low to high or high to low
frequencies and to stop at the next
broadcasting station.
. SiriusXM Satellite Radio
Push the SEEK button
orto
tune to the first channel of the next or
previous category.
During satellite radio reception, the follow-
ing notices will be displayed under certain
conditions.
. NO SIGNAL (No signal is received while
the SAT tuner is connected.)
. OFF AIR (Broadcasting signed off)
. CHECK ANTENNA (Antenna connection
error)
. LOADING (When the initial setting is
performed)
. UPDATING (When the satellite radio
subscription is not active)
SCAN tuning:
Push the SCAN tuning button to tune from
low to high frequencies and stop at each
broadcasting station/channel for 5 sec- onds. Pushing the button again during this
5 seconds period will stop SCAN tuning
and the radio will remain tuned to that
station/channel.
If the SCAN tuning button is not pushed
within 5 seconds, SCAN tuning moves to
the next station/channel.
toStation memory operations:
12 stations/channels can be set for the FM
band (6 each for FM1 and FM2), 18 for
SiriusXM Satellite Radio (6 each for XM1,
XM2 and XM3) and 6 stations can be set
for the AM band.
1. Choose the radio band using the radio band select button.
2. Tune to the desired station/channel using the
, SCAN button or the
radio TUNE knob.
3. Push and hold the desired station preset button
tountil the radio
mutes.
4. The station indicator will then come on and the sound will resume. Memorizing
is now complete.
5. Other buttons can be set in the same manner.
If the 12-volt battery cable is disconnected, or if the fuse opens, the radio memory will
be erased. In that case, reset the desired
stations/channels.
Menu (SiriusXM Satellite Radio) (models
with navigation system):
When the
“Menu”key on the display is
selected while the SiriusXM Satellite Radio
is being played, the menu list will be
displayed.
The following items are available.
. Preset List
Displays the preset channel list. If 1 of
the 6 preset stations listed is touched
and held, the current station will be
stored as the new preset.
. Customize Channel List
Selects specific channels to skip while
using the TUNE, SEEK/CATEGORY or
Menu-Categories feature.
. Favorite Artists & Songs
Stores the current artist or song that is
being played. Touch the “Alert”key to
be reminded when the stored artist or
song is playing on a station while
listening to SiriusXM Satellite Radio.
. Categories
Selecting a category will go to the first
channel in that category as defined by
Page 265 of 522
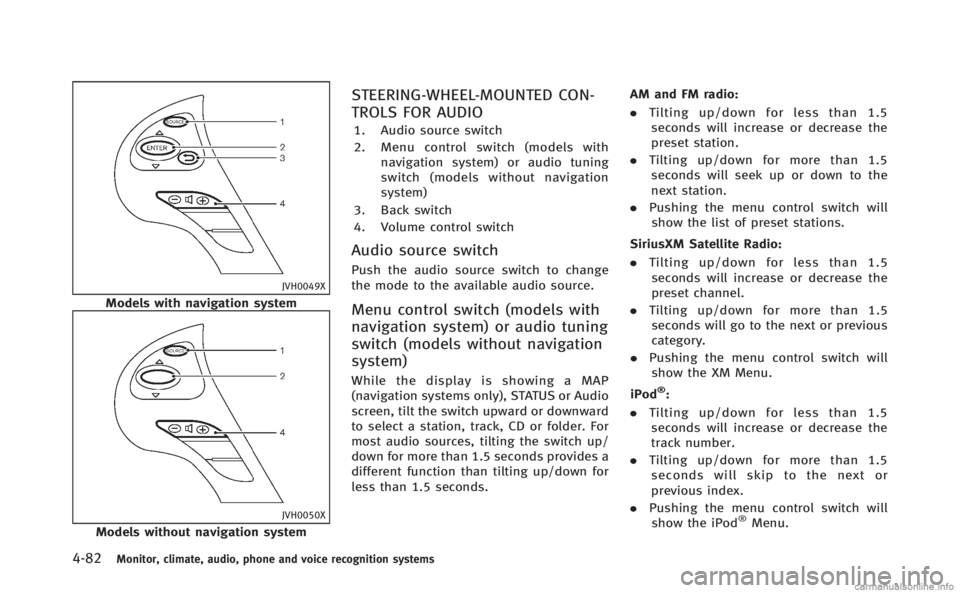
4-82Monitor, climate, audio, phone and voice recognition systems
JVH0049X
Models with navigation system
JVH0050X
Models without navigation system
STEERING-WHEEL-MOUNTED CON-
TROLS FOR AUDIO
1. Audio source switch
2. Menu control switch (models withnavigation system) or audio tuning
switch (models without navigation
system)
3. Back switch
4. Volume control switch
Audio source switch
Push the audio source switch to change
the mode to the available audio source.
Menu control switch (models with
navigation system) or audio tuning
switch (models without navigation
system)
While the display is showing a MAP
(navigation systems only), STATUS or Audio
screen, tilt the switch upward or downward
to select a station, track, CD or folder. For
most audio sources, tilting the switch up/
down for more than 1.5 seconds provides a
different function than tilting up/down for
less than 1.5 seconds. AM and FM radio:
. Tilting up/down for less than 1.5
seconds will increase or decrease the
preset station.
. Tilting up/down for more than 1.5
seconds will seek up or down to the
next station.
. Pushing the menu control switch will
show the list of preset stations.
SiriusXM Satellite Radio:
. Tilting up/down for less than 1.5
seconds will increase or decrease the
preset channel.
. Tilting up/down for more than 1.5
seconds will go to the next or previous
category.
. Pushing the menu control switch will
show the XM Menu.
iPod®:
. Tilting up/down for less than 1.5
seconds will increase or decrease the
track number.
. Tilting up/down for more than 1.5
seconds will skip to the next or
previous index.
. Pushing the menu control switch will
show the iPod
®Menu.