window INFINITI QX80 2014 Owner's Guide
[x] Cancel search | Manufacturer: INFINITI, Model Year: 2014, Model line: QX80, Model: INFINITI QX80 2014Pages: 578, PDF Size: 2.8 MB
Page 180 of 578

WARNING
The Intelligent Key transmits radio waves
when the buttons are pushed. The FAA
advises that radio waves may affect aircraft
navigation and communication systems. Do
not operate the Intelligent Key while on an
airplane. Make sure the buttons are not
operated unintentionally when the unit is
stored for a flight.
It is possible to lock/unlock all doors, fuel-
filler door, activate the panic alarm and
open the windows by pushing the buttons
on the Intelligent Key from outside the
vehicle.
Before locking the doors, make sure the
Intelligent Key is not left in the vehicle.
The LOCK/UNLOCK button on the Intelli-
gent Key can operate at a distance of
approximately 33 ft (10 m) from the
vehicle. (The effective distance depends
upon the conditions around the vehicle.)
As many as 4 Intelligent Keys can be used
with one vehicle. For information concern-
ing the purchase and use of additional
Intelligent Keys, contact an INFINITI retai-
ler.The lock and unlock buttons on the
Intelligent Key will not operate when:
.
the distance between the Intelligent Key
and the vehicle is over 33 ft (10 m).
. the Intelligent Key battery runs down.
After locking with the remote keyless entry
function, pull the door handle to make sure
the doors are securely locked.
The LOCK/UNLOCK operating range varies
depending on the environment. To securely
operate the lock and unlock buttons,
approach the vehicle to about 3 ft (1 m)
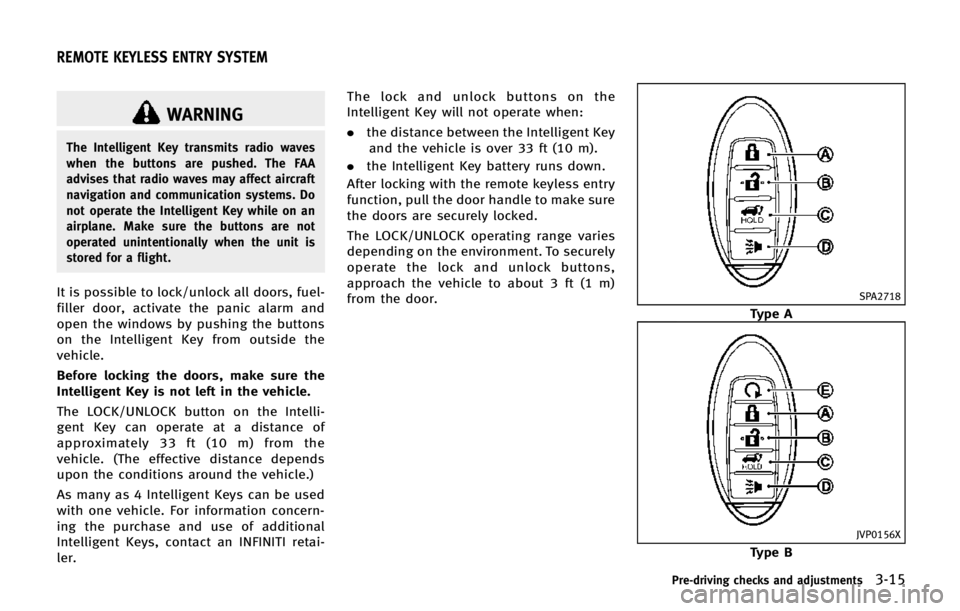
from the door.SPA2718
Type A
JVP0156X
Type B
Pre-driving checks and adjustments3-15
REMOTE KEYLESS ENTRY SYSTEM
Page 181 of 578

3-16Pre-driving checks and adjustments
*ALOCK button
*BUNLOCK button
*CPower lift gate button
*DPANIC button
*ERemote engine start button
HOW TO USE REMOTE KEYLESS
ENTRY SYSTEM
When you lock or unlock the doors or the
lift gate, the hazard indicator will flash and
the horn (or the outside chime) will sound
as a confirmation. For details, see“Setting
hazard indicator and horn mode” later in
this section.
Locking doors and fuel-filler door
1. Move the shift lever to the P (Park) position, push the ignition switch to the
OFF position and make sure you carry
the Intelligent Key with you.*
2. Close all the doors and the lift gate.
3. Push the LOCK
button*Aon the
Intelligent Key.
4. All the doors, the lift gate and fuel-filler door will lock.
5. The hazard indicator flashes twice and the horn chirps once.
*: Doors will lock with the Intelligent Key while the ignition switch is in the ACC or
ON position.
Unlocking doors and fuel-filler door
1. Push the UNLOCKbutton*Bon the
Intelligent Key once.
2. The hazard indicator flashes once. The driver’s door and fuel-filler door will
unlock.
The puddle light and the passenger
cabin illumination will illuminate and
stay on for a short period of time.
3. Push the UNLOCK
button on the
Intelligent Key again within 60 sec-
onds.
4. The hazard indicator flashes once again. All the doors will unlock.
All doors will be locked automatically
unless one of the following operations is
performed within 1 minute after pushing
the UNLOCK button on the Intelligent Key
while the doors are locked. If during this 1-
minute time period, the UNLOCK button on
the Intelligent Key is pushed, all doors will
be locked automatically after another 1
minute.
. Opening any door .
Pushing the ignition switch
Opening windows
To open the windows, push the door
UNLOCKbutton on the Intelligent Key
for about 3 seconds after the door is
unlocked.
To stop opening, release the UNLOCK
button.
Window cannot be closed using the In-
telligent Key.
The door windows can be opened or closed
by turning the mechanical key in a door
lock. (See “Doors”earlier in this section.)
Opening/closing lift gate
1. Push the power lift gate button
*Cfor more than 1 second.
2. The lift gate will automatically open.
The hazard indicator flashes 4 times and
the outside chime sounds for approxi-
mately 3 seconds.
To close the lift gate, push the power lift
gate button
for more than 1 second.
The lift gate will automatically close.
If the button
is pushed while the lift
gate is being opened or closed, the lift gate
will reverse.
Page 196 of 578

SPA2739
Adjusting outside mirrors
The outside mirror control switch is located
on the driver’s door armrest.
The outside mirror will operate only when
the ignition switch is in the ACC or ON
position.
Move the switch right or left to select the
right or left side mirror
*1, then adjust
using the control switch
*2.
Defrosting outside mirrors
The outside mirrors will be heated when
the rear window defroster switch is oper-
ated. (See “Rear window and outside mirror defroster switch”
in the“2. Instru-
ments and controls” section.)
SPA2738
Power foldable outside mirrors
CAUTION
.Do not touch the mirrors while they are
moving. Your hand may be pinched, and
the mirror may malfunction.
. Do not drive with the mirrors stored. You
will be unable to see behind the vehicle.
. If the mirrors were folded or unfolded by
hand, there is a chance that the mirror
will move forward or backward during
driving. If the mirrors were folded or
unfolded by hand, be sure to adjust
Pre-driving checks and adjustments3-31
Page 222 of 578

When you push the CAMERA button or shift
the shift lever into the R (Reverse) position
while the ignition switch is in the ON
position, the Around View Monitor oper-
ates. The monitor displays various views of
the position of the vehicle.
Available views:
.Bird-Eye View
The surrounding view of the vehicle.
. Front-Side View
The view around and ahead of the front
passenger’s side wheel.
. Front View
An approximately 150-degree view of
the front of the vehicle.
. Rear view
An approximately 150-degree view of
the rear of the vehicle.
. Rear-Wide View
An approximately 180-degree view of
the rear of the vehicle.
The system is designed as an aid to the
driver in situations such as slot parking or
parallel parking.
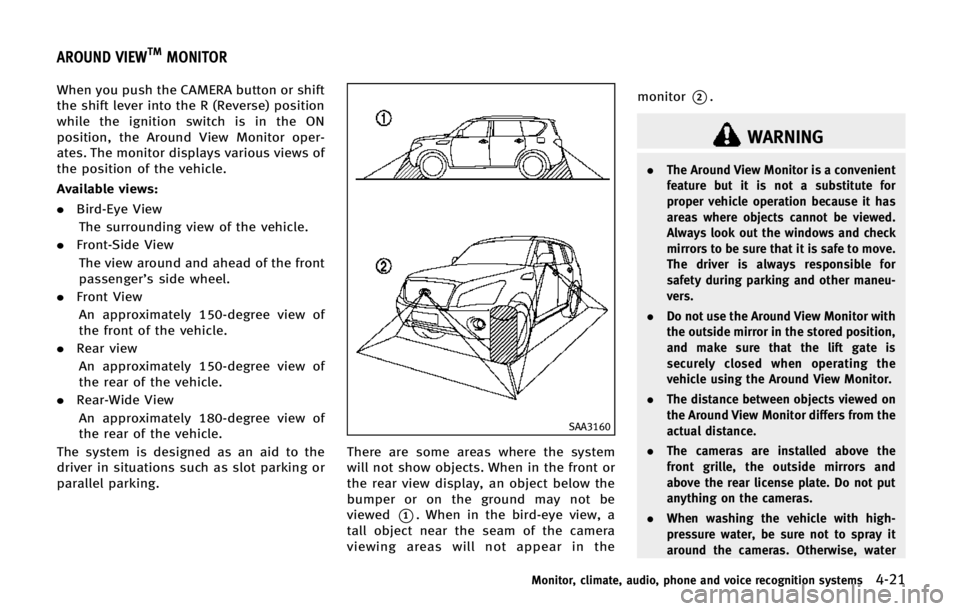
SAA3160
There are some areas where the system
will not show objects. When in the front or
the rear view display, an object below the
bumper or on the ground may not be
viewed
*1. When in the bird-eye view, a
tall object near the seam of the camera
viewing areas will not appear in the monitor
*2.
WARNING
.
The Around View Monitor is a convenient
feature but it is not a substitute for
proper vehicle operation because it has
areas where objects cannot be viewed.
Always look out the windows and check
mirrors to be sure that it is safe to move.
The driver is always responsible for
safety during parking and other maneu-
vers.
. Do not use the Around View Monitor with
the outside mirror in the stored position,
and make sure that the lift gate is
securely closed when operating the
vehicle using the Around View Monitor.
. The distance between objects viewed on
the Around View Monitor differs from the
actual distance.
. The cameras are installed above the
front grille, the outside mirrors and
above the rear license plate. Do not put
anything on the cameras.
. When washing the vehicle with high-
pressure water, be sure not to spray it
around the cameras. Otherwise, water
Monitor, climate, audio, phone and voice recognition systems4-21
AROUND VIEWTMMONITOR
Page 232 of 578

.This function is designed as an aid to
the driver in detecting large stationary
objects to help avoid damaging the
vehicle.
. The system is not designed to prevent
contact with small or moving objects.
. The system will not detect small objects
below the bumper, and may not detect
objects close to the bumper or on the
ground.
. The system may not detect the following
objects:
—Fluffy objects such as snow, cloth,
cotton, glass or wool.
—Thin objects such as rope, wire orchain.
—Wedge-shaped objects.
. If your vehicle sustains damage to the
bumper fascia, leaving it misaligned or
bent, the sensing zone may be altered
causing inaccurate measurement of ob-
jects or false alarms.
CAUTION
.Excessive noise (such as audio system
volume or an open vehicle window) will
interfere with the tone and it may not be
heard.
. Keep the surface of the sonar sensors
(located on the front and rear bumper
fascia) free from accumulations of snow,
ice and dirt. Do not scratch the surface of
the sonar sensors when cleaning. If the
sensors are covered, the accuracy of the
sonar function will be diminished.
The system gives the tone for front objects
when the shift lever is in the D (Drive)
position and both front and rear objects
when the shift lever is in the R (Reverse)
position.
When the camera image is shown on the
display, the system shows the sonar
indicator regardless of the shift lever
position.
The system is deactivated at speeds above
6 MPH(10 km/h). It is reactivated at lower
speeds.
When the objects are detected, the indi- cator (green) appears and blinks and the
tone sounds intermittently. When the
vehicle moves closer to the object, the
color of the indicator turns yellow and the
rate of the blinking and the rate of the tone
increase. When the vehicle is very close to
the object, the indicator stops blinking and
turns red, and the tone sounds continu-
ously.
The intermittent tone will stop after three
seconds when an object is detected by
only the corner sonar and the distance
does not change.
The tone will stop when the object gets
away from the vehicle.
Monitor, climate, audio, phone and voice recognition systems4-31
Page 235 of 578

4-34Monitor, climate, audio, phone and voice recognition systems
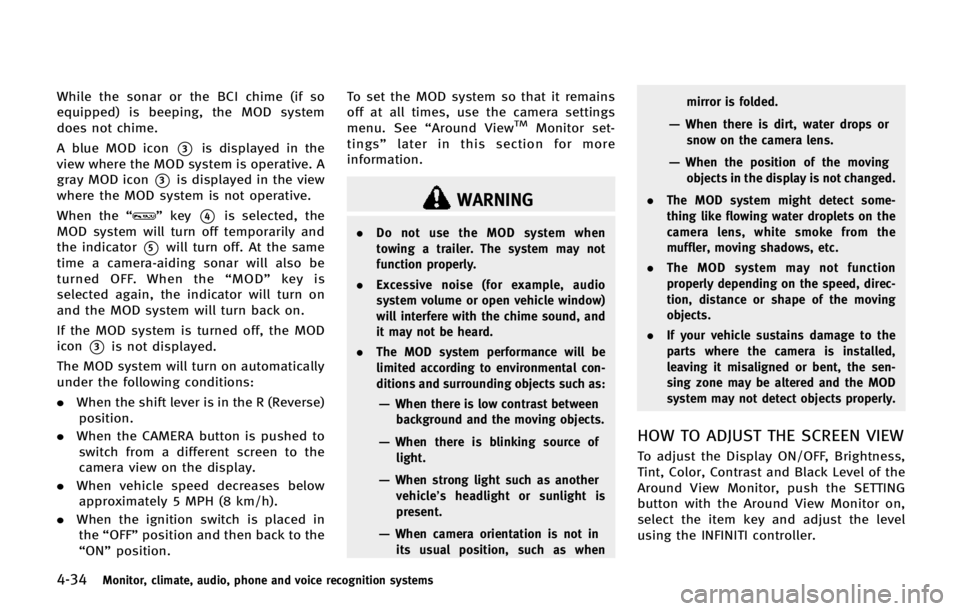
While the sonar or the BCI chime (if so
equipped) is beeping, the MOD system
does not chime.
A blue MOD icon
*3is displayed in the
view where the MOD system is operative. A
gray MOD icon
*3is displayed in the view
where the MOD system is not operative.
When the “
”key*4is selected, the
MOD system will turn off temporarily and
the indicator
*5will turn off. At the same
time a camera-aiding sonar will also be
turned OFF. When the “MOD” key is
selected again, the indicator will turn on
and the MOD system will turn back on.
If the MOD system is turned off, the MOD
icon
*3is not displayed.
The MOD system will turn on automatically
under the following conditions:
. When the shift lever is in the R (Reverse)
position.
. When the CAMERA button is pushed to
switch from a different screen to the
camera view on the display.
. When vehicle speed decreases below
approximately 5 MPH (8 km/h).
. When the ignition switch is placed in
the “OFF” position and then back to the
“ON” position. To set the MOD system so that it remains
off at all times, use the camera settings
menu. See
“Around View
TMMonitor set-
tings” later in this section for more
information.
WARNING
. Do not use the MOD system when
towing a trailer. The system may not
function properly.
. Excessive noise (for example, audio
system volume or open vehicle window)
will interfere with the chime sound, and
it may not be heard.
. The MOD system performance will be
limited according to environmental con-
ditions and surrounding objects such as:
—When there is low contrast between
background and the moving objects.
—When there is blinking source oflight.
—When strong light such as another
vehicle’ s headlight or sunlight is
present.
—When camera orientation is not in its usual position, such as when mirror is folded.
—When there is dirt, water drops or
snow on the camera lens.
—When the position of the movingobjects in the display is not changed.
. The MOD system might detect some-
thing like flowing water droplets on the
camera lens, white smoke from the
muffler, moving shadows, etc.
. The MOD system may not function
properly depending on the speed, direc-
tion, distance or shape of the moving
objects.
. If your vehicle sustains damage to the
parts where the camera is installed,
leaving it misaligned or bent, the sen-
sing zone may be altered and the MOD
system may not detect objects properly.
HOW TO ADJUST THE SCREEN VIEW
To adjust the Display ON/OFF, Brightness,
Tint, Color, Contrast and Black Level of the
Around View Monitor, push the SETTING
button with the Around View Monitor on,
select the item key and adjust the level
using the INFINITI controller.
Page 240 of 578

WARNING
.The air conditioner cooling function
operates only when the engine is run-
ning.
. Do not leave children or adults who
would normally require the support of
others alone in your vehicle. Pets should
not be left alone either. On hot, sunny
days, temperatures in a closed vehicle
could quickly become high enough to
cause severe or possibly fatal injuries to
people or animals.
. Do not use the recirculation mode for
long periods as it may cause the interior
air to become stale and the windows to
fog up.
. Do not adjust the heating and air
conditioning controls while driving so
that full attention may be given to
vehicle operation.
Start the engine and operate the automatic
climate control system.
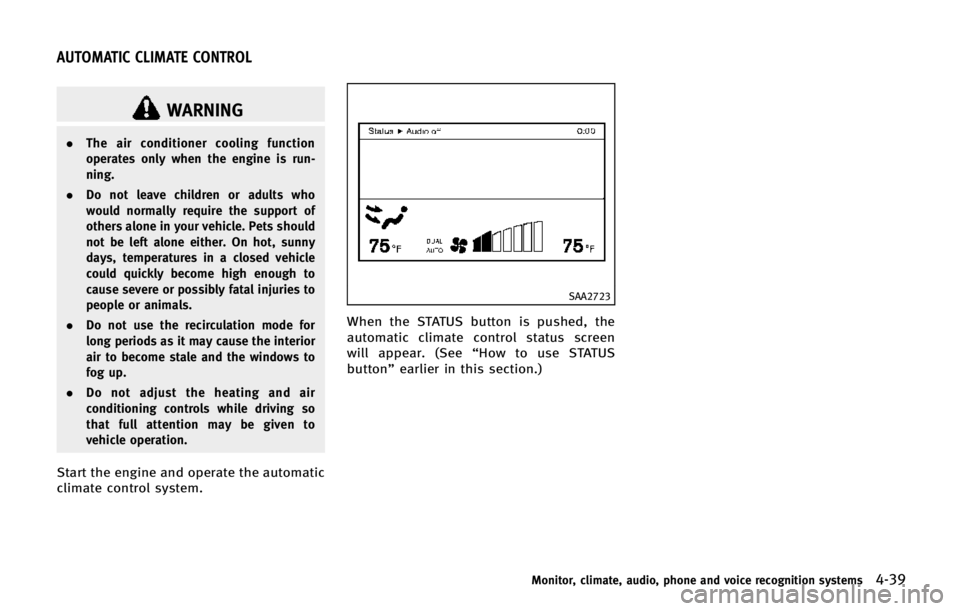
SAA2723
When the STATUS button is pushed, the
automatic climate control status screen
will appear. (See “How to use STATUS
button” earlier in this section.)
Monitor, climate, audio, phone and voice recognition systems4-39
AUTOMATIC CLIMATE CONTROL
Page 241 of 578

4-40Monitor, climate, audio, phone and voice recognition systems
SAA3059
Without Advanced Climate Control System
SAA3161
With Advanced Climate Control System1.
“AUTO” automatic climate control ON
button/Temperature control dial (dri-
ver side)
2. “
”front defroster button
3. “
”rear window defroster button
(See “Rear window and outside mirror
defroster switch” in the“2. Instru-
ments and controls” section.)
4. “
”fan speed decrease button
5. “OFF” button for climate control sys-
tem
6. “
”fan speed increase button
7. “
”intake air control button
8. “
”air recirculation button
9. “DUAL” zone control ON/OFF button/
Temperature control dial (passenger
side)
10. “MODE” manual air flow control but-
ton
11. “REAR” control button
12. “A/C” air conditioner ON/OFF button
13. “
”upper vent button
14. “
”auto-recirculation button
Page 242 of 578

AUTOMATIC CLIMATE CONTROL
Automatic operation
Cooling and/or dehumidified heating
(AUTO):
This mode may be used all year round. The
system works automatically to control the
inside temperature, air flow distribution
and fan speed after the preferred tempera-
ture is set manually.
1. Push the“AUTO” button on. (The
indicator on the button will illuminate
and AUTO will be displayed.)
2. Turn the temperature control dial (dri- ver side) to set the desired tempera-
ture.
.The temperature can be set withinthe following range.
— For U.S.: 60 to 908F
— For Canada: 18 to 328C
.The temperature of the passenger
compartment will be maintained
automatically. Air flow distribution
and fan speed will also be controlled
automatically.
3. You can individually set driver and front passenger side temperature using each
temperature control button. When the “DUAL”
button is pushed or the pas-
senger side temperature control button
is turned, the DUAL indicator will come
on. To turn off the passenger side
temperature control, push the “DUAL”
button.
4. To turn off the climate control system, push the “OFF”button.
A visible mist may be seen coming from the
ventilators in hot, humid conditions as the
air is cooled rapidly. This does not indicate
a malfunction.
Heating (A/C OFF):
The air conditioner does not activate in this
mode. When you need to heat only, use
this mode.
1. Push the “AUTO”button on.
2. Push the “A/C” button. (The A/C
indicator will turn off.)
3. Turn the temperature control dial to set the desired temperature.
. The temperature of the passenger
compartment will be maintained auto-
matically. Air flow distribution and fan
speed are also controlled automati-
cally. .
Do not set the temperature lower than
the outside air temperature. Otherwise
the system may not work properly.
. Not recommended if windows fog up.
Dehumidified defrosting or defogging: 1. Push the “
”front defroster button.
(The indicator light on the button will
illuminate.)
2. Turn the temperature control dial to set the desired temperature.
. To quickly remove ice from the outside
of the windows, push the fan speed
increase button “
”and set it to the
maximum position.
. As soon as possible after the wind-
shield is clean, push the “AUTO”button
to return to the auto mode.
. When the “
”front defroster button
is pushed, the air conditioner will
automatically be turned on at outside
temperatures above 238 F(−58C) to
defog the windshield, and the air
recirculate mode will automatically be
turned off.
Outside air is drawn into the passenger
compartment to improve the defogging
performance.
Monitor, climate, audio, phone and voice recognition systems4-41
Page 248 of 578

The climate control system is equipped
with a natural grape seed polyphenol filter
which collects and neutralizes dirt, pollen,
dust, etc.
To make sure that the air conditioner
heats, defogs and ventilates efficiently,
replace the filter in accordance with the
maintenance schedule in the INFINITI Ser-
vice and Maintenance Guide. To replace the
filter, contact an INFINITI retailer.
The filter should be replaced if the air flow
decreases significantly or if windows fog
up easily when operating the heater or air
conditioner.
SERVICING CLIMATE CONTROL
The climate control system in your INFINITI
is charged with a refrigerant designed with
the environment in mind.This refrigerant
will not harm the earth’s ozone layer.
However, special charging equipment and
lubricant are required when servicing your
INFINITI air conditioner. Using improper
refrigerants or lubricants will cause severe
damage to your climate control system.
(See “Capacities and recommended fuel/
lubricants” in the“9. Technical and con-
sumer information” section for climate
control system refrigerant and lubricant recommendations.)
Your INFINITI retailer will be able to service
your environmentally friendly climate con-
trol system.
WARNING
The system contains refrigerant under high
pressure. To avoid personal injury, any air
conditioner service should be done only by
an experienced technician with the proper
equipment.
AUDIO OPERATION PRECAUTIONS
Radio
Push the ignition switch to the ACC or ON
position and push the radio band select
button to turn on the radio. If you listen to
the radio with the engine not running, the
ignition switch should be pushed to the
ACC position.
Radio reception is affected by station
signal strength, distance from radio trans-
mitter, buildings, bridges, mountains and
other external influences. Intermittent
changes in reception quality normally are
caused by these external influences.
Using a cellular phone in or near the
vehicle may influence radio reception
quality.
Radio reception:
Your INFINITI radio system is equipped with
state-of-the-art electronic circuits to en-
hance radio reception. These circuits are
designed to extend reception range, and to
enhance the quality of that reception.
However there are some general character-
istics of both FM and AM radio signals that
can affect radio reception quality in a
moving vehicle, even when the finest
Monitor, climate, audio, phone and voice recognition systems4-47
AUDIO SYSTEM