light INFINITI QX80 2014 Owners Manual
[x] Cancel search | Manufacturer: INFINITI, Model Year: 2014, Model line: QX80, Model: INFINITI QX80 2014Pages: 578, PDF Size: 2.8 MB
Page 217 of 578

4-16Monitor, climate, audio, phone and voice recognition systems
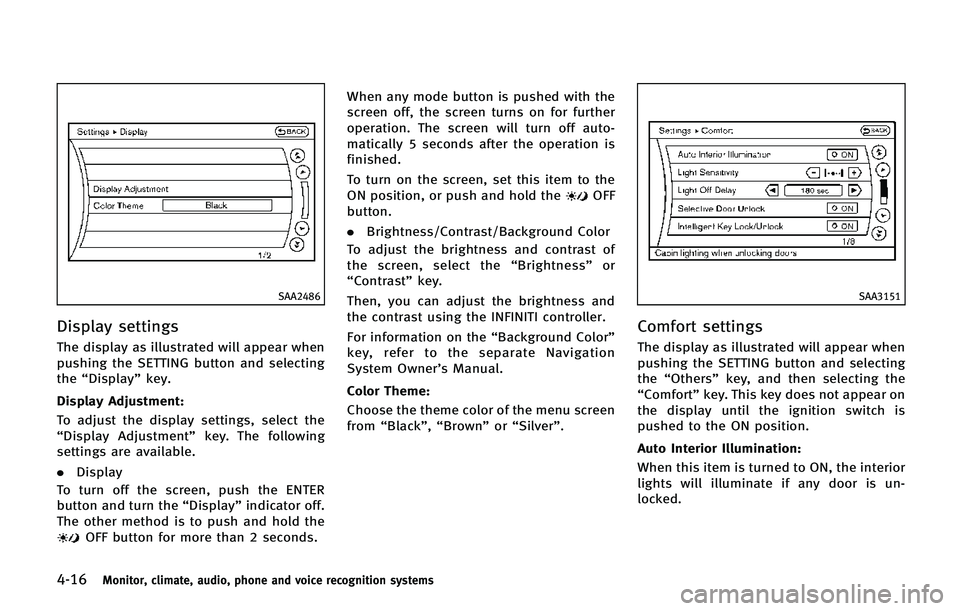
SAA2486
Display settings
The display as illustrated will appear when
pushing the SETTING button and selecting
the“Display” key.
Display Adjustment:
To adjust the display settings, select the
“Display Adjustment” key. The following
settings are available.
. Display
To turn off the screen, push the ENTER
button and turn the “Display”indicator off.
The other method is to push and hold the
OFF button for more than 2 seconds. When any mode button is pushed with the
screen off, the screen turns on for further
operation. The screen will turn off auto-
matically 5 seconds after the operation is
finished.
To turn on the screen, set this item to the
ON position, or push and hold the
OFF
button.
. Brightness/Contrast/Background Color
To adjust the brightness and contrast of
the screen, select the “Brightness” or
“Contrast” key.
Then, you can adjust the brightness and
the contrast using the INFINITI controller.
For information on the “Background Color”
key, refer to the separate Navigation
System Owner’s Manual.
Color Theme:
Choose the theme color of the menu screen
from “Black”, “Brown” or“Silver”.
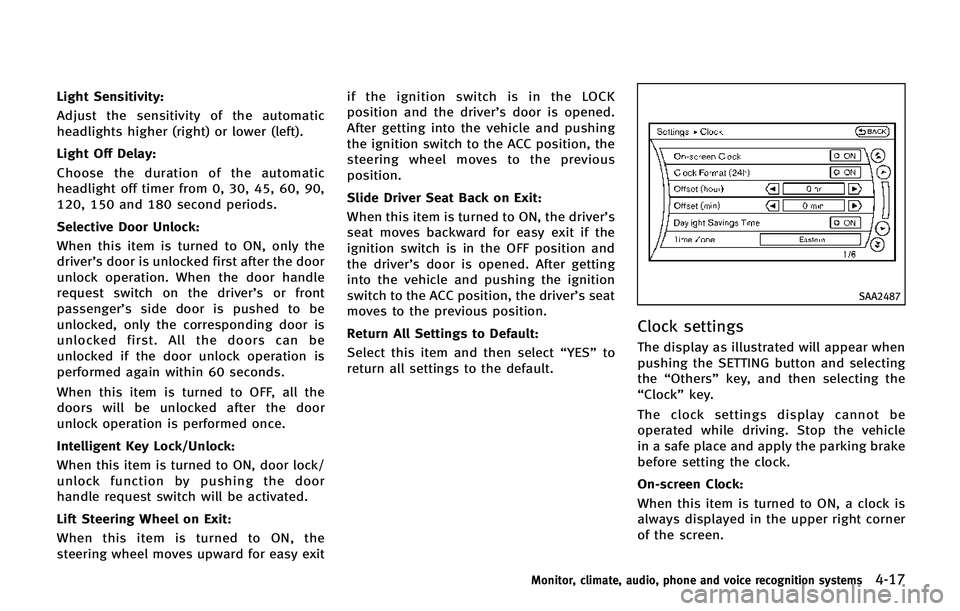
SAA3151
Comfort settings
The display as illustrated will appear when
pushing the SETTING button and selecting
the “Others” key, and then selecting the
“Comfort” key. This key does not appear on
the display until the ignition switch is
pushed to the ON position.
Auto Interior Illumination:
When this item is turned to ON, the interior
lights will illuminate if any door is un-
locked.
Page 218 of 578

Light Sensitivity:
Adjust the sensitivity of the automatic
headlights higher (right) or lower (left).
Light Off Delay:
Choose the duration of the automatic
headlight off timer from 0, 30, 45, 60, 90,
120, 150 and 180 second periods.
Selective Door Unlock:
When this item is turned to ON, only the
driver’s door is unlocked first after the door
unlock operation. When the door handle
request switch on the driver’s or front
passenger’s side door is pushed to be
unlocked, only the corresponding door is
unlocked first. All the doors can be
unlocked if the door unlock operation is
performed again within 60 seconds.
When this item is turned to OFF, all the
doors will be unlocked after the door
unlock operation is performed once.
Intelligent Key Lock/Unlock:
When this item is turned to ON, door lock/
unlock function by pushing the door
handle request switch will be activated.
Lift Steering Wheel on Exit:
When this item is turned to ON, the
steering wheel moves upward for easy exitif the ignition switch is in the LOCK
position and the driver’s door is opened.
After getting into the vehicle and pushing
the ignition switch to the ACC position, the
steering wheel moves to the previous
position.
Slide Driver Seat Back on Exit:
When this item is turned to ON, the driver’s
seat moves backward for easy exit if the
ignition switch is in the OFF position and
the driver’s door is opened. After getting
into the vehicle and pushing the ignition
switch to the ACC position, the driver’s seat
moves to the previous position.
Return All Settings to Default:
Select this item and then select “YES”to
return all settings to the default.
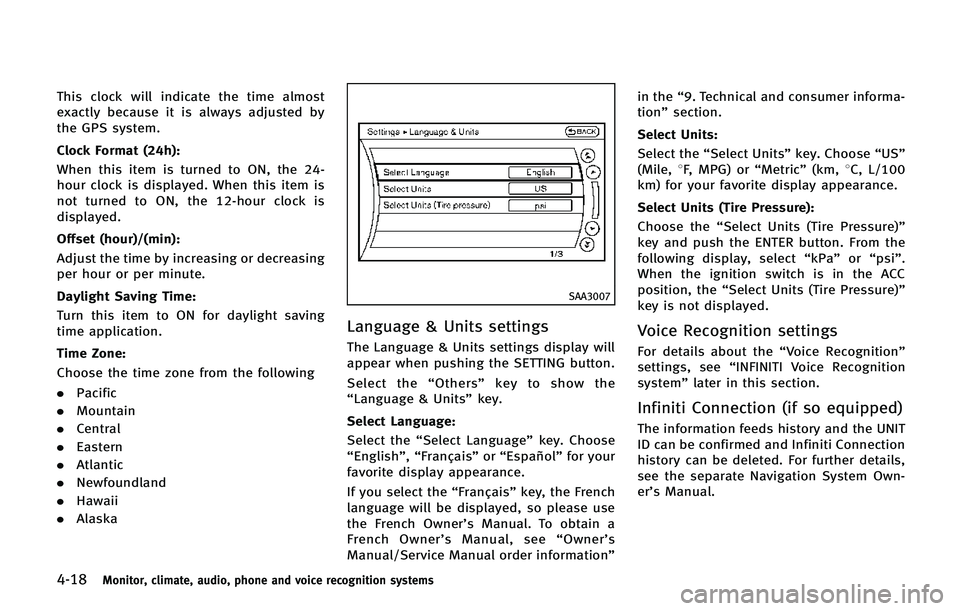
SAA2487
Clock settings
The display as illustrated will appear when
pushing the SETTING button and selecting
the “Others” key, and then selecting the
“Clock” key.
The clock settings display cannot be
operated while driving. Stop the vehicle
in a safe place and apply the parking brake
before setting the clock.
On-screen Clock:
When this item is turned to ON, a clock is
always displayed in the upper right corner
of the screen.
Monitor, climate, audio, phone and voice recognition systems4-17
Page 219 of 578

4-18Monitor, climate, audio, phone and voice recognition systems
This clock will indicate the time almost
exactly because it is always adjusted by
the GPS system.
Clock Format (24h):
When this item is turned to ON, the 24-
hour clock is displayed. When this item is
not turned to ON, the 12-hour clock is
displayed.
Offset (hour)/(min):
Adjust the time by increasing or decreasing
per hour or per minute.
Daylight Saving Time:
Turn this item to ON for daylight saving
time application.
Time Zone:
Choose the time zone from the following
.Pacific
. Mountain
. Central
. Eastern
. Atlantic
. Newfoundland
. Hawaii
. Alaska
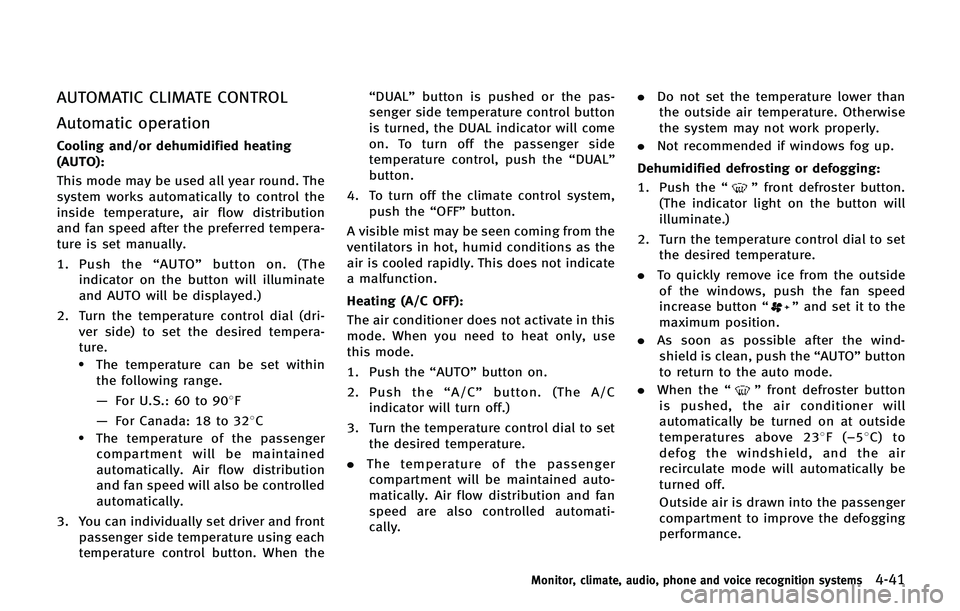
SAA3007
Language & Units settings
The Language & Units settings display will
appear when pushing the SETTING button.
Select the “Others” key to show the
“Language & Units” key.
Select Language:
Select the “Select Language” key. Choose
“English”, “Français” or“Español” for your
favorite display appearance.
If you select the “Français”key, the French
language will be displayed, so please use
the French Owner’s Manual. To obtain a
French Owner’ s Manual, see “Owner’ s
Manual/Service Manual order information” in the
“9. Technical and consumer informa-
tion” section.
Select Units: Select the “Select Units” key. Choose“US”
(Mile, 8F, MPG) or “Metric”(km,8C, L/100
km) for your favorite display appearance.
Select Units (Tire Pressure):
Choose the “Select Units (Tire Pressure)”
key and push the ENTER button. From the
following display, select “kPa”or“psi”.
When the ignition switch is in the ACC
position, the “Select Units (Tire Pressure)”
key is not displayed.Voice Recognition settings
For details about the “Voice Recognition”
settings, see “INFINITI Voice Recognition
system” later in this section.
Infiniti Connection (if so equipped)
The information feeds history and the UNIT
ID can be confirmed and Infiniti Connection
history can be deleted. For further details,
see the separate Navigation System Own-
er’s Manual.
Page 226 of 578

SAA1840
Front view
SAA1896
Rear view
Front and rear view
Guiding lines, which indicate the vehicle
width and distances to objects with re-
ference to the vehicle body line
*A, are
displayed on the monitor.
Distance guide lines:
Indicate distances from the vehicle body.
. Red line
*1: approx. 1.5 ft (0.5 m)
. Yellow line
*2: approx. 3 ft (1 m)
. Green line
*3: approx. 7 ft (2 m)
. Green line
*4: approx. 10 ft (3 m)
Vehicle width guide lines
*5:
Indicate the vehicle width when backing
up.
Predictive course lines
*6:
Indicate the predictive course when oper-
ating the vehicle. The predictive course
lines will be displayed on the monitor
when the steering wheel is turned. The
predictive course lines will move depend-
ing on how much the steering wheel is
turned and will not be displayed while the
steering wheel is in the neutral position.
The front view will not be displayed when
the vehicle speed is above 6 MPH (10
km/h).
WARNING
. The distance between objects viewed in
the rear view differs from actual distance
because a wideangle lens is used.
Objects in the RearView will appear
visually opposite than when viewed in
the rear view and outside mirrors.
. On a snow-covered or slippery road,
there may be a difference between the
predictive course line and the actual
course line.
. The displayed lines on the RearView will
appear slightly off to the right because
the RearView camera is not installed in
the rear center of the vehicle.
NOTE:
When the monitor displays the front view
and the steering wheel turns about 90
degrees or less from the neutral position,
both the right and left predictive course
lines
*6are displayed. When the steering
wheel turns about 90 degrees or more, a
line is displayed only on the opposite side
of the turn.
Monitor, climate, audio, phone and voice recognition systems4-25
Page 227 of 578

4-26Monitor, climate, audio, phone and voice recognition systems
Bird-eye view
WARNING
.Objects in the bird-eye view will appear
further than the actual distance because
the bird-eye view is a pseudo view that
is processed by combining the views
from the cameras on the outside mirrors,
the front and the rear of the vehicle.
. Tall objects, such as a curb or vehicle,
may be misaligned or not displayed at
the seam of the views.
. Objects that are above the camera
cannot be displayed.
. The view for the bird-eye view may be
misaligned when the camera position
alters.
. A line on the ground may be misaligned
and is not seen as being straight at the
seam of the views. The misalignment will
increase as the line proceeds away from
the vehicle.
. Tire angle display does not indicate the
actual tire angle
JVH0265X
The bird-eye view shows the overhead view
of the vehicle, which helps confirm the
vehicle position and the predicted course
to a parking space.
The vehicle icon
*1shows the position of
the vehicle. Note that the size of the
vehicle icon on the bird-eye view may
differ somewhat from the actual vehicle.
The areas that the cameras cannot cover
*2
are indicated in black.
The non-viewable area
*2is highlighted in
yellow for several seconds after the bird-
eye view is displayed. It will be shown only
the first time after the ignition switch is
placed in the “ON”position. When the corner of the vehicle moves
closer to an object, the corner sonar
indicators
*3appears.
The driver can check the direction and
angle of the tire on the display by tire icon
*4when driving the vehicle forward or
backward.
Predictive course lines (
*5and*6)
indicate the predictive course when oper-
ating the vehicle. The predictive course
lines will be displayed on the monitor
when the steering wheel is turned. The
predictive course lines will move depend-
ing on how much the steering wheel is
turned and will not be displayed while the
steering wheel is in the neutral position.
When the monitor displays the front view
and the steering wheel turns about 90
degrees or less from the neutral position,
the two green predictive course lines
*5
are shown in front of the vehicle.
When the steering wheel turns about 90
degrees or more, one green predictive
course line
*6is shown in front of the
vehicle and the other green predictive
course line
*6is shown at side of the
vehicle.
When the monitor displays the rear view,
Page 228 of 578

the predictive course lines are shown at
back of the vehicle.
SAA1842
Front-side view
Guiding lines:
Guiding lines that indicate the width and
the front end of the vehicle are displayed
on the monitor.
The front-of-vehicle line
*1shows the front
part of the vehicle.
The side-of-vehicle line
*2shows the
vehicle width including the outside mirror.
The extensions
*3of both the front*1
and side*2lines are shown with a green
dotted line.
The corner sonar indicator
*4will appear when a corner of the vehicle moves closer
to an object.
The corner sonar indicator
*4can be
turned off. See “Around ViewTMMonitor
settings” later in this section.
CAUTION
The turn signal light may look like the side-
of-vehicle line. This is not a malfunction.
Monitor, climate, audio, phone and voice recognition systems4-27
Page 235 of 578

4-34Monitor, climate, audio, phone and voice recognition systems
While the sonar or the BCI chime (if so
equipped) is beeping, the MOD system
does not chime.
A blue MOD icon
*3is displayed in the
view where the MOD system is operative. A
gray MOD icon
*3is displayed in the view
where the MOD system is not operative.
When the “
”key*4is selected, the
MOD system will turn off temporarily and
the indicator
*5will turn off. At the same
time a camera-aiding sonar will also be
turned OFF. When the “MOD” key is
selected again, the indicator will turn on
and the MOD system will turn back on.
If the MOD system is turned off, the MOD
icon
*3is not displayed.
The MOD system will turn on automatically
under the following conditions:
. When the shift lever is in the R (Reverse)
position.
. When the CAMERA button is pushed to
switch from a different screen to the
camera view on the display.
. When vehicle speed decreases below
approximately 5 MPH (8 km/h).
. When the ignition switch is placed in
the “OFF” position and then back to the
“ON” position. To set the MOD system so that it remains
off at all times, use the camera settings
menu. See
“Around View
TMMonitor set-
tings” later in this section for more
information.
WARNING
. Do not use the MOD system when
towing a trailer. The system may not
function properly.
. Excessive noise (for example, audio
system volume or open vehicle window)
will interfere with the chime sound, and
it may not be heard.
. The MOD system performance will be
limited according to environmental con-
ditions and surrounding objects such as:
—When there is low contrast between
background and the moving objects.
—When there is blinking source oflight.
—When strong light such as another
vehicle’ s headlight or sunlight is
present.
—When camera orientation is not in its usual position, such as when mirror is folded.
—When there is dirt, water drops or
snow on the camera lens.
—When the position of the movingobjects in the display is not changed.
. The MOD system might detect some-
thing like flowing water droplets on the
camera lens, white smoke from the
muffler, moving shadows, etc.
. The MOD system may not function
properly depending on the speed, direc-
tion, distance or shape of the moving
objects.
. If your vehicle sustains damage to the
parts where the camera is installed,
leaving it misaligned or bent, the sen-
sing zone may be altered and the MOD
system may not detect objects properly.
HOW TO ADJUST THE SCREEN VIEW
To adjust the Display ON/OFF, Brightness,
Tint, Color, Contrast and Black Level of the
Around View Monitor, push the SETTING
button with the Around View Monitor on,
select the item key and adjust the level
using the INFINITI controller.
Page 236 of 578

Do not adjust the Brightness, Tint, Color,
Contrast and Black Level of the Around
View Monitor while the vehicle is moving.
Make sure the parking brake is firmly
applied.
JVH0323M
AROUND VIEWTMMONITOR SET-
TINGS
To set up the Around View Monitor to your
preferred settings, push the SETTING but-
ton, select the “Other”key and then select
the “Camera ”key.
Predictive Course Lines:
When this item is turned to ON, the
predictive course line is displayed in the
front and the rear view and bird-eye view.
Camera View Priority:
The view shown on the screen at the
beginning of around view monitor opera-
tion can be selected in order of priority. Non-viewable Area Reminder:
With this item turned to ON, the non-
viewable area is highlighted in yellow for
several seconds after the bird-eye view is
displayed. It will be shown only the first
time after the ignition switch is in the
“ON”
position.
Buzzer Volume:
Adjust the volume of the buzzer.
Corner Sonar Sensitivity:
Adjust the sensitivity level of the corner
sonar higher (right) or lower (left).
Monitor, climate, audio, phone and voice recognition systems4-35
Page 238 of 578
![INFINITI QX80 2014 Owners Manual JVH0271X
When the“[X]”icon is displayed on the
screen, the camera image may be receiving
temporary electronic disturbances from
surrounding devices. This will not hinder
normal driving operation b INFINITI QX80 2014 Owners Manual JVH0271X
When the“[X]”icon is displayed on the
screen, the camera image may be receiving
temporary electronic disturbances from
surrounding devices. This will not hinder
normal driving operation b](/img/42/41141/w960_41141-237.png)
JVH0271X
When the“[X]”icon is displayed on the
screen, the camera image may be receiving
temporary electronic disturbances from
surrounding devices. This will not hinder
normal driving operation but the system
should be inspected by an INFINITI retailer
if it occurs frequently.
OPERATING TIPS
. The screen displayed on the Around
View Monitor will automatically return
to the previous screen 3 minutes after
the CAMERA button has been pushed
while the shift lever is in a position
other than the R (Reverse) position. .
When the view is switched, the display
images on the screen may be displayed
with some delay.
. When the temperature is extremely high
or low, the screen may not display
objects clearly. This is not a malfunc-
tion.
. When strong light is directly coming on
the camera, objects may not be dis-
played clearly. This is not a malfunc-
tion.
. The screen may flicker under fluores-
cent light. This is not a malfunction.
. The colors of objects on the Around
View Monitor may differ somewhat
from the actual color of objects. This
is not a malfunction.
. Objects on the monitor may not be clear
and the color of the object may differ in
a dark environment. This is not a
malfunction.
. There may be differences in sharpness
between each camera view of the bird-
eye view.
. If dirt, rain or snow accumulates on the
camera, the Around View Monitor may
not display objects clearly. Clean the
camera. .
Do not use alcohol, benzine or thinner
to clean the camera. This will cause
discoloration. To clean the camera,
wipe with a cloth that has been
dampened with a diluted mild cleaning
agent and then wipe with a dry cloth.
. Do not damage the camera because the
monitor screen may be adversely af-
fected.
. Do not use wax on the camera lens.
Wipe off any wax with a clean cloth that
has been dampened with a mild
detergent diluted with water.
Monitor, climate, audio, phone and voice recognition systems4-37
Page 242 of 578

AUTOMATIC CLIMATE CONTROL
Automatic operation
Cooling and/or dehumidified heating
(AUTO):
This mode may be used all year round. The
system works automatically to control the
inside temperature, air flow distribution
and fan speed after the preferred tempera-
ture is set manually.
1. Push the“AUTO” button on. (The
indicator on the button will illuminate
and AUTO will be displayed.)
2. Turn the temperature control dial (dri- ver side) to set the desired tempera-
ture.
.The temperature can be set withinthe following range.
— For U.S.: 60 to 908F
— For Canada: 18 to 328C
.The temperature of the passenger
compartment will be maintained
automatically. Air flow distribution
and fan speed will also be controlled
automatically.
3. You can individually set driver and front passenger side temperature using each
temperature control button. When the “DUAL”
button is pushed or the pas-
senger side temperature control button
is turned, the DUAL indicator will come
on. To turn off the passenger side
temperature control, push the “DUAL”
button.
4. To turn off the climate control system, push the “OFF”button.
A visible mist may be seen coming from the
ventilators in hot, humid conditions as the
air is cooled rapidly. This does not indicate
a malfunction.
Heating (A/C OFF):
The air conditioner does not activate in this
mode. When you need to heat only, use
this mode.
1. Push the “AUTO”button on.
2. Push the “A/C” button. (The A/C
indicator will turn off.)
3. Turn the temperature control dial to set the desired temperature.
. The temperature of the passenger
compartment will be maintained auto-
matically. Air flow distribution and fan
speed are also controlled automati-
cally. .
Do not set the temperature lower than
the outside air temperature. Otherwise
the system may not work properly.
. Not recommended if windows fog up.
Dehumidified defrosting or defogging: 1. Push the “
”front defroster button.
(The indicator light on the button will
illuminate.)
2. Turn the temperature control dial to set the desired temperature.
. To quickly remove ice from the outside
of the windows, push the fan speed
increase button “
”and set it to the
maximum position.
. As soon as possible after the wind-
shield is clean, push the “AUTO”button
to return to the auto mode.
. When the “
”front defroster button
is pushed, the air conditioner will
automatically be turned on at outside
temperatures above 238 F(−58C) to
defog the windshield, and the air
recirculate mode will automatically be
turned off.
Outside air is drawn into the passenger
compartment to improve the defogging
performance.
Monitor, climate, audio, phone and voice recognition systems4-41