lock INFINITI QX80 2020 Infiniti Connection
[x] Cancel search | Manufacturer: INFINITI, Model Year: 2020, Model line: QX80, Model: INFINITI QX80 2020Pages: 276, PDF Size: 1.16 MB
Page 99 of 276

.Applying pressure to the display
screens may damage it.
“Care and maintenance”
(page 3-56)
The rear displays are located on the back of
the front head restraints.
Use the remote controller to operate the
rear display screens.
“Remote controller” (page 3-46)
Select the left or right rear display using
controller and push <
>to activate the
corresponding rear display. When the
display is turned on, a green indicator on
the lower corner of the display will
illuminate.
The lower part of the rear displays
functions as a signal receiver/transmitter
for the remote controller and wireless head-
phones, and should not be blocked or
covered.
Turning the rear displays on/off can also be
done on the front display.
“Controlling the rear system on the
front display” (page 3-53)
NOTE:
. The rear displays may turn off auto-
matically when the temperature is high
to protect the display screens from
being damaged.
. The movement of the images displayed
on the rear displays could slow down
when the temperature is below 32°F
(0°C) but this is not a malfunction. The
movement will return to normal when
the temperature rises between 32°F
(0°C) and 122°F (50°C).
. The following conditions may occur but
these are characteristics of the crystal
display and are not malfunctions:
— Black spots, bright spots and after-
images appear on this display.
— The screen appears faint or dimmed
depending on the angle viewed.OPERATIONS ON REAR DIS-
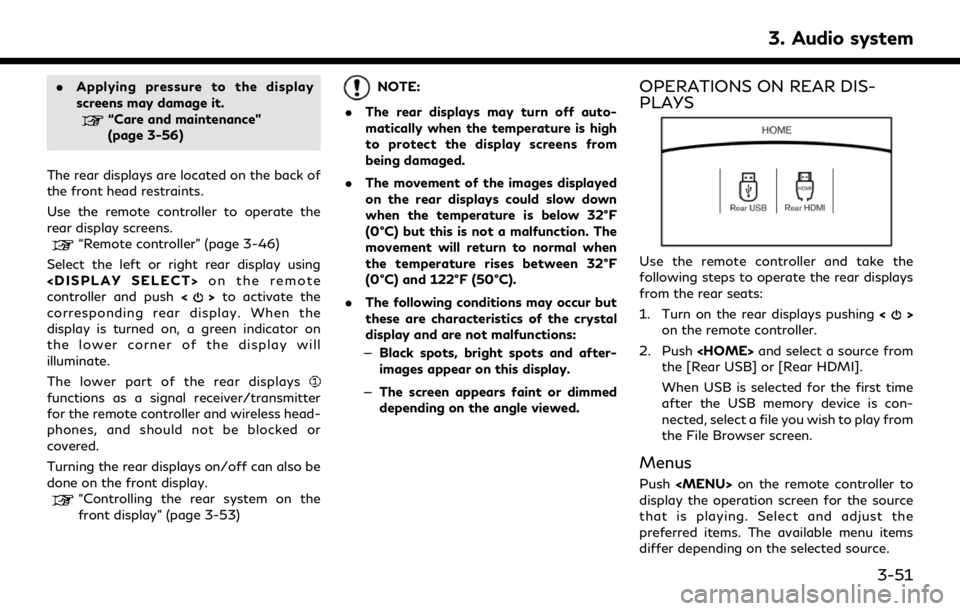
PLAYS
Use the remote controller and take the
following steps to operate the rear displays
from the rear seats:
1. Turn on the rear displays pushing <
>
on the remote controller.
2. Push
the [Rear USB] or [Rear HDMI].
When USB is selected for the first time
after the USB memory device is con-
nected, select a file you wish to play from
the File Browser screen.
Menus
Push
Page 101 of 276
![INFINITI QX80 2020 Infiniti Connection Available items:. [Display Adjustment]
— [Picture Mode] Select image quality from normal,
dynamic, cinema and game.
— [Auto Bright] Select from normal, bright, off and
dark. The brightness of the INFINITI QX80 2020 Infiniti Connection Available items:. [Display Adjustment]
— [Picture Mode] Select image quality from normal,
dynamic, cinema and game.
— [Auto Bright] Select from normal, bright, off and
dark. The brightness of the](/img/42/35001/w960_35001-100.png)
Available items:. [Display Adjustment]
— [Picture Mode] Select image quality from normal,
dynamic, cinema and game.
— [Auto Bright] Select from normal, bright, off and
dark. The brightness of the screen is
adjusted automatically according to
the brightness inside the vehicle
compartment. The sensor is located
on the rear displays.
— [Brightness]/[Tint]/[Contrast]/[Col- or]/[Black Level]
Adjust the levels using <
>or <>
on the remote controller.
— [Default] Select this item to reset the screen
settings to the default value.
. [Automatic Detail Enhancement]
The enhancement of the contrast for
details can be adjusted automatically
with this function. Select the level of
the function from high, medium and low.
. [Super Resolution]
Blurred images with a low resolution can
be converted and adjusted into more
crisp, clearer images. Select the level of the function from high, medium and low.
. [Automatic Contrast Adjustment]
Objects in dark images that are difficult
to view can be adjusted and enhanced
automatically for clearer viewing. Select
the level of the function from high,
medium and low.
. [Noise Reduction]
With the noise reduction function, block
noise that accompanies images can be
reduced. Select the level of the function
from high, medium and low.Software information
To display the software information of the
Mobile Entertainment System, push
[Information].
CONTROLLING THE REAR SYS-
TEM ON THE FRONT DISPLAY
To control the rear displays and the rear
speakers on the front display, push
Page 102 of 276

3. Audio system
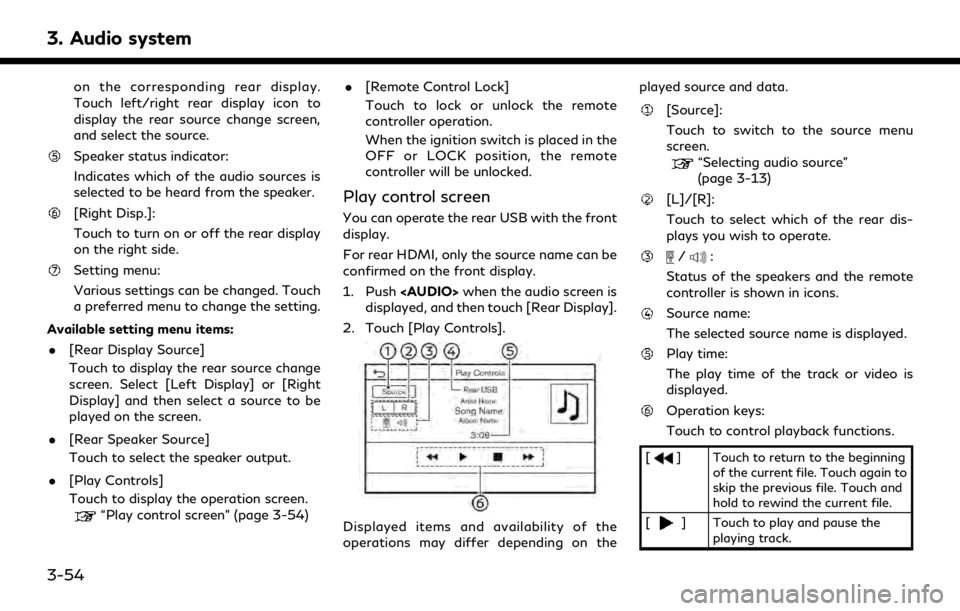
on the corresponding rear display.
Touch left/right rear display icon to
display the rear source change screen,
and select the source.
Speaker status indicator:
Indicates which of the audio sources is
selected to be heard from the speaker.
[Right Disp.]:
Touch to turn on or off the rear display
on the right side.
Setting menu:
Various settings can be changed. Touch
a preferred menu to change the setting.
Available setting menu items: . [Rear Display Source]
Touch to display the rear source change
screen. Select [Left Display] or [Right
Display] and then select a source to be
played on the screen.
. [Rear Speaker Source]
Touch to select the speaker output.
. [Play Controls]
Touch to display the operation screen.
“Play control screen” (page 3-54) .
[Remote Control Lock]
Touch to lock or unlock the remote
controller operation.
When the ignition switch is placed in the
OFF or LOCK position, the remote
controller will be unlocked.
Play control screen
You can operate the rear USB with the front
display.
For rear HDMI, only the source name can be
confirmed on the front display.
1. Push
Page 109 of 276

— Your cellular phone is locked in orderto prevent dialing.
. If Apple CarPlay® or Android Auto is
active, the Bluetooth® Hands-Free
Phone cannot be used.
. When the radio wave condition is not
ideal or ambient sound is too loud, it may
be difficult to hear the other person’s
voice during a call.
. Immediately after the ignition switch is
placed in the ACC or ON position, it may
not be possible to receive a call for a
short period of time.
. Do not place the cellular phone in an area
surrounded by metal or far away from
the in-vehicle phone module to prevent
tone quality degradation and wireless
connection disruption.
. While a cellular phone is connected
through the Bluetooth® wireless con-
nection, the battery power of the cellular
phone may discharge quicker than usual.
. Visit the website below for trouble-
shooting help if the Bluetooth® Hands-
Free Phone System seems to be mal-
functioning.
www.infinitiusa.com/bluetooth/ .
Some cellular phones or other devices
may cause interference or a buzzing
noise to come from the audio system
speakers. Storing the device in a differ-
ent location may reduce or eliminate the
noise.
. Refer to the cellular phone Owner’s
Manual regarding the telephone pairing
procedure specific to your phone, bat-
tery charging, cellular phone antenna,
etc.
. The antenna or battery display on the
monitor may not coincide with the
antenna or battery display of some
cellular phones.
. If reception between callers is unclear,
adjusting the incoming or outgoing call
volume may improve the clarity.
“Volume and Beeps settings”
(page 2-32)
. The microphone is located near the map
light.
. To improve call quality, the microphone is
optimized to recognize the driver’s voice.
Speech from vehicle passengers may not
be captured by the Bluetooth® Hands-
Free Phone System. .
Keep the interior of the vehicle as quiet
as possible to hear the caller’s voice
clearly as well as to minimize echo.
Reduce background noise as much as
possible by closing windows and point-
ing HVAC vents away from the ceiling.
PHONE SCREEN
The phone screen can be displayed by on
both the upper display and the lower display.
. Push <
>on the steering wheel to
display the phone screen on the upper
display.
. Push
Page 112 of 276
![INFINITI QX80 2020 Infiniti Connection 4. Hands-Free Phone
Holding a call:
To hold the call, touch [Hold Call].
INFO:
If [Allow 2 Phones Simultaneously] is turned
on, two hands-free phone devices can be
connected at the same time. If one o INFINITI QX80 2020 Infiniti Connection 4. Hands-Free Phone
Holding a call:
To hold the call, touch [Hold Call].
INFO:
If [Allow 2 Phones Simultaneously] is turned
on, two hands-free phone devices can be
connected at the same time. If one o](/img/42/35001/w960_35001-111.png)
4. Hands-Free Phone
Holding a call:
To hold the call, touch [Hold Call].
INFO:
If [Allow 2 Phones Simultaneously] is turned
on, two hands-free phone devices can be
connected at the same time. If one of the
connected devices receives an incoming call
while the other device is already online, a
pop-up message will appear to inform that
answering the call will hang up the line of the
other connected device. Touch [Answer] to
answer the call and hang up the line on the
other device. Touch [Decline] to continue the
conversation on the other device.
“Bluetooth® settings” (page 2-29)
During a call
The Call in Progress screen will appear
during a call. To hang up the phone, touch [Hang up].
Operations during a call:
There are some options available other than
hanging up a call or answering/rejecting
incoming calls.
Touch one of the following displayed keys on
the screen to take action.
Available item Action
[Mute] When muted, your voice will not be heard by the person
on the other end of the line.
[Dial Number] Using the touch-tone, send digits to the connected
party for using services such
as voicemail.
[Use Handset] Transfer the call to the cellular phone.
[Switch Call]* Answer another incoming call. The person you are
talking to will be placed on
hold. Push once more to
speak to the person on hold
again.
*: Available when a call is received while on
the line with another person. The availability
of this function depends on the cellular phone.
INFO:
. To adjust the person’s voice to be louder
or quieter, push <-
+>on the steering
wheel or turn
on the phone.
. Models with navigation system:
If
Page 141 of 276

network, the Bluetooth® connection
with wireless Apple CarPlay® (if so
equipped) connected device will be dis-
connected.
. If you connect the iPhone® that is using
wireless Apple CarPlay® (if so equipped)
via USB cable, the in-vehicle system
provides power to the iPhone®.
. If wireless Apple CarPlay® (if so
equipped) is not started automatically,
touch [
] on the device settings screen.“Setting devices” (page 2-28)
. If you are using Apple CarPlay® or
Android Auto, you cannot start Apple
CarPlay® with the other iPhone®. To use
Apple CarPlay® with the other iPhone®,
disconnect the current device, or deacti-
vate Apple CarPlay® or Android Auto on
the Connections settings.
“Connections settings” (page 2-28)
Apple CarPlay® OPERATION
After starting Apple CarPlay®, the iPhone®
functions displayed on the screen can be
operable using the in-vehicle system.
To return to the Apple CarPlay® top menu
screen after detailed operation, touch [
]on
the lower corner of the Apple CarPlay®
screen.
To exit Apple CarPlay® screen, push the
buttons such as
Page 145 of 276

setting of the navigation system will be
cancelled.
. The Phone menu and access to the
connected phone through the Voice
Recognition System will be disabled
while Android Auto is connected. To
access your phone, talk to your Google
Assistant or select the phone icon in the
Android Auto top menu screen.
INITIAL Android Auto SETTINGS
Before using Android Auto, download the
Android Auto app from the Google Play
store on your Android phone.
It may be necessary to operate the Android
phone when connecting first.
Depending on the selection on the connect-
ing Android phone, such as approval, some
of the features of Android Auto are not
available.
Android Auto OPERATION
Unlock your phone’s screen before connect-
ing your Android phone.
1. Connect your Android phone to the USB
connection port.
“USB (Universal Serial Bus) connec-
tion ports and AUX (auxiliary) input
jack” (page 2-8)
“USB connection ports” (page 2-9)
2. Depending on the setting, a Startup Information screen will appear on the
upper display. Touch [Yes] to use An-
droid Auto.
INFO:
.If you are using Android Auto or AppleCarPlay®, you can not start Android
Auto with the other Android phone.
To use the Android Auto with the
other Android phone, disconnect the
current device, or deactivate Android
Auto or Apple CarPlay® on the Con-
nections settings.
“Connections settings”
(page 2-28)
.If you do not wish to display the
Startup Information screen each time
you activate Android Auto, turn on [Don’t Ask Anymore] on the Startup
Information screen. The Startup In-
formation screen will not be displayed
from the next Android Auto activa-
tion. The Startup Information screen
can be set to appear again in the
Android Auto setting menu.
“Android Auto settings”
(page 5-27)
.The Bluetooth® setting of your An-
droid phone will be turned on and
connected to in-vehicle system auto-
matically when Android Auto is acti-
vated. Keep the Bluetooth® turned
on to use the phone functions.
.Some functions of Android Auto arenot available if the Bluetooth® is not
connected.
3. The Android Auto top menu screen will appear on the upper display. The Android
phone functions displayed on the screen
should now be operable using the in-
vehicle system.
4. To exit the Android Auto screen, touch [
] and then touch the key to return to
INFINITI InTouchTM.
5. Information and vehicle settings
5-25
Page 148 of 276

5. Information and vehicle settings
Android Auto SYSTEM LIMITA-
TIONS
For all features of Android Auto to operate
correctly, it is necessary to have a compa-
tible Android phone, a cellular connection
and a data plan.
When Android Auto is operating, system
performance is affected by the strength of
the cellular connection or performance of
the phone itself. If performance of the
system decreases:. Disconnect and reconnect your phone
. Close all apps and restart them
. Cycle phone power off/on to restart
It should also be confirmed that the latest
version of both Android OS and the Android
Auto App are installed on the cellular phone.
Functionality of Android Auto may decrease
or be lost if there are changes to operating
systems, hardware, software or other tech-
nologies central to supporting the system
that are outside of INFINITI’s control. Chan-
ging government regulations may also affect
the operation of Android Auto.
SIRI® EYES FREE
GENERAL INFORMATION
Apple Siri® Eyes Free personal assistant can
be accessed from the vehicle. Siri® Eyes Free
can be accessed in Siri® Eyes Free mode to
reduce user distraction. In this mode, Siri®
Eyes Free is available for interaction by voice
control. After connecting a compatible Apple
device by using Bluetooth®, Siri® Eyes Free
can be activated by pushing and holding
<
> on the steering wheel.
Siri® is a trademark of Apple Inc., registered
in the U.S. and other countries.
INFO:
. Some Siri® Eyes Free functions, such as
opening apps, may not be available
during driving.
. For best results, always update your
device to the latest software version.
. Keep the interior of the vehicle as quiet
as possible. Close the windows to elim-
inate the surrounding noises (traffic
noises, vibration sounds, etc.), which
may prevent the system from recogniz-
ing the voice commands correctly. .
For functions that can be used in Siri®
Eyes Free, refer to the Apple website.
REQUIREMENTS
Siri® is available on the iPhone® 4S or later.
Devices released before iPhone® 4S are not
supported by the Siri® Eyes Free system.
Visit www.apple.com/ios/siri for details
about device compatibility.
Siri® must be enabled on the phone. Please
check phone settings.
If the device has a lock screen, Siri® must be
accessible from the lock screen. Please check
phone settings.
SIRI® EYES FREE ACTIVATION
Siri® Eyes Free function can be activated
using <>on the steering wheel.“Control buttons and touch screen
display” (page 2-2)
1. Connect a Siri® Eyes Free enabled iPhone® to the vehicle.
“Setting devices” (page 2-28)
2. After the Bluetooth® connection is es- tablished, push and hold <
>on the
steering wheel to activate the Siri® Eyes
Free function.
5-28
Page 163 of 276

When a point on the map is touched, the
cross pointer is displayed and the position
touched is moved to the center of the screen.
Long touch:
Touch the direction to move to. The map
continues to scroll while the screen is
touched.
Drag:
Drag the screen to scroll the map.
Swipe/flick:
Swipe or flick the screen to scroll the map
screen quickly.
Using INFINITI controller:
1. Slide the slide switch to move continu-ously across the map in a direction.
2. While moving on the map, the cross pointer appears.
INFO:
. 3D map can be displayed by dragging
with two fingers in scrolled 2D map.
. Map scrolling operations are limited and
not fully available while driving.
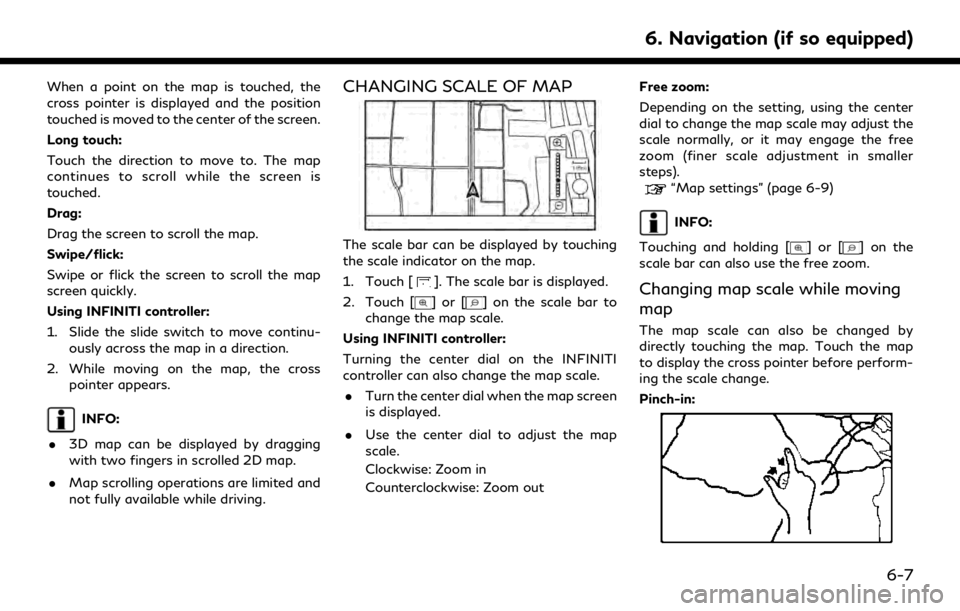
CHANGING SCALE OF MAP
The scale bar can be displayed by touching
the scale indicator on the map.
1. Touch [
]. The scale bar is displayed.
2. Touch [
]or[] on the scale bar to
change the map scale.
Using INFINITI controller:
Turning the center dial on the INFINITI
controller can also change the map scale. . Turn the center dial when the map screen
is displayed.
. Use the center dial to adjust the map
scale.
Clockwise: Zoom in
Counterclockwise: Zoom out Free zoom:
Depending on the setting, using the center
dial to change the map scale may adjust the
scale normally, or it may engage the free
zoom (finer scale adjustment in smaller
steps).
“Map settings” (page 6-9)
INFO:
Touching and holding [
]or[] on the
scale bar can also use the free zoom.
Changing map scale while moving
map
The map scale can also be changed by
directly touching the map. Touch the map
to display the cross pointer before perform-
ing the scale change.
Pinch-in:
6. Navigation (if so equipped)
6-7
Page 166 of 276
![INFINITI QX80 2020 Infiniti Connection 6. Navigation (if so equipped)
Available setting items may vary depending on models and specifications.
Available setting items
Menu itemAction
[Split Screen View] [Change Order] Change the display or INFINITI QX80 2020 Infiniti Connection 6. Navigation (if so equipped)
Available setting items may vary depending on models and specifications.
Available setting items
Menu itemAction
[Split Screen View] [Change Order] Change the display or](/img/42/35001/w960_35001-165.png)
6. Navigation (if so equipped)
Available setting items may vary depending on models and specifications.
Available setting items
Menu itemAction
[Split Screen View] [Change Order] Change the display order of the display view bar items.
[Full Map] Display full map screen.
[Split Screen: Dual Map] Select a split screen view to be applied.
“Display view bar” (page 2-15)
[Intersection]
[Turn List]
[Where Am I?]
[Split Screen: Turn by turn]
[Fuel Economy]
[Audio]
[TomTom Current Conditions]
[TomTom 5–Day Weather Forecast]
[TomTom Hourly Weather Forecast]
[SXM Current Conditions]
[SXM 5–Day Weather Forecast]
[SXM Hourly Weather Forecast]
[SXM Sports Scores]
[Analog Clock]
[Digital Clock]
6-10