System pin JAGUAR XF 2011 1.G Owners Manual
[x] Cancel search | Manufacturer: JAGUAR, Model Year: 2011, Model line: XF, Model: JAGUAR XF 2011 1.GPages: 225, PDF Size: 7.32 MB
Page 27 of 225
R
(FM8) SEMCON JLR OWNER GUIDE VER 1.00 EURO
LANGUAGE: english-en; MARQUE: jaguar; MODEL: XF
Occupant safety
27
If the vehicle is moving at or above 16 km/h (10
mph) and the seat belt of an occupied front
seat is not fastened, the warning lamp will
flash.
The flashing lasts for 10 seconds and repeats
every 10 seconds for approximately 5 minutes
or until the belt(s) is fastened or the vehicle
stops.
If the warning lamp re mains illuminated after
the seat belt(s) fastened, seek qualified
assistance as soon as pos sible. The vehicle can
still be driven with the warning lamp
illuminated, provided the seat belt(s) is
properly fastened.
Note: If a heavy object is placed on the front
passenger seat, it may activate the Beltminder
feature. It is recomme nded that the object be
placed in the luggage compartment or secured
using the seat belt.
Note: Although not advisable, it is possible to
disable the Beltminder function. Please see
your Dealer/Authorised Repairer to disable or
re-instate the function.
ACTIVE SEAT BELTS
The Active Seat Belt System enhances front
seat occupant support during extreme vehicle
manoeuvres such as understeer, oversteer or
high braking forces by te nsioning the seat belt.
Tension is released when the vehicle
manoeuvre is completed. The occupant may
notice a further slight in crease in tension just
prior to release of th e seat belt, which is
entirely normal.
In the unlikely event that tension is not released
after a manoeuvre is completed, bring the
vehicle to a safe stop. Unbuckle and re-buckle
the seat belt, which should then extract and
retract normally, before continuing with the
journey. Seat belts should be worn by all
vehicle occupants, for every journey,
no matter how short.
If the Active Seat Belts Unavailable message
and the yellow general warning symbol are
displayed in the message centre, contact your
Jaguar Dealer/ Authorised Repairer as soon as
possible. The vehicle is still safe to drive and
the Active Seat Belts will still function as
standard seat belts.
CHILD SEATS
For optimum safety, children should
travel in the rear of the vehicle at all
times; front passenger seat travel is
not recommended. However, if it is
essential that a child travels in the
front (not permitted in Australia), set
the vehicle seat fully rearward and
seat the child in an approved
forward-facing child seat. Do not use
a rear-facing child seat - an inflating
airbag could impact with the seat and
cause serious injury.
Do not use a forward facing child seat
until the child usin g it is above the
minimum weight of 9 kg (20 lb.) and
able to sit up unaided. Up to the age of
two, a child's spine and neck are not
sufficiently developed to avoid injury
in a frontal impact.
Do not allow a baby or infant to be
held or carried on the lap. The force of
a crash can increase effective body
weight by as much as thirty times,
making it impossible to hold onto the
child.
Page 48 of 225
L
(FM8) SEMCON JLR OWNER GUIDE VER 1.00 EURO
LANGUAGE: english-en; MARQUE: jaguar; MODEL: XF
Garage door opener
48
Garage door openerGARAGE DOOR TRANSCEIVER
Do not use the transceiver with any
garage door opener that lacks the
safety stop and reverse feature as
required by safety standards.
When programming the transceiver to
a garage door opener or entry gate,
ensure the area is clear. This will
prevent potential harm or damage as
the gate or garage door will activate
during the programme.
This device may suffer from
interference if operate d in the vicinity of
a mobile or fixed station transmitter.
This interference is li kely to affect the
hand-held transmitter as well as the
in-car transceiver.
The door transceiver is located in the rear-view
mirror. It can be programmed to transmit the
radio frequencies of up to three different
transmitters, which can be used to operate
garage doors, entry gates, home lighting,
security systems or other radio frequency
operated devices.
Although this section mainly describes the
procedures for a garage door opener, it equally
applies to the previously mentioned
applications.
In some countries, this feature is also known
as the HomeLink® Universal Transceiver.
For further information, see 50,
INFORMATION AND ASSISTANCE .
BEFORE PROGRAMMING
When programming a device that may
require you to press and re-press the
hand-held transmitter (cycle), unplug
the device during the cycling process to
prevent possible motor failure.
For best results, fit a new battery to the
hand-held transmitter of the garage door
opener (or other device ) before programming.
If your garage door opener receiver (located in
the garage) is equippe d with an antenna,
ensure that the antenna is hanging straight
down.
PROGRAMMING
Ensuring that the engine is switched off:
1. Ensure that the ignition system is on.
2. Hold the end of the original garage door
opener hand-held transmitter 50 to
150 mm (2 to 6 inches) away from the
transceiver in the rear-view mirror, keeping
the indicator lamp in view.
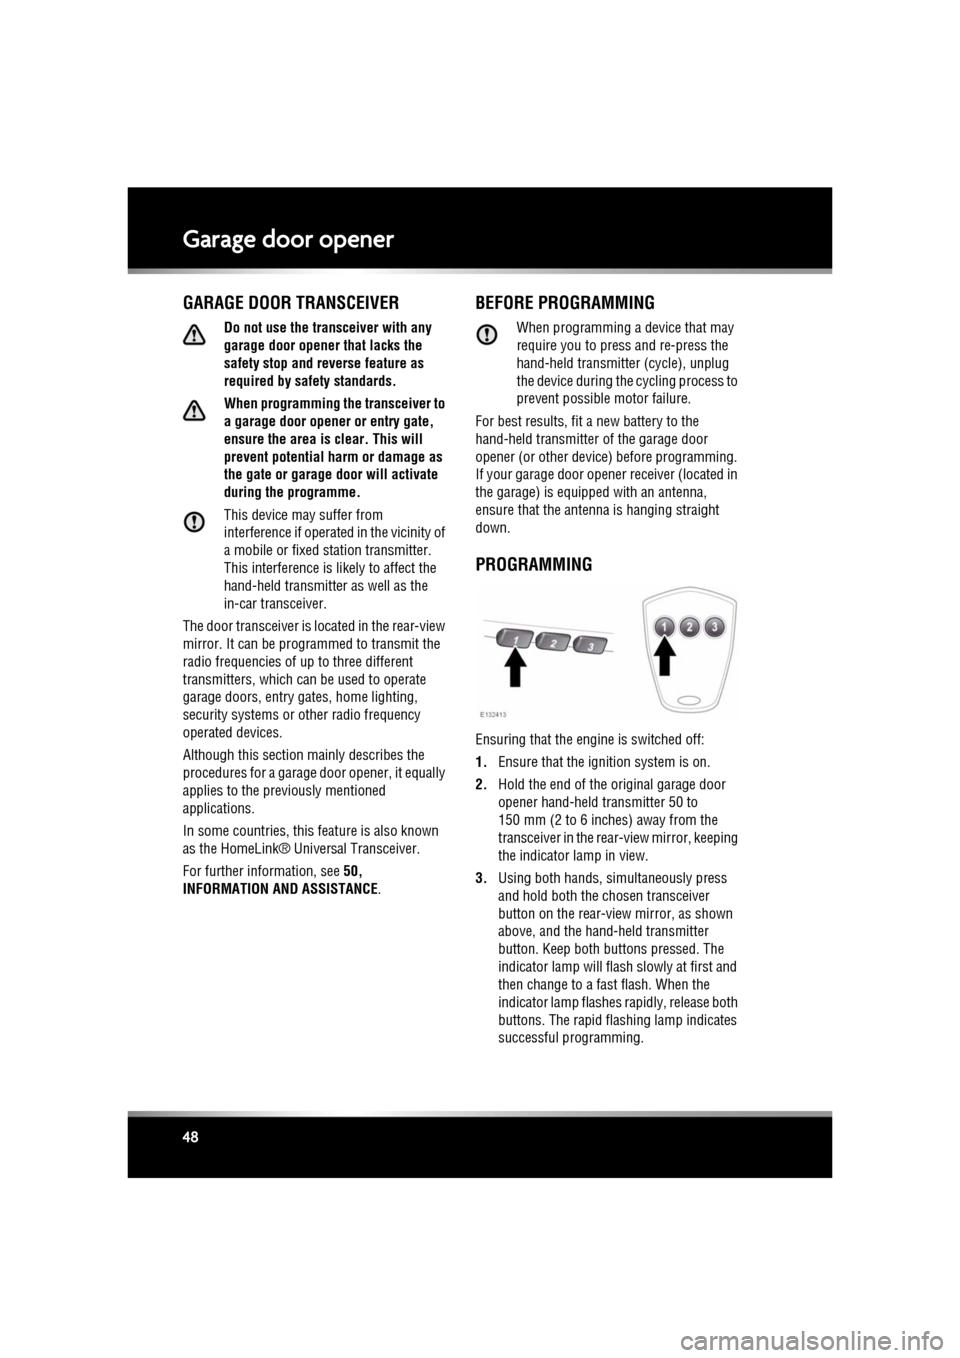
3. Using both hands, simultaneously press
and hold both the chosen transceiver
button on the rear-view mirror, as shown
above, and the hand- held transmitter
button. Keep both but tons pressed. The
indicator lamp will flas h slowly at first and
then change to a fast flash. When the
indicator lamp flashes rapidly, release both
buttons. The rapid flashing lamp indicates
successful programming.
Page 49 of 225
R
(FM8) SEMCON JLR OWNER GUIDE VER 1.00 EURO
LANGUAGE: english-en; MARQUE: jaguar; MODEL: XF
Garage door opener
49
4. If, after 60 seconds, the indicator lamp
does not flash rapidly, release both the
transceiver and the hand-held transmitter
buttons and repeat th e procedure starting
with Step 2. Position the hand-held
transmitter at a different angle and/or
distance.
5. Press and hold the programmed garage
door opener button and observe the
indicator lamp.
•If the indicator is continuous,
programming is complete and your
device should operate when the garage
door opener button is pressed and held
for approximately 1 to 2 seconds and
then released.
• If the indicator lamp blinks rapidly for
two seconds and then illuminates
continuously, proceed with the
following programming instructions
for rolling code de vice equipment.
TO ERASE ALL PROGRAMMING
For first time programming, ensure that the
engine is switched off:
1.Ensure that the igniti on system is in
convenience mode (see 7, CONVENIENCE
MODE ).
2. Press and hold the two outer buttons on
the transceiver in the rear-view mirror.
Keep the buttons pressed until the
indicator lamp begins to flash (this will take
approximately 20 seconds), then release
the buttons.
All memories in the gara ge door opener have
now been cleared.
Note: Do not perform this procedure when
programming the addi tional garage door
opener buttons.
ROLLING CODE DEVICE EQUIPMENT
PROGRAMMING
Note: The assistance of a second person, may
make the following steps quicker and easier.
Once the button has been pressed there are
only 30 seconds in which to complete Step 3.
1. At the garage door opener receiver (motor
head unit) in the garage, locate the learn or
smart button/switch.
•The name of the but ton or switch may
vary between manufacturers.
2. Press and release the learn or smart
button.
3. Return to the vehicle and firmly press and
hold the programmed garage door opener
button for two seconds and release.
4. Repeat the press, hold, release sequence
three times to complete the programming
process.
The garage door opener in the rear-view mirror
should now activate the rolling code device.
REPROGRAMMING A SINGLE
GARAGE DOOR OPENER BUTTON
To programme a device to a previously
programmed button:
1. Press and hold the desired
pre-programmed garage door opener
button for at least 20 seconds, but no
longer than 30 seconds, until the indicator
lamp begins to flash.
2. Without releasing th e rear-view mirror
button, position the ha nd-held transmitter
approximately 50 to 150 mm (2 to 6
inches) away from the transceiver in the
rear-view mirror, keeping the indicator
lamp in view.
3. Carry out Step 3 of Programming .
Page 53 of 225
R
(FM8) SEMCON JLR OWNER GUIDE VER 1.00 EURO
LANGUAGE: english-en; MARQUE: jaguar; MODEL: XF
Warning lamps
53
DYNAMIC STABILITY CONTROL
(DSC) (AMBER)
If there is a fault, this warning lamp will
illuminate in the instrument panel and the
message centre will display DSC NOT
AVAILABLE .
The vehicle can still be driven, but the DSC
system will not activate under wheel spin or
slide conditions. You s hould seek qualified
assistance as soon as possible.
If Trac DSC is selected, the warning lamp will
also illuminate and the message TRAC DSC is
displayed for 4 seconds.
DYNAMIC STABILITY CONTROL
(DSC) OFF (AMBER)
REAR FOG LAMPS (AMBER)
ADAPTIVE CRUISE CONTROL
(AMBER) FORWARD ALERT (AMBER)
AIRBAG (AMBER)
AUTOMATIC SPEED LIMITER
(AMBER)
ADAPTIVE FRONT LIGHTING SYSTEM
(AMBER)
TYRE PRESSURE MONITORING
SYSTEM (YELLOW)
Flashes when DSC is active.
Illuminates when DSC is switched
off. A chime will also sound and
the message DSC OFF is displayed
in the message centre.
Illuminates when the rear fog
lamps are switched on.
Illuminates when adaptive cruise
control is active, to indicate that
the vehicle is in follow mode.
Illuminates when forward alert is
active.
Illuminates if the airbag system
develops a fault.
Seek qualified
assistance as soon as possible.
Illuminates when Automatic
Speed Limiter is active.
Illuminates when there is a system
fault. The headlamps will still
operate, but without this feature
operating correctly . Seek qualified
assistance as soon as possible.
Illuminates when one or more
tyres are significantly
under-inflated. The vehicle should
be stopped as soon as possible
and the tyres checked and inflated
to the recommended pressure.
Page 58 of 225
L
(FM8) SEMCON JLR OWNER GUIDE VER 1.00 EURO
LANGUAGE: english-en; MARQUE: jaguar; MODEL: XF
Touch screen
58
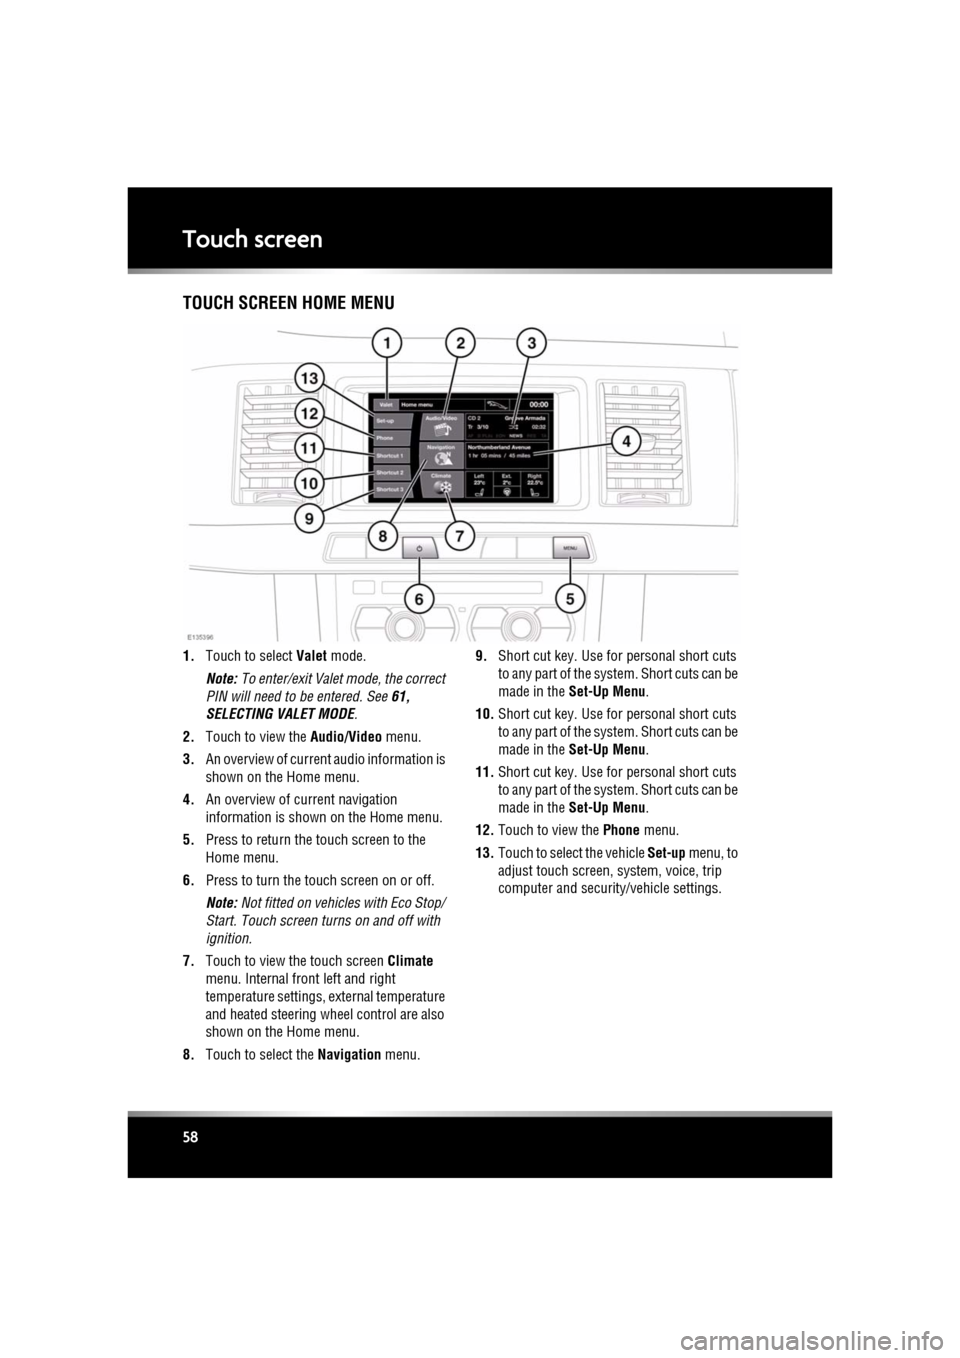
Touch screenTOUCH SCREEN HOME MENU
1. Touch to select Valet mode.
Note: To enter/exit Valet mode, the correct
PIN will need to be entered. See 61,
SELECTING VALET MODE .
2. Touch to view the Audio/Video menu.
3. An overview of current audio information is
shown on the Home menu.
4. An overview of current navigation
information is shown on the Home menu.
5. Press to return the touch screen to the
Home menu.
6. Press to turn the touch screen on or off.
Note: Not fitted on vehicles with Eco Stop/
Start. Touch screen turns on and off with
ignition.
7. Touch to view the touch screen Climate
menu. Internal fr ont left and right
temperature settings, external temperature
and heated steering wheel control are also
shown on the Home menu.
8. Touch to select the Navigation menu. 9.
Short cut key. Use for personal short cuts
to any part of the system. Short cuts can be
made in the Set-Up Menu .
10. Short cut key. Use for personal short cuts
to any part of the system. Short cuts can be
made in the Set-Up Menu .
11. Short cut key. Use for personal short cuts
to any part of the system. Short cuts can be
made in the Set-Up Menu .
12. Touch to view the Phone menu.
13. Touch to select the vehicle Set-up menu, to
adjust touch screen, system, voice, trip
computer and security/vehicle settings.
Page 84 of 225
L
(FM8) SEMCON JLR OWNER GUIDE VER 1.00 EURO
LANGUAGE: english-en; MARQUE: jaguar; MODEL: XF
Stability control
84
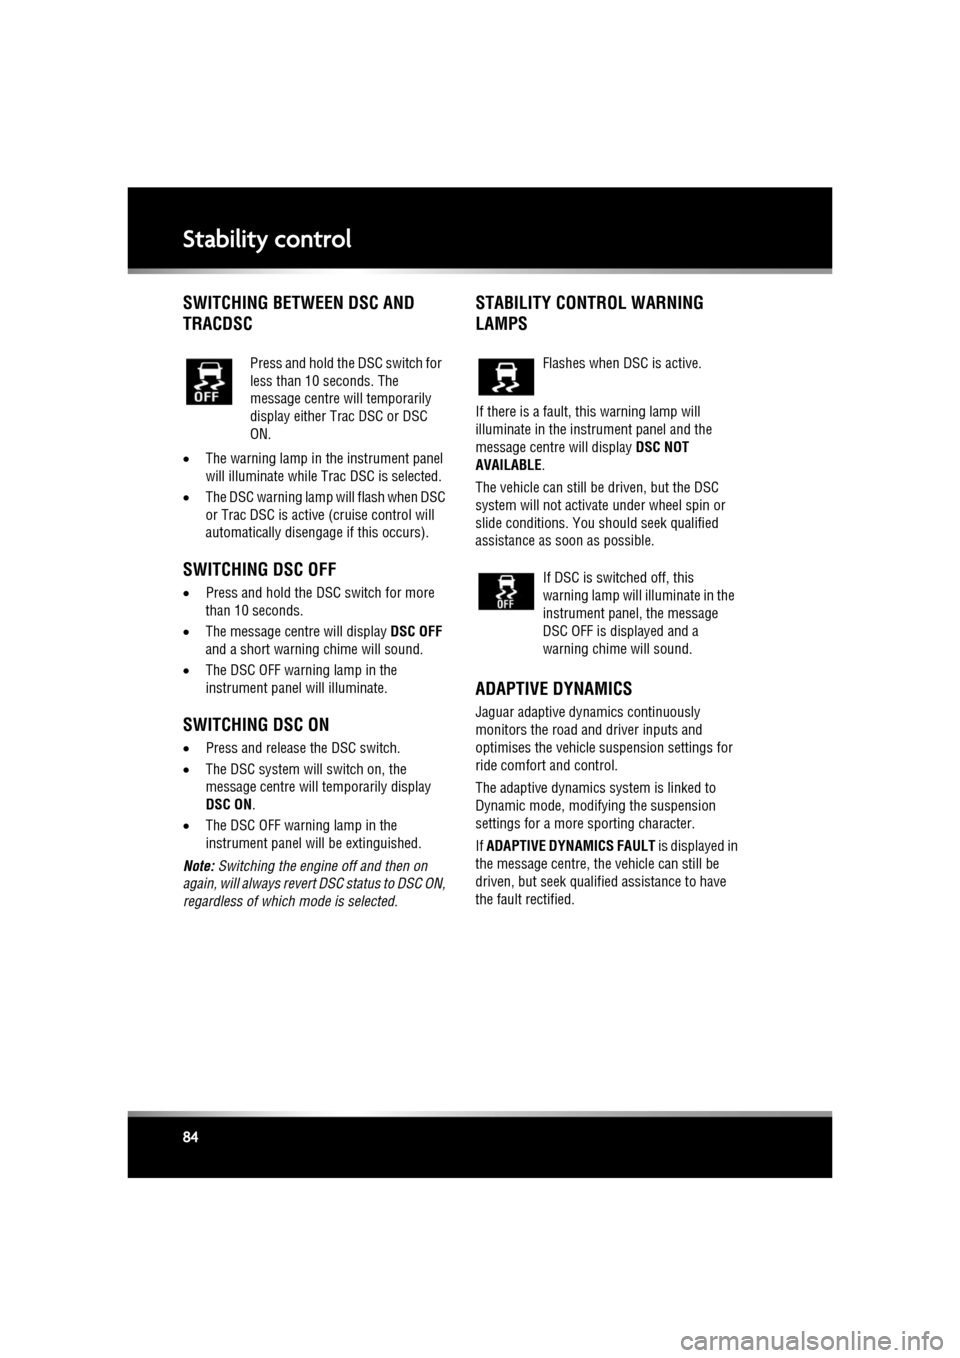
SWITCHING BETWEEN DSC AND
TRACDSC
• The warning lamp in the instrument panel
will illuminate while Trac DSC is selected.
• The DSC warning lamp will flash when DSC
or Trac DSC is active (cruise control will
automatically disengage if this occurs).
SWITCHING DSC OFF
• Press and hold the DSC switch for more
than 10 seconds.
• The message centre will display DSC OFF
and a short warning chime will sound.
• The DSC OFF warning lamp in the
instrument panel will illuminate.
SWITCHING DSC ON
•Press and release the DSC switch.
• The DSC system will switch on, the
message centre will temporarily display
DSC ON .
• The DSC OFF warning lamp in the
instrument panel will be extinguished.
Note: Switching the engine off and then on
again, will always revert DSC status to DSC ON,
regardless of which mode is selected.
STABILITY CONTROL WARNING
LAMPS
If there is a fault, this warning lamp will
illuminate in the inst rument panel and the
message centre will display DSC NOT
AVAILABLE .
The vehicle can still be driven, but the DSC
system will not activate under wheel spin or
slide conditions. You should seek qualified
assistance as soon as possible.
ADAPTIVE DYNAMICS
Jaguar adaptive dyna mics continuously
monitors the road and driver inputs and
optimises the vehicle suspension settings for
ride comfort and control.
The adaptive dynamics system is linked to
Dynamic mode, modify ing the suspension
settings for a more sporting character.
If ADAPTIVE DYNAMICS FAULT is displayed in
the message centre, the vehicle can still be
driven, but seek qualified assistance to have
the fault rectified.
Press and hold the DSC switch for
less than 10 seconds. The
message centre will temporarily
display either Trac DSC or DSC
ON.
Flashes when DSC is active.
If DSC is switched off, this
warning lamp will illuminate in the
instrument panel, the message
DSC OFF is displayed and a
warning chime will sound.
Page 87 of 225
R
(FM8) SEMCON JLR OWNER GUIDE VER 1.00 EURO
LANGUAGE: english-en; MARQUE: jaguar; MODEL: XF
Brakes
87
BrakesIMPORTANT INFORMATION
Do not rest your foot on the brake
pedal whilst the vehicle is in motion.
Never allow the vehicle to coast
(freewheel) with the engine turned off.
The engine must be running to provide
full braking assistance. The brakes
will still function wi th the engine off,
but far more pressure will be required
to operate them.
If the red brake warning lamp
illuminates, safely bring the vehicle to
a stop, as quickly as possible and
seek qualified assistance.
Never place non-approved floor
matting or any other obstructions
under the brake pedal. This restricts
pedal travel and braking efficiency.
Driving through heavy rain or water can have
an adverse effect on braking efficiency. Under
such circumstances, it is recommended that
you lightly apply the brak es intermittently to
dry the brakes.
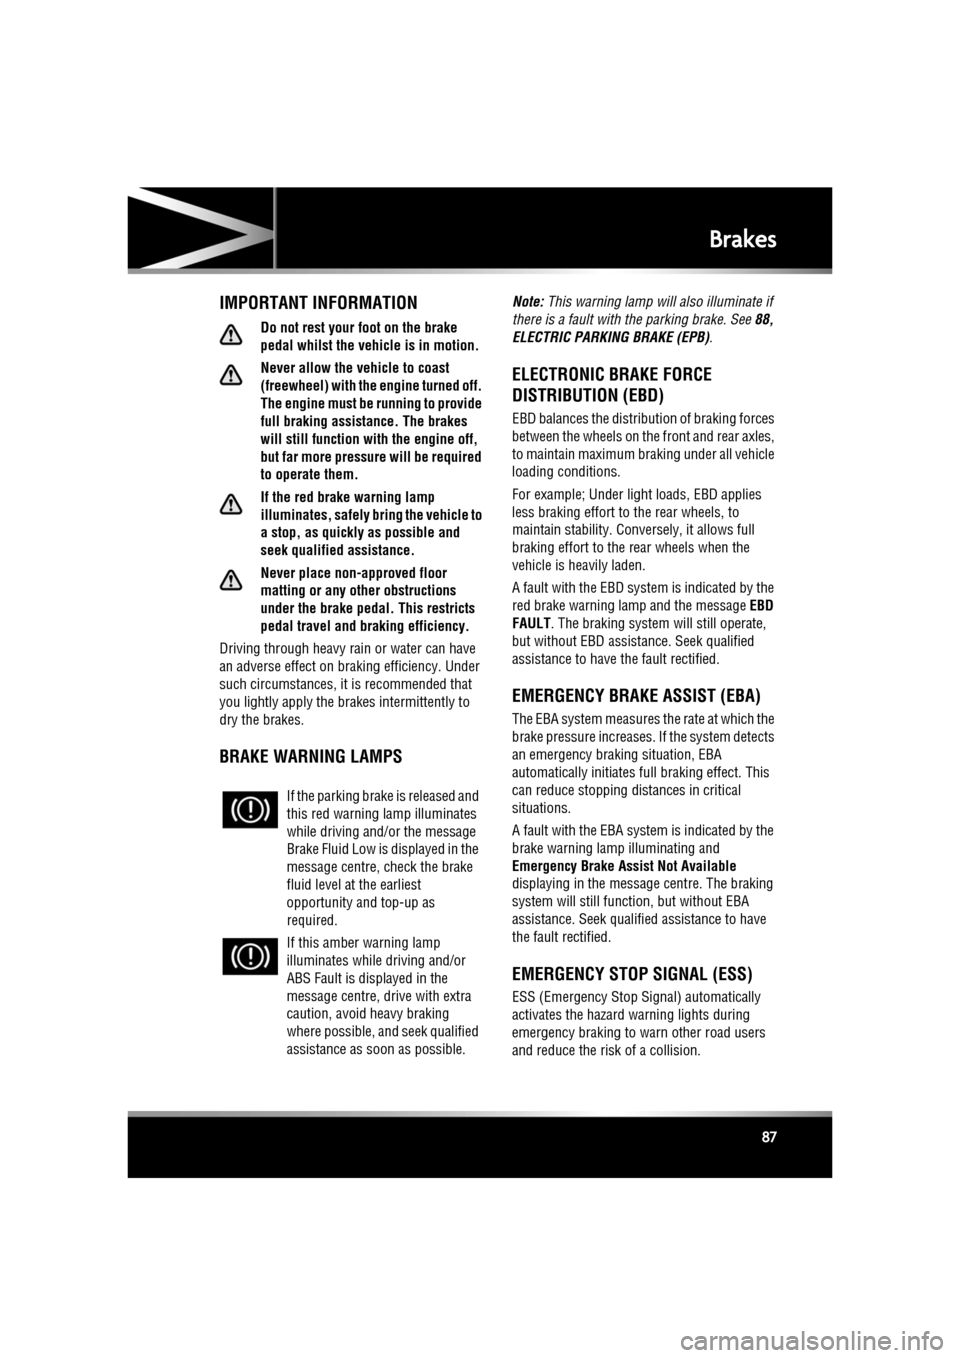
BRAKE WARNING LAMPS
Note: This warning lamp will also illuminate if
there is a fault with the parking brake. See 88,
ELECTRIC PARKIN G BRAKE (EPB).
ELECTRONIC BRAKE FORCE
DISTRIBUTION (EBD)
EBD balances the distribution of braking forces
between the wheels on the front and rear axles,
to maintain maximum braking under all vehicle
loading conditions.
For example; Under light loads, EBD applies
less braking effort to the rear wheels, to
maintain stability. Conv ersely, it allows full
braking effort to the rear wheels when the
vehicle is heavily laden.
A fault with the EBD system is indicated by the
red brake warning lamp and the message EBD
FAULT . The braking system will still operate,
but without EBD assist ance. Seek qualified
assistance to have the fault rectified.
EMERGENCY BRAKE ASSIST (EBA)
The EBA system measures the rate at which the
brake pressure increases. If the system detects
an emergency braki ng situation, EBA
automatically initiates fu ll braking effect. This
can reduce stopping distances in critical
situations.
A fault with the EBA system is indicated by the
brake warning lamp illuminating and
Emergency Brake Assist Not Available
displaying in the message centre. The braking
system will still func tion, but without EBA
assistance. Seek qualified assistance to have
the fault rectified.
EMERGENCY STOP SIGNAL (ESS)
ESS (Emergency Stop Signal) automatically
activates the hazard warning lights during
emergency braking to warn other road users
and reduce the risk of a collision.
If the parking brake
is released and
this red warning lamp illuminates
while driving and/or the message
Brake Fluid Low is displayed in the
message centre, check the brake
fluid level at the earliest
opportunity and top-up as
required.
If this amber warning lamp
illuminates while driving and/or
ABS Fault is displayed in the
message centre, drive with extra
caution, avoid heavy braking
where possible, and seek qualified
assistance as soon as possible.
Page 117 of 225
R
(FM8) SEMCON JLR OWNER GUIDE VER 1.00 EURO
LANGUAGE: english-en; MARQUE: jaguar; MODEL: XF
Portable media
117
PLAYING A PORTABLE DEVICE
If you are using a USB mass storage device or
approved iPod, you can control playback using
the touch screen controls.
If you are using a Blue tooth® device, you can
control playback using the touch screen, but
some controls are unavailable.
If you are using any portable media device via
the AUX socket, then you must control
playback from the device itself.
Jaguar does not recommend the use of
a Hard Disc Drive via the USB link while
the vehicle is in motion. These devices
are not designed for in car use and may
be damaged.
CONNECTING MULTIPLE DEVICES
Do not plug non-audio devices into the
USB port.
You can connect multiple devices
simultaneously to the portable media interface
and switch between th em using the touch
screen. Select iPod, USB , Bluetooth or AUX, to
switch between modes.
The device docked first will remain the active
device until you choose to change.
If, after changing to the newly-docked device,
you change back to the first device, play will
resume at the point you left it (USB and iPod
only).
Note: You cannot use a USB hub to connect
more than one USB devi ce to the audio unit.
Note: Devices connected to the iPod and USB
ports will be charged, but devices that are fully
discharged will not play.
Note: Options such as Repeat and Shuffle
relate to the device curre ntly playing, they will
not apply to any subsequent device.
PAIRING AND CONNECTING USING
THE MEDIA PLAYER
For further information on Bluetooth®, see
129, BLUETOOTH® INFORMATION .
Note: The process of pairing and connecting
your media device with the vehicle, using the
media device, will vary depending on the type
of media device.
1. Switch on the ignition and ensure the touch
screen is active.
2. From the Home menu, select Audio/Video,
then My Music .
3. A menu will appear. Select Search new.
4. Select Device to vehicle option.
Note: The vehicle’s Bluetooth® system is
only discoverable for 3 minutes.
5. Using the media device, search for
Bluetooth® devices. On some media
devices, this is referred to as new paired
device. See your medi a device’s operating
instructions for further information.
6. When the vehicle’s Bluetooth® system is
discovered, follow the on-screen
instructions. Select Yes when prompted, to
confirm the pairing.
Either your device or the vehicle system
will ask for a PIN (Personal Identification
Number). When prompted, enter a PIN of
your choice and select OK to confirm.
7. Enter the same PIN into the other device.
8. Once your device is paired and connected
to the system, a confirmation message will
be displayed, before switching to the My
music: Bluetooth screen.
Note: Some media devices do not
automatically connect and need to be
manually connected, via the device or by
using the Change device option.
Page 118 of 225

L
(FM8) SEMCON JLR OWNER GUIDE VER 1.00 EURO
LANGUAGE: english-en; MARQUE: jaguar; MODEL: XF
Portable media
118
PAIRING AND CONNECTING A
BLUETOOTH® DEVICE USING THE
TOUCH SCREEN
For further informatio n on Bluetooth®, see
129, BLUETOOTH® INFORMATION .
1. Switch on your device’s Bluetooth®
connection. Make sure that it is in
Bluetooth® discov erable mode,
sometimes referred to as find me mode
(see your device’s operating instructions
for more information).
2. Switch on the ignition and ensure the touch
screen is active.
3. From the Home menu, select Audio/Video,
then My Music .
4. A menu will appear. Select Search new.
5. Select Vehicle to device option.
6. Identify your device fr om the displayed list
and select the corresponding Pair and
connect option.
Note: If more than 5 devices are detected,
it may be necessary to use the scroll bar to
see the entire list.
7. When prompted, enter the PIN (Personal
Identification Number) code into your
device. See your device's operating
instructions for more information.
8. Once your device is paired and connected
to the system, a confirmation message will
be displayed before switching to the My
music: Bluetooth screen.
Note: Due to the duration of a Bluetooth®
search, it is advised that the time-out to home
screen feature is switched off before
attempting to search fo r Bluetooth® devices.
This setting can be changed within Set-up,
Screen, Time out home .
AUTOMATIC BLUETOOTH®
RECONNECTION
If devices have already been paired and
connected, when Bluetoot h® is selected from
the My music menu, the system will
automatically connect to th e last used device (a
confirmation pop-up appears) . If the last used
device is not present, then the system will
search for other previously connected devices
and automatically conne ct if one is found.
If no previously connect ed device is found,
Please connect device is displayed and the
Change device option is given.
LOSS OF CONNECTION
If a loss of connection between the vehicle and
the Bluetooth® device occurs, a pop-up is
displayed. Select Reconnect to automatically
restore the connection. A confirmation pop-up
will appear before the touch screen reverts to
its previous mode.
CHANGING/DISCONNECTING A
DEVICE
1. From the menu, select Change device.
2. Select Disconnect . A confirmation pop-up
will appear and then you will be given the
option to Search new or select a different
device from the list of paired devices.
Page 127 of 225
R
(FM8) SEMCON JLR OWNER GUIDE VER 1.00 EURO
LANGUAGE: english-en; MARQUE: jaguar; MODEL: XF
Voice control
127
The voice tutorial can be cancelled at any time
by touching the on-screen pop-up or by
pressing and holding the Voice button.
VOICE TRAINING
This is a feature designed to enable the system
to better recognise the vocal characteristics of
a user, once the training has been completed.
To carry out Voice training:
1. Select Setup from the Home menu.
2. Select Voice and from the Setup menu.
3. Select Voice training from the Voice
settings menu.
4. Select User 1 or User 2 , to start the
training.
5. Follow the on-screen and audible
instructions.
The training session can be cancelled at any
time by touching the on-screen pop-up or by
pressing and holding the Voice button.
VOICETAGS
Voicetags enable the user to personalise the
Voice system so that a single name can be used
to call-up a navigation destination, telephone
number or radio channel.
To add a Voicetag:
1. Briefly press the Voice button to start a
Voice session.
2. Wait for the tone to sound then say Phone,
Navigation or Radio .
3. Say Store voicetag .
Alternatively, Voicetag s can be managed via
the touch screen as follows:
1. Select Setup from the Home menu.
2. Select Voice from the Setup menu.
3. Select Voicetags from the Voice settings
menu. 4.
Select the system which the Voicetag is to
activate ( Phone, Navigation or Radio ).
Follow the on-screen and audible instructions.
NAVIGATION POI VOICE COMMANDS
To request the display of POI (Point Of Interest)
identifiers on the navi gation display, say
Navigation , followed by the name of the
desired POI category from the following list:
• Petrol station/Petrol.
• Parking/Car park.
• Jaguar Dealer.
• Hospital.
• Golf course.
• Tourist information.
• Restaurant/I’m hungry.
• Shopping centre.
• Hotel.
• Motorway service.
• Town centre.
Icons will appear on th e navigation display,
indicating the locations of the selected POI. For
further information about POIs, see 141,
CATEGORIES AND SUB-CATEGORIES.