key JEEP CHEROKEE 2015 KL / 5.G Service Manual
[x] Cancel search | Manufacturer: JEEP, Model Year: 2015, Model line: CHEROKEE, Model: JEEP CHEROKEE 2015 KL / 5.GPages: 772, PDF Size: 18.21 MB
Page 177 of 772
Front Map/Reading Lights
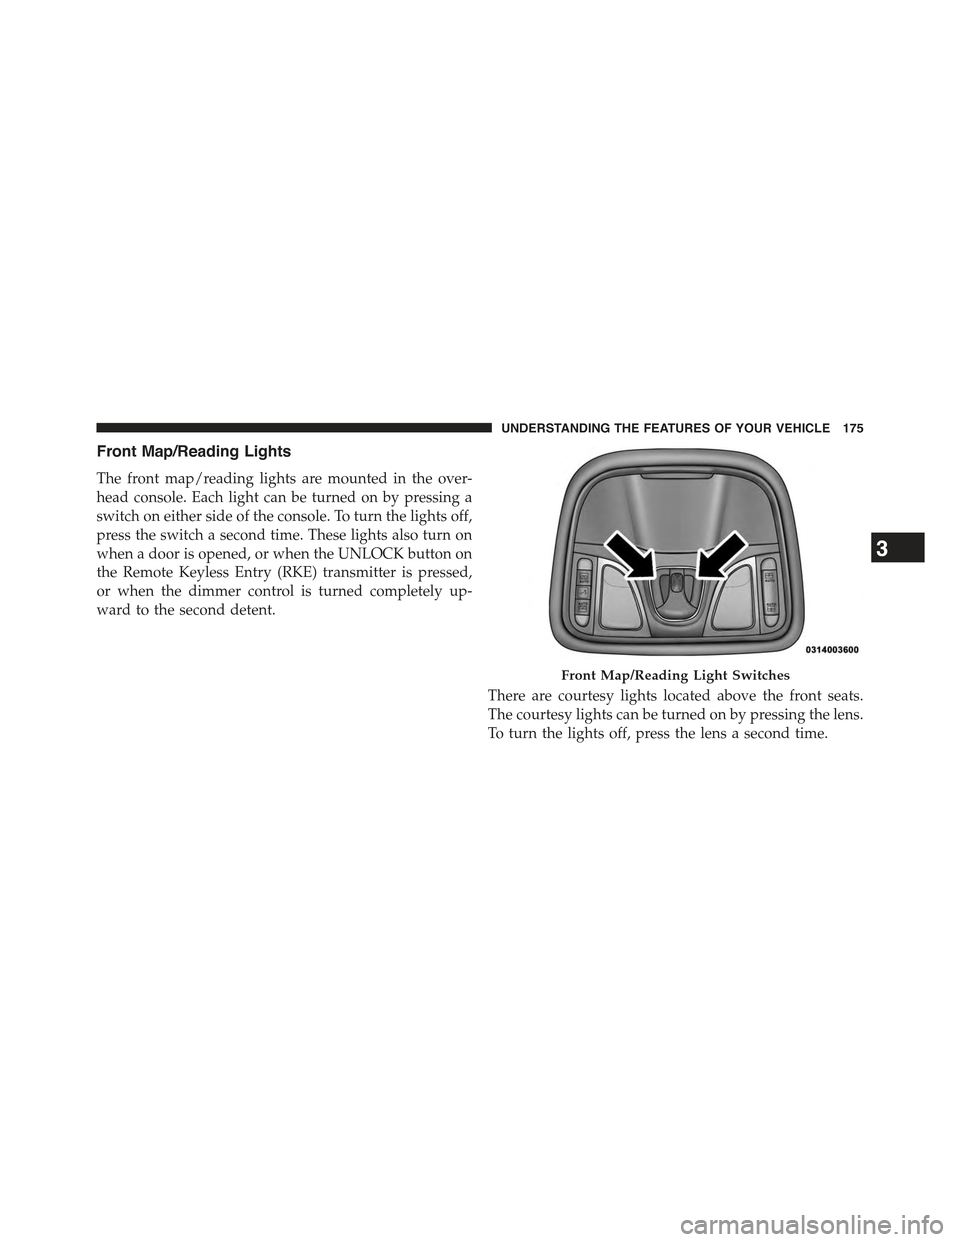
The front map/reading lights are mounted in the over-
head console. Each light can be turned on by pressing a
switch on either side of the console. To turn the lights off,
press the switch a second time. These lights also turn on
when a door is opened, or when the UNLOCK button on
the Remote Keyless Entry (RKE) transmitter is pressed,
or when the dimmer control is turned completely up-
ward to the second detent.
There are courtesy lights located above the front seats.
The courtesy lights can be turned on by pressing the lens.
To turn the lights off, press the lens a second time.
Front Map/Reading Light Switches
3
UNDERSTANDING THE FEATURES OF YOUR VEHICLE 175
Page 212 of 772
Service ACC/FCW Warning
If the system turns off, and the EVIC/DID displays
“ACC/FCW Unavailable Service Required”or “Cruise/
FCW Unavailable Service Required”, there may be an
internal system fault or a temporary malfunction that
limits ACC functionality. Although the vehicle is still
drivable under normal conditions, ACC will be tempo-
rarily unavailable. If this occurs, try activating ACC again
later, following a key cycle. If the problem persists, see
your authorized dealer.
Precautions While Driving With ACC
In certain driving situations, ACC may have detection
issues. In these cases, ACC may brake late or unexpect-
edly. The driver needs to stay alert and may need to
intervene.
Towing A Trailer
NOTE:Towing a trailer is not advised when using ACC.
Offset Driving
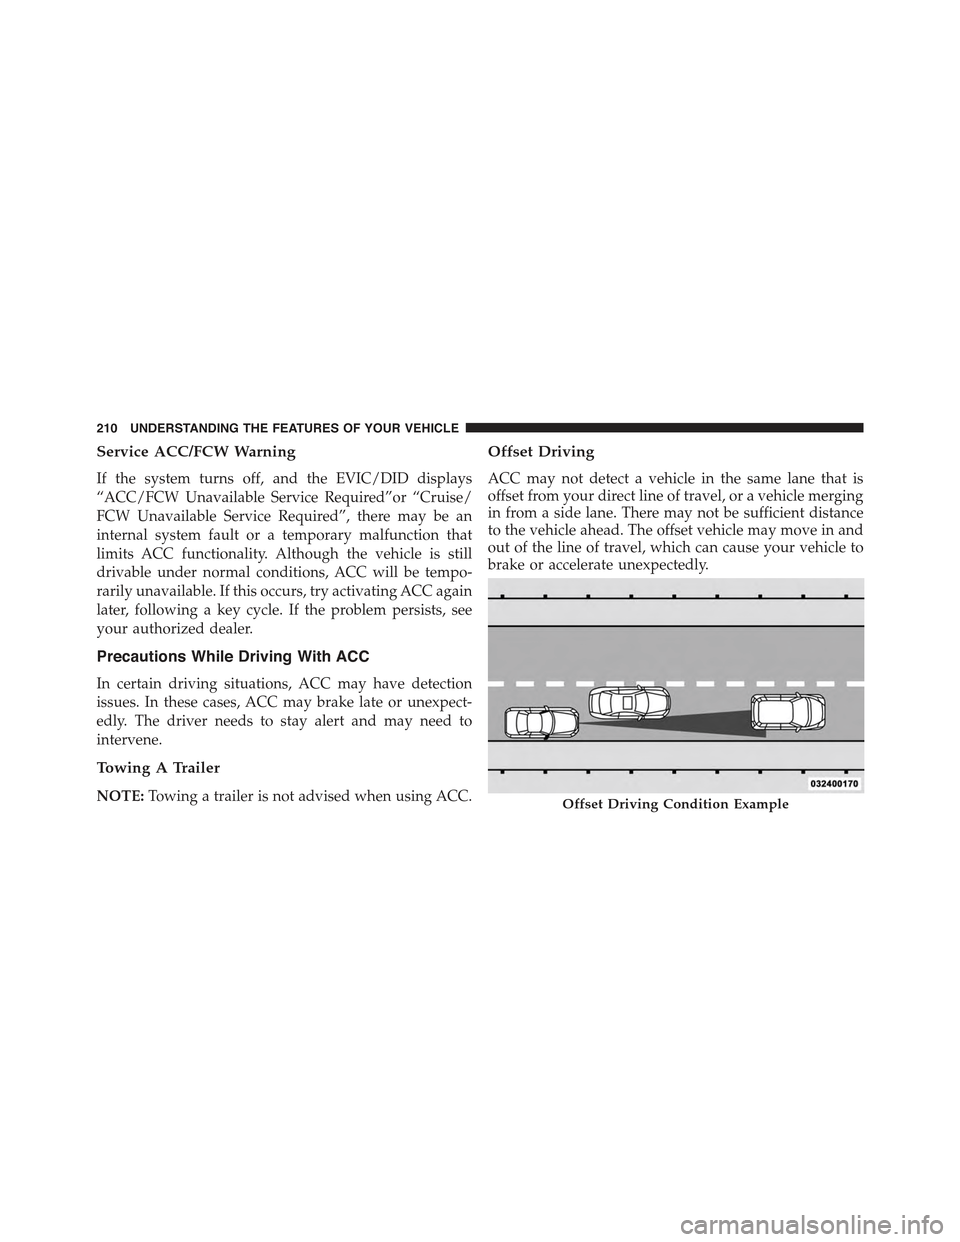
ACC may not detect a vehicle in the same lane that is
offset from your direct line of travel, or a vehicle merging
in from a side lane. There may not be sufficient distance
to the vehicle ahead. The offset vehicle may move in and
out of the line of travel, which can cause your vehicle to
brake or accelerate unexpectedly.
Offset Driving Condition Example
210 UNDERSTANDING THE FEATURES OF YOUR VEHICLE
Page 222 of 772
NOTE:
•The minimum speed for FCW activation is 1 mph
(2 km/h).
•The FCW alerts may be triggered on objects other than
vehicles such as guard rails or sign posts based on the
course prediction. This is expected and is a part of
normal FCW activation and functionality.
•It is unsafe to test the FCW system. To prevent such
misuse of the system, after four Active Braking events
within a key cycle, the Active Braking portion of FCW
will be deactivated until the next key cycle.
•The FCW system is intended for on-road use only. If
the vehicle is taken off-road, the FCW system should
be deactivated to prevent unnecessary warnings to the
surroundings.
WARNING!
Forward Collision Warning (FCW) is not intended to
avoid a collision on its own, nor can FCW detect
every type of potential collision. The driver has the
responsibility to avoid a collision by controlling the
vehicle via braking and steering. Failure to follow
this warning could lead to serious injury or death.
Turning FCW ON Or OFF
NOTE:The default status of FCW is “On”, this allows
the system to warn you of a possible collision with the
vehicle in front of you.
The forward collision button is located on the switch
panel below the Uconnect® display.
220 UNDERSTANDING THE FEATURES OF YOUR VEHICLE
Page 223 of 772
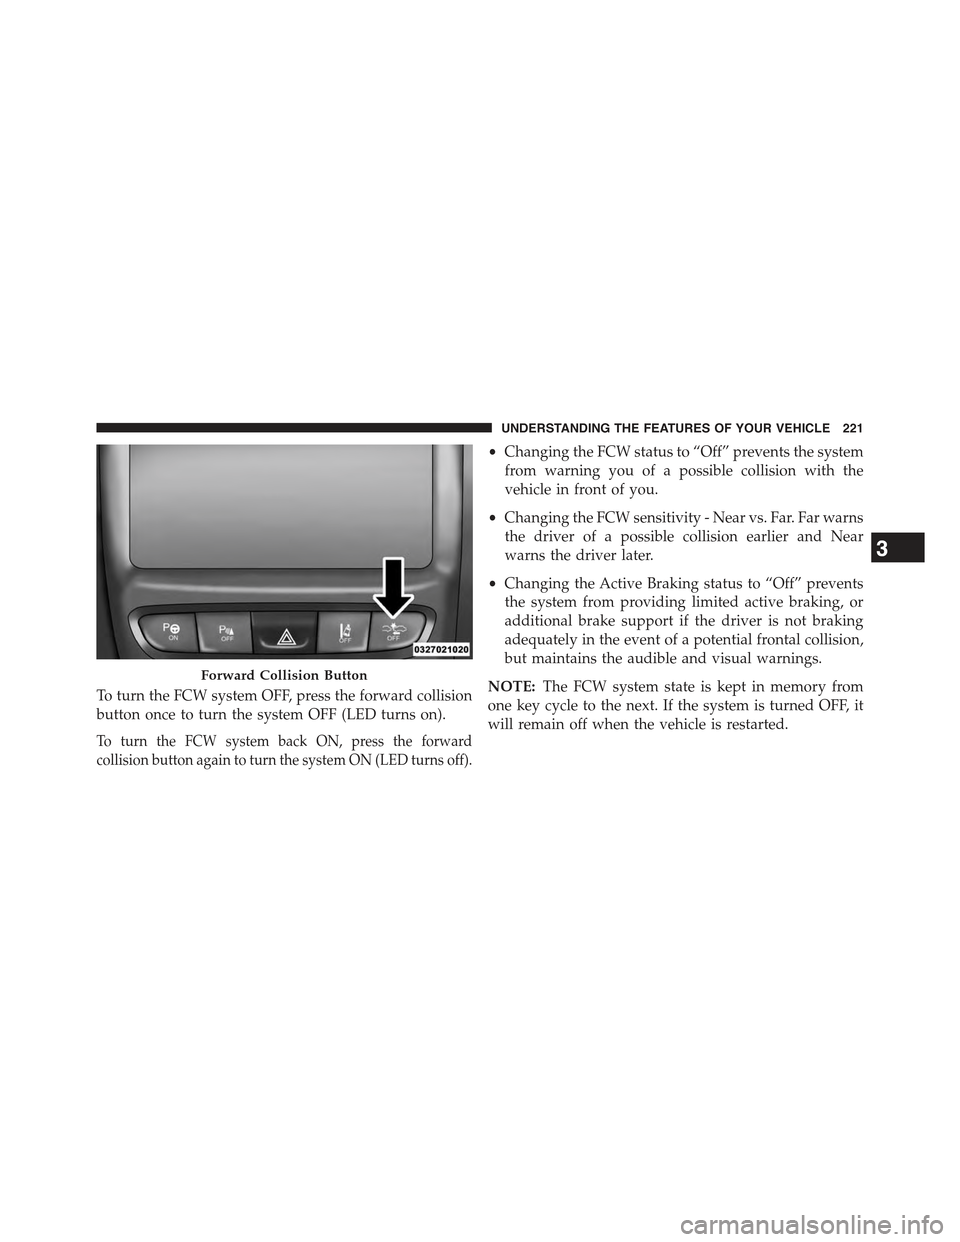
To turn the FCW system OFF, press the forward collision
button once to turn the system OFF (LED turns on).
To turn the FCW system back ON, press the forward
collision button again to turn the system ON (LED turns off).
•Changing the FCW status to “Off” prevents the system
from warning you of a possible collision with the
vehicle in front of you.
•Changing the FCW sensitivity - Near vs. Far. Far warns
the driver of a possible collision earlier and Near
warns the driver later.
•Changing the Active Braking status to “Off” prevents
the system from providing limited active braking, or
additional brake support if the driver is not braking
adequately in the event of a potential frontal collision,
but maintains the audible and visual warnings.
NOTE:The FCW system state is kept in memory from
one key cycle to the next. If the system is turned OFF, it
will remain off when the vehicle is restarted.
Forward Collision Button
3
UNDERSTANDING THE FEATURES OF YOUR VEHICLE 221
Page 244 of 772
•Jackhammers, large trucks, and other vibrations could
affect the performance of ParkSense®.
•When you turn ParkSense® OFF, the instrument clus-
ter will display “PARKSENSE OFF” Furthermore, once
you turn ParkSense® off, it remains off until you turn
it on again, even if you cycle the ignition key.
•When you move the shift lever to the REVERSE
position and ParkSense® is turned OFF, the EVIC/
DID will display “PARKSENSE OFF” message for as
long as the vehicle is in REVERSE.
•ParkSense®, when on, will reduce the volume of the
radio when it is sounding a tone.
•Clean the ParkSense® sensors regularly, taking care
not to scratch or damage them. The sensors must not
be covered with ice, snow, slush, mud, dirt or debris.
Failure to do so can result in the system not working
properly. The ParkSense® system might not detect an
obstacle behind the fascia/bumper, or it could provide
a false indication that an obstacle is behind the fascia/
bumper.
•Use the ParkSense® switch to turn the ParkSense®
system OFF if objects such as bicycle carriers, trailer
hitches, etc. are placed within 12 in (30 cm) from the
rear fascia/bumper. Failure to do so can result in the
system misinterpreting a close object as a sensor
problem, causing the “PARKSENSE UNAVAILABLE
SERVICE REQUIRED” message to be displayed in the
EVIC/DID.
•ParkSense® should be disabled when the liftgate is in
the open position and the vehicle is in REVERSE. An
open liftgate could provide a false indication that an
obstacle is behind the vehicle.
242 UNDERSTANDING THE FEATURES OF YOUR VEHICLE
Page 261 of 772
•When you turn ParkSense® off, the instrument cluster
will display “PARKSENSE OFF.” Furthermore, once
you turn ParkSense® off, it remains off until you turn
it on again, even if you cycle the ignition key.
•When you move the shift lever to the REVERSE
position and ParkSense® is turned off, the instrument
cluster will display “PARKSENSE OFF” for as long as
the vehicle is in REVERSE.
•ParkSense®, when on, will reduce the volume of the
radio when it is sounding a tone.
•Clean the ParkSense® sensors regularly, taking care
not to scratch or damage them. The sensors must not
be covered with ice, snow, slush, mud, dirt or debris.
Failure to do so can result in the system not working
properly. The ParkSense® system might not detect an
obstacle behind or in front of the fascia/bumper, or it
could provide a false indication that an obstacle is
behind or in front of the fascia/bumper.
•Use the ParkSense® switch to turn the ParkSense®
system off if objects such as bicycle carriers, trailer
hitches, etc. are placed within 12 in (30 cm) from the
rear fascia/bumper. Failure to do so can result in the
system misinterpreting a close object as a sensor
problem, causing the “PARKSENSE UNAVAILABLE
SERVICE REQUIRED” message to be displayed in the
instrument cluster.
•ParkSense® should be disabled when the liftgate is in
the open position. An opened liftgate could provide a
false indication that an obstacle is behind the vehicle.
•There may be a delay in the object detection rate if the
object is moving. This will cause the automatic braking
application to be delayed.
3
UNDERSTANDING THE FEATURES OF YOUR VEHICLE 259
Page 294 of 772
Reprogramming A Single HomeLink® Button
(Rolling Code)
To reprogram a channel that has been previously trained,
follow these steps:
1. Turn the ignition switch to the ON/RUN position.
For vehicle’s equipped with Keyless Enter-N-Go, place
the ignition in the RUN position with the Engine ON.
2. Push and hold the desired HomeLink® button until
the indicator light begins to flash after 20 seconds.Do
not release the button.
3.Without releasing the buttonproceed with “Program-
ming A Rolling Code” step 2 and follow all remaining
steps.
Programming A Non-Rolling Code
For programming Garage Door Openers manufactured
before 1995.
1. Cycle the ignition to the ON/RUN position.
2. Place the hand-held transmitter 1 to 3 inches (3 to 8
cm) away from the HomeLink® button you would like
to program while keeping the HomeLink® indicator
light in view.
3. Simultaneously push and hold both the HomeLink®
button you want to program and the hand-held trans-
mitter button.
4. Continue to hold both buttons and observe the indi-
cator light. HomeLink® indicator will flash slowly
and then rapidly after HomeLink® has received the
frequency signal from the hand-held transmitter. Re-
lease both buttons after the indicator light changes
from slow to rapid.
5. Push and hold the programmed HomeLink® button
and observe the indicator light.
292 UNDERSTANDING THE FEATURES OF YOUR VEHICLE
Page 295 of 772
•If the indicator light stays on constantly, program-
ming is complete and the garage door/device should
activate when the HomeLink® button is pressed.
•To program the remaining two HomeLink® buttons,
repeat each step for each remaining button. DO NOT
erase the channels.
Reprogramming A Single HomeLink® Button
(Non — Rolling Code)
To reprogram a channel that has been previously trained,
follow these steps:
1. Cycle the ignition to the ON/RUN position.
For vehicle’s equipped with Keyless Enter-N-Go, place
the ignition in the RUN position with the Engine ON.
2. Push and hold the desired HomeLink® button until
the indicator light begins to flash after 20 seconds.Do
not release the button.
3.Without releasing the buttonproceed with “Program-
ming A Non-Rolling Code” step 2 and follow all
remaining steps.
Canadian/Gate Operator Programming
For programming transmitters in Canada/United States
that require the transmitter signals to “time-out” after
several seconds of transmission.
Canadian radio frequency laws require transmitter sig-
nals to time-out (or quit) after several seconds of trans-
mission – which may not be long enough for HomeLink®
to pick up the signal during programming. Similar to this
Canadian law, some U.S. gate operators are designed to
time-out in the same manner.
It may be helpful to unplug the device during the cycling
process to prevent possible overheating of the garage
door or gate motor.
1. Cycle the ignition to the ON/RUN position.
3
UNDERSTANDING THE FEATURES OF YOUR VEHICLE 293
Page 300 of 772
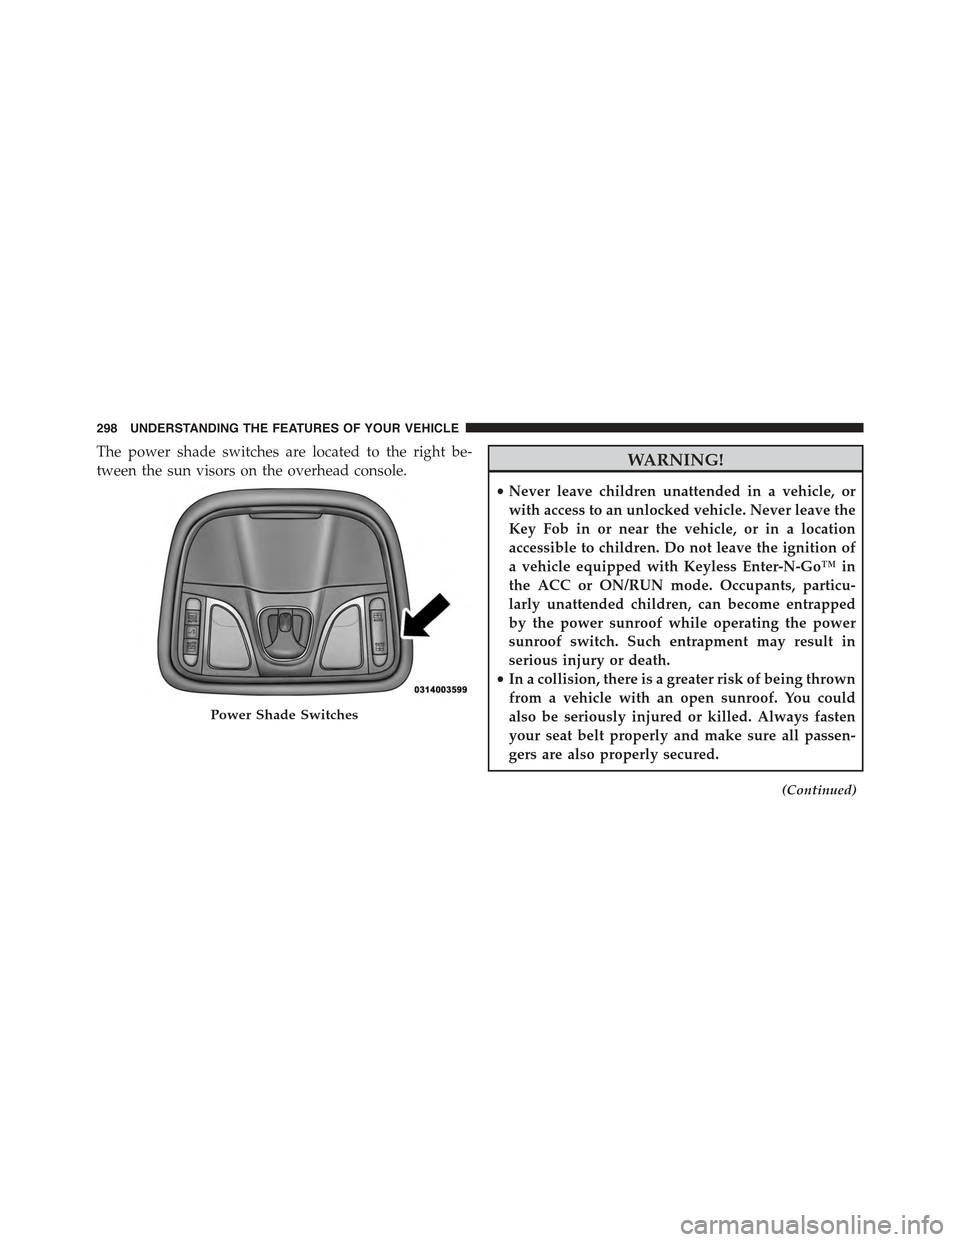
The power shade switches are located to the right be-
tween the sun visors on the overhead console.WARNING!
•Never leave children unattended in a vehicle, or
with access to an unlocked vehicle. Never leave the
Key Fob in or near the vehicle, or in a location
accessible to children. Do not leave the ignition of
a vehicle equipped with Keyless Enter-N-Go™ in
the ACC or ON/RUN mode. Occupants, particu-
larly unattended children, can become entrapped
by the power sunroof while operating the power
sunroof switch. Such entrapment may result in
serious injury or death.
•In a collision, there is a greater risk of being thrown
from a vehicle with an open sunroof. You could
also be seriously injured or killed. Always fasten
your seat belt properly and make sure all passen-
gers are also properly secured.
(Continued)
Power Shade Switches
298 UNDERSTANDING THE FEATURES OF YOUR VEHICLE
Page 304 of 772
NOTE:If three consecutive sunroof close attempts result
in Pinch Protect reversals, the fourth close attempt will be
a Manual Close movement with Pinch Protect disabled.
Wind Buffeting
Wind buffeting can be described as the perception of
pressure on the ears or a helicopter-type sound in the
ears. Your vehicle may exhibit wind buffeting with the
windows down, or the sunroof (if equipped) in certain
open or partially open positions. This is a normal occur-
rence and can be minimized. If the buffeting occurs with
the rear windows open, then open the front and rear
windows together to minimize the buffeting. If the
buffeting occurs with the sunroof open, adjust the sun-
roof opening to minimize the buffeting or open any
window.
Sunroof Maintenance
Use only a non-abrasive cleaner and a soft cloth to clean
the glass panel.
Ignition OFF Operation
The power sunroof switch will remain active for up to
approximately ten minutes after the ignition switch is
turned to the LOCK position. Opening either front door
will cancel this feature.
NOTE:Ignition Off time is programmable through the
Uconnect® System. Refer to “Uconnect® Settings/
Customer Programmable Features” in “Understanding
Your Instrument Panel” for further information.
ELECTRICAL POWER OUTLETS
Your vehicle is equipped with 12 Volt (13 Amp) power
outlets that can be used to power cellular phones, small
electronics and other low powered electrical accessories.
The power outlets are labeled with either a “key” or a
“battery” symbol to indicate how the outlet is powered.
Power outlets labeled with a “key” are powered when
302 UNDERSTANDING THE FEATURES OF YOUR VEHICLE