brake light JEEP CHEROKEE 2015 KL / 5.G Owner's Manual
[x] Cancel search | Manufacturer: JEEP, Model Year: 2015, Model line: CHEROKEE, Model: JEEP CHEROKEE 2015 KL / 5.GPages: 244, PDF Size: 30.6 MB
Page 176 of 244
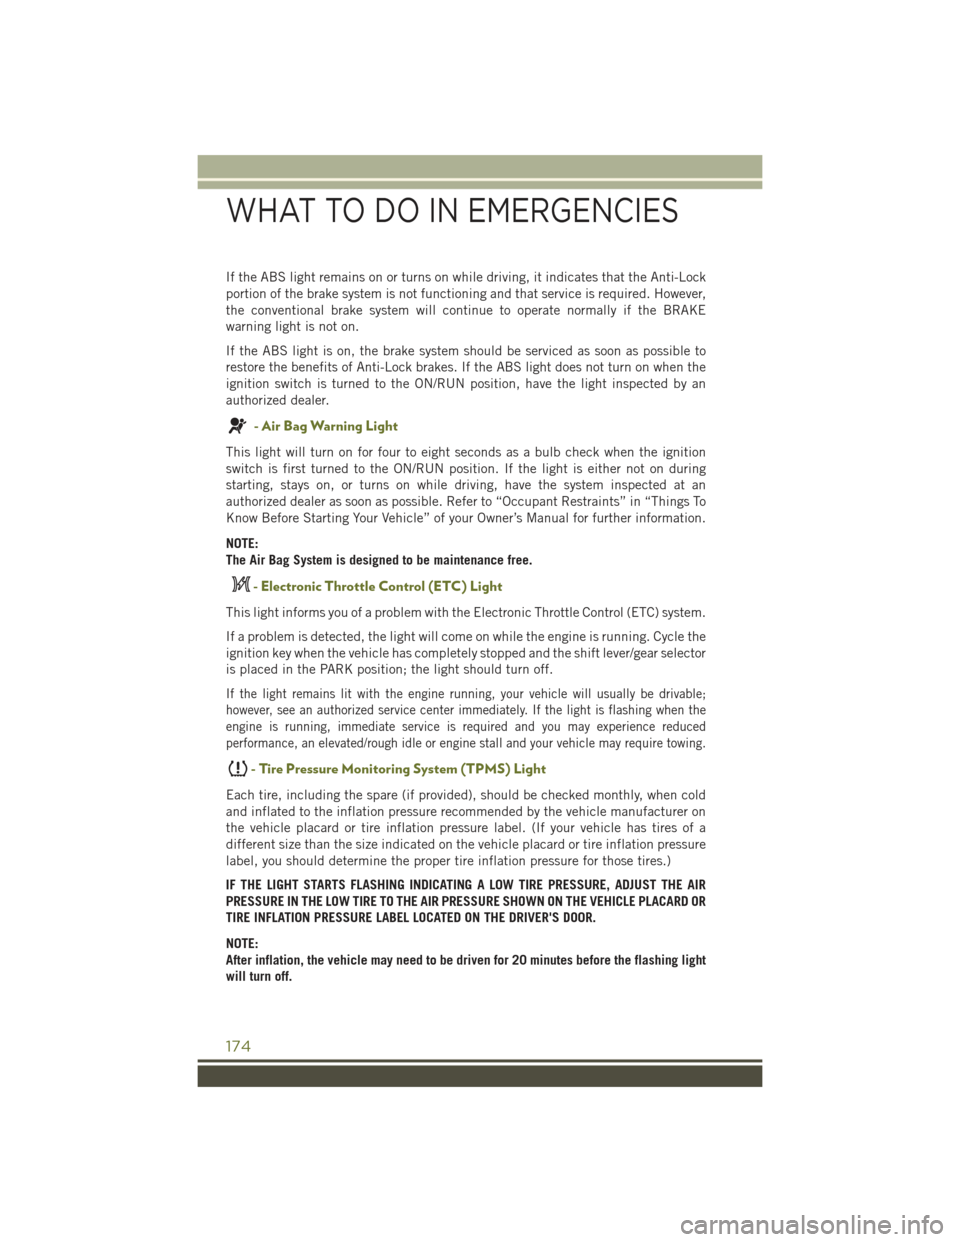
If the ABS light remains on or turns on while driving, it indicates that the Anti-Lock
portion of the brake system is not functioning and that service is required. However,
the conventional brake system will continue to operate normally if the BRAKE
warning light is not on.
If the ABS light is on, the brake system should be serviced as soon as possible to
restore the benefits of Anti-Lock brakes. If the ABS light does not turn on when the
ignition switch is turned to the ON/RUN position, have the light inspected by an
authorized dealer.
- Air Bag Warning Light
This light will turn on for four to eight seconds as a bulb check when the ignition
switch is first turned to the ON/RUN position. If the light is either not on during
starting, stays on, or turns on while driving, have the system inspected at an
authorized dealer as soon as possible. Refer to “Occupant Restraints” in “Things To
Know Before Starting Your Vehicle” of your Owner’s Manual for further information.
NOTE:
The Air Bag System is designed to be maintenance free.
- Electronic Throttle Control (ETC) Light
This light informs you of a problem with the Electronic Throttle Control (ETC) system.
If a problem is detected, the light will come on while the engine is running. Cycle the
ignition key when the vehicle has completely stopped and the shift lever/gear selector
is placed in the PARK position; the light should turn off.
If the light remains lit with the engine running, your vehicle will usually be drivable;
however, see an authorized service center immediately. If the light is flashing when the
engine is running, immediate service is required and you may experience reduced
performance, an elevated/rough idle or engine stall and your vehicle may require towing.
-TirePressureMonitoringSystem(TPMS)Light
Each tire, including the spare (if provided), should be checked monthly, when cold
and inflated to the inflation pressure recommended by the vehicle manufacturer on
the vehicle placard or tire inflation pressure label. (If your vehicle has tires of a
different size than the size indicated on the vehicle placard or tire inflation pressure
label, you should determine the proper tire inflation pressure for those tires.)
IF THE LIGHT STARTS FLASHING INDICATING A LOW TIRE PRESSURE, ADJUST THE AIR
PRESSURE IN THE LOW TIRE TO THE AIR PRESSURE SHOWN ON THE VEHICLE PLACARD OR
TIRE INFLATION PRESSURE LABEL LOCATED ON THE DRIVER'S DOOR.
NOTE:
After inflation, the vehicle may need to be driven for 20 minutes before the flashing light
will turn off.
WHAT TO DO IN EMERGENCIES
174
Page 178 of 244
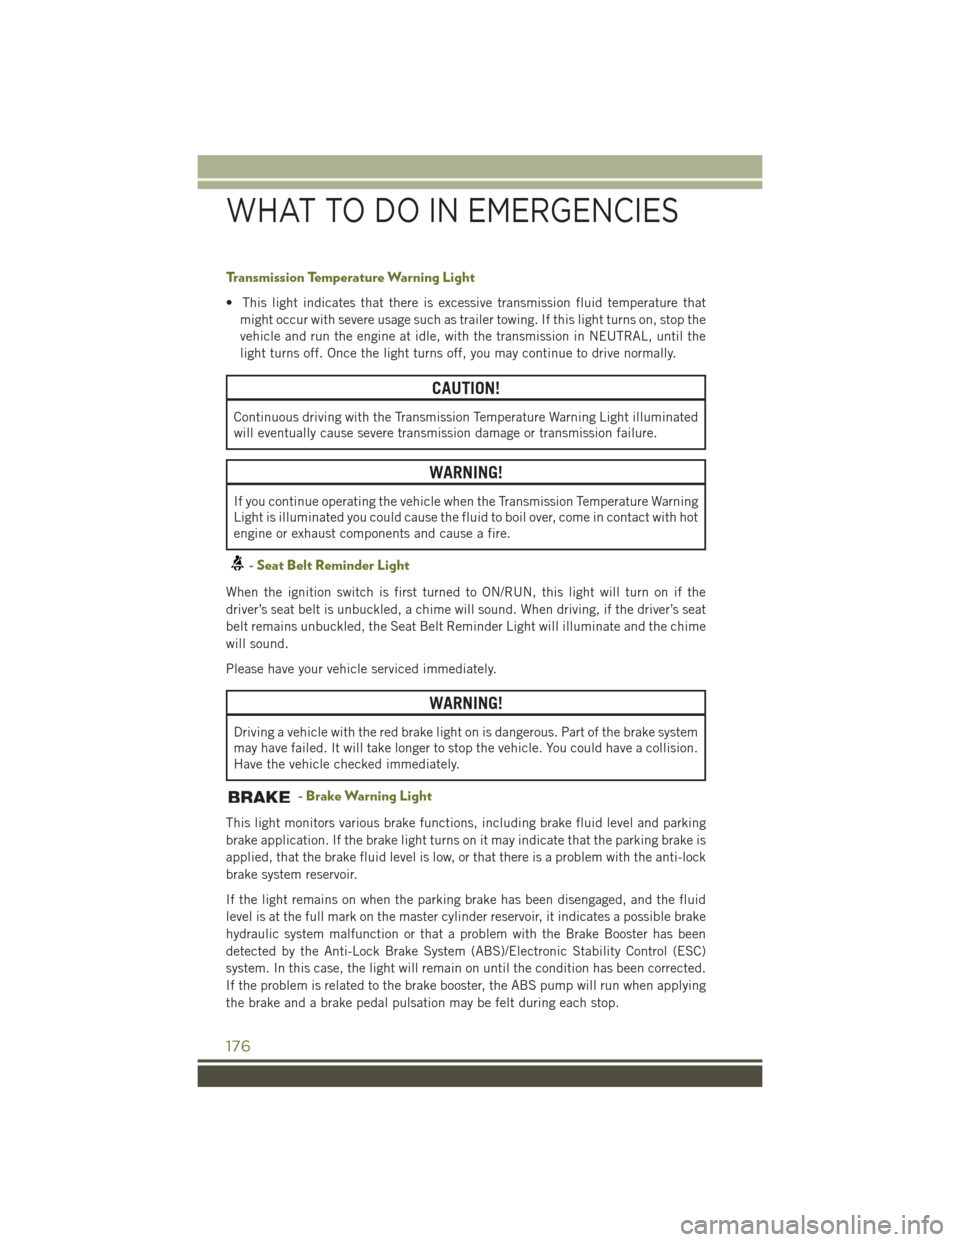
Transmission Temperature Warning Light
• This light indicates that there is excessive transmission fluid temperature that
might occur with severe usage such as trailer towing. If this light turns on, stop the
vehicle and run the engine at idle, with the transmission in NEUTRAL, until the
light turns off. Once the light turns off, you may continue to drive normally.
CAUTION!
Continuous driving with the Transmission Temperature Warning Light illuminated
will eventually cause severe transmission damage or transmission failure.
WARNING!
If you continue operating the vehicle when the Transmission Temperature Warning
Light is illuminated you could cause the fluid to boil over, come in contact with hot
engine or exhaust components and cause a fire.
- Seat Belt Reminder Light
When the ignition switch is first turned to ON/RUN, this light will turn on if the
driver’s seat belt is unbuckled, a chime will sound. When driving, if the driver’s seat
belt remains unbuckled, the Seat Belt Reminder Light will illuminate and the chime
will sound.
Please have your vehicle serviced immediately.
WARNING!
Driving a vehicle with the red brake light on is dangerous. Part of the brake system
may have failed. It will take longer to stop the vehicle. You could have a collision.
Have the vehicle checked immediately.
- Brake Warning Light
This light monitors various brake functions, including brake fluid level and parking
brake application. If the brake light turns on it may indicate that the parking brake is
applied, that the brake fluid level is low, or that there is a problem with the anti-lock
brake system reservoir.
If the light remains on when the parking brake has been disengaged, and the fluid
level is at the full mark on the master cylinder reservoir, it indicates a possible brake
hydraulic system malfunction or that a problem with the Brake Booster has been
detected by the Anti-Lock Brake System (ABS)/Electronic Stability Control (ESC)
system. In this case, the light will remain on until the condition has been corrected.
If the problem is related to the brake booster, the ABS pump will run when applying
the brake and a brake pedal pulsation may be felt during each stop.
WHAT TO DO IN EMERGENCIES
176
Page 179 of 244
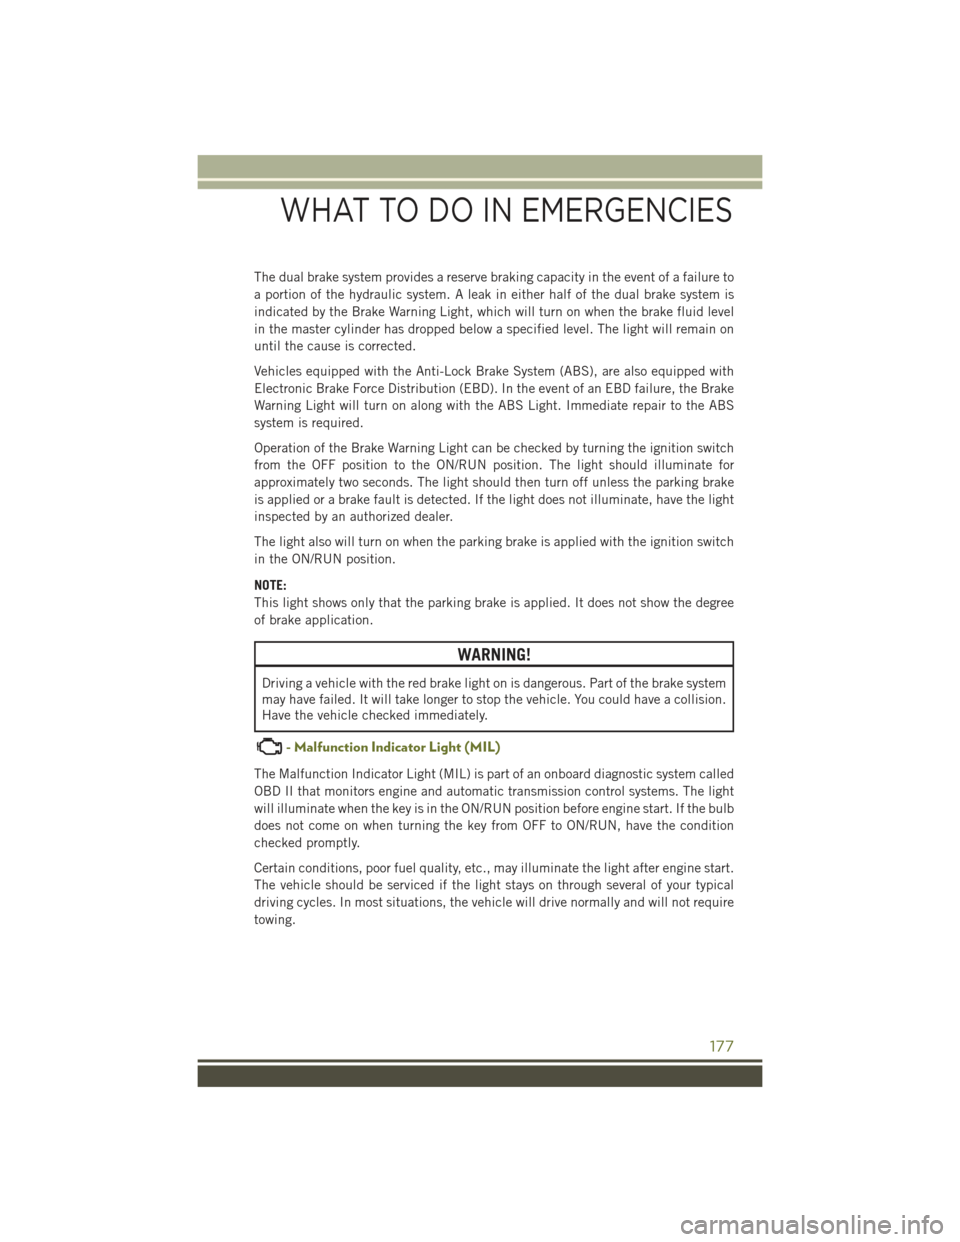
The dual brake system provides a reserve braking capacity in the event of a failure to
a portion of the hydraulic system. A leak in either half of the dual brake system is
indicated by the Brake Warning Light, which will turn on when the brake fluid level
in the master cylinder has dropped below a specified level. The light will remain on
until the cause is corrected.
Vehicles equipped with the Anti-Lock Brake System (ABS), are also equipped with
Electronic Brake Force Distribution (EBD). In the event of an EBD failure, the Brake
Warning Light will turn on along with the ABS Light. Immediate repair to the ABS
system is required.
Operation of the Brake Warning Light can be checked by turning the ignition switch
from the OFF position to the ON/RUN position. The light should illuminate for
approximately two seconds. The light should then turn off unless the parking brake
is applied or a brake fault is detected. If the light does not illuminate, have the light
inspected by an authorized dealer.
The light also will turn on when the parking brake is applied with the ignition switch
in the ON/RUN position.
NOTE:
This light shows only that the parking brake is applied. It does not show the degree
of brake application.
WARNING!
Driving a vehicle with the red brake light on is dangerous. Part of the brake system
may have failed. It will take longer to stop the vehicle. You could have a collision.
Have the vehicle checked immediately.
- Malfunction Indicator Light (MIL)
The Malfunction Indicator Light (MIL) is part of an onboard diagnostic system called
OBD II that monitors engine and automatic transmission control systems. The light
will illuminate when the key is in the ON/RUN position before engine start. If the bulb
does not come on when turning the key from OFF to ON/RUN, have the condition
checked promptly.
Certain conditions, poor fuel quality, etc., may illuminate the light after engine start.
The vehicle should be serviced if the light stays on through several of your typical
driving cycles. In most situations, the vehicle will drive normally and will not require
towing.
WHAT TO DO IN EMERGENCIES
177
Page 180 of 244
CAUTION!
Prolonged driving with the Malfunction Indicator Light (MIL) on could cause
damage to the engine control system. It also could affect fuel economy and
driveability. If the MIL is flashing, severe catalytic converter damage and power
loss will soon occur. Immediate service is required.
WARNING!
A malfunctioning catalytic converter, as referenced above, can reach higher
temperatures than in normal operating conditions. This can cause a fire if you
drive slowly or park over flammable substances such as dry plants, wood,
cardboard, etc. This could result in death or serious injury to the driver, occupants
or others.
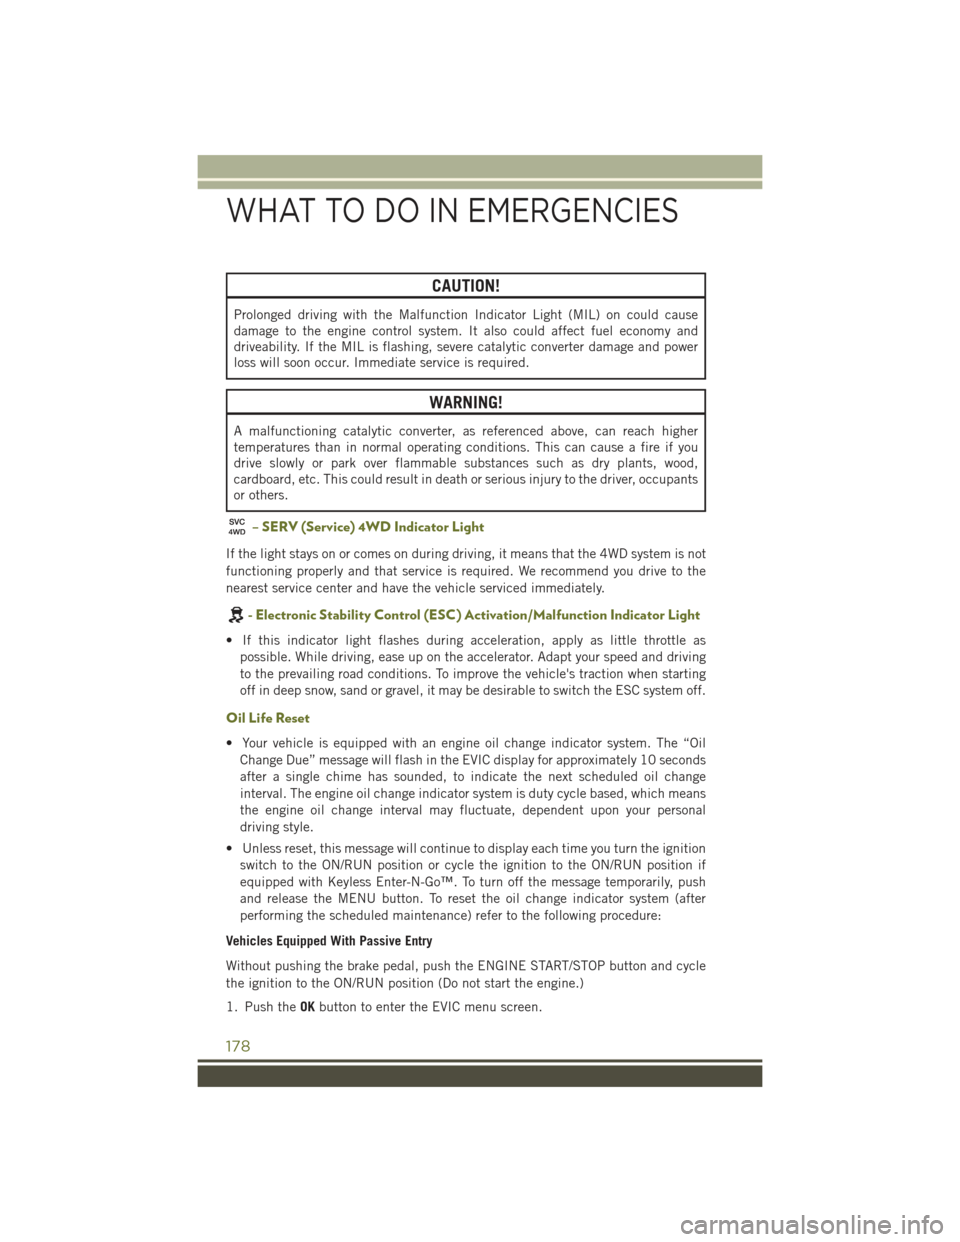
– SERV (Service) 4WD Indicator Light
If the light stays on or comes on during driving, it means that the 4WD system is not
functioning properly and that service is required. We recommend you drive to the
nearest service center and have the vehicle serviced immediately.
-ElectronicStabilityControl(ESC)Activation/MalfunctionIndicatorLight
• If this indicator light flashes during acceleration, apply as little throttle as
possible. While driving, ease up on the accelerator. Adapt your speed and driving
to the prevailing road conditions. To improve the vehicle's traction when starting
off in deep snow, sand or gravel, it may be desirable to switch the ESC system off.
Oil Life Reset
• Your vehicle is equipped with an engine oil change indicator system. The “Oil
Change Due” message will flash in the EVIC display for approximately 10 seconds
after a single chime has sounded, to indicate the next scheduled oil change
interval. The engine oil change indicator system is duty cycle based, which means
the engine oil change interval may fluctuate, dependent upon your personal
driving style.
• Unless reset, this message will continue to display each time you turn the ignition
switch to the ON/RUN position or cycle the ignition to the ON/RUN position if
equipped with Keyless Enter-N-Go™. To turn off the message temporarily, push
and release the MENU button. To reset the oil change indicator system (after
performing the scheduled maintenance) refer to the following procedure:
Vehicles Equipped With Passive Entry
Without pushing the brake pedal, push the ENGINE START/STOP button and cycle
the ignition to the ON/RUN position (Do not start the engine.)
1. Push theOKbutton to enter the EVIC menu screen.
WHAT TO DO IN EMERGENCIES
178
Page 181 of 244
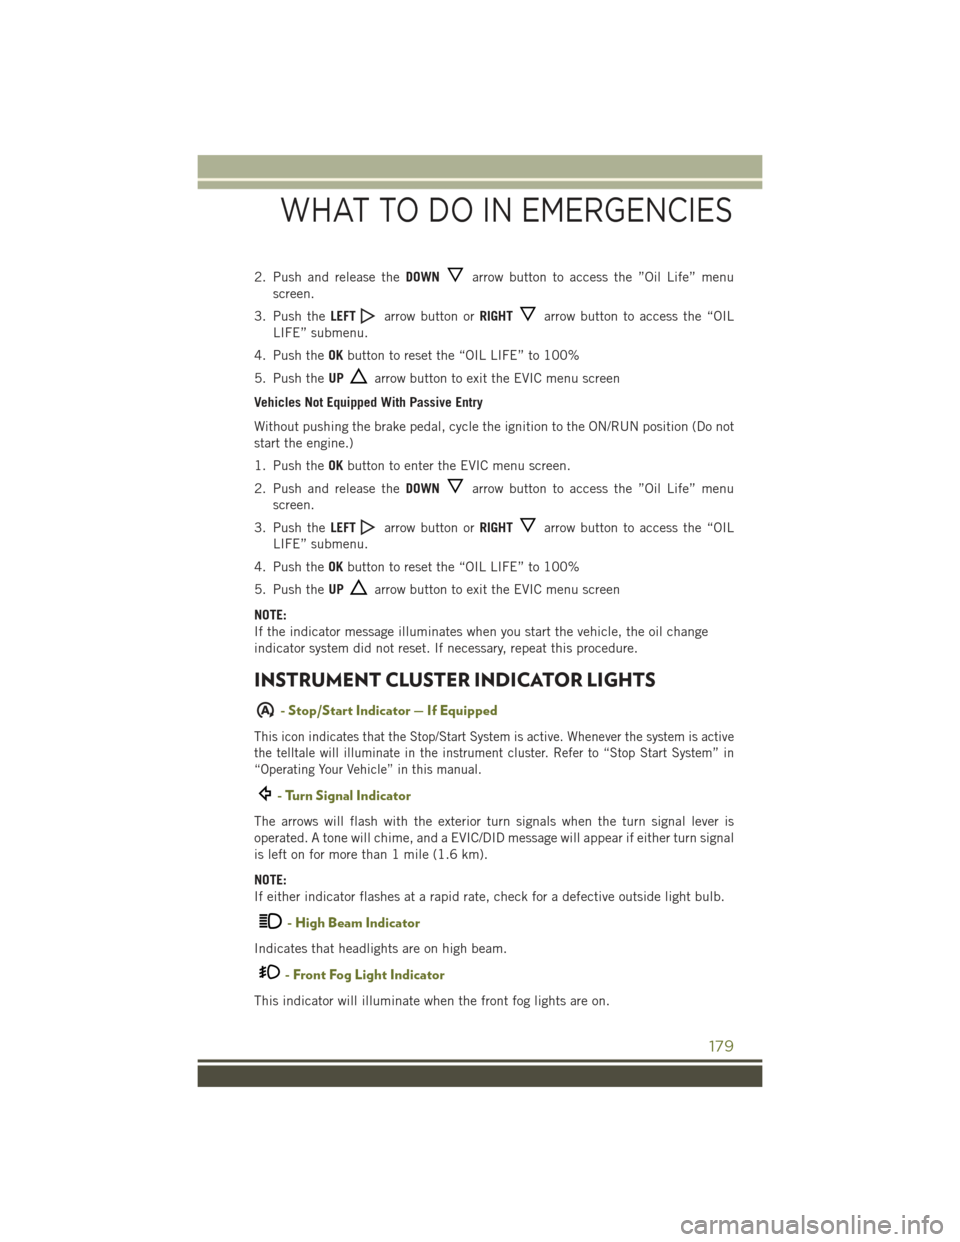
2. Push and release theDOWNarrow button to access the ”Oil Life” menu
screen.
3. Push theLEFTarrow button orRIGHTarrow button to access the “OIL
LIFE” submenu.
4. Push theOKbutton to reset the “OIL LIFE” to 100%
5. Push theUParrow button to exit the EVIC menu screen
Vehicles Not Equipped With Passive Entry
Without pushing the brake pedal, cycle the ignition to the ON/RUN position (Do not
start the engine.)
1. Push theOKbutton to enter the EVIC menu screen.
2. Push and release theDOWNarrow button to access the ”Oil Life” menu
screen.
3. Push theLEFTarrow button orRIGHTarrow button to access the “OIL
LIFE” submenu.
4. Push theOKbutton to reset the “OIL LIFE” to 100%
5. Push theUParrow button to exit the EVIC menu screen
NOTE:
If the indicator message illuminates when you start the vehicle, the oil change
indicator system did not reset. If necessary, repeat this procedure.
INSTRUMENT CLUSTER INDICATOR LIGHTS
A- Stop/Start Indicator — If Equipped
This icon indicates that the Stop/Start System is active. Whenever the system is active
the telltale will illuminate in the instrument cluster. Refer to “Stop Start System” in
“Operating Your Vehicle” in this manual.
- Turn Signal Indicator
The arrows will flash with the exterior turn signals when the turn signal lever is
operated. A tone will chime, and a EVIC/DID message will appear if either turn signal
is left on for more than 1 mile (1.6 km).
NOTE:
If either indicator flashes at a rapid rate, check for a defective outside light bulb.
- High Beam Indicator
Indicates that headlights are on high beam.
- Front Fog Light Indicator
This indicator will illuminate when the front fog lights are on.
WHAT TO DO IN EMERGENCIES
179
Page 196 of 244
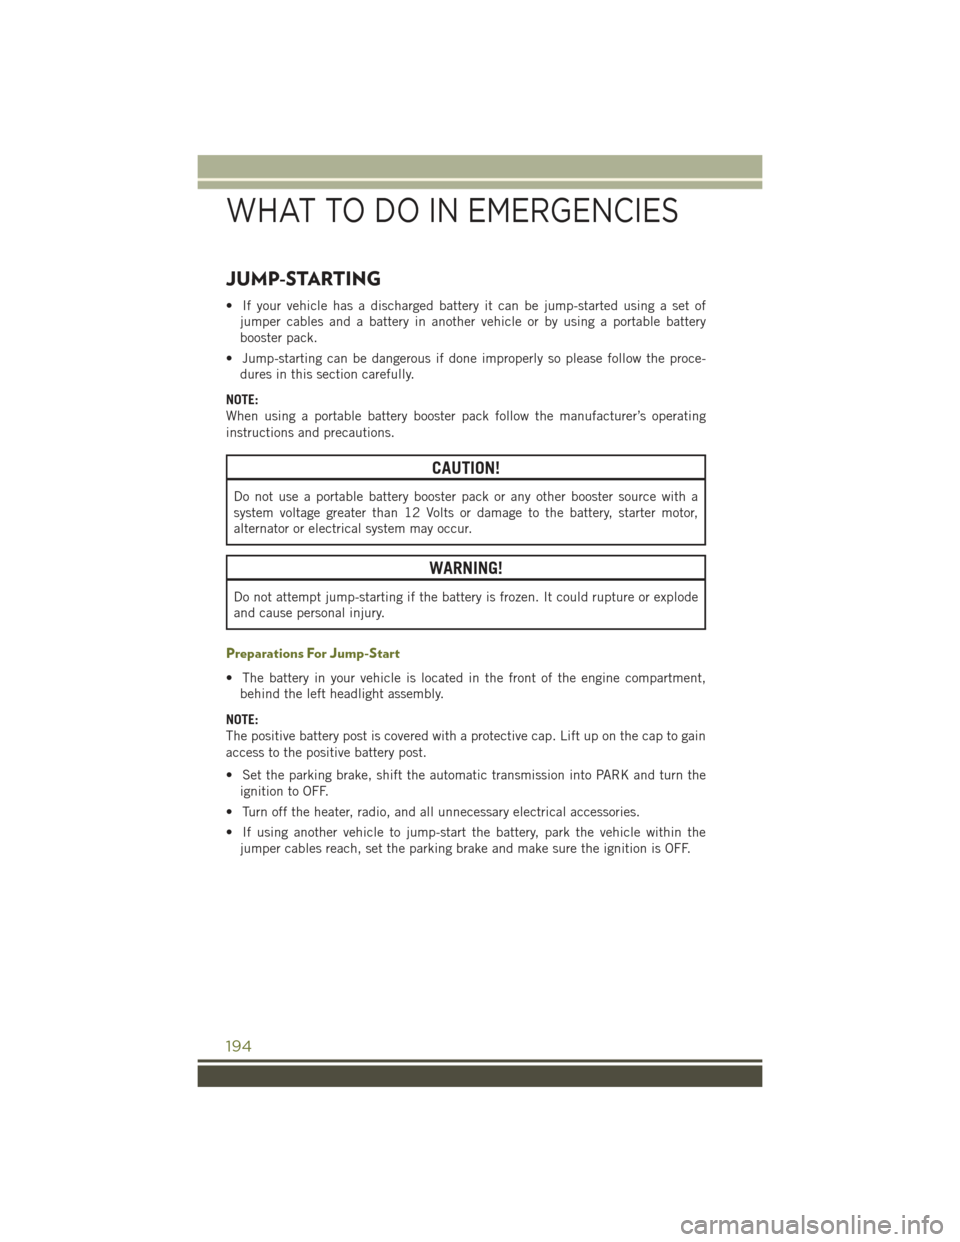
JUMP-STARTING
• If your vehicle has a discharged battery it can be jump-started using a set of
jumper cables and a battery in another vehicle or by using a portable battery
booster pack.
• Jump-starting can be dangerous if done improperly so please follow the proce-
dures in this section carefully.
NOTE:
When using a portable battery booster pack follow the manufacturer’s operating
instructions and precautions.
CAUTION!
Do not use a portable battery booster pack or any other booster source with a
system voltage greater than 12 Volts or damage to the battery, starter motor,
alternator or electrical system may occur.
WARNING!
Do not attempt jump-starting if the battery is frozen. It could rupture or explode
and cause personal injury.
Preparations For Jump-Start
• The battery in your vehicle is located in the front of the engine compartment,
behind the left headlight assembly.
NOTE:
The positive battery post is covered with a protective cap. Lift up on the cap to gain
access to the positive battery post.
• Set the parking brake, shift the automatic transmission into PARK and turn the
ignition to OFF.
• Turn off the heater, radio, and all unnecessary electrical accessories.
• If using another vehicle to jump-start the battery, park the vehicle within the
jumper cables reach, set the parking brake and make sure the ignition is OFF.
WHAT TO DO IN EMERGENCIES
194
Page 211 of 244
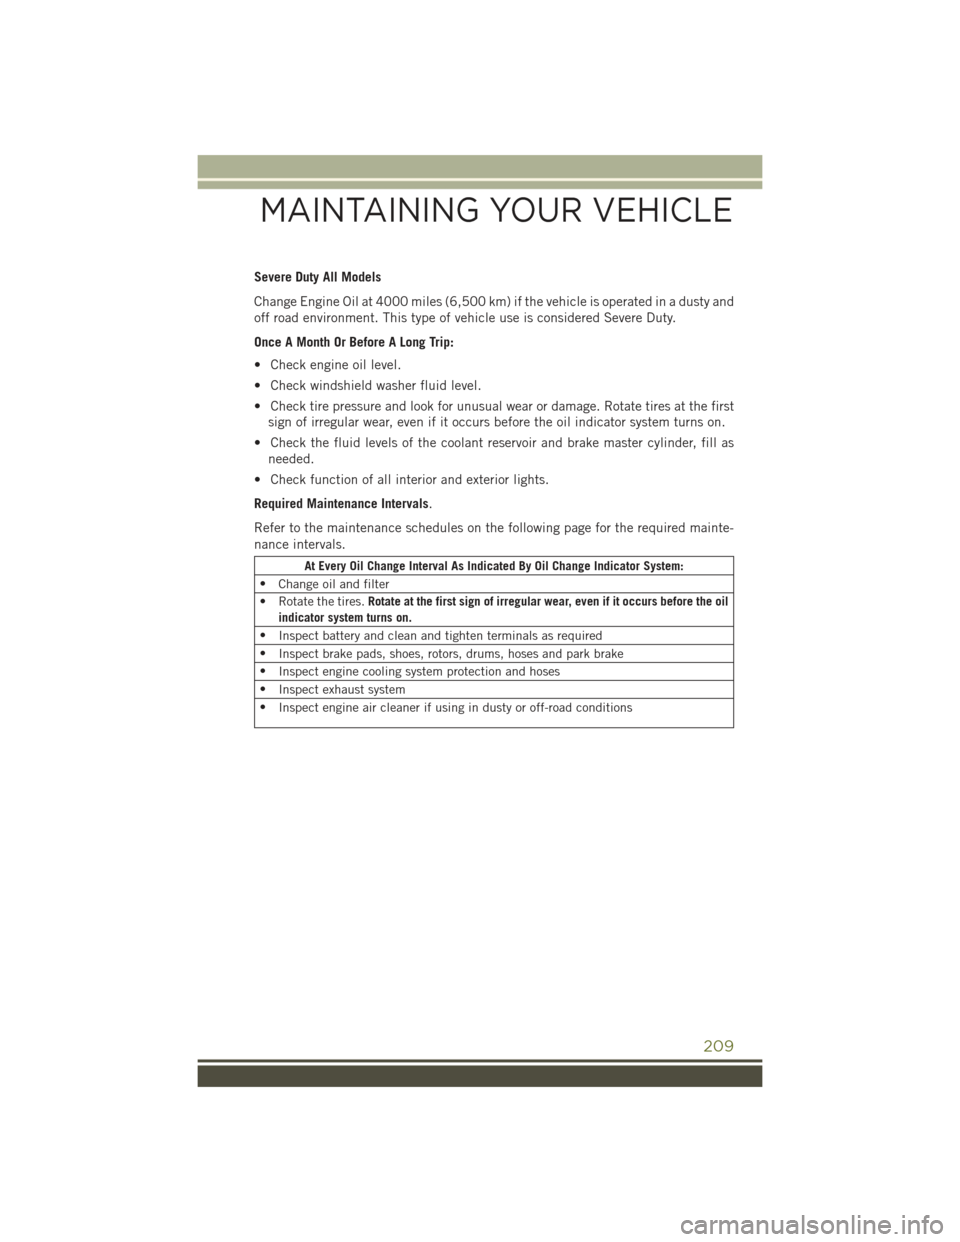
Severe Duty All Models
Change Engine Oil at 4000 miles (6,500 km) if the vehicle is operated in a dusty and
off road environment. This type of vehicle use is considered Severe Duty.
Once A Month Or Before A Long Trip:
• Check engine oil level.
• Check windshield washer fluid level.
• Check tire pressure and look for unusual wear or damage. Rotate tires at the first
sign of irregular wear, even if it occurs before the oil indicator system turns on.
• Check the fluid levels of the coolant reservoir and brake master cylinder, fill as
needed.
• Check function of all interior and exterior lights.
Required Maintenance Intervals.
Refer to the maintenance schedules on the following page for the required mainte-
nance intervals.
At Every Oil Change Interval As Indicated By Oil Change Indicator System:
•Change oil and filter
• Rotate the tires.Rotate at the first sign of irregular wear, even if it occurs before the oil
indicator system turns on.
•Inspect battery and clean and tighten terminals as required
•Inspect brake pads, shoes, rotors, drums, hoses and park brake
•Inspect engine cooling system protection and hoses
•Inspect exhaust system
•Inspect engine air cleaner if using in dusty or off-road conditions
MAINTAINING YOUR VEHICLE
209
Page 216 of 244
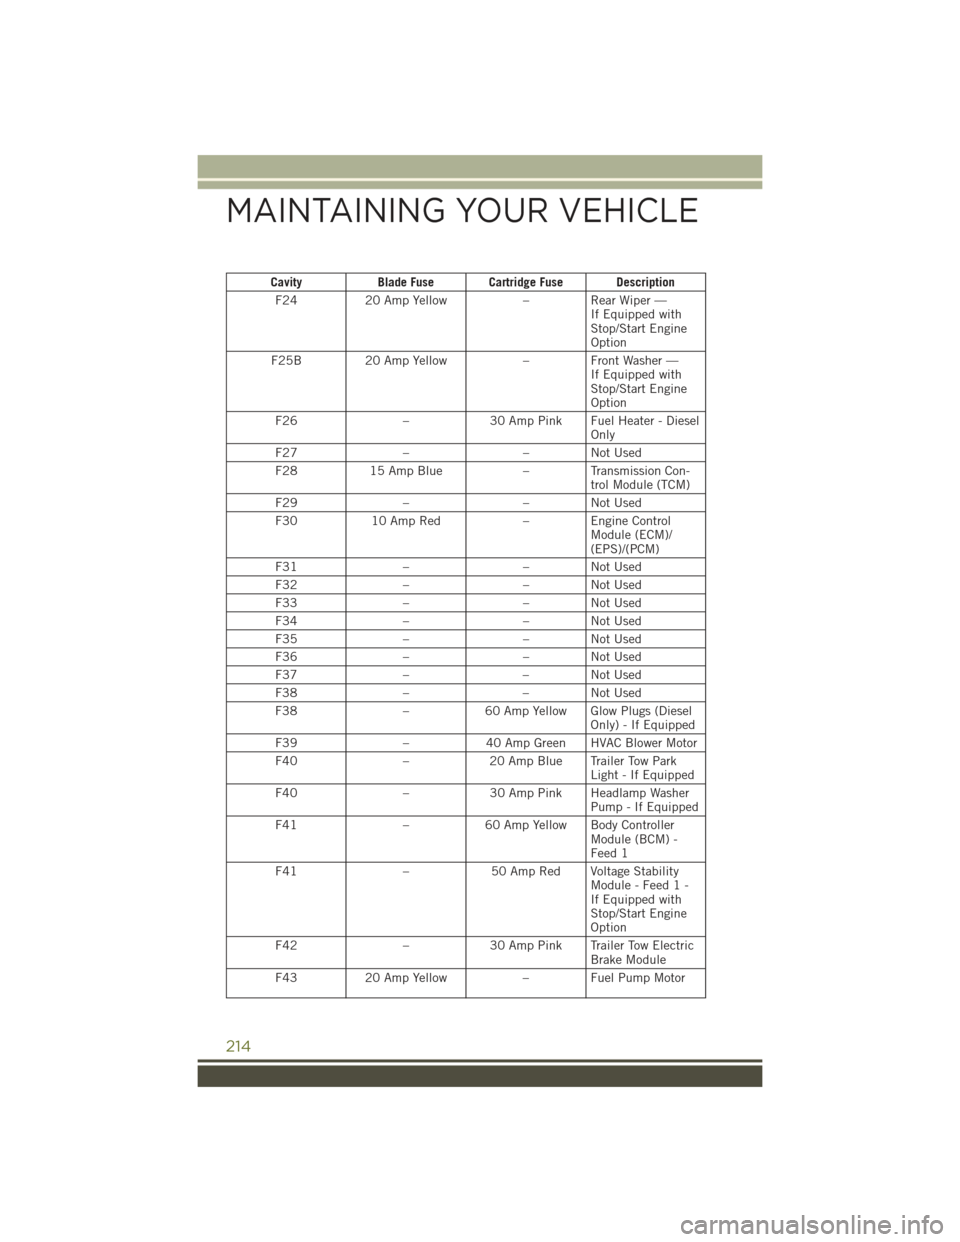
CavityBlade Fuse Cartridge Fuse Description
F2420 Amp Yellow–RearWiper—If Equipped withStop/Start EngineOption
F25B20 Amp Yellow–FrontWasher—If Equipped withStop/Start EngineOption
F26–30 Amp Pink Fuel Heater - DieselOnly
F27––NotUsed
F2815 Amp Blue–TransmissionCon-trol Module (TCM)
F29––NotUsed
F3010 Amp Red–EngineControlModule (ECM)/(EPS)/(PCM)
F31––NotUsed
F32––NotUsed
F33––NotUsed
F34––NotUsed
F35––NotUsed
F36––NotUsed
F37––NotUsed
F38––NotUsed
F38–60 Amp Yellow Glow Plugs (DieselOnly) - If Equipped
F39–40 Amp Green HVAC Blower Motor
F40–20 Amp Blue Trailer Tow ParkLight - If Equipped
F40–30 Amp Pink Headlamp WasherPump - If Equipped
F41–60 Amp Yellow Body ControllerModule (BCM) -Feed 1
F41–50 Amp Red Voltage StabilityModule - Feed 1 -If Equipped withStop/Start EngineOption
F42–30 Amp Pink Trailer Tow ElectricBrake Module
F4320 Amp Yellow–FuelPumpMotor
MAINTAINING YOUR VEHICLE
214
Page 217 of 244
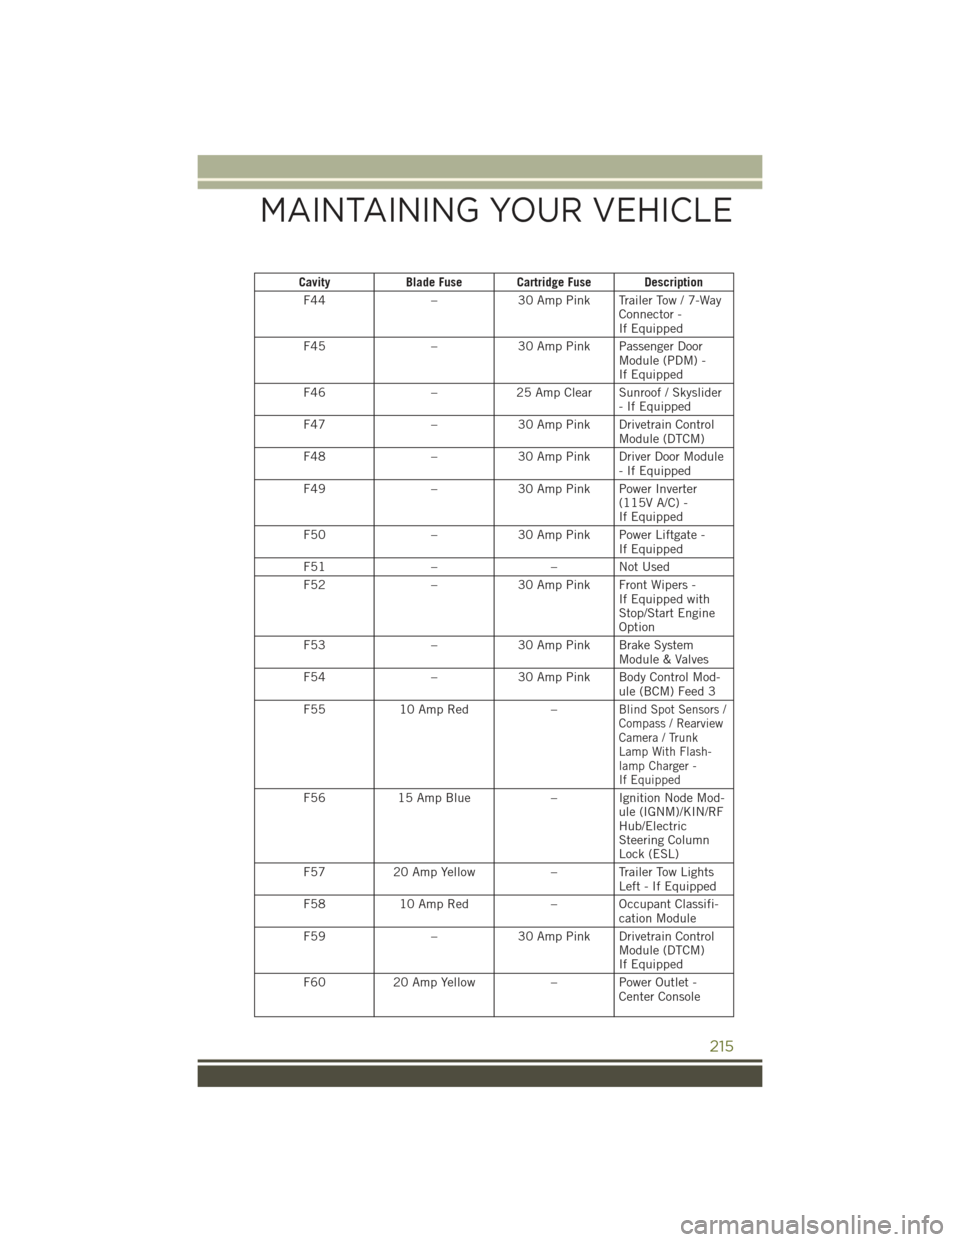
CavityBlade Fuse Cartridge Fuse Description
F44–30 Amp Pink Trailer Tow / 7-WayConnector -If Equipped
F45–30 Amp Pink Passenger DoorModule (PDM) -If Equipped
F46–25 Amp Clear Sunroof / Skyslider-IfEquipped
F47–30 Amp Pink Drivetrain ControlModule (DTCM)
F48–30 Amp Pink Driver Door Module-IfEquipped
F49–30 Amp Pink Power Inverter(115V A/C) -If Equipped
F50–30 Amp Pink Power Liftgate -If Equipped
F51––NotUsed
F52–30 Amp Pink Front Wipers -If Equipped withStop/Start EngineOption
F53–30 Amp Pink Brake SystemModule & Valves
F54–30 Amp Pink Body Control Mod-ule (BCM) Feed 3
F5510 Amp Red–Blind Spot Sensors /Compass / RearviewCamera / TrunkLamp With Flash-lamp Charger -If Equipped
F5615 Amp Blue–IgnitionNodeMod-ule (IGNM)/KIN/RFHub/ElectricSteering ColumnLock (ESL)
F5720 Amp Yellow– Trailer Tow LightsLeft - If Equipped
F5810 Amp Red– Occupant Classifi-cation Module
F59–30 Amp Pink Drivetrain ControlModule (DTCM)If Equipped
F6020 Amp Yellow– Power Outlet -Center Console
MAINTAINING YOUR VEHICLE
215
Page 231 of 244
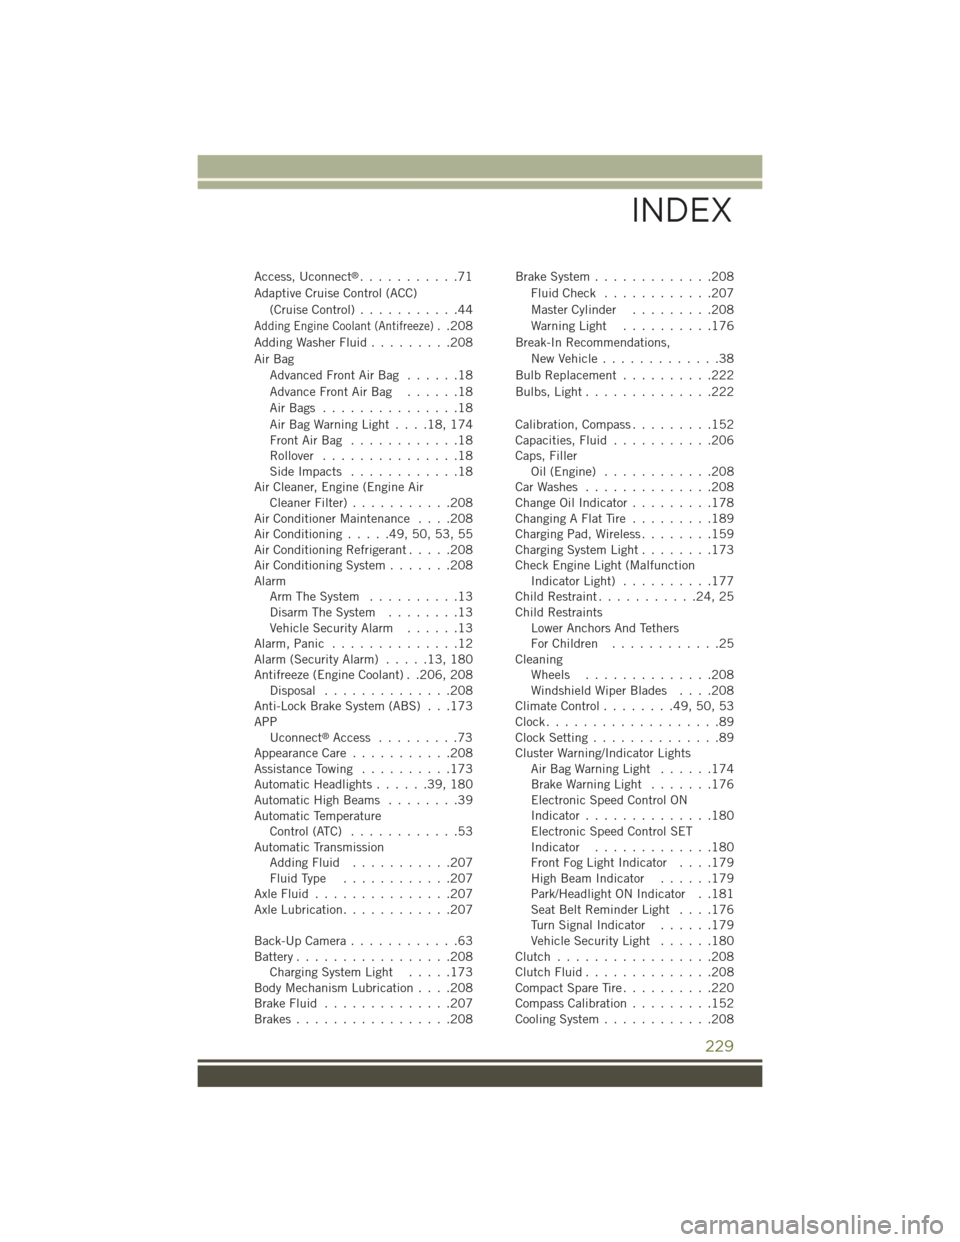
Access, Uconnect®...........71
Adaptive Cruise Control (ACC)
(Cruise Control)...........44
Adding Engine Coolant (Antifreeze)..208
Adding Washer Fluid.........208
Air Bag
Advanced Front Air Bag . . . . . .18
Advance Front Air Bag . . . . . .18
Air Bags . . . . . . . . . . . . . . .18
Air Bag Warning Light . . . .18, 174Front Air Bag . . . . . . . . . . . .18Rollover...............18Side Impacts . . . . . . . . . . . .18Air Cleaner, Engine (Engine AirCleaner Filter)...........208Air Conditioner Maintenance....208Air Conditioning.....49,50,53,55Air Conditioning Refrigerant.....208Air Conditioning System.......208AlarmArm The System..........13Disarm The System........13Vehicle Security Alarm......13Alarm, Panic . . . . . . . . . . . . . .12Alarm (Security Alarm).....13,180Antifreeze (Engine Coolant) . .206, 208Disposal..............208Anti-Lock Brake System (ABS) . . .173APPUconnect®Access.........73Appearance Care...........208Assistance Towing..........173Automatic Headlights......39,180Automatic High Beams........39Automatic TemperatureControl (ATC)............53Automatic TransmissionAdding Fluid...........207Fluid Type . . . . . . . . . . . .207Axle Fluid . . . . . . . . . . . . . . .207Axle Lubrication............207
Back-Up Camera............63Battery.................208Charging System Light.....173Body Mechanism Lubrication....208Brake Fluid..............207Brakes.................208
Brake System.............208
Fluid Check . . . . . . . . . . . .207
Master Cylinder.........208
Warning Light . . . . . . . . . .176
Break-In Recommendations,
New Vehicle.............38
Bulb Replacement..........222
Bulbs, Light..............222
Calibration, Compass.........152Capacities, Fluid...........206Caps, FillerOil (Engine) . . . . . . . . . . . .208Car Washes . . . . . . . . . . . . . .208Change Oil Indicator.........178Changing A Flat Tire . . . . . . . . .189Charging Pad, Wireless........159Charging System Light........173Check Engine Light (MalfunctionIndicator Light)..........177Child Restraint...........24,25Child RestraintsLower Anchors And TethersFor Children............25CleaningWheels..............208Windshield Wiper Blades....208Climate Control........49,50,53Clock...................89Clock Setting..............89Cluster Warning/Indicator LightsAir Bag Warning Light . . . . . .174Brake Warning Light.......176Electronic Speed Control ONIndicator..............180Electronic Speed Control SETIndicator.............180Front Fog Light Indicator....179High Beam Indicator......179Park/Headlight ON Indicator . .181Seat Belt Reminder Light....176Turn Signal Indicator......179Vehicle Security Light......180Clutch . . . . . . . . . . . . . . . . .208Clutch Fluid . . . . . . . . . . . . . .208Compact Spare Tire . . . . . . . . . .220Compass Calibration.........152Cooling System............208
INDEX
229