door lock JEEP CHEROKEE 2015 KL / 5.G Owner's Manual
[x] Cancel search | Manufacturer: JEEP, Model Year: 2015, Model line: CHEROKEE, Model: JEEP CHEROKEE 2015 KL / 5.GPages: 244, PDF Size: 30.6 MB
Page 128 of 244
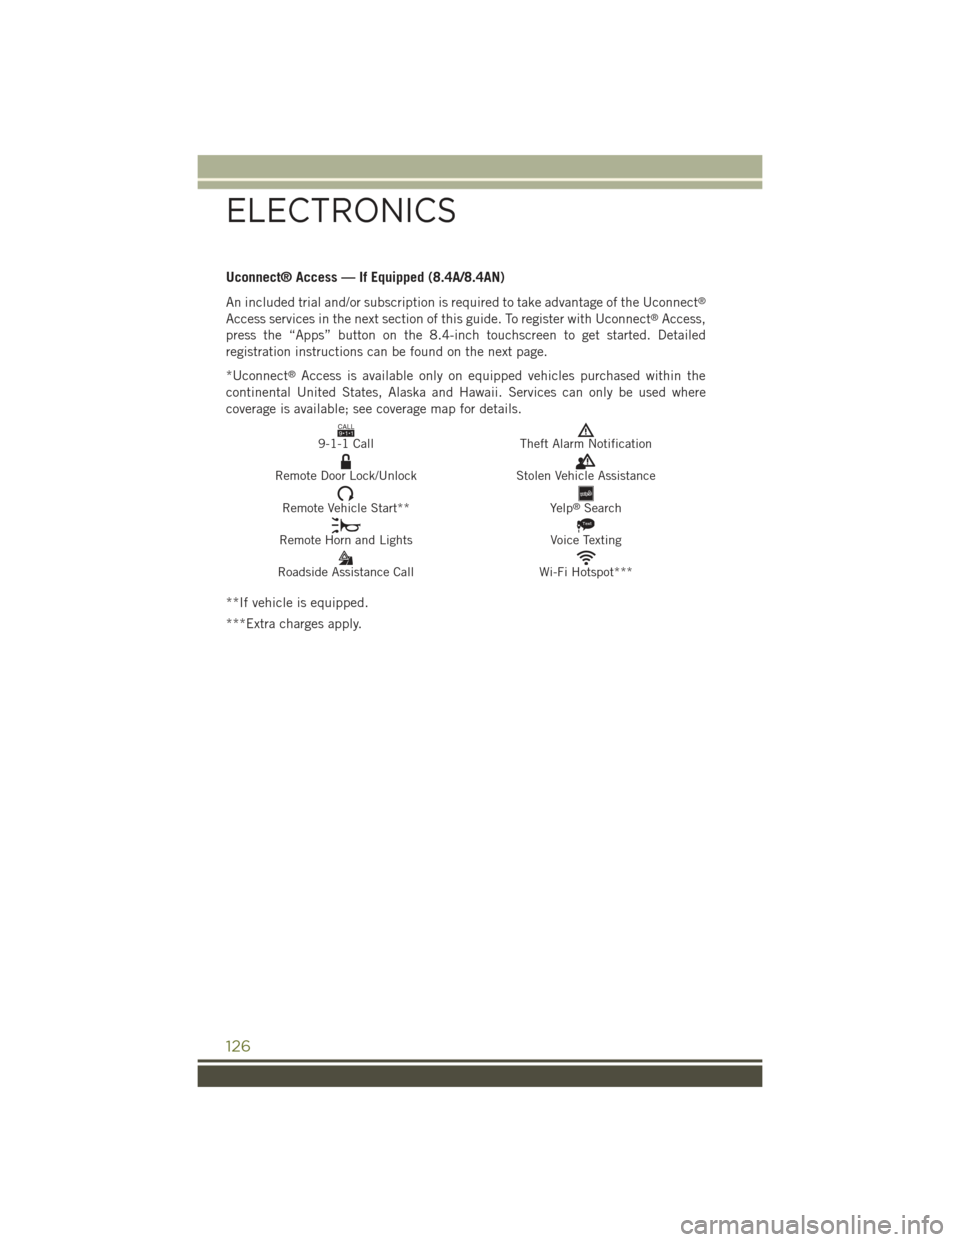
Uconnect® Access — If Equipped (8.4A/8.4AN)
An included trial and/or subscription is required to take advantage of the Uconnect®
Access services in the next section of this guide. To register with Uconnect®Access,
press the “Apps” button on the 8.4-inch touchscreen to get started. Detailed
registration instructions can be found on the next page.
*Uconnect®Access is available only on equipped vehicles purchased within the
continental United States, Alaska and Hawaii. Services can only be used where
coverage is available; see coverage map for details.
CALL9119-1-1 CallTheft Alarm Notification
Remote Door Lock/UnlockStolen Vehicle Assistance
Remote Vehicle Start**Yelp®Search
Remote Horn and Lights
Text
Voice Texting
Roadside Assistance CallWi-Fi Hotspot***
**If vehicle is equipped.
***Extra charges apply.
ELECTRONICS
126
Page 155 of 244
PROGRAMMABLE FEATURES
Uconnect® Customer Programmable Features
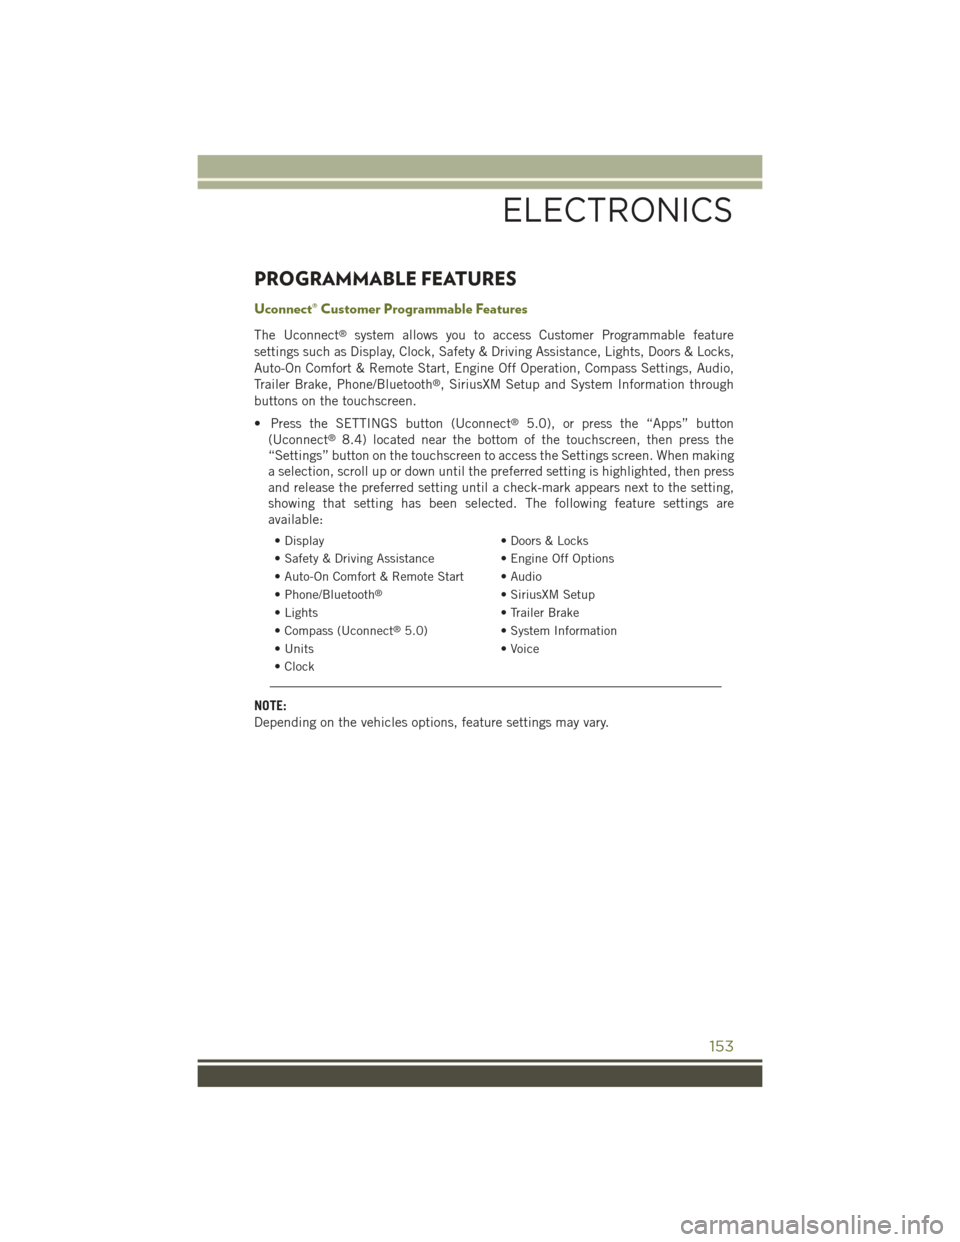
The Uconnect®system allows you to access Customer Programmable feature
settings such as Display, Clock, Safety & Driving Assistance, Lights, Doors & Locks,
Auto-On Comfort & Remote Start, Engine Off Operation, Compass Settings, Audio,
Trailer Brake, Phone/Bluetooth®, SiriusXM Setup and System Information through
buttons on the touchscreen.
• Press the SETTINGS button (Uconnect®5.0), or press the “Apps” button
(Uconnect®8.4) located near the bottom of the touchscreen, then press the
“Settings” button on the touchscreen to access the Settings screen. When making
a selection, scroll up or down until the preferred setting is highlighted, then press
and release the preferred setting until a check-mark appears next to the setting,
showing that setting has been selected. The following feature settings are
available:
• Display• Doors & Locks
• Safety & Driving Assistance• Engine Off Options
• Auto-On Comfort & Remote Start • Audio
• Phone/Bluetooth®• SiriusXM Setup
• Lights• Trailer Brake
• Compass (Uconnect®5.0)• System Information
• Units• Voice
• Clock
NOTE:
Depending on the vehicles options, feature settings may vary.
ELECTRONICS
153
Page 158 of 244
Using HomeLink®
To operate, push and release the programmed HomeLink®button. Activation will now
occur for the programmed device (i.e., garage door opener, gate operator, security
system, entry door lock, home/office lighting, etc.,). The hand-held transmitter of the
device may also be used at any time.
WARNING!
• Your motorized door or gate will open and close while you are programming the
universal transceiver. Do not program the transceiver if people or pets are in the
path of the door or gate.
• Do not run your vehicle in a closed garage or confined area while programming
the transceiver. Exhaust gas from your vehicle contains Carbon Monoxide (CO)
which is odorless and colorless. Carbon Monoxide is poisonous when inhaled
and can cause you and others to be severely injured or killed.
POWER INVERTER
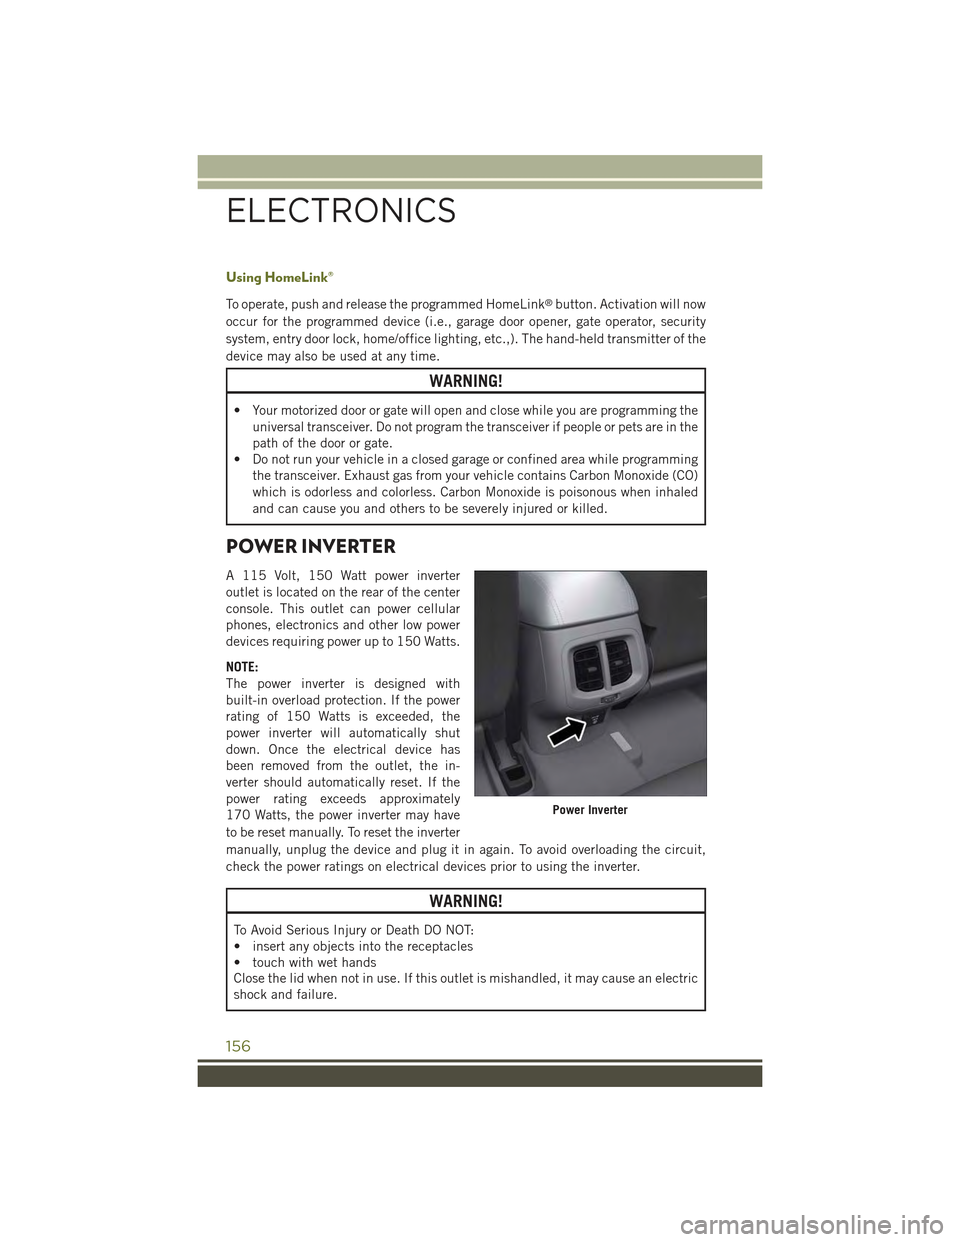
A 115 Volt, 150 Watt power inverter
outlet is located on the rear of the center
console. This outlet can power cellular
phones, electronics and other low power
devices requiring power up to 150 Watts.
NOTE:
The power inverter is designed with
built-in overload protection. If the power
rating of 150 Watts is exceeded, the
power inverter will automatically shut
down. Once the electrical device has
been removed from the outlet, the in-
verter should automatically reset. If the
power rating exceeds approximately
170 Watts, the power inverter may have
to be reset manually. To reset the inverter
manually, unplug the device and plug it in again. To avoid overloading the circuit,
check the power ratings on electrical devices prior to using the inverter.
WARNING!
To Avoid Serious Injury or Death DO NOT:
• insert any objects into the receptacles
• touch with wet hands
Close the lid when not in use. If this outlet is mishandled, it may cause an electric
shock and failure.
Power Inverter
ELECTRONICS
156
Page 176 of 244
If the ABS light remains on or turns on while driving, it indicates that the Anti-Lock
portion of the brake system is not functioning and that service is required. However,
the conventional brake system will continue to operate normally if the BRAKE
warning light is not on.
If the ABS light is on, the brake system should be serviced as soon as possible to
restore the benefits of Anti-Lock brakes. If the ABS light does not turn on when the
ignition switch is turned to the ON/RUN position, have the light inspected by an
authorized dealer.
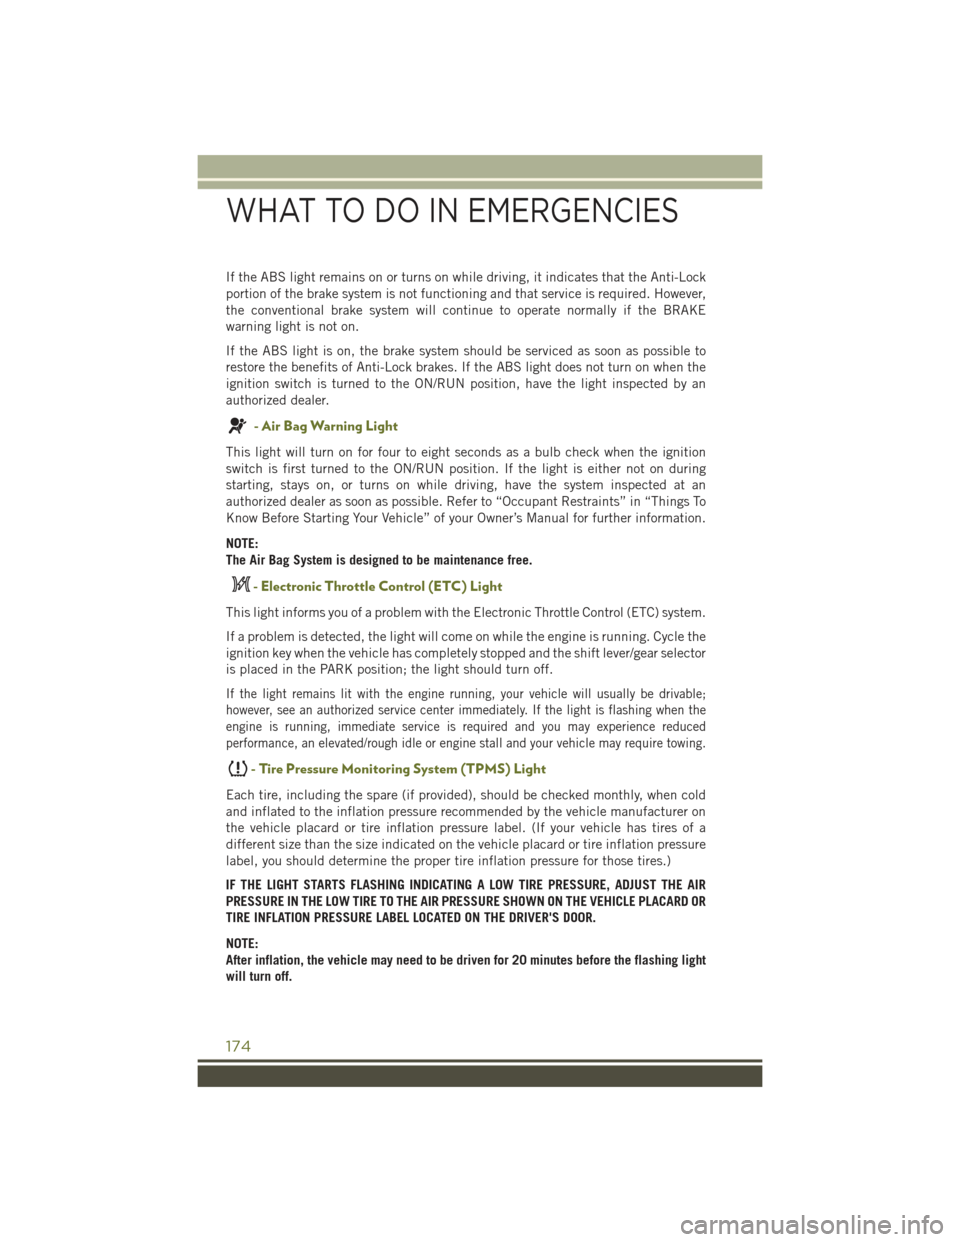
- Air Bag Warning Light
This light will turn on for four to eight seconds as a bulb check when the ignition
switch is first turned to the ON/RUN position. If the light is either not on during
starting, stays on, or turns on while driving, have the system inspected at an
authorized dealer as soon as possible. Refer to “Occupant Restraints” in “Things To
Know Before Starting Your Vehicle” of your Owner’s Manual for further information.
NOTE:
The Air Bag System is designed to be maintenance free.
- Electronic Throttle Control (ETC) Light
This light informs you of a problem with the Electronic Throttle Control (ETC) system.
If a problem is detected, the light will come on while the engine is running. Cycle the
ignition key when the vehicle has completely stopped and the shift lever/gear selector
is placed in the PARK position; the light should turn off.
If the light remains lit with the engine running, your vehicle will usually be drivable;
however, see an authorized service center immediately. If the light is flashing when the
engine is running, immediate service is required and you may experience reduced
performance, an elevated/rough idle or engine stall and your vehicle may require towing.
-TirePressureMonitoringSystem(TPMS)Light
Each tire, including the spare (if provided), should be checked monthly, when cold
and inflated to the inflation pressure recommended by the vehicle manufacturer on
the vehicle placard or tire inflation pressure label. (If your vehicle has tires of a
different size than the size indicated on the vehicle placard or tire inflation pressure
label, you should determine the proper tire inflation pressure for those tires.)
IF THE LIGHT STARTS FLASHING INDICATING A LOW TIRE PRESSURE, ADJUST THE AIR
PRESSURE IN THE LOW TIRE TO THE AIR PRESSURE SHOWN ON THE VEHICLE PLACARD OR
TIRE INFLATION PRESSURE LABEL LOCATED ON THE DRIVER'S DOOR.
NOTE:
After inflation, the vehicle may need to be driven for 20 minutes before the flashing light
will turn off.
WHAT TO DO IN EMERGENCIES
174
Page 217 of 244
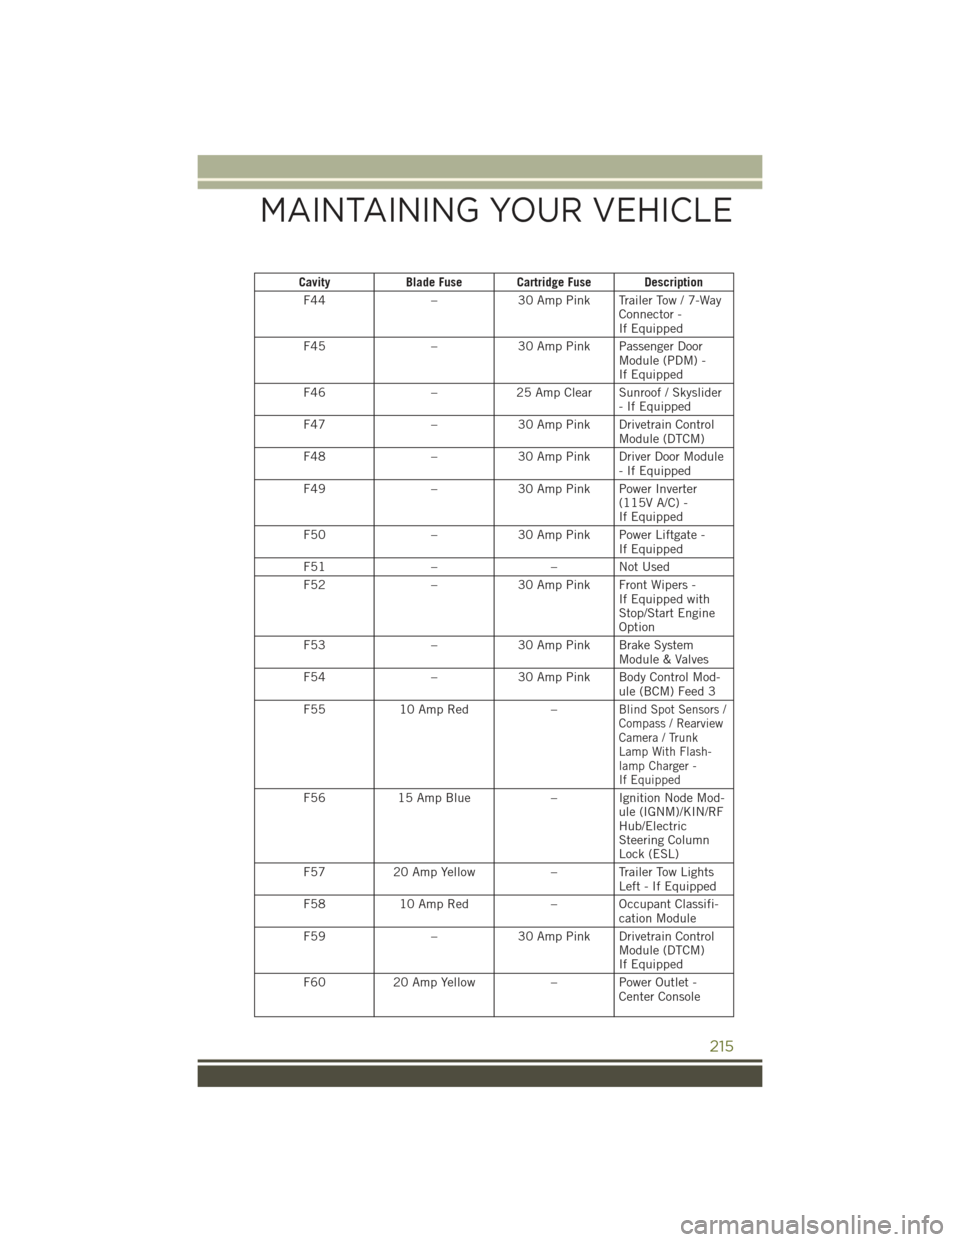
CavityBlade Fuse Cartridge Fuse Description
F44–30 Amp Pink Trailer Tow / 7-WayConnector -If Equipped
F45–30 Amp Pink Passenger DoorModule (PDM) -If Equipped
F46–25 Amp Clear Sunroof / Skyslider-IfEquipped
F47–30 Amp Pink Drivetrain ControlModule (DTCM)
F48–30 Amp Pink Driver Door Module-IfEquipped
F49–30 Amp Pink Power Inverter(115V A/C) -If Equipped
F50–30 Amp Pink Power Liftgate -If Equipped
F51––NotUsed
F52–30 Amp Pink Front Wipers -If Equipped withStop/Start EngineOption
F53–30 Amp Pink Brake SystemModule & Valves
F54–30 Amp Pink Body Control Mod-ule (BCM) Feed 3
F5510 Amp Red–Blind Spot Sensors /Compass / RearviewCamera / TrunkLamp With Flash-lamp Charger -If Equipped
F5615 Amp Blue–IgnitionNodeMod-ule (IGNM)/KIN/RFHub/ElectricSteering ColumnLock (ESL)
F5720 Amp Yellow– Trailer Tow LightsLeft - If Equipped
F5810 Amp Red– Occupant Classifi-cation Module
F59–30 Amp Pink Drivetrain ControlModule (DTCM)If Equipped
F6020 Amp Yellow– Power Outlet -Center Console
MAINTAINING YOUR VEHICLE
215
Page 220 of 244
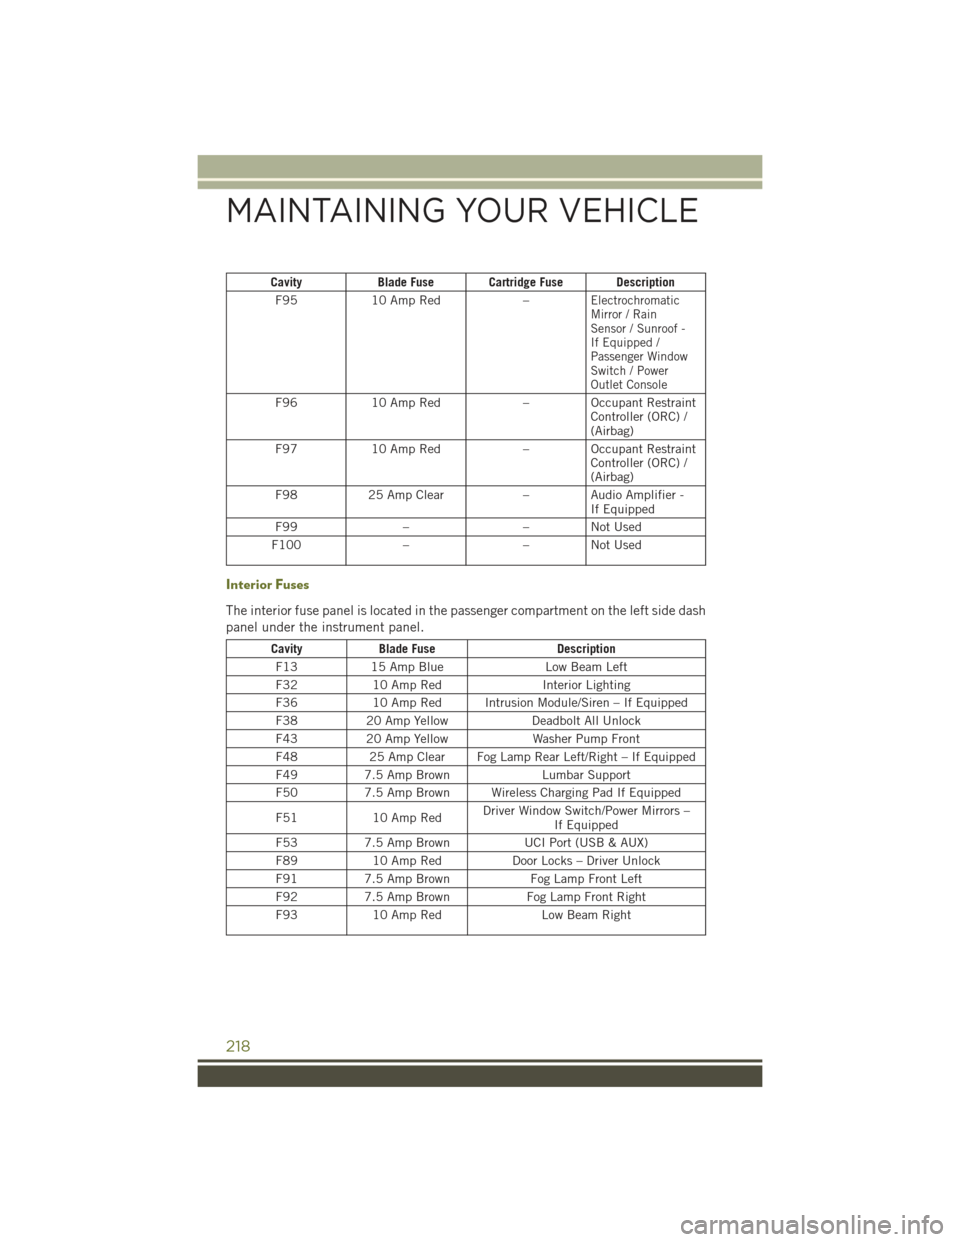
CavityBlade Fuse Cartridge Fuse Description
F9510 Amp Red–ElectrochromaticMirror / RainSensor / Sunroof -If Equipped /Passenger WindowSwitch / PowerOutlet Console
F9610 Amp Red–OccupantRestraintController (ORC) /(Airbag)
F9710 Amp Red–OccupantRestraintController (ORC) /(Airbag)
F9825 Amp Clear–AudioAmplifier-If Equipped
F99––NotUsed
F100––NotUsed
Interior Fuses
The interior fuse panel is located in the passenger compartment on the left side dash
panel under the instrument panel.
CavityBlade FuseDescription
F1315 Amp BlueLow Beam Left
F3210 Amp RedInterior Lighting
F3610 Amp Red Intrusion Module/Siren – If Equipped
F3820 Amp YellowDeadbolt All Unlock
F4320 Amp YellowWasher Pump Front
F4825 Amp Clear Fog Lamp Rear Left/Right – If Equipped
F497.5 Amp BrownLumbar Support
F507.5 Amp Brown Wireless Charging Pad If Equipped
F5110 Amp RedDriver Window Switch/Power Mirrors –If Equipped
F537.5 Amp BrownUCI Port (USB & AUX)
F8910 Amp RedDoor Locks – Driver Unlock
F917.5 Amp BrownFog Lamp Front Left
F927.5 Amp BrownFog Lamp Front Right
F9310 Amp RedLow Beam Right
MAINTAINING YOUR VEHICLE
218
Page 228 of 244
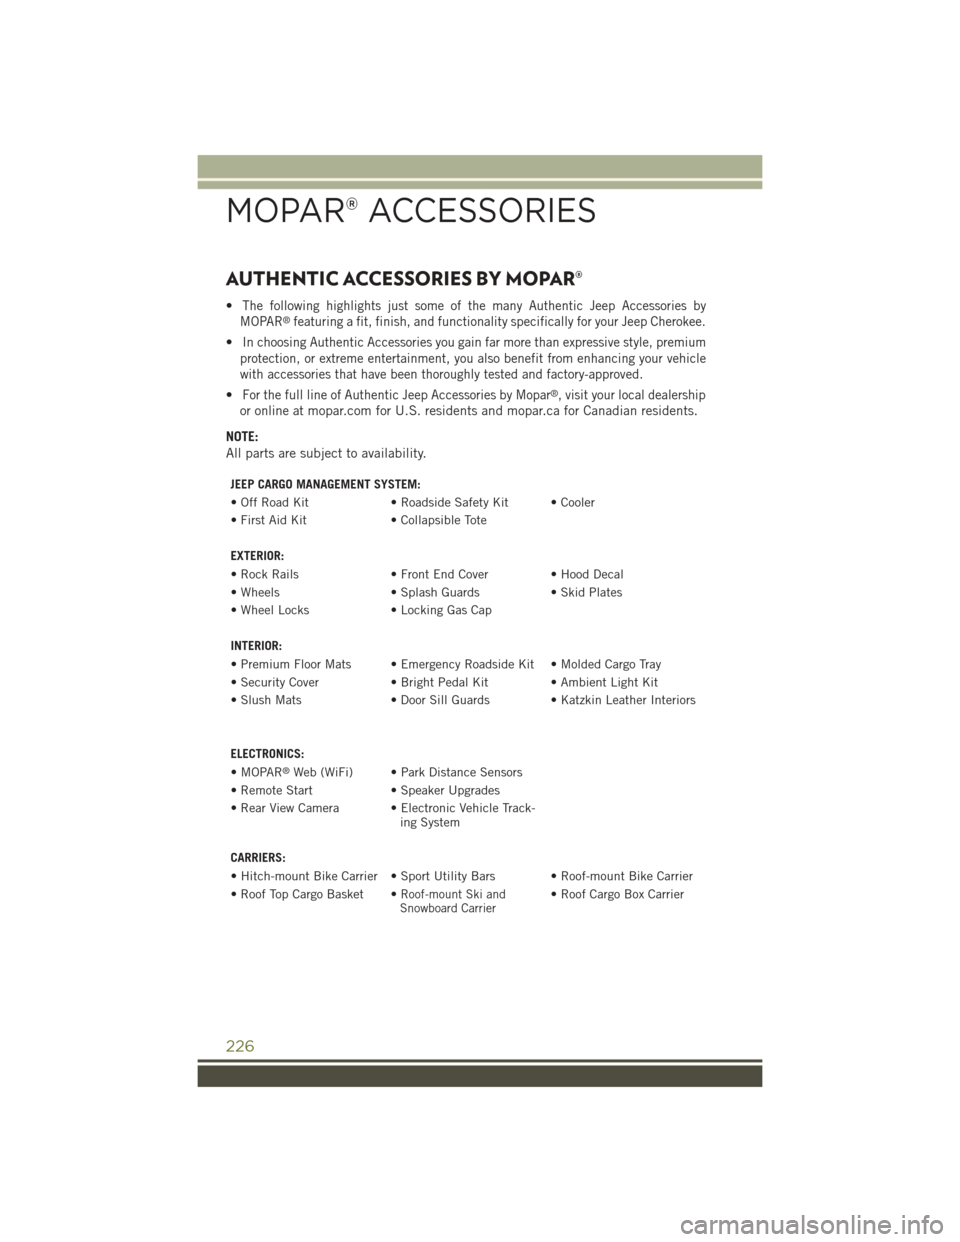
AUTHENTIC ACCESSORIES BY MOPAR®
•The following highlights just some of the many Authentic Jeep Accessories by
MOPAR®featuring a fit, finish, and functionality specifically for your Jeep Cherokee.
•In choosing Authentic Accessories you gain far more than expressive style, premium
protection, or extreme entertainment, you also benefit from enhancing your vehicle
with accessories that have been thoroughly tested and factory-approved.
•For the full line of Authentic Jeep Accessories by Mopar®, visit your local dealership
or online atmopar.com for U.S. residents and mopar.ca for Canadian residents.
NOTE:
All parts are subject to availability.
JEEP CARGO MANAGEMENT SYSTEM:
• Off Road Kit• Roadside Safety Kit • Cooler
• First Aid Kit• Collapsible Tote
EXTERIOR:
• Rock Rails• Front End Cover • Hood Decal
• Wheels• Splash Guards• Skid Plates
• Wheel Locks• Locking Gas Cap
INTERIOR:
• Premium Floor Mats • Emergency Roadside Kit • Molded Cargo Tray
• Security Cover• Bright Pedal Kit • Ambient Light Kit
• Slush Mats• Door Sill Guards • Katzkin Leather Interiors
ELECTRONICS:
•MOPAR®Web (WiFi) • Park Distance Sensors
• Remote Start• Speaker Upgrades
• Rear View Camera • Electronic Vehicle Track-ing System
CARRIERS:
• Hitch-mount Bike Carrier • Sport Utility Bars • Roof-mount Bike Carrier
• Roof Top Cargo Basket •Roof-mount Ski andSnowboard Carrier• Roof Cargo Box Carrier
MOPAR® ACCESSORIES
226
Page 229 of 244
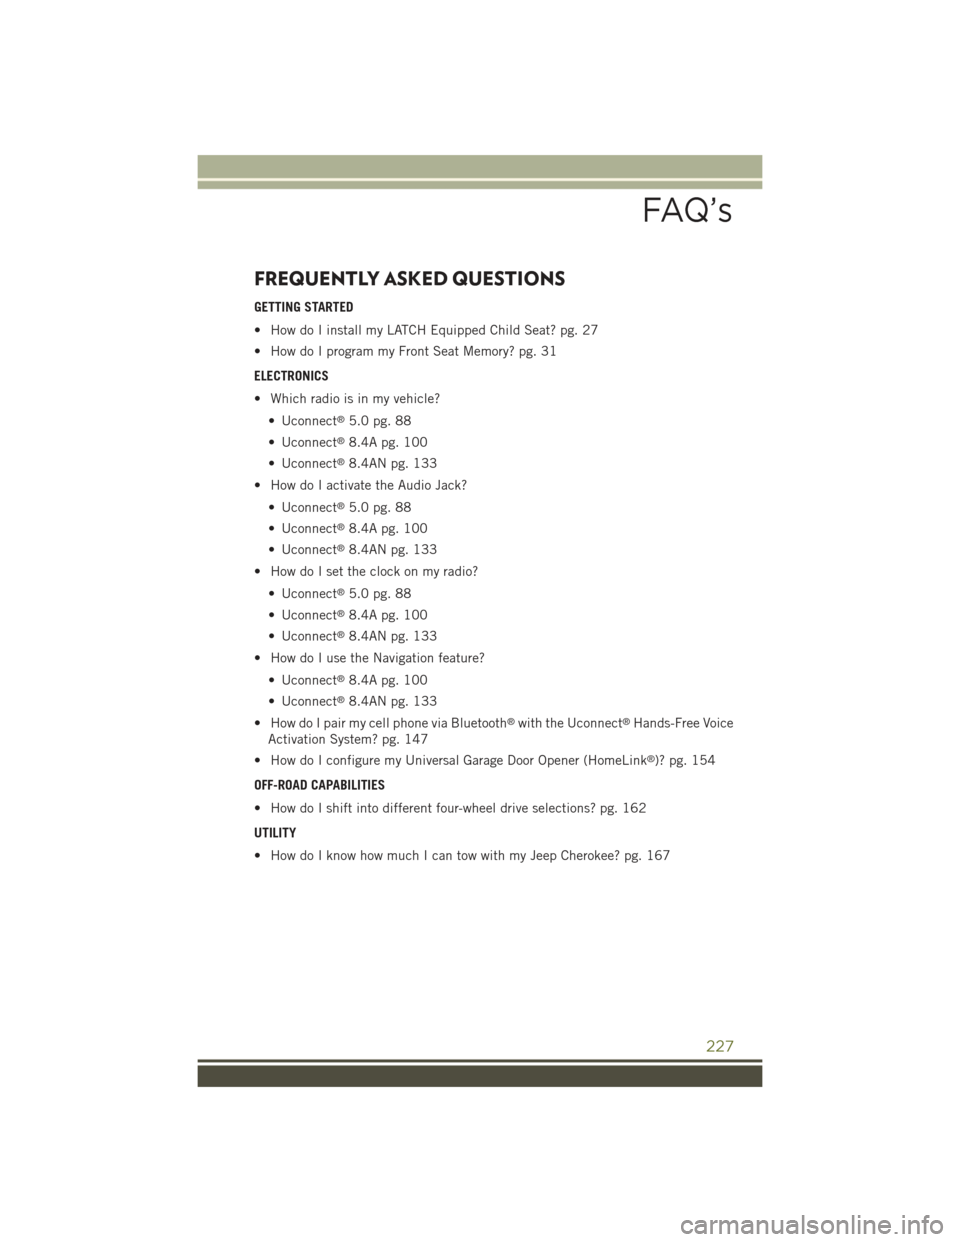
FREQUENTLY ASKED QUESTIONS
GETTING STARTED
• How do I install my LATCH Equipped Child Seat? pg. 27
• How do I program my Front Seat Memory? pg. 31
ELECTRONICS
• Which radio is in my vehicle?
• Uconnect®5.0 pg. 88
• Uconnect®8.4A pg. 100
• Uconnect®8.4AN pg. 133
• How do I activate the Audio Jack?
• Uconnect®5.0 pg. 88
• Uconnect®8.4A pg. 100
• Uconnect®8.4AN pg. 133
• How do I set the clock on my radio?
• Uconnect®5.0 pg. 88
• Uconnect®8.4A pg. 100
• Uconnect®8.4AN pg. 133
• How do I use the Navigation feature?
• Uconnect®8.4A pg. 100
• Uconnect®8.4AN pg. 133
• How do I pair my cell phone via Bluetooth®with the Uconnect®Hands-Free Voice
Activation System? pg. 147
• How do I configure my Universal Garage Door Opener (HomeLink®)? pg. 154
OFF-ROAD CAPABILITIES
• How do I shift into different four-wheel drive selections? pg. 162
UTILITY
• How do I know how much I can tow with my Jeep Cherokee? pg. 167
FAQ’s
227
Page 233 of 244
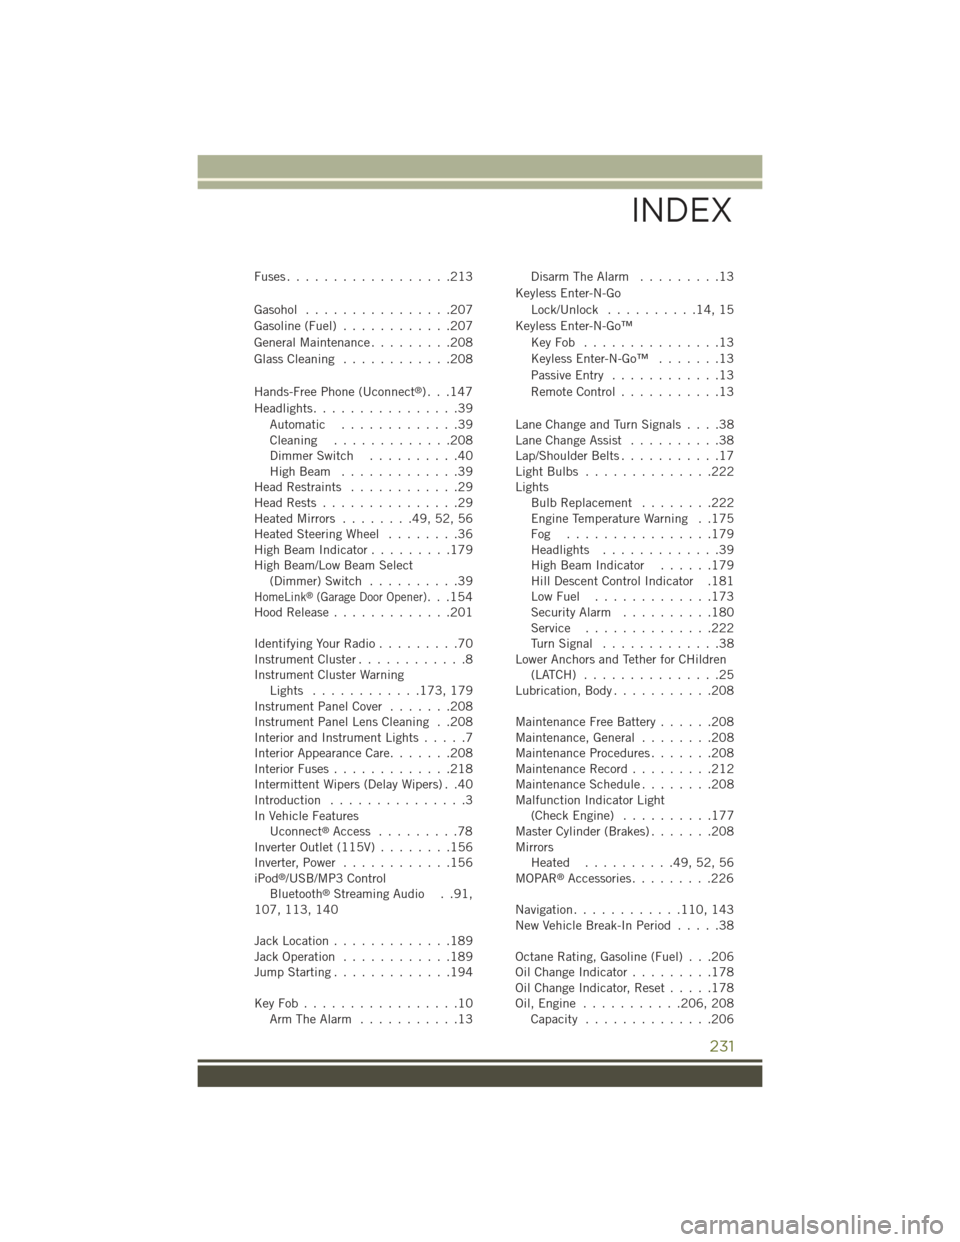
Fuses . . . . . . . . . . . . . . . . . .213
Gasohol . . . . . . . . . . . . . . . .207
Gasoline (Fuel)............207
General Maintenance . . . . . . . . .208
Glass Cleaning............208
Hands-Free Phone (Uconnect®). . .147
Headlights. . . . . . . . . . . . . . . .39
Automatic . . . . . . . . . . . . .39Cleaning . . . . . . . . . . . . .208Dimmer Switch..........40High Beam . . . . . . . . . . . . .39Head Restraints............29Head Rests...............29Heated Mirrors........49,52,56Heated Steering Wheel........36High Beam Indicator.........179High Beam/Low Beam Select(Dimmer) Switch..........39HomeLink®(Garage Door Opener)...154Hood Release.............201
Identifying Your Radio.........70Instrument Cluster............8Instrument Cluster WarningLights . . . . . . . . . . . .173, 179Instrument Panel Cover.......208Instrument Panel Lens Cleaning . .208Interior and Instrument Lights.....7Interior Appearance Care.......208Interior Fuses.............218Intermittent Wipers (Delay Wipers) . .40Introduction...............3In Vehicle FeaturesUconnect®Access.........78Inverter Outlet (115V)........156Inverter, Power............156iPod®/USB/MP3 ControlBluetooth®Streaming Audio . .91,107, 113, 140
Jack Location.............189Jack Operation............189Jump Starting.............194
Key Fob . . . . . . . . . . . . . . . . .10Arm The Alarm...........13
Disarm The Alarm.........13
Keyless Enter-N-Go
Lock/Unlock..........14,15
Keyless Enter-N-Go™
Key Fob . . . . . . . . . . . . . . .13
Keyless Enter-N-Go™.......13
Passive Entry............13
Remote Control...........13
Lane Change and Turn Signals . . . .38Lane Change Assist..........38Lap/Shoulder Belts...........17Light Bulbs . . . . . . . . . . . . . .222LightsBulb Replacement . . . . . . . .222Engine Temperature Warning . .175Fog . . . . . . . . . . . . . . . .179Headlights.............39High Beam Indicator......179Hill Descent Control Indicator .181Low Fuel . . . . . . . . . . . . .173Security Alarm..........180Service..............222Tu r n S i g n a l . . . . . . . . . . . . . 3 8Lower Anchors and Tether for CHildren(LATCH)...............25Lubrication, Body...........208
Maintenance Free Battery......208Maintenance, General . . . . . . . .208Maintenance Procedures.......208Maintenance Record . . . . . . . . .212Maintenance Schedule . . . . . . . .208Malfunction Indicator Light(Check Engine) . . . . . . . . . .177Master Cylinder (Brakes).......208MirrorsHeated..........49,52,56MOPAR®Accessories.........226
Navigation............110, 143New Vehicle Break-In Period.....38
Octane Rating, Gasoline (Fuel) . . .206Oil Change Indicator.........178Oil Change Indicator, Reset.....178Oil, Engine...........206, 208Capacity..............206
INDEX
231