light JEEP CHEROKEE 2015 KL / 5.G Owner's Manual
[x] Cancel search | Manufacturer: JEEP, Model Year: 2015, Model line: CHEROKEE, Model: JEEP CHEROKEE 2015 KL / 5.GPages: 244, PDF Size: 30.6 MB
Page 84 of 244
You can set-up notifications for your account to receive an email or text
(SMS) message every time a command is sent. Login to Mopar Owner Connect
(moparownerconnect.com) and click on Edit Profile to manage Uconnect®Notifica-
tions.
Remote Horn And Lights— It’s easy to locate a vehicle in a dark, crowded or noisy
parking area by activating the horn and lights. It may also help if you need to draw
attention to your vehicle for any reason. You can send a request to your vehicle in one
of three ways:
1. Using the Uconnect®Access App from a compatible smartphone.
2. From the Mopar Owner Connect website.
3. By contacting the Uconnect®Care on the phone.
To use this feature after the Uconnect®Access App is downloaded, login using your
user name and password. You will need your four digit Uconnect®Security PIN to
confirm the request. You can set-up notifications for your account to receive an
email or text (SMS) message every time a command is sent. Login to Mopar Owner
Connect (moparownerconnect.com) and click on Edit Profile to manage Uconnect®
Notifications.
Voice Texting— Want to dictate a personal message? Register with Uconnect®
Access to take advantage of a new, cloudbased Voice Texting service, an enhance-
ment to Voice Text Reply.
Voice Texting allows you to compose a new text or reply to an incoming text message.
Before you attempt to use the Voice Texting feature, check to ensure you have the
following:
1. A paired, Bluetooth®enabled phone with the Message Access Profile (MAP). Not
all Bluetooth®enabled phones support MAP, including all iPhones®(Apple iOS).
Visit UconnectPhone.com for system and device compatibility information.
2.An active Uconnect®Access trial or paid subscription. Press the “Apps” button on
the lower right hand corner of the touchscreen to begin the registration process.
3. Accept the “Allow MAP” profile request on your smart phone. (Please refer to
device manufacturer instructions for details).
To Send A Text Message:
1. Push the Uconnect®Phone Buttonon the steering wheel.
2. Wait for the beep.
3. Say “Text.”
4. Uconnect®will prompt you “Say the phone number, or full name and phone type
of the contact you want to send a message to.”
5. Wait for the beep and say a contact that is in your phonebook, or a mobile phone
number that you would like to send the message to.
ELECTRONICS
82
Page 99 of 244
Media
Uconnect®offers connections via USB, SD, Bluetooth®and auxiliary ports(If Equipped). Voice operation is only available for connected USB and iPod®
devices. (Remote CD player optional and not available on all vehicles.)
Push the VR button. After the beep, say one of the following commands andfollow the prompts to switch your media source or choose an artist.
•Change sourceto Bluetooth®
•Change sourceto iPod®
•Change sourceto USB
•Play artistBeethoven;Play albumGreatest Hits;Play songMoonlight Sonata;Play
genreClassical
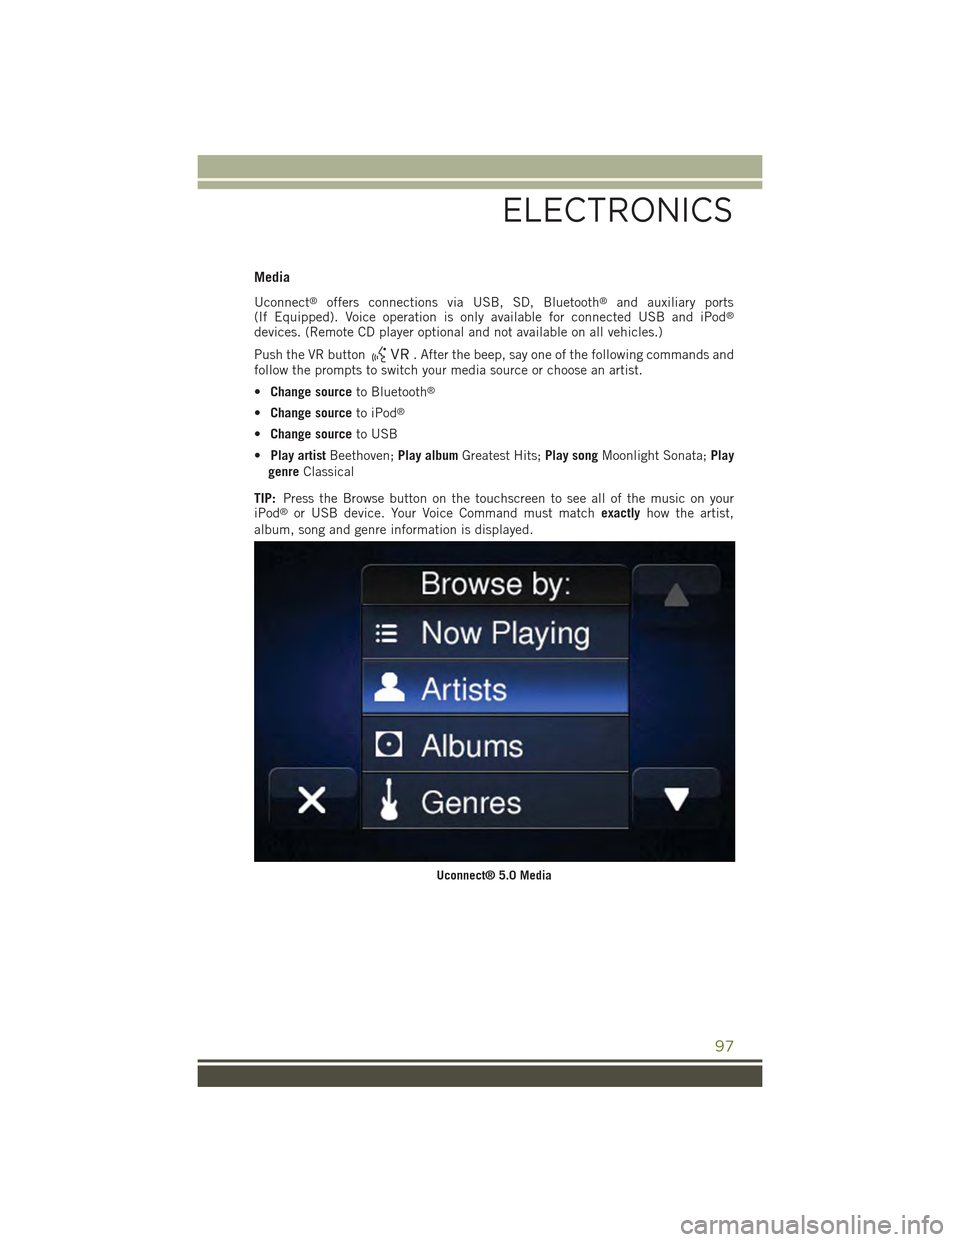
TIP:Press the Browse button on the touchscreen to see all of the music on youriPod®or USB device. Your Voice Command must matchexactlyhow the artist,
album, song and genre information is displayed.
Uconnect® 5.0 Media
ELECTRONICS
97
Page 123 of 244
Media
Uconnect®offers connections via USB, SD, Bluetooth®and auxiliary ports
(If Equipped). Voice operation is only available for connected USB and iPod®
devices. (Remote CD player optional and not available on all vehicles.)
Push the VR button. After the beep, say one of the following commands and
follow the prompts to switch your media source or choose an artist.
•Change sourceto Bluetooth®
•Change sourceto iPod®
•Change sourceto USB
•Play artistBeethoven;Play albumGreatest Hits;Play songMoonlight Sonata;Play
genreClassical
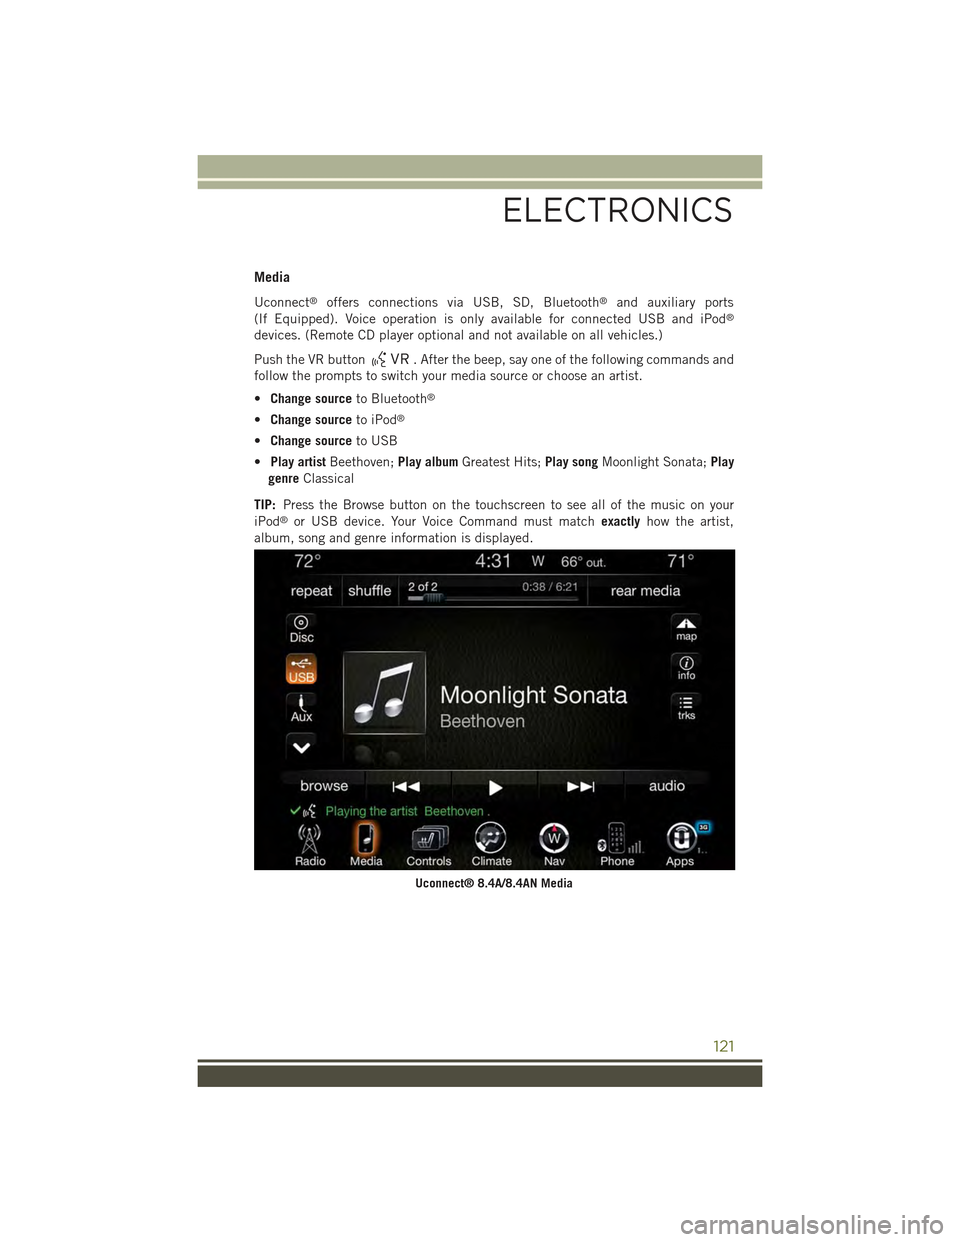
TIP:Press the Browse button on the touchscreen to see all of the music on your
iPod®or USB device. Your Voice Command must matchexactlyhow the artist,
album, song and genre information is displayed.
Uconnect® 8.4A/8.4AN Media
ELECTRONICS
121
Page 128 of 244
Uconnect® Access — If Equipped (8.4A/8.4AN)
An included trial and/or subscription is required to take advantage of the Uconnect®
Access services in the next section of this guide. To register with Uconnect®Access,
press the “Apps” button on the 8.4-inch touchscreen to get started. Detailed
registration instructions can be found on the next page.
*Uconnect®Access is available only on equipped vehicles purchased within the
continental United States, Alaska and Hawaii. Services can only be used where
coverage is available; see coverage map for details.
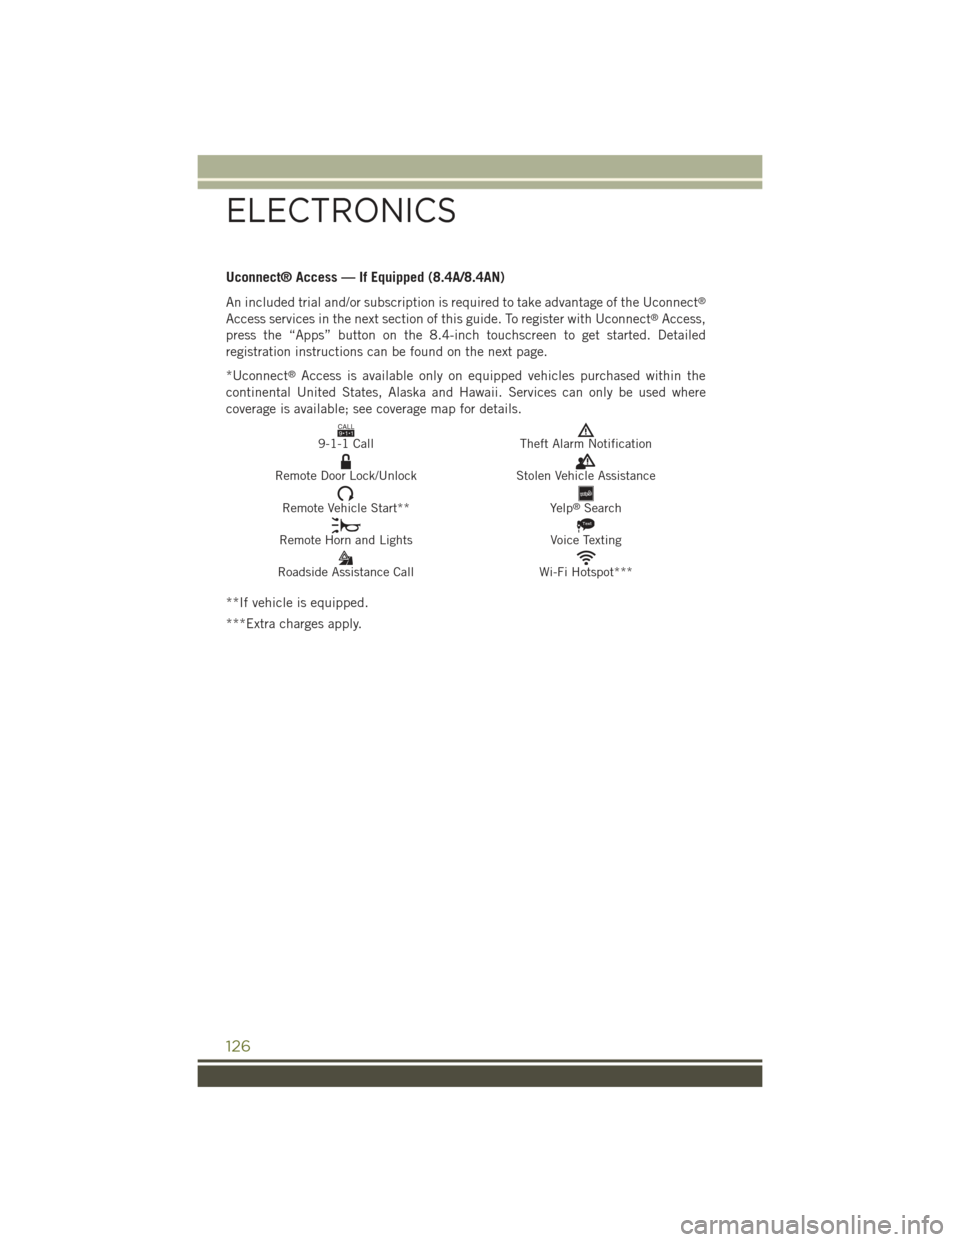
CALL9119-1-1 CallTheft Alarm Notification
Remote Door Lock/UnlockStolen Vehicle Assistance
Remote Vehicle Start**Yelp®Search
Remote Horn and Lights
Text
Voice Texting
Roadside Assistance CallWi-Fi Hotspot***
**If vehicle is equipped.
***Extra charges apply.
ELECTRONICS
126
Page 155 of 244
PROGRAMMABLE FEATURES
Uconnect® Customer Programmable Features
The Uconnect®system allows you to access Customer Programmable feature
settings such as Display, Clock, Safety & Driving Assistance, Lights, Doors & Locks,
Auto-On Comfort & Remote Start, Engine Off Operation, Compass Settings, Audio,
Trailer Brake, Phone/Bluetooth®, SiriusXM Setup and System Information through
buttons on the touchscreen.
• Press the SETTINGS button (Uconnect®5.0), or press the “Apps” button
(Uconnect®8.4) located near the bottom of the touchscreen, then press the
“Settings” button on the touchscreen to access the Settings screen. When making
a selection, scroll up or down until the preferred setting is highlighted, then press
and release the preferred setting until a check-mark appears next to the setting,
showing that setting has been selected. The following feature settings are
available:
• Display• Doors & Locks
• Safety & Driving Assistance• Engine Off Options
• Auto-On Comfort & Remote Start • Audio
• Phone/Bluetooth®• SiriusXM Setup
• Lights• Trailer Brake
• Compass (Uconnect®5.0)• System Information
• Units• Voice
• Clock
NOTE:
Depending on the vehicles options, feature settings may vary.
ELECTRONICS
153
Page 156 of 244
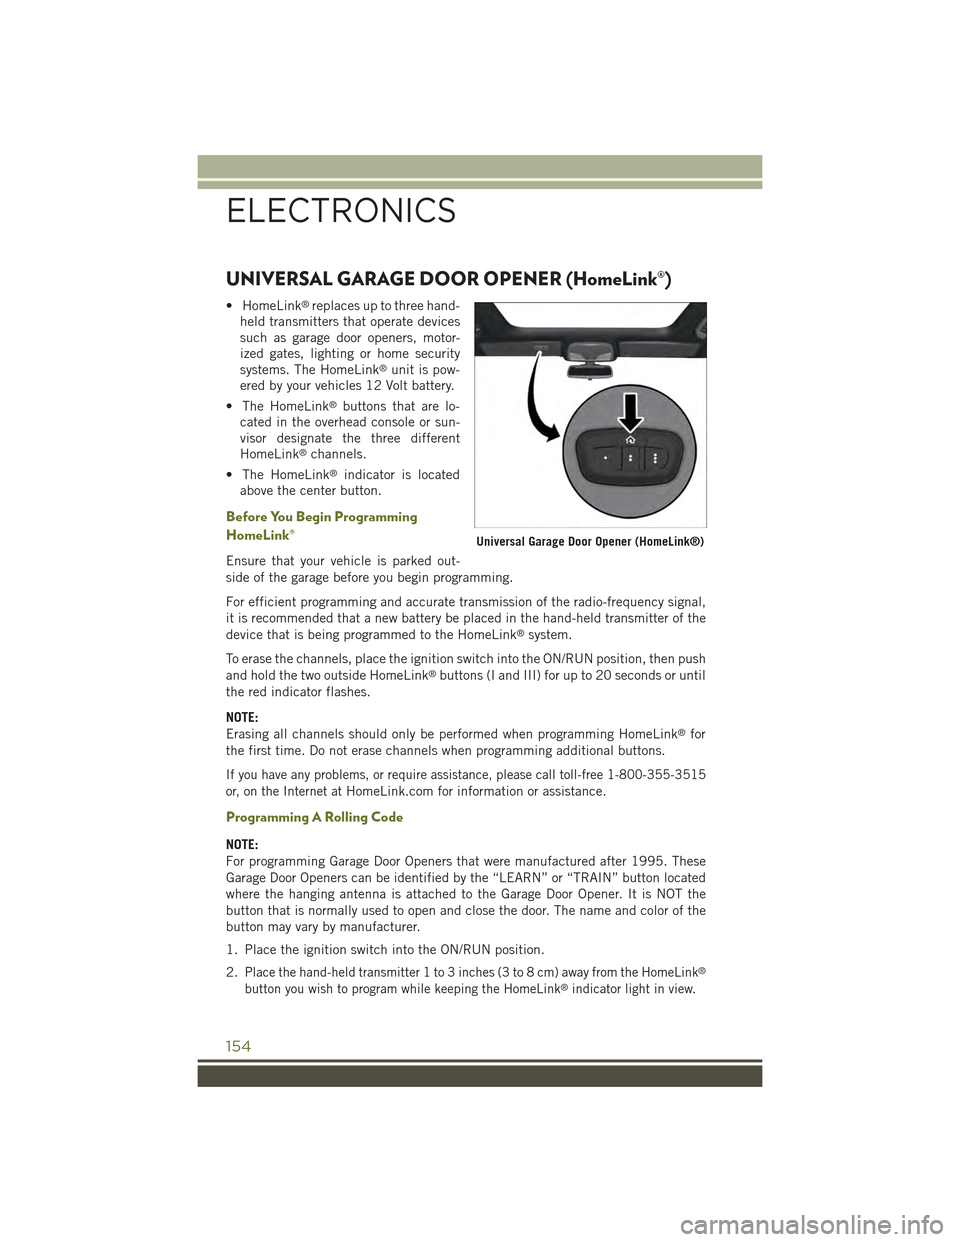
UNIVERSAL GARAGE DOOR OPENER (HomeLink®)
• HomeLink®replaces up to three hand-
held transmitters that operate devices
such as garage door openers, motor-
ized gates, lighting or home security
systems. The HomeLink®unit is pow-
ered by your vehicles 12 Volt battery.
• The HomeLink®buttons that are lo-
cated in the overhead console or sun-
visor designate the three different
HomeLink®channels.
• The HomeLink®indicator is located
above the center button.
Before You Begin Programming
HomeLink®
Ensure that your vehicle is parked out-
side of the garage before you begin programming.
For efficient programming and accurate transmission of the radio-frequency signal,
it is recommended that a new battery be placed in the hand-held transmitter of the
device that is being programmed to the HomeLink®system.
To erase the channels, place the ignition switch into the ON/RUN position, then push
and hold the two outside HomeLink®buttons (I and III) for up to 20 seconds or until
the red indicator flashes.
NOTE:
Erasing all channels should only be performed when programming HomeLink®for
the first time. Do not erase channels when programming additional buttons.
If you have any problems, or require assistance, please call toll-free 1-800-355-3515
or, on the Internet atHomeLink.com for information or assistance.
Programming A Rolling Code
NOTE:
For programming Garage Door Openers that were manufactured after 1995. These
Garage Door Openers can be identified by the “LEARN” or “TRAIN” button located
where the hanging antenna is attached to the Garage Door Opener. It is NOT the
button that is normally used to open and close the door. The name and color of the
button may vary by manufacturer.
1. Place the ignition switch into the ON/RUN position.
2.Place the hand-held transmitter 1 to 3 inches (3 to 8 cm) away from the HomeLink®
button you wish to program while keeping the HomeLink®indicator light in view.
Universal Garage Door Opener (HomeLink®)
ELECTRONICS
154
Page 157 of 244
3. Push and hold the HomeLink®button you want to program while you push and
hold the hand-held transmitter button.
4. Continue to hold both buttons and observe the indicator light. The HomeLink®
indicator will flash slowly and then rapidly after HomeLink®has received the
frequency signal from the hand-held transmitter. Release both buttons after the
indicator light changes from slow to rapid.
5. At the garage door opener motor (in the garage), locate the “LEARN” or
“TRAINING” button. This can usually be found where the hanging antenna wire
is attached to the garage door opener motor. Firmly push and release the
“LEARN” or “TRAINING” button.
NOTE:
You have 30 seconds in which to initiate the next step after the LEARN button has
been pushed.
6. Return to the vehicle and push the programmed HomeLink®button twice
(holding the button for two seconds each time). If the device is plugged in and
activates, programming is complete.
NOTE:
If the device does not activate, push the button a third time (for two seconds) to
complete the training.
7. To program the remaining two HomeLink®buttons, repeat each step for each
remaining button. DO NOT erase the channels.
Programming A Non-Rolling Code
NOTE:
For programming Garage Door Openers manufactured before 1995.
1. Turn the ignition switch to the ON/RUN position.
2. Place the hand-held transmitter 1 to 3 inches (3 to 8 cm) away from the
HomeLink®button you wish to program while keeping the HomeLink®indicator
light in view.
3. Push and hold the HomeLink®button you want to program while you push and
hold the hand-held transmitter button.
4. Continue to hold both buttons and observe the indicator light. The HomeLink®
indicator will flash slowly and then rapidly after HomeLink®has received the
frequency signal from the hand-held transmitter. Release both buttons after the
indicator light changes from slow to rapid.
5. Push and hold the programmed HomeLink®button and observe the indicator
light. If the indicator light stays on constantly, programming is complete and the
garage door (or device) should activate when the HomeLink®button is pushed.
6. To program the two remaining HomeLink®buttons, repeat each step for each
remaining button. DO NOT erase the channels.
ELECTRONICS
155
Page 158 of 244
Using HomeLink®
To operate, push and release the programmed HomeLink®button. Activation will now
occur for the programmed device (i.e., garage door opener, gate operator, security
system, entry door lock, home/office lighting, etc.,). The hand-held transmitter of the
device may also be used at any time.
WARNING!
• Your motorized door or gate will open and close while you are programming the
universal transceiver. Do not program the transceiver if people or pets are in the
path of the door or gate.
• Do not run your vehicle in a closed garage or confined area while programming
the transceiver. Exhaust gas from your vehicle contains Carbon Monoxide (CO)
which is odorless and colorless. Carbon Monoxide is poisonous when inhaled
and can cause you and others to be severely injured or killed.
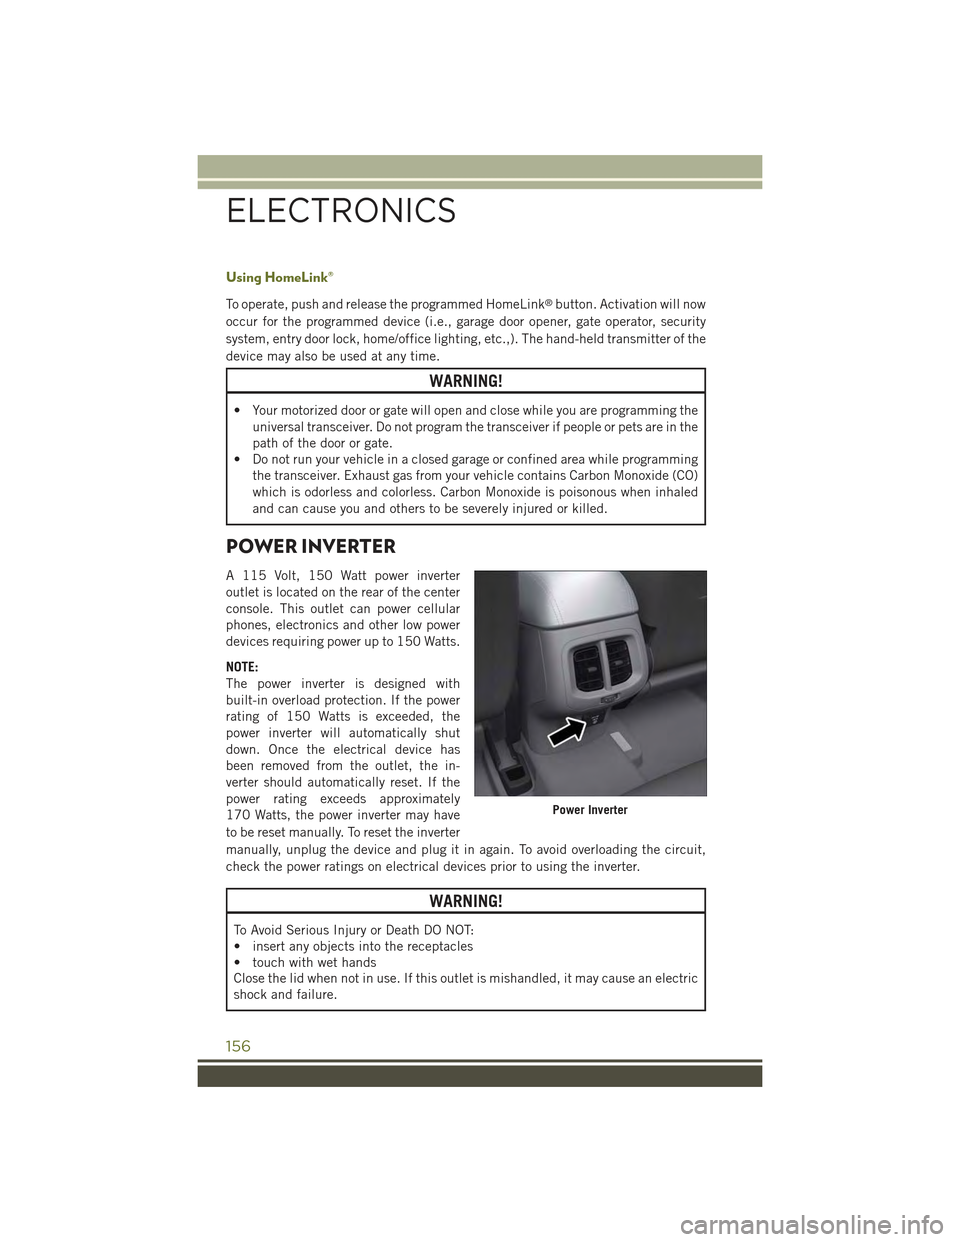
POWER INVERTER
A 115 Volt, 150 Watt power inverter
outlet is located on the rear of the center
console. This outlet can power cellular
phones, electronics and other low power
devices requiring power up to 150 Watts.
NOTE:
The power inverter is designed with
built-in overload protection. If the power
rating of 150 Watts is exceeded, the
power inverter will automatically shut
down. Once the electrical device has
been removed from the outlet, the in-
verter should automatically reset. If the
power rating exceeds approximately
170 Watts, the power inverter may have
to be reset manually. To reset the inverter
manually, unplug the device and plug it in again. To avoid overloading the circuit,
check the power ratings on electrical devices prior to using the inverter.
WARNING!
To Avoid Serious Injury or Death DO NOT:
• insert any objects into the receptacles
• touch with wet hands
Close the lid when not in use. If this outlet is mishandled, it may cause an electric
shock and failure.
Power Inverter
ELECTRONICS
156
Page 159 of 244
POWER OUTLET
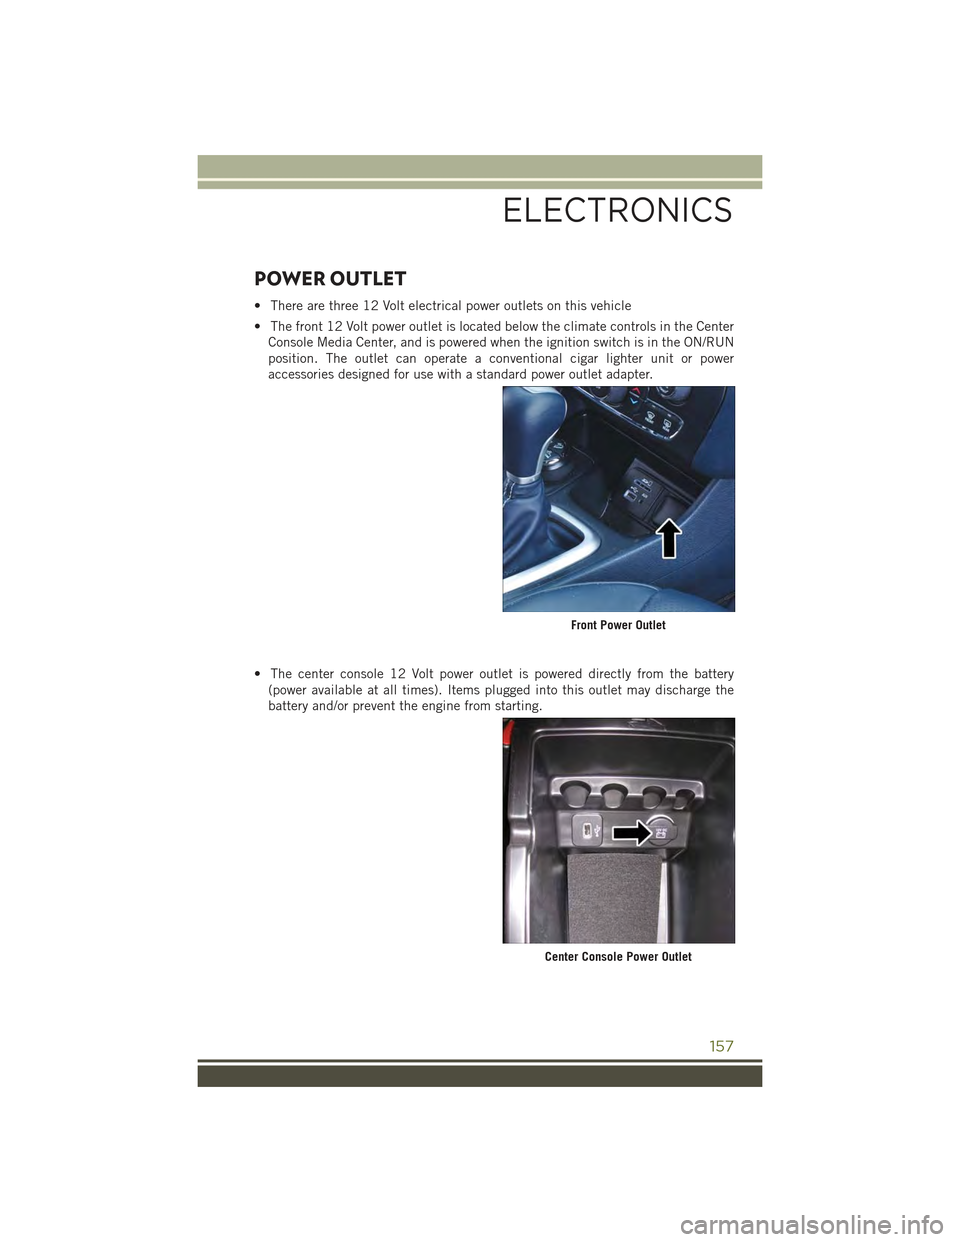
• There are three 12 Volt electrical power outlets on this vehicle
• The front 12 Volt power outlet is located below the climate controls in the Center
Console Media Center, and is powered when the ignition switch is in the ON/RUN
position. The outlet can operate a conventional cigar lighter unit or power
accessories designed for use with a standard power outlet adapter.
• The center console 12 Volt power outlet is powered directly from the battery
(power available at all times). Items plugged into this outlet may discharge the
battery and/or prevent the engine from starting.
Front Power Outlet
Center Console Power Outlet
ELECTRONICS
157
Page 160 of 244
• There is also a 12 Volt power outlet located in the rear cargo area of the vehicle .
This power outlet has power available directly from the battery (power available at
all times). Items plugged into this outlet also may discharge the battery and/or
prevent the engine from starting.
NOTE:
• Do not exceed the maximum power of 160 Watts (13 Amps) at 12 Volts. If the
160 Watt (13 Amp) power rating is exceeded, the fuse protecting the system will
need to be replaced.
• Power outlets are designed for accessory plugs only. Do not insert any other
object in the power outlet as this will damage the outlet and blow the fuse.
Improper use of the power outlet can cause damage not covered by your new
vehicle warranty.
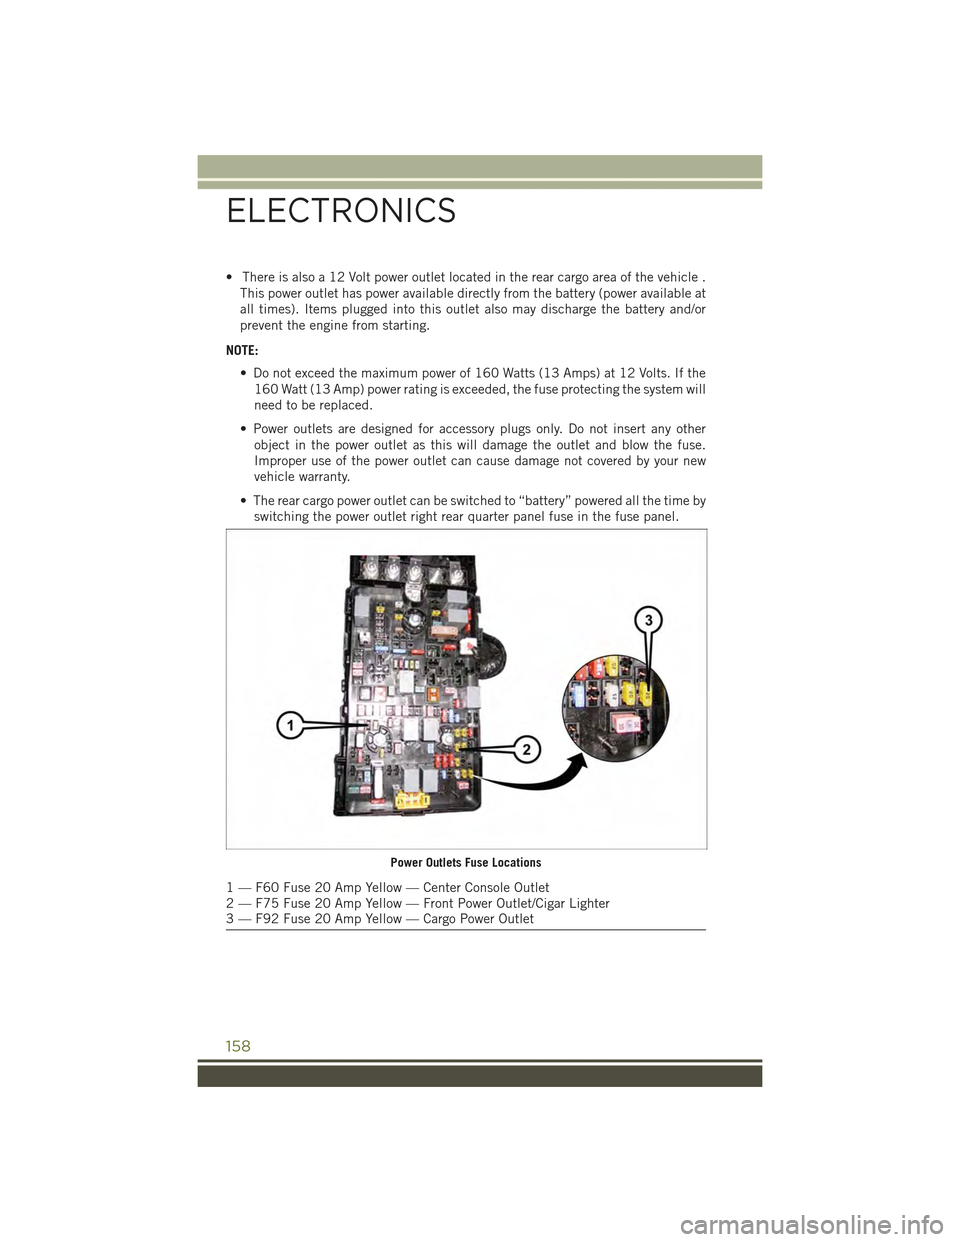
• The rear cargo power outlet can be switched to “battery” powered all the time by
switching the power outlet right rear quarter panel fuse in the fuse panel.
Power Outlets Fuse Locations
1 — F60 Fuse 20 Amp Yellow — Center Console Outlet2 — F75 Fuse 20 Amp Yellow — Front Power Outlet/Cigar Lighter3 — F92 Fuse 20 Amp Yellow — Cargo Power Outlet
ELECTRONICS
158