flat tire JEEP CHEROKEE 2016 KL / 5.G Owner's Manual
[x] Cancel search | Manufacturer: JEEP, Model Year: 2016, Model line: CHEROKEE, Model: JEEP CHEROKEE 2016 KL / 5.GPages: 236, PDF Size: 11.24 MB
Page 183 of 236
WARNING!
A loose tire or jack thrown forward in a collision or hard stop could endanger the
occupants of the vehicle. Always stow the jack parts and the spare tire in the
places provided. Have the deflated (flat) tire repaired or replaced immediately.
Preparations For Jacking
1. Park the vehicle on a firm level surface as far from the edge of the roadway aspossible. Avoid icy or slippery areas.
WARNING!
Do not attempt to change a tire on the side of the vehicle close to moving traffic,
pull far enough off the road to avoid being hit when operating the jack or changing
the wheel.
2. Turn on the Hazard Warning flasher.
3. Set the parking brake.
4. Place the shift lever into PARK.
5. Turn the ignition off to the LOCK position.
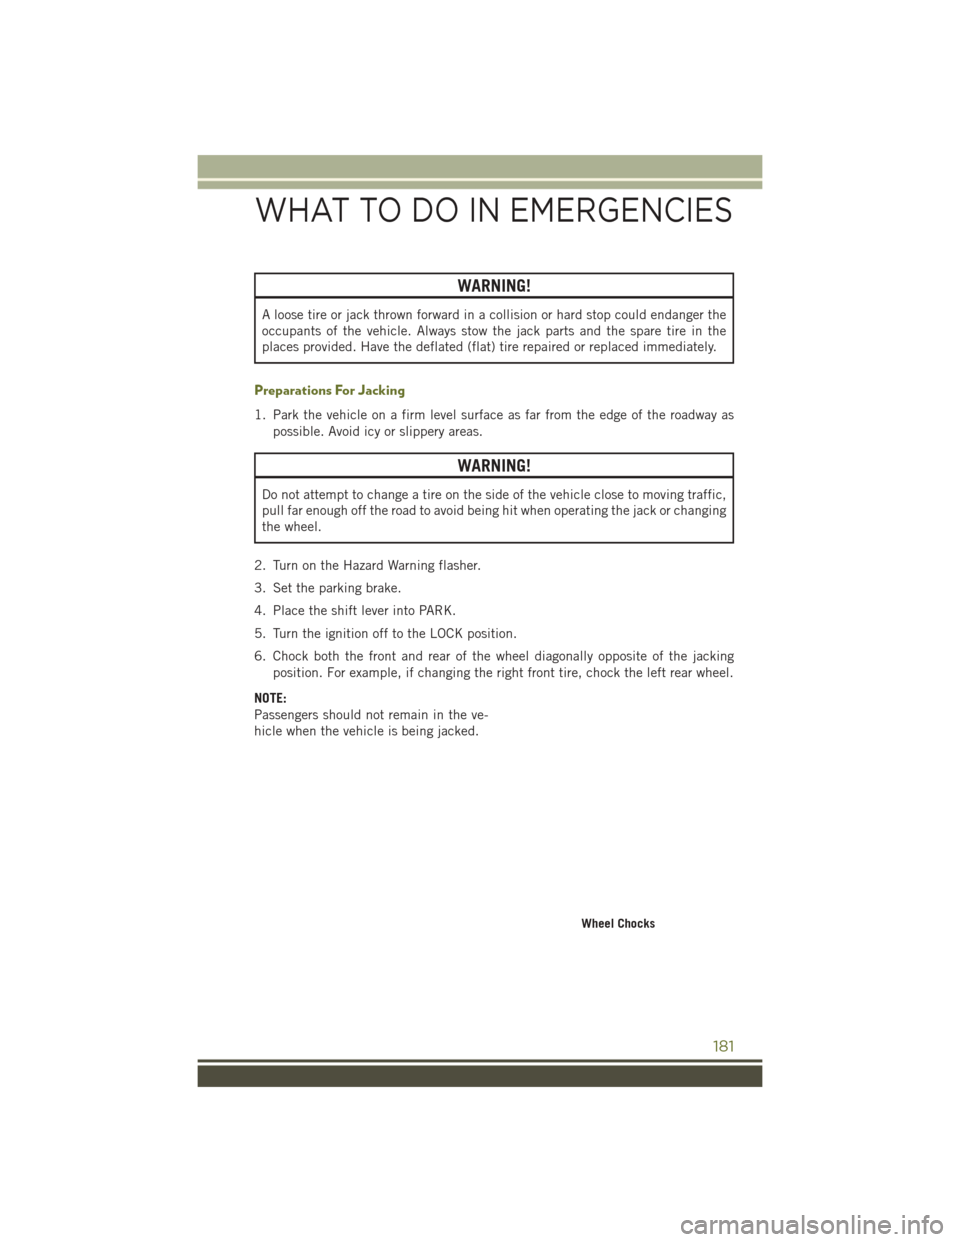
6. Chock both the front and rear of the wheel diagonally opposite of the jacking position. For example, if changing the right front tire, chock the left rear wheel.
NOTE:
Passengers should not remain in the ve-
hicle when the vehicle is being jacked.
Wheel Chocks
WHAT TO DO IN EMERGENCIES
181
Page 184 of 236
Jacking Instructions
WARNING!
Carefully follow these tire changing warnings to help prevent personal injury or
damage to your vehicle:
• Always park on a firm, level surface as far from the edge of the roadway aspossible before raising the vehicle.
• Turn on the Hazard Warning flasher.
• Chock the wheel diagonally opposite the wheel to be raised.
• Set the parking brake firmly and set the transmission in PARK.
• Never start or run the engine with the vehicle on a jack.
• Do not let anyone sit in the vehicle when it is on a jack.
• Do not get under the vehicle when it is on a jack. If you need to get under a
raised vehicle, take it to a service center where it can be raised on a lift.
• Only use the jack in the positions indicated and for lifting this vehicle during
a tire change.
• If working on or near a roadway, be extremely careful of motor traffic.
• To assure that spare tires, flat or inflated, are securely stowed, spares must be
stowed with the valve stem facing the ground.
CAUTION!
Do not attempt to raise the vehicle by jacking on locations other than those
indicated in the Jacking Instructions for this vehicle.
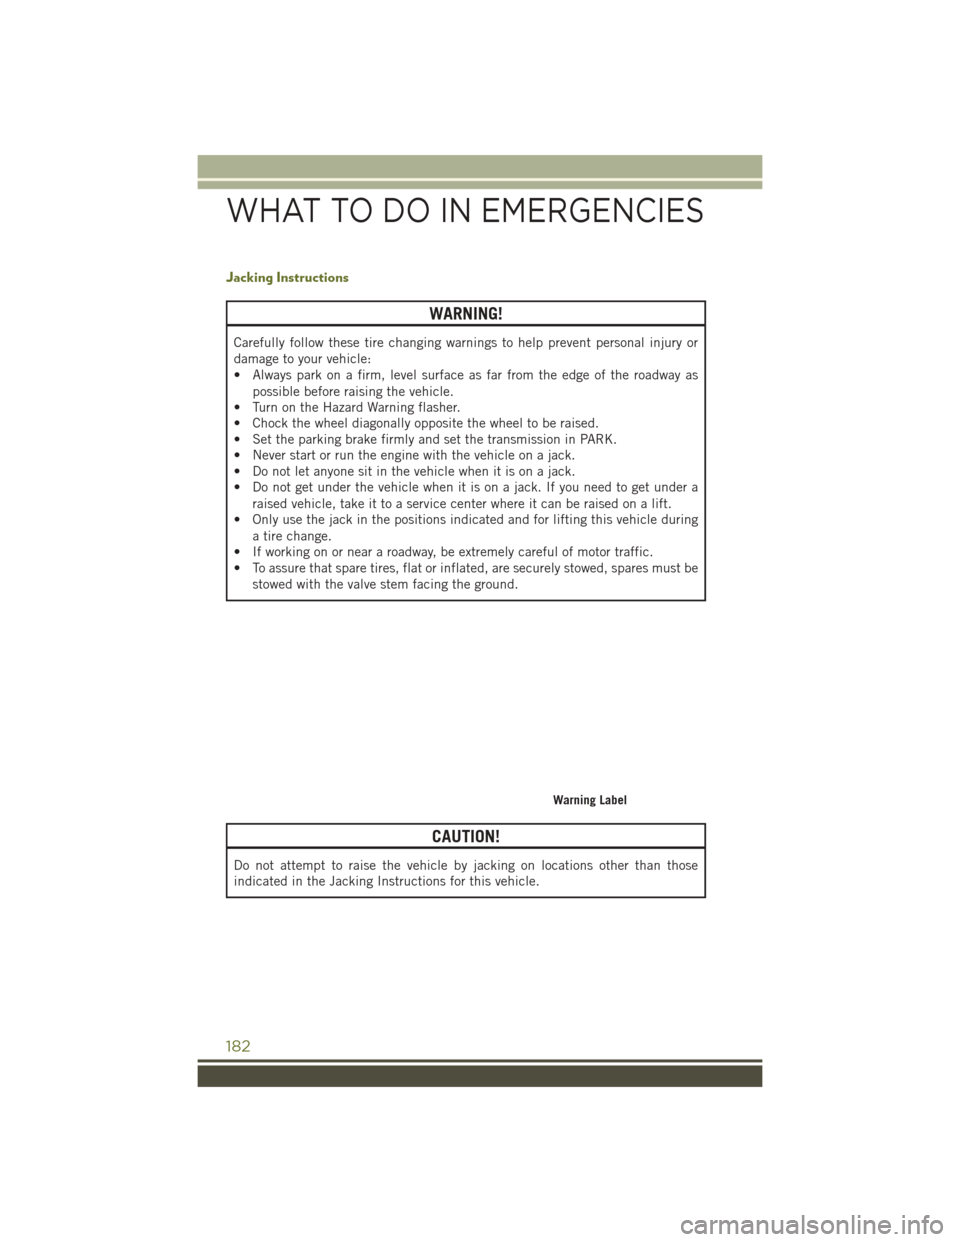
Warning Label
WHAT TO DO IN EMERGENCIES
182
Page 185 of 236
1. Remove the spare tire, jack, and wheel bolt wrench.
2. If equipped with aluminum wheels where the center cap covers the wheel bolts,use the wheel bolt wrench to pry the center cap off carefully before raising the
vehicle.
3. Before raising the vehicle, use the wheel bolt wrench to loosen, but not remove, the wheel bolts on the wheel with the flat tire. Turn the wheel bolts counterclock-
wise one turn while the wheel is still on the ground.
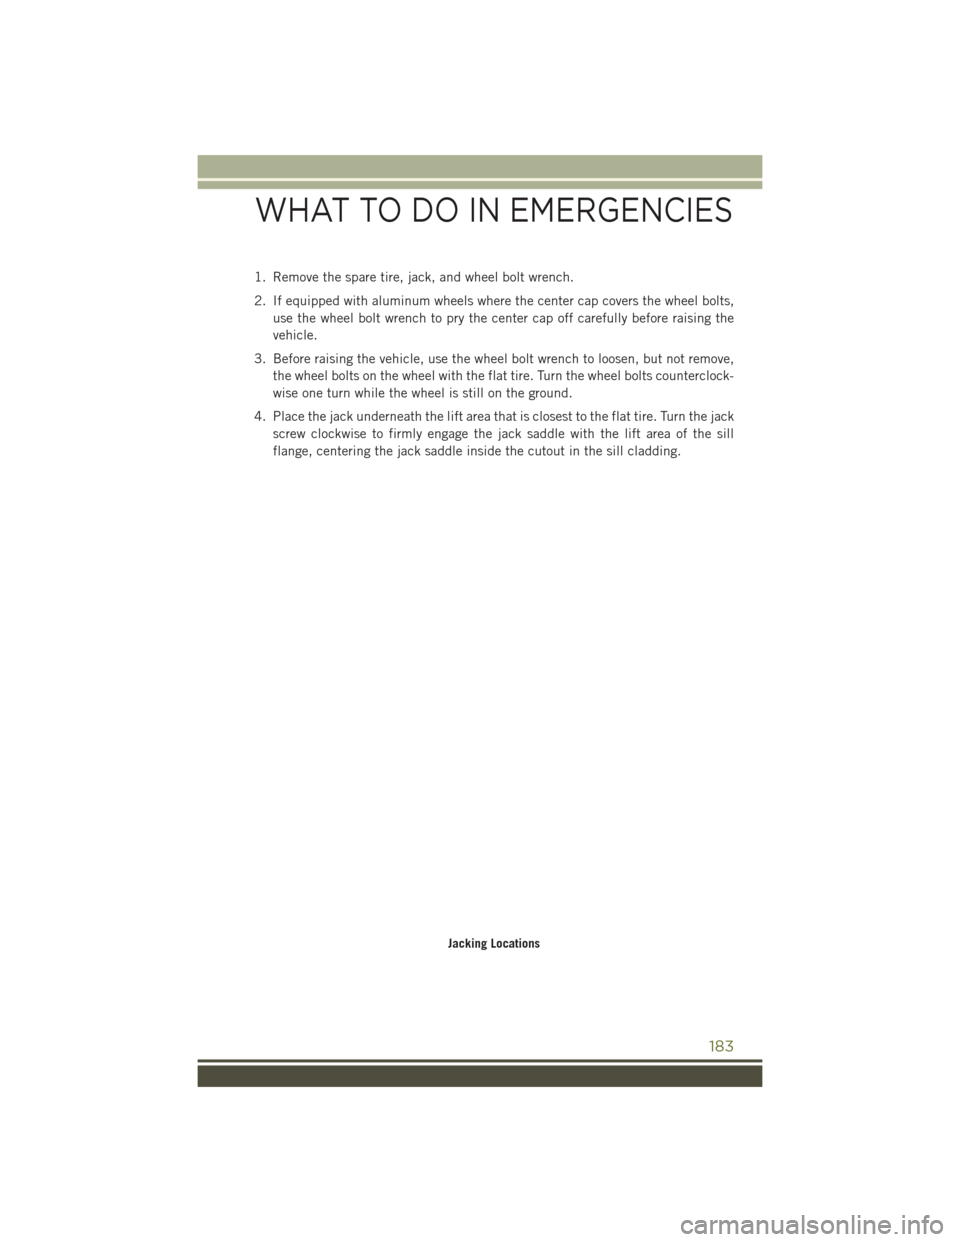
4. Place the jack underneath the lift area that is closest to the flat tire. Turn the jack screw clockwise to firmly engage the jack saddle with the lift area of the sill
flange, centering the jack saddle inside the cutout in the sill cladding.
Jacking Locations
WHAT TO DO IN EMERGENCIES
183
Page 186 of 236
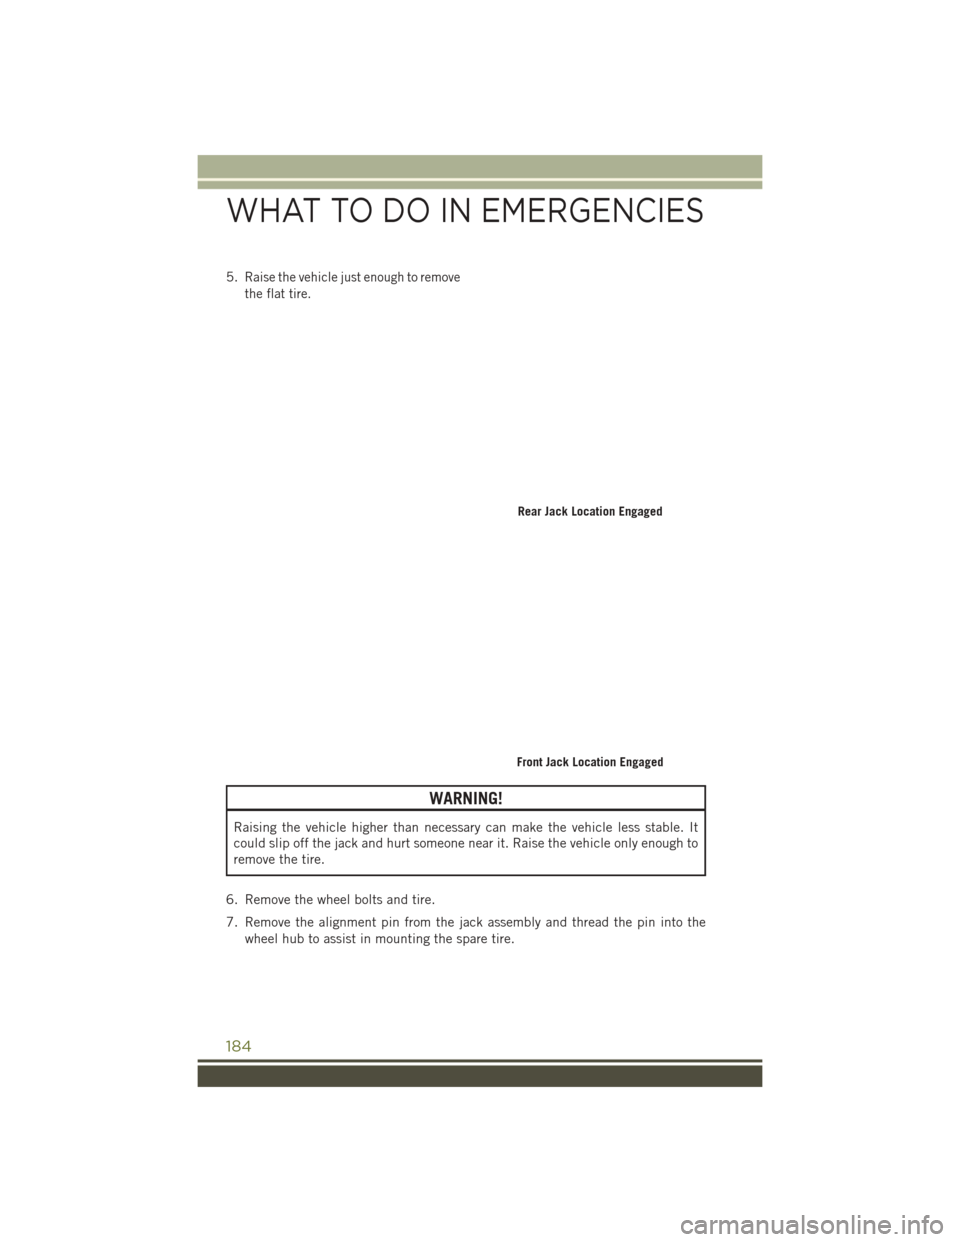
5.Raise the vehicle just enough to remove
the flat tire.
WARNING!
Raising the vehicle higher than necessary can make the vehicle less stable. It
could slip off the jack and hurt someone near it. Raise the vehicle only enough to
remove the tire.
6. Remove the wheel bolts and tire.
7. Remove the alignment pin from the jack assembly and thread the pin into the wheel hub to assist in mounting the spare tire.
Rear Jack Location Engaged
Front Jack Location Engaged
WHAT TO DO IN EMERGENCIES
184
Page 187 of 236
8. Mount the spare tire.
CAUTION!
Be sure to mount the spare tire with the valve stem facing outward. The vehicle
could be damaged if the spare tire is mounted incorrectly.
NOTE: • For vehicles so equipped, do not attempt to install a center cap or wheel coveron the compact spare.
• Refer to “Compact Spare Tire” and to “Limited-Use Spare” under “Tires— General Information” in “Starting and Operating” in the Owner's Manual on the
DVD for additional warnings, cautions, and information about the spare tire, its
use, and operation.
9. Install the wheel bolts with the threaded end of the wheel bolt toward the wheel. Lightly tighten the wheel bolts.
WARNING!
To avoid the risk of forcing the vehicle off the jack, do not fully tighten the wheel
bolts until the vehicle has been lowered. Failure to follow this warning may result
in serious injury.
10. Lower the vehicle to the ground by turning the jack handle counterclockwise.
11. Finish tightening the lug bolts. Push down on the wrench while at the end of the handle for increased leverage. Tighten the lug bolts in a star pattern until each
nut has been tightened twice. The correct wheel bolt tightness is 100 ft lb
(135 N·m). If in doubt about the correct tightness, have them checked with a
torque wrench by your authorized dealer or at a service station.
12. Securely stow the jack, tools, chocks and flat tire.
WARNING!
A loose tire or jack thrown forward in a collision or hard stop could endanger the
occupants of the vehicle. Always stow the jack parts and the spare tire in the
places provided. Have the deflated (flat) tire repaired or replaced immediately.
WHAT TO DO IN EMERGENCIES
185
Page 214 of 236
TIRES — GENERAL INFORMATION
TIRE PRESSURES
Check the inflation pressure of each tire, including the spare tire (if equipped), at
least monthly and inflate to the recommended pressure for your vehicle.
The tire pressures recommended for your vehicle are found on the “Tire and Loading
Information” label located on the driver’s side door opening or B pillar.
NOTE:
Refer to the Owner's Manual on the DVD
or the Tire Information Supplement lo-
cated in your Owners Information kit for
more information regarding tire warnings
and instructions.
WARNING!
• Overloading of your tires is dangerous. Overloading can cause tire failure,affect vehicle handling, and increase your stopping distance. Use tires of the
recommended load capacity for your vehicle. Never overload them.
• Improperly inflated tires are dangerous and can cause collisions. Under-
inflation increases tire flexing and can result in over-heating and tire failure.
Over-inflation reduces a tire’s ability to cushion shock. Objects on the road and
chuck holes can cause damage that results in tire failure. Unequal tire
pressures can cause steering problems. You could lose control of your vehicle.
Over-inflated or under-inflated tires can affect vehicle handling and can fail
suddenly, resulting in loss of vehicle control. Always drive with each tire
inflated to the recommended cold tire inflation pressure.
Tire And Loading Information Location (Example)
MAINTAINING YOUR VEHICLE
212
Page 216 of 236
Full Size Spare — If Equipped
The full size spare is for temporary emergency use only. This tire may look like the
originally equipped tire on the front or rear axle of your vehicle, but it is not. This
spare tire may have limited tread life. When the tread is worn to the tread wear
indicators, the temporary use full size spare tire needs to be replaced. Since it is not
the same as your original equipment tire, replace (or repair) the original equipment
tire and reinstall on the vehicle at the first opportunity.
Limited-Use Spare — If Equipped
The limited-use spare tire is for temporary emergency use only. This tire is identified
by a label located on the limited-use spare wheel. This label contains the driving
limitations for this spare. This tire may look like the original equipped tire on the front
or rear axle of your vehicle, but it is not. Installation of this limited-use spare tire
affects vehicle handling. Since it is not the same as your original equipment tire,
replace (or repair) the original equipment tire and reinstall on the vehicle at the first
opportunity.
WARNING!
Limited-use spares are for emergency use only. Installation of this limited-use
spare tire affects vehicle handling. With this tire, do not drive more than the speed
listed on the limit-use spare wheel. Keep inflated to the cold tire inflation
pressures listed on your Tire and Loading Information Placard located on the
driver’s side B-Pillar or the rear edge of the driver’s side door. Replace (or repair)
the original equipment tire at the first opportunity and reinstall it on your vehicle.
Failure to do so could result in loss of vehicle control.
WHEEL AND WHEEL TRIM CARE
All wheels and wheel trim, especially aluminum and chrome plated wheels, should
be cleaned regularly with a mild soap and water to prevent corrosion.
To remove heavy soil and/or excessive brake dust, use MOPAR Wheel Cleaner or
equivalent or select a non-abrasive, non-acidic cleaner.
CAUTION!
Do not use scouring pads, steel wool, a bristle brush, or metal polishes. Do not use
oven cleaner. These products may damage the wheel's protective finish. Avoid
automatic car washes that use acidic solutions or harsh brushes that may damage
the wheel's protective finish. Only MOPAR Wheel Cleaner or equivalent is
recommended.
MAINTAINING YOUR VEHICLE
214
Page 221 of 236
FREQUENTLY ASKED QUESTIONS
GETTING STARTED
How do I install my LATCH Equipped Child Seat? pg. 27
How do I program my Front Seat Memory? pg. 33
ELECTRONICS
Which radio is in my vehicle?
• Uconnect 5.0 pg. 85
• Uconnect 8.4A/8.4AN pg. 97
How do I activate the Audio Jack?
• Uconnect 5.0 pg. 89
• Uconnect 8.4A/8.4AN pg. 104
How do I set the clock on my radio?
• Uconnect 5.0 pg. 85
• Uconnect 8.4A/8.4AN pg. 97
How do I use the Navigation feature?
• Uconnect 8.4A/8.4AN pg. 107
How do I configure my Universal Garage Door Opener (HomeLink)? pg. 144
How do I pair my cell phone via Bluetooth with the Uconnect Hands-Free Voice
Activation System? pg. 131
How do I improve the Bluetooth performance of my Uconnect System? pg. 140
OFF-ROAD CAPABILITIES
How do I shift into different four-wheel drive selections? pg. 153
UTILITY
How do I know how much I can tow with my Jeep Cherokee? pg. 158
WHAT TO DO IN EMERGENCIES
What do I do if my TPMS warning light is blinking? pg. 164
How do I change a flat tire? pg. 180
How do I Jump-Start my vehicle? pg. 186
MAINTAINING YOUR VEHICLE
Where is my Fuse Block located? pg. 204
What type of oil do I use? pg. 198
How often should I change my engine’s oil? pg. 200
What should my tire pressure be set at? pg. 212
FAQ’s
219
Page 222 of 236
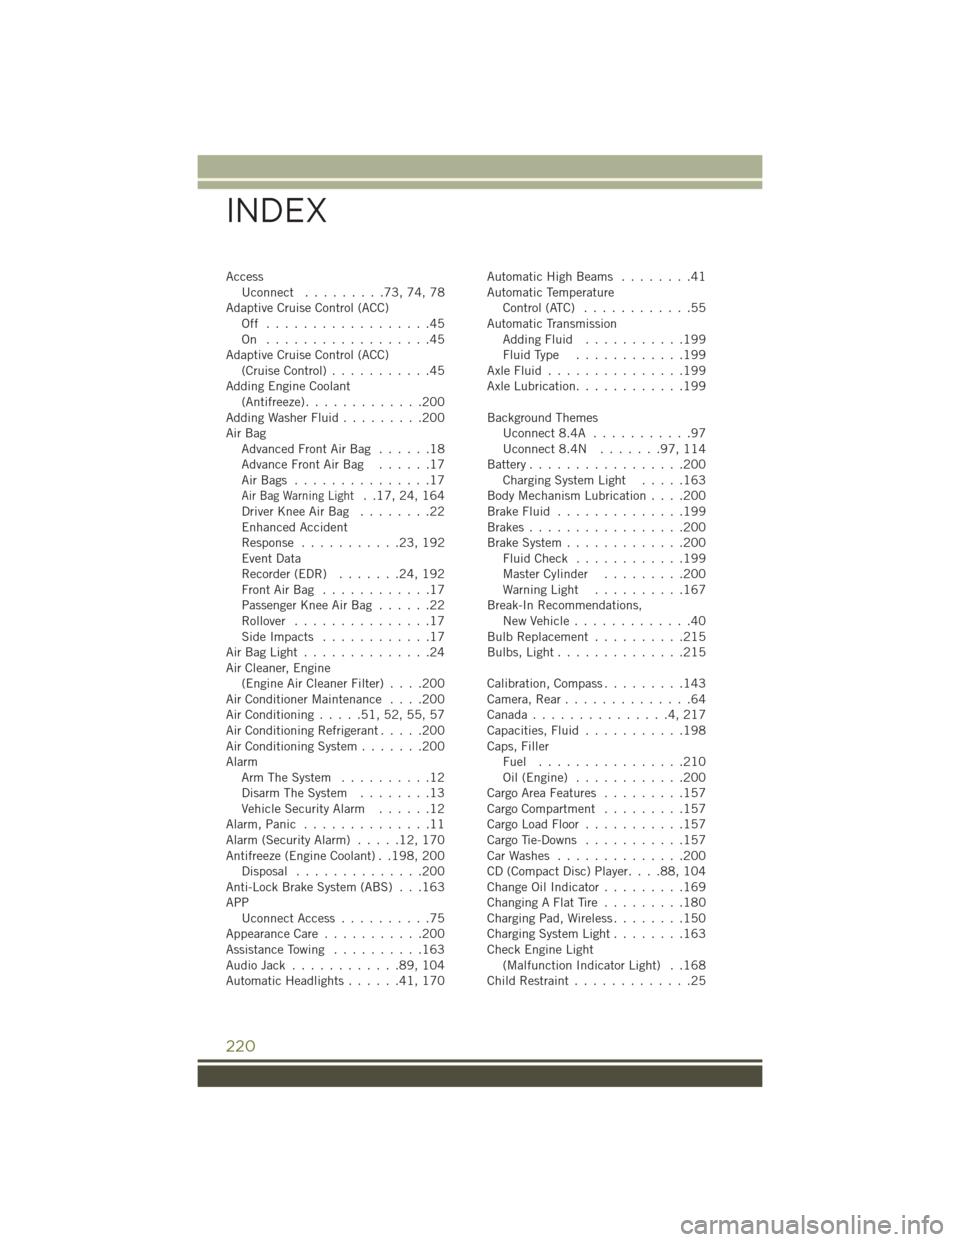
AccessUconnect .........73,74,78
Adaptive Cruise Control (ACC) Off ..................45
On ..................45
Adaptive Cruise Control (ACC) (Cruise Control) ...........45
Adding Engine Coolant (Antifreeze) .............200
Adding Washer Fluid .........200
Air Bag AdvancedFrontAirBag ......18
AdvanceFrontAirBag ......17
AirBags ...............17
Air Bag Warning Light. .17, 24, 164
Driver Knee Air Bag ........22
Enhanced Accident
Response ...........23,192
Event Data
Recorder (EDR) .......24,192
FrontAirBag ............17
Passenger Knee Air Bag ......22
Rollover ...............17
SideImpacts ............17
AirBagLight..............24
Air Cleaner, Engine (Engine Air Cleaner Filter) ....200
Air Conditioner Maintenance ....200
Air Conditioning .....51,52,55,57
Air Conditioning Refrigerant .....200
Air Conditioning System .......200
Alarm Arm The System ..........12
Disarm The System ........13
Vehicle Security Alarm ......12
Alarm, Panic ..............11
Alarm (Security Alarm) .....12,170
Antifreeze (Engine Coolant) . .198, 200 Disposal ..............200
Anti-Lock Brake System (ABS) . . .163
APP Uconnect Access ..........75
Appearance Care ...........200
Assistance Towing ..........163
Audio Jack ............89,104
Automatic Headlights ......41,170 Automatic High Beams
........41
Automatic Temperature Control (ATC) ............55
Automatic Transmission AddingFluid ...........199
FluidType ............199
AxleFluid...............199
Axle Lubrication ............199
Background Themes Uconnect8.4A ...........97
Uconnect8.4N .......97,114
Battery .................200
Charging System Light .....163
Body Mechanism Lubrication ....200
BrakeFluid ..............199
Brakes.................200
Brake System .............200
FluidCheck ............199
Master Cylinder .........200
Warning Light ..........167
Break-In Recommendations, New Vehicle .............40
Bulb Replacement ..........215
Bulbs,Light..............215
Calibration, Compass .........143
Camera, Rear ..............64
Canada...............4,217
Capacities, Fluid ...........198
Caps, Filler Fuel ................210
Oil (Engine) ............200
Cargo Area Features .........157
Cargo Compartment .........157
Cargo Load Floor ...........157
Cargo Tie-Downs ...........157
CarWashes ..............200
CD (Compact Disc) Player ....88,104
Change Oil Indicator .........169
ChangingAFlatTire .........180
Charging Pad, Wireless ........150
Charging System Light ........163
Check Engine Light (Malfunction Indicator Light) . .168
Child Restraint .............
25
INDEX
220