warning JEEP CHEROKEE 2016 KL / 5.G Owner's Manual
[x] Cancel search | Manufacturer: JEEP, Model Year: 2016, Model line: CHEROKEE, Model: JEEP CHEROKEE 2016 KL / 5.GPages: 236, PDF Size: 11.24 MB
Page 39 of 236
HEATED/VENTILATED SEATS
Front Heated Seats
If your vehicle is equipped with front heated seats, the control buttons are located
within the Uconnect system. You can gain access to the control buttons through the
climate screen or the controls screen.
• Press the heated seat button
once to turn the HI setting ON.
• Press the heated seat button
a second time to turn the LO setting ON.
• Press the heated seat button
a third time to turn the heating elements OFF.
If the HI-level setting is selected, the system will automatically switch to LO-level
after approximately 60 minutes of continuous operation. At that time, the display will
change from HI to LO, indicating the change. The LO-level setting will turn OFF
automatically after approximately 45 minutes.
NOTE:
The engine must be running for the heated seats to operate.
Vehicles Equipped With Remote Start
On models that are equipped with remote start, the heated seats can be programed
to come on during a remote start.
This feature can be programmed through the Uconnect system. Refer to “Uconnect
Settings” in “Understanding Your Instrument Panel” in the Owner’s Manual on the
DVD for further information.
WARNING!
• Persons who are unable to feel pain to the skin because of advanced age, chronic illness, diabetes, spinal cord injury, medication, alcohol use, exhaus-
tion or other physical condition must exercise care when using the seat heater.
It may cause burns even at low temperatures, especially if used for long periods
of time.
• Do not place anything on the seat or seatback that insulates against heat, such
as a blanket or cushion. This may cause the seat heater to overheat. Sitting in
a seat that has been overheated could cause serious burns due to the increased
surface temperature of the seat.
GETTING STARTED
37
Page 41 of 236
Vehicles Equipped With Remote Start
On models that are equipped with remote start, the heated steering wheel can be
programmed to come on during a remote start through the Uconnect system. Refer to
“Uconnect Settings” in “Understanding Your Instrument Panel” in the Owner’s Manual
on the DVD for further information.
WARNING!
• Persons who are unable to feel pain to the skin because of advanced age,chronic illness, diabetes, spinal cord injury, medication, alcohol use, exhaus-
tion, or other physical conditions must exercise care when using the steering
wheel heater. It may cause burns even at low temperatures, especially if used
for long periods.
• Do not place anything on the steering wheel that insulates against heat, such
as a blanket or steering wheel covers of any type and material. This may cause
the steering wheel heater to overheat.
TILT/TELESCOPING STEERING COLUMN
This feature allows you to tilt the steering column upward or downward. It also allows
you to lengthen or shorten the steering column. The tilt/telescoping lever is located
below the steering wheel at the end of the steering column.
To unlock the steering column, push the
control handle downward (toward the
floor). To tilt the steering column, move
the steering wheel upward or downward as
desired. To lengthen or shorten the steer-
ing column, pull the steering wheel out-
ward or push it inward as desired. To lock
the steering column in position, push the
control handle upward until fully engaged.
WARNING!
Do not adjust the steering column while driving. Adjusting the steering column
while driving or driving with the steering column unlocked, could cause the driver
to lose control of the vehicle. Failure to follow this warning may result in serious
injury or death.
Tilt/Telescoping Lever
GETTING STARTED
39
Page 46 of 236
Metric Speed (km/h)
• Pushing the SET+button once will result in a 1 km/h increase in set speed. Each
subsequent tap of the button results in an increase of 1 km/h.
• If the button is continually pushed, the set speed will continue to increase until the button is released, then the new set speed will be established.
To Decrease Speed
• When the Electronic Speed Control is set, you can decrease speed by pushing the SET -button.
The drivers preferred units can be selected through the instrument panel settings if
equipped. Refer to “Understanding Your Instrument Panel” in the Owner’s Manual
on the DVD for more information. The speed decrement shown is dependant on the
speed of U.S. (mph) or Metric (km/h) units:
U.S. Speed (mph)
• Pushing the SET -button once will result in a 1 mph decrease in set speed. Each
subsequent tap of the button results in a decrease of 1 mph.
• If the button is continually pushed, the set speed will continue to decrease until the button is released, then the new set speed will be established.
Metric Speed (km/h)
• Pushing the SET -button once will result in a 1 km/h decrease in set speed. Each
subsequent tap of the button results in a decrease of 1 km/h.
• If the button is continually pushed, the set speed will continue to decrease until the button is released, then the new set speed will be established.
Resume
To resume a previously selected set speed in memory, push the RES button and
release.
Cancel
• Push the CANCEL button, or apply the brakes to cancel the set speed andmaintain the set speed memory.
• Push the ON/OFF button to turn the system off and erase the set speed memory.
WARNING!
Leaving the Electronic Speed Control system on when not in use is dangerous. You
could accidentally set the system or cause it to go faster than you want. You could
lose control and have an accident. Always leave the system OFF when you are not
using it.
OPERATING YOUR VEHICLE
44
Page 50 of 236
WARNING!
Adaptive Cruise Control (ACC) is a convenience system. It is not a substitute for
active driving involvement. It is always the driver’s responsibility to be attentive of
road, traffic, and weather conditions, vehicle speed, distance to the vehicle ahead;
and, most importantly, brake operation to ensure safe operation of the vehicle
under all road conditions. Your complete attention is always required while driving
to maintain safe control of your vehicle. Failure to follow these warnings can result
in a collision and death or serious personal injury.
The ACC system:
• Does not react to pedestrians, oncoming vehicles, and stationary objects (e.g.,a stopped vehicle in a traffic jam or a disabled vehicle).
• Cannot take street, traffic, and weather conditions into account, and may be
limited upon adverse sight distance conditions.
• Does not always fully recognize complex driving conditions, which can result in
wrong or missing distance warnings.
• Will bring the vehicle to a complete stop while following a target vehicle and
hold the vehicle for approximately 3 minutes in the stop position. If the target
vehicle does not start moving within 3 minutes the parking brake will be
activated, and the ACC system will be cancelled.
You should switch off the ACC system:
• When driving in fog, heavy rain, heavy snow, sleet, heavy traffic, and complex
driving situations (i.e., in highway construction zones).
• When entering a turn lane or highway off ramp; when driving on roads that are
winding, icy, snow-covered, slippery, or have steep uphill or downhill slopes.
• When towing a trailer up or down steep slopes.
• When circumstances do not allow safe driving at a constant speed.
The Cruise Control system has two control modes:
• Adaptive Cruise Control mode for maintaining an appropriate distance between
vehicles.
• Normal (fixed speed) electronic speed control mode for cruising at a constant
preset speed. For additional information, refer to “Normal (Fixed Speed)
Cruise Control Mode” section in the Owners Manual on your DVD.
Normal (fixed speed) electronic speed control will not react to preceding vehicles.
Always be aware of the mode selected.
You can change the mode by using the Cruise Control buttons. The two control
modes function differently. Always confirm which mode is selected.
OPERATING YOUR VEHICLE
48
Page 51 of 236
FORWARD COLLISION WARNING (FCW) WITH
MITIGATION
The Forward Collision Warning (FCW) system with mitigation provides the driver with
audible warnings, visual warnings (within the EVIC/DID), and may apply a brake jerk
to warn the driver when it detects a potential frontal collision. The warnings and
limited braking are intended to provide the driver with enough time to react, avoid or
mitigate the potential collision.
• FCW monitors the information from the forward looking sensors as well as theElectronic Brake Controller (EBC), to calculate the probability of a forward
collision. When the system determines that a forward collision is probable, the
driver will be provided with audible and visual warnings and may provide a brake
jerk warning.
• If the driver does not take action based upon these progressive warnings, then the system will provide a limited level of active braking to help slow the vehicle and
mitigate the potential forward collision. If the driver reacts to the warnings by
braking and the system determines that the driver intends to avoid the collision by
braking but has not applied sufficient brake force, the system will compensate and
provide additional brake force as required.
Turning FCW ON Or OFF
NOTE:
The default status of FCW is “On,” this allows the system to warn you of a possible
collision with the vehicle in front of you when you are farther away and it applies
limited braking. This gives you the most reaction time to avoid a possible collision.
The forward collision button is on the switch panel that is located in the center of the
instrument panel.
• To turn the FCW system OFF, push the forward collision button once (LED turns on).
• To turn the FCW system back ON, push the forward collision button again (LED turns off).
Changing FCW Status
The FCW feature has two settings and can be changed within the Uconnect System
Screen:
• Far
• Near
NOTE:
The FCW and active braking settings can only be changed when the vehicle is in
PARK.
OPERATING YOUR VEHICLE
49
Page 52 of 236
Far
The default status of FCW is the “Far” setting.
The far setting provides warnings for potential collisions more distant in front of the
vehicle, allowing the driver to have the most reaction time to avoid a collision.
This setting is designed to provide early warnings per NHTSA (National Highway
Traffic Safety Administration) recommendations.
More cautious drivers that do not mind frequent warnings may prefer this setting.
NOTE:
This setting gives you the most reaction time.
Near
Changing the FCW status to the “Near” setting, allows the system to warn you of a
potential frontal collision when you are much closer.
This setting provides less reaction time than the “Far” setting, which allows for a
more dynamic driving experience.
More dynamic or aggressive drivers that want to avoid frequent warnings may prefer
this setting.
Off
Changing the FCW status to “Off” prevents the system from warning you of a possible
collision with the vehicle in front of you.
Turning Active Braking ON Or OFF
The Active Braking feature has two settings and can be changed within the Uconnect
System Screen:
•On
• Off
Changing the Active Braking status to “Off” prevents the system from providing
limited autonomous braking, or additional brake support if the driver is not braking
adequately in the event of a potential frontal collision.
NOTE:
If FCW is set to “Off,” “FCW OFF” will be displayed in the EVIC/DID.
Refer to the Owner's Manual on the DVD for further details.
WARNING!
Forward Collision Warning (FCW) is not intended to avoid a collision on its own, nor
can FCW detect every type of potential collision. The driver has the responsibility
to avoid a collision by controlling the vehicle via braking and steering. Failure to
follow this warning could lead to serious injury or death.
OPERATING YOUR VEHICLE
50
Page 62 of 236
To Manually Turn On The Stop/Start System
Push the STOP/START Off switch (located on the switch bank). The light on the
switch will turn off.
For complete details on the Stop/Start System refer to the “Stop/Start System” in the
“Starting And Operating” section located in your owners manual on the DVD for
further information.
ELECTRIC PARK BRAKE (EPB)
Your vehicle is equipped with a new Electric Park Brake System (EPB) that offers
greater convenience. The park brake switch is located in the center console.
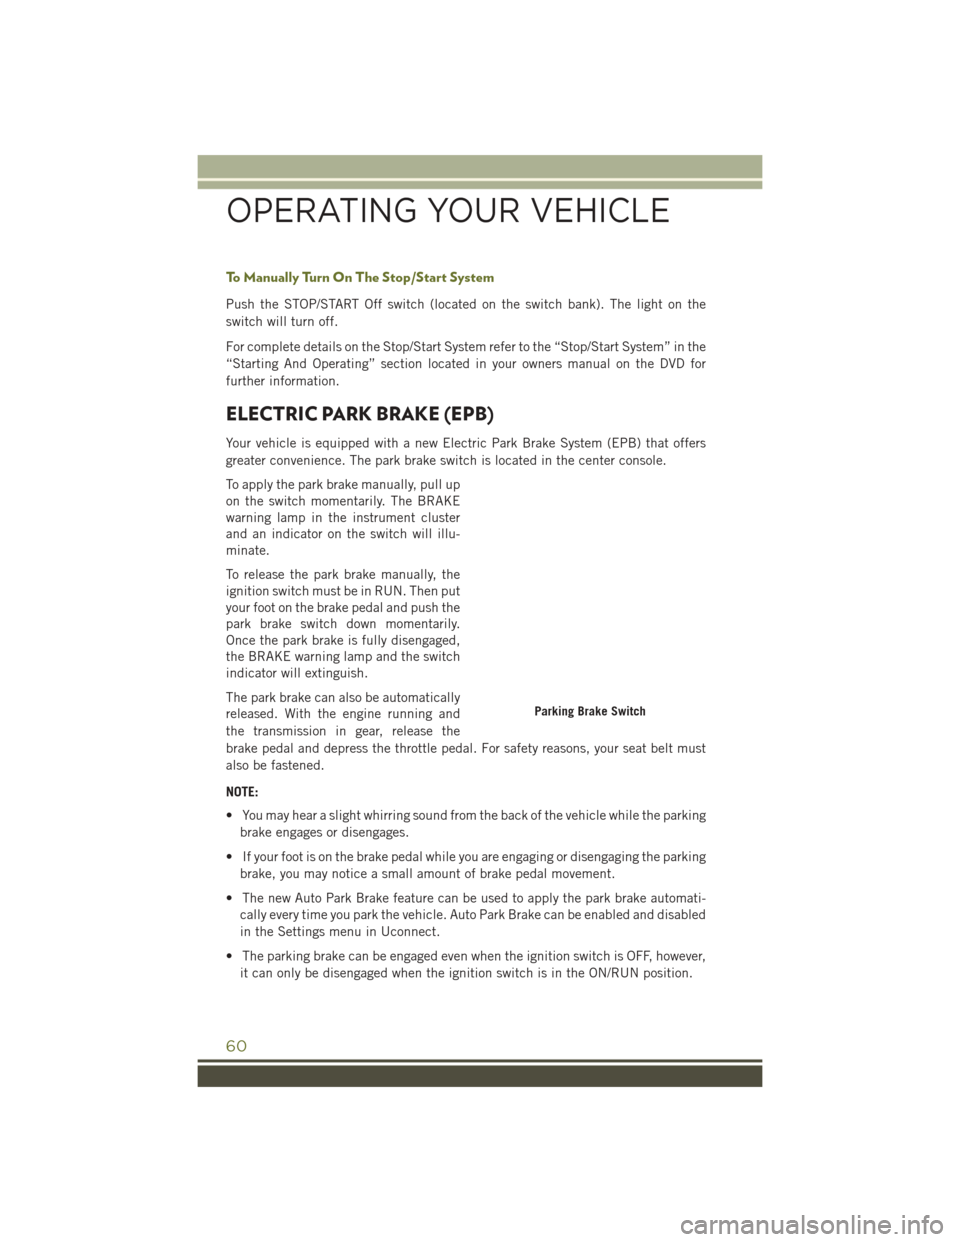
To apply the park brake manually, pull up
on the switch momentarily. The BRAKE
warning lamp in the instrument cluster
and an indicator on the switch will illu-
minate.
To release the park brake manually, the
ignition switch must be in RUN. Then put
your foot on the brake pedal and push the
park brake switch down momentarily.
Once the park brake is fully disengaged,
the BRAKE warning lamp and the switch
indicator will extinguish.
The park brake can also be automatically
released. With the engine running and
the transmission in gear, release the
brake pedal and depress the throttle pedal. For safety reasons, your seat belt must
also be fastened.
NOTE:
• You may hear a slight whirring sound from the back of the vehicle while the parkingbrake engages or disengages.
• If your foot is on the brake pedal while you are engaging or disengaging the parking brake, you may notice a small amount of brake pedal movement.
• The new Auto Park Brake feature can be used to apply the park brake automati- cally every time you park the vehicle. Auto Park Brake can be enabled and disabled
in the Settings menu in Uconnect.
• The parking brake can be engaged even when the ignition switch is OFF, however, it can only be disengaged when the ignition switch is in the ON/RUN position.
Parking Brake Switch
OPERATING YOUR VEHICLE
60
Page 63 of 236
• SafeHold a new feature that will automatically apply the park brake under certainconditions. The EPB monitors the status of the driver’s seat belt, driver’s door and
pedal positions to determine if the driver may have exited while the vehicle is still
capable of moving and will then automatically apply the park brake to prevent the
vehicle from rolling.
• The EPB fault lamp will illuminate if the EPB switch is held for longer than 20 seconds in either the released or applied position. The light will extinguish
upon releasing the switch.
• Refer to the Starting And Operating section of your vehicle’s Owner’s Manual on the DVD for further details.
CAUTION!
If the Brake System Warning Light remains on with the parking brake released, a
brake system malfunction is indicated. Have the brake system serviced by an
authorized dealer immediately.
WARNING!
• Never use the PARK position as a substitute for the parking brake. Always apply the parking brake fully when parked to guard against vehicle movement and
possible injury or damage.
• When leaving the vehicle, always make sure the ignition is in the OFF mode,
remove the Key Fob from the vehicle, and lock your vehicle.
• Never leave children alone in a vehicle, or with access to an unlocked vehicle.
Allowing children to be in a vehicle unattended is dangerous for a number of
reasons. A child or others could be seriously or fatally injured. Children should
be warned not to touch the parking brake, brake pedal or the transmission gear
selector.
• Do not leave the Key Fob in or near the vehicle, (or in a location accessible to
children), and do not leave the ignition in the ACC or ON/RUN mode. A child
could operate power windows, other controls, or move the vehicle.
• Be sure the parking brake is fully disengaged before driving; failure to do so can
lead to brake failure and a collision.
• Always fully apply the parking brake when leaving your vehicle, or it may roll
and cause damage or injury. Also be certain to leave the transmission in PARK.
Failure to do so may allow the vehicle to roll and cause damage or injury.
•
Driving the vehicle with the parking brake engaged, or repeated use of the parking
brake to slow the vehicle may cause serious damage to the brake system.
OPERATING YOUR VEHICLE
61
Page 64 of 236
PARKSENSE
ParkSense Front And Rear Park Assist
ParkSense can be enabled and disabled by pushing the ParkSense switch located on
the switch panel below the Uconnect display.
The six ParkSense sensors, located in
the rear fascia/bumper, monitor the area
behind the vehicle that is within the sen-
sors’ field of view. The sensors can de-
tect obstacles from approximately 12 in
(30 cm) up to 79 in (200 cm) from the
rear fascia/bumper in the horizontal di-
rection, depending on the location, type
and orientation of the obstacle.
The six ParkSense sensors, located in the
front fascia/bumper, monitor the area in
front of the vehicle that is within the
sensors’ field of view. The sensors can
detect obstacles from approximately
12 in (30 cm) up to 47 in (120 cm) from
the front fascia/bumper in the horizontal
direction, depending on the location, type and orientation of the obstacle.
When an object is detected within 2 meters behind the rear bumper while the vehicle
is in REVERSE, a warning will display in the Electronic Vehicle Information Center
(EVIC) or Driver Information Display (DID). In addition a chime will sound (when
Sound and Display is selected from the Customer Programmable Features screen of
the Uconnect System). As the vehicle moves closer to the object, the chime rate will
change from single 1/2 second tone (for rear only), to slow (for rear only), to fast,
to continuous.
Refer to your Owner's Manual on the DVD for further details.
ParkSense Switch
OPERATING YOUR VEHICLE
62
Page 65 of 236
ParkSense Active Park Assist
The ParkSense Active Park Assist system can be enabled and disabled with the ParkSense
Active Park Assist switch, located on the switch panel below the Uconnect display.
The ParkSense Active Park Assist system
is intended to assist the driver during
parallel and perpendicular parking ma-
neuvers by identifying a proper parking
space, providing audible/visual instruc-
tions, and controlling the steering wheel.
The ParkSense Active Park Assist system
is defined as “semi-automatic” since the
driver maintains control of the accelerator,
shift lever and brakes. Depending on the
driver’s parking maneuver selection, the
ParkSense Active Park Assist system is
capable of maneuvering a vehicle into a
parallel or a perpendicular parking space
on either side (i.e., driver side or passen-
ger side).
Refer to your Owner's Manual on the DVD for further details.
CAUTION!
• ParkSense is only a parking aid and it is unable to recognize every obstacle,including small obstacles. Parking curbs might be temporarily detected or not
detected at all. Obstacles located above or below the sensors will not be
detected when they are in close proximity.
• The vehicle must be driven slowly when using ParkSense in order to be able to stop in time when an obstacle is detected. It is recommended that the driver
looks over his/her shoulder when using ParkSense.
WARNING!
• Drivers must be careful when backing up even when using ParkSense. Always
check carefully behind your vehicle, look behind you, and be sure to check for
pedestrians, animals, other vehicles, obstructions, and blind spots before
backing up. You are responsible for safety and must continue to pay attention
to your surroundings. Failure to do so can result in serious injury or death.
• Before using ParkSense, it is strongly recommended that the ball mount and
hitch ball assembly is disconnected from the vehicle when the vehicle is not
used for towing. Failure to do so can result in injury or damage to vehicles or
obstacles because the hitch ball will be much closer to the obstacle than the
rear fascia when the loudspeaker sounds the continuous tone. Also, the sensors
could detect the ball mount and hitch ball assembly, depending on its size and
shape, giving a false indication that an obstacle is behind the vehicle.
ParkSense Active Park Assist Switch
OPERATING YOUR VEHICLE
63