instrument cluster JEEP CHEROKEE 2017 KL / 5.G Manual Online
[x] Cancel search | Manufacturer: JEEP, Model Year: 2017, Model line: CHEROKEE, Model: JEEP CHEROKEE 2017 KL / 5.GPages: 615, PDF Size: 5.72 MB
Page 357 of 615
LANESENSE — IF EQUIPPED
LaneSense Operation
The LaneSense system is operational at speeds above
37 mph (60 km/h) and below 112 mph (180 km/h). The
LaneSense system uses a forward looking camera to detect
lane markings and measure vehicle position within the
lane boundaries.
When both lane markings are detected and the driver
unintentionally drifts out of the lane (no turn signal
applied), the LaneSense system provides a haptic warning
in the form of torque applied to the steering wheel to
prompt the driver to remain within the lane boundaries. If
the driver continues to unintentionally drift out of the lane,
the LaneSense system provides a visual warning through
the instrument cluster display to prompt the driver to
remain within the lane boundaries.
The driver may manually override the haptic warning by
applying torque into the steering wheel at any time.When only a single lane marking is detected and the driver
unintentionally drifts across the lane marking (no turn
signal applied), the LaneSense system provides a visual
warning through the instrument cluster display to prompt
the driver to remain within the lane. When only a single
lane marking is detected, a haptic (torque) warning will not
be provided.
NOTE:
When operating conditions have been met, the
LaneSense system will monitor if the driver ’s hands are on
the steering wheel and provides an audible warning to the
driver when the driver ’s hands are not detected on the
steering wheel. The system will cancel if the driver does
not return their hands to the wheel.
6
STARTING AND OPERATING 355
Page 358 of 615
Turning LaneSense On Or Off
The default status of LaneSense is “OFF”.
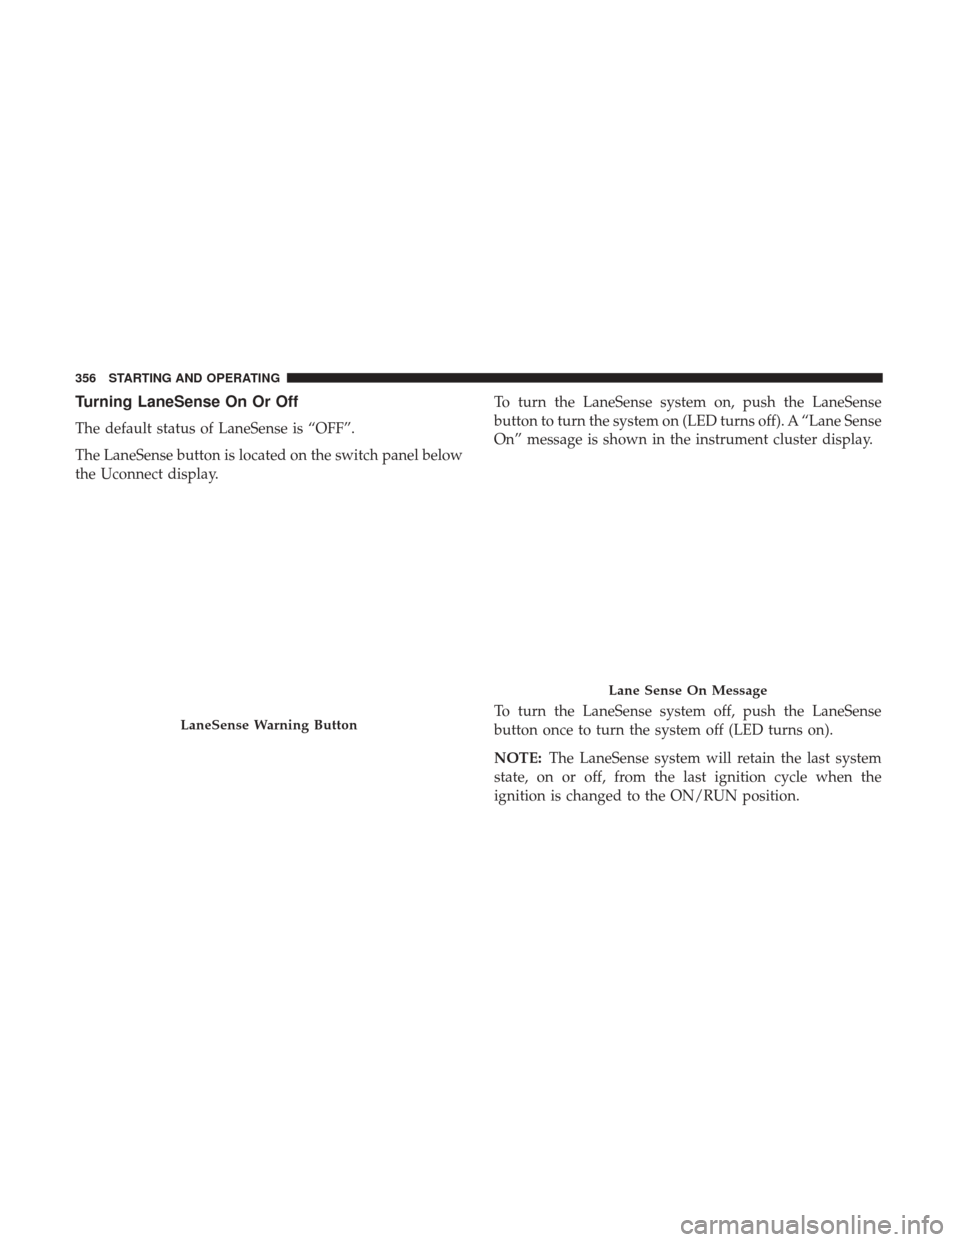
The LaneSense button is located on the switch panel below
the Uconnect display.To turn the LaneSense system on, push the LaneSense
button to turn the system on (LED turns off). A “Lane Sense
On” message is shown in the instrument cluster display.
To turn the LaneSense system off, push the LaneSense
button once to turn the system off (LED turns on).
NOTE:
The LaneSense system will retain the last system
state, on or off, from the last ignition cycle when the
ignition is changed to the ON/RUN position.
LaneSense Warning Button
Lane Sense On Message
356 STARTING AND OPERATING
Page 359 of 615
LaneSense Warning Message
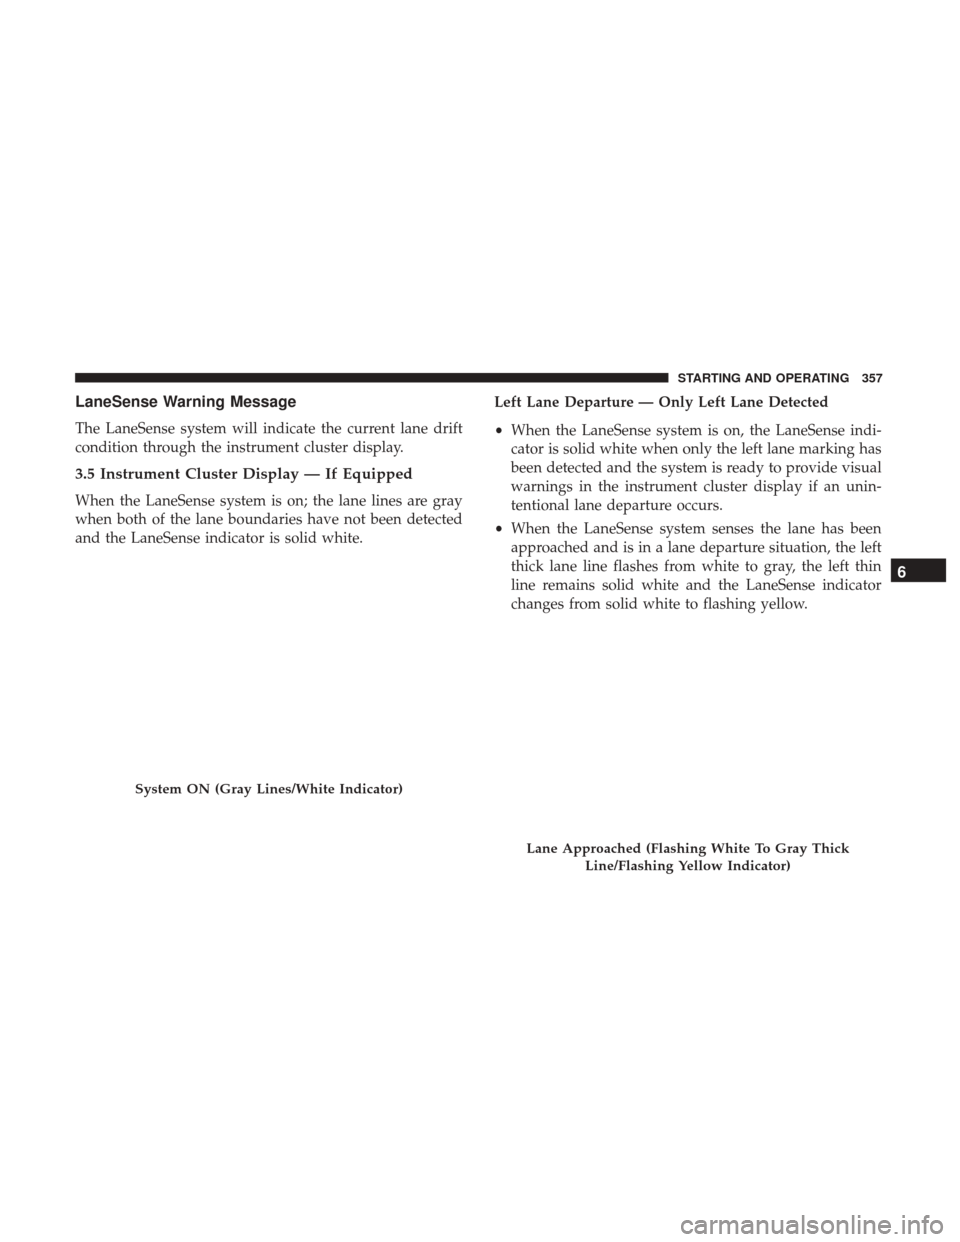
The LaneSense system will indicate the current lane drift
condition through the instrument cluster display.
3.5 Instrument Cluster Display — If Equipped
When the LaneSense system is on; the lane lines are gray
when both of the lane boundaries have not been detected
and the LaneSense indicator is solid white.Left Lane Departure — Only Left Lane Detected
•
When the LaneSense system is on, the LaneSense indi-
cator is solid white when only the left lane marking has
been detected and the system is ready to provide visual
warnings in the instrument cluster display if an unin-
tentional lane departure occurs.
• When the LaneSense system senses the lane has been
approached and is in a lane departure situation, the left
thick lane line flashes from white to gray, the left thin
line remains solid white and the LaneSense indicator
changes from solid white to flashing yellow.
System ON (Gray Lines/White Indicator)
Lane Approached (Flashing White To Gray Thick
Line/Flashing Yellow Indicator)
6
STARTING AND OPERATING 357
Page 360 of 615
NOTE:The LaneSense system operates with the similar
behavior for a right lane departure when only the right
lane marking has been detected.
Left Lane Departure — Both Lanes Detected
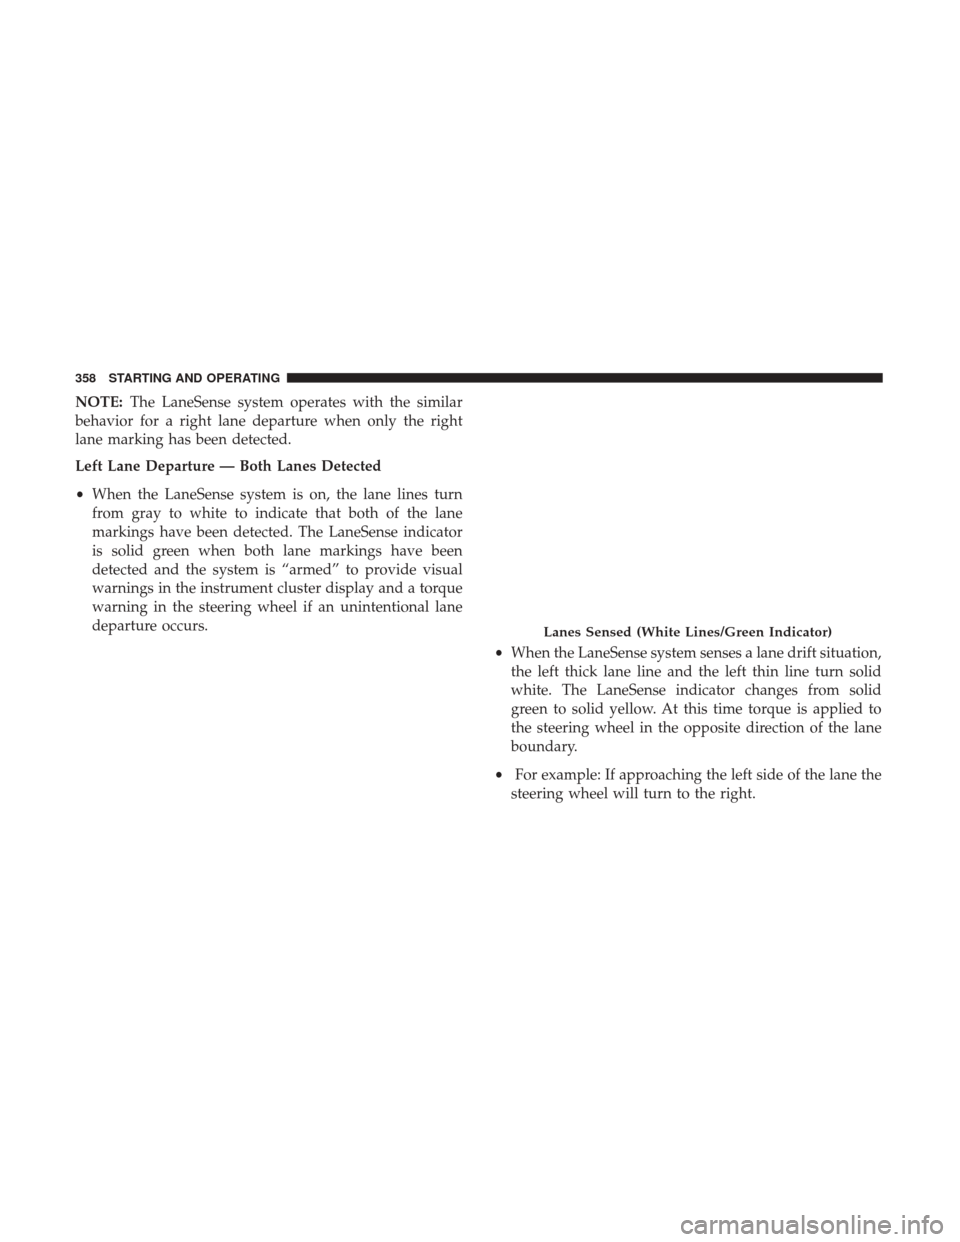
• When the LaneSense system is on, the lane lines turn
from gray to white to indicate that both of the lane
markings have been detected. The LaneSense indicator
is solid green when both lane markings have been
detected and the system is “armed” to provide visual
warnings in the instrument cluster display and a torque
warning in the steering wheel if an unintentional lane
departure occurs.
•When the LaneSense system senses a lane drift situation,
the left thick lane line and the left thin line turn solid
white. The LaneSense indicator changes from solid
green to solid yellow. At this time torque is applied to
the steering wheel in the opposite direction of the lane
boundary.
• For example: If approaching the left side of the lane the
steering wheel will turn to the right.
Lanes Sensed (White Lines/Green Indicator)
358 STARTING AND OPERATING
Page 362 of 615
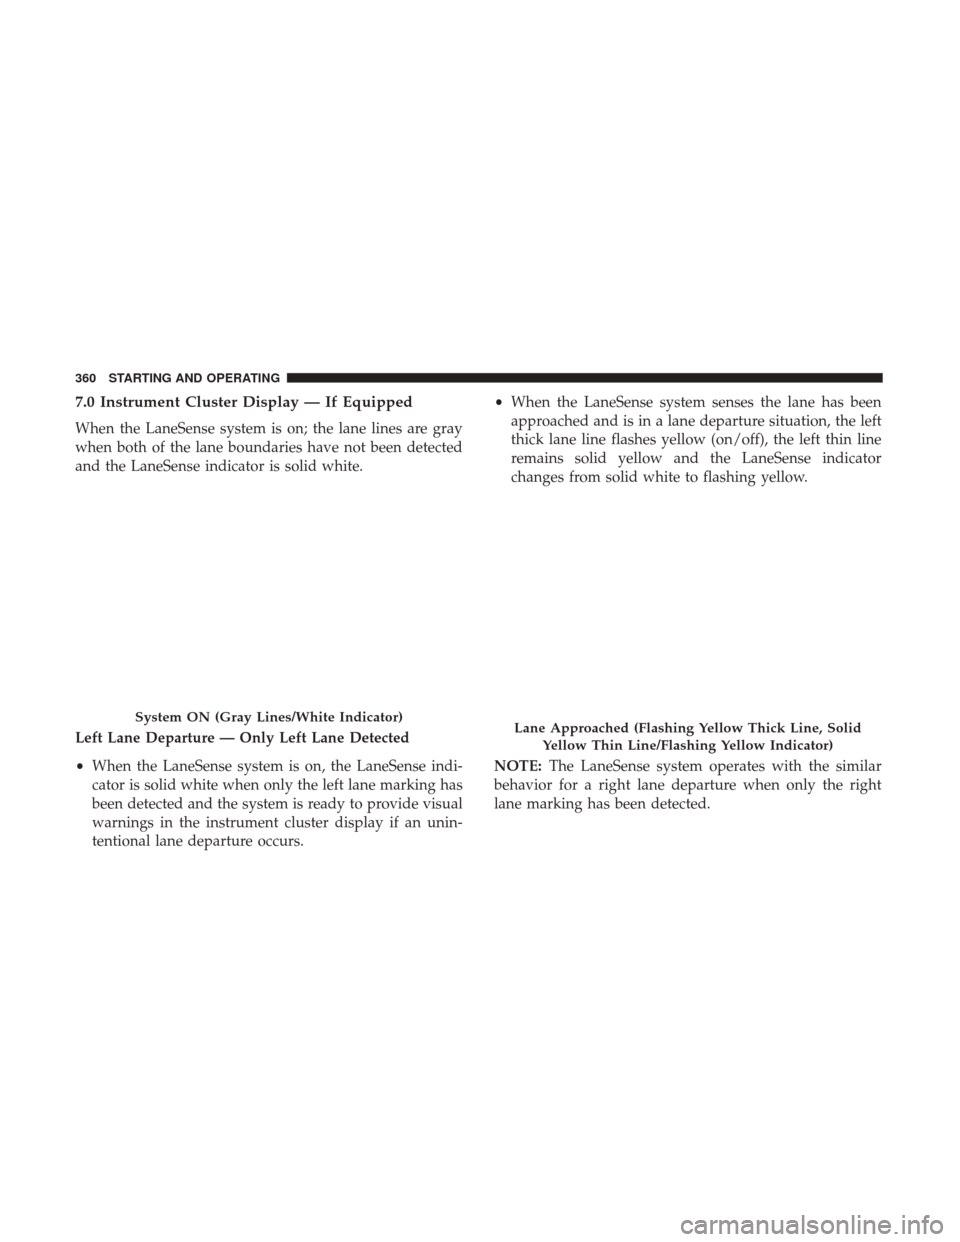
7.0 Instrument Cluster Display — If Equipped
When the LaneSense system is on; the lane lines are gray
when both of the lane boundaries have not been detected
and the LaneSense indicator is solid white.
Left Lane Departure — Only Left Lane Detected
•When the LaneSense system is on, the LaneSense indi-
cator is solid white when only the left lane marking has
been detected and the system is ready to provide visual
warnings in the instrument cluster display if an unin-
tentional lane departure occurs. •
When the LaneSense system senses the lane has been
approached and is in a lane departure situation, the left
thick lane line flashes yellow (on/off), the left thin line
remains solid yellow and the LaneSense indicator
changes from solid white to flashing yellow.
NOTE: The LaneSense system operates with the similar
behavior for a right lane departure when only the right
lane marking has been detected.
System ON (Gray Lines/White Indicator)Lane Approached (Flashing Yellow Thick Line, Solid
Yellow Thin Line/Flashing Yellow Indicator)
360 STARTING AND OPERATING
Page 363 of 615
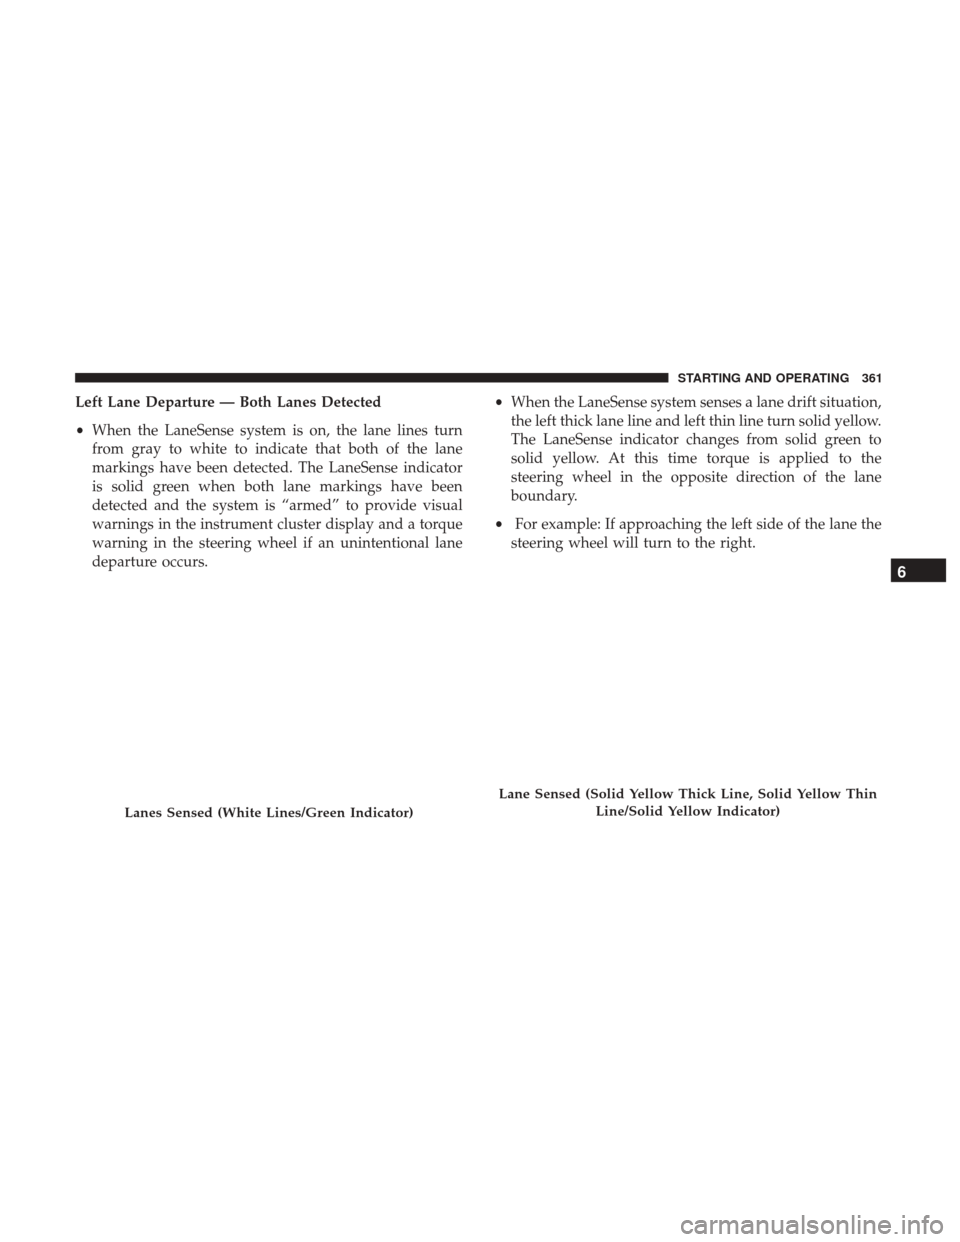
Left Lane Departure — Both Lanes Detected
•When the LaneSense system is on, the lane lines turn
from gray to white to indicate that both of the lane
markings have been detected. The LaneSense indicator
is solid green when both lane markings have been
detected and the system is “armed” to provide visual
warnings in the instrument cluster display and a torque
warning in the steering wheel if an unintentional lane
departure occurs. •
When the LaneSense system senses a lane drift situation,
the left thick lane line and left thin line turn solid yellow.
The LaneSense indicator changes from solid green to
solid yellow. At this time torque is applied to the
steering wheel in the opposite direction of the lane
boundary.
• For example: If approaching the left side of the lane the
steering wheel will turn to the right.
Lanes Sensed (White Lines/Green Indicator)
Lane Sensed (Solid Yellow Thick Line, Solid Yellow Thin
Line/Solid Yellow Indicator)
6
STARTING AND OPERATING 361
Page 410 of 615
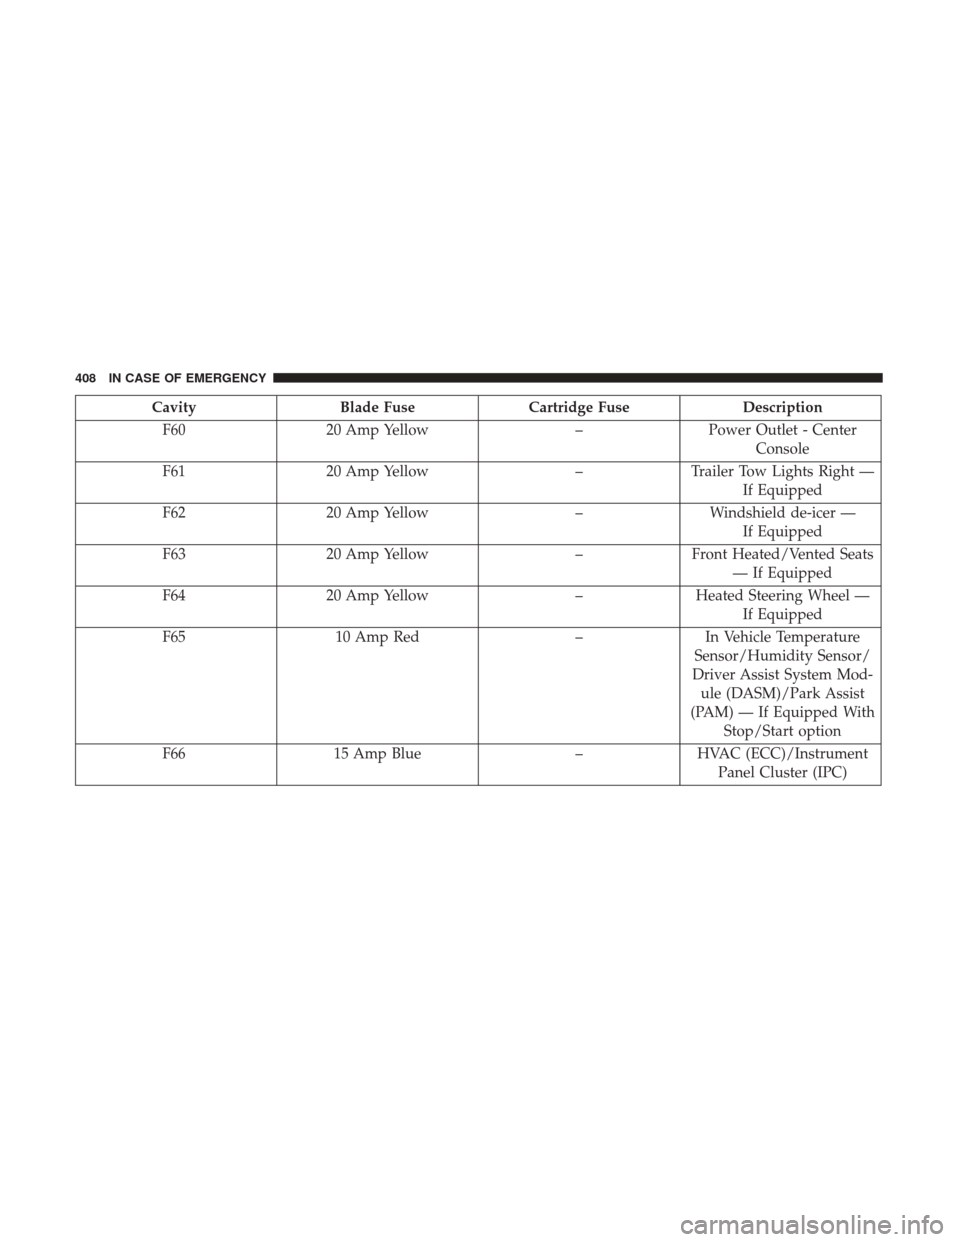
CavityBlade Fuse Cartridge Fuse Description
F60 20 Amp Yellow –Power Outlet - Center
Console
F61 20 Amp Yellow –Trailer Tow Lights Right —
If Equipped
F62 20 Amp Yellow –Windshield de-icer —
If Equipped
F63 20 Amp Yellow –Front Heated/Vented Seats
— If Equipped
F64 20 Amp Yellow –Heated Steering Wheel —
If Equipped
F65 10 Amp Red –In Vehicle Temperature
Sensor/Humidity Sensor/
Driver Assist System Mod- ule (DASM)/Park Assist
(PAM) — If Equipped With Stop/Start option
F66 15 Amp Blue –HVAC (ECC)/Instrument
Panel Cluster (IPC)
408 IN CASE OF EMERGENCY
Page 412 of 615
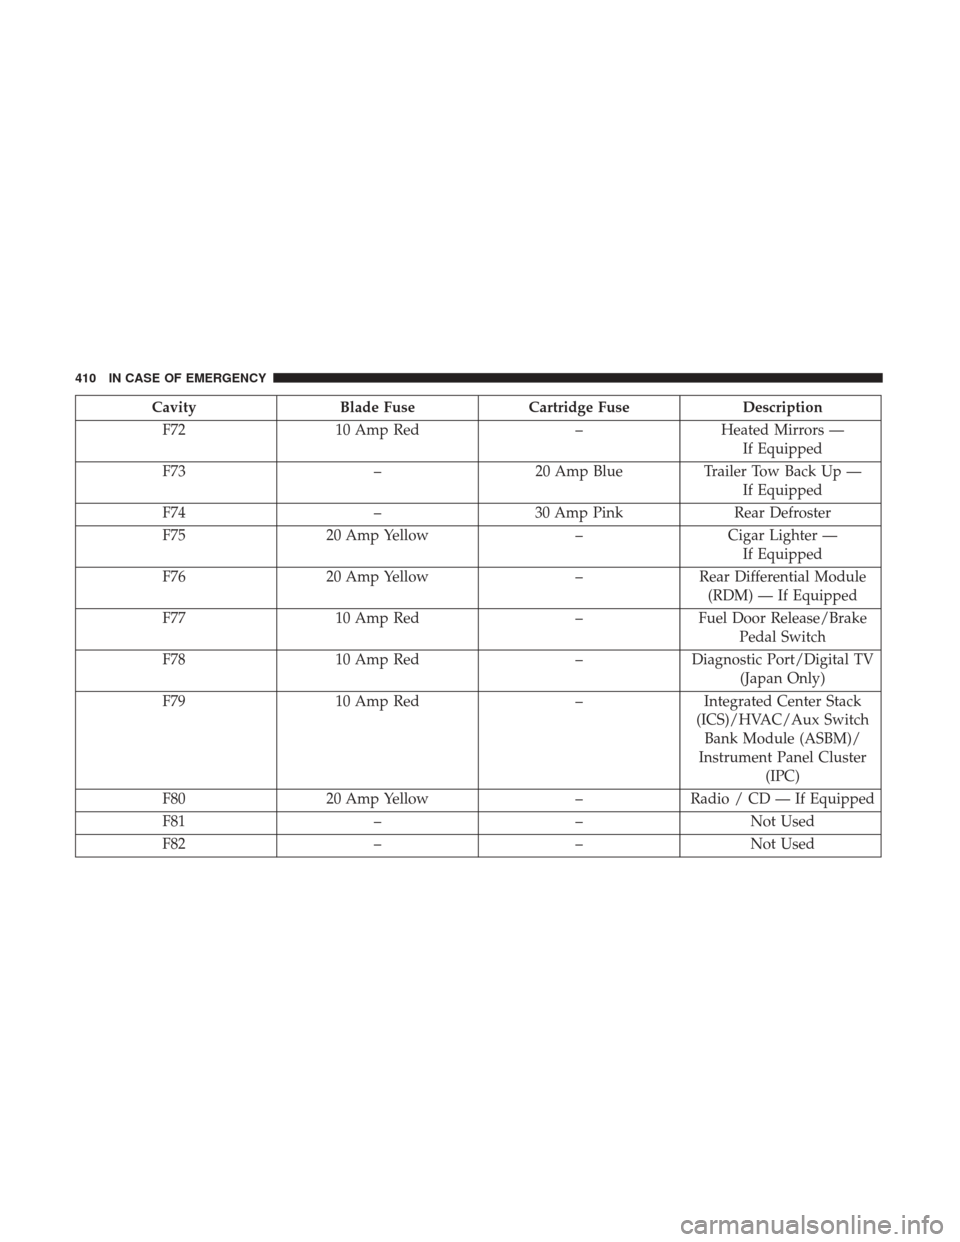
CavityBlade Fuse Cartridge Fuse Description
F72 10 Amp Red –Heated Mirrors —
If Equipped
F73 –20 Amp Blue Trailer Tow Back Up —
If Equipped
F74 –30 Amp Pink Rear Defroster
F75 20 Amp Yellow –Cigar Lighter —
If Equipped
F76 20 Amp Yellow –Rear Differential Module
(RDM) — If Equipped
F77 10 Amp Red –Fuel Door Release/Brake
Pedal Switch
F78 10 Amp Red –Diagnostic Port/Digital TV
(Japan Only)
F79 10 Amp Red –Integrated Center Stack
(ICS)/HVAC/Aux Switch Bank Module (ASBM)/
Instrument Panel Cluster (IPC)
F80 20 Amp Yellow –Radio / CD — If Equipped
F81 ––Not Used
F82 ––Not Used
410 IN CASE OF EMERGENCY
Page 449 of 615
SCHEDULED SERVICING
Your vehicle is equipped with an automatic oil change
indicator system. The oil change indicator system will
remind you that it is time to take your vehicle in for
scheduled maintenance.
Based on engine operation conditions, the oil change
indicator message will illuminate. This means that service
is required for your vehicle. Operating conditions such as
frequent short-trips, trailer tow, extremely hot or cold
ambient temperatures will influence when the “Oil Change
Required” message is displayed. Severe Operating Condi-
tions can cause the change oil message to illuminate as
early as 3,500 miles (5,600 km) since last reset. Have your
vehicle serviced as soon as possible, within the next 500
miles (805 km).
Your authorized dealer will reset the oil change indicator
message after completing the scheduled oil change. If a
scheduled oil change is performed by someone other than
your authorized dealer, the message can be reset by
referring to the steps described under “Instrument Cluster
Display” in “Understanding Your Instrument Panel” for
further information.NOTE:
Under no circumstances should oil change inter-
vals exceed 10,000 miles (16,000 km), twelve months or 350
hours of engine run time, whichever comes first. The 350
hours of engine run or idle time is generally only a concern
for fleet customers.
Severe Duty All Models
Change Engine Oil at 4,000 miles (6,500 km) if the vehicle
is operated in a dusty and off road environment or is
operated predominately at idle or only very low engine
RPM’s. This type of vehicle use is considered Severe Duty.
Once A Month Or Before A Long Trip:
• Check engine oil level.
• Check windshield washer fluid level.
• Check tire pressure and look for unusual wear or
damage. Rotate tires at the first sign of irregular wear,
even if it occurs before the oil indicator system turns on.
• Check the fluid levels of the coolant reservoir and brake
master cylinder, fill as needed.
• Check function of all interior and exterior lights.
8
SERVICING AND MAINTENANCE 447
Page 510 of 615
Plastic And Coated Parts
Use MOPAR Total Clean to clean vinyl upholstery.
CAUTION!
Direct contact of air fresheners, insect repellents, sun-
tan lotions, or hand sanitizers to the plastic, painted, or
decorated surfaces of the interior may cause permanent
damage. Wipe away immediately.
CAUTION!
Damage caused by these type of products may not be
covered by your New Vehicle Limited Warranty.
Cleaning Plastic Instrument Cluster Lenses
The lenses in front of the instruments in this vehicle are
molded in clear plastic. When cleaning the lenses, care
must be taken to avoid scratching the plastic.
1. Clean with a wet soft cloth. A mild soap solution may beused, but do not use high alcohol content or abrasive
cleaners. If soap is used, wipe clean with a clean damp
cloth.
2. Dry with a soft cloth.
Leather Parts
MOPAR Total Clean is specifically recommended for
leather upholstery.
Your leather upholstery can be best preserved by regular
cleaning with a damp soft cloth. Small particles of dirt can
act as an abrasive and damage the leather upholstery and
should be removed promptly with a damp cloth. Stubborn
soils can be removed easily with a soft cloth and MOPAR
Total Clean. Care should be taken to avoid soaking your
leather upholstery with any liquid. Please do not use
polishes, oils, cleaning fluids, solvents, detergents, or
ammonia-based cleaners to clean your leather upholstery.
Application of a leather conditioner is not required to
maintain the original condition.
NOTE: If equipped with light colored leather, it tends to
show any foreign material, dirt, and fabric dye transfer
more so than darker colors. The leather is designed to for
easy cleaning, and FCA recommends MOPAR total care
leather cleaner applied on a cloth to clean the leather seats
as needed.
508 SERVICING AND MAINTENANCE