ESP JEEP CHEROKEE 2020 Owner handbook (in English)
[x] Cancel search | Manufacturer: JEEP, Model Year: 2020, Model line: CHEROKEE, Model: JEEP CHEROKEE 2020Pages: 332, PDF Size: 8.87 MB
Page 168 of 332
STARTING AND OPERATING
166
PARKSENSE FRONT AND
REAR PARK ASSIST — IF
EQUIPPED
The ParkSense Park Assist system provides
visual and audible indications of the
distance between the rear and/or front fascia
and a detected obstacle when backing up or
moving forward (e.g. during a parking
maneuver). The vehicle brakes may be auto-
matically applied and released when
performing a reverse parking maneuver if the
system detects a possible collision with an
obstacle.
Refer to “ParkSense System Usage Precau -
tions” in “Starting And Operating” in the
Owner’s Manual for limitations of this system
and recommendations.
ParkSense will retain the last system state
(enabled or disabled) from the last ignition
cycle when the ignition is changed to the ON/
RUN position.
WARNING!
Drivers must be careful when backing up
even when using ParkSense. Always
check carefully behind your vehicle, look
behind you, and be sure to check for
pedestrians, animals, other vehicles,
obstructions, and blind spots before
backing up. You are responsible for
safety and must continue to pay atten -
tion to your surroundings. Failure to do
so can result in serious injury or death.
Before using ParkSense, it is strongly
recommended that the ball mount and
hitch ball assembly is disconnected from
the vehicle when the vehicle is not used
for towing. Failure to do so can result in
injury or damage to vehicles or obstacles
because the hitch ball will be much
closer to the obstacle than the rear fascia
when the loudspeaker sounds the contin -
uous tone. Also, the sensors could detect
the ball mount and hitch ball assembly,
depending on its size and shape, giving
a false indication that an obstacle is
behind the vehicle.
CAUTION!
ParkSense is only a parking aid and it is
unable to recognize every obstacle,
including small obstacles. Parking curbs
might be temporarily detected or not
detected at all. Obstacles located above
or below the sensors will not be detected
when they are in close proximity.
The vehicle must be driven slowly when
using ParkSense in order to be able to
stop in time when an obstacle is
detected. It is recommended that the
driver looks over his/her shoulder when
using ParkSense.
2020_JEEP_CHEROKEE_UG_RHD_UK.book Page 166
Page 170 of 332
STARTING AND OPERATING
168
PARKSENSE ACTIVE PARK
ASSIST SYSTEM — IF
EQUIPPED
The ParkSense Active Park Assist system is
intended to assist the driver during parallel
and perpendicular parking maneuvers by
identifying a proper parking space, providing
audible/visual instructions, and controlling
the steering wheel. The ParkSense Active
Park Assist system is defined as “semi-auto-
matic” since the driver maintains control of
the accelerator, gear selector and brakes.
Depending on the driver's parking maneuver
selection, the ParkSense Active Park Assist
system is capable of maneuvering a vehicle
into a parallel or a perpendicular parking
space on either side (i.e., driver side or
passenger side).
NOTE:
The driver is always responsible for
controlling the vehicle, responsible for any
surrounding objects, and must intervene
as required.
The system is provided to assist the driver
and not to substitute the driver.
During a semi-automatic maneuver, if the
driver touches the steering wheel after
being instructed to remove their hands
from the steering wheel, the system will
cancel, and the driver will be required to
manually complete the parking maneuver.
The system may not work in all conditions
(e.g. environmental conditions such as
heavy rain, snow, etc., or if searching for a
parking space that has surfaces that will
absorb the ultrasonic sensor waves).
New vehicles from the dealer must have at
least 30 miles (48 km) accumulated
before the ParkSense Active Park Assist
system is fully calibrated and performs
accurately. This is due to the system’s
dynamic vehicle calibration to improve the
performance of the feature. The system
will also continuously perform the
dynamic vehicle calibration to account for
differences such as over or under inflated
tires and new tires.
The ParkSense Active Park Assist system can
be enabled and disabled with the ParkSense
Active Park Assist switch, located on the
switch panel below the Uconnect display. To enable the ParkSense Active
Park Assist system, push the Park
-
Sense Active Park Assist switch
once (LED turns on).
To disable the ParkSense Active Park Assist
system, push the ParkSense Active Park
Assist switch again (LED turns off).
Refer to the Owner’s Manual for further infor -
mation.LANESENSE — IF EQUIPPED
LaneSense Operation
The LaneSense system is operational at
speeds above 37 mph (60 km/h) and below
112 mph (180 km/h). The LaneSense
system uses a forward looking camera to
detect lane markings and measure vehicle
position within the lane boundaries.
When both lane markings are detected and the
driver unintentionally drifts out of the lane (no
turn signal applied), the LaneSense system
provides a haptic warning in the form of torque
applied to the steering wheel, as well as a
visual warning in the instrument cluster
display, to prompt the driver to remain within
the lane boundaries. The LaneSense system
2020_JEEP_CHEROKEE_UG_RHD_UK.book Page 168
Page 173 of 332
171
(Continued)
For example: If approaching the left side
of the lane the steering wheel will turn to
the right.
When the LaneSense system senses the
lane has been approached and is in a lane
departure situation, the left thick lane line
flashes yellow (on/off) and the left thin
line remains solid yellow. The LaneSense
telltale changes from solid yellow to
flashing yellow. At this time torque is
applied to the steering wheel in the oppo-
site direction of the lane boundary.For example: If approaching the left side
of the lane the steering wheel will turn to
the right.
NOTE:
The LaneSense system operates with the
similar behavior for a right lane departure.
Changing LaneSense Status
The LaneSense system has settings to adjust
the intensity of the torque warning and the
warning zone sensitivity (early/late) that you
can configure through the Uconnect system
screen.
Refer to “Uconnect Settings” in “Multi -
media” in the Owner’s Manual for further
information. NOTE:
When enabled, the system operates above
37 mph (60 km/h) and below 112 mph
(180 km/h).
Use of the turn signal suppresses the
warnings.
The system will not apply torque to the
steering wheel whenever a safety system
engages (Anti-Lock Brakes, Traction
Control System, Electronic Stability
Control, Forward Collision Warning, etc.).
PARKVIEW REAR BACK UP
CAMERA — IF EQUIPPED
Your vehicle may be equipped with the
ParkView Rear Back Up Camera that allows
you to see an on-screen image of the rear
surroundings of your vehicle whenever the
gear selector is put into REVERSE. The
image will be displayed in the touchscreen
display along with a caution note to “check
entire surroundings” across the top of the
screen. After five seconds this note will
disappear. The ParkView camera is located
on the rear of the vehicle above the rear
license plate. NOTE:
The ParkView Rear Back Up Camera has
programmable modes of operation that may
be selected through the Uconnect System.
Refer to “Uconnect Settings” in “Multi
-
media” in the Owner’s Manual for further
information.
WARNING!
Drivers must be careful when backing up
even when using the ParkView Rear Back
Up Camera. Always check carefully behind
your vehicle, and be sure to check for
pedestrians, animals, other vehicles,
obstructions, or blind spots before backing
up. You are responsible for the safety of
your surroundings and must continue to
pay attention while backing up. Failure to
do so can result in serious injury or death.
CAUTION!
To avoid vehicle damage, ParkView
should only be used as a parking aid. The
ParkView camera is unable to view every
obstacle or object in your drive path.
2020_JEEP_CHEROKEE_UG_RHD_UK.book Page 171
Page 179 of 332
177
NOTE:
If AdBlue® (UREA) is spilled out of the
filler neck, clean up well the area and
proceed to filling up again. If the liquid
crystallizes, eliminate it with a sponge and
warm water.
DO NOT EXCEED THE MAXIMUM LEVEL:
this could cause damage to the reservoir.
AdBlue® (UREA) freezes at under 12° F
(-11° C). Although the system is designed
to operate below the freezing point of the
UREA, it is advisable not to fill the tank
beyond the maximum level because if the
UREA freezes the system can be
damaged. Follow the instructions in this
section.
If the AdBlue® (UREA) is spilled on
painted surfaces or aluminum, immedi-
ately clean the area with water and use
absorbent material to collect the fluid that
has been spilled on the ground.
Do not try to start the engine if AdBlue®
(UREA) was accidentally added to the
diesel fuel tank, this can result in serious
engine damage, contact an authorized
dealer.
Do not add additives or other fluids to
AdBlue® (UREA), doing so could damage
the system.
The use of non-conforming or degraded
AdBlue® (UREA) may lead to indications
appearing on the instrument panel display
refer to “Warning Lights And Messages” in
the “Getting To Know Your Instrument
Panel” for further information.
Never pour AdBlue® (UREA) into another
container: it could be contaminated.
If the AdBlue® (UREA) runs out, see refer
to “Warning Lights And Messages” in the
“Getting To Know Your Instrument Panel”
for further information to continue using
the car normally.
VEHICLE LOADING
Weights Label
As required by local regulations, your vehicle
has a weights label affixed to the driver's side
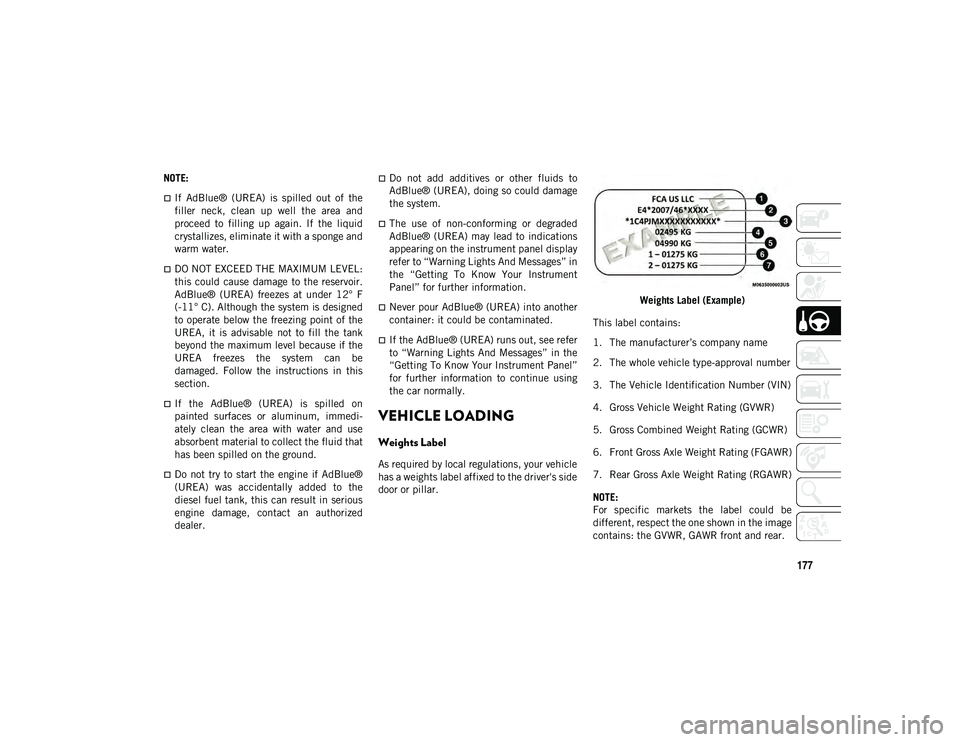
door or pillar. Weights Label (Example)
This label contains:
1. The manufacturer’s company name
2. The whole vehicle type-approval number
3. The Vehicle Identification Number (VIN)
4. Gross Vehicle Weight Rating (GVWR)
5. Gross Combined Weight Rating (GCWR)
6. Front Gross Axle Weight Rating (FGAWR)
7. Rear Gross Axle Weight Rating (RGAWR)
NOTE:
For specific markets the label could be
different, respect the one shown in the image
contains: the GVWR, GAWR front and rear.
2020_JEEP_CHEROKEE_UG_RHD_UK.book Page 177
Page 207 of 332
205
(Continued)
(Continued)
rafts, or similar inflatable items. However,
use only the Air Pump Hose and make sure
the Mode Select Knob is in the Air Mode
when inflating such items to avoid
injecting sealant into them. The Tire
Service Kit Sealant is only intended to seal
punctures less than 1/4 inch (6 mm)
diameter in the tread of your tire.
Do not lift or carry the Tire Service Kit by
the hoses.
Sealing A Tire With Tire Service Kit
(A) Whenever You Stop To Use Tire Service
Kit:
1. Pull over to a safe location and turn on the vehicle’s Hazard Warning flashers.
2. Verify that the valve stem (on the wheel with the deflated tire) is in a position that
is near to the ground. This will allow the
Tire Service Kit Hoses and to reach the
valve stem and keep the Tire Service Kit
flat on the ground. This will provide the
best positioning of the kit when injecting
the sealant into the deflated tire and
running the air pump. Move the vehicle
as necessary to place the valve stem in
this position before proceeding.
WARNING!
Do not attempt to seal a tire on the side
of the vehicle closest to traffic. Pull far
enough off the road to avoid the danger
of being hit when using the Tire Service
Kit.
Do not use Tire Service Kit or drive the
vehicle under the following circum -
stances:
If the puncture in the tire tread is
approximately 1/4 inch (6 mm) or
larger.
If the tire has any sidewall damage.
If the tire has any damage from driving with extremely low tire pres-
sure.
If the tire has any damage fromdriving on a flat tire.
If the wheel has any damage.
If you are unsure of the condition ofthe tire or the wheel.
Keep Tire Service Kit away from open
flames or heat source.
A loose Tire Service Kit thrown forward in
a collision or hard stop could endanger
the occupants of the vehicle. Always
stow the Tire Service Kit in the place
provided. Failure to follow these warn -
ings can result in injuries that are serious
or fatal to you, your passengers, and
others around you.
Take care not to allow the contents of
Tire Service Kit to come in contact with
hair, eyes, or clothing. Tire Service Kit
sealant is harmful if inhaled, swallowed,
or absorbed through the skin. It causes
skin, eye, and respiratory irritation.
Flush immediately with plenty of water if
there is any contact with eyes or skin.
Change clothing as soon as possible, if
there is any contact with clothing.
WARNING! (Continued)
Tire Service Kit Sealant solution
contains latex. In case of an allergic
reaction or rash, consult a physician
immediately. Keep Tire Service Kit out
of reach of children. If swallowed, rinse
mouth immediately with plenty of water
and drink plenty of water. Do not induce
vomiting! Consult a physician immedi -
ately.
WARNING! (Continued)
2020_JEEP_CHEROKEE_UG_RHD_UK.book Page 205
Page 211 of 332
209
(F) Sealant Bottle And Hose Replacement:
1. Uncoil the Sealant Hose (clear in color).
2. Locate the red colored round SealantBottle release button at the lower right
hand corner of the kit.
3. Push and hold the Sealant Bottle release button, then pull out the bottle holding
the button.
4. Clean any remaining sealant from the Tire Service Kit housing.
5. Position the new Sealant Bottle in the housing so that the Sealant Hose aligns
with the hose slot in the front of the
housing. Push and hold the Sealant
Bottle release button, then push the
bottle into the housing by holding the
button. An audible click will be heard
indicating the bottle is locked into place.
Release the button.
6. Verify that the cap is installed on the fitting at the end of the Sealant Hose and
return the hose to its storage area
(located on top of the housing).
7. Return the Tire Service Kit to its storage location in the vehicle.
JUMP STARTING
If your vehicle has a discharged battery, it
can be jump started using a set of jumper
cables and a battery in another vehicle or by
using a portable battery booster pack. Jump
starting can be dangerous if done improp -
erly, so please follow the procedures in this
section carefully.
NOTE:
When using a portable battery booster pack,
follow the manufacturer’s operating instruc -
tions and precautions.
WARNING!
As required by current regulations, the
information on chemical substances for
the protection of human health and the
environment and on the safe use of the
sealing fluid are on the packaging label.
Compliance with the indications on the
label is an essential condition to ensure
the safety and effectiveness of the
product. Remember to carefully read the
label before use. The user of the product is
responsible for any damages caused by
improper use. The sealing fluid has an
expiration date. Replace the bottle if the
sealant has expired.
CAUTION!
Dispose of the bottle and the sealant
liquid properly. Have them disposed of in
compliance with national and local
regulations.
WARNING!
Do not attempt jump starting if the battery
is frozen. It could rupture or explode and
cause personal injury.
CAUTION!
Do not use a portable battery booster pack
or any other booster source with a system
voltage greater than 12 Volts or damage to
the battery, starter motor, alternator or
electrical system may occur.
2020_JEEP_CHEROKEE_UG_RHD_UK.book Page 209
Page 219 of 332
217
Recovery Strap — If Equipped
Your vehicle may be included with a recovery
strap. Recovery straps do not act like tradi-
tional tow straps, chains, or winch cables. Using Recovery Strap
1. Review all warnings and instructions
first.
2. Position the recovery vehicle.
3. Connect the recovery strap.
4. Add a recovery damper or blanket.
5. Clear the danger zone.
6. Safely and slowly start pulling.
7. Disconnect the recovery strap after both vehicles are secure and parked.
ENHANCED ACCIDENT
RESPONSE SYSTEM (EARS)
This vehicle is equipped with an Enhanced
Accident Response System.
Please refer to “Occupant Restraint
Systems” in “Safety” for further information
on the Enhanced Accident Response System
(EARS) function.
EVENT DATA RECORDER
(EDR)
This vehicle is equipped with an Event Data
Recorder (EDR). The main purpose of an
EDR is to record data that will assist in
understanding how a vehicle’s systems
performed under certain crash or near
crash-like situations, such as an air bag
deployment or hitting a road obstacle.
Please refer to “Occupant Restraint
Systems” in “Safety” for further information
on the Event Data Recorder (EDR).
WARNING!
Recovery straps should only be used in
emergencies to rescue stranded vehicles.
Only use Recovery straps on vehicles that
fit within the recommended Gross Vehicle
Weight (GVW) of your recovery strap. Only
attach recovery straps to Optional
Equipment (OE) recommended anchor
points or emergency towing anchor points.
Never attach to tow ball or vehicle tie down
point, these are not designed for this
purpose. Never attach to vehicle steering,
drive train, or any other suspension
components. NEVER pull a strap over sharp
edges or abrasive surfaces that can damage
the recovery strap. NEVER use a damaged
strap, it has reduced strength. DO NOT
attempt to repair straps. ONLY persons
involved in the recovery should be in either
vehicle. No passengers. Anyone inside the
vehicles can be struck by strap recoil,
causing serious injury. MOVE bystanders at
least 40 ft (12.2 m) from the recovery area
when using the recovery strap.
2020_JEEP_CHEROKEE_UG_RHD_UK.book Page 217
Page 220 of 332
218
SERVICING AND MAINTENAN
CESCHEDULED SERVICING
Correct servicing is crucial for guaranteeing a
long life for the car under the best condi-
tions. For this reason, Jeep has planned a
series of checks and services at fixed
distance intervals and, where provided, at
fixed time intervals, as described in the
Scheduled Servicing plan. To keep the car’s
efficiency in tip-top condition, in the
following Scheduled Service plan pages a
few additional checks are listed that should
be carried out more frequently with respect
to the normal coupon redemption schedule.
Scheduled Servicing is offered by all autho -
rized dealerships according to fixed time or
mileage intervals. If, during each operation,
in addition to the ones scheduled, the need
arises for further replacements or repairs,
these may be carried out with the owner's
explicit agreement only.
The technicians at your dealership know your
vehicle best, and have access to factory
trained information, genuine Mopar parts,
and specially designed electronic and
mechanical tools that can help prevent
future costly repairs. If your car is used
frequently for towing, the interval between
one scheduled servicing operation and the next should be reduced. More frequent main
-
tenance may be needed for vehicles in severe
operating conditions, such as dusty areas
and very short trip driving.
NOTE:
Scheduled Servicing interventions are set
out by the Manufacturer. Failure to have
them carried out may invalidate the
warranty. It is advised to inform an autho -
rized dealership of any small operating irreg -
ularities without waiting for the next service.
Scheduled Servicing — Gasoline Engine
The oil change indicator system will remind
you that it is time to take your vehicle in for
engine oil replacement.
An “Oil Change Required” message will be
displayed in the instrument cluster and a
single chime will sound, indicating that an
oil change is necessary.
The oil change indicator message will illumi -
nate approximately 7,000 miles
(11,200 km) after the most recent oil
change was performed. Have your vehicle
serviced as soon as possible, within
500 miles (800 km). NOTE:
The oil change indicator message will not
monitor the time since the last oil change.
Change your vehicle’s oil if it has been
12 months since your last oil change even
if the oil change indicator message is NOT
illuminated.
Change your engine oil more often if you
drive your vehicle off-road for an extended
period of time (refer to the “Heavy Duty
Use of Vehicle” section).
Under no circumstances should oil change
intervals exceed 7,500 miles
(12,000 km) or 12 months, whichever
comes first.
Your authorized dealer will reset the oil
change indicator message after completing
the scheduled oil change.
2020_JEEP_CHEROKEE_UG_RHD_UK.book Page 218
Page 243 of 332
241(Continued)
RAISING THE VEHICLE
In the case where it is necessary to raise the
vehicle, go to an authorized dealer or service
station.
TIRES
Tires — General Information
Tire Pressure
Proper tire inflation pressure is essential to
the safe and satisfactory operation of your
vehicle. Four primary areas are affected by
improper tire pressure:
Safety
Fuel Economy
Tread Wear
Ride Comfort and Vehicle Stability
Safety Both underinflation and overinflation affect
the stability of the vehicle and can produce
a feeling of sluggish response or over respon
-
siveness in the steering. NOTE:
Unequal tire pressures from side to side
may cause erratic and unpredictable
steering response.
Unequal tire pressure from side to side
may cause the vehicle to drift left or right.
Fuel Economy
Underinflated tires will increase tire rolling
resistance resulting in higher fuel consump -
tion.
Tread Wear
Improper cold tire inflation pressures can
cause abnormal wear patterns and reduced
tread life, resulting in the need for earlier tire
replacement.
Ride Comfort And Vehicle Stability
Proper tire inflation contributes to a comfort -
able ride. Over-inflation produces a jarring
and uncomfortable ride.
WARNING!
Improperly inflated tires are dangerous
and can cause collisions.
Underinflation increases tire flexing and
can result in overheating and tire failure.
Overinflation reduces a tire's ability to
cushion shock. Objects on the road and
chuckholes can cause damage that
result in tire failure.
Overinflated or underinflated tires can
affect vehicle handling and can fail
suddenly, resulting in loss of vehicle
control.
Unequal tire pressures can cause
steering problems. You could lose
control of your vehicle.
Unequal tire pressures from one side of
the vehicle to the other can cause the
vehicle to drift to the right or left.
Always drive with each tire inflated to the
recommended cold tire inflation pres-
sure.
WARNING! (Continued)
2020_JEEP_CHEROKEE_UG_RHD_UK.book Page 241
Page 244 of 332
SERVICING AND MAINTENAN
CE
242
Tire Inflation Pressures
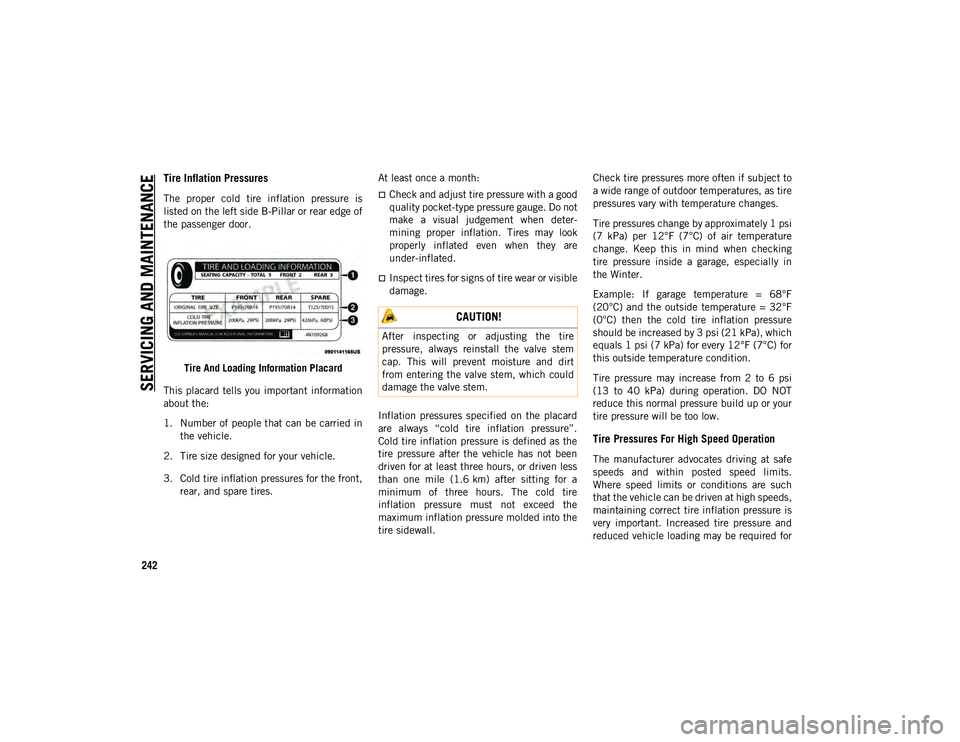
The proper cold tire inflation pressure is
listed on the left side B-Pillar or rear edge of
the passenger door.Tire And Loading Information Placard
This placard tells you important information
about the:
1. Number of people that can be carried in the vehicle.
2. Tire size designed for your vehicle.
3. Cold tire inflation pressures for the front, rear, and spare tires. At least once a month:Check and adjust tire pressure with a good
quality pocket-type pressure gauge. Do not
make a visual judgement when deter
-
mining proper inflation. Tires may look
properly inflated even when they are
under-inflated.
Inspect tires for signs of tire wear or visible
damage.
Inflation pressures specified on the placard
are always “cold tire inflation pressure”.
Cold tire inflation pressure is defined as the
tire pressure after the vehicle has not been
driven for at least three hours, or driven less
than one mile (1.6 km) after sitting for a
minimum of three hours. The cold tire
inflation pressure must not exceed the
maximum inflation pressure molded into the
tire sidewall. Check tire pressures more often if subject to
a wide range of outdoor temperatures, as tire
pressures vary with temperature changes.
Tire pressures change by approximately 1 psi
(7 kPa) per 12°F (7°C) of air temperature
change. Keep this in mind when checking
tire pressure inside a garage, especially in
the Winter.
Example: If garage temperature = 68°F
(20°C) and the outside temperature = 32°F
(0°C) then the cold tire inflation pressure
should be increased by 3 psi (21 kPa), which
equals 1 psi (7 kPa) for every 12°F (7°C) for
this outside temperature condition.
Tire pressure may increase from 2 to 6 psi
(13 to 40 kPa) during operation. DO NOT
reduce this normal pressure build up or your
tire pressure will be too low.
Tire Pressures For High Speed Operation
The manufacturer advocates driving at safe
speeds and within posted speed limits.
Where speed limits or conditions are such
that the vehicle can be driven at high speeds,
maintaining correct tire inflation pressure is
very important. Increased tire pressure and
reduced vehicle loading may be required for
CAUTION!
After inspecting or adjusting the tire
pressure, always reinstall the valve stem
cap. This will prevent moisture and dirt
from entering the valve stem, which could
damage the valve stem.
2020_JEEP_CHEROKEE_UG_RHD_UK.book Page 242