fluid JEEP CHEROKEE 2021 Owner handbook (in English)
[x] Cancel search | Manufacturer: JEEP, Model Year: 2021, Model line: CHEROKEE, Model: JEEP CHEROKEE 2021Pages: 332, PDF Size: 8.87 MB
Page 145 of 332
143
SafeHold
SafeHold is a safety feature of the Electric
Park Brake System that will engage the park
brake automatically if the vehicle is left
unsecured while the ignition is in ON/RUN.
For automatic transmissions, the park brake
will automatically engage if all of the
following conditions are met:
The vehicle is at a standstill.
There is no attempt to depress the brake
pedal or accelerator pedal.
The seat belt is unbuckled.
The driver door is open.
For manual transmissions, the park brake
will automatically engage if all of the
following conditions are met:
The vehicle is at a standstill.
There is no attempt to depress the brake
pedal or accelerator pedal.
The clutch pedal is not pressed.
The seat belt is unbuckled.
The driver door is open.
MANUAL TRANSMISSION —
IF EQUIPPED NOTE:
During cold weather, you may experience
increased effort in shifting until the trans -
mission fluid warms up. This is normal.
Shifting
Fully press the clutch pedal before shifting
gears. As you release the clutch pedal, lightly
press the accelerator pedal.
You should always use FIRST gear when
starting from a standing position.
WARNING!
You or others could be injured if you leave
the vehicle unattended without having the
parking brake fully applied. The parking
brake should always be applied when the
driver is not in the vehicle, especially on
an incline.
CAUTION!
Never drive with your foot resting on the
clutch pedal, or attempt to hold the
vehicle on a hill with the clutch pedal
partially engaged, as this will cause
abnormal wear on the clutch.
Do not drive with your hand resting on
the gear selector as the force exerted,
even if slight, could lead over time to
premature wear of the gearbox internal
components.
2020_JEEP_CHEROKEE_UG_RHD_UK.book Page 143
Page 177 of 332
175
Adblue® (UREA) — If Equipped
The vehicle is equipped with an UREA injec-
tion system and Selective Catalytic Reduc -
tion to meet emission standards. These two
systems ensure compliance with the diesel
emissions requirements; at the same time,
they ensure fuel-efficiency, handling, torque
and power. For messages and system warn -
ings, refer to the “Warning Lights And
Messages” in the “Getting To Know Your
Instrument Panel” section. AdBlue® (UREA)
is a very stable product with a long shelf life.
Stored at temperatures LOWER than 90 °F
(32 °C), it has a shelf life of at least one year.
For more information on the AdBlue® liquid
type, see the “Fluids and lubricants” in the
“Technical specifications” section. The
vehicle is equipped with an automatic
AdBlue® heating system when the engine
starts allowing the system to work correctly
at temperatures lower than 12 °F (-11 °C).
NOTE:
AdBlue® freezes at temperatures lower than
12 °F (-11 °C).
AdBlue® (UREA) Storage
AdBlue® (UREA) is considered a very stable
product with a long shelf life. If AdBlue®
(UREA) is kept in temperatures between 10°
and 90°F (-12° and 32°C), it will last a
minimum of one year.
AdBlue® (UREA) is subject to freezing at the
lowest temperatures. For example, AdBlue®
(UREA) may freeze at temperatures at or
below 12° F (-11° C). The system has been
designed to operate in this environment.
NOTE:
When working with AdBlue® (UREA), it is
important to know that:
Any containers or parts that come into
contact with AdBlue® (UREA) must be
AdBlue® (UREA) compatible (plastic or
stainless steel). Copper, brass, aluminum,
iron or non-stainless steel should be
avoided as they are subject to corrosion by
AdBlue® (UREA).
If AdBlue® (UREA) is spilled, it should be
wiped up completely.
Adding AdBlue® (UREA)
Preliminary Conditions
AdBlue® (UREA) freezes at temperatures
lower than 12° F (-11° C). If the car stands
for a long time at this temperature refilling
could be difficult. For this reason, it is
advised to park the vehicle in a garage and/
or heated environment and wait for the
UREA to return to liquid state before topping
up.
Proceed as follows:
Park the car on flat ground and stop the
engine by placing the ignition in the OFF
position.
Open the fuel door, undo and remove the
cap (blue) from the AdBlue® (UREA)
filler.
2020_JEEP_CHEROKEE_UG_RHD_UK.book Page 175
Page 179 of 332
177
NOTE:
If AdBlue® (UREA) is spilled out of the
filler neck, clean up well the area and
proceed to filling up again. If the liquid
crystallizes, eliminate it with a sponge and
warm water.
DO NOT EXCEED THE MAXIMUM LEVEL:
this could cause damage to the reservoir.
AdBlue® (UREA) freezes at under 12° F
(-11° C). Although the system is designed
to operate below the freezing point of the
UREA, it is advisable not to fill the tank
beyond the maximum level because if the
UREA freezes the system can be
damaged. Follow the instructions in this
section.
If the AdBlue® (UREA) is spilled on
painted surfaces or aluminum, immedi-
ately clean the area with water and use
absorbent material to collect the fluid that
has been spilled on the ground.
Do not try to start the engine if AdBlue®
(UREA) was accidentally added to the
diesel fuel tank, this can result in serious
engine damage, contact an authorized
dealer.
Do not add additives or other fluids to
AdBlue® (UREA), doing so could damage
the system.
The use of non-conforming or degraded
AdBlue® (UREA) may lead to indications
appearing on the instrument panel display
refer to “Warning Lights And Messages” in
the “Getting To Know Your Instrument
Panel” for further information.
Never pour AdBlue® (UREA) into another
container: it could be contaminated.
If the AdBlue® (UREA) runs out, see refer
to “Warning Lights And Messages” in the
“Getting To Know Your Instrument Panel”
for further information to continue using
the car normally.
VEHICLE LOADING
Weights Label
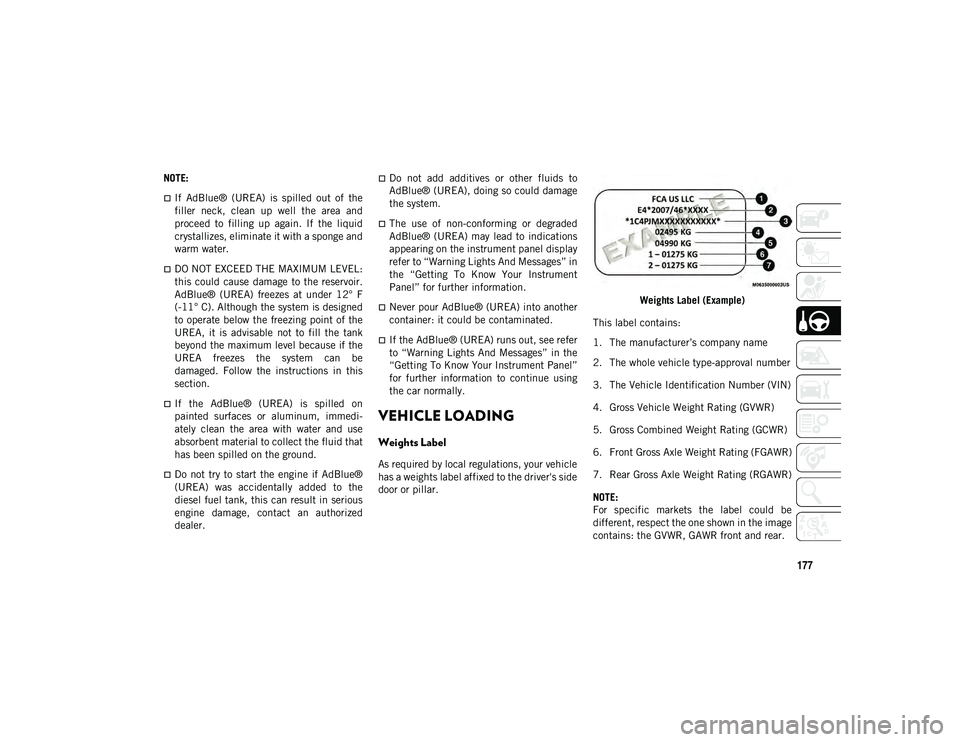
As required by local regulations, your vehicle
has a weights label affixed to the driver's side
door or pillar. Weights Label (Example)
This label contains:
1. The manufacturer’s company name
2. The whole vehicle type-approval number
3. The Vehicle Identification Number (VIN)
4. Gross Vehicle Weight Rating (GVWR)
5. Gross Combined Weight Rating (GCWR)
6. Front Gross Axle Weight Rating (FGAWR)
7. Rear Gross Axle Weight Rating (RGAWR)
NOTE:
For specific markets the label could be
different, respect the one shown in the image
contains: the GVWR, GAWR front and rear.
2020_JEEP_CHEROKEE_UG_RHD_UK.book Page 177
Page 180 of 332
STARTING AND OPERATING
178
Gross Vehicle Weight Rating (GVWR)
The Gross Vehicle Weight Rating (GVWR) is
the total permissible weight of your vehicle
including driver, passengers, vehicle,
options and cargo. The label also specifies
maximum capacities of front and rear axle
systems (GAWR). Total load must be limited
so GVWR and front and rear GAWR are not
exceeded.
Payload
The payload of a vehicle is defined as the
allowable load weight a truck can carry,
including the weight of the driver, all passen-
gers, options and cargo.
Gross Axle Weight Rating (GAWR)
The Gross Axle Weight Rating (GAWR) is the
maximum permissible load on the front and
rear axles. The load must be distributed in
the cargo area so that the GAWR of each axle
is not exceeded.
Each axle GAWR is determined by the
components in the system with the lowest
load carrying capacity (axle, springs, tires or
wheels). Heavier axles or suspension compo -nents sometimes specified by purchasers for
increased durability does not necessarily
increase the vehicle's GVWR.
Curb Weight
The curb weight of a vehicle is defined as the
total weight of the vehicle with all fluids,
including vehicle fuel, at full capacity condi
-
tions, and with no occupants or cargo loaded
into the vehicle. The front and rear curb
weight values are determined by weighing
your vehicle on a commercial scale before
any occupants or cargo are added.
Loading
The actual total weight and the weight of the
front and rear of your vehicle at the ground
can best be determined by weighing it when
it is loaded and ready for operation.
The entire vehicle should first be weighed on
a commercial scale to ensure that the GVWR
has not been exceeded. The weight on the
front and rear of the vehicle should then be
determined separately to be sure that the
load is properly distributed over the front and
rear axle. Weighing the vehicle may show
that the GAWR of either the front or rear
axles has been exceeded but the total load is
within the specified GVWR. If so, weight must be shifted from front to rear or rear to
front as appropriate until the specified
weight limitations are met. Store the heavier
items down low and be sure that the weight
is distributed equally. Stow all loose items
securely before driving.
Improper weight distributions can have an
adverse effect on the way your vehicle steers
and handles and the way the brakes operate.
CAUTION!
Do not load your vehicle any heavier than
the GVWR or the maximum front and rear
GAWR. If you do, parts on your vehicle can
break, or it can change the way your
vehicle handles. This could cause you to
lose control. Also overloading can shorten
the life of your vehicle.
2020_JEEP_CHEROKEE_UG_RHD_UK.book Page 178
Page 208 of 332
IN CASE OF EMERGENCY
206
3. Place the transmission in PARK (P) (autotransmission) or in Gear (manual trans -
mission) and place the ignition in the
OFF position.
4. Apply the parking brake.
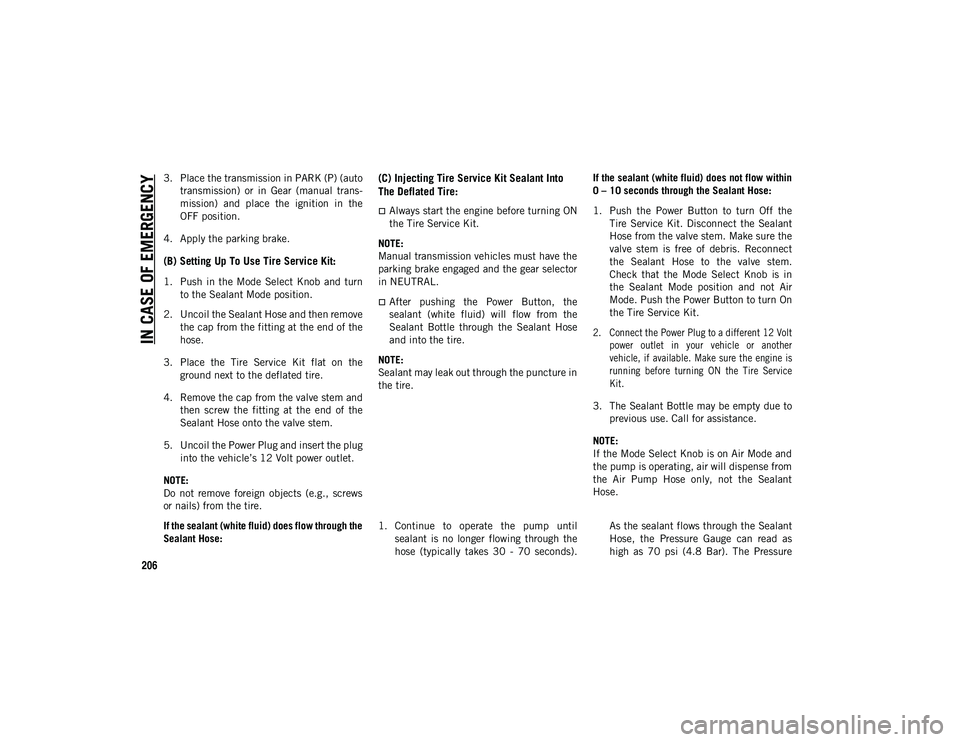
(B) Setting Up To Use Tire Service Kit:
1. Push in the Mode Select Knob and turn to the Sealant Mode position.
2. Uncoil the Sealant Hose and then remove the cap from the fitting at the end of the
hose.
3. Place the Tire Service Kit flat on the ground next to the deflated tire.
4. Remove the cap from the valve stem and then screw the fitting at the end of the
Sealant Hose onto the valve stem.
5. Uncoil the Power Plug and insert the plug into the vehicle’s 12 Volt power outlet.
NOTE:
Do not remove foreign objects (e.g., screws
or nails) from the tire.
(C) Injecting Tire Service Kit Sealant Into
The Deflated Tire:
Always start the engine before turning ON
the Tire Service Kit.
NOTE:
Manual transmission vehicles must have the
parking brake engaged and the gear selector
in NEUTRAL.
After pushing the Power Button, the
sealant (white fluid) will flow from the
Sealant Bottle through the Sealant Hose
and into the tire.
NOTE:
Sealant may leak out through the puncture in
the tire. If the sealant (white fluid) does not flow within
0 – 10 seconds through the Sealant Hose:
1. Push the Power Button to turn Off the
Tire Service Kit. Disconnect the Sealant
Hose from the valve stem. Make sure the
valve stem is free of debris. Reconnect
the Sealant Hose to the valve stem.
Check that the Mode Select Knob is in
the Sealant Mode position and not Air
Mode. Push the Power Button to turn On
the Tire Service Kit.
2. Connect the Power Plug to a different 12 Volt power outlet in your vehicle or another
vehicle, if available. Make sure the engine is
running before turning ON the Tire Service
Kit.
3. The Sealant Bottle may be empty due to previous use. Call for assistance.
NOTE:
If the Mode Select Knob is on Air Mode and
the pump is operating, air will dispense from
the Air Pump Hose only, not the Sealant
Hose.
If the sealant (white fluid) does flow through the
Sealant Hose: 1. Continue to operate the pump until
sealant is no longer flowing through the
hose (typically takes 30 - 70 seconds). As the sealant flows through the Sealant
Hose, the Pressure Gauge can read as
high as 70 psi (4.8 Bar). The Pressure
2020_JEEP_CHEROKEE_UG_RHD_UK.book Page 206
Page 211 of 332
209
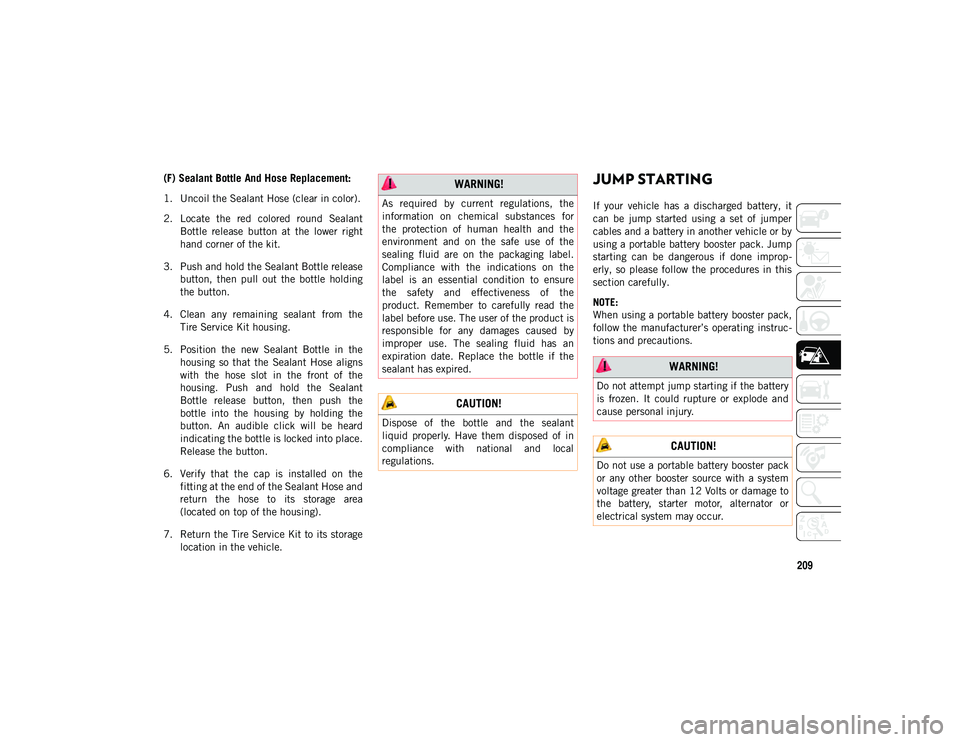
(F) Sealant Bottle And Hose Replacement:
1. Uncoil the Sealant Hose (clear in color).
2. Locate the red colored round SealantBottle release button at the lower right
hand corner of the kit.
3. Push and hold the Sealant Bottle release button, then pull out the bottle holding
the button.
4. Clean any remaining sealant from the Tire Service Kit housing.
5. Position the new Sealant Bottle in the housing so that the Sealant Hose aligns
with the hose slot in the front of the
housing. Push and hold the Sealant
Bottle release button, then push the
bottle into the housing by holding the
button. An audible click will be heard
indicating the bottle is locked into place.
Release the button.
6. Verify that the cap is installed on the fitting at the end of the Sealant Hose and
return the hose to its storage area
(located on top of the housing).
7. Return the Tire Service Kit to its storage location in the vehicle.
JUMP STARTING
If your vehicle has a discharged battery, it
can be jump started using a set of jumper
cables and a battery in another vehicle or by
using a portable battery booster pack. Jump
starting can be dangerous if done improp -
erly, so please follow the procedures in this
section carefully.
NOTE:
When using a portable battery booster pack,
follow the manufacturer’s operating instruc -
tions and precautions.
WARNING!
As required by current regulations, the
information on chemical substances for
the protection of human health and the
environment and on the safe use of the
sealing fluid are on the packaging label.
Compliance with the indications on the
label is an essential condition to ensure
the safety and effectiveness of the
product. Remember to carefully read the
label before use. The user of the product is
responsible for any damages caused by
improper use. The sealing fluid has an
expiration date. Replace the bottle if the
sealant has expired.
CAUTION!
Dispose of the bottle and the sealant
liquid properly. Have them disposed of in
compliance with national and local
regulations.
WARNING!
Do not attempt jump starting if the battery
is frozen. It could rupture or explode and
cause personal injury.
CAUTION!
Do not use a portable battery booster pack
or any other booster source with a system
voltage greater than 12 Volts or damage to
the battery, starter motor, alternator or
electrical system may occur.
2020_JEEP_CHEROKEE_UG_RHD_UK.book Page 209
Page 221 of 332
219
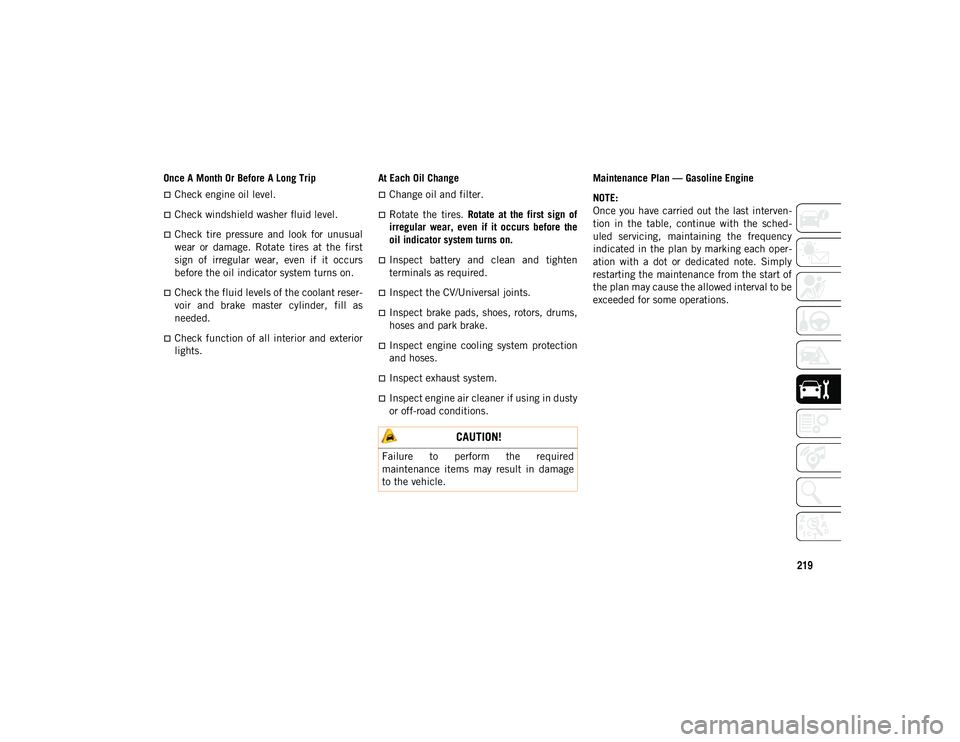
Once A Month Or Before A Long Trip
Check engine oil level.
Check windshield washer fluid level.
Check tire pressure and look for unusual
wear or damage. Rotate tires at the first
sign of irregular wear, even if it occurs
before the oil indicator system turns on.
Check the fluid levels of the coolant reser-
voir and brake master cylinder, fill as
needed.
Check function of all interior and exterior
lights. At Each Oil Change
Change oil and filter.
Rotate the tires.
Rotate at the first sign of
irregular wear, even if it occurs before the
oil indicator system turns on.
Inspect battery and clean and tighten
terminals as required.
Inspect the CV/Universal joints.
Inspect brake pads, shoes, rotors, drums,
hoses and park brake.
Inspect engine cooling system protection
and hoses.
Inspect exhaust system.
Inspect engine air cleaner if using in dusty
or off-road conditions. Maintenance Plan — Gasoline Engine
NOTE:
Once you have carried out the last interven
-
tion in the table, continue with the sched -
uled servicing, maintaining the frequency
indicated in the plan by marking each oper -
ation with a dot or dedicated note. Simply
restarting the maintenance from the start of
the plan may cause the allowed interval to be
exceeded for some operations.
CAUTION!
Failure to perform the required
maintenance items may result in damage
to the vehicle.
2020_JEEP_CHEROKEE_UG_RHD_UK.book Page 219
Page 223 of 332
221
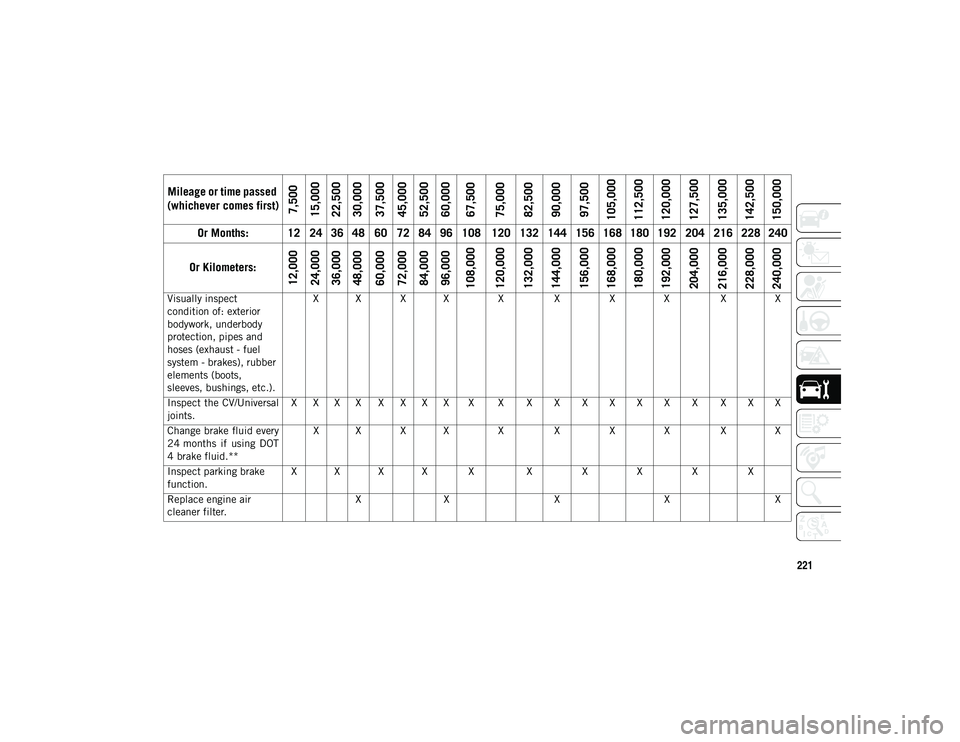
Visually inspect
condition of: exterior
bodywork, underbody
protection, pipes and
hoses (exhaust - fuel
system - brakes), rubber
elements (boots,
sleeves, bushings, etc.).X X X X X X X X X X
Inspect the CV/Universal
joints. X X X X X X X X X X X X X X X X X X X X
Change brake fluid every
24 months if using DOT
4 brake fluid.** X X X X X X X X X X
Inspect parking brake
function. X X X X X
X X X X X
Replace engine air
cleaner filter. X
X XX X
Mileage or time passed
(whichever comes first)
7,500
15,000
22,500
30,000
37,500
45,000
52,500
60,000
67,500
75,000
82,500
90,000
97,500
105,000
112,500
120,000
127,500
135,000
142,500
150,000
Or Months: 12 24 36 48 60 72 84 96 108 120 132 144 156 168 180 192 204 216 228 240
Or Kilometers:
12,000
24,000
36,000
48,000
60,000
72,000
84,000
96,000
108,000
120,000
132,000
144,000
156,000
168,000
180,000
192,000
204,000
216,000
228,000
240,000
2020_JEEP_CHEROKEE_UG_RHD_UK.book Page 221
Page 225 of 332
223
(Continued)
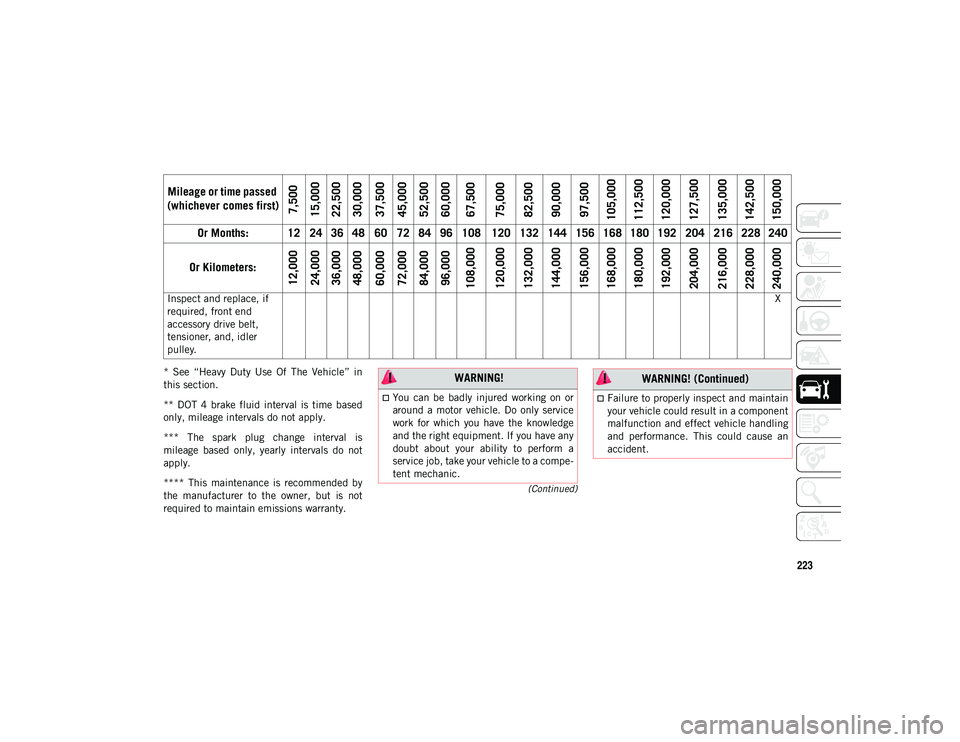
* See “Heavy Duty Use Of The Vehicle” in
this section.
** DOT 4 brake fluid interval is time based
only, mileage intervals do not apply.
*** The spark plug change interval is
mileage based only, yearly intervals do not
apply.
**** This maintenance is recommended by
the manufacturer to the owner, but is not
required to maintain emissions warranty.Inspect and replace, if
required, front end
accessory drive belt,
tensioner, and, idler
pulley.
X
Mileage or time passed
(whichever comes first)
7,500
15,000
22,500
30,000
37,500
45,000
52,500
60,000
67,500
75,000
82,500
90,000
97,500
105,000
112,500
120,000
127,500
135,000
142,500
150,000
Or Months: 12 24 36 48 60 72 84 96 108 120 132 144 156 168 180 192 204 216 228 240
Or Kilometers:
12,000
24,000
36,000
48,000
60,000
72,000
84,000
96,000
108,000
120,000
132,000
144,000
156,000
168,000
180,000
192,000
204,000
216,000
228,000
240,000
WARNING!
You can be badly injured working on or
around a motor vehicle. Do only service
work for which you have the knowledge
and the right equipment. If you have any
doubt about your ability to perform a
service job, take your vehicle to a compe-
tent mechanic.Failure to properly inspect and maintain
your vehicle could result in a component
malfunction and effect vehicle handling
and performance. This could cause an
accident.
WARNING! (Continued)
2020_JEEP_CHEROKEE_UG_RHD_UK.book Page 223
Page 227 of 332
225
Once A Month Or Before A Long Trip
Check engine oil level.
Check windshield washer fluid level.
Check tire pressure and look for unusual
wear or damage. Rotate tires at the first
sign of irregular wear, even if it occurs
before the oil indicator system turns on.
Check the fluid levels of the coolant reser-
voir and brake master cylinder, fill as
needed.
Check function of all interior and exterior
lights.
Control and recovery of additive level for
AdBlue® Diesel emissions (UREA) (if
equipped) At Each Oil Change
Change the engine oil filter.
Inspect the brake hoses and lines.
Inspect for the presence of water in the
fuel filter/water separator unit.
Inspect the CV/Universal joints.
Demanding Vehicle Use
Restore additive level for AdBlue® Diesel
emissions (UREA) (if equipped), when the
lamp is illuminated or the message on the
instrument panel.
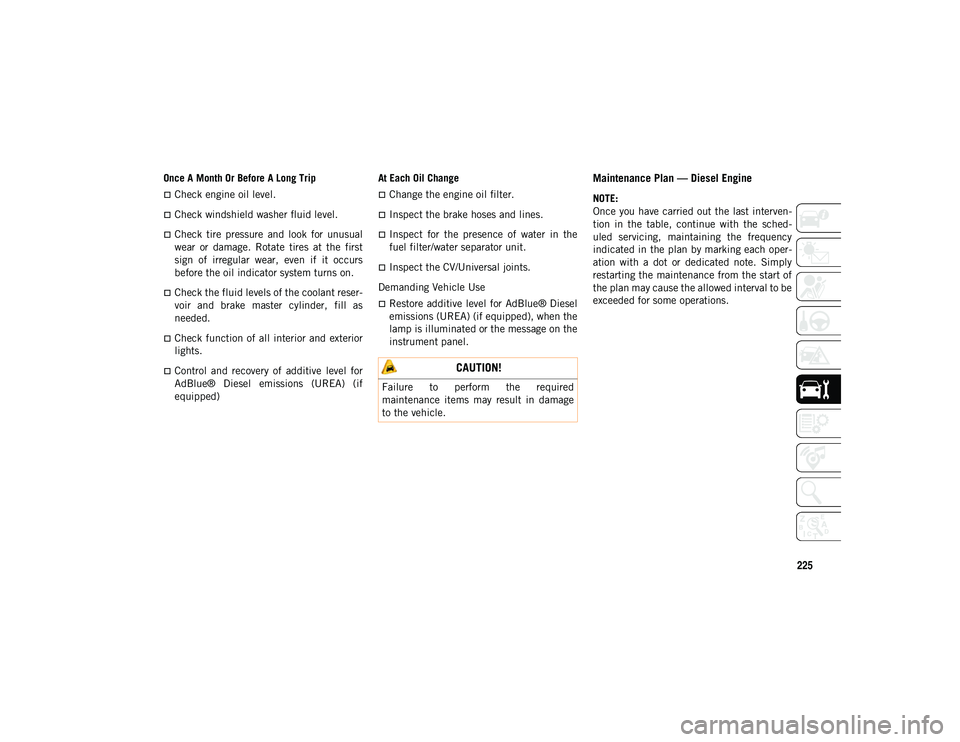
Maintenance Plan — Diesel Engine
NOTE:
Once you have carried out the last interven -
tion in the table, continue with the sched -
uled servicing, maintaining the frequency
indicated in the plan by marking each oper -
ation with a dot or dedicated note. Simply
restarting the maintenance from the start of
the plan may cause the allowed interval to be
exceeded for some operations.
CAUTION!
Failure to perform the required
maintenance items may result in damage
to the vehicle.
2020_JEEP_CHEROKEE_UG_RHD_UK.book Page 225