engine JEEP CHEROKEE LATITUDE 2019 Owner's Guide
[x] Cancel search | Manufacturer: JEEP, Model Year: 2019, Model line: CHEROKEE LATITUDE, Model: JEEP CHEROKEE LATITUDE 2019Pages: 638, PDF Size: 6.16 MB
Page 402 of 638
WARNING!(Continued)
fuse with metal wires or any other material. Do not
place a fuse inside a circuit breaker cavity or vice
versa. Failure to use proper fuses may result in
serious personal injury, fire and/or property damage.
• Before replacing a fuse, make sure that the ignition is
off and that all the other services are switched off
and/or disengaged.
• If the replaced fuse blows again, contact an autho-
rized dealer.
• If a general protection fuse for safety systems (air
bag system, braking system), power unit systems
(engine system, transmission system) or steering
system blows, contact an authorized dealer.
General Information
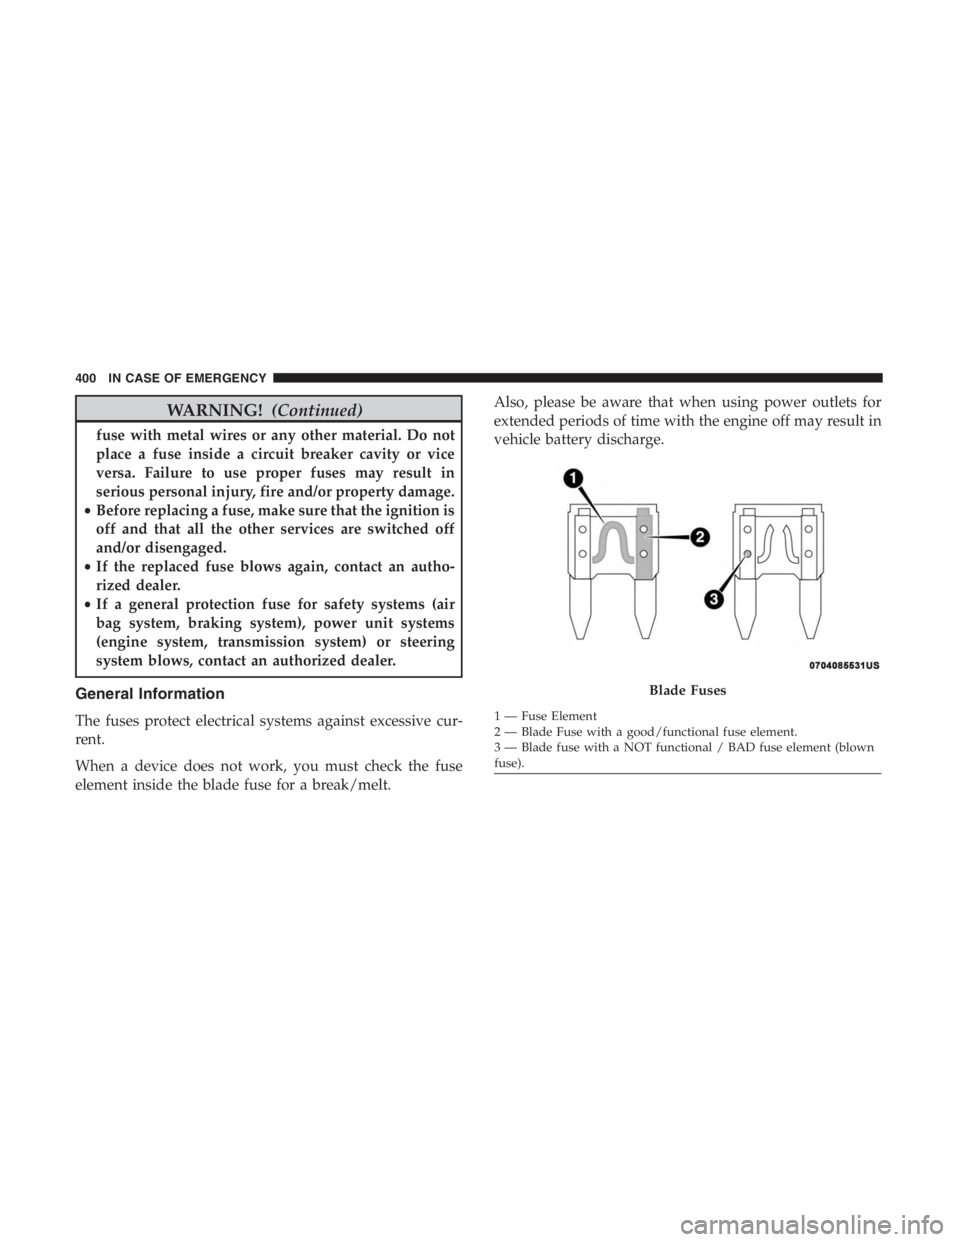
The fuses protect electrical systems against excessive cur-
rent.
When a device does not work, you must check the fuse
element inside the blade fuse for a break/melt. Also, please be aware that when using power outlets for
extended periods of time with the engine off may result in
vehicle battery discharge.
Page 439 of 638
6. Verify that the cap is installed on the fitting at the end ofthe Sealant Hose (3) and return the hose to its storage
area (located on top of the housing).
7. Return the Tire Service Kit to its storage location in the vehicle.
JUMP STARTING
If your vehicle has a discharged battery, it can be jump
started using a set of jumper cables and a battery in another
vehicle or by using a portable battery booster pack. Jump
starting can be dangerous if done improperly, so please
follow the procedures in this section carefully.
NOTE: When using a portable battery booster pack, follow
the manufacturer ’s operating instructions and precautions.
CAUTION!
Do not use a portable battery booster pack or any other
booster source with a system voltage greater than 12
Volts or damage to the battery, starter motor, alternator
or electrical system may occur.
Preparations For Jump Start
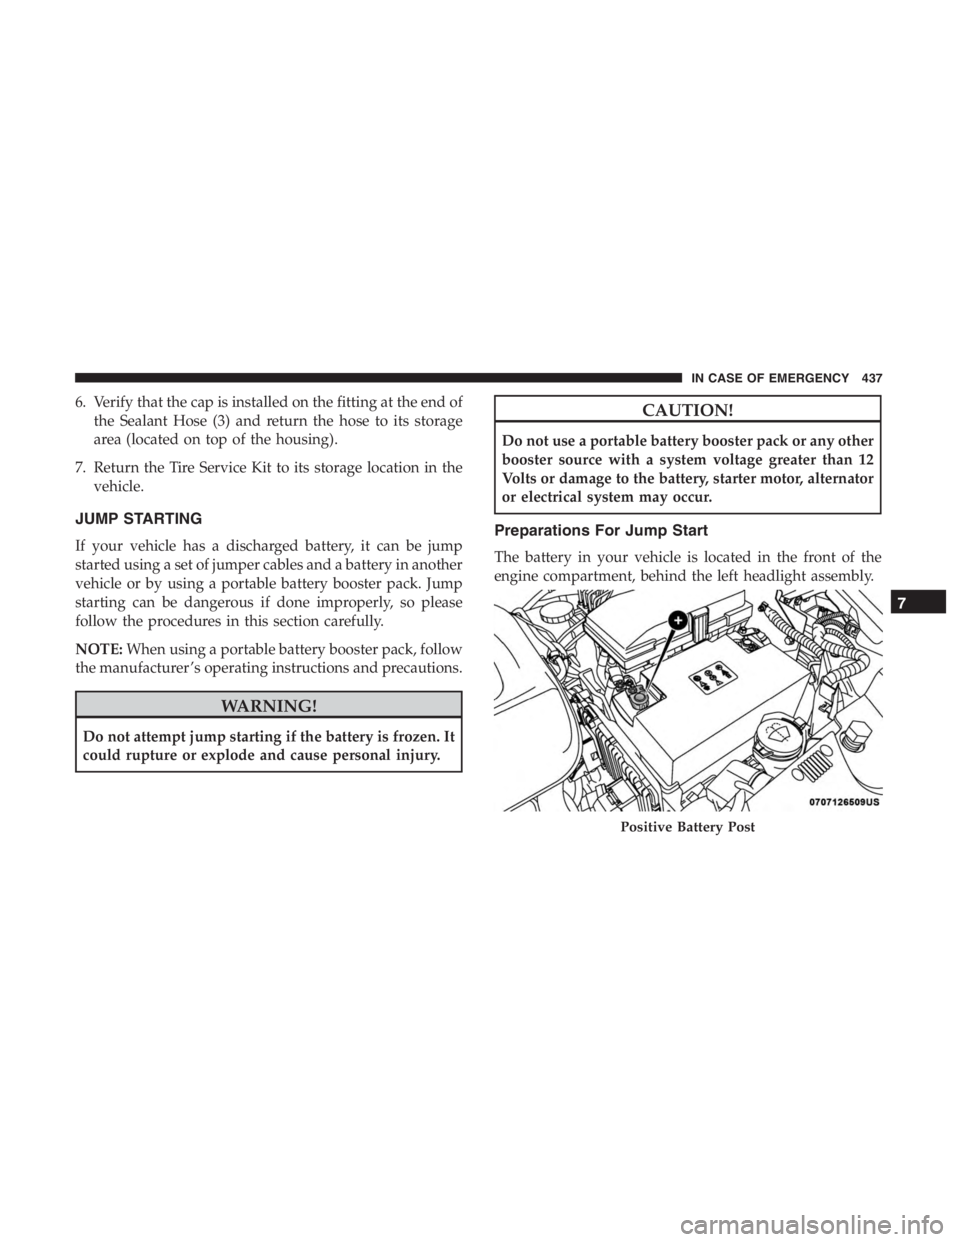
The battery in your vehicle is located in the front of the
engine compartment, behind the left headlight assembly.
Page 441 of 638
2. Connect the opposite end of the positive(+)jumper
cable to the positive (+)post of the booster battery.
3. Connect the negative (-)end of the jumper cable to the
negative (-)post of the booster battery.
4. Connect the opposite end of the negative (-)jumper
cable to a good engine ground (exposed metal part of
the discharged vehicle’s engine) away from the battery
and the fuel injection system.
Page 443 of 638
WARNING!
You or others can be badly burned by hot engine
coolant (antifreeze) or steam from your radiator. If you
see or hear steam coming from under the hood, do not
open the hood until the radiator has had time to cool.
Never try to open a cooling system pressure cap when
the radiator or coolant bottle is hot.
GEAR SELECTOR OVERRIDE
If a malfunction occurs and the gear selector cannot be
moved out of the PARK position, you can use the following
procedure to temporarily move the gear selector:
1. Turn the engine OFF.
2. Apply the parking brake.
3. Using a screwdriver or similar tool, carefully separatethe shifter bezel and boot assembly from the center
console, and raise it up to access the gear selector
mechanism. 4. Press and maintain firm pressure on the brake pedal.
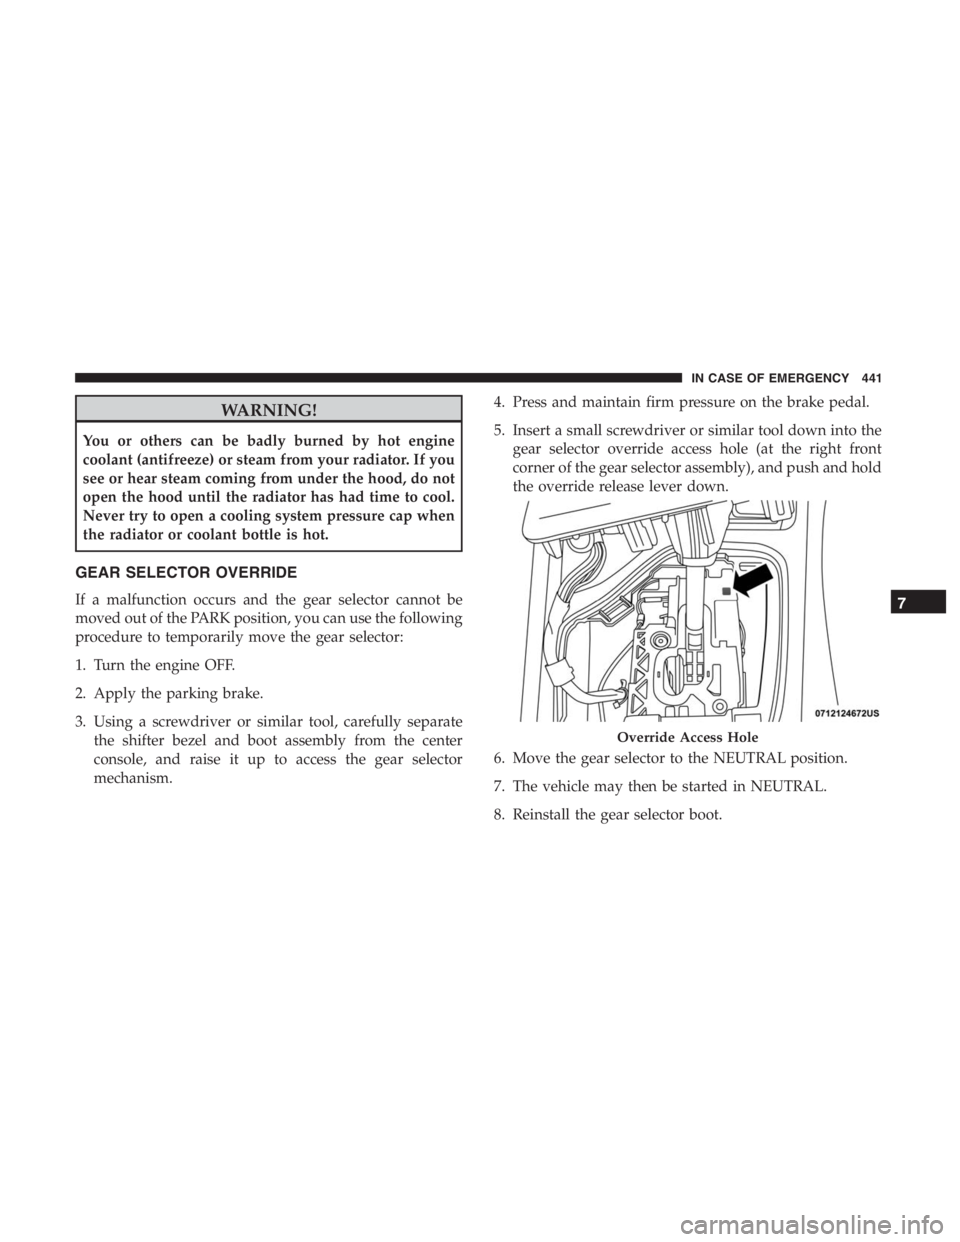
5. Insert a small screwdriver or similar tool down into the
gear selector override access hole (at the right front
corner of the gear selector assembly), and push and hold
the override release lever down.
6. Move the gear selector to the NEUTRAL position.
7. The vehicle may then be started in NEUTRAL.
8. Reinstall the gear selector boot.
Page 444 of 638
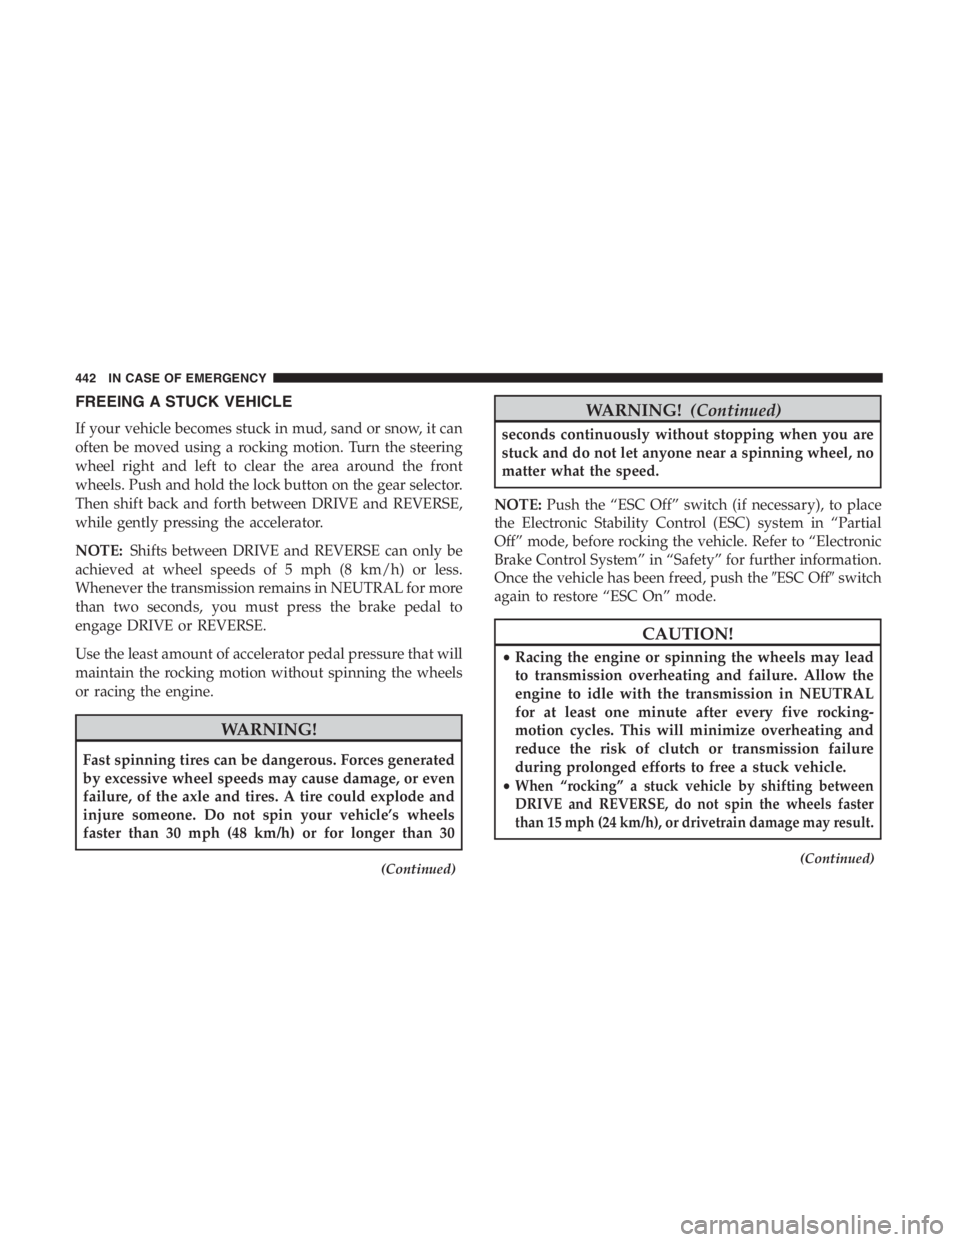
FREEING A STUCK VEHICLE
If your vehicle becomes stuck in mud, sand or snow, it can
often be moved using a rocking motion. Turn the steering
wheel right and left to clear the area around the front
wheels. Push and hold the lock button on the gear selector.
Then shift back and forth between DRIVE and REVERSE,
while gently pressing the accelerator.
NOTE:Shifts between DRIVE and REVERSE can only be
achieved at wheel speeds of 5 mph (8 km/h) or less.
Whenever the transmission remains in NEUTRAL for more
than two seconds, you must press the brake pedal to
engage DRIVE or REVERSE.
Use the least amount of accelerator pedal pressure that will
maintain the rocking motion without spinning the wheels
or racing the engine.
Page 454 of 638
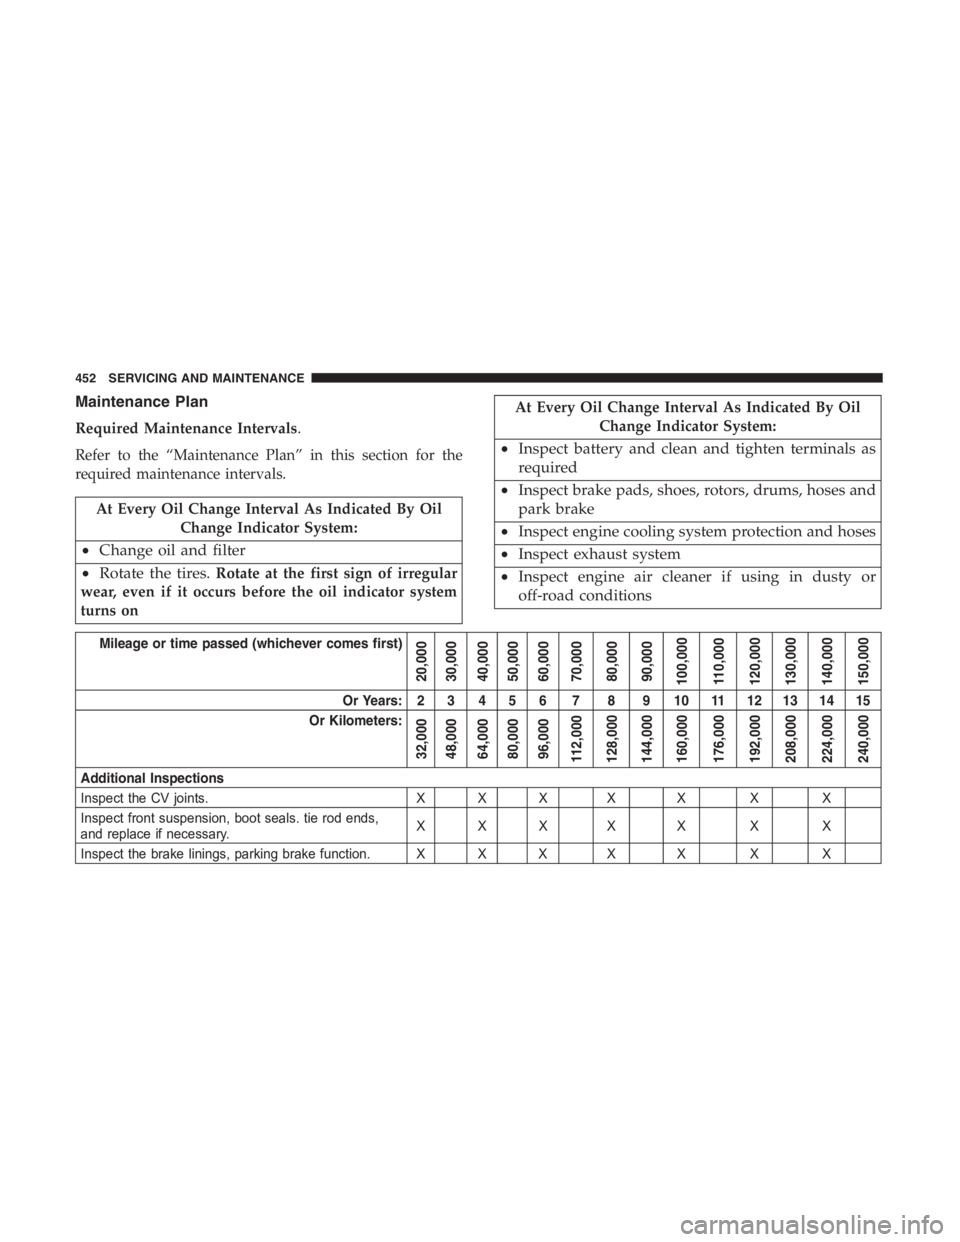
At Every Oil Change Interval As Indicated By OilChange Indicator System:
•Inspect battery and clean and tighten terminals as
required
• Inspect brake pads, shoes, rotors, drums, hoses and
park brake
• Inspect engine cooling system protection and hoses
• Inspect exhaust system
• Inspect engine air cleaner if using in dusty or
off-road conditions
Page 455 of 638
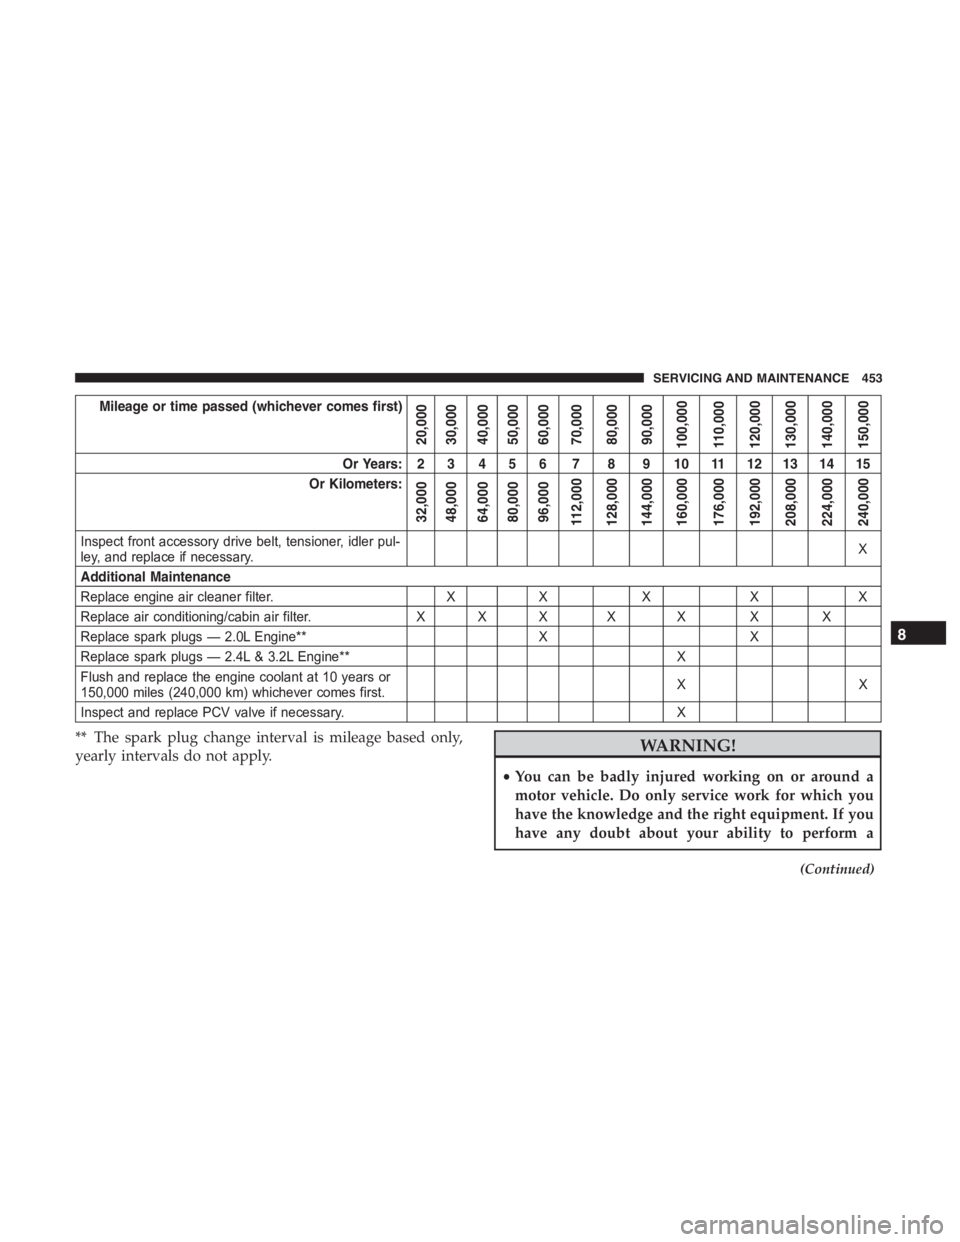
Mileage or time passed (whichever comes first)
20,000
30,000
40,000
50,000
60,000
70,000
80,000
90,000
100,000
110,000
120,000
130,000
140,000
150,000
Or Years: 2 3 4 5 6 7 8 9 10 11 12 13 14 15
Or Kilometers:
32,000
48,000
64,000
80,000
96,000
112,000
128,000
144,000
160,000
176,000
192,000
208,000
224,000
240,000
Inspect front accessory drive belt, tensioner, idler pul-
ley, and replace if necessary. X
Additional Maintenance
Replace engine air cleaner filter. XX X X X
Replace air conditioning/cabin air filter. X X X X X X X
Replace spark plugs — 2.0L Engine** XX
Replace spark plugs — 2.4L & 3.2L Engine** X
Flush and replace the engine coolant at 10 years or
150,000 miles (240,000 kmyf whichever comes first. XX
Inspect and replace PCV valve if necessary. X
** The spark plug change interval is mileage based only,
yearly intervals do not apply.
Page 456 of 638
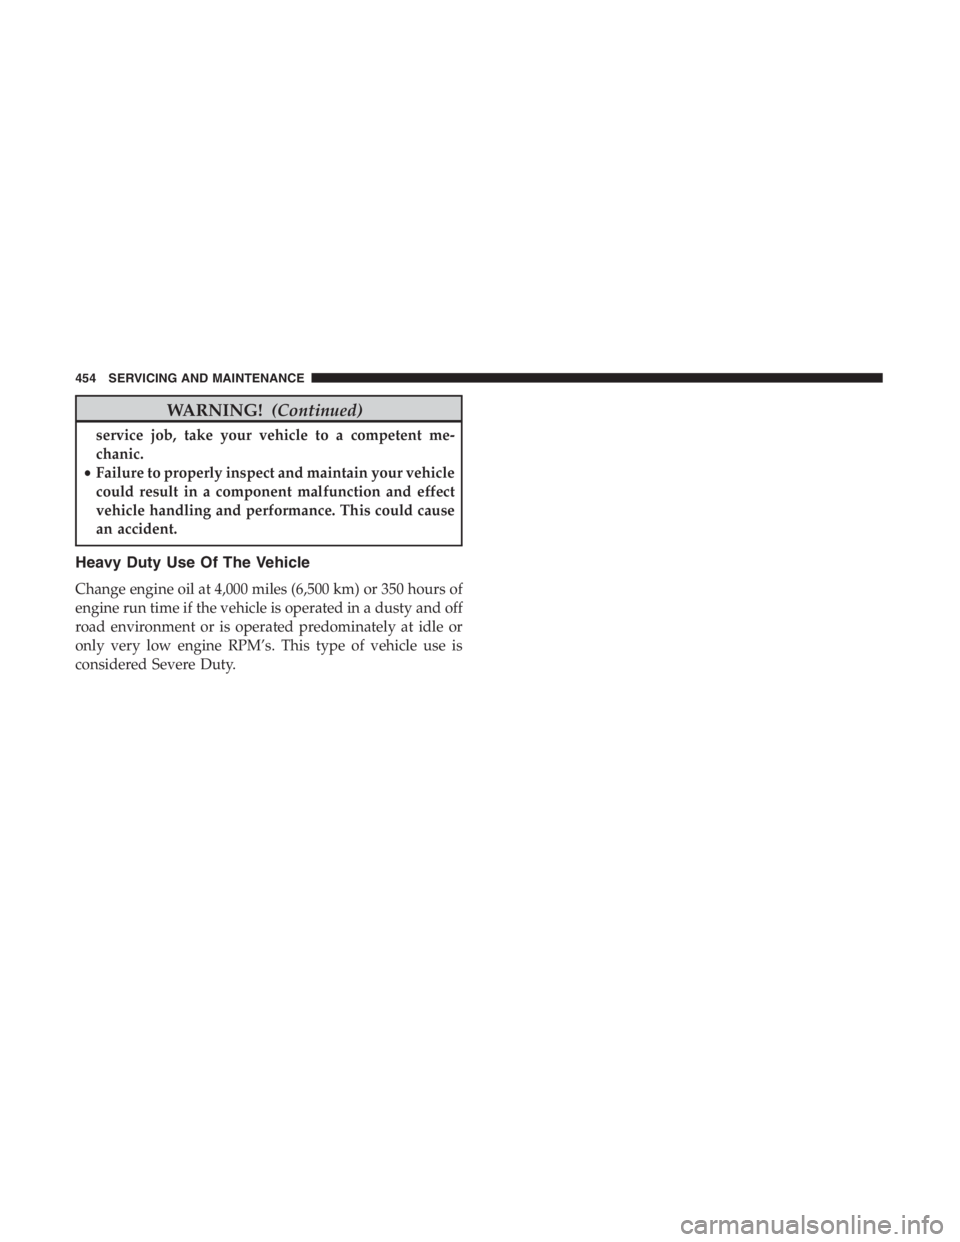
WARNING!(Continued)
service job, take your vehicle to a competent me-
chanic.
• Failure to properly inspect and maintain your vehicle
could result in a component malfunction and effect
vehicle handling and performance. This could cause
an accident.
Heavy Duty Use Of The Vehicle
Change engine oil at 4,000 miles (6,500 km) or 350 hours of
engine run time if the vehicle is operated in a dusty and off
road environment or is operated predominately at idle or
only very low engine RPM’s. This type of vehicle use is
considered Severe Duty.
454 SERVICING AND MAINTENANCE
Page 465 of 638
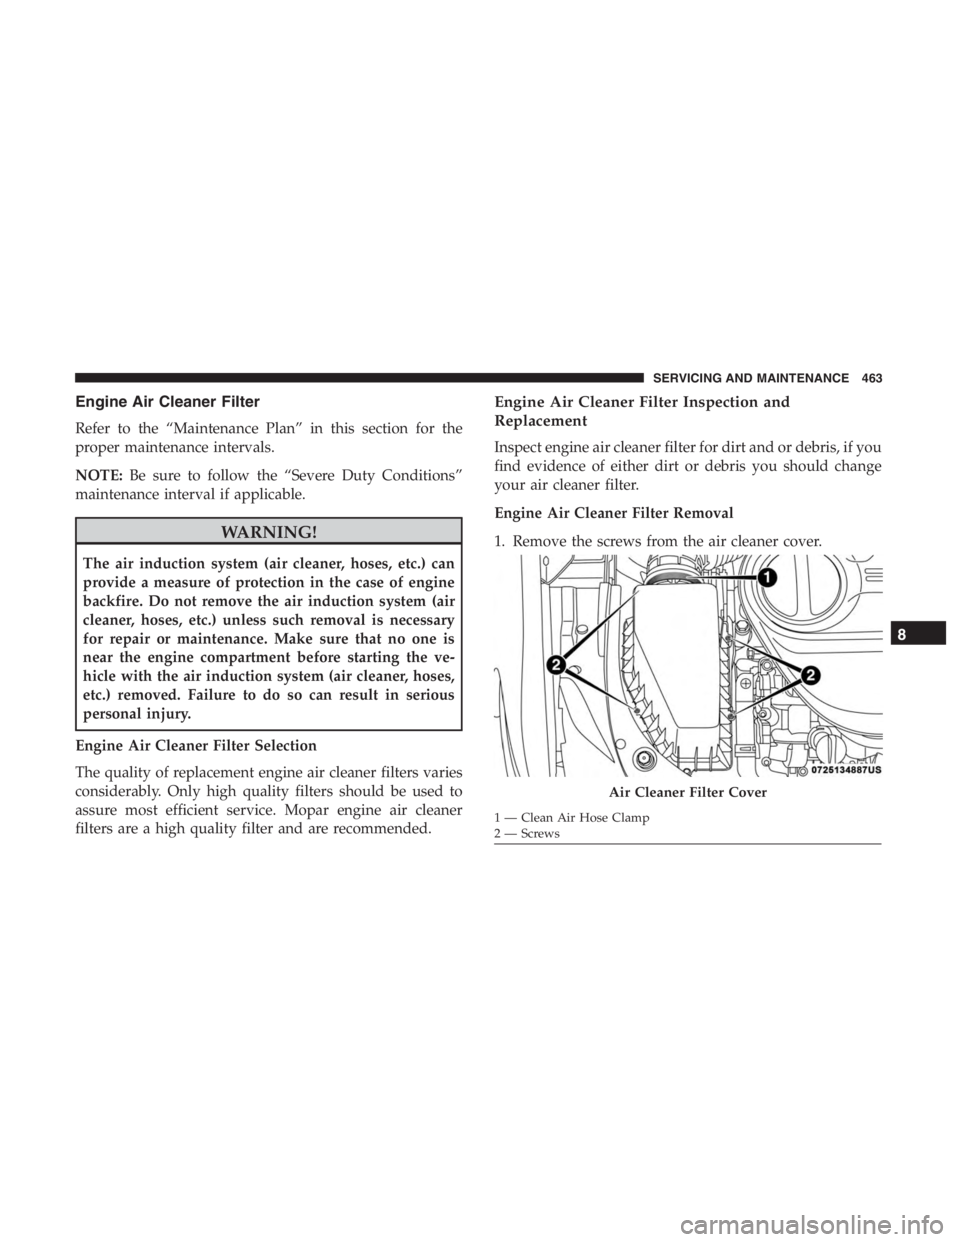
Engine Air Cleaner Filter
Refer to the “Maintenance Plan” in this section for the
proper maintenance intervals.
NOTE:Be sure to follow the “Severe Duty Conditions”
maintenance interval if applicable.
Page 467 of 638
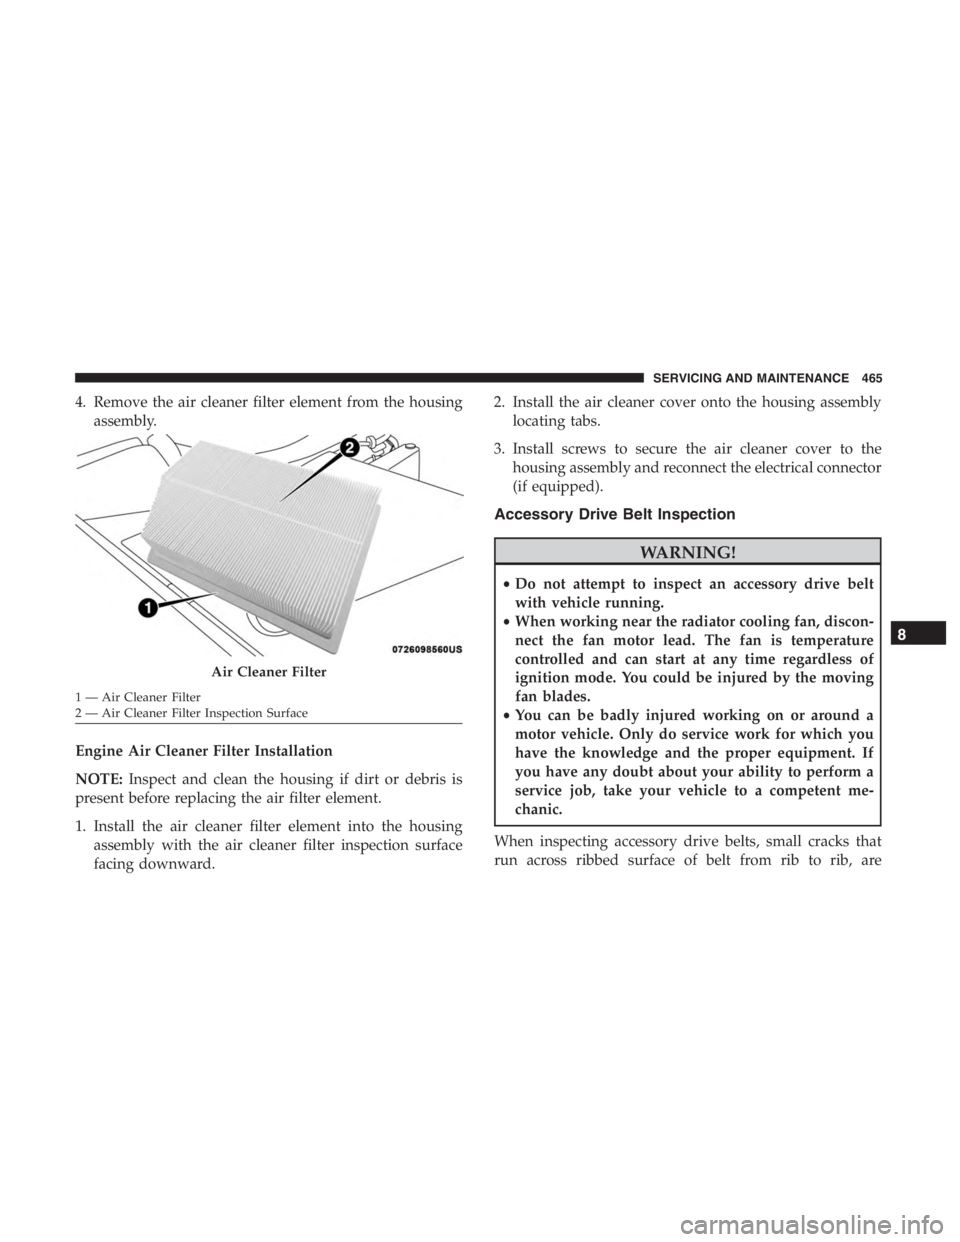
4. Remove the air cleaner filter element from the housingassembly.
Engine Air Cleaner Filter Installation
NOTE: Inspect and clean the housing if dirt or debris is
present before replacing the air filter element.
1. Install the air cleaner filter element into the housing assembly with the air cleaner filter inspection surface
facing downward. 2. Install the air cleaner cover onto the housing assembly
locating tabs.
3. Install screws to secure the air cleaner cover to the housing assembly and reconnect the electrical connector
(if equipped).
Accessory Drive Belt Inspection