child restraint JEEP COMMANDER 2007 1.G User Guide
[x] Cancel search | Manufacturer: JEEP, Model Year: 2007, Model line: COMMANDER, Model: JEEP COMMANDER 2007 1.GPages: 456, PDF Size: 6.85 MB
Page 62 of 456
kits or retro-fit kits. You are urged to take advantage of all
the available attachments provided with your child re-
straint in any vehicle.
NOTE:When using the LATCH attaching system to
install a child restraint, please ensure that all seat belts
not being used for occupant restraints are stowed and out
of reach of children. It is recommended that before
installing the child restraint, buckle the seat belt so the
seat belt is tucked behind the child restraint and out of
reach. If the buckled seat belt interferes with the child
restraint installation, instead of tucking the seat belt
behind the child restraint, route the seat belt through the
child restraint belt path and then buckle it. This should
stow the seat belt out of the reach of an inquisitive child.
Remind all children in the vehicle that the seat belts are
not toys and should not be played with, and never leave
your child unattended in the vehicle.The second row outboard seating positions have lower
anchorages that are capable of accommodating LATCH-
compatible child seats having flexible, webbing-mounted
lower attachments. Child seats with fixed lower attach-
ments must be installed in the outboard positions only.
Regardless of the specific type of lower attachment,
NEVERinstall LATCH-compatible child seats such that
two seats share a common lower anchorage.
If you are installing LATCH-compatible child restraints
in adjacent rear seating positions, you can use the
LATCH anchors or the vehicle’s seat belt for the outboard
position, but you must use the vehicle’s seat belt at the
center position. If your child restraints are not LATCH-
compatible, you can only install the child restraints using
the vehicle’s seat belts. Please refer to the next section for
typical installation instructions.
62 THINGS TO KNOW BEFORE STARTING YOUR VEHICLE
Page 63 of 456
Installing the LATCH-Compatible Child Restraint
System
We urge that you carefully follow the directions of the
manufacturer when installing your child restraint. Not all
child restraint systems will be installed as described here.
Again, carefully follow the installation instructions that
were provided with the child restraint system.
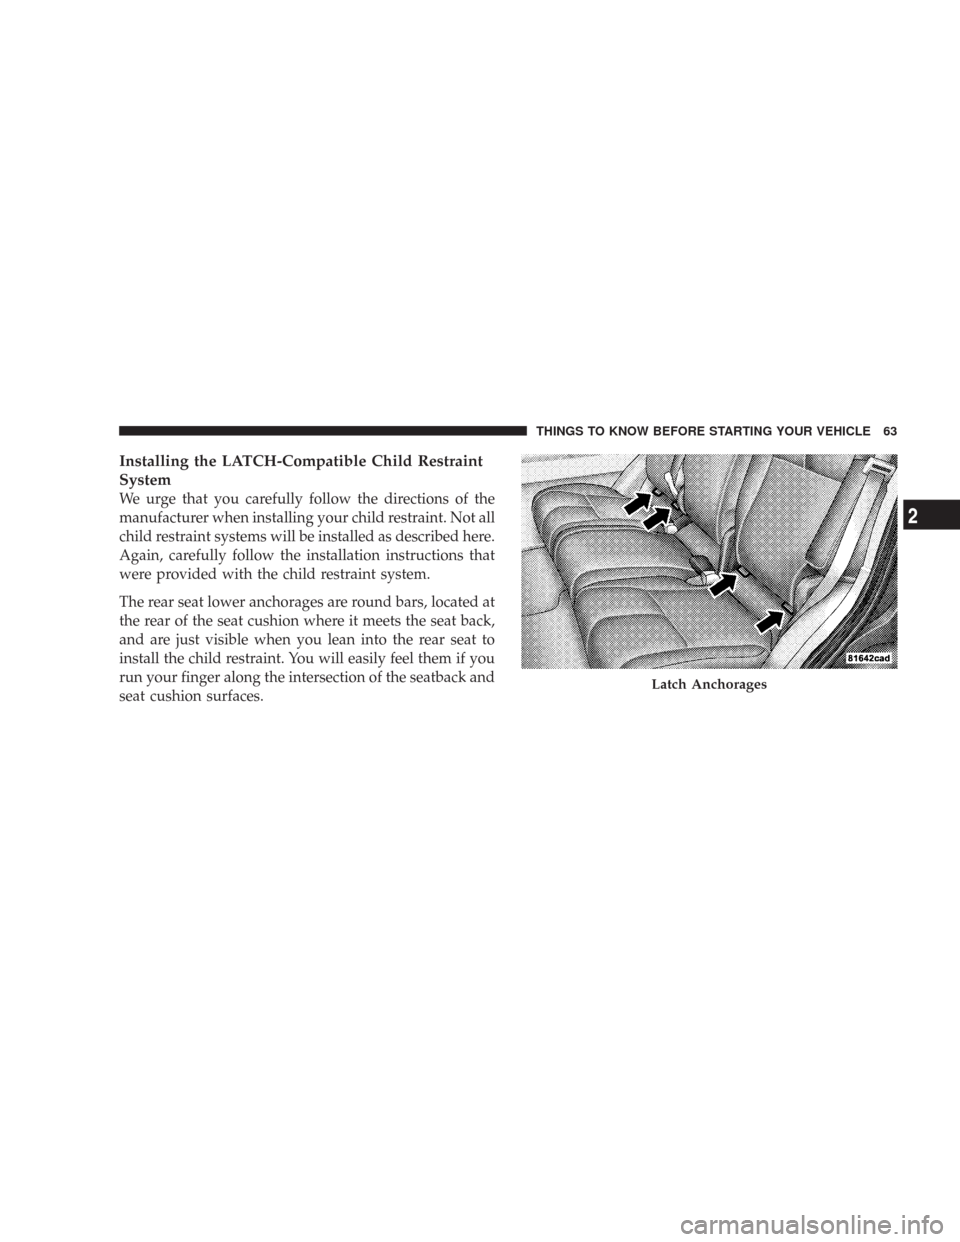
The rear seat lower anchorages are round bars, located at
the rear of the seat cushion where it meets the seat back,
and are just visible when you lean into the rear seat to
install the child restraint. You will easily feel them if you
run your finger along the intersection of the seatback and
seat cushion surfaces.
Latch Anchorages
THINGS TO KNOW BEFORE STARTING YOUR VEHICLE 63
2
Page 64 of 456
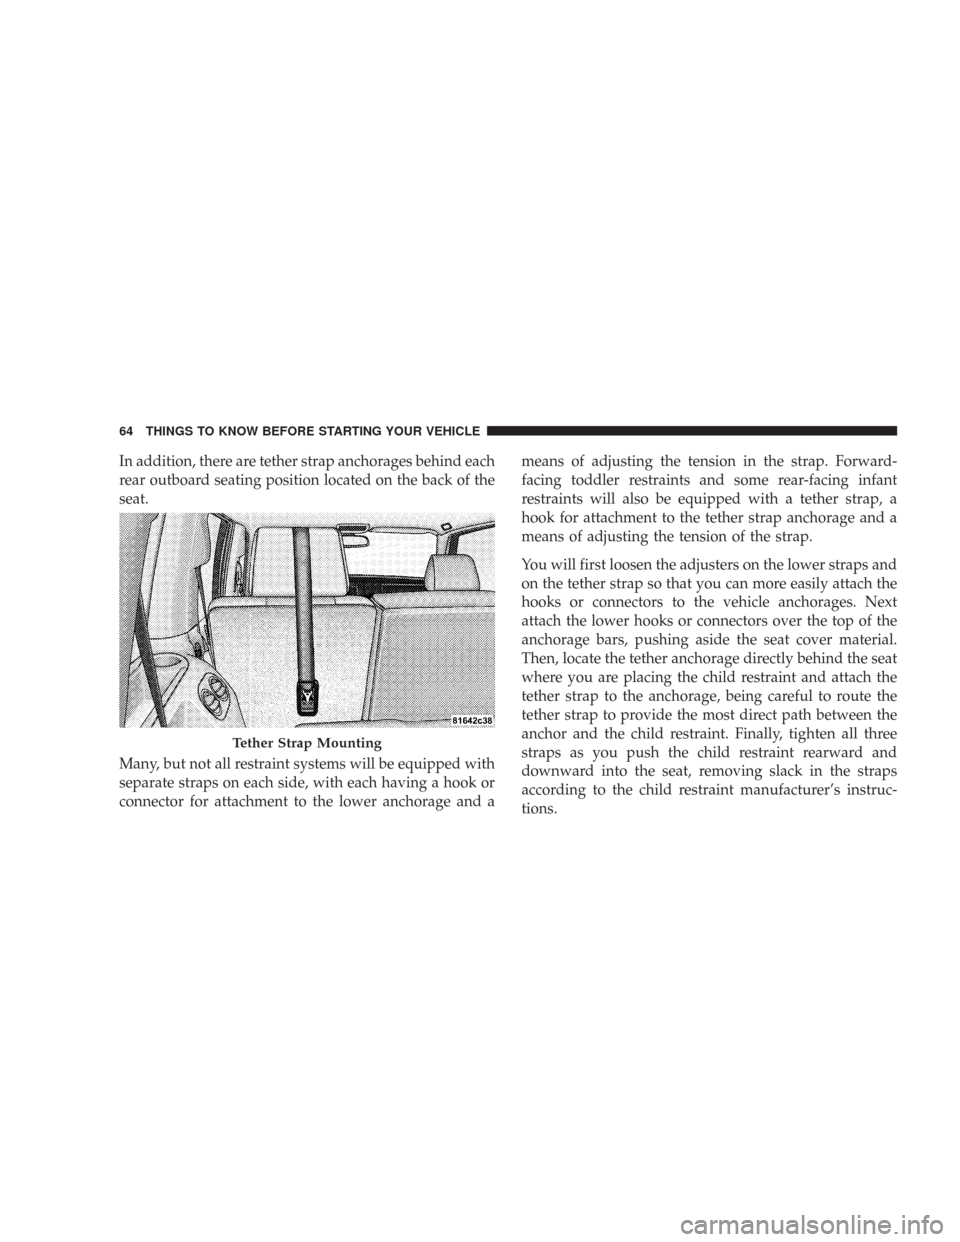
In addition, there are tether strap anchorages behind each
rear outboard seating position located on the back of the
seat.
Many, but not all restraint systems will be equipped with
separate straps on each side, with each having a hook or
connector for attachment to the lower anchorage and ameans of adjusting the tension in the strap. Forward-
facing toddler restraints and some rear-facing infant
restraints will also be equipped with a tether strap, a
hook for attachment to the tether strap anchorage and a
means of adjusting the tension of the strap.
You will first loosen the adjusters on the lower straps and
on the tether strap so that you can more easily attach the
hooks or connectors to the vehicle anchorages. Next
attach the lower hooks or connectors over the top of the
anchorage bars, pushing aside the seat cover material.
Then, locate the tether anchorage directly behind the seat
where you are placing the child restraint and attach the
tether strap to the anchorage, being careful to route the
tether strap to provide the most direct path between the
anchor and the child restraint. Finally, tighten all three
straps as you push the child restraint rearward and
downward into the seat, removing slack in the straps
according to the child restraint manufacturer’s instruc-
tions.
Tether Strap Mounting
64 THINGS TO KNOW BEFORE STARTING YOUR VEHICLE
Page 65 of 456
WARNING!
Improper installation of a child restraint to the
LATCH anchorages can lead to failure of an infant or
child restraint. The child could be badly injured or
killed. Follow the manufacturer’s directions exactly
when installing an infant or child restraint.
Installing Child Restraints Using the Vehicle Seat
Belt
The passenger seat belts are equipped with either cinch-
ing latch plates or automatic locking retractors, which are
designed to keep the lap portion tight around the child
restraint so that it is not necessary to use a locking clip. If
the seat belt has a cinching latch plate, pulling up on the
shoulder portion of the lap/shoulder belt will tighten the
belt. The cinching latch plate will keep the belt tight,
however, any seat belt system will loosen with time, so
check the belt occasionally and pull it tight if necessary.If the seat belt has a automatic locking retractor, it will
have a distinctive label. Pull the belt from the retractor
until there is enough to allow you to pass through the
child restraint and slide the latch plate into the buckle.
Then, pull the belt until it is all extracted from the
retractor. Allow the belt to return to the retractor, pulling
on the excess webbing to tighten the lap portion about
the child restraint. Refer to “Automatic Locking Mode”
earlier in this section.
In the rear seat, you may have trouble tightening the
lap/shoulder belt on the child restraint because the
buckle or latch plate is too close to the belt path opening
on the restraint. Disconnect the latch plate from the
buckle and twist the short buckle-end belt several times
to shorten it. Insert the latch plate into the buckle with the
release button facing out.
If the belt still can’t be tightened, or if by pulling and
pushing on the restraint loosens the belt, you may need
THINGS TO KNOW BEFORE STARTING YOUR VEHICLE 65
2
Page 66 of 456
to do something more. Disconnect the latch plate from
the buckle, turn the buckle around, and insert the latch
plate into the buckle again. If you still can’t make the
child restraint secure, try a different seating position.
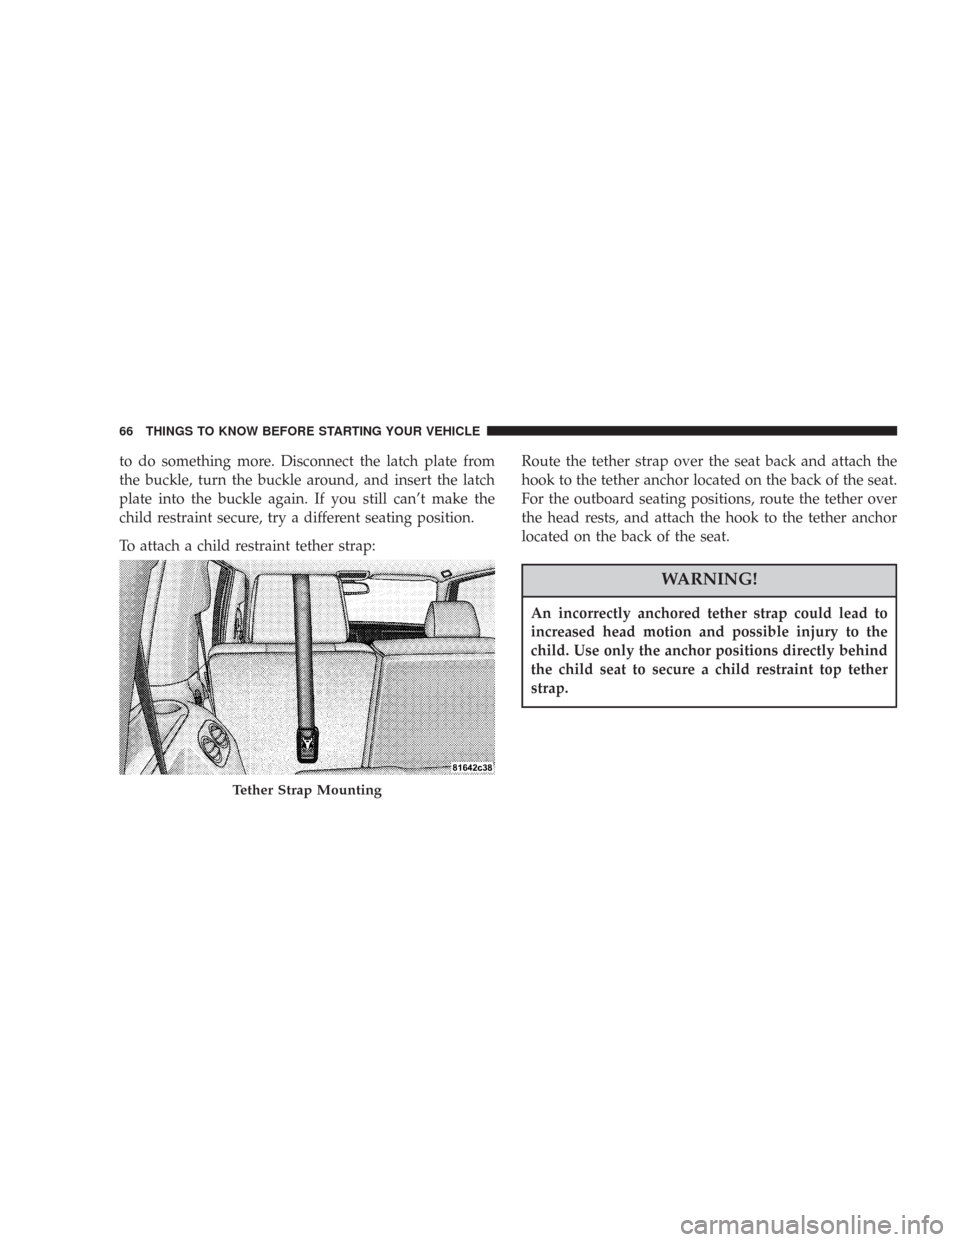
To attach a child restraint tether strap:Route the tether strap over the seat back and attach the
hook to the tether anchor located on the back of the seat.
For the outboard seating positions, route the tether over
the head rests, and attach the hook to the tether anchor
located on the back of the seat.
WARNING!
An incorrectly anchored tether strap could lead to
increased head motion and possible injury to the
child. Use only the anchor positions directly behind
the child seat to secure a child restraint top tether
strap.
Tether Strap Mounting
66 THINGS TO KNOW BEFORE STARTING YOUR VEHICLE
Page 113 of 456
4. Close the tailgate.
WARNING!
The cargo area in the rear of the vehicle (with the
rear seatbacks in the locked-up or folded down
position) should not be used as a play area by
children when the vehicle is in motion. They could
be seriously injured in an accident. Children should
be seated and using the proper restraint system.
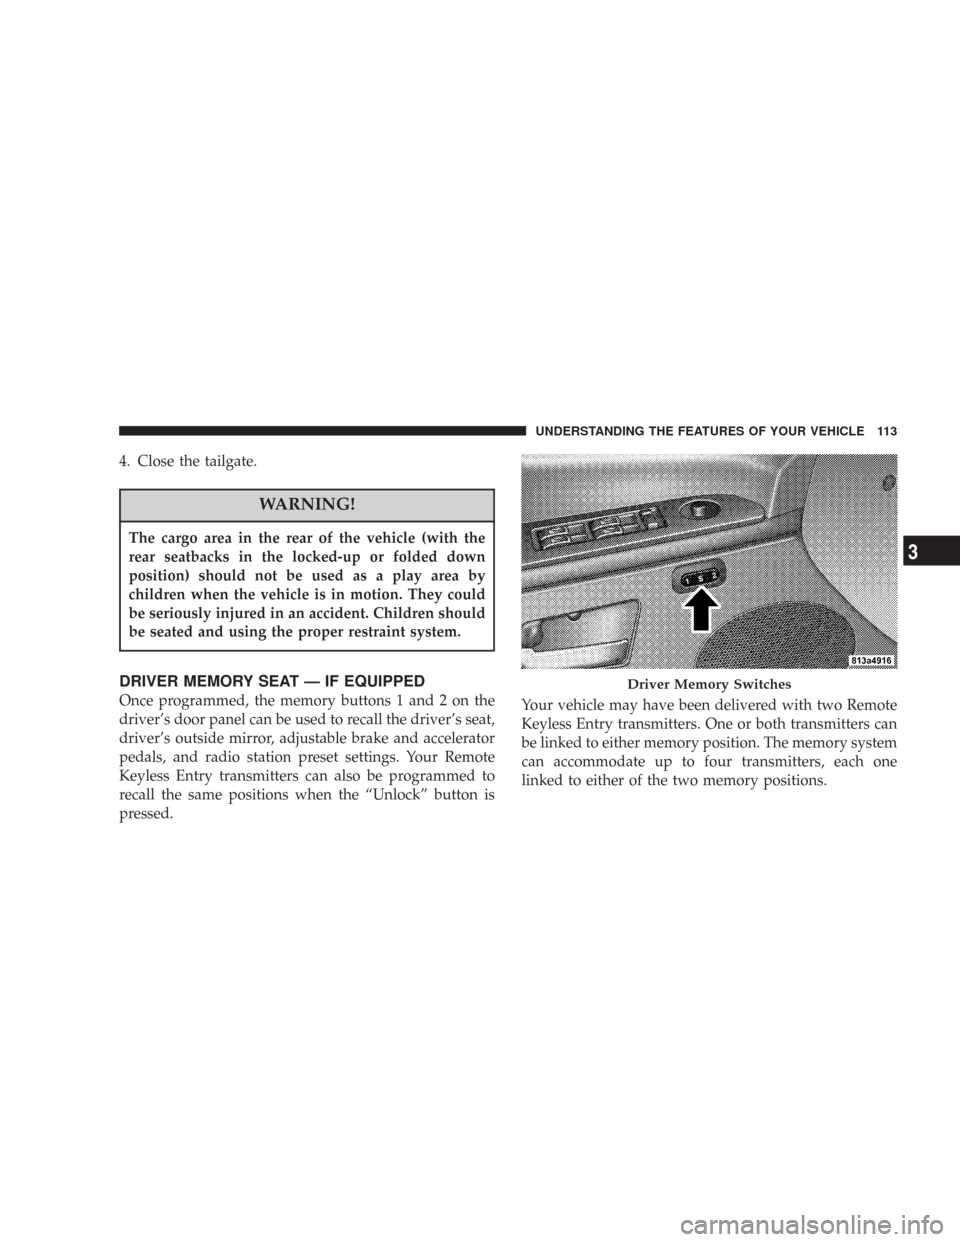
DRIVER MEMORY SEAT — IF EQUIPPED
Once programmed, the memory buttons 1 and 2 on the
driver’s door panel can be used to recall the driver’s seat,
driver’s outside mirror, adjustable brake and accelerator
pedals, and radio station preset settings. Your Remote
Keyless Entry transmitters can also be programmed to
recall the same positions when the “Unlock” button is
pressed.Your vehicle may have been delivered with two Remote
Keyless Entry transmitters. One or both transmitters can
be linked to either memory position. The memory system
can accommodate up to four transmitters, each one
linked to either of the two memory positions.
Driver Memory Switches
UNDERSTANDING THE FEATURES OF YOUR VEHICLE 113
3
Page 440 of 456
Caution, Exhaust Gas..................... 152
CD (Compact Disc) Player...............199,213
Cellular Phone.......................... 80
Certification Label....................... 317
Chains, Tire............................ 295
Changing A Flat Tire..................... 342
Chart, Tire Sizing........................ 281
Checks, Safety.........................69,70
Child Restraint......................57,63,65
Child Restraint Tether Anchors.............61,63
Child Safety Locks........................ 28
Climate Control......................... 233
Clock...........................201,215,221
Command View Skylights.................. 161
Compact Disc (CD) Maintenance............. 232
Compass.............................. 191
Compass Variance....................... 196
Computer, Trip/Travel.................... 191
Console, Overhead....................... 151Contract, Service........................ 432
Converter, Catalytic...................... 367
Cooling System......................... 375
Adding Coolant (Antifreeze).............. 377
Coolant Capacity...................... 402
Coolant Level......................... 379
Disposal of Used Coolant................ 379
Drain, Flush, and Refill.................. 376
Inspection........................375,379
Points to Remember.................... 379
Pressure Cap......................... 378
Radiator Cap......................... 378
Selection of Coolant (Antifreeze).........376,402
Courtesy Lights......................... 125
Crankcase Emission Control System.......... 369
Cruise Control (Speed Control).............. 132
Cruise Light........................... 182
Cup Holder............................ 163
Customer Assistance..................... 430
440 INDEX
Page 451 of 456
Restraints, Child......................... 57
Restraints, Occupant...................... 37
Rocking Vehicle When Stuck................ 263
Roof Type Carrier....................... 168
Rotation, Tires.......................... 296
Safety Checks Inside Vehicle................. 69
Safety Checks Outside Vehicle............... 70
Safety Defects, Reporting.................. 433
Safety, Exhaust Gas....................... 36
Safety Information, Tire................... 280
Safety Tips............................. 68
Satellite Radio.......................221,226
Satellite Radio Antenna................... 230
Schedule, Maintenance.................... 406
Seat Belt Maintenance..................... 69
Seat Belts.............................. 38
Adjustable Upper Shoulder Anchorage........ 42
And Pregnant Women................... 45Child Restraint.......................57,65
Extender............................. 45
Front Seat............................ 38
Inspection............................ 69
Maintenance........................69,392
Pretensioners.......................... 44
Reminder............................ 182
Shoulder Belt Anchorage.................. 42
Seats................................. 103
Adjustment.......................... 103
Cleaning............................ 391
Easy Entry........................... 116
Fold and Tumble Rear................... 108
Head Restraints....................... 106
Heated............................. 106
Lumbar Support....................... 105
Memory............................. 113
Power...........................105,106
Rear Folding.......................108,111
INDEX 451
10
Page 453 of 456
Steering Wheel Mounted Sound System
Controls.............................. 230
Storage............................... 400
Storage, Vehicle......................245,400
Storing Your Vehicle...................... 400
Sun Roof.............................. 158
Sun Visor Extension....................... 80
Supplemental Restraint System - Airbag........ 46
Synthetic Engine Oil...................... 364
System, Navigation...................... 220
System, Remote Starting.................... 25
Tachometer............................ 178
Temperature Control, Automatic (ATC)........ 236
Temperature Gauge, Engine Coolant.......... 180
Tether Anchor, Child Restraint............... 61
Tilt Steering Column..................... 130
Time Delay, Headlight.................... 124
Tire and Loading Information Placard......... 284Tire Identification Number (TIN)............. 283
Tire Markings.......................... 280
Tire Safety Information.................... 280
Tires ............................70,288,435
Air Pressure.......................... 289
Alignment and Balance.................. 294
Chains.............................. 295
Changing............................ 342
General Information.................... 288
High Speed.......................... 291
Inflation Pressures..................... 289
Jacking............................. 342
Life of Tires.......................... 293
Load Capacity.....................284,285
Pressure Monitor System (TPMS)........... 297
Pressure Warning Light.................. 179
Quality Grading....................... 435
Radial.............................. 291
Replacement......................... 293
INDEX 453
10