window JEEP COMMANDER 2010 1.G Owner's Manual
[x] Cancel search | Manufacturer: JEEP, Model Year: 2010, Model line: COMMANDER, Model: JEEP COMMANDER 2010 1.GPages: 460, PDF Size: 7.11 MB
Page 139 of 460
Sunshade Operation
The sunshade can be opened manually. However, the
sunshade will open automatically as the sunroof opens.
NOTE:The sunshade cannot be closed if the sunroof is
open.
Wind Buffeting
Wind buffeting can be described as the perception of
pressure on the ears or a helicopter-type sound in the
ears. Your vehicle may exhibit wind buffeting with the
windows down, or the sunroof (if equipped) in certain
open or partially open positions. This is a normal occur-
rence and can be minimized. If the buffeting occurs with
the rear windows open, open the front and rear windows
together to minimize the buffeting. If the buffeting occurs
with the sunroof open, adjust the sunroof opening to
minimize the buffeting or open any window.
Sunroof Maintenance
Use only a non-abrasive cleaner and a soft cloth to clean
the glass panel.
Ignition Off Operation
The power sunroof switches remain active for 10 minutes
after the ignition switch has been turned OFF. Opening
either front door will cancel this feature.
Sunroof Fully Closed
Press the switch forward and release to ensure that the
sunroof is fully closed.
COMMAND-VIEW™ SKYLIGHTS — IF EQUIPPED
The two fixed skylights are above the second row seats.
The glass is tinted to shield the second row occupants
from the sun and glare. Each skylight includes a roller
shade that is concealed in the assembly to block out more
light when desired.
3
UNDERSTANDING THE FEATURES OF YOUR VEHICLE 139
Page 148 of 460
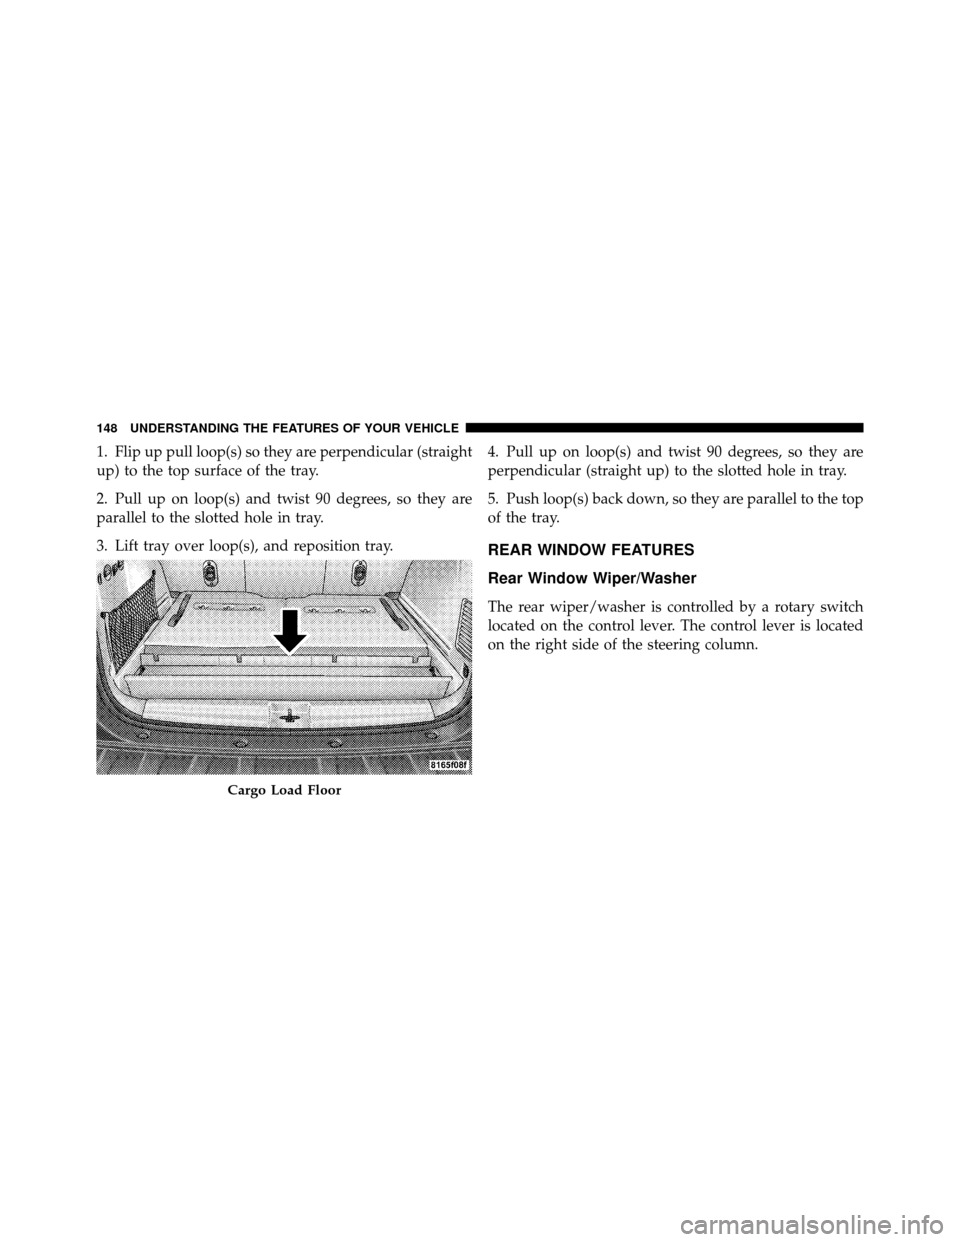
1. Flip up pull loop(s) so they are perpendicular (straight
up) to the top surface of the tray.
2. Pull up on loop(s) and twist 90 degrees, so they are
parallel to the slotted hole in tray.
3. Lift tray over loop(s), and reposition tray.4. Pull up on loop(s) and twist 90 degrees, so they are
perpendicular (straight up) to the slotted hole in tray.
5. Push loop(s) back down, so they are parallel to the top
of the tray.
REAR WINDOW FEATURES
Rear Window Wiper/Washer
The rear wiper/washer is controlled by a rotary switch
located on the control lever. The control lever is located
on the right side of the steering column.
Cargo Load Floor
148 UNDERSTANDING THE FEATURES OF YOUR VEHICLE
Page 149 of 460
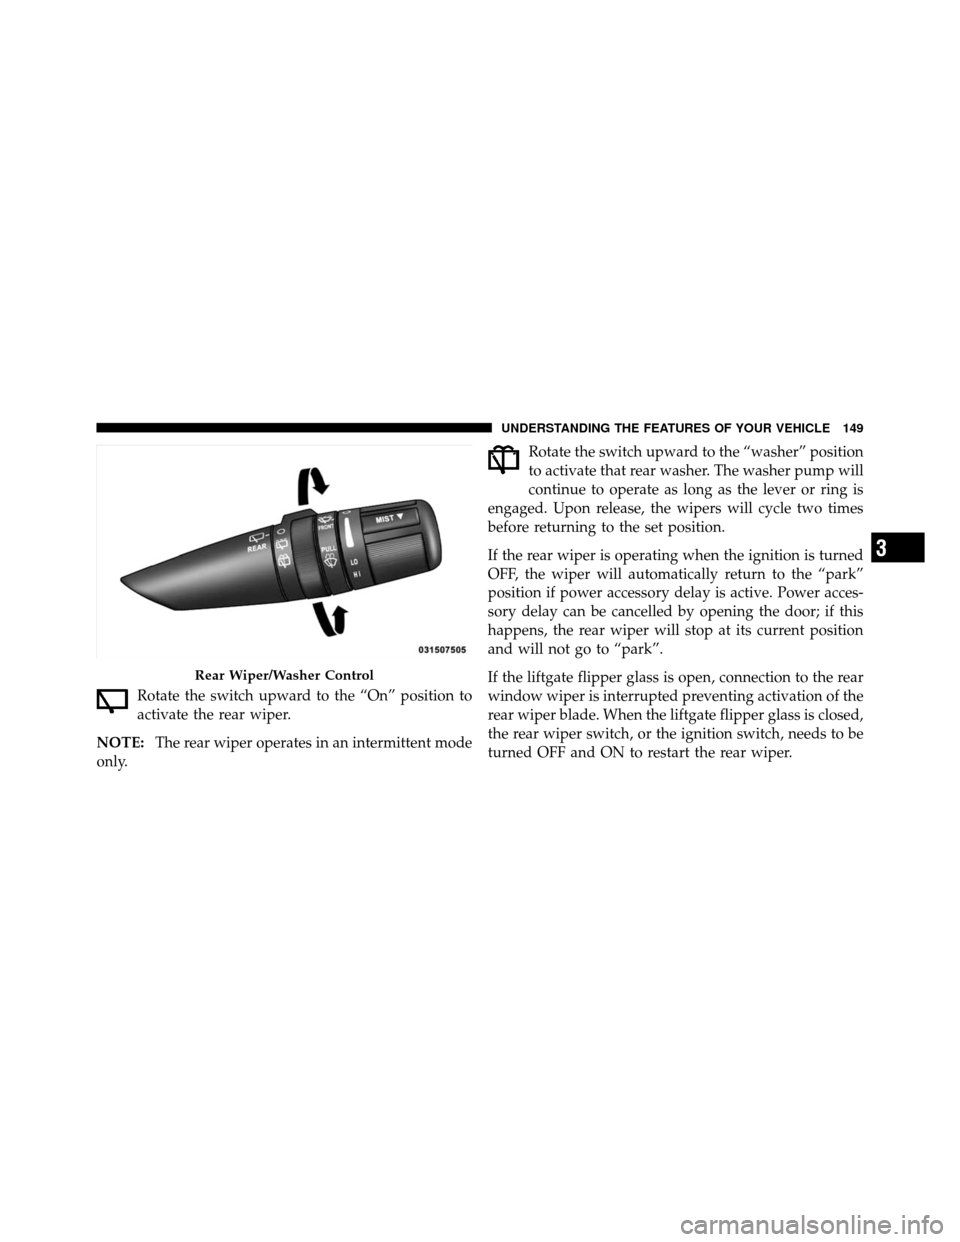
Rotate the switch upward to the “On” position to
activate the rear wiper.
NOTE: The rear wiper operates in an intermittent mode
only. Rotate the switch upward to the “washer” position
to activate that rear washer. The washer pump will
continue to operate as long as the lever or ring is
engaged. Upon release, the wipers will cycle two times
before returning to the set position.
If the rear wiper is operating when the ignition is turned
OFF, the wiper will automatically return to the “park”
position if power accessory delay is active. Power acces-
sory delay can be cancelled by opening the door; if this
happens, the rear wiper will stop at its current position
and will not go to “park”.
If the liftgate flipper glass is open, connection to the rear
window wiper is interrupted preventing activation of the
rear wiper blade. When the liftgate flipper glass is closed,
the rear wiper switch, or the ignition switch, needs to be
turned OFF and ON to restart the rear wiper.
Rear Wiper/Washer Control
3
UNDERSTANDING THE FEATURES OF YOUR VEHICLE 149
Page 150 of 460
Rear Window Defroster
The rear window defroster button is located on the
climate control panel. Press this button to turn on
the rear window defroster and the heated outside mirrors
(if equipped). An indicator in the button will illuminate
when the rear window defroster is on. The rear window
defroster automatically turns off after approximately
10 minutes. For an additional five minutes of operation,
press the button a second time.
NOTE: To prevent excessive battery drain, use the rear
window defroster only when the engine is operating.
CAUTION!
Failure to follow these cautions can cause damage to
the heating elements:
(Continued)
CAUTION! (Continued)
•Use care when washing the inside of the rear
window. Do not use abrasive window cleaners on
the interior surface of the window. Use a soft cloth
and a mild washing solution, wiping parallel to
the heating elements. Labels can be peeled off
after soaking with warm water.
•Do not use scrapers, sharp instruments, or abra-
sive window cleaners on the interior surface of the
window.
•Keep all objects a safe distance from the window.
ROOF LUGGAGE RACK — IF EQUIPPED
The crossbars and siderails are designed to carry the
weight on vehicles equipped with a luggage rack. The
load must not exceed 150 lbs (68 kg), and should be
uniformly distributed over the luggage rack crossbars.
150 UNDERSTANDING THE FEATURES OF YOUR VEHICLE
Page 184 of 460
NOTE:The seat will return to the memorized seat
location (if Recall Memory with Remote Key Unlock is set
to ON) when the RKE transmitter is used to unlock the
door. Refer to “Easy Entry/Exit Seat” under “Driver
Memory Seat” in Section 3 of this manual for more
information.
Key Off Power Delay
When this feature is selected, the power window
switches, radio, uconnect™ phone (if equipped), DVD
video system (if equipped), power sunroof (if equipped),
and power outlets will remain active for up to 10 minutes
after the ignition switch is turned off. Opening a vehicle
door will cancel this feature. To make your selection,
press and release the FUNCTION SELECT button until
“Off,” “45 sec.,” “5 min.,” or “10 min.” appears.
Illuminated Approach
When this feature is selected, the headlights will activate
and remain on for up to 90 seconds when the doors are unlocked with the RKE transmitter. To make your selec-
tion, press and release the FUNCTION SELECT button
until “OFF,” “30 sec.,” “60 sec.,” or “90 sec.” appears.
Hill Start Assist
When on is selected, the HSA system is active. Refer to
“HSA (Hill Start Assistance)” under “Electronic Brake
Control System” in Section 5 of this manual for system
function and operating information. To make your selec-
tion, press and release the FUNCTION SELECT button
until “ON” or “OFF” appears.
Display Units of Measure In
The EVIC, odometer, and uconnect™ gps (if equipped)
can be changed between English and Metric units of
measure. To make your selection, press and release the
FUNCTION SELECT button until “ENGLISH” or “MET-
RIC” appears.
184 UNDERSTANDING YOUR INSTRUMENT PANEL
Page 191 of 460
Push the rotary TUNE/SCROLL control knob a second
time and MID will display. Turn the TUNE/SCROLL
control knob to the right or left to increase or decrease the
mid-range tones.
Push the rotary TUNE/SCROLL control knob a third
time and TREBLE will display. Turn the TUNE/SCROLL
control knob to the right or left to increase or decrease the
treble tones.
Push the rotary TUNE/SCROLL control knob a fourth
time and BALANCE will display. Turn the TUNE/
SCROLL control knob to the right or left to adjust the
sound level from the right or left side speakers.
Push the rotary TUNE/SCROLL control knob a fifth time
and FADE will display. Turn the TUNE/SCROLL control
knob to the left or right to adjust the sound level between
the front and rear speakers.Push the rotary TUNE/SCROLL control knob again to
exit setting tone, balance, and fade.
AM/FM Button
Press the buttons to select either AM or FM mode.
SET/RND Button — To Set the Pushbutton
Memory
When you are receiving a station that you wish to
commit to pushbutton memory, press the SET/RND
button. The symbol SET 1 will now show in the display
window. Select the button (1 to 6) you wish to lock onto
this station and press and release that button. If a button
is not selected within five seconds after pressing the
SET/RND button, the station will continue to play but
will not be stored into pushbutton memory.4
UNDERSTANDING YOUR INSTRUMENT PANEL 191
Page 192 of 460
You may add a second station to each pushbutton by
repeating the above procedure with this exception: Press
the SET/RND button twice and SET 2 will show in the
display window. Each button can be set for SET 1 and
SET 2 in both AM and FM. This allows a total of 12 AM
and 12 FM stations to be stored into pushbutton memory.
The stations stored in SET 2 memory can be selected by
pressing the pushbutton twice.
Every time a preset button is used, a corresponding
button number will display.
Buttons1-6
These buttons tune the radio to the stations that you
commit to pushbutton memory (12 AM and 12 FM
stations).
DISC Button
Pressing the DISC button will allow you to switch from
AM/FM modes to Disc modes.
Operation Instructions — CD MODE For CD And
MP3 Audio Play
NOTE:
•The ignition switch must be in the ON or ACC
position to operate the radio.
•This radio is capable of playing compact discs (CD),
recordable compact discs (CD-R), rewritable compact
discs (CD-RW), compact discs with MP3 tracks and
multisession compact discs with CD and MP3 tracks.
Inserting Compact Disc(s)
Gently insert one CD into the CD player with the CD
label facing up. The CD will automatically be pulled into
the CD player and the CD icon will illuminate on the
radio display. If a CD does not go into the slot more than
1.0 in (2.5 cm), a disc may already be loaded and must be
ejected before a new disc can be loaded.
192 UNDERSTANDING YOUR INSTRUMENT PANEL
Page 203 of 460
window. Select the button (1–6) you wish to lock onto this
station and press and release that button. If a button is
not selected within five seconds after pressing the SET/
RND button, the station will continue to play but will not
be stored into pushbutton memory.
You may add a second station to each pushbutton by
repeating the above procedure with this exception: Press
the SET/RND button twice and SET 2 will show in the
display window. Each button can be set for SET 1 and
SET 2 in both AM and FM. This allows a total of 12 AM
and 12 FM stations to be stored into pushbutton memory.
The stations stored in SET 2 memory can be selected by
pressing the pushbutton twice.
Every time a preset button is used, a corresponding
button number will display.Buttons 1 - 6
These buttons tune the radio to the stations that you
commit to pushbutton memory (12 AM and 12 FM
stations).
DISC/AUX Button
Pressing the DISC/AUX button will allow you to switch
from AM/FM modes to DISC/AUX mode.
Operation Instructions — CD MODE for CD and
MP3 Audio Play
NOTE:
•The ignition switch must be in the ON or ACC
position to operate the radio.
•This radio is capable of playing compact discs (CD),
recordable compact discs (CD-R), rewritable compact
discs (CD-RW), compact discs with MP3 tracks and
multisession compact discs with CD and MP3 tracks.
4
UNDERSTANDING YOUR INSTRUMENT PANEL 203
Page 218 of 460
or turning the TUNE/SCROLL control knob within five
seconds will allow the program format type to be se-
lected.
Toggle the MUSIC TYPE button again to select the music
type.
By pressing the SEEK button when the Music Type
function is active, the radio will be tuned to the next
channel with the same selected Music Type name.
If a preset button is activated while in the Music Type
(Program Type) mode, the Music Type mode will be
exited and the radio will tune to the preset channel.
SETUP Button
Pressing the SETUP button allows you to select the
following items:
•Display Sirius ID number — Press the AUDIO/
SELECT button to display the Sirius ID number. This
number is used to activate, deactivate, or change the
Sirius subscription.
SET Button – To Set the Pushbutton Memory
When you are receiving a channel that you wish to
commit to pushbutton memory, press the SET button.
The symbol SET 1 will now show in the display window.
Select the button (1-6) you wish to lock onto this channel
and press and release that button. If a button is not
selected within five seconds after pressing the SET but-
ton, the channel will continue to play but will not be
stored into pushbutton memory.
You may add a second channel to each pushbutton by
repeating the above procedure with this exception: Press
the SET button twice and SET 2 will show in the display
window. Each button can be set for SET 1 and SET 2. This
allows a total of 12 Satellite channels to be stored into
218 UNDERSTANDING YOUR INSTRUMENT PANEL
Page 225 of 460
directed to the front door windows through the side
window demister grilles. Some airflow is delivered to the
floor while in defrost so that comfort can be maintained.
Defrost/FloorAir flows through the front and rear floor outlets
and the outlets at the base of the windshield. Air is
also directed to the front door windows through the
side window demister grilles. Some airflow is delivered
to the floor while in defrost so that comfort can be
maintained.
Floor Air flows through the floor outlets located under
the instrument panel and into the rear seating area
through vents under the front seats. Some airflow is
delivered to defrost while in the floor mode so that
comfort can be maintained. Bi-Level
Air flows both through the outlets located in the
instrument panel and those located on the floor. Air
flows through the registers in the back of the center
console, and under the front seats to the rear seat
passengers. These registers can be closed to partially
block airflow. The center console outlets deliver condi-
tioned air while the floor outlets deliver heated air.
Panel Air flows through the outlets located in the instru-
ment panel. Air flows through the registers in the
back of the center console to the rear seat passengers.
These registers can be closed to block airflow.
4
UNDERSTANDING YOUR INSTRUMENT PANEL 225