manual radio set JEEP COMMANDER 2010 1.G Owners Manual
[x] Cancel search | Manufacturer: JEEP, Model Year: 2010, Model line: COMMANDER, Model: JEEP COMMANDER 2010 1.GPages: 460, PDF Size: 7.11 MB
Page 16 of 460
NOTE:
•If you try to remove the key before you place the shift
lever in PARK, it may become trapped temporarily in
the ignition switch. If this occurs, rotate the key to the
right slightly, then remove the key as described. If a
malfunction occurs, the system will trap the key in the
ignition switch to warn you that this safety feature is
inoperable. The engine can be started and stopped, but
the key cannot be removed until you obtain service.
•For vehicles equipped with the Electronic Vehicle
Information Center (EVIC), the power window
switches, radio, power sunroof (if equipped), and
power outlets will remain active for up to 10 minutes
after the ignition switch is turned to the LOCK posi-
tion. Opening either front door will cancel this feature.
The time for this feature is programmable. For details,
refer to “Key Off Power Delay,” under “PersonalSettings (Customer-Programmable Features)” under
“Electronic Vehicle Information Center (EVIC)” in
Section 4 of this manual.
WARNING!
Never leave children alone in a vehicle. Leaving
unattended children in a vehicle is dangerous for a
number of reasons. A child or others could be seri-
ously or fatally injured. Do not leave the key in the
ignition. A child could operate power windows,
other controls, or move the vehicle.
CAUTION!
An unlocked car is an invitation to thieves. Always
remove key from the ignition and lock all doors
when leaving the vehicle unattended.
16 THINGS TO KNOW BEFORE STARTING YOUR VEHICLE
Page 184 of 460
NOTE:The seat will return to the memorized seat
location (if Recall Memory with Remote Key Unlock is set
to ON) when the RKE transmitter is used to unlock the
door. Refer to “Easy Entry/Exit Seat” under “Driver
Memory Seat” in Section 3 of this manual for more
information.
Key Off Power Delay
When this feature is selected, the power window
switches, radio, uconnect™ phone (if equipped), DVD
video system (if equipped), power sunroof (if equipped),
and power outlets will remain active for up to 10 minutes
after the ignition switch is turned off. Opening a vehicle
door will cancel this feature. To make your selection,
press and release the FUNCTION SELECT button until
“Off,” “45 sec.,” “5 min.,” or “10 min.” appears.
Illuminated Approach
When this feature is selected, the headlights will activate
and remain on for up to 90 seconds when the doors are unlocked with the RKE transmitter. To make your selec-
tion, press and release the FUNCTION SELECT button
until “OFF,” “30 sec.,” “60 sec.,” or “90 sec.” appears.
Hill Start Assist
When on is selected, the HSA system is active. Refer to
“HSA (Hill Start Assistance)” under “Electronic Brake
Control System” in Section 5 of this manual for system
function and operating information. To make your selec-
tion, press and release the FUNCTION SELECT button
until “ON” or “OFF” appears.
Display Units of Measure In
The EVIC, odometer, and uconnect™ gps (if equipped)
can be changed between English and Metric units of
measure. To make your selection, press and release the
FUNCTION SELECT button until “ENGLISH” or “MET-
RIC” appears.
184 UNDERSTANDING YOUR INSTRUMENT PANEL
Page 186 of 460
•Your system can be set to display pressure units in PSI,
kPa, or BAR.
SALES CODE (RER/REN) — AM/FM/CD/DVD
RADIO – IF EQUIPPED
NOTE:The sales code is located on the lower right side
of the unit’s faceplate.
The REN and RER radios contain a CD/DVD player, USB
port, and a 30-gigabyte hard drive (HDD). Sirius Satellite
Radio is optional. The 6.5 in (16.5 cm) touch screen allows
for easy menu selection.
The RER radio also contains a Global Positioning System
(GPS)-based Navigation system.
Refer to your uconnect™ tunes (REN) or (RER) user’s
manual for detailed operating instructions.
Operating Instructions — Voice Recognition
System (VR) — If Equipped
Refer to “Voice Recognition System (VR)” in the
uconnect™ User Manual located on the DVD for further
details.
Operating Instructions — uconnect™ phone — If
Equipped
Refer to “uconnect™ phone” in the uconnect™ User
Manual located on the DVD for further details.
Clock Setting Procedure
uconnect™ gps — RER only
The GPS receiver used in this system is synchronized to
the time data being transmitted by the GPS satellite. The
satellite clock is Greenwich Mean Time (GMT). This is the
worldwide standard for time. This makes the system’s
clock very accurate once the appropriate time zone and
daylight savings information is set.
186 UNDERSTANDING YOUR INSTRUMENT PANEL
Page 187 of 460
To Manually Set the Clock — RER/REN
1. Turn on the radio.
2. Touch the screen where the time is displayed.
3. Touch the screen where “User Clock” is displayed. The
clock setting menu will appear on the screen.
4. To move the hour forward, touch the screen where the
word “Hour” with the arrow pointing upward is dis-
played. To move the hour backward, touch the screen
where the word “Hour” with the arrow pointing down-
ward is displayed.
5. To move the minute forward, touch the screen where
the word “Min” with the arrow pointing upward is
displayed. To move the minute backward, touch the
screen where the word “Min” with the arrow pointing
downward is displayed.6. To save the new time setting, touch the screen where
the word “Save” is displayed.
Changing Daylight Savings Time
When selected, this feature will display the time of day in
daylight savings time. Proceed as follows to change the
current setting:
1. Turn on the radio.
2. Touch the screen where the time is displayed. The
clock setting menu will appear on the screen.
3. When this feature is on, a check mark will appear in
the box next to the words “Daylight Savings.” Touch the
screen where the words “Daylight Savings” are dis-
played to change the current setting.
4
UNDERSTANDING YOUR INSTRUMENT PANEL 187
Page 198 of 460
Operating Instructions — Radio Mode
NOTE:The ignition switch must be in the ON or ACC
position to operate the radio.
Power Switch/Volume Control (Rotary)
Push the ON/VOLUME control knob to turn on the
radio. Push the ON/VOLUME control knob a second
time to turn off the radio.
Electronic Volume Control
The electronic volume control turns continuously (360
degrees) in either direction without stopping. Turning the
ON/VOLUME control knob to the right increases the
volume and to the left decreases it.
When the audio system is turned on, the sound will be
set at the same volume level as last played.
SEEK Buttons
Press and release the SEEK buttons to search for the next
listenable station in AM/FM mode. Press the right switch to seek up and the left switch to seek down. The radio
will remain tuned to the new station until you make
another selection. Holding either button will bypass
stations without stopping until you release it.
Voice Recognition System (Radio) — If Equipped
Refer to “Voice Recognition (VR)” in the uconnect™ User
Manual located on the DVD for further details.
Voice Recognition Button uconnect™ phone — If
Equipped
Press this button to operate the uconnect™ phone feature
(if equipped). Refer to “Voice Recognition (VR)” in the
uconnect™ User Manual located on the DVD for further
details.
If your vehicle is not equipped with or this feature is not
available on your vehicle, a “Not Equipped With
UConnect” message will display on the radio screen.
198 UNDERSTANDING YOUR INSTRUMENT PANEL
Page 199 of 460
Phone Button uconnect™ phone — If Equipped
Press this button to operate the uconnect™ phone feature
(if equipped). Refer to “uconnect™ phone” in the
uconnect™ User Manual located on the DVD for further
details.
If your vehicle is not equipped with or this feature is not
available on your vehicle, a “Not Equipped With
UConnect” message will display on the radio screen.
TIME Button
Press the TIME button to alternate display of the time
and radio frequency.
Clock Setting Procedure
1. Press and hold the TIME button until the hours blink.
2. Adjust the hours by turning the right side TUNE/
SCROLL control knob.3. After adjusting the hours, press the right side TUNE/
SCROLL control knob to set the minutes. The minutes
will begin to blink.
4. Adjust the minutes using the right side TUNE/
SCROLL control knob. Press the TUNE/SCROLL control
knob to save time change.
5. To exit, press any button/knob or wait five seconds.
The clock can also be set by pressing the SETUP button.
For vehicles equipped with satellite radio, press the
SETUP button, use the TUNE/SCROLL control to select
SET CLOCK, and then follow the above procedure,
starting at Step 2. For vehicles not equipped with satellite
radio, press the SETUP button and then follow the above
procedure, starting at Step 2.
4
UNDERSTANDING YOUR INSTRUMENT PANEL 199
Page 209 of 460
Operation Instructions - Auxiliary Mode
The auxiliary (AUX) jack is an audio input jack which
allows the user to plug in a portable device such as an
MP3 player or cassette player and utilize the vehicle’s
audio system to amplify the source and play through the
vehicle speakers.
Pressing the AUX button will change the mode to auxil-
iary device if the AUX jack is connected.
NOTE:The AUX device must be turned on and the
device’s volume set to the proper level. If the AUX audio
is not loud enough, turn the device’s volume up. If the
AUX audio sounds distorted, turn the device’s volume
down.
TIME Button (Auxiliary Mode)
Press this button to change the display to time of day. The
time of day will display for five seconds (when the
ignition is OFF).
Operating Instructions - uconnect™ phone (If
Equipped)
Refer to “uconnect™ phone” in the uconnect™ User
Manual located on the DVD for further details.
Operating Instructions - uconnect™ studios
(Satellite Radio) (If Equipped)
Refer to “uconnect™ studios (Satellite Radio)” in the
uconnect™ User Manual located on the DVD for further
details.
UNIVERSAL CONSUMER INTERFACE (UCI) — IF
EQUIPPED
NOTE: This section is for sales code RES and REQ/
REL/RET radios only with uconnect™. For sales code
RER, REN, REP, REW or REZ touch-screen radio UCI
feature, refer to the separate RER, REN or REZ User’s
Manual. UCI is available only if equipped as an option
with these radios.
4
UNDERSTANDING YOUR INSTRUMENT PANEL 209
Page 219 of 460
pushbutton memory. The channels stored in SET 2
memory can be selected by pressing the pushbutton
twice.
Every time a preset button is used, a corresponding
button number will display.
Buttons1-6
These buttons tune the radio to the channels that you
commit to pushbutton memory (12 Satellite stations).
Operating Instructions - uconnect™ phone (If
Equipped)
Refer to “uconnect™ phone” in the uconnect™ User
Manual located on the DVD for further details.
uconnect™ studios (SIRIUS BACKSEAT TV™) —
IF EQUIPPED
Satellite video uses direct satellite receiver broadcasting
technology to provide streaming video. The subscriptionservice provider is SIRIUS Satellite Radio. SIRIUS Back-
seat TV™ offers three video channels for family enter-
tainment, directly from its satellites and broadcasting
studios.
NOTE:
SIRIUS service is not available in Hawaii and
has limited coverage in Alaska.
Refer to your Video Entertainment System (VES)™, RER
Navigation or REN Multimedia User Manuals for de-
tailed operating instructions.
VIDEO ENTERTAINMENT SYSTEM™ (SALES
CODE XRV) — IF EQUIPPED
The optional VES™ (Video Entertainment System) con-
sists of a DVD player and LCD (liquid crystal display)
screen, a battery-powered remote control, and two head-
sets. Refer to the “uconnect™ studios” section of
uconnect™ User Manual located on the DVD for further
details.
4
UNDERSTANDING YOUR INSTRUMENT PANEL 219
Page 223 of 460
6. Do not expose the disc to direct sunlight.
7. Do not store the disc where temperatures may become
too high.
NOTE:If you experience difficulty in playing a particu-
lar disc, it may be damaged (i.e., scratched, reflective
coating removed, a hair, moisture or dew on the disc)
oversized, or have protection encoding. Try a known
good disc before considering disc player service.
RADIO OPERATION AND CELLULAR PHONES
Under certain conditions, the cellular phone being on in
your vehicle can cause erratic or noisy performance from
your radio. This condition may be lessened or eliminated
by relocating the cellular phone antenna. This condition
is not harmful to the radio. If your radio performance
does not satisfactorily “clear” by the repositioning of the
antenna, it is recommended that the radio volume be
turned down or off during cellular phone operation.
CLIMATE CONTROLS
Manual Heating and Air Conditioning System — If
Equipped
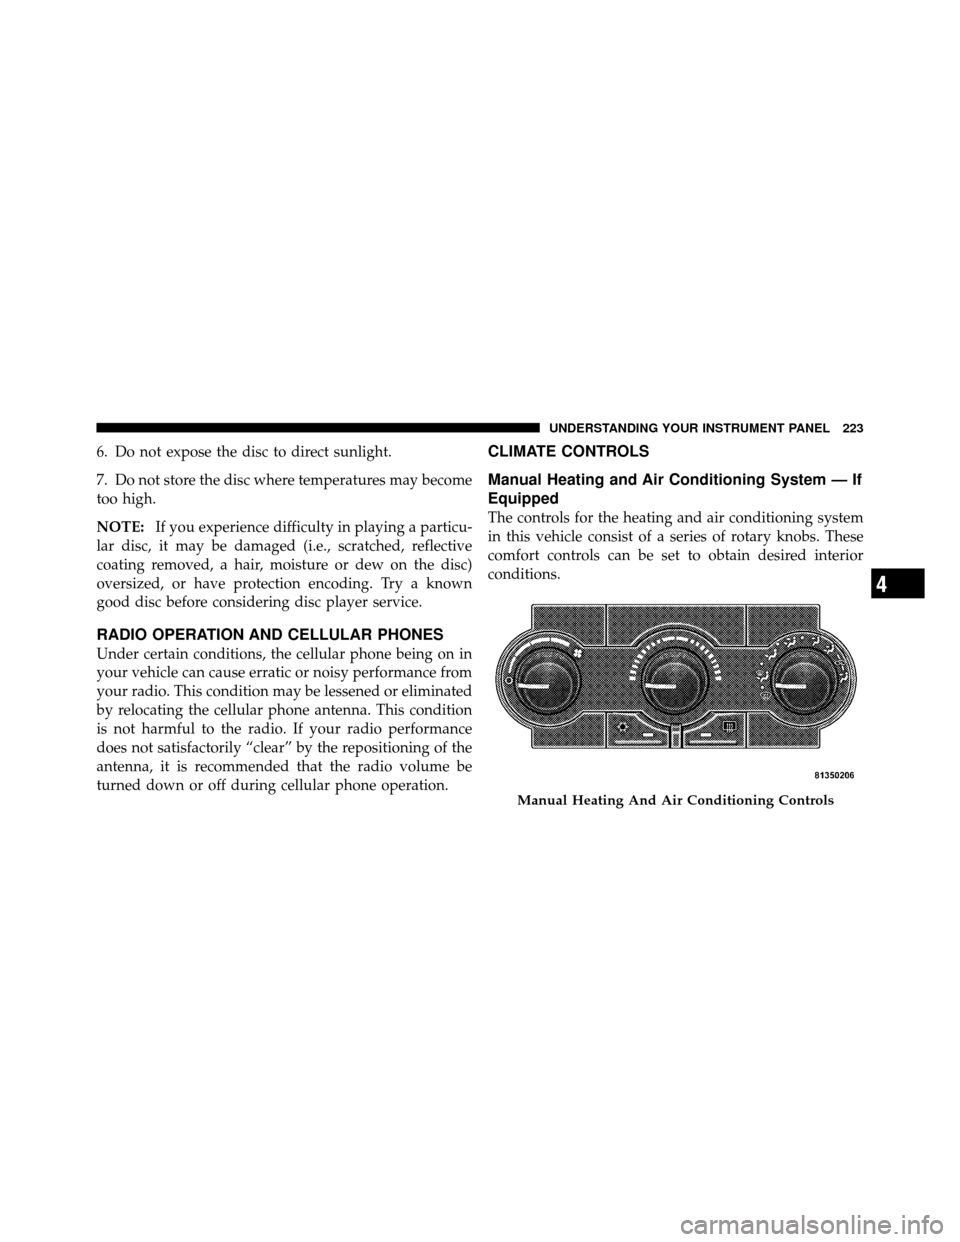
The controls for the heating and air conditioning system
in this vehicle consist of a series of rotary knobs. These
comfort controls can be set to obtain desired interior
conditions.
Manual Heating And Air Conditioning Controls
4
UNDERSTANDING YOUR INSTRUMENT PANEL 223
Page 452 of 460
Luggage Rack (Roof Rack)................. 150
Lumbar Support ......................... 87
Maintenance Free Battery .................. 367
Maintenance Procedures ................... 362
Maintenance Schedule .................... 412
Malfunction Indicator Light (Check Engine) . . 162,360
Manual, Service ......................... 437
Memory Feature (Memory Seat) .............. 98
Memory Seat ........................... 98
Memory Seats and Radio ................... 98
Mini-Trip Computer ...................... 176
Mirrors ................................ 82
Automatic Dimming ..................... 82
Electric Powered ....................... 84
Electric Remote ........................ 84
Exterior Folding ........................ 83
Heated .............................. 84
Outside .............................. 83
Rearview ............................. 82 Vanity
............................... 85
Mode Fuel Saver ........................... 176
Modifications/Alterations, Vehicle ............. 9
Monitor, Tire Pressure System ............... 303
Mopar Parts ......................... 362,436
Multi-Displacement Engine System ........... 271
Multi-Function Control Lever ............... 104
New Vehicle Break-In Period ................ 73
Occupant Restraints ................... 38,55,58
Occupant Restraints (Sedan) .............51,55,57
Octane Rating, Gasoline (Fuel) .............. 314
Odometer .......................... 167,168
Trip ................................ 167
Off-Pavement Driving (Off-Road) ..........261,386
Off-Road Driving (Off-Pavement) ..........261,386
Oil Change Indicator ..................... 175
Oil Change Indicator, Reset ................. 175
452 INDEX