belt JEEP COMMANDER 2010 1.G User Guide
[x] Cancel search | Manufacturer: JEEP, Model Year: 2010, Model line: COMMANDER, Model: JEEP COMMANDER 2010 1.GPages: 78, PDF Size: 7.31 MB
Page 3 of 78
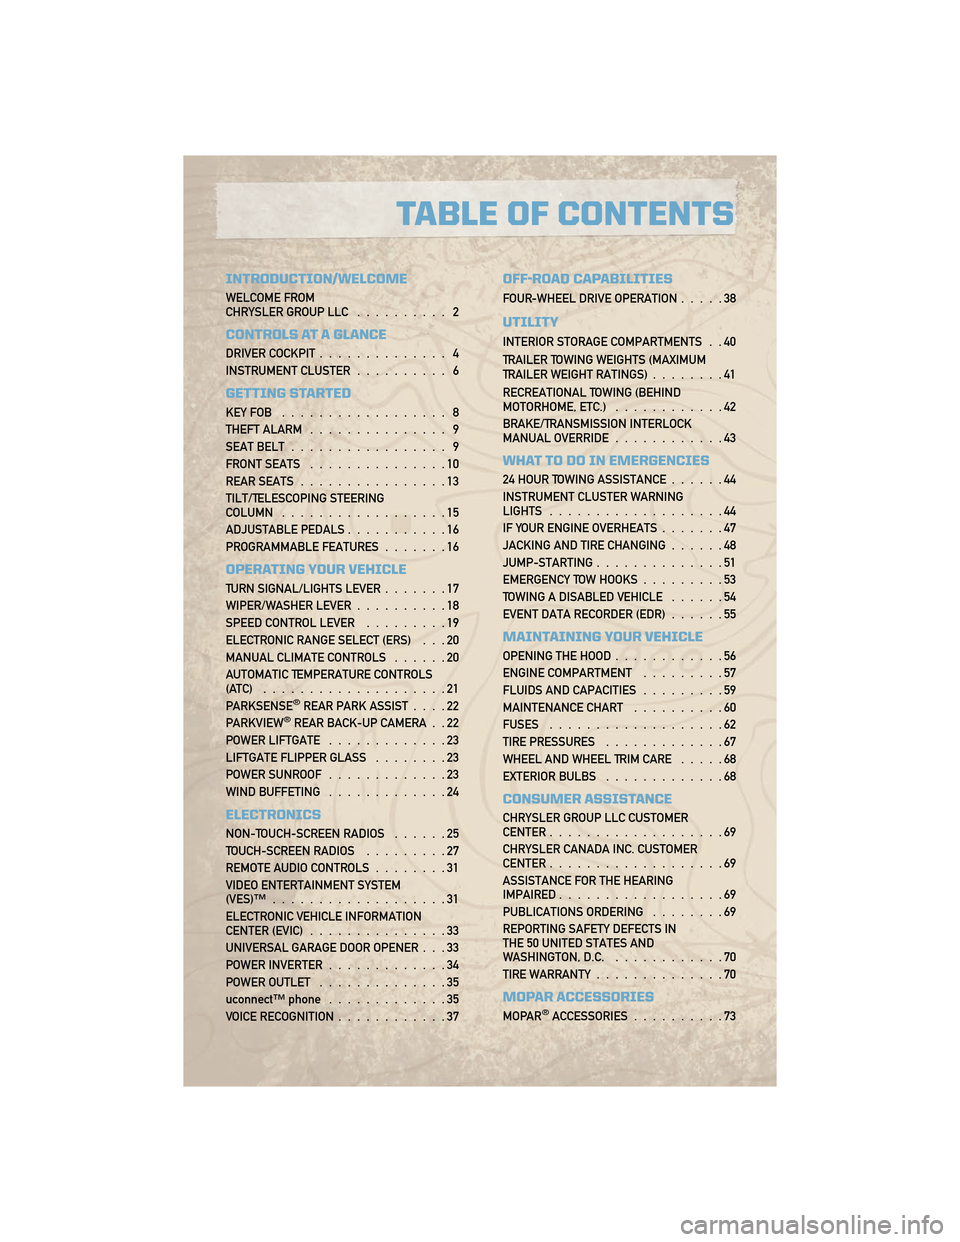
INTRODUCTION/WELCOME
WELCOME FROM
CHRYSLER GROUP LLC.......... 2
CONTROLS AT A GLANCE
DRIVER COCKPIT.............. 4
INSTRUMENT CLUSTER .......... 6
GETTING STARTED
KEYFOB .................. 8
THEFT ALARM............... 9
SEAT BELT ................. 9
FRONT SEATS ...............10
REAR SEATS ................13
TILT/TELESCOPING STEERING
COLUMN ..................15
ADJUSTABLE PEDALS ...........16
PROGRAMMABLE FEATURES .......16
OPERATING YOUR VEHICLE
TURN SIGNAL/LIGHTS LEVER .......17
WIPER/WASHER LEVER ..........18
SPEED CONTROL LEVER .........19
ELECTRONIC RANGE SELECT (ERS) . . . 20
MANUAL CLIMATE CONTROLS ......20
AUTOMATIC TEMPERATURE CONTROLS
(ATC) ....................21
PARKSENSE
®REAR PARK ASSIST ....22
PARKVIEW®REAR BACK-UP CAMERA . . 22
POWER LIFTGATE .............23
LIFTGATE FLIPPER GLASS ........23
POWER SUNROOF .............23
WIND BUFFETING .............24
ELECTRONICS
NON-TOUCH-SCREEN RADIOS ......25
TOUCH-SCREEN RADIOS .........27
REMOTE AUDIO CONTROLS ........31
VIDEO ENTERTAINMENT SYSTEM
(VES)™ ...................31
ELECTRONIC VEHICLE INFORMATION
CENTER (EVIC) ...............33
UNIVERSAL GARAGE DOOR OPENER . . . 33
POWER INVERTER .............34
POWER OUTLET ..............35
uconnect™ phone .............35
VOICE RECOGNITION ............37
OFF-ROAD CAPABILITIES
FOUR-WHEEL DRIVE OPERATION .....38
UTILITY
INTERIOR STORAGE COMPARTMENTS . . 40
TRAILER TOWING WEIGHTS (MAXIMUM
TRAILER WEIGHT RATINGS)........41
RECREATIONAL TOWING (BEHIND
MOTORHOME, ETC.) ............42
BRAKE/TRANSMISSION INTERLOCK
MANUAL OVERRIDE ............43
WHAT TO DO IN EMERGENCIES
24 HOUR TOWING ASSISTANCE ......44
INSTRUMENT CLUSTER WARNING
LIGHTS ...................44
IF YOUR ENGINE OVERHEATS .......47
JACKING AND TIRE CHANGING ......48
JUMP-STARTING ..............51
EMERGENCY TOW HOOKS .........53
TOWING A DISABLED VEHICLE ......54
EVENT DATA RECORDER (EDR) ......55
MAINTAINING YOUR VEHICLE
OPENING THE HOOD............56
ENGINE COMPARTMENT .........57
FLUIDS AND CAPACITIES .........59
MAINTENANCE CHART ..........60
FUSES ...................62
TIRE PRESSURES .............67
WHEEL AND WHEEL TRIM CARE .....68
EXTERIOR BULBS .............68
CONSUMER ASSISTANCE
CHRYSLER GROUP LLC CUSTOMER
CENTER...................69
CHRYSLER CANADA INC. CUSTOMER
CENTER ...................69
ASSISTANCE FOR THE HEARING
IMPAIRED ..................69
PUBLICATIONS ORDERING ........69
REPORTING SAFETY DEFECTS IN
THE 50 UNITED STATES AND
WASHINGTON, D.C. ............70
TIRE WARRANTY ..............70
MOPAR ACCESSORIES
MOPAR®ACCESSORIES..........73
TABLE OF CONTENTS
Page 8 of 78
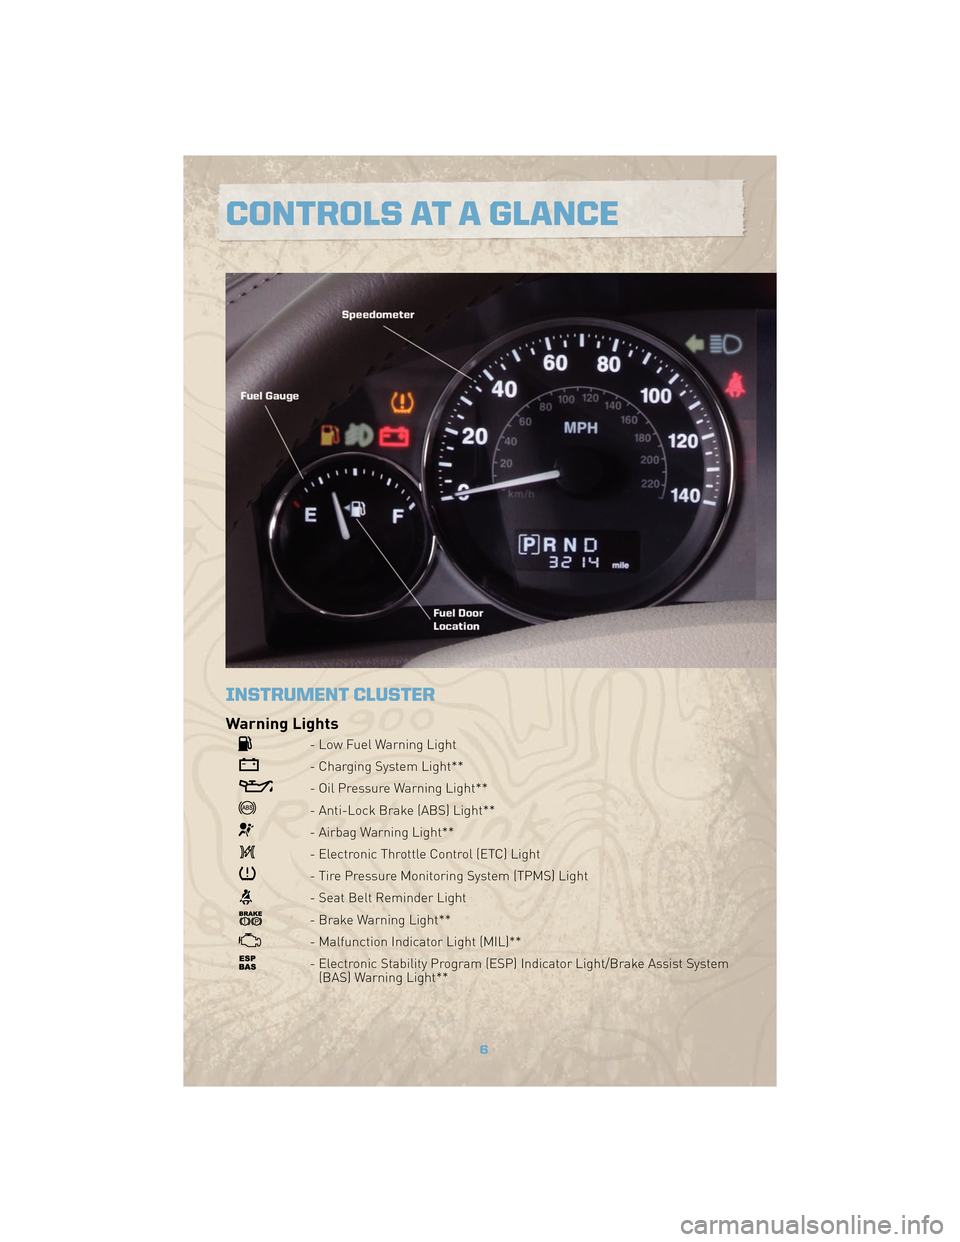
INSTRUMENT CLUSTER
Warning Lights
- Low Fuel Warning Light
- Charging System Light**
- Oil Pressure Warning Light**
- Anti-Lock Brake (ABS) Light**
- Airbag Warning Light**
- Electronic Throttle Control (ETC) Light
- Tire Pressure Monitoring System (TPMS) Light
- Seat Belt Reminder Light
- Brake Warning Light**
- Malfunction Indicator Light (MIL)**
- Electronic Stability Program (ESP) Indicator Light/Brake Assist System(BAS) Warning Light**
6
CONTROLS AT A GLANCE
Page 11 of 78
WARNING!
• Do not start or run an engine in a closed garage or confined area. Exhaust gascontains Carbon Monoxide (CO) which is odorless and colorless. Carbon Monoxide
is poisonous and can cause serious injury or death when inhaled.
• Keep Key Fob transmitters away from children. Operation of the Remote Start System, windows, door locks or other controls could cause serious injury or
death.
Panic Alarm
• Press the PANIC button once to turn the panic alarm on.
• Wait approximately three seconds and press the button a second time to turn the panic
alarm off.
Express Window Feature
• To remotely lower both front door windows at the same time, press and release theUNLOCK button and then immediately press and hold the UNLOCK button until the
windows lower to the level desired or until they lower completely.
Emergency Key
• Should the battery in the vehicle or the Key Fob transmitter go dead, there is anemergency key located in the Key Fob. To remove the emergency key, slide the button at
the top of the Key Fob sideways with your thumb and then pull the key out with your
other hand.
• The emergency key is also for locking the glove compartment.
THEFT ALARM
To Arm
• Press the Key Fob LOCK button or the power door lock switch while the door is open.
To Disarm
• Press the Key Fob UNLOCK button or turn the ignition to the ON position.
SEAT BELT
• Be sure everyone in your vehicle is in a seat using a seat belt properly.
WARNING!
In a collision, you and your passengers can suffer much greater injuries if you are
not properly buckled up. You can strike the interior of your vehicle or other
passengers, or you can be thrown out of the vehicle. Always be sure you and others
in your vehicle are buckled up properly.
9
GETTING STARTED
Page 12 of 78
FRONT SEATS
WARNING!
Adjusting a seat while the vehicle is moving is dangerous. The sudden movement of
the seat could cause you to lose control. The seat belt might not be properly
adjusted and you could be injured. Only adjust a seat while the vehicle is parked.
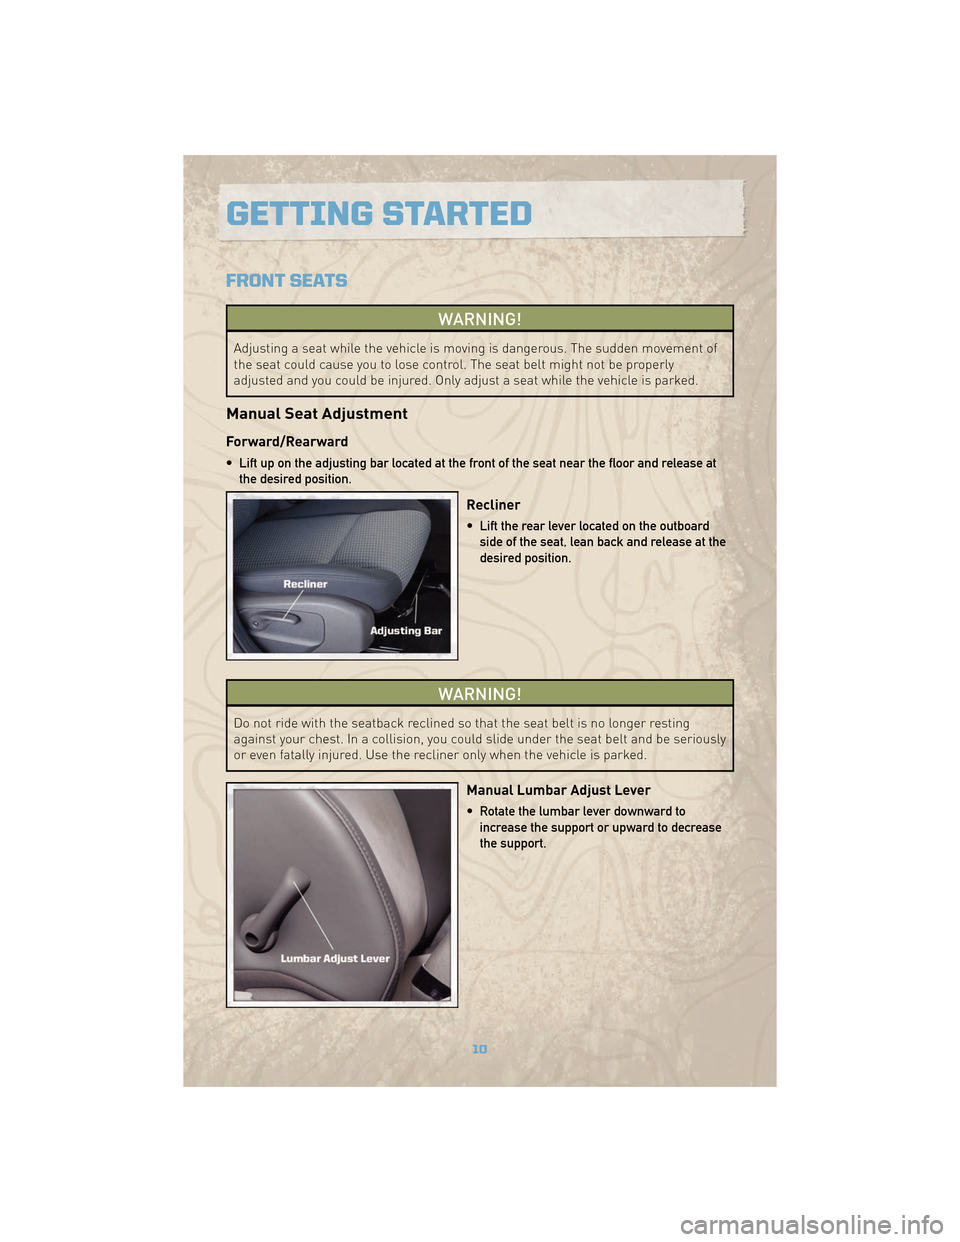
Manual Seat Adjustment
Forward/Rearward
• Lift up on the adjusting bar located at the front of the seat near the floor and release atthe desired position.
Recliner
• Lift the rear lever located on the outboardside of the seat, lean back and release at the
desired position.
WARNING!
Do not ride with the seatback reclined so that the seat belt is no longer resting
against your chest. In a collision, you could slide under the seat belt and be seriously
or even fatally injured. Use the recliner only when the vehicle is parked.
Manual Lumbar Adjust Lever
• Rotate the lumbar lever downward toincrease the support or upward to decrease
the support.
GETTING STARTED
10
Page 25 of 78
POWER LIFTGATE
• The power liftgate may be opened manually or by pressing the LIFTGATE button on theKey Fob. Press the LIFTGATE button on the Key Fob twice within five seconds to open the
power liftgate. Once the liftgate is open, pressing the button twice within five seconds a
second time will close the liftgate.
• Also, the power liftgate may be closed by pressing the Liftgate switch located on the left rear trim, near the liftgate opening. Pressing once will close the liftgate only. This button
cannot be used to open the liftgate.
LIFTGATE FLIPPER GLASS
• The liftgate flipper glass is also unlocked when the liftgate is unlocked. To open theflipper glass, push up on the window switch located on the liftgate.
WARNING!
To avoid injury, stand back when opening. Glass may automatically rise.
NOTE: If a malfunction to the liftgate latch should occur, an emergency liftgate latch
release can be used to open the liftgate. The emergency liftgate latch release can be
accessed through a snap-in cover located on the liftgate trim panel.
WARNING!
Driving with the flipper glass open can allow poisonous exhaust gases into your
vehicle. You and your passengers could be injured by these fumes. Keep the flipper
glass closed when you are operating the vehicle.
POWER SUNROOF
• The power sunroof switch is located on the overhead console.
WARNING!
• Never leave children in a vehicle with the key in the ignition switch. Occupants, particularly unattended children, can become entrapped by the power sunroof
while operating the power sunroof switch. Such entrapment may result in serious
injury or death.
• In an accident, there is a greater risk of being thrown from a vehicle with an open sunroof. You could also be seriously injured or killed. Always fasten your seat belt
properly and make sure all passengers are properly secured too.
• Do not allow small children to operate the sunroof. Never allow your fingers, other body parts, or any object to project through the sunroof opening. Injury may result.
23
OPERATING YOUR VEHICLE
Page 42 of 78
INTERIOR STORAGE COMPARTMENTS
Rear Storage Compartment
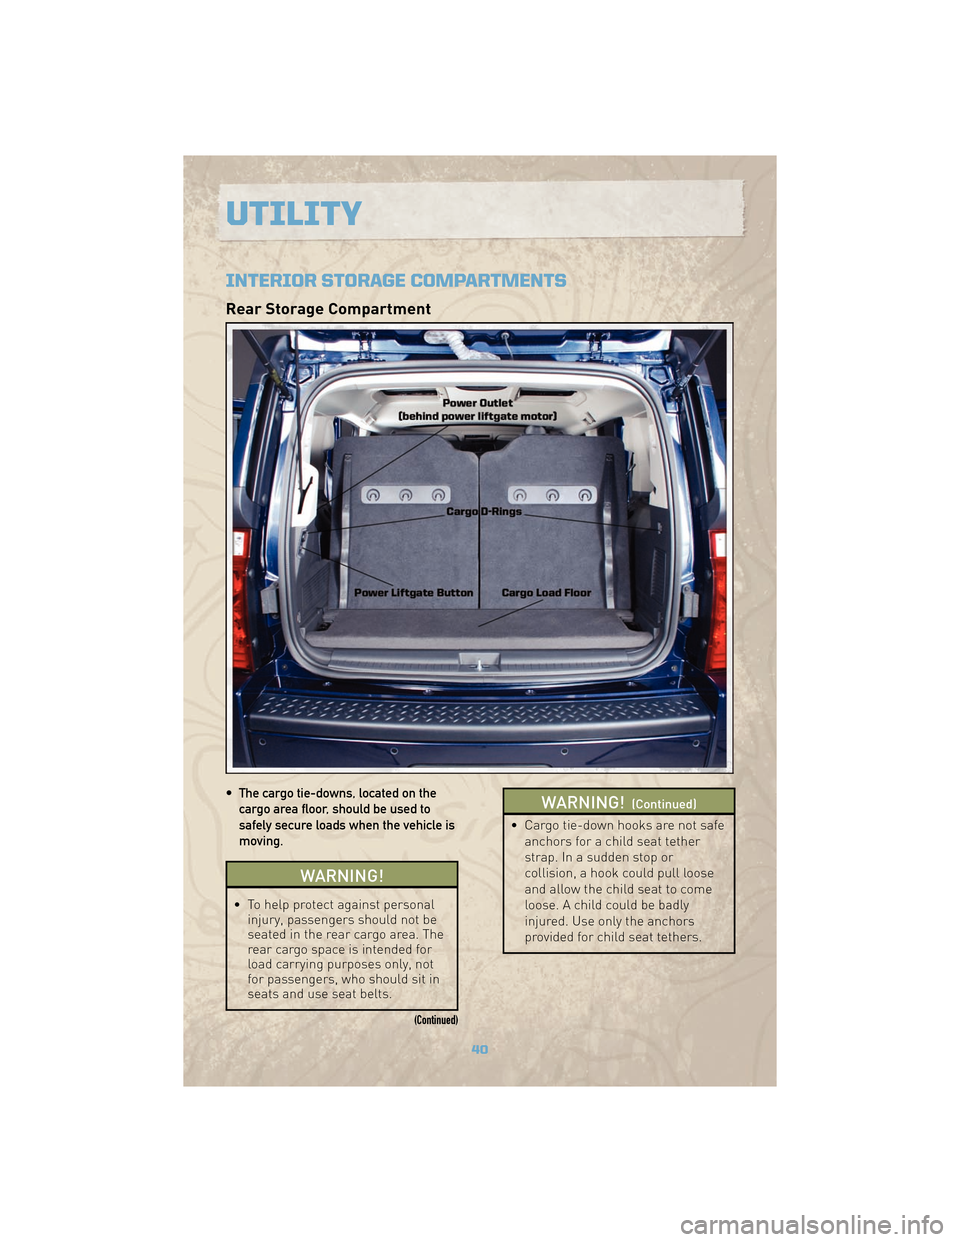
• The cargo tie-downs, located on thecargo area floor, should be used to
safely secure loads when the vehicle is
moving.
WARNING!
• To help protect against personal injury, passengers should not be
seated in the rear cargo area. The
rear cargo space is intended for
load carrying purposes only, not
for passengers, who should sit in
seats and use seat belts.
(Continued)
WARNING!(Continued)
• Cargo tie-down hooks are not safe
anchors for a child seat tether
strap. In a sudden stop or
collision, a hook could pull loose
and allow the child seat to come
loose. A child could be badly
injured. Use only the anchors
provided for child seat tethers.
UTILITY
40
Page 54 of 78
WARNING!(Continued)
• A battery generates hydrogen gas which is flammable and explosive. Keep flamesor sparks away from the battery vent holes. Don’t lean over the battery when
attaching clamps or allow the clamps to touch each other.
• Do not use a booster battery or any other booster source with an output that exceeds 12-volts (i.e., do not use a 24-volt power source).
• Check the battery test indicator (if equipped). If a light or bright colored dot is visible in the indicator, DO NOT jump-start the battery. If the indicator is dark or shows a green dot,
proceed as follows:
• Remove all metal jewelry, such as watch bands or bracelets, which might make an unintended electrical contact.
WARNING!
• Do not permit vehicles to touch each other as this could establish a ground connection and personal injury could result.
• Do not connect the cable to the negative post of the discharged battery. The resulting electrical spark could cause the battery to explode and could result in
personal injury.
• Park the booster vehicle within cable reach but without letting the vehicles touch. Set the parking brake on both vehicles, shift the automatic transmission into PARK, and turn the
ignition to LOCK.
• Turn off the heater, radio, and all unnecessary electrical loads.
• Connect one end of a jumper cable to the positive terminal of the booster battery. Connect the other end of the same cable to the positive terminal of the discharged battery.
• Connect the other cable, first to the negative terminal of the booster battery and then to the engine ground (-) of the vehicle with the discharged battery. Make sure you have a
good contact on the engine ground.
• Start the engine in the vehicle which has the booster battery; let the engine idle a few minutes.
• Start the engine in the vehicle with the discharged battery.
• When removing the jumper cables, reverse the above sequence exactly. Be careful of the moving belts and fan.
WARNING!
During cold weather when temperatures are below the freezing point, electrolyte in a
discharged battery may freeze. Do not attempt jump-starting because the battery
could rupture or explode. The battery temperature must be brought up above the
freezing point before attempting a jump-start.
WHAT TO DO IN EMERGENCIES
52
Page 57 of 78
EVENT DATA RECORDER (EDR)
• This vehicle is equipped with an Event Data Recorder (EDR). The main purpose of an EDRis to record, in certain crash or near crash-like situations, such as an air bag deployment
or hitting a road obstacle, data that will assist in understanding how a vehicle's systems
performed. The EDR is designed to record data related to vehicle dynamics and safety
systems for a short period of time, typically 30 seconds or less. The EDR in this vehicle is
designed to record such data as:
• How various systems in your vehicle were operating;
• Whether or not the driver and passenger safety belts were buckled/fastened;
• How far (if at all) the driver was depressing the accelerator and/or brake pedal; and,
• How fast the vehicle was traveling.
• This data can help provide a better understanding of the circumstances in which a crash and injuries occur. NOTE: EDR data is recorded by your vehicle only if a non-trivial crash
situation occurs; no data is recorded by the EDR under normal driving conditions and no
personal data (e.g., name, gender, age, and crash location) is recorded. However, other
parties, such as law enforcement, could combine the EDR data with the type of
personally identifying data routinely acquired during a crash investigation.
• To read data recorded by an EDR, special equipment is required, and access to the vehicle or the EDR is needed. In addition to the vehicle manufacturer, other parties, such
as law enforcement, that have the special equipment, can read the information if they
have access to the vehicle or the EDR.
55
WHAT TO DO IN EMERGENCIES