radio JEEP COMPASS 2012 1.G Owner's Manual
[x] Cancel search | Manufacturer: JEEP, Model Year: 2012, Model line: COMPASS, Model: JEEP COMPASS 2012 1.GPages: 108, PDF Size: 4.03 MB
Page 45 of 108
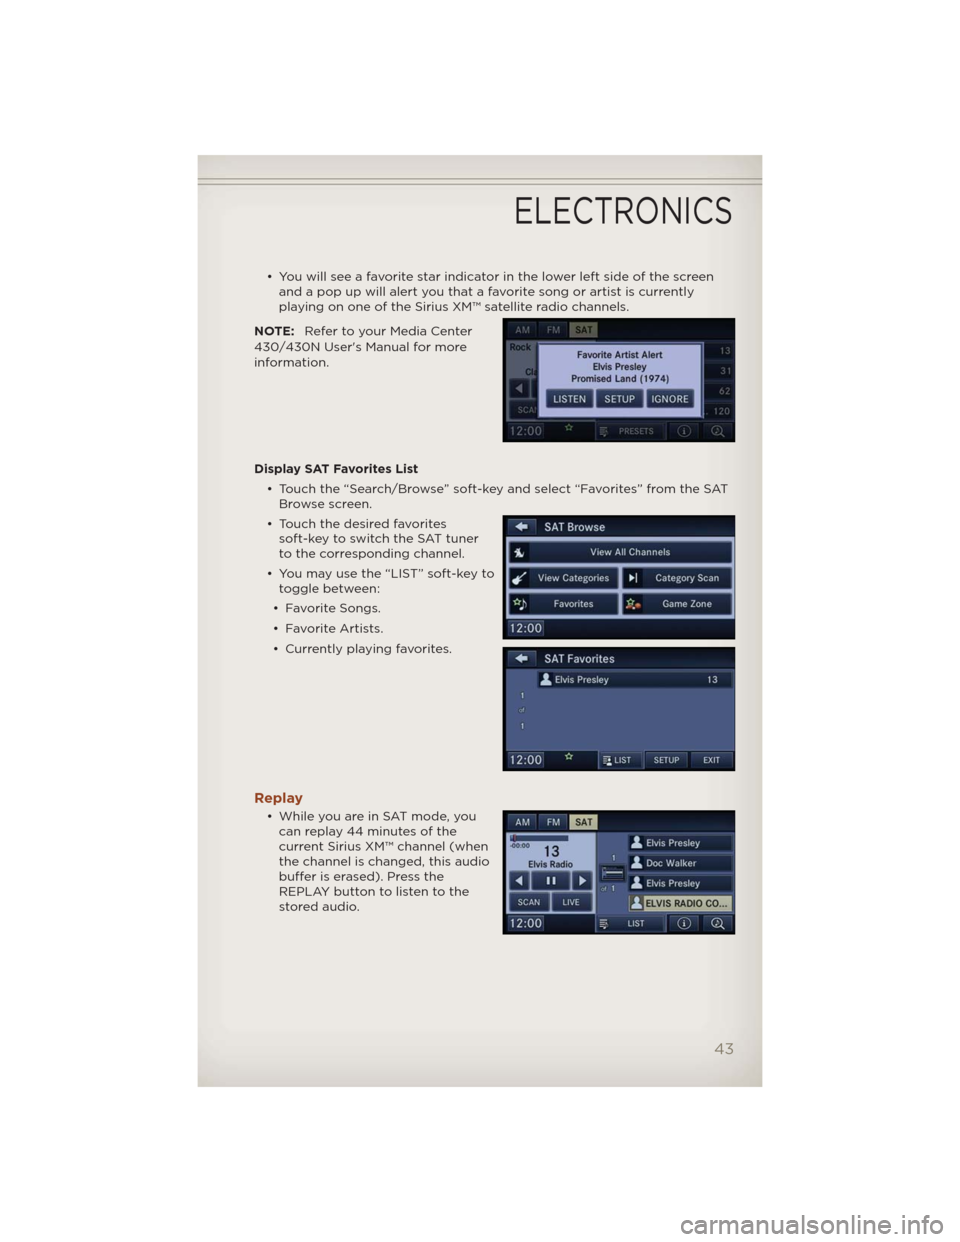
• You will see a favorite star indicator in the lower left side of the screen
and a pop up will alert you that a favorite song or artist is currently
playing on one of the Sirius XM™ satellite radio channels.
NOTE:Refer to your Media Center
430/430N User's Manual for more
information.
Display SAT Favorites List
• Touch the “Search/Browse” soft-key and select “Favorites” from the SAT
Browse screen.
• Touch the desired favorites
soft-key to switch the SAT tuner
to the corresponding channel.
• You may use the “LIST” soft-key to
toggle between:
• Favorite Songs.
• Favorite Artists.
• Currently playing favorites.
Replay
• While you are in SAT mode, you
can replay 44 minutes of the
current Sirius XM™ channel (when
the channel is changed, this audio
buffer is erased). Press the
REPLAY button to listen to the
stored audio.
ELECTRONICS
43
Page 48 of 108
STEERING WHEEL AUDIO CONTROLS
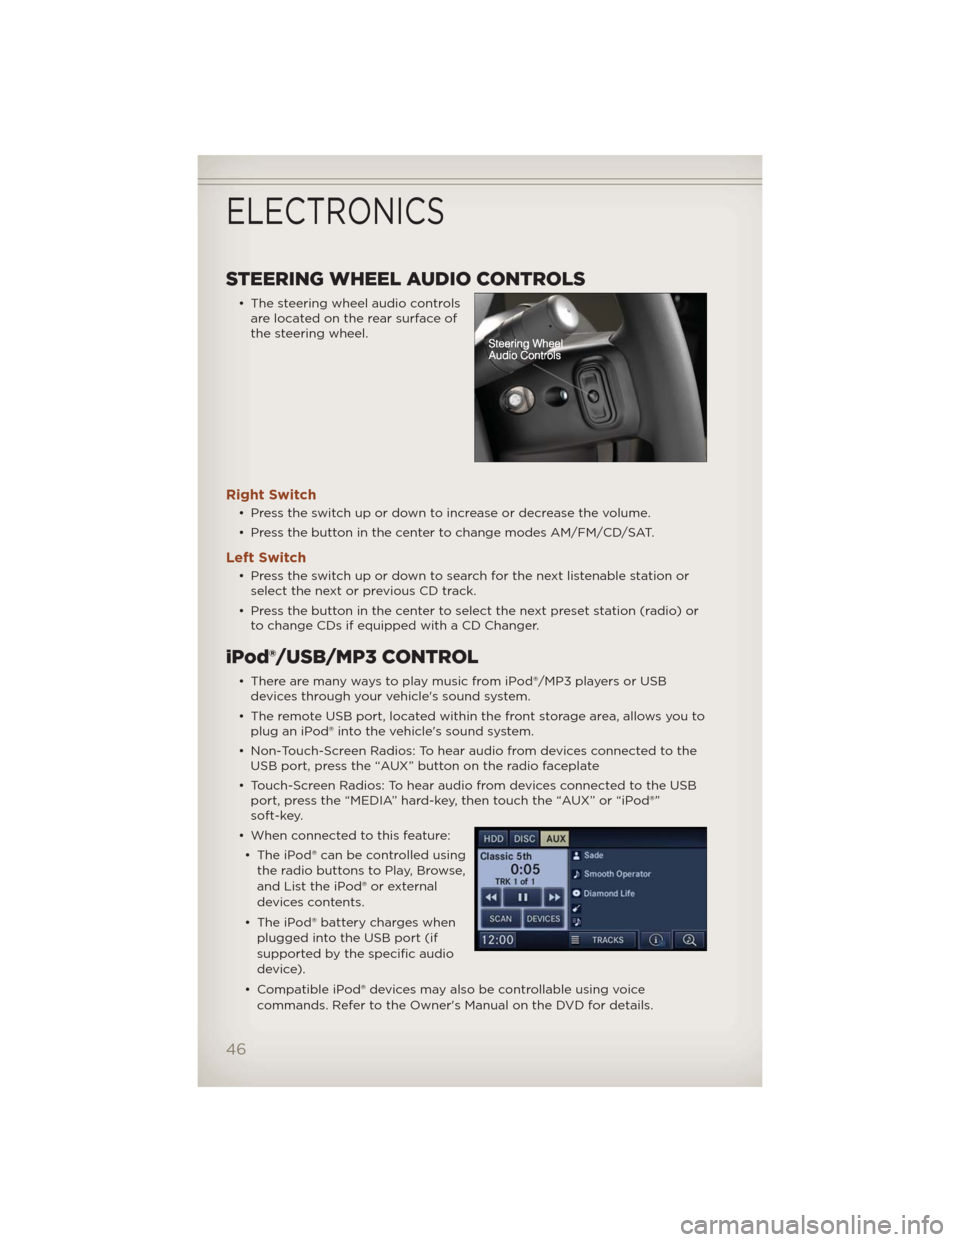
• The steering wheel audio controls
are located on the rear surface of
the steering wheel.
Right Switch
• Press the switch up or down to increase or decrease the volume.
• Press the button in the center to change modes AM/FM/CD/SAT.
Left Switch
• Press the switch up or down to search for the next listenable station or
select the next or previous CD track.
• Press the button in the center to select the next preset station (radio) or
to change CDs if equipped with a CD Changer.
iPod®/USB/MP3 CONTROL
• There are many ways to play music from iPod®/MP3 players or USB
devices through your vehicle's sound system.
• The remote USB port, located within the front storage area, allows you to
plug an iPod® into the vehicle's sound system.
• Non-Touch-Screen Radios: To hear audio from devices connected to the
USB port, press the “AUX” button on the radio faceplate
• Touch-Screen Radios: To hear audio from devices connected to the USB
port, press the “MEDIA” hard-key, then touch the “AUX” or “iPod®”
soft-key.
• When connected to this feature:
• The iPod® can be controlled using
the radio buttons to Play, Browse,
and List the iPod® or external
devices contents.
• The iPod® battery charges when
plugged into the USB port (if
supported by the specific audio
device).
• Compatible iPod® devices may also be controllable using voice
commands. Refer to the Owner's Manual on the DVD for details.
ELECTRONICS
46
Page 49 of 108
NOTE:
• The USB port supports certain Mini, Classic, Nano, Touch, and iPhone®
devices. The USB port also supports playing music from compatible
external USB Mass Storage Class memory devices. For supported audio file
formats, refer to the USB Port section in the Owner's Manual on the DVD.
Refer to www.UconnectPhone.com website for a list of tested iPod®s. Some
iPod® software versions may not fully support the USB port features.
Please visit Apple’s website for iPod® software updates.
WARNING!
Do not plug in or remove the iPod® or external device while driving.
Failure to follow this warning could result in a collision.
Uconnect™ Phone
• To determine if your vehicle is equipped with Uconnect™ Phone, press
the “Uconnect™ Phone” button. If your vehicle has this feature, after
a couple seconds you will hear a voice prompt. If not, you will see a
message on the radio “Uconnect phone not available”.
• The Uconnect™ Phone is a voice-activated, hands-free, in-vehicle
communications system with Voice Command Capability (see Voice
Command section).
NOTE:To access the tutorial, press the “Uconnect™ Phone” button
.
After the BEEP, say “tutorial”. Press any hard-key/button or touch the display
(Touch-Screen radio) to cancel the tutorial.
• The Uconnect™ Phone allows you to dial a phone number with your
mobile phone using simple voice commands.
• Refer to your vehicle Owner's Manual on the DVD for further details.
NOTE:The Uconnect™ Phone requires a mobile phone equipped with the
Bluetooth® Hands-Free Profile, Version 1.0 or higher. For Uconnect™ customer
support, call 1–877–855–8400 or visit www.UconnectPhone.com.
Phone Pairing
NOTE:Pairing is a one-time initial setup before using the phone.
• Press the “Phone” button
to begin.
• Wait for the “ready” prompt and BEEP.
• (After the BEEP), say ”setup” or “Uconnect device setup”.
• (After the BEEP), say “device pairing”.
ELECTRONICS
47
Page 51 of 108
• Only the phonebook of the currently connected mobile phone is
accessible.
• Only the mobile phone’s phonebook is downloaded. SIM card
phonebook is not part of the Mobile phonebook.
• This downloaded phonebook cannot be edited or deleted on the
Uconnect™ Phone. These can only be edited on the mobile phone. The
changes are transferred and updated to Uconnect™ Phone on the next
phone connection.
Phonebook Edit
• Press the “Phone” button
.
• (After the BEEP), say “phonebook”.
• (After the BEEP), say “new entry” or “list names” or “delete”.
• Follow the prompts.
Making A Phone Call
• Press the “Phone” button.
• (After the BEEP), say “dial” (or “call” a name).
• (After the BEEP), say number (or name).
Receiving A Call – Accept (And End)
• When an incoming call rings/is announced on Uconnect™, press the
Phone button.
• To end a call, press the Phone button
.
Mute (Or Unmute) Microphone During Call
• During a call, press the “Voice Command” button.
• (After the BEEP), say “mute” (or “mute off”).
Transfer Ongoing Call Between Handset And Vehicle
• During a call, press the “Voice Command” button.
• (After the BEEP), say “transfer call”.
Changing The Volume
• Start a dialogue by pressing the “Phone” button, then adjust the
volume during a normal call.
• Use the radio ON/OFF VOLUME rotary knob to adjust the volume to a
comfortable level while the Uconnect™ system is speaking. Please note
the volume setting for Uconnect™ is different than the audio system.
ELECTRONICS
49
Page 52 of 108
WARNING!
• Any voice commanded system should be used only in safe driving
conditions following local laws and phone use. All attention should
be kept on the roadway ahead. Failure to do so may result in a
collision causing you and others to be severely injured or killed.
• In an emergency, to use Uconnect™ Phone, your mobile phone must
be:
• turned on,
• paired to Uconnect™ Phone,
• and have network coverage.
Uconnect™ VOICE COMMAND
• The Uconnect™ Voice Command system allows you to control your AM,
FM radio, satellite radio, disc player, HDD, Uconnect™ Phone, a memo
recorder, and supported portable media devices.
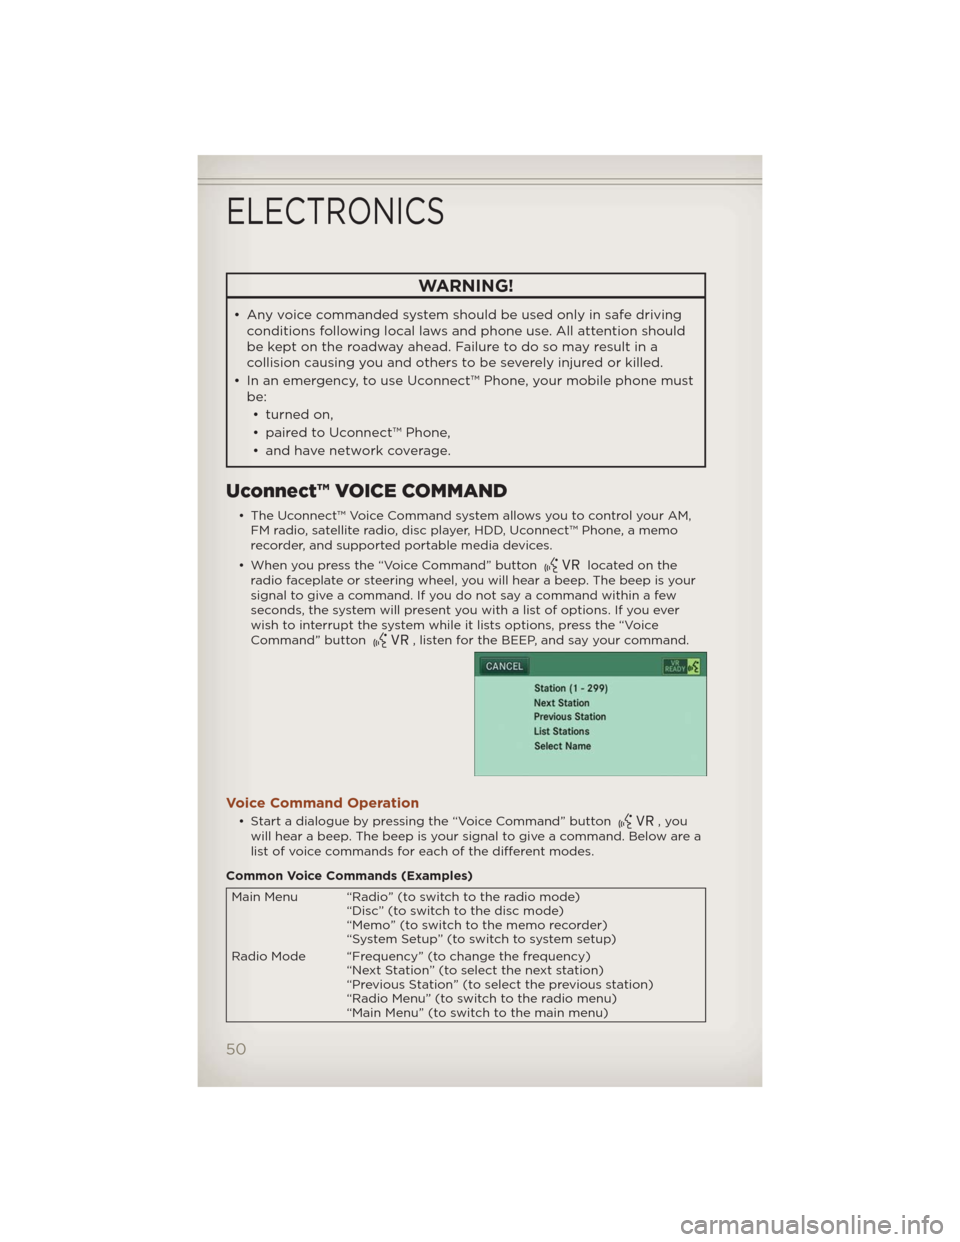
• When you press the “Voice Command” button
located on the
radio faceplate or steering wheel, you will hear a beep. The beep is your
signal to give a command. If you do not say a command within a few
seconds, the system will present you with a list of options. If you ever
wish to interrupt the system while it lists options, press the “Voice
Command” button
, listen for the BEEP, and say your command.
Voice Command Operation
• Start a dialogue by pressing the “Voice Command” button,you
will hear a beep. The beep is your signal to give a command. Below are a
list of voice commands for each of the different modes.
Common Voice Commands (Examples)
Main Menu “Radio” (to switch to the radio mode)
“Disc” (to switch to the disc mode)
“Memo” (to switch to the memo recorder)
“System Setup” (to switch to system setup)
Radio Mode “Frequency” (to change the frequency)
“Next Station” (to select the next station)
“Previous Station” (to select the previous station)
“Radio Menu” (to switch to the radio menu)
“Main Menu” (to switch to the main menu)
ELECTRONICS
50
Page 53 of 108
Sirius XM™
Satellite Radio
Mode“Channel Number” (to change the channel by its spoken
number)
“Next Channel” (to select the next channel)
“Previous Channel” (to select the previous channel)
“List Channel” (to hear a list of available channels)
“Select Name” (to say the name of a channel)
“Radio Menu” (to switch to the radio menu)
“Main Menu” (to switch to the main menu)
Disc Mode “Track” (#) (to change the track)
“Next Track” (to play the next track)
“Previous Track” (to play the previous track)
“Main Menu” (to switch to the main menu)
Memo Mode To switch to the voice recorder mode, say “Memo”. The
following are common voice commands for this mode:
“New Memo” (to record a new memo) — During the
recording, you may press the Voice Command button
to stop recording. You proceed by saying one of
the following commands:
— “Save” (to save the memo)
— “Continue” (to continue recording)
— “Delete” (to delete the recording)
— “Play Memos” (to play previously recorded memos) —
During the playback you may press the Voice Command
button
to stop playing memos. You proceed by saying
one of the following commands:
— “Repeat” (to repeat a memo)
— “Next” (to play the next memo)
— “Previous” (to play the previous memo)
— “Delete” (to delete a memo)
— “Delete All” (to delete all memos)
SMS (Text Messaging)
• If equipped with Uconnect™ Voice Command, your Media Center 430N &
730N radios may be able to play incoming Short Message Service (SMS)
messages (text messages) through the vehicle's sound system.
• It also allows you to respond by selecting from various pre-defined
phrases.
• Not all phones are compatible with this feature. Refer to the phone
compatibility list at www.UconnectPhone.com. Connected mobile
phones must be bluetooth-compatible, and paired with your radio.
• Press the “Voice Command” button
and after the BEEP, say
“SMS” to get started.
NOTE:To access the tutorial, press the “Voice Command” button
.
After the BEEP, say “tutorial”. Press any hard-key/button or touch the display
(Touch-Screen radio) to cancel the tutorial.
ELECTRONICS
51
Page 54 of 108
WARNING!
Any voice commanded system should be used only in safe driving
conditions following local laws and phone use. All attention should be
kept on the roadway ahead. Failure to do so may result in a collision
causing you and others to be severely injured or killed.
Bluetooth® STREAMING AUDIO
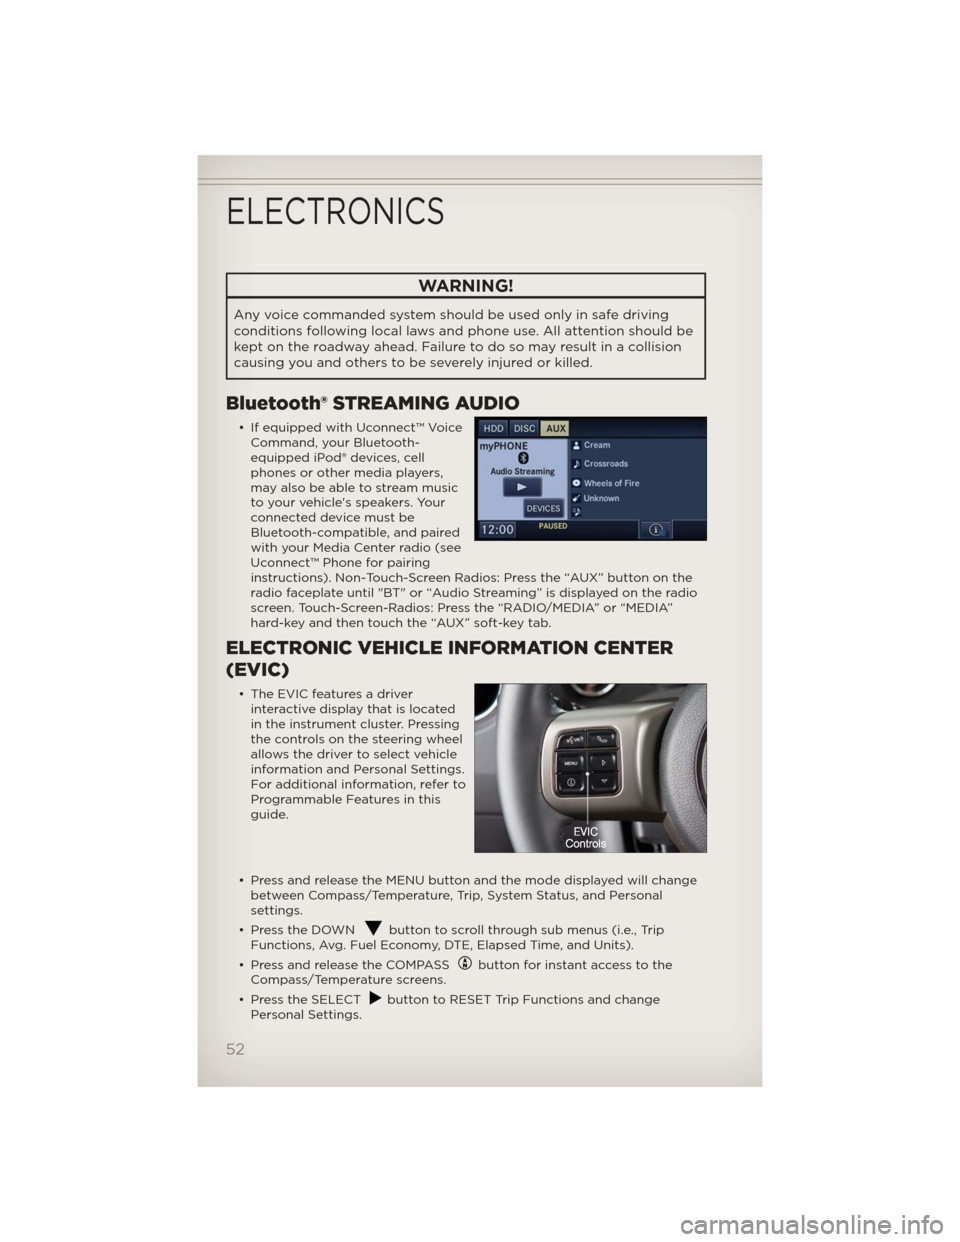
• If equipped with Uconnect™ Voice
Command, your Bluetooth-
equipped iPod® devices, cell
phones or other media players,
may also be able to stream music
to your vehicle's speakers. Your
connected device must be
Bluetooth-compatible, and paired
with your Media Center radio (see
Uconnect™ Phone for pairing
instructions). Non-Touch-Screen Radios: Press the “AUX” button on the
radio faceplate until "BT" or “Audio Streaming” is displayed on the radio
screen. Touch-Screen-Radios: Press the “RADIO/MEDIA” or “MEDIA”
hard-key and then touch the “AUX” soft-key tab.
ELECTRONIC VEHICLE INFORMATION CENTER
(EVIC)
• The EVIC features a driver
interactive display that is located
in the instrument cluster. Pressing
the controls on the steering wheel
allows the driver to select vehicle
information and Personal Settings.
For additional information, refer to
Programmable Features in this
guide.
• Press and release the MENU button and the mode displayed will change
between Compass/Temperature, Trip, System Status, and Personal
settings.
• Press the DOWN
button to scroll through sub menus (i.e., Trip
Functions, Avg. Fuel Economy, DTE, Elapsed Time, and Units).
• Press and release the COMPASS
button for instant access to the
Compass/Temperature screens.
• Press the SELECT
button to RESET Trip Functions and change
Personal Settings.
ELECTRONICS
52
Page 56 of 108
Sound Horn With Lock
• To turn the horn chirp on or off when the doors are locked:
• Press the LOCK button for at least 4 seconds, but no longer than
10 seconds. Then, press the PANIC button while still holding the LOCK
button.
• Release both buttons at the same time.
Flashing Lights With Lock
• The turn signal lights flashing, when the doors are locked or unlocked,
feature can be turned on or off. To turn this feature on or off:
• Press and hold the UNLOCK button for at least 4 seconds, but no longer
than 10 seconds. Then, press and hold the LOCK button while still
holding the UNLOCK button.
• Release both buttons at the same time.
UNIVERSAL GARAGE DOOR OPENER (HomeLink®)
• HomeLink® replaces up to three hand-held transmitters that operate
devices such as garage door openers, motorized gates, lighting or home
security systems. The HomeLink® unit is powered by your vehicles 12 Volt
battery.
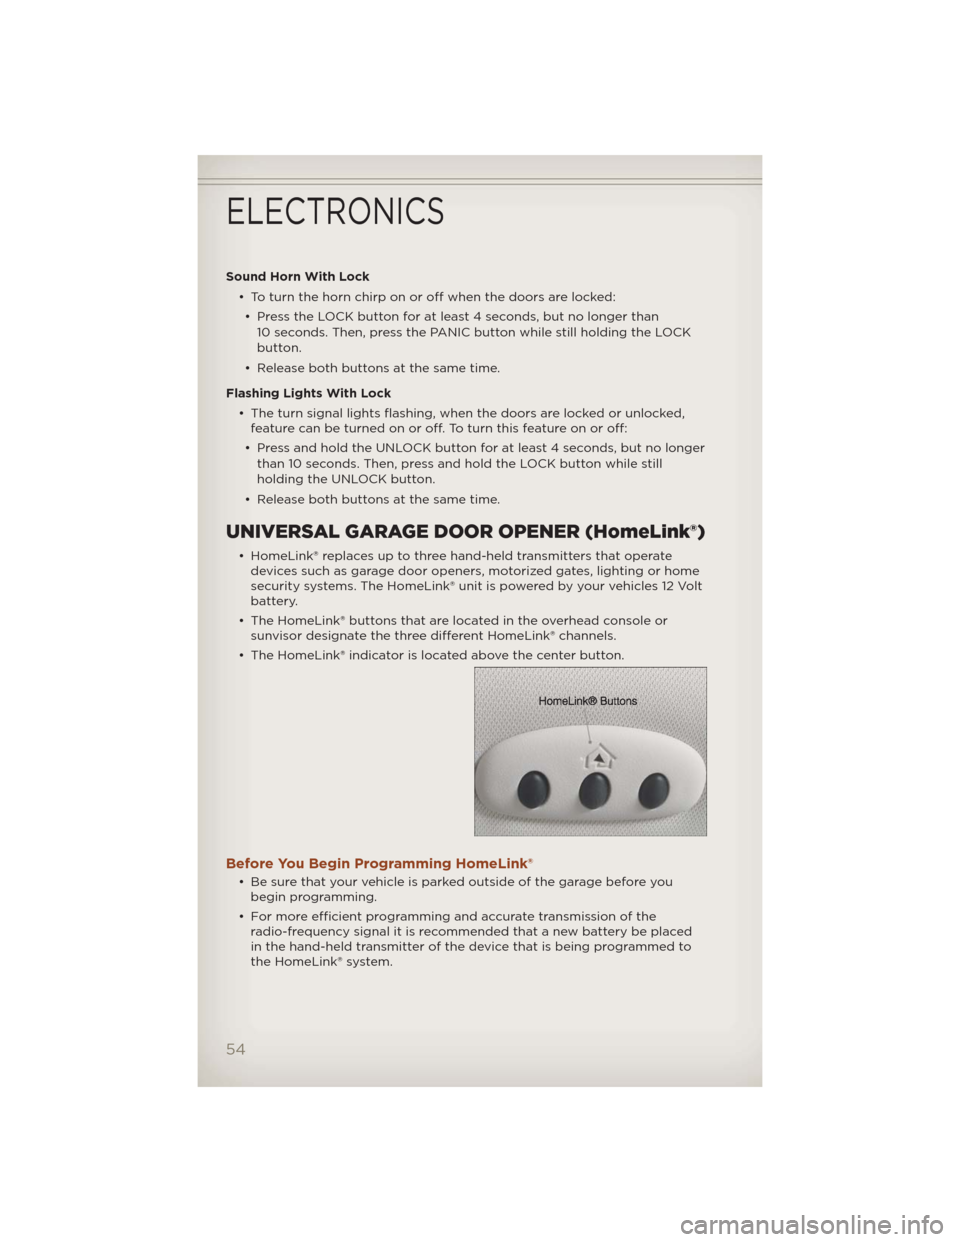
• The HomeLink® buttons that are located in the overhead console or
sunvisor designate the three different HomeLink® channels.
• The HomeLink® indicator is located above the center button.
Before You Begin Programming HomeLink®
• Be sure that your vehicle is parked outside of the garage before you
begin programming.
• For more efficient programming and accurate transmission of the
radio-frequency signal it is recommended that a new battery be placed
in the hand-held transmitter of the device that is being programmed to
the HomeLink® system.
ELECTRONICS
54
Page 76 of 108
JUMP-STARTING PROCEDURES
• If your vehicle has a discharged battery it can be jump-started using a
set of jumper cables and a battery in another vehicle or by using a
portable battery booster pack. Jump-starting can be dangerous if done
improperly so please follow the procedures in this section carefully.
NOTE:When using a portable battery booster pack follow the
manufacturer’s operating instructions and precautions.
Preparations For Jump-Start
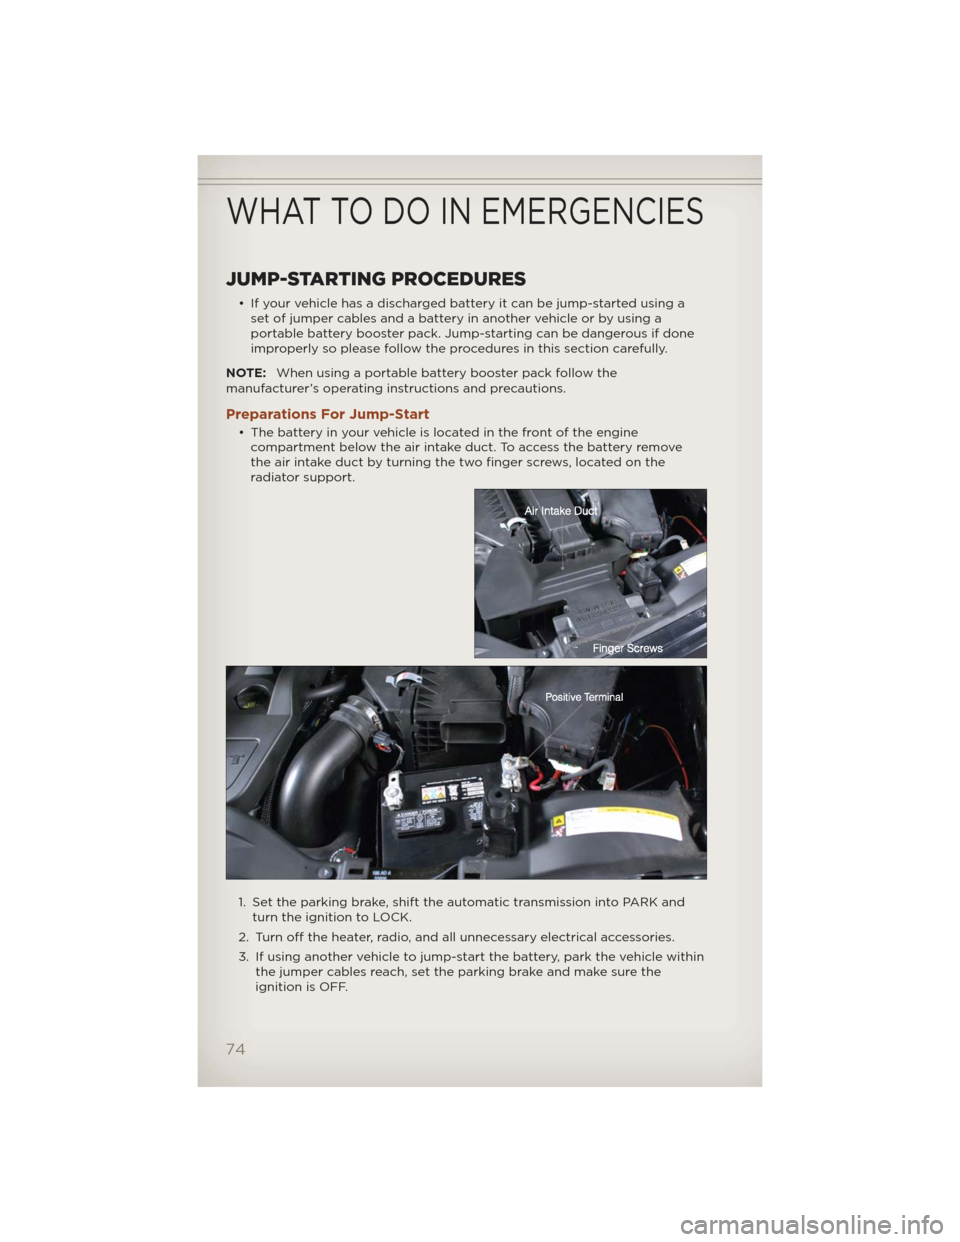
• The battery in your vehicle is located in the front of the engine
compartment below the air intake duct. To access the battery remove
the air intake duct by turning the two finger screws, located on the
radiator support.
1. Set the parking brake, shift the automatic transmission into PARK and
turn the ignition to LOCK.
2. Turn off the heater, radio, and all unnecessary electrical accessories.
3. If using another vehicle to jump-start the battery, park the vehicle within
the jumper cables reach, set the parking brake and make sure the
ignition is OFF.
WHAT TO DO IN EMERGENCIES
74
Page 90 of 108
CavityCartridge
FuseMini-Fuse Description
15 40 Amp
GreenRAD Fan Relay Battery Feed
16 15 Amp Lt
BlueIGN Run/ACC Dome
Lamp/Sunroof/Rear Wiper
Motor/ACC Inverter
17 10 Amp Red IOD Feed Mod-Wcm
18 40 Amp
GreenASD Relay Contact PWR Feed
19 20 Amp
YellowPWR Amp 1 & Amp 2 Feed
20 15 Amp Lt
BlueIOD Feed Radio
21 10 Amp Red IOD Feed Intrus Mod/Siren (If
Equipped)
22 10 Amp Red IGN RUN Heat/AC/Compass
Sensor
23 15 Amp Lt
BlueENG ASD Relay Feed 3
24 15 Amp Lt
BluePower Sunroof Feed
25 10 Amp Red Heated Mirror (If Equipped)
26 15 Amp Lt
BlueENG ASD Relay Feed 2
27 10 Amp Red IGN RUN Only ORC Feed
28 10 Amp Red IGN RUN ORC/OCM Feed
29 Hot Car (No Fuse Required)
30 20 Amp
YellowHeated Seat (If Equipped)
31 10 Amp Red Headlamp Washer Relay
Control (If Equipped)
32 30 Amp Pink ENG ASD Control Feed 1
33 10 Amp Red ABS MOD/J1962 Conn/PCM
34 30 Amp Pink ABS Valve Feed
35 40 Amp
GreenABS Pump Feed
36 30 Amp Pink Headlamp/Washer
Control/Smart Glass (If
Equipped)
37 25 Amp
NaturalDiesel Fuel Heater (If
Equipped)
MAINTAINING YOUR VEHICLE
88