battery JEEP COMPASS 2012 1.G User Guide
[x] Cancel search | Manufacturer: JEEP, Model Year: 2012, Model line: COMPASS, Model: JEEP COMPASS 2012 1.GPages: 108, PDF Size: 4.03 MB
Page 48 of 108
STEERING WHEEL AUDIO CONTROLS
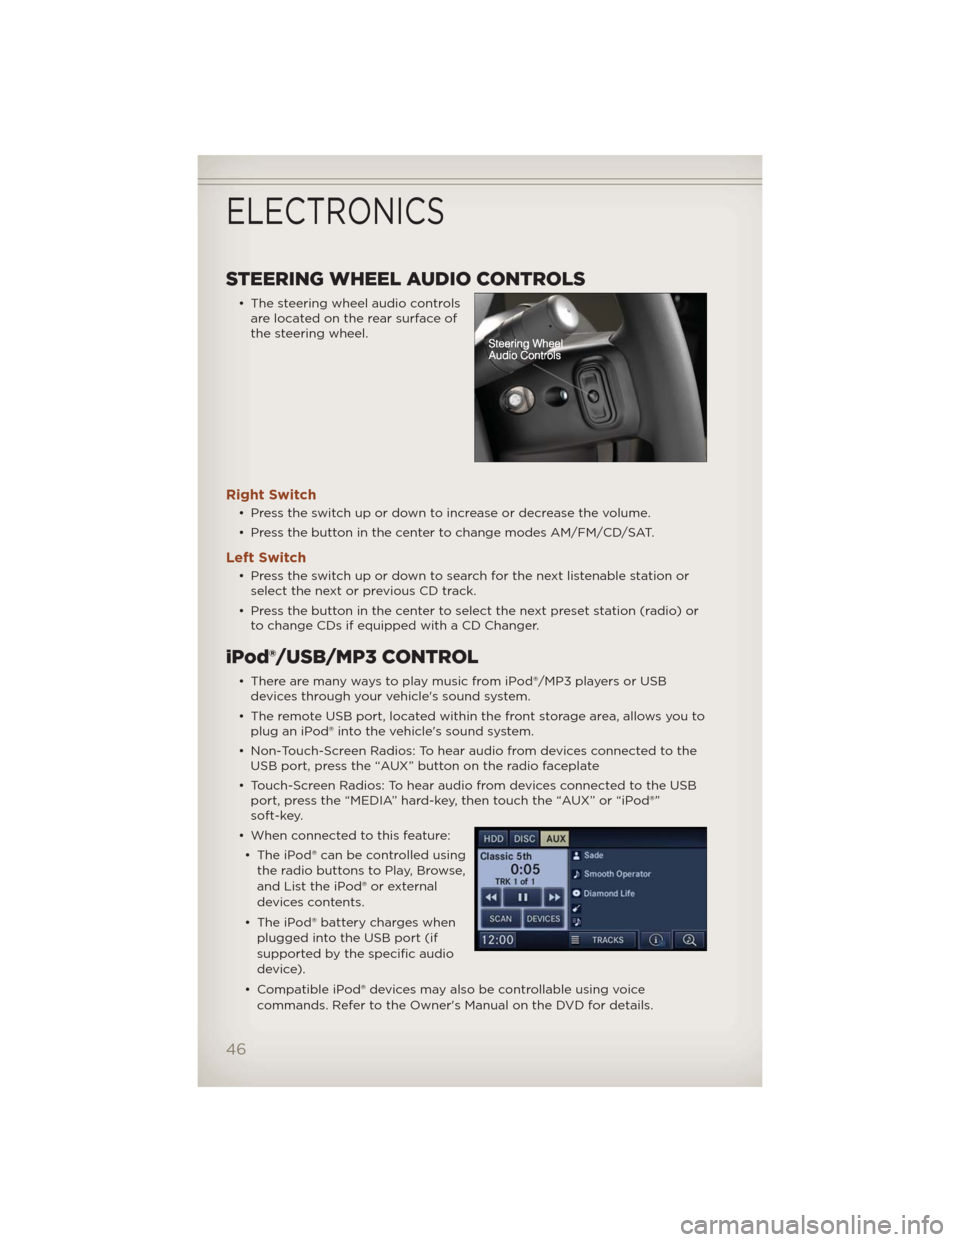
• The steering wheel audio controls
are located on the rear surface of
the steering wheel.
Right Switch
• Press the switch up or down to increase or decrease the volume.
• Press the button in the center to change modes AM/FM/CD/SAT.
Left Switch
• Press the switch up or down to search for the next listenable station or
select the next or previous CD track.
• Press the button in the center to select the next preset station (radio) or
to change CDs if equipped with a CD Changer.
iPod®/USB/MP3 CONTROL
• There are many ways to play music from iPod®/MP3 players or USB
devices through your vehicle's sound system.
• The remote USB port, located within the front storage area, allows you to
plug an iPod® into the vehicle's sound system.
• Non-Touch-Screen Radios: To hear audio from devices connected to the
USB port, press the “AUX” button on the radio faceplate
• Touch-Screen Radios: To hear audio from devices connected to the USB
port, press the “MEDIA” hard-key, then touch the “AUX” or “iPod®”
soft-key.
• When connected to this feature:
• The iPod® can be controlled using
the radio buttons to Play, Browse,
and List the iPod® or external
devices contents.
• The iPod® battery charges when
plugged into the USB port (if
supported by the specific audio
device).
• Compatible iPod® devices may also be controllable using voice
commands. Refer to the Owner's Manual on the DVD for details.
ELECTRONICS
46
Page 56 of 108
Sound Horn With Lock
• To turn the horn chirp on or off when the doors are locked:
• Press the LOCK button for at least 4 seconds, but no longer than
10 seconds. Then, press the PANIC button while still holding the LOCK
button.
• Release both buttons at the same time.
Flashing Lights With Lock
• The turn signal lights flashing, when the doors are locked or unlocked,
feature can be turned on or off. To turn this feature on or off:
• Press and hold the UNLOCK button for at least 4 seconds, but no longer
than 10 seconds. Then, press and hold the LOCK button while still
holding the UNLOCK button.
• Release both buttons at the same time.
UNIVERSAL GARAGE DOOR OPENER (HomeLink®)
• HomeLink® replaces up to three hand-held transmitters that operate
devices such as garage door openers, motorized gates, lighting or home
security systems. The HomeLink® unit is powered by your vehicles 12 Volt
battery.
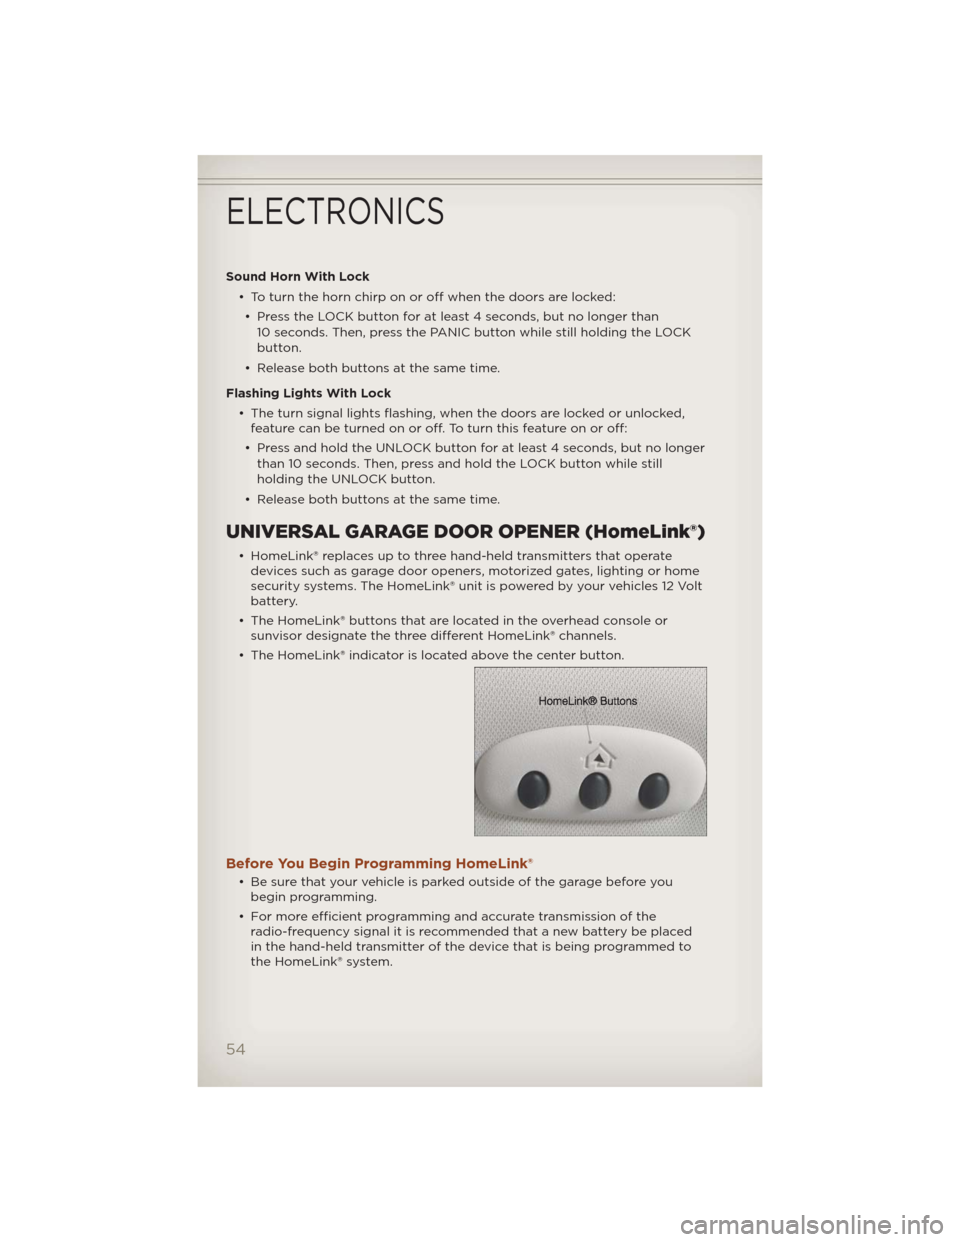
• The HomeLink® buttons that are located in the overhead console or
sunvisor designate the three different HomeLink® channels.
• The HomeLink® indicator is located above the center button.
Before You Begin Programming HomeLink®
• Be sure that your vehicle is parked outside of the garage before you
begin programming.
• For more efficient programming and accurate transmission of the
radio-frequency signal it is recommended that a new battery be placed
in the hand-held transmitter of the device that is being programmed to
the HomeLink® system.
ELECTRONICS
54
Page 76 of 108
JUMP-STARTING PROCEDURES
• If your vehicle has a discharged battery it can be jump-started using a
set of jumper cables and a battery in another vehicle or by using a
portable battery booster pack. Jump-starting can be dangerous if done
improperly so please follow the procedures in this section carefully.
NOTE:When using a portable battery booster pack follow the
manufacturer’s operating instructions and precautions.
Preparations For Jump-Start
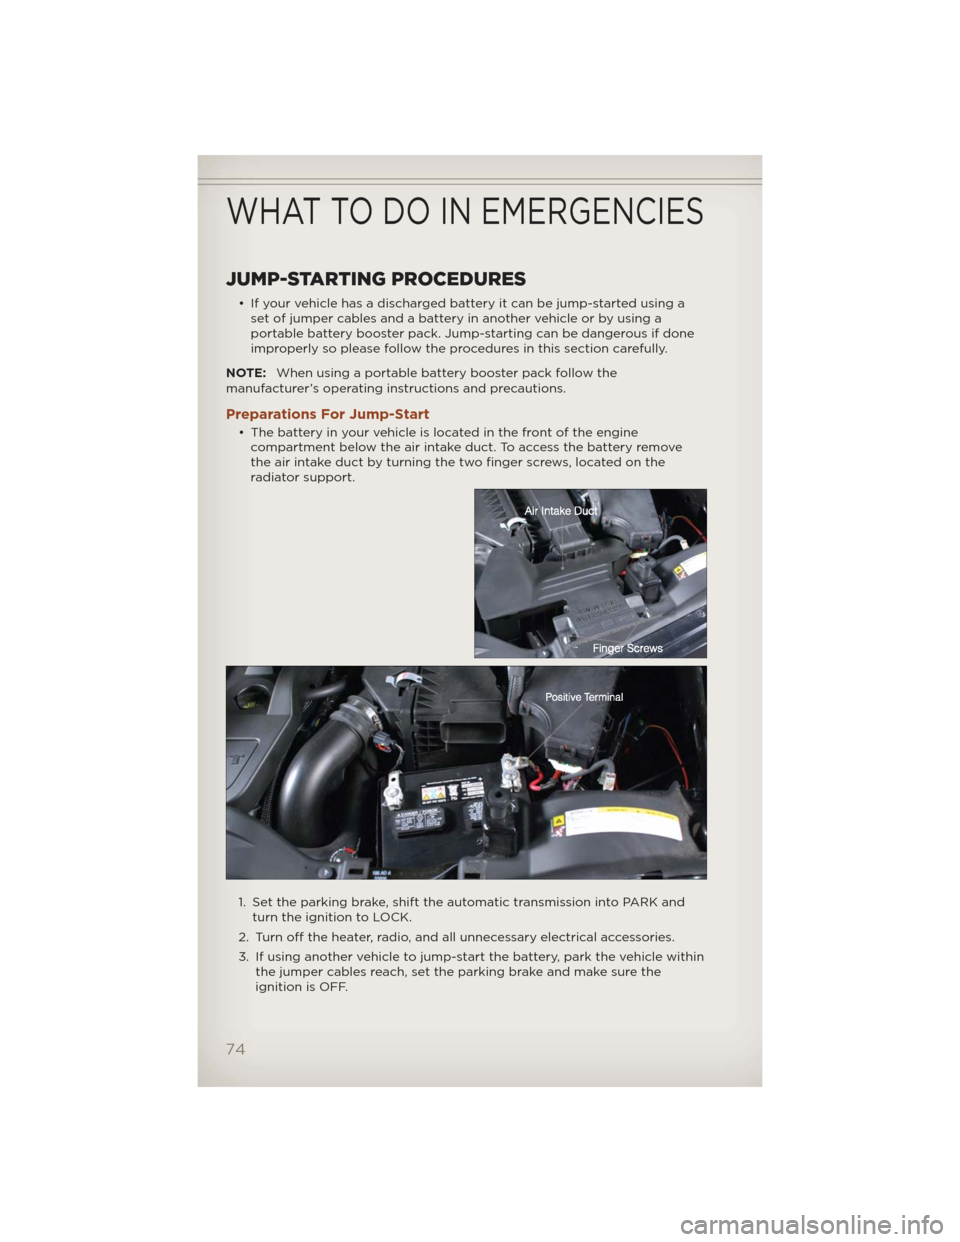
• The battery in your vehicle is located in the front of the engine
compartment below the air intake duct. To access the battery remove
the air intake duct by turning the two finger screws, located on the
radiator support.
1. Set the parking brake, shift the automatic transmission into PARK and
turn the ignition to LOCK.
2. Turn off the heater, radio, and all unnecessary electrical accessories.
3. If using another vehicle to jump-start the battery, park the vehicle within
the jumper cables reach, set the parking brake and make sure the
ignition is OFF.
WHAT TO DO IN EMERGENCIES
74
Page 77 of 108
Jump-Starting Procedure
NOTE:Remove Air Intake before proceeding with this Jump-Starting
procedure.
1. Connect the positive(+)end of the jumper cable to the positive(+)post
of the discharged vehicle.
2. Connect the opposite end of the positive(+)jumper cable to the
positive(+)post of the booster battery.
3. Connect the negative end(-)of the jumper cable to the negative(-)
post of the booster battery.
4. Connect the opposite end of the negative(-)jumper cable to a good
engine ground (exposed metal part of the discharged vehicle’s engine)
away from the battery and the fuel injection system.
5. Start the engine in the vehicle that has the booster battery, let the
engine idle a few minutes, and then start the engine in the vehicle with
the discharged battery.
Once the engine is started, remove the jumper cables in the reverse
sequence:
6. Disconnect the negative(-)jumper cable from the engine ground of the
vehicle with the discharged battery.
7. Disconnect the negative end(-)of the jumper cable from the negative
(-)post of the booster battery.
8. Disconnect the opposite end of the positive(+)jumper cable from the
positive(+)post of the booster battery.
9. Disconnect the positive(+)end of the jumper cable from the positive
(+)post of the discharged vehicle.
10. Reinstall the air intake duct.
NOTE:If frequent jump-starting is required to start your vehicle you should
have the battery and charging system inspected at your authorized dealer.
CAUTION!
• Accessories that can be plugged into the vehicle power outlets
draw power from the vehicle’s battery, even when not in use (i.e.,
cellular phones, etc.). Eventually, if plugged in long enough, the
vehicle’s battery will discharge sufficiently to degrade battery life
and/or prevent the engine from starting.
• Do not use a portable battery booster pack or any other booster
source with a system voltage greater than 12 Volts or damage to the
battery, starter motor, alternator or electrical system may occur.
• Failure to follow these procedures could result in damage to the
charging system of the booster vehicle or the discharged vehicle.
WHAT TO DO IN EMERGENCIES
75
Page 78 of 108
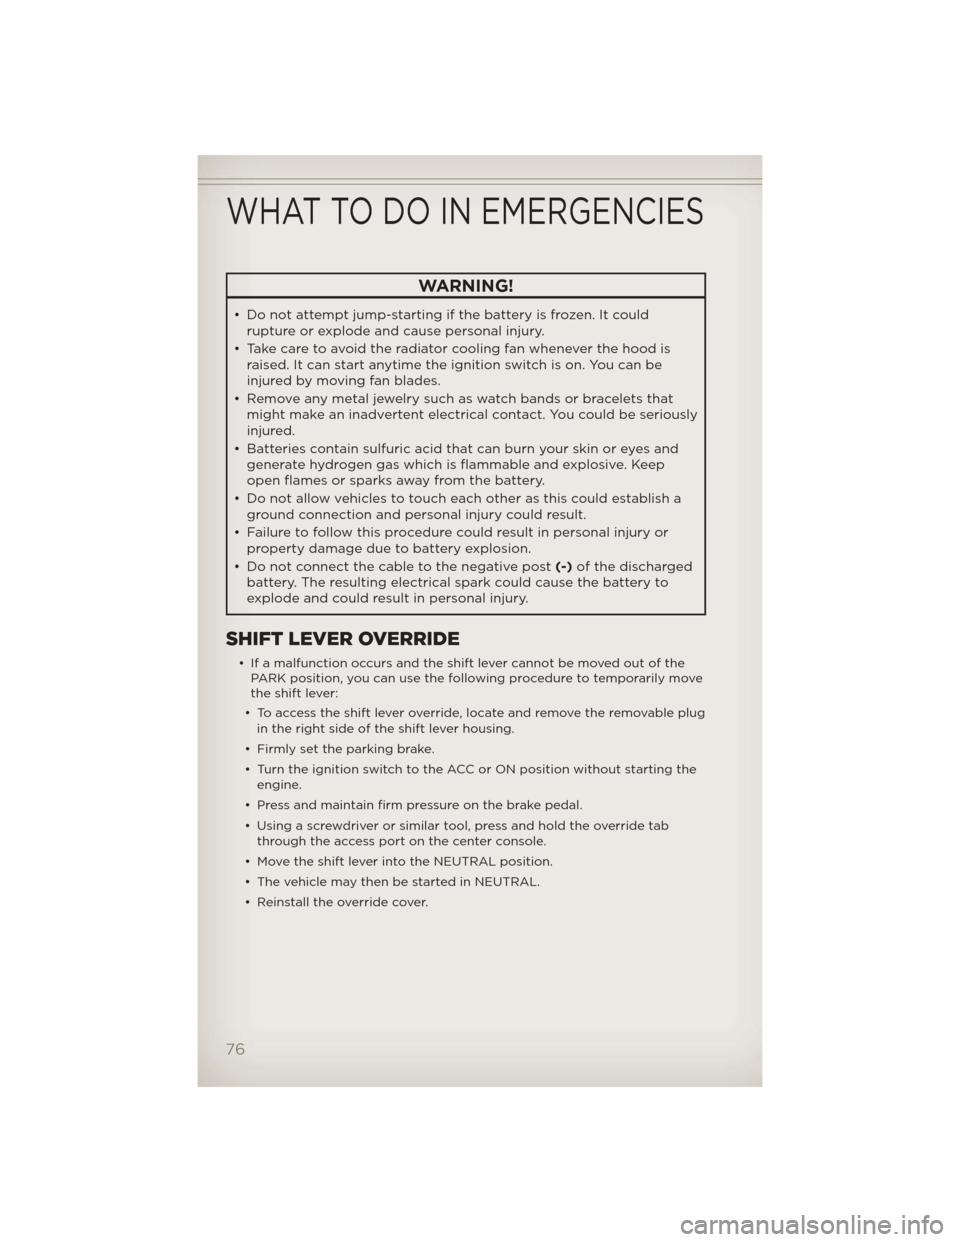
WARNING!
• Do not attempt jump-starting if the battery is frozen. It could
rupture or explode and cause personal injury.
• Take care to avoid the radiator cooling fan whenever the hood is
raised. It can start anytime the ignition switch is on. You can be
injured by moving fan blades.
• Remove any metal jewelry such as watch bands or bracelets that
might make an inadvertent electrical contact. You could be seriously
injured.
• Batteries contain sulfuric acid that can burn your skin or eyes and
generate hydrogen gas which is flammable and explosive. Keep
open flames or sparksaway from the battery.
• Do not allow vehicles to touch each other as this could establish a
ground connection and personal injury could result.
• Failure to follow this procedure could result in personal injury or
property damage due to battery explosion.
• Do not connect the cable to the negative post(-)of the discharged
battery. The resulting electrical spark could cause the battery to
explode and could result in personal injury.
SHIFT LEVER OVERRIDE
• If a malfunction occurs and the shift lever cannot be moved out of the
PARK position, you can use the following procedure to temporarily move
the shift lever:
• To access the shift lever override, locate and remove the removable plug
in the right side of the shift lever housing.
• Firmly set the parking brake.
• Turn the ignition switch to the ACC or ON position without starting the
engine.
• Press and maintain firm pressure on the brake pedal.
• Using a screwdriver or similar tool, press and hold the override tab
through the access port on the center console.
• Move the shift lever into the NEUTRAL position.
• The vehicle may then be started in NEUTRAL.
• Reinstall the override cover.
WHAT TO DO IN EMERGENCIES
76
Page 90 of 108
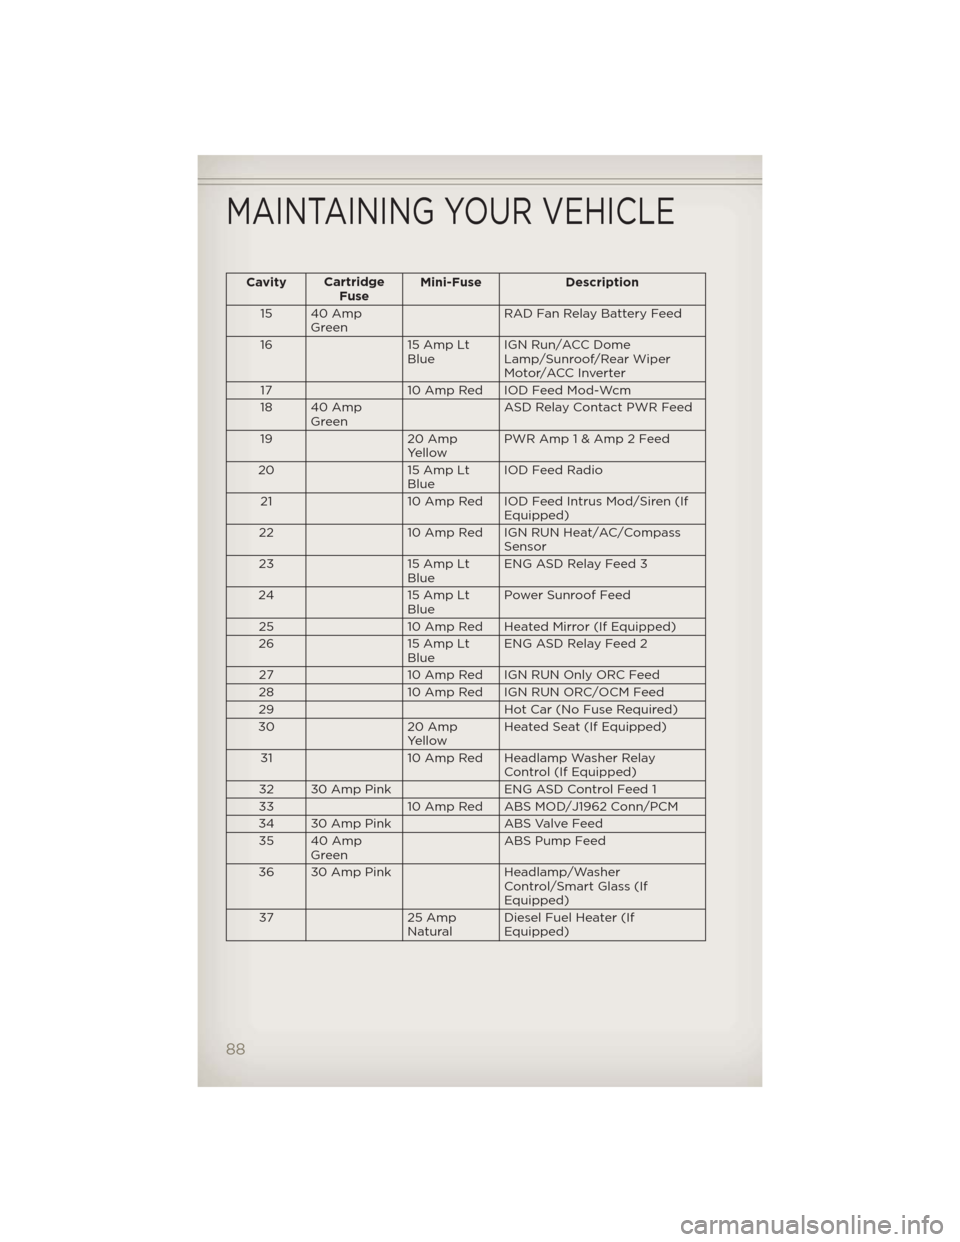
CavityCartridge
FuseMini-Fuse Description
15 40 Amp
GreenRAD Fan Relay Battery Feed
16 15 Amp Lt
BlueIGN Run/ACC Dome
Lamp/Sunroof/Rear Wiper
Motor/ACC Inverter
17 10 Amp Red IOD Feed Mod-Wcm
18 40 Amp
GreenASD Relay Contact PWR Feed
19 20 Amp
YellowPWR Amp 1 & Amp 2 Feed
20 15 Amp Lt
BlueIOD Feed Radio
21 10 Amp Red IOD Feed Intrus Mod/Siren (If
Equipped)
22 10 Amp Red IGN RUN Heat/AC/Compass
Sensor
23 15 Amp Lt
BlueENG ASD Relay Feed 3
24 15 Amp Lt
BluePower Sunroof Feed
25 10 Amp Red Heated Mirror (If Equipped)
26 15 Amp Lt
BlueENG ASD Relay Feed 2
27 10 Amp Red IGN RUN Only ORC Feed
28 10 Amp Red IGN RUN ORC/OCM Feed
29 Hot Car (No Fuse Required)
30 20 Amp
YellowHeated Seat (If Equipped)
31 10 Amp Red Headlamp Washer Relay
Control (If Equipped)
32 30 Amp Pink ENG ASD Control Feed 1
33 10 Amp Red ABS MOD/J1962 Conn/PCM
34 30 Amp Pink ABS Valve Feed
35 40 Amp
GreenABS Pump Feed
36 30 Amp Pink Headlamp/Washer
Control/Smart Glass (If
Equipped)
37 25 Amp
NaturalDiesel Fuel Heater (If
Equipped)
MAINTAINING YOUR VEHICLE
88