belt JEEP COMPASS 2015 1.G Workshop Manual
[x] Cancel search | Manufacturer: JEEP, Model Year: 2015, Model line: COMPASS, Model: JEEP COMPASS 2015 1.GPages: 560, PDF Size: 11.51 MB
Page 151 of 560
WARNING!(Continued)
•Do not allow people to ride in any area of your
vehicle that is not equipped with seats and seat
belts. In a collision, people riding in these areas are
more likely to be seriously injured or killed.
•Be sure everyone in your vehicle is in a seat and
using a seat belt properly.
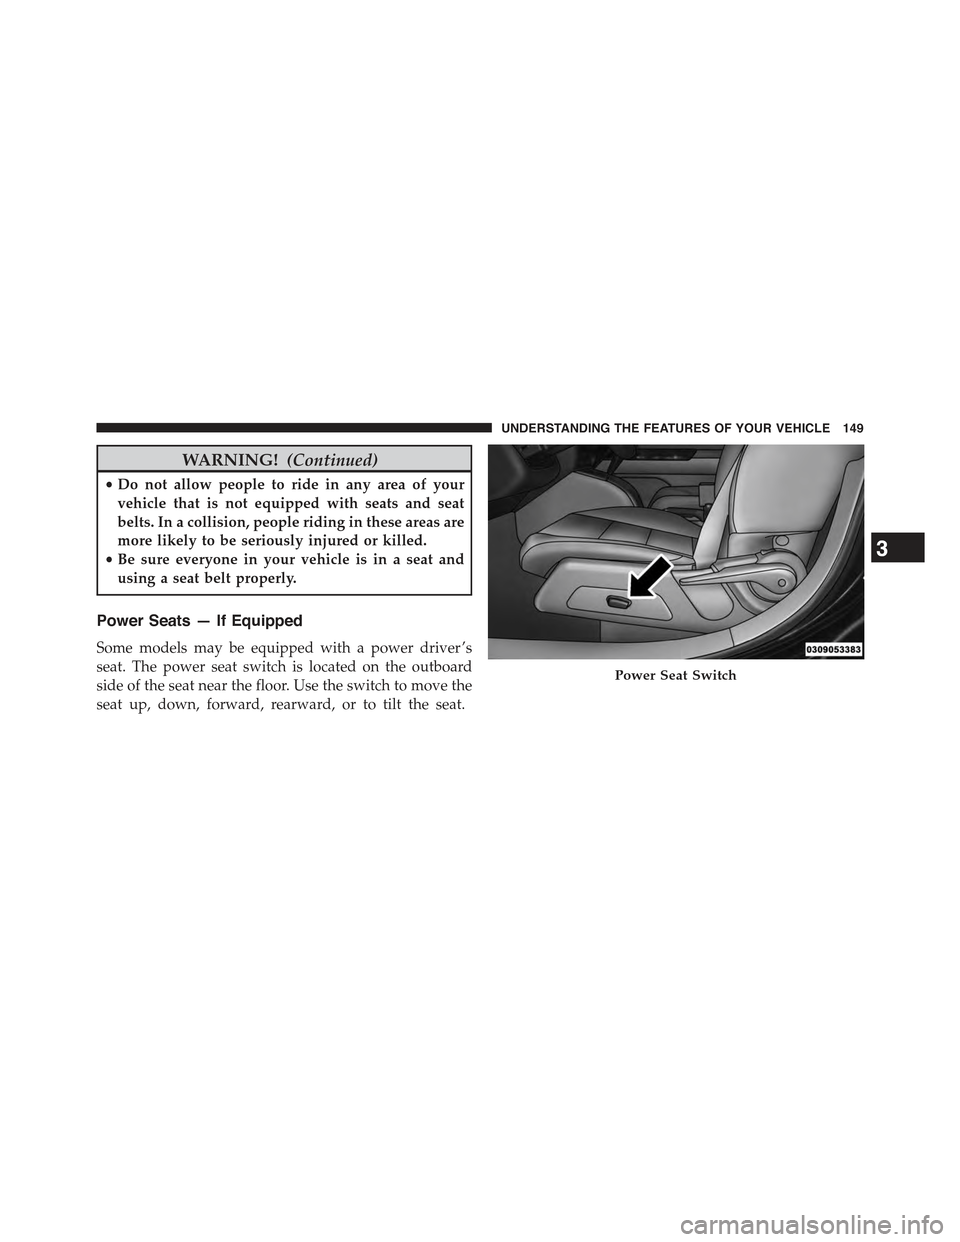
Power Seats — If Equipped
Some models may be equipped with a power driver ’s
seat. The power seat switch is located on the outboard
side of the seat near the floor. Use the switch to move the
seat up, down, forward, rearward, or to tilt the seat.
Power Seat Switch
3
UNDERSTANDING THE FEATURES OF YOUR VEHICLE 149
Page 152 of 560
WARNING!
•Adjusting a seat while driving may be dangerous.
Moving a seat while driving could result in loss of
control which could cause a collision and serious
injury or death.
•Seats should be adjusted before fastening the seat
belts and while the vehicle is parked. Serious
injury or death could result from a poorly adjusted
seat belt.
CAUTION!
Do not place any article under a power seat or
impede its ability to move as it may cause damage to
the seat controls. Seat travel may become limited if
movement is stopped by an obstruction in the seat’s
path.
Adjusting The Seat Forward Or Rearward
The seat can be adjusted both forward and rearward.
Push the seat switch forward or rearward, the seat will
move in the direction of the switch. Release the switch
when the desired position has been reached.
Adjusting The Seat Up Or Down
The height of the seats can be adjusted up or down. Pull
upward or push downward on the seat switch, the seat
will move in the direction of the switch. Release the
switch when the desired position is reached.
Tilting The Seat Up Or Down
The angle of the seat cushion can be adjusted in four
directions. Pull upward or push downward on the front
or rear of the seat switch, the front or rear of the seat
cushion will move in the direction of the switch. Release
the switch when the desired position is reached.
150 UNDERSTANDING THE FEATURES OF YOUR VEHICLE
Page 155 of 560
WARNING!
•Adjusting a seat while driving may be dangerous.
Moving a seat while driving could result in loss of
control which could cause a collision and serious
injury or death.
•Seats should be adjusted before fastening the seat
belts and while the vehicle is parked. Serious
injury or death could result from a poorly adjusted
seat belt.
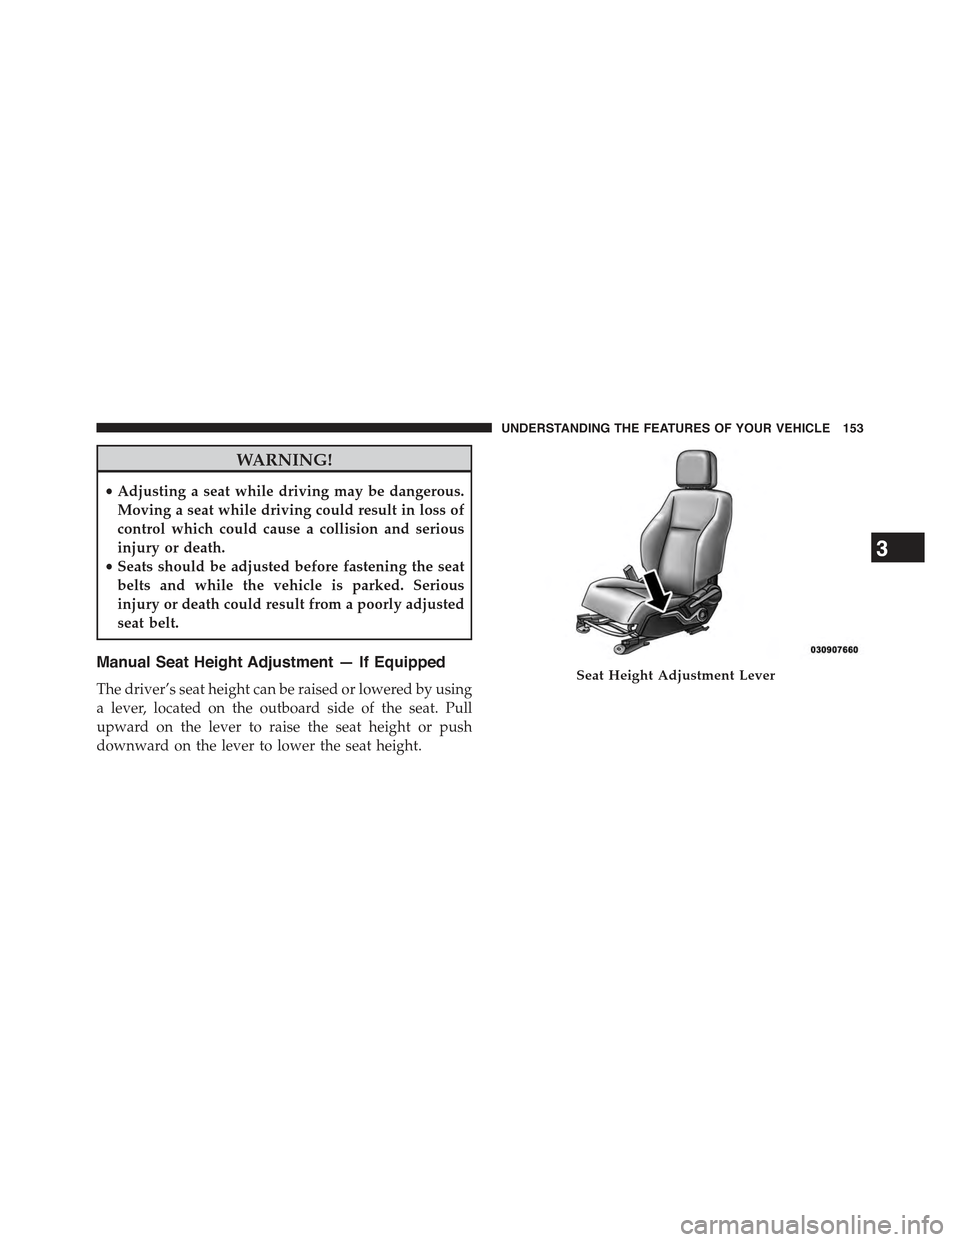
Manual Seat Height Adjustment — If Equipped
The driver’s seat height can be raised or lowered by using
a lever, located on the outboard side of the seat. Pull
upward on the lever to raise the seat height or push
downward on the lever to lower the seat height.
Seat Height Adjustment Lever
3
UNDERSTANDING THE FEATURES OF YOUR VEHICLE 153
Page 157 of 560
WARNING!
Do not ride with the seatback reclined so that the
shoulder belt is no longer resting against your chest.
In a collision you could slide under the seat belt,
which could result in serious injury or death.
Head Restraints
Head restraints are designed to reduce the risk of injury
by restricting head movement in the event of a rear
impact. Head restraints should be adjusted so that the top
of the head restraint is located above the top of your ear.
WARNING!
The head restraints for all occupants must be prop-
erly adjusted prior to operating the vehicle or occu-
pying a seat. Head restraints should never be ad-
justed while the vehicle is in motion. Driving a
vehicle with the head restraints improperly adjusted
or removed could cause serious injury or death in the
event of a collision.
Active Head Restraints — Front Seats
Active Head Restraints are passive, deployable compo-
nents, and vehicles with this equipment cannot be readily
identified by any markings, only through visual inspec-
tion of the head restraint. The head restraint will be split
in two halves, with the front half being soft foam and
trim, the back half being decorative plastic.
3
UNDERSTANDING THE FEATURES OF YOUR VEHICLE 155
Page 162 of 560
WARNING!
Be certain that the seatback is securely locked into
position. If the seatback is not securely locked into
position the seat will not provide the proper stability
for child seats and/or passengers. An improperly
latched seat could cause serious injury.
Reclining Rear Seat — If Equipped
For additional comfort, pull the strap forward just
enough to release the seatback latch. Then push the
seatback to a reclined position, approximately 35 degrees
maximum, and release the strap.
WARNING!
Do not ride with the seatback reclined so that the
shoulder belt is no longer resting against your chest.
In a collision you could slide under the seat belt and
be seriously or even fatally injured. Use the recliner
only when the vehicle is parked.
TO OPEN AND CLOSE THE HOOD
To open the hood, two latches must be released.
1. Pull the hood release lever located on the left kick
panel.
160 UNDERSTANDING THE FEATURES OF YOUR VEHICLE
Page 190 of 560
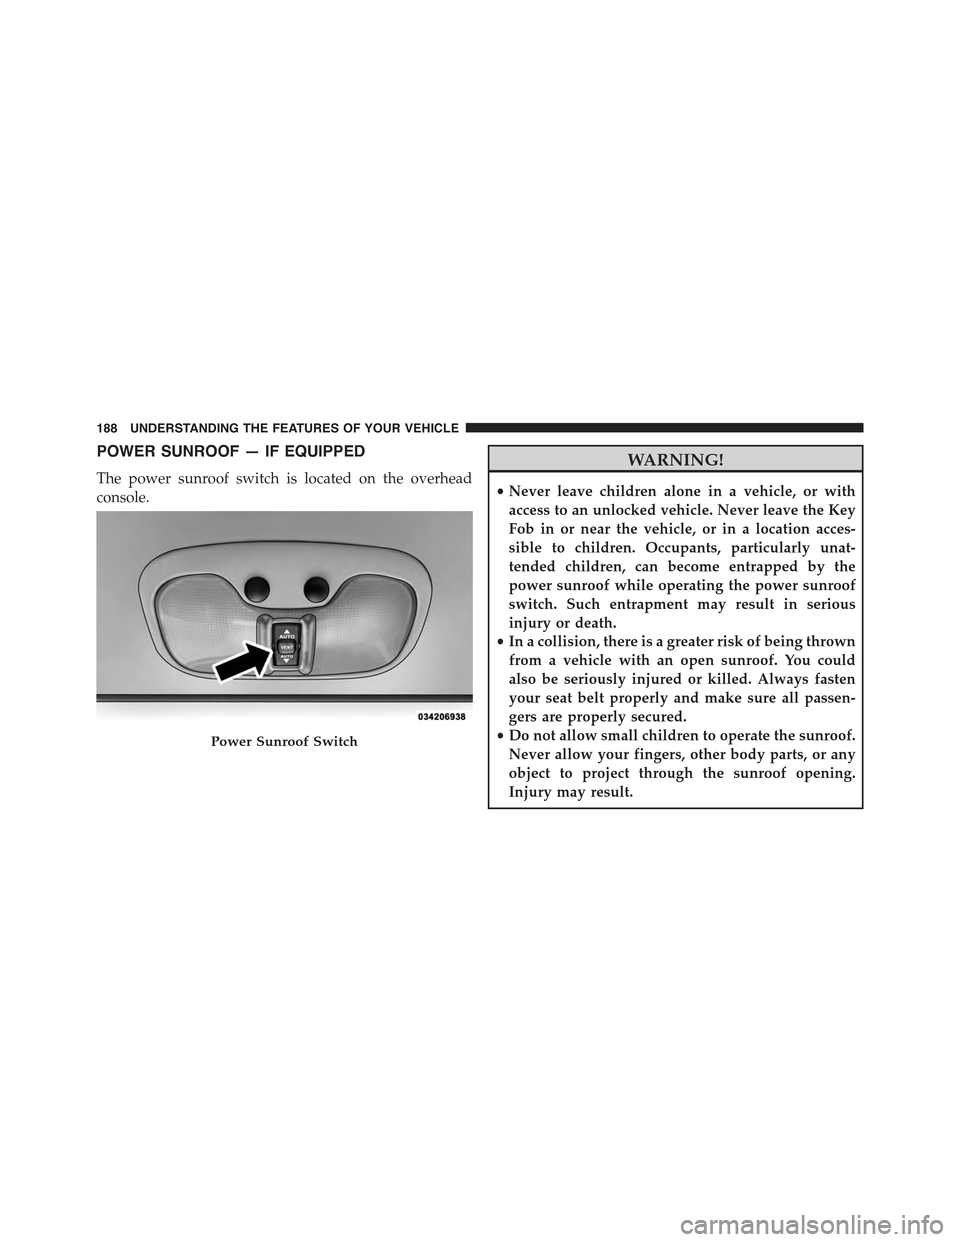
POWER SUNROOF — IF EQUIPPED
The power sunroof switch is located on the overhead
console.
WARNING!
•Never leave children alone in a vehicle, or with
access to an unlocked vehicle. Never leave the Key
Fob in or near the vehicle, or in a location acces-
sible to children. Occupants, particularly unat-
tended children, can become entrapped by the
power sunroof while operating the power sunroof
switch. Such entrapment may result in serious
injury or death.
•In a collision, there is a greater risk of being thrown
from a vehicle with an open sunroof. You could
also be seriously injured or killed. Always fasten
your seat belt properly and make sure all passen-
gers are properly secured.
•Do not allow small children to operate the sunroof.
Never allow your fingers, other body parts, or any
object to project through the sunroof opening.
Injury may result.
Power Sunroof Switch
188 UNDERSTANDING THE FEATURES OF YOUR VEHICLE
Page 205 of 560
WARNING!
•Cargo tie-down loops are not safe anchors for a
child seat tether strap. In a sudden stop or collision
a loop could pull loose and allow the child seat to
come loose. A child could be badly injured. Use
only the anchors provided for child seat tethers.
•The weight and position of cargo and passengers
can change the vehicle center of gravity and vehicle
handling. To avoid loss of control resulting in
personal injury, follow these guidelines for loading
your vehicle:
•Always place cargo evenly on the cargo floor. Put
heavier objects as low and as far forward as pos-
sible.
(Continued)
WARNING!(Continued)
•Place as much cargo as possible in front of the rear
axle. Too much weight or improperly placed weight
over or behind the rear axle can cause the rear of
the vehicle to sway.
•Do not pile luggage or cargo higher than the top of
the seatback. This could impair visibility or be-
come a dangerous projectile in a sudden stop or
collision.
•To help protect against personal injury, passengers
should not be seated in the rear cargo area. The rear
cargo space is intended for load carrying purposes
only, not for passengers, who should sit in seats
and use seat belts.
3
UNDERSTANDING THE FEATURES OF YOUR VEHICLE 203
Page 218 of 560
If the vehicle is driven more than 1 mile (1.6 km) with
either turn signal on, a continuous chime will sound to
alert you to turn the signals off. If either indicator flashes
at a rapid rate, check for a defective outside light bulb.
9. High Beam Indicator
This indicator shows that the high beam head-
lights are on. Push the multifunction lever for-
ward to switch the headlights to high beam, and pull
toward yourself (normal position) to return to low beam.
10. Anti-Lock Brake (ABS) Light
This light monitors the Anti-Lock Brake System
(ABS). The light will turn on when the ignition
switch is turned to the ON/RUN position and
may stay on for as long as four seconds.
If the ABS light remains on or turns on while driving, it
indicates that the Anti-Lock portion of the brake system
is not functioning and that service is required. However,
the conventional brake system will continue to operate
normally if the BRAKE warning light is not on.
If the ABS light is on, the brake system should be serviced
as soon as possible to restore the benefits of Anti-Lock
brakes. If the ABS light does not turn on when the
ignition switch is turned to the ON/RUN position, have
the light inspected by an authorized dealer.
11. Seat Belt Reminder Light
When the ignition switch is first turned to ON/
RUN, this light will turn on for four to eight
seconds as a bulb check. During the bulb check, if
the driver’s seat belt is unbuckled, a chime will sound.
After the bulb check or when driving, if the driver’s seat
belt remains unbuckled, the Seat Belt Reminder Light
will illuminate and the chime will sound. Refer to
“Occupant Restraints” in “Things To Know Before Start-
ing Your Vehicle” for further information.
216 UNDERSTANDING YOUR INSTRUMENT PANEL
Page 318 of 560
STARTING PROCEDURES
Before starting your vehicle, adjust your seat, adjust both
inside and outside mirrors, and fasten your seat belts.
WARNING!
•Before exiting a vehicle, always apply the parking
brake, shift the transmission into PARK, and re-
move the Key Fob from the ignition. When leaving
the vehicle, always lock your vehicle.
•Never leave children alone in a vehicle, or with
access to an unlocked vehicle.
•Allowing children to be in a vehicle unattended is
dangerous for a number of reasons. A child or
others could be seriously or fatally injured. Chil-
dren should be warned not to touch the parking
brake, brake pedal or the shift lever.
(Continued)
WARNING!(Continued)
•Do not leave the Key Fob in or near the vehicle, or
in a location accessible to children. A child could
operate power windows, other controls, or move
the vehicle.
Manual Transmission — If Equipped
Before starting the engine fully apply the parking brake,
press the clutch pedal to the floor, and place the shift
lever in NEUTRAL.
NOTE:
•The engine will not start unless the clutch pedal is
pressed to the floor.
•If the key will not turn and the steering wheel is locked,
rotate the wheel in either direction to relieve pressure on
the locking mechanism and then turn the key.
316 STARTING AND OPERATING
Page 345 of 560
CAUTION!
Never park your vehicle over dry grass or other
combustible materials. The heat from your vehicle
exhaust system could cause a fire.
WARNING!
Always wear your seat belt and firmly tie down
cargo. Unsecured cargo can become projectiles in an
off-road situation.
When To Use Low (L Off-Road) With The 4WD
Lock Lever Engaged
When driving off-road, shift into low (L Off-Road) and
activate the 4WD LOCK. This will provide additional
traction and activates the numerous off-road features to
improve handling and control on slippery or difficult
terrain. Due to the sustained lower gearing, low (L Off-
Road) with 4WD LOCK engaged will allow the engine to
operate in a higher power range. This will allow you to
cross over obstacles and descend hills, with improved
control and less effort.
NOTE:For maximum off-road performance, premium
fuel is recommended. While the vehicle will operate on
regular fuel when in L Off-Road mode, the engine has been
calibrated for maximum performance using premium fuel.
Driving In Snow, Mud And Sand
There is a drastic reduction in traction when driving in
snow, mud or sand. The vehicle will be less responsive to
steering, acceleration and braking inputs. Therefore, you
should accelerate slowly, leave greater stopping distances
and avoid abrupt vehicle maneuvers. You want to keep a
slow constant steady pace. The key is to maintain the
vehicle’s momentum.
5
STARTING AND OPERATING 343