mirror JEEP COMPASS 2015 1.G Owners Manual
[x] Cancel search | Manufacturer: JEEP, Model Year: 2015, Model line: COMPASS, Model: JEEP COMPASS 2015 1.GPages: 560, PDF Size: 11.51 MB
Page 105 of 560
UNDERSTANDING THE FEATURES OF YOUR VEHICLE
CONTENTS
!MIRRORS............................107
▫Inside Day/Night Mirror................107
▫Automatic Dimming Mirror — If Equipped . . .108
▫Outside Mirror — Driver Side............109
▫Outside Mirror — Passenger Side..........109
▫Folding Outside Mirrors................109
▫Power Mirrors.......................110
▫Heated Mirrors — If Equipped............110
▫Vanity Mirrors — If Equipped............110
▫Sun Visor Sliding Feature................111
!Uconnect® PHONE — IF EQUIPPED........111
▫Operation..........................113
▫Phone Call Features...................121
▫Uconnect® Phone Features..............124
▫Advanced Phone Connectivity............129
▫Things You Should Know About Your
Uconnect® Phone.....................130
▫General Information...................142
!VOICE COMMAND — IF EQUIPPED........142
▫Voice Command System Operation.........142
3
Page 109 of 560
MIRRORS
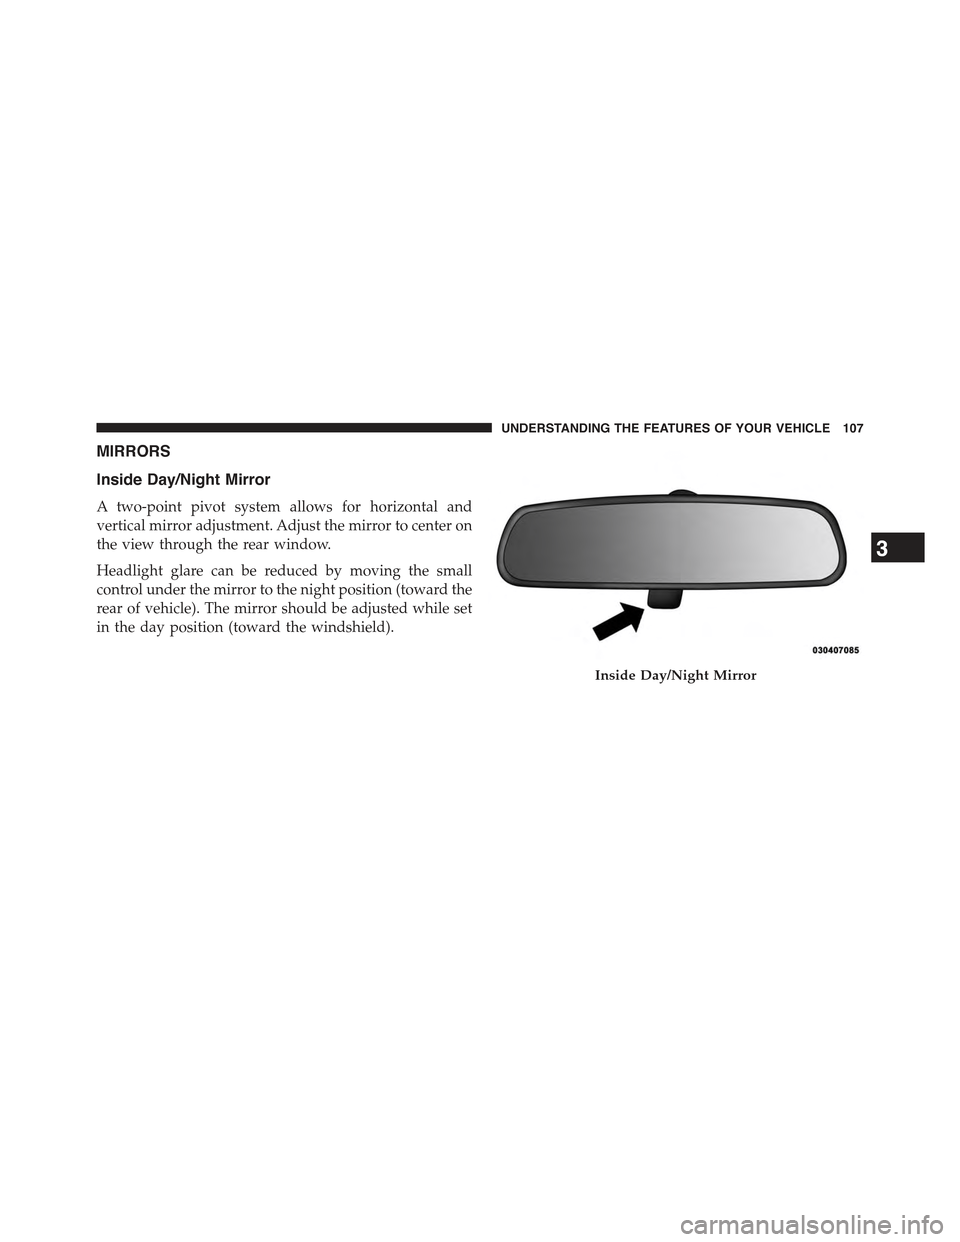
Inside Day/Night Mirror
A two-point pivot system allows for horizontal and
vertical mirror adjustment. Adjust the mirror to center on
the view through the rear window.
Headlight glare can be reduced by moving the small
control under the mirror to the night position (toward the
rear of vehicle). The mirror should be adjusted while set
in the day position (toward the windshield).
Inside Day/Night Mirror
3
UNDERSTANDING THE FEATURES OF YOUR VEHICLE 107
Page 110 of 560
Automatic Dimming Mirror — If Equipped
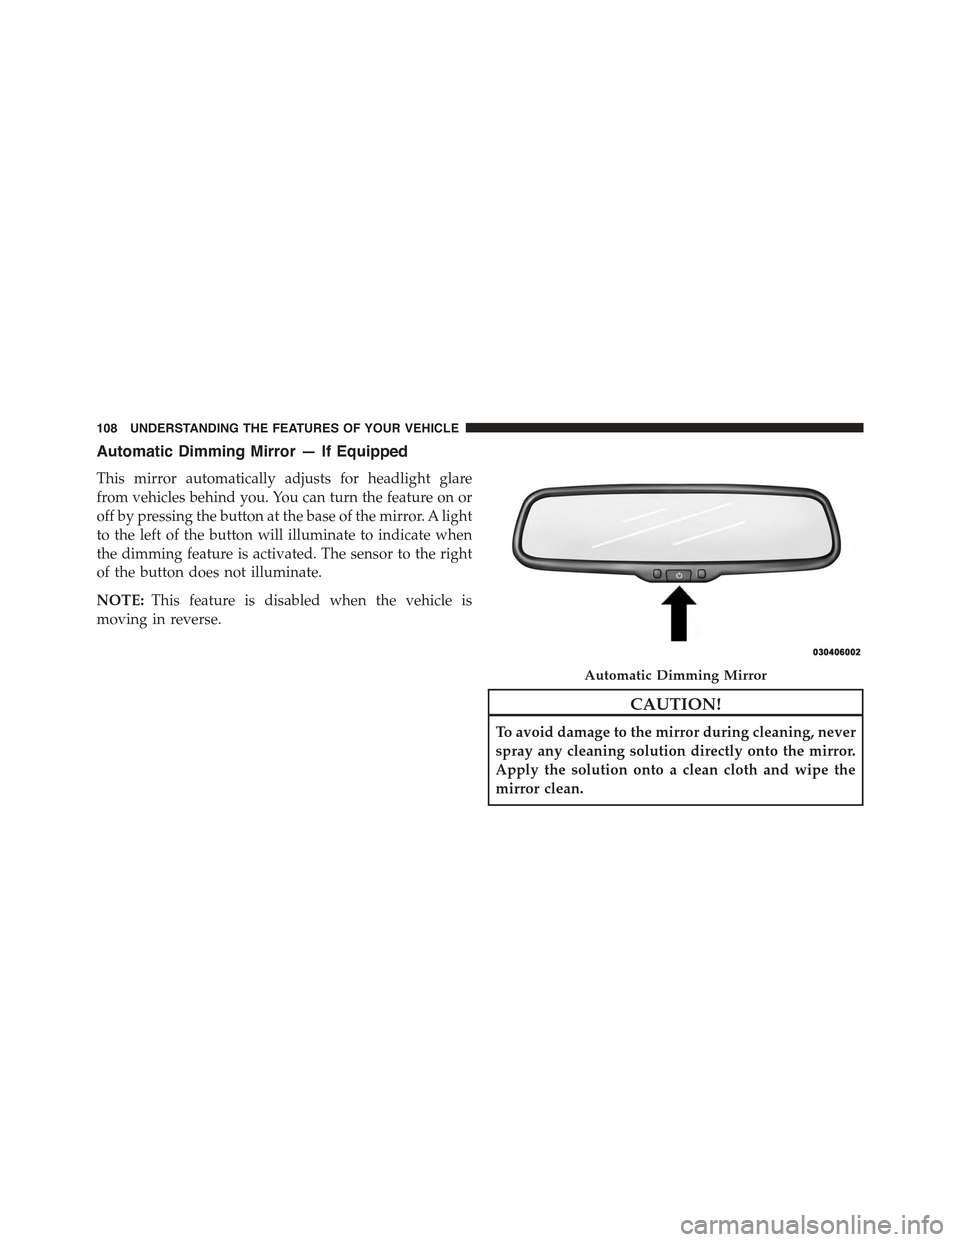
This mirror automatically adjusts for headlight glare
from vehicles behind you. You can turn the feature on or
off by pressing the button at the base of the mirror. A light
to the left of the button will illuminate to indicate when
the dimming feature is activated. The sensor to the right
of the button does not illuminate.
NOTE:This feature is disabled when the vehicle is
moving in reverse.
CAUTION!
To avoid damage to the mirror during cleaning, never
spray any cleaning solution directly onto the mirror.
Apply the solution onto a clean cloth and wipe the
mirror clean.
Automatic Dimming Mirror
108 UNDERSTANDING THE FEATURES OF YOUR VEHICLE
Page 111 of 560
Outside Mirror — Driver Side
Adjust the flat outside mirror so you can just see the side
of your vehicle in the part of the mirror closest to the
vehicle with your head close to the door glass.
Outside Mirror — Passenger Side
Adjust the convex outside mirror so you can just see the
side of your vehicle in the part of the mirror closest to the
vehicle with your head close to the center of the vehicle.
WARNING!
Vehicles and other objects seen in the passenger side
convex mirror will look smaller and farther away
than they really are. Relying too much on your
passenger side convex mirror could cause you to
(Continued)
WARNING!(Continued)
collide with another vehicle or other object. Use your
inside mirror when judging the size or distance of a
vehicle seen in the passenger side convex mirror.
Some vehicles will not have a convex passenger side
mirror.
Folding Outside Mirrors
The outside mirrors are hinged and may be moved,
manually, either forward or rearward to resist damage.
The hinges have three detent positions; full forward, full
rearward and normal.
3
UNDERSTANDING THE FEATURES OF YOUR VEHICLE 109
Page 112 of 560
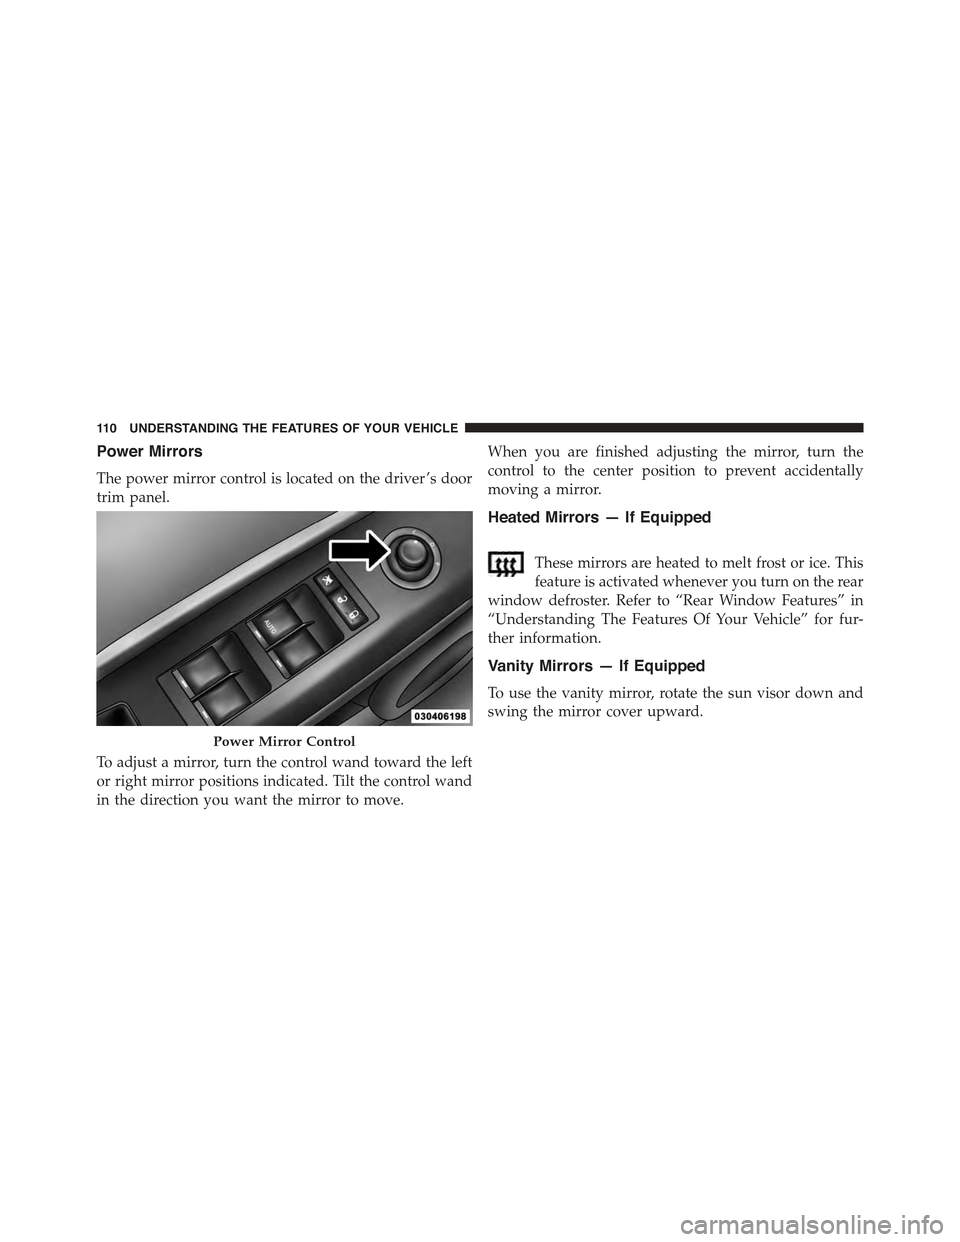
Power Mirrors
The power mirror control is located on the driver ’s door
trim panel.
To adjust a mirror, turn the control wand toward the left
or right mirror positions indicated. Tilt the control wand
in the direction you want the mirror to move.
When you are finished adjusting the mirror, turn the
control to the center position to prevent accidentally
moving a mirror.
Heated Mirrors — If Equipped
These mirrors are heated to melt frost or ice. This
feature is activated whenever you turn on the rear
window defroster. Refer to “Rear Window Features” in
“Understanding The Features Of Your Vehicle” for fur-
ther information.
Vanity Mirrors — If Equipped
To use the vanity mirror, rotate the sun visor down and
swing the mirror cover upward.
Power Mirror Control
11 0 U N D E R S TA N D I N G T H E F E AT U R E S O F Y O U R V E H I C L E
Page 113 of 560
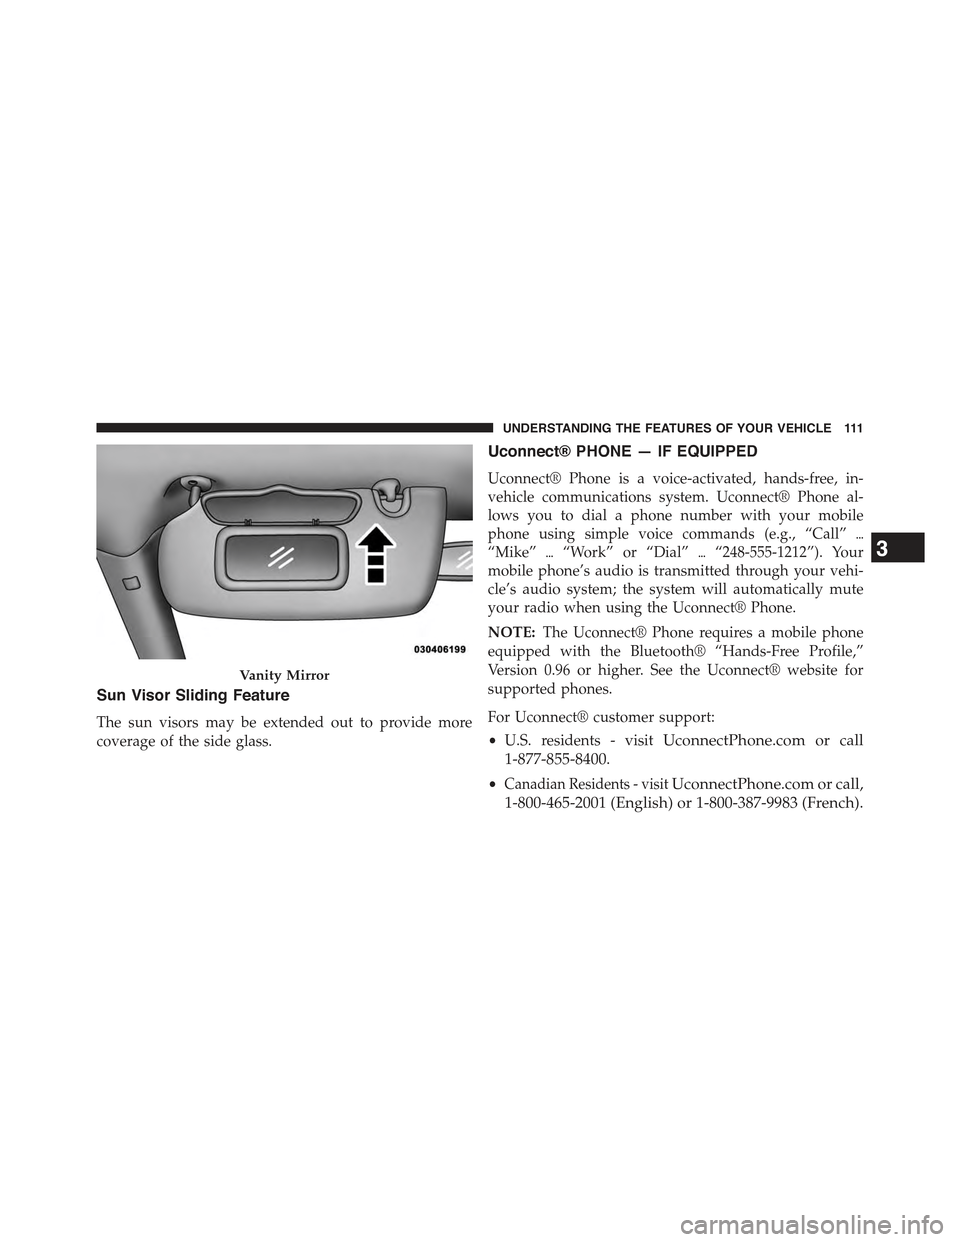
Sun Visor Sliding Feature
The sun visors may be extended out to provide more
coverage of the side glass.
Uconnect® PHONE — IF EQUIPPED
Uconnect® Phone is a voice-activated, hands-free, in-
vehicle communications system. Uconnect® Phone al-
lows you to dial a phone number with your mobile
phone using simple voice commands (e.g., “Call”$
“Mike”$“Work” or “Dial”$“248-555-1212”). Your
mobile phone’s audio is transmitted through your vehi-
cle’s audio system; the system will automatically mute
your radio when using the Uconnect® Phone.
NOTE:The Uconnect® Phone requires a mobile phone
equipped with the Bluetooth® “Hands-Free Profile,”
Version 0.96 or higher. See the Uconnect® website for
supported phones.
For Uconnect® customer support:
•U.S. residents - visitUconnectPhone.com or call
1-877-855-8400.
•Canadian Residents - visitUconnectPhone.com or call,
1-800-465-2001 (English) or 1-800-387-9983 (French).
Vanity Mirror
3
UNDERSTANDING THE FEATURES OF YOUR VEHICLE 111
Page 134 of 560
Voice Command
For best performance:
•Adjust the rearview mirror to provide at least½inch
(1 cm) gap between the overhead console (if equipped)
and the mirror.
•Always wait for the beep before speaking.
•Speak normally without pausing, just as you would
speak to a person sitting a few feet/meters away from
you.
•Make sure that no one other than you is speaking
during a Voice Command period.
Performance is maximized under:
•Low-to-medium blower setting
•Low-to-medium vehicle speed
•Low road noise
•Smooth road surface
•Fully closed windows
•Dry weather condition
NOTE:
•Even though the system is designed for users speaking
in North American English, French, and Spanish ac-
cents, the system may not always work for some.
•When navigating through an automated system such
as voice mail, or when sending a page, at the end of
speaking the digit string, make sure to say “Send.”
•Storing names in the phonebook when the vehicle is
not in motion is recommended.
•It is not recommended to store similar sounding names
in the Uconnect® Phonebook.
132 UNDERSTANDING THE FEATURES OF YOUR VEHICLE
Page 169 of 560
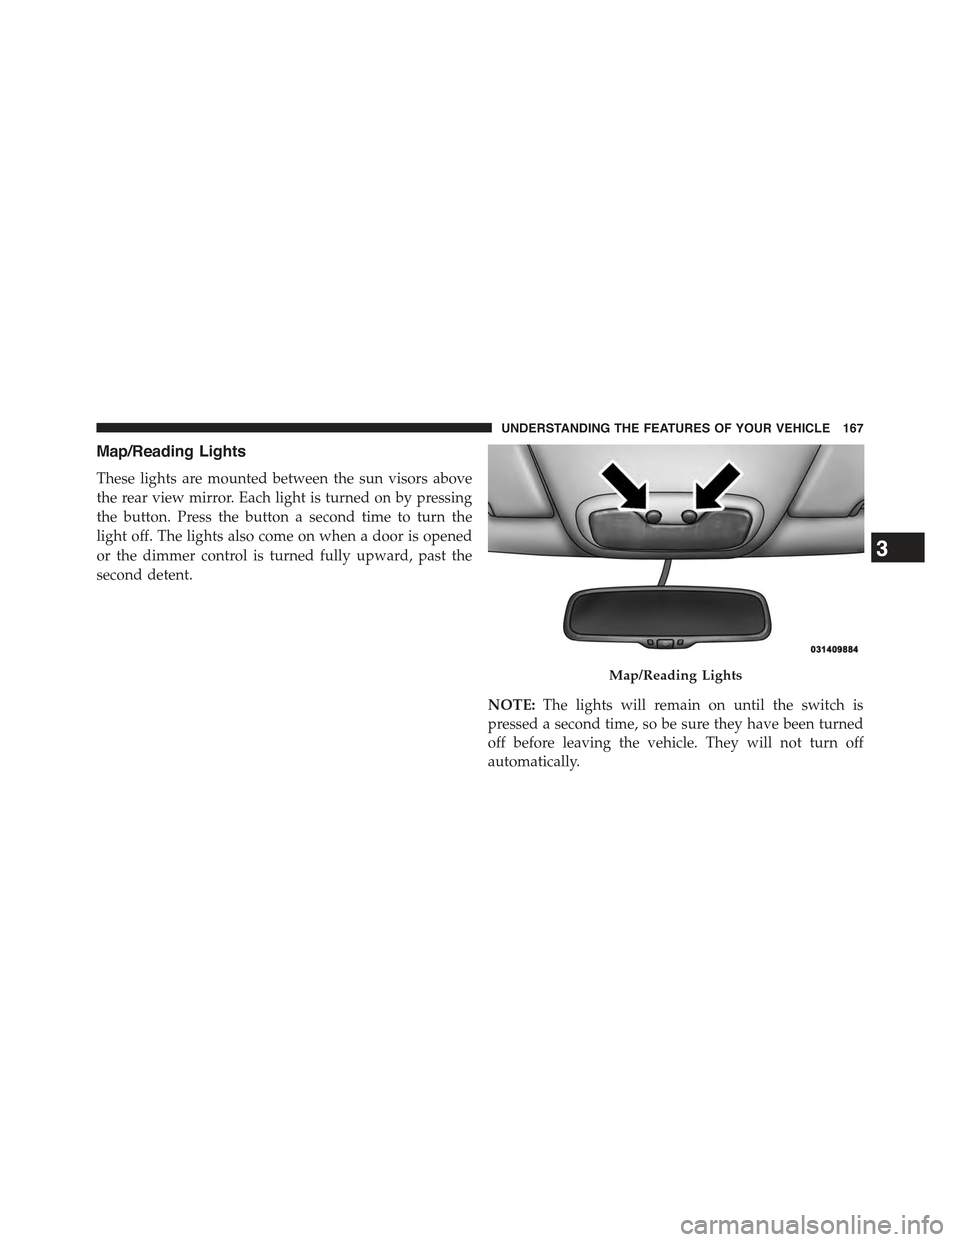
Map/Reading Lights
These lights are mounted between the sun visors above
the rear view mirror. Each light is turned on by pressing
the button. Press the button a second time to turn the
light off. The lights also come on when a door is opened
or the dimmer control is turned fully upward, past the
second detent.
NOTE:The lights will remain on until the switch is
pressed a second time, so be sure they have been turned
off before leaving the vehicle. They will not turn off
automatically.
Map/Reading Lights
3
UNDERSTANDING THE FEATURES OF YOUR VEHICLE 167
Page 207 of 560
Rotate the center portion of the lever upward to
the first detent position for rear wiper operation.
NOTE:The rear wiper operates in an intermittent mode
only.
Rotate the center portion of the lever past the first
detent to activate the rear washer. The washer
pump and the wiper will continue to operate as
long as the switch is held (for a maximum of
10 seconds). Upon release, the wiper will continue to cycle
two times before returning to the set position.
If the rear wiper is operating when the ignition is turned
OFF, the wiper will automatically return to the “park”
position if power accessory delay is active. Power acces-
sory delay can be cancelled by opening the door, if this
happens the rear wiper will stop at its current position
and will not go to “park”.
Rear Window Defroster
The rear window defroster button is located on
the climate controls mode control knob. Push the
button to turn on the rear window defroster and the
heated outside mirrors (if equipped). An indicator in the
button will illuminate when the rear window defroster is
on. The rear window defroster automatically turns off
after approximately 10 minutes. For an additional five
minutes of operation, push the button a second time.
NOTE:To prevent excessive battery drain, use the rear
window defroster only when the engine is operating.
3
UNDERSTANDING THE FEATURES OF YOUR VEHICLE 205
Page 309 of 560
Winter Operation
Use of the air Recirculation Mode during winter months is
not recommended because it may cause window fogging.
Vacation Storage
Anytime you store your vehicle, or keep it out of service
(i.e., vacation) for two weeks or more, run the air
conditioning system at idle for about five minutes in the
fresh air and high blower settings. This will ensure
adequate system lubrication to minimize the possibility
of compressor damage when the system is started again.
Window Fogging
Interior fogging on the windshield can be quickly re-
moved by turning the mode selector to Defrost. The
Defrost/Floor mode can be used to maintain a clear
windshield and provide sufficient heating. If side win-
dow fogging becomes a problem, increase blower speed.
Vehicle windows tend to fog on the inside in mild but
rainy or humid weather.
NOTE:Recirculate without A/C should not be used for
long periods as fogging may occur.
Side Window Demisters
A side window demister outlet is located at each end of
the instrument panel. These non-adjustable outlets direct
air toward the side windows when the system is in the
FLOOR, MIX, or DEFROST mode. The air is directed at
the area of the windows through which you view the
outside mirrors.
4
UNDERSTANDING YOUR INSTRUMENT PANEL 307