check engine JEEP COMPASS 2018 Owner handbook (in English)
[x] Cancel search | Manufacturer: JEEP, Model Year: 2018, Model line: COMPASS, Model: JEEP COMPASS 2018Pages: 348, PDF Size: 6.03 MB
Page 146 of 348
WARNING!
• Do not leave children or animals inside
parked vehicles in hot weather. Interior
heat build-up may cause serious injury
or death.
NOTE:
Engine start up in very low ambient tempera-
ture could result in evident white smoke. This
condition will disappear as the engine warms
up.
CAUTION!
The engine is allowed to crank as long as
30 seconds. If the engine fails to start
during this period, please wait at least two
minutes for the starter to cool before re-
peating start procedure.
Normal Starting Procedure — Keyless
Enter-N-Go
Observe the instrument panel cluster lights
when starting the engine.
NOTE:
Normal starting of either a cold or a warm
engine is obtained without pumping or press-
ing the accelerator pedal.
1. Always apply the parking brake.
2. Press and hold the brake pedal while
pushing the ENGINE START/STOP button
once.
NOTE:
A delay of the start of up to five seconds is
possible under very cold conditions. The
“Wait to Start” telltale will be illuminated
during the pre-heat process, When the
engine Wait To Start light goes off the
engine will automatically crank.
CAUTION!
If the “Water in Fuel Indicator Light” re-
mains on, DO NOT START the engine be-
fore the water is drained from the fuel
filters to avoid engine damage.
3. The system will automatically engage the
starter to crank the engine. If the vehicle
fails to start, the starter will disengage
automatically after 30 seconds.
4. If you wish to stop the cranking of the
engine prior to the engine starting, push
the button again.
5. Check that the oil pressure warning light
has turned off.
6. Release the parking brake.
STARTING AND OPERATING
144
Page 152 of 348
Parking
When parking and leaving the vehicle, pro-
ceed as follows:
• Engage a gear (first gear if facing uphill or
reverse if facing downhill) and leave the
wheels turned.
• Stop the engine and engage the park brake.
• Always remove the key fob.
• Block the wheels with a wedge or a stone if
the vehicle is parked on a steep slope.
NOTE:
NEVER leave the car with the gearbox in
neutral (or, if equipped with automatic trans-
mission, before placing the gear lever in
PARK).
WARNING!
Never leave children unattended in the
vehicle. Always remove the key fob when
exiting the vehicle and take it with you.
AUTOMATIC
TRANSMISSION — IF
EQUIPPED
WARNING!
• Never use the PARK position as a sub-
stitute for the park brake. Always apply
the park brake fully when exiting the
vehicle to guard against vehicle move-
ment and possible injury or damage.
• Your vehicle could move and injure you
and others if it is not in PARK. Check by
trying to move the gear selector out of
PARK with the brake pedal released.
Make sure the transmission is in PARK
before exiting the vehicle.
• It is dangerous to shift out of PARK or
NEUTRAL if the engine speed is higher
than idle speed. If your foot is not firmly
pressing the brake pedal, the vehicle
could accelerate quickly forward or in
reverse. You could lose control of the
vehicle and hit someone or something.
Only shift into gear when the engine is
WARNING!
idling normally and your foot is firmly
pressing the brake pedal.
• The vehicle may not engage a newly
selected gear if the vehicle is moving
while shifting.
• Unintended movement of a vehicle
could injure those in or near the vehicle.
As with all vehicles, you should never
exit a vehicle while the engine is run-
ning. Before exiting a vehicle always
come to a complete stop, then apply the
park brake, shift the transmission into
PARK, turn the engine OFF, and remove
the key fob. When the ignition is in the
LOCK/OFF (key removal) position (or,
with push button start, when the ignition
is in the OFF mode), the transmission is
locked in PARK, securing the vehicle
against unwanted movement.
• When leaving the vehicle, always make
sure the ignition is in the OFF mode,
remove the key fob from the vehicle, and
lock the vehicle.
• Never leave children alone in a vehicle,
or with access to an unlocked vehicle.
STARTING AND OPERATING
150
Page 155 of 348
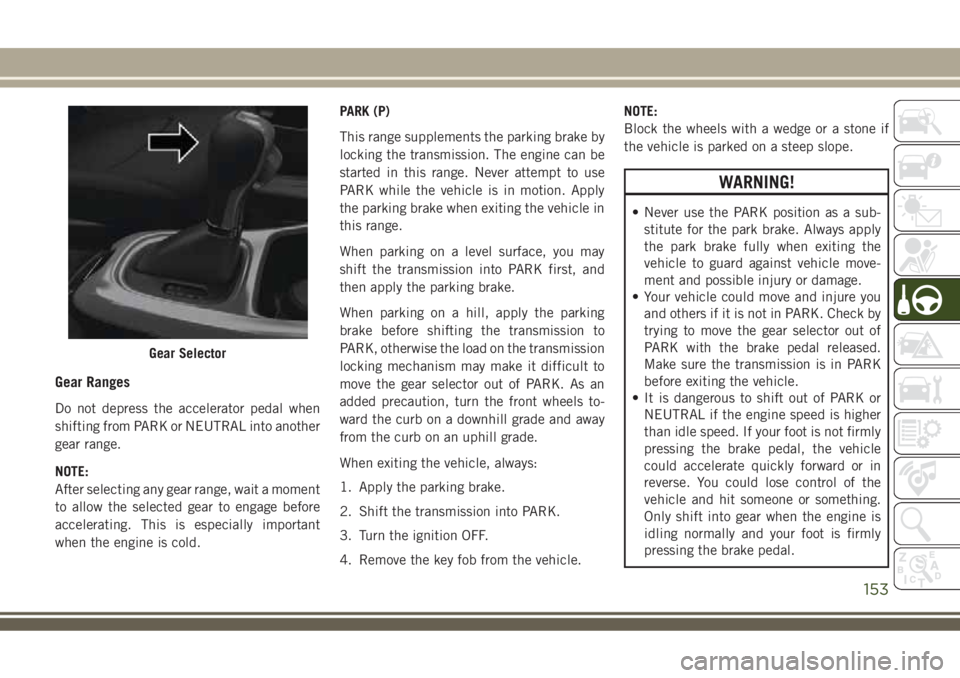
Gear Ranges
Do not depress the accelerator pedal when
shifting from PARK or NEUTRAL into another
gear range.
NOTE:
After selecting any gear range, wait a moment
to allow the selected gear to engage before
accelerating. This is especially important
when the engine is cold.PARK (P)
This range supplements the parking brake by
locking the transmission. The engine can be
started in this range. Never attempt to use
PARK while the vehicle is in motion. Apply
the parking brake when exiting the vehicle in
this range.
When parking on a level surface, you may
shift the transmission into PARK first, and
then apply the parking brake.
When parking on a hill, apply the parking
brake before shifting the transmission to
PARK, otherwise the load on the transmission
locking mechanism may make it difficult to
move the gear selector out of PARK. As an
added precaution, turn the front wheels to-
ward the curb on a downhill grade and away
from the curb on an uphill grade.
When exiting the vehicle, always:
1. Apply the parking brake.
2. Shift the transmission into PARK.
3. Turn the ignition OFF.
4. Remove the key fob from the vehicle.NOTE:
Block the wheels with a wedge or a stone if
the vehicle is parked on a steep slope.
WARNING!
• Never use the PARK position as a sub-
stitute for the park brake. Always apply
the park brake fully when exiting the
vehicle to guard against vehicle move-
ment and possible injury or damage.
• Your vehicle could move and injure you
and others if it is not in PARK. Check by
trying to move the gear selector out of
PARK with the brake pedal released.
Make sure the transmission is in PARK
before exiting the vehicle.
• It is dangerous to shift out of PARK or
NEUTRAL if the engine speed is higher
than idle speed. If your foot is not firmly
pressing the brake pedal, the vehicle
could accelerate quickly forward or in
reverse. You could lose control of the
vehicle and hit someone or something.
Only shift into gear when the engine is
idling normally and your foot is firmly
pressing the brake pedal.
Gear Selector
153
Page 194 of 348
Reverse Lamps
1. Open the liftgate.
2. Using a suitable tool remove the access
panel for body side lamps, remove lift gate
access cover for lift gate lamps.
3. Disconnect the electrical connector by
pushing the release.
4. Remove bulb and replace making sure it
is properly locked.
5. Reconnect the electrical connector.
6. Reinstall the access panels making sure
they are locked in correctly.
7. Finally close the tailgate.
3rd Stop Lamp
The CHMSL is LED. For their replacement,
see an authorized dealer.
License Plate Lights
The license plate light is LED. For their
replacement, see an authorized dealer.FUSES
WARNING!
• When replacing a blown fuse, always use
an appropriate replacement fuse with
the same amp rating as the original fuse.
Never replace a fuse with another fuse of
higher amp rating. Never replace a
blown fuse with metal wires or any other
material. Do not place a fuse inside a
circuit breaker cavity or vice versa. Fail-
ure to use proper fuses may result in
serious personal injury, fire and/or prop-
erty damage.
• Before replacing a fuse, make sure that
the ignition is off and that all the other
services are switched off and/or disen-
gaged.
• If the replaced fuse blows again, contact
an authorized dealer.
• If a general protection fuse for safety
systems (air bag system, braking sys-
WARNING!
tem), power unit systems (engine sys-
tem, transmission system) or steering
system blows, contact an authorized
dealer.
General Information
The fuses protect electrical systems against
excessive current.
When a device does not work, you must check
the fuse element inside the blade fuse for a
break/melt.
Also, please be aware that when using power
outlets for extended periods of time with the
engine off may result in vehicle battery dis-
charge.
Fuse Location
The fuses are grouped into controllers lo-
cated in the engine compartment.
IN CASE OF EMERGENCY
192
Page 223 of 348
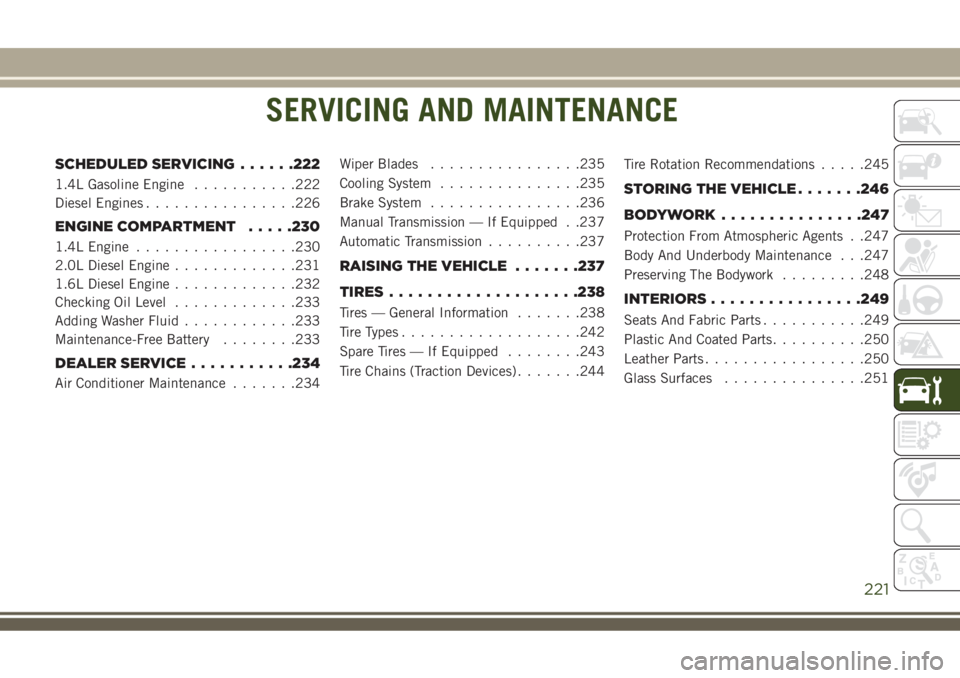
SERVICING AND MAINTENANCE
SCHEDULED SERVICING......222
1.4L Gasoline Engine...........222
Diesel Engines................226
ENGINE COMPARTMENT.....230
1.4L Engine.................230
2.0L Diesel Engine.............231
1.6L Diesel Engine.............232
Checking Oil Level.............233
Adding Washer Fluid............233
Maintenance-Free Battery........233
DEALER SERVICE...........234
Air Conditioner Maintenance.......234Wiper Blades................235
Cooling System...............235
Brake System................236
Manual Transmission — If Equipped . .237
Automatic Transmission..........237
RAISING THE VEHICLE.......237
TIRES....................238
Tires — General Information.......238
Tire Types...................242
Spare Tires — If Equipped........243
Tire Chains (Traction Devices).......244Tire Rotation Recommendations.....245
STORING THE VEHICLE.......246
BODYWORK...............247
Protection From Atmospheric Agents . .247
Body And Underbody Maintenance . . .247
Preserving The Bodywork.........248
INTERIORS................249
Seats And Fabric Parts...........249
Plastic And Coated Parts..........250
Leather Parts.................250
Glass Surfaces...............251
SERVICING AND MAINTENANCE
221
Page 224 of 348
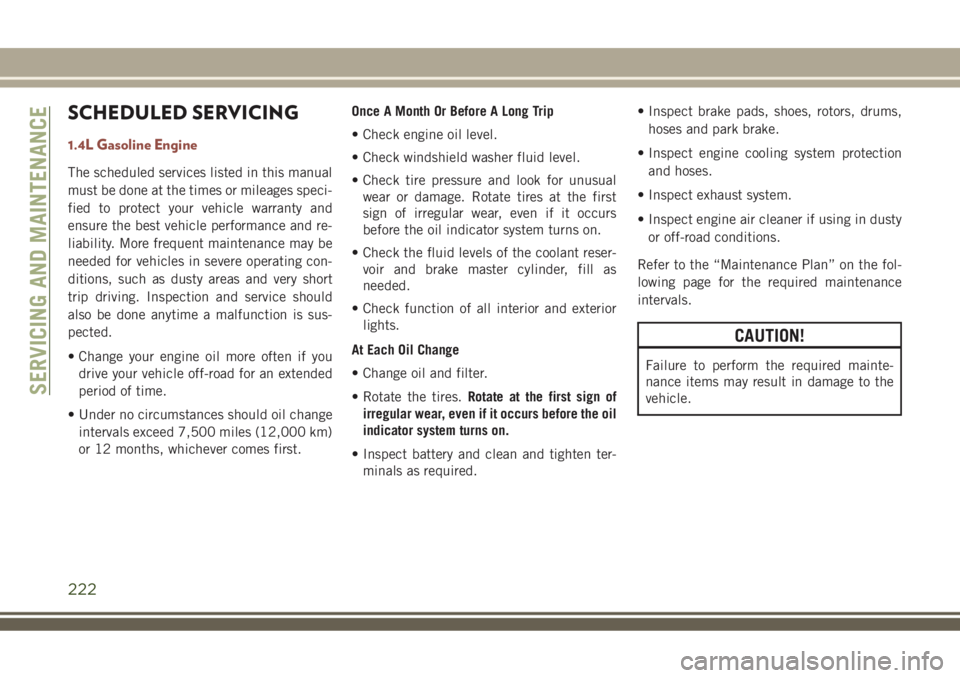
SCHEDULED SERVICING
1.4L Gasoline Engine
The scheduled services listed in this manual
must be done at the times or mileages speci-
fied to protect your vehicle warranty and
ensure the best vehicle performance and re-
liability. More frequent maintenance may be
needed for vehicles in severe operating con-
ditions, such as dusty areas and very short
trip driving. Inspection and service should
also be done anytime a malfunction is sus-
pected.
• Change your engine oil more often if you
drive your vehicle off-road for an extended
period of time.
• Under no circumstances should oil change
intervals exceed 7,500 miles (12,000 km)
or 12 months, whichever comes first.Once A Month Or Before A Long Trip
• Check engine oil level.
• Check windshield washer fluid level.
• Check tire pressure and look for unusual
wear or damage. Rotate tires at the first
sign of irregular wear, even if it occurs
before the oil indicator system turns on.
• Check the fluid levels of the coolant reser-
voir and brake master cylinder, fill as
needed.
• Check function of all interior and exterior
lights.
At Each Oil Change
• Change oil and filter.
• Rotate the tires.Rotate at the first sign of
irregular wear, even if it occurs before the oil
indicator system turns on.
• Inspect battery and clean and tighten ter-
minals as required.• Inspect brake pads, shoes, rotors, drums,
hoses and park brake.
• Inspect engine cooling system protection
and hoses.
• Inspect exhaust system.
• Inspect engine air cleaner if using in dusty
or off-road conditions.
Refer to the “Maintenance Plan” on the fol-
lowing page for the required maintenance
intervals.
CAUTION!
Failure to perform the required mainte-
nance items may result in damage to the
vehicle.
SERVICING AND MAINTENANCE
222
Page 226 of 348
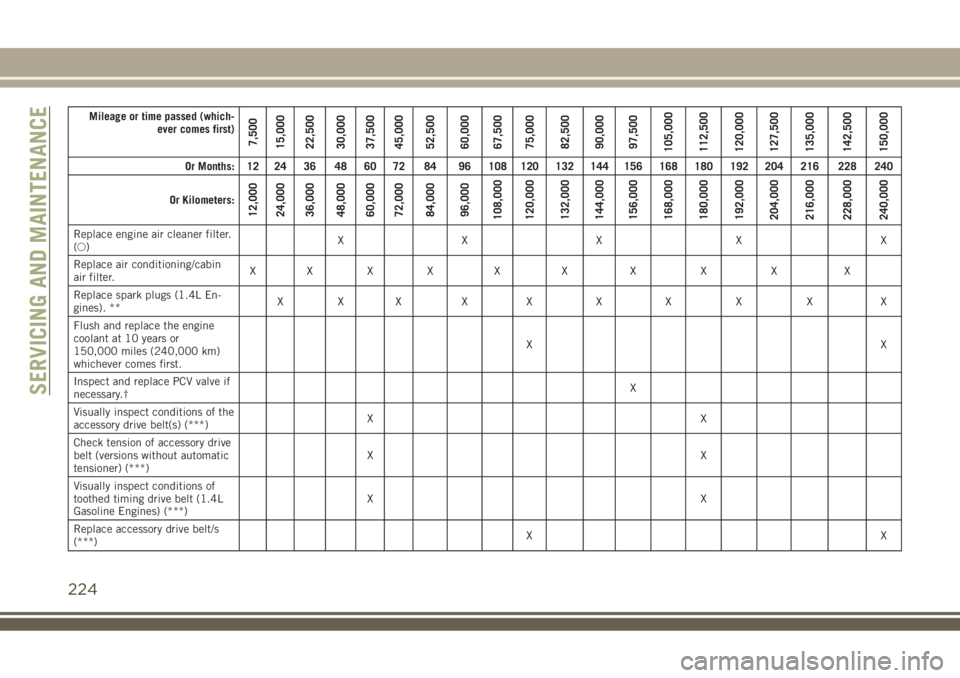
Mileage or time passed (which-
ever comes first)
7,500
15,000
22,500
30,000
37,500
45,000
52,500
60,000
67,500
75,000
82,500
90,000
97,500
105,000
112,500
120,000
127,500
135,000
142,500
150,000
Or Months: 12 24 36 48 60 72 84 96 108 120 132 144 156 168 180 192 204 216 228 240
Or Kilometers:
12,000
24,000
36,000
48,000
60,000
72,000
84,000
96,000
108,000
120,000
132,000
144,000
156,000
168,000
180,000
192,000
204,000
216,000
228,000
240,000
Replace engine air cleaner filter.
(○)XX X X X
Replace air conditioning/cabin
air filter.XXXXXX X X X X
Replace spark plugs (1.4L En-
gines). **XXX X X X X X X X
Flush and replace the engine
coolant at 10 years or
150,000 miles (240,000 km)
whichever comes first.XX
Inspect and replace PCV valve if
necessary.†X
Visually inspect conditions of the
accessory drive belt(s) (***)XX
Check tension of accessory drive
belt (versions without automatic
tensioner) (***)XX
Visually inspect conditions of
toothed timing drive belt (1.4L
Gasoline Engines) (***)XX
Replace accessory drive belt/s
(***)XX
SERVICING AND MAINTENANCE
224
Page 229 of 348
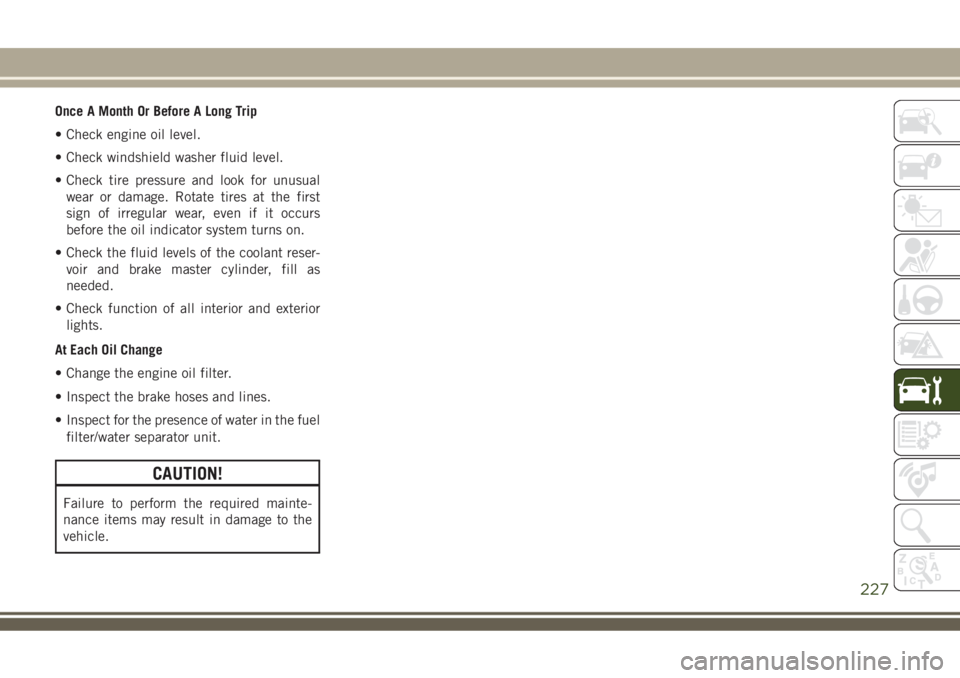
Once A Month Or Before A Long Trip
• Check engine oil level.
• Check windshield washer fluid level.
• Check tire pressure and look for unusual
wear or damage. Rotate tires at the first
sign of irregular wear, even if it occurs
before the oil indicator system turns on.
• Check the fluid levels of the coolant reser-
voir and brake master cylinder, fill as
needed.
• Check function of all interior and exterior
lights.
At Each Oil Change
• Change the engine oil filter.
• Inspect the brake hoses and lines.
• Inspect for the presence of water in the fuel
filter/water separator unit.
CAUTION!
Failure to perform the required mainte-
nance items may result in damage to the
vehicle.
227
Page 235 of 348
Checking Oil Level
To assure proper engine lubrication, the en-
gine oil must be maintained at the correct
level. Check the oil level at regular intervals,
such as once a month or before a long trip.
The best time to check the engine oil level is
approximately five minutes after a fully
warmed engine is shut off. Do not check oil
level before starting the engine after it has sat
overnight. Checking engine oil level when the
engine is cold will give you an incorrect read-
ing.
Checking the oil while the vehicle is on level
ground, and approximately five minutes after
a fully warmed engine is shut off, will improve
the accuracy of the oil level readings. Main-
tain the oil level between the range markings
on the dipstick. The safe range is indicated
by a crosshatch zone. Adding 1 quart (0.9 Li-
ters) of oil when the reading is at the low end
of the indicated range will result in the oil
level at the full end of the indicator range.
CAUTION!
• Overfilling or underfilling will cause oil
aeration, or loss of oil pressure. This
could damage your engine.
• Never use Non-Detergent Oil or Straight
Mineral Oil in the engine or damage may
result.
Adding Washer Fluid
The fluid reservoir is located in the front of
the engine compartment. Be sure to check
the fluid level in the reservoir at regular
intervals. Fill the reservoir with windshield
washer solvent (not radiator antifreeze) and
operate the system for a few seconds to flush
out the residual washer fluid.
When refilling the washer fluid reservoir, take
some washer fluid, apply it to a cloth or towel,
and wipe clean the wiper blades; this will
help blade performance.To prevent freeze-up of your windshield
washer system in cold weather, select a solu-
tion or mixture that meets or exceeds the
temperature range of your climate. This rat-
ing information can be found on most washer
fluid containers.
WARNING!
Commercially available windshield washer
solvents are flammable. They could ignite
and burn you. Care must be exercised
when filling or working around the washer
solution.
Maintenance-Free Battery
Your vehicle is equipped with a maintenance-
free battery. You will never have to add water,
nor is periodic maintenance required.
WARNING!
• Battery fluid is a corrosive acid solution
and can burn or even blind you. Do not
allow battery fluid to contact your eyes,
skin, or clothing. Do not lean over a
battery when attaching clamps. If acid
233
Page 238 of 348
WARNING!
• When working near the radiator cooling
fan, disconnect the fan motor lead or
turn the ignition to the OFF mode. The
fan is temperature controlled and can
start at any time the ignition is in the ON
mode.
Coolant Checks
Check engine coolant (antifreeze) protection
every 12 months (before the onset of freezing
weather, where applicable). If the engine
coolant (antifreeze) is dirty or rusty in appear-
ance, the system should be drained, flushed
and refilled with fresh engine coolant (anti-
freeze). Check the front of the A/C condenser
for any accumulation of bugs, leaves, etc. If
dirty, clean by gently spraying water from a
garden hose vertically down the face of the
condenser.
Brake System
In order to assure brake system performance,
all brake system components should be in-
spected periodically. Refer to the “Mainte-
nance Plan” in this section for the proper
maintenance intervals.
WARNING!
Riding the brakes can lead to brake failure
and possibly a collision. Driving with your
foot resting or riding on the brake pedal
can result in abnormally high brake tem-
peratures, excessive lining wear, and pos-
sible brake damage. You would not have
your full braking capacity in an emergency.
Brake Master Cylinder
The fluid in the master cylinder should be
checked when performing under hood ser-
vices or immediately if the “Brake Warning
Light” is illuminated.
Be sure to clean the top of the master cylin-
der area before removing the cap. If neces-
sary, add fluid to bring the fluid level up to
the requirements described on the brakefluid reservoir. With disc brakes, fluid level
can be expected to fall as the brake pads
wear. Brake fluid level should be checked
when pads are replaced. However, low fluid
level may be caused by a leak and a checkup
may be needed.
Use only manufacturer's recommended
brake fluid. Refer to “Fluids And Lubricants”
in “Technical Specifications” for further
information.
WARNING!
• Use only manufacturer's recommended
brake fluid. Refer to “Fluids And Lubri-
cants” in “Technical Specifications” for
further information. Using the wrong
type of brake fluid can severely damage
your brake system and/or impair its per-
formance. The proper type of brake fluid
for your vehicle is also identified on the
original factory installed hydraulic mas-
ter cylinder reservoir.
• To avoid contamination from foreign
matter or moisture, use only new brake
fluid or fluid that has been in a tightly
SERVICING AND MAINTENANCE
236