service indicator JEEP COMPASS 2018 Owner handbook (in English)
[x] Cancel search | Manufacturer: JEEP, Model Year: 2018, Model line: COMPASS, Model: JEEP COMPASS 2018Pages: 348, PDF Size: 6.03 MB
Page 224 of 348
SCHEDULED SERVICING
1.4L Gasoline Engine
The scheduled services listed in this manual
must be done at the times or mileages speci-
fied to protect your vehicle warranty and
ensure the best vehicle performance and re-
liability. More frequent maintenance may be
needed for vehicles in severe operating con-
ditions, such as dusty areas and very short
trip driving. Inspection and service should
also be done anytime a malfunction is sus-
pected.
• Change your engine oil more often if you
drive your vehicle off-road for an extended
period of time.
• Under no circumstances should oil change
intervals exceed 7,500 miles (12,000 km)
or 12 months, whichever comes first.Once A Month Or Before A Long Trip
• Check engine oil level.
• Check windshield washer fluid level.
• Check tire pressure and look for unusual
wear or damage. Rotate tires at the first
sign of irregular wear, even if it occurs
before the oil indicator system turns on.
• Check the fluid levels of the coolant reser-
voir and brake master cylinder, fill as
needed.
• Check function of all interior and exterior
lights.
At Each Oil Change
• Change oil and filter.
• Rotate the tires.Rotate at the first sign of
irregular wear, even if it occurs before the oil
indicator system turns on.
• Inspect battery and clean and tighten ter-
minals as required.• Inspect brake pads, shoes, rotors, drums,
hoses and park brake.
• Inspect engine cooling system protection
and hoses.
• Inspect exhaust system.
• Inspect engine air cleaner if using in dusty
or off-road conditions.
Refer to the “Maintenance Plan” on the fol-
lowing page for the required maintenance
intervals.
CAUTION!
Failure to perform the required mainte-
nance items may result in damage to the
vehicle.
SERVICING AND MAINTENANCE
222
Page 228 of 348
Heavy Duty Use Of Vehicle
†† Change the engine oil and engine oil filter
at every 4500 miles (7,500 km) or
12 months if using your vehicle under any of
the following severe duty conditions:
• Stop and go driving.
• Driving in dusty conditions.
• Short trips of less than 10 miles (16 km).
• Trailer towing.
• Taxi, police, or delivery service (commercial
service).
• Off-road or desert operation.
Diesel Engines
Your vehicle is equipped with an automatic
oil change indicator system. The oil change
indicator system will remind you that it is
time to take your vehicle in for scheduled
maintenance.
Based on engine operation conditions, the oil
change indicator message will illuminate.
This means that service is required for yourvehicle. Operating conditions such as fre-
quent short-trips, trailer tow, extremely hot or
cold ambient temperatures will influence
when the “Oil Change Required” message is
displayed. Severe Operating Conditions can
cause the change oil message to illuminate
as earlier than specified. Have your vehicle
serviced as soon as possible, within the next
500 miles (805 km).
To help you have the best driving experience
possible, the manufacturer has identified the
specific vehicle maintenance service inter-
vals that are required to keep your vehicle
operating properly and safely.
The manufacturer recommends that these
maintenance intervals be performed at your
selling dealer. The technicians at your deal-
ership know your vehicle best, and have ac-
cess to factory trained information, genuine
Mopar parts, and specially designed elec-
tronic and mechanical tools that can help
prevent future costly repairs.
The maintenance intervals shown should be
performed as indicated in this section.NOTE:
•The actual interval for changing engine oil
and replacing the engine oil filter depends on
the vehicle usage conditions, and is signaled
by the warning light or message in the instru-
ment panel. In any case, it must never exceed
two years. If the vehicle is used mainly for
urban driving, change the engine oil and filter
every year.
•Flush and replace the engine coolant at
120 months or 150,000 miles (240,000 km)
whichever comes first.
•Regardless of the distance covered, the tim-
ing and accessory belts must be changed
every 4 years for particularly demanding use
(cold climates, city driving, long periods of
idling) or at least every 6 years. Under no
circumstances should these intervals be
exceeded.SERVICING AND MAINTENANCE
226
Page 242 of 348
Tire Repair
If your tire becomes damaged, it may be
repaired if it meets the following criteria:
• The tire has not been driven on when flat.
• The damage is only on the tread section of
your tire (sidewall damage is not repair-
able).
• The puncture is no greater thana¼ofan
inch (6 mm).
Consult an authorized tire dealer for tire re-
pairs and additional information.
Damaged Run Flat tires, or Run Flat tires that
have experienced a loss of pressure should be
replaced immediately with another Run Flat
tire of identical size and service description
(Load Index and Speed Symbol).
Run Flat Tires — If Equipped
Run Flat tires allow you the capability to drive
50 miles (80 km) at 50 mph (80 km/h) after
a rapid loss of inflation pressure. This rapid
loss of inflation is referred to as the Run Flat
mode. A Run Flat mode occurs when the tire
inflation pressure is of/or below 14 psi
(96 kPa). Once a Run Flat tire reaches therun flat mode it has limited driving capabili-
ties and needs to be replaced immediately. A
Run Flat tire is not repairable.
It is not recommended driving a vehicle
loaded at full capacity or to tow a trailer while
a tire is in the run flat mode.
See the tire pressure monitoring section for
more information.
Tire Spinning
When stuck in mud, sand, snow, or ice con-
ditions, do not spin your vehicle's wheels
above 30 mph (48 km/h) or for longer than
30 seconds continuously without stopping.
Refer to “Freeing A Stuck Vehicle” in “In
Case Of Emergency” for further information.
WARNING!
Fast spinning tires can be dangerous.
Forces generated by excessive wheel
speeds may cause tire damage or failure. A
tire could explode and injure someone. Do
not spin your vehicle's wheels faster than
30 mph (48 km/h) for more than 30 sec-
WARNING!
onds continuously when you are stuck,
and do not let anyone near a spinning
wheel, no matter what the speed.
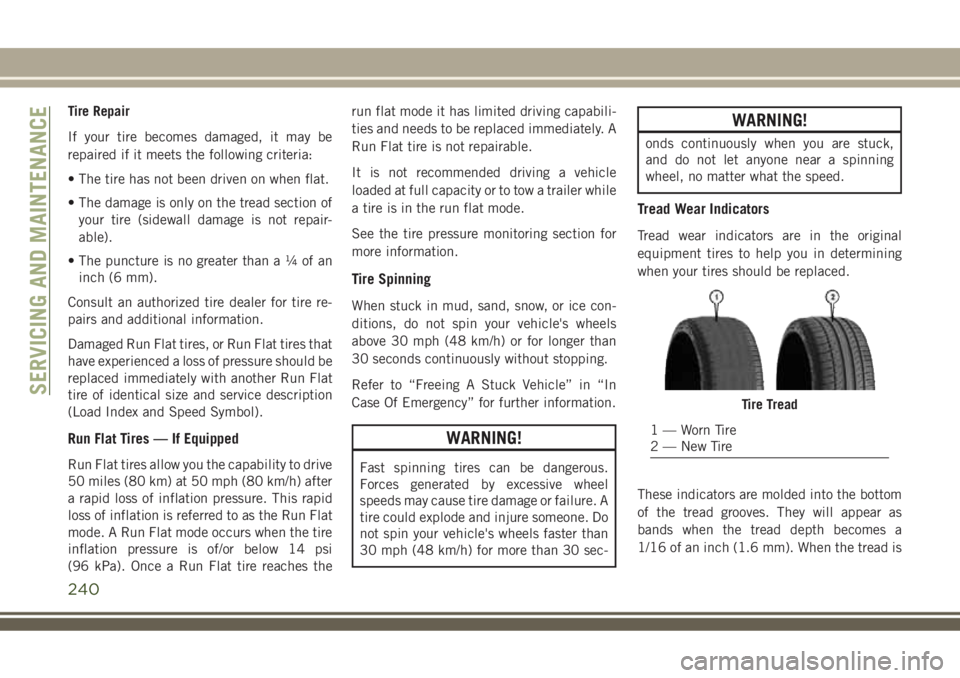
Tread Wear Indicators
Tread wear indicators are in the original
equipment tires to help you in determining
when your tires should be replaced.
These indicators are molded into the bottom
of the tread grooves. They will appear as
bands when the tread depth becomes a
1/16 of an inch (1.6 mm). When the tread is
Tire Tread
1 — Worn Tire
2 — New Tire
SERVICING AND MAINTENANCE
240
Page 243 of 348
worn to the tread wear indicators, the tire
should be replaced. Refer to “Replacement
Tires” in this section for further information.
Life Of Tire
The service life of a tire is dependent upon
varying factors including, but not limited to:
• Driving style.
• Tire pressure - Improper cold tire inflation
pressures can cause uneven wear patterns
to develop across the tire tread. These ab-
normal wear patterns will reduce tread life,
resulting in the need for earlier tire replace-
ment.
• Distance driven.
• Performance tires, tires with a speed rating
of V or higher, and Summer tires typically
have a reduced tread life. Rotation of these
tires per the vehicle scheduled mainte-
nance is highly recommended.
WARNING!
Tires and the spare tire should be replaced
after six years, regardless of the remaining
tread. Failure to follow this warning can
WARNING!
result in sudden tire failure. You could lose
control and have a collision resulting in
serious injury or death.
Keep dismounted tires in a cool, dry place
with as little exposure to light as possible.
Protect tires from contact with oil, grease,
and gasoline.
Replacement Tires
The tires on your new vehicle provide a bal-
ance of many characteristics. They should be
inspected regularly for wear and correct cold
tire inflation pressures. The manufacturer
strongly recommends that you use tires
equivalent to the originals in size, quality and
performance when replacement is needed.
Refer to the paragraph on “Tread Wear Indi-
cators” in this section. Refer to the Tire and
Loading Information placard or the Vehicle
Certification Label for the size designation of
your tire. The Load Index and Speed Symbol
for your tire will be found on the original
equipment tire sidewall.It is recommended to replace the two front
tires or two rear tires as a pair. Replacing just
one tire can seriously affect your vehicle’s
handling. If you ever replace a wheel, make
sure that the wheel’s specifications match
those of the original wheels.
It is recommended you contact an authorized
tire dealer or original equipment dealer with
any questions you may have on tire specifica-
tions or capability. Failure to use equivalent
replacement tires may adversely affect the
safety, handling, and ride of your vehicle.
WARNING!
• Do not use a tire, wheel size, load rating,
or speed rating other than that specified
for your vehicle. Some combinations of
unapproved tires and wheels may
change suspension dimensions and per-
formance characteristics, resulting in
changes to steering, handling, and brak-
ing of your vehicle. This can cause un-
predictable handling and stress to steer-
ing and suspension components. You
could lose control and have a collision
241
Page 245 of 348
Snow tires generally have lower speed ratings
than what was originally equipped with your
vehicle and should not be operated at sus-
tained speeds over 75 mph (120 km/h). For
speeds above 75 mph (120 km/h) refer to
original equipment or an authorized tire
dealer for recommended safe operating
speeds, loading and cold tire inflation pres-
sures.
While studded tires improve performance on
ice, skid and traction capability on wet or dry
surfaces may be poorer than that of non-
studded tires. Some states prohibit studded
tires; therefore, local laws should be checked
before using these tire types.
Spare Tires — If Equipped
For vehicles equipped with Tire Service Kit
instead of a spare tire, please refer to “Tire
Service Kit” in “In Case Of Emergency” in the
Owner’s Manual for further information.
CAUTION!
Because of the reduced ground clearance,
do not take your vehicle through an auto-
matic car wash with a compact or limited
use temporary spare installed. Damage to
the vehicle may result.
Spare Tire Matching Original Equipped Tire
And Wheel — If Equipped
Your vehicle may be equipped with a spare
tire and wheel equivalent in look and function
to the original equipment tire and wheel
found on the front or rear axle of your vehicle.
This spare tire may be used in the tire rotation
for your vehicle. If your vehicle has this op-
tion, refer to an authorized tire dealer for the
recommended tire rotation pattern.
Compact Spare Tire — If Equipped
The compact spare is for temporary emer-
gency use only. You can identify if your ve-
hicle is equipped with a compact spare by
looking at the spare tire description on the
Tire and Loading Information Placard located
on the driver’s side door opening or on thesidewall of the tire. Compact spare tire de-
scriptions begin with the letter “T” or “S”
preceding the size designation. Example:
T145/80D18 103M.
T,S=Temporary Spare Tire
Since this tire has limited tread life, the
original equipment tire should be repaired (or
replaced) and reinstalled on your vehicle at
the first opportunity.
Do not install a wheel cover or attempt to
mount a conventional tire on the compact
spare wheel, since the wheel is designed
specifically for the compact spare tire. Do not
install more than one compact spare tire and
wheel on the vehicle at any given time.
WARNING!
Compact and collapsible spares are for
temporary emergency use only. With these
spares, do not drive more than 50 mph
(80 km/h). Temporary use spares have lim-
ited tread life. When the tread is worn to
the tread wear indicators, the temporary
use spare tire needs to be replaced. Be
sure to follow the warnings, which apply to
243
Page 274 of 348
• Press the “+” or “–” buttons on the touch-
screen, or press and drag over the level bar
for each of the equalizer bands. The level
value, which spans between plus or minus
nine, is displayed at the bottom of each of
the bands.
Speed Adjusted Volume
• Press the “Speed Adjusted Volume” button
on the touchscreen to activate the Speed
Adjusted Volume screen. The Speed Ad-
justed Volume is adjusted by pressing the
volume level indicator. This alters the auto-
matic adjustment of the audio volume with
variation to vehicle speed.
Loudness
• Press the “On” button on the touchscreen
to activate Loudness. Press “Off” to deac-
tivate this feature. When Loudness is On,
the sound quality at lower volumes
improves.
AUX Volume Offset
• Press the “AUX Volume Offset” button on
the touchscreen to activate the AUX Vol-
ume Offset screen. The AUX Volume Offset
is adjusted by pressing of the “+” and “–”buttons. This alters the AUX input audio
volume. The level value, which spans be-
tween plus or minus three, is displayed
above the adjustment bar.
Auto Play
• Press the “Auto Play” button on the touch-
screen to activate the Auto Play screen. The
Auto Play feature has two settings “On”
and “Off.” With Auto Play on, music begins
playing from a connected device, immedi-
ately after it is connected to the radio.
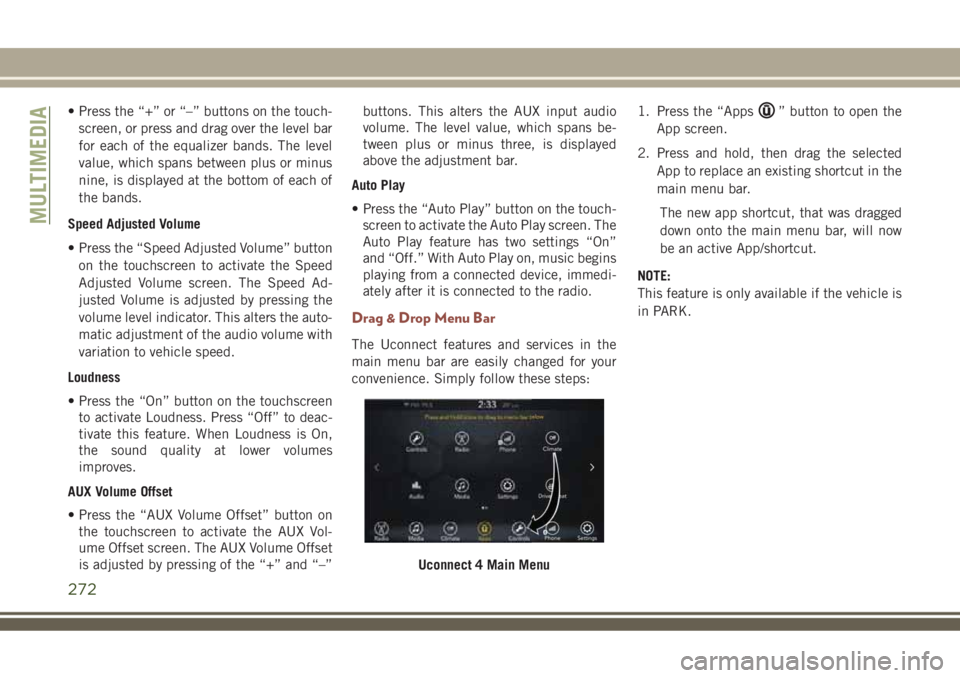
Drag & Drop Menu Bar
The Uconnect features and services in the
main menu bar are easily changed for your
convenience. Simply follow these steps:1. Press the “Apps
” button to open the
App screen.
2. Press and hold, then drag the selected
App to replace an existing shortcut in the
main menu bar.
The new app shortcut, that was dragged
down onto the main menu bar, will now
be an active App/shortcut.
NOTE:
This feature is only available if the vehicle is
in PARK.
Uconnect 4 Main Menu
MULTIMEDIA
272
Page 282 of 348
Equalizer
• Press the “Equalizer” button on the touch-
screen to activate the Equalizer screen.
• Press the “+” or “–” buttons on the touch-
screen, or press and drag over the level bar
for each of the equalizer bands. The level
value, which spans between plus or minus
nine, is displayed at the bottom of each of
the Bands.
Speed Adjusted Volume
• Press the “Speed Adjusted Volume” button
on the touchscreen to activate the Speed
Adjusted Volume screen. The Speed Ad-
justed Volume is adjusted by pressing the
volume level indicator. This alters the auto-
matic adjustment of the audio volume with
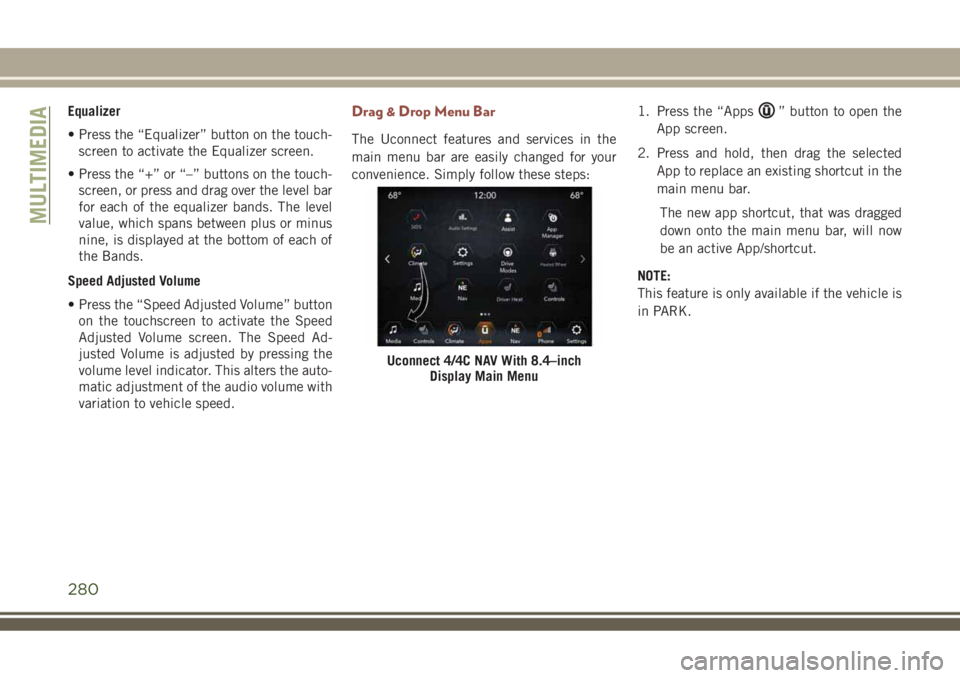
variation to vehicle speed.Drag & Drop Menu Bar
The Uconnect features and services in the
main menu bar are easily changed for your
convenience. Simply follow these steps:1. Press the “Apps
” button to open the
App screen.
2. Press and hold, then drag the selected
App to replace an existing shortcut in the
main menu bar.
The new app shortcut, that was dragged
down onto the main menu bar, will now
be an active App/shortcut.
NOTE:
This feature is only available if the vehicle is
in PARK.
Uconnect 4/4C NAV With 8.4–inch
Display Main Menu
MULTIMEDIA
280
Page 336 of 348
Car Washes..................248
Chains, Tire..................244
Changing A Flat Tire.........199, 237
Check Engine Light (Malfunction
Indicator Light)..............72
Checking Your Vehicle For Safety. . . .136
Checks, Safety................136
Child Safety Locks..............25
Cleaning
Wheels..................247
Windshield Wiper Blades.......235
Climate Control................40
Manual...................40
Clock.....................266
Clock Setting.................266
Compact Spare Tire.............243
Computer, Trip/Travel.............61
Cooling System...............235
Coolant Capacity............258
Coolant Level..............236
Selection Of Coolant
(Antifreeze)............258, 259
Corrosion Protection............247
Cruise Light.............69, 70, 71
Customer Assistance............316
Customer Programmable Features. . . .290Daytime Running Lights........34, 35
Dealer Service................234
Defroster, Windshield............137
Diagnostic System, Onboard........71
Diesel Fuel..................257
Diesel Fuel Requirements.........257
Dimmer Switch, Headlight.......34, 35
Dipsticks
Oil (Engine)...............233
Disabled Vehicle Towing..........216
Disturb.................302, 311
Door Ajar.................62, 63
Door Ajar Light..............62, 63
Driver's Seat Back Tilt............25
Electrical
Outlet, Auxiliary (Power Outlet).56
Electric Parking Brake...........145
Electronic Brake Control System......77
Anti-Lock Brake System........76
Traction Control System........77
Electronic Speed Control (Cruise
Control)..................162
Electronic Stability Control (ESC).....79
Electronic Throttle Control Warning Light.63
Emergency, In Case Of
Hazard Warning Flasher........186
Jacking..............199, 237Jump Starting..............211
Overheating...............214
Tow Hooks................218
Towing..................216
Emission Control System Maintenance . .72
Engine.....................230
Checking Oil Level...........233
Coolant (Antifreeze)..........259
Cooling..................235
Exhaust Gas Caution.......136, 257
Jump Starting..............211
Oil .................258, 259
Oil Filler Cap..............230
Oil Selection..............258
Overheating...............214
Starting.................141
Enhanced Accident Response Feature .220
Exhaust Gas Caution.........136, 257
Exhaust System...............136
Exterior Lighting...............34
Exterior Lights.............34, 138
Filters
Air Conditioning..........47, 235
Engine Oil................259
Flashers
Hazard Warning.............186
INDEX
334
Page 338 of 348
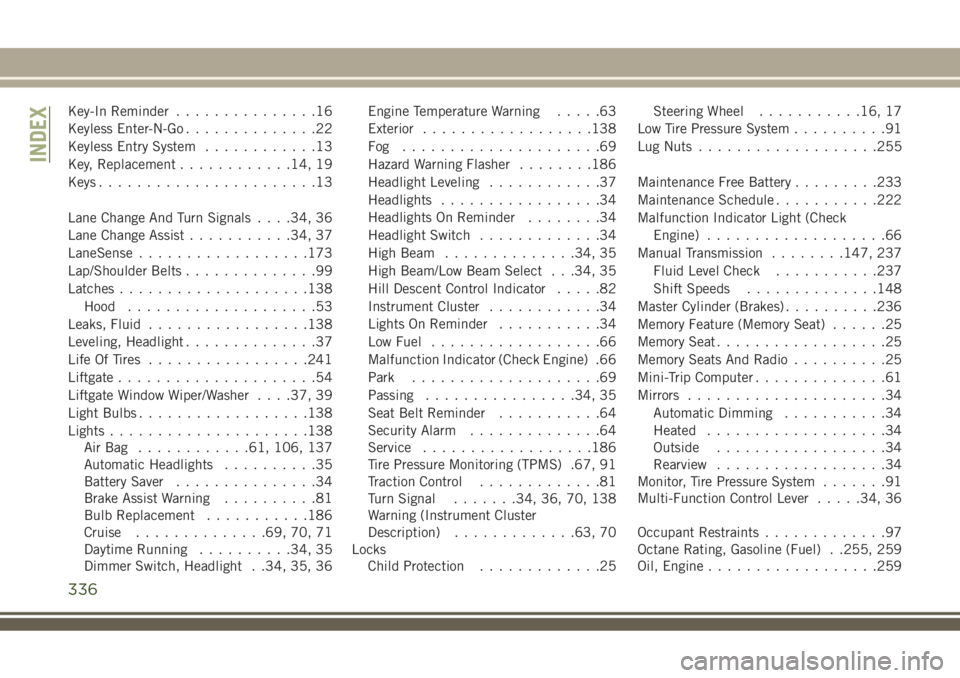
Key-In Reminder...............16
Keyless Enter-N-Go..............22
Keyless Entry System............13
Key, Replacement............14, 19
Keys.......................13
Lane Change And Turn Signals. . . .34, 36
Lane Change Assist...........34, 37
LaneSense..................173
Lap/Shoulder Belts..............99
Latches....................138
Hood....................53
Leaks, Fluid.................138
Leveling, Headlight..............37
Life Of Tires.................241
Liftgate.....................54
Liftgate Window Wiper/Washer. . . .37, 39
Light Bulbs..................138
Lights.....................138
AirBag ............61, 106, 137
Automatic Headlights..........35
Battery Saver...............34
Brake Assist Warning..........81
Bulb Replacement...........186
Cruise..............69, 70, 71
Daytime Running..........34, 35
Dimmer Switch, Headlight . .34, 35, 36Engine Temperature Warning.....63
Exterior..................138
Fog .....................69
Hazard Warning Flasher........186
Headlight Leveling............37
Headlights.................34
Headlights On Reminder........34
Headlight Switch.............34
High Beam..............34, 35
High Beam/Low Beam Select . . .34, 35
Hill Descent Control Indicator.....82
Instrument Cluster............34
Lights On Reminder...........34
Low Fuel..................66
Malfunction Indicator (Check Engine) .66
Park....................69
Passing................34, 35
Seat Belt Reminder...........64
Security Alarm..............64
Service.................
.186
Tire Pressure Monitoring (TPMS) .67, 91
T
raction Control.............81
Turn Signal.......34, 36, 70, 138
Warning (Instrument Cluster
Description).............63, 70
Locks
Child Protection.............25Steering Wheel...........16, 17
Low Tire Pressure System..........91
Lug Nuts...................255
Maintenance Free Battery.........233
Maintenance Schedule...........222
Malfunction Indicator Light (Check
Engine)...................66
Manual Transmission........147, 237
Fluid Level Check...........237
Shift Speeds..............148
Master Cylinder (Brakes)..........236
Memory Feature (Memory Seat)......25
Memory Seat..................25
Memory Seats And Radio..........25
Mini-Trip Computer..............61
Mirrors.....................34
Automatic Dimming...........34
Heated...................34
Outside..................34
Rearview..................34
Monitor, Tire Pressure System.......91
Multi-Function Control Lever.....34, 36
Occupant Restraints.............97
Octane Rating, Gasoline (Fuel) . .255, 259
Oil, Engine..................259
INDEX
336
Page 341 of 348
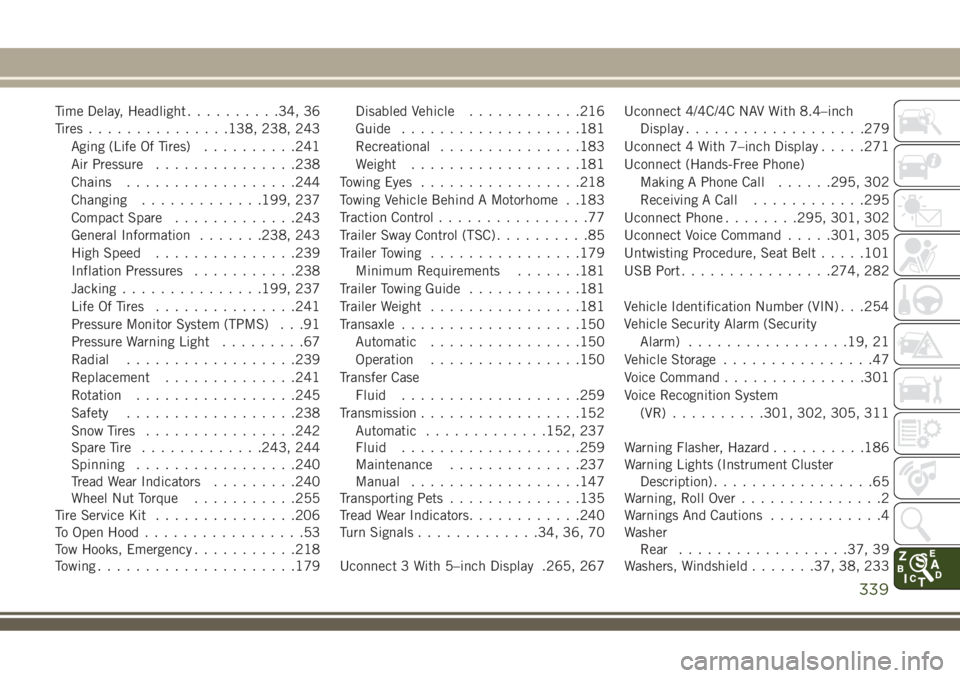
Time Delay, Headlight..........34, 36
Tires...............138, 238, 243
Aging (Life Of Tires)..........241
Air Pressure...............238
Chains..................244
Changing.............199, 237
Compact Spare.............243
General Information.......238, 243
High Speed...............239
Inflation Pressures...........238
Jacking...............199, 237
Life Of Tires...............241
Pressure Monitor System (TPMS) . . .91
Pressure Warning Light.........67
Radial..................239
Replacement..............241
Rotation.................245
Safety..................238
Snow Tires................242
Spare Tire.............243, 244
Spinning.................240
Tread Wear Indicators.........240
Wheel Nut Torque...........255
Tire Service Kit...............206
To Open Hood.................53
Tow Hooks, Emergency...........218
Towing.....................179Disabled Vehicle............216
Guide...................181
Recreational...............183
Weight..................181
Towing Eyes.................218
Towing Vehicle Behind A Motorhome . .183
Traction Control................77
Trailer Sway Control (TSC)..........85
Trailer Towing................179
Minimum Requirements.......181
Trailer Towing Guide............181
T
railer Weight................181
Transaxle...................150
Automatic................150
Operation................150
Transfer Case
Fluid...................259
Transmission.................152
Automatic.............152, 237
Fluid...................259
Maintenance..............237
Manual..................147
Transporting Pets..............135
Tread Wear Indicators............240
Turn Signals.............34, 36, 70
Uconnect 3 With 5–inch Display .265, 267Uconnect 4/4C/4C NAV With 8.4–inch
Display...................279
Uconnect 4 With 7–inch Display.....271
Uconnect (Hands-Free Phone)
Making A Phone Call......295, 302
Receiving A Call............295
Uconnect Phone........295, 301, 302
Uconnect Voice Command.....301, 305
Untwisting Procedure, Seat Belt.....101
USB Port................274, 282
Vehicle Identification Number (VIN) . . .254
Vehicle Security Alarm (Security
Alarm).................19, 21
Vehicle Storage................47
Voice Command...............301
Voice Recognition System
(VR)..........301, 302, 305, 311
Warning Flasher, Hazard..........186
Warning Lights (Instrument Cluster
Description).................65
Warning, Roll Over...............2
Warnings And Cautions............4
Washer
Rear..................37, 39
Washers, Windshield......
.37, 38, 233
339