radio controls JEEP COMPASS 2018 Owner handbook (in English)
[x] Cancel search | Manufacturer: JEEP, Model Year: 2018, Model line: COMPASS, Model: JEEP COMPASS 2018Pages: 348, PDF Size: 6.03 MB
Page 30 of 348
NOTE:
The Easy Entry/Exit feature is not enabled
when the vehicle is delivered from the fac-
tory. The Easy Entry/Exit feature is enabled
(or later disabled) through the programmable
features in the Uconnect system. Refer to
“Uconnect Settings/Customer Programmable
Features” in “Multimedia” in the Owner’s
Manual for further information.
Front Heated Seats — If Equipped
The front heated seats control buttons are
located within the Uconnect system. You can
gain access to the control buttons through
the climate screen or the controls screen.
• Press the heated seat button
once to
turn the HI setting on.
• Press the heated seat button
a second
time to turn the LO setting on.
• Press the heated seat button
a third
time to turn the heating elements off.
If your vehicle is equipped with automatic
temperature controls with an integrated cen-
ter stack, or manual temperature controls,
you’ll find the heated seat switches on the
switch bank below the radio screen.If the HI level setting is selected, the system
will automatically switch to LO level after
approximately 60 minutes of continuous op-
eration. At that time, the display will change
from HI to LO, indicating the change. The LO
level setting will turn off automatically after
approximately 45 minutes.
NOTE:
The engine must be running for the heated
seats to operate.
Vehicles With Remote Start — If Equipped
On models that are equipped with remote
start, the heated seats can be programmed to
come on during a remote start.
This feature can be programmed through the
Uconnect system. Refer to “Uconnect Set-
tings” in “Multimedia” in the Owner’s
Manual for further information.
WARNING!
• Persons who are unable to feel pain to
the skin because of advanced age,
chronic illness, diabetes, spinal cord in-
jury, medication, alcohol use, exhaus-
WARNING!
tion or other physical condition must
exercise care when using the seat
heater. It may cause burns even at low
temperatures, especially if used for long
periods of time.
• Do not place anything on the seat or
seatback that insulates against heat,
such as a blanket or cushion. This may
cause the seat heater to overheat. Sit-
ting in a seat that has been overheated
could cause serious burns due to the
increased surface temperature of the
seat.
Front Ventilated Seats — If Equipped
If your vehicle is equipped with ventilated
seats, the seat cushion and seat back will
have fans that draw the air from the passen-
ger compartment and move air through fine
perforations in the seat cover to help keep the
driver and front passenger cooler in higher
ambient temperatures. The fans operate at
two speeds, HI and LO.GETTING TO KNOW YOUR VEHICLE
28
Page 263 of 348
MULTIMEDIA
CYBERSECURITY...........263
TIPS CONTROLS AND GENERAL
INFORMATION.............264
Steering Wheel Audio Controls......264
Reception Conditions............264
Care And Maintenance...........264
Anti-Theft Protection............264
UCONNECT 3 WITH 5–INCH DIS-
PLAY — IF EQUIPPED........265
Uconnect 3 With 5–inch Display At A
Glance.....................265
Clock Setting.................266
Audio Setting................266
Radio Operation...............267
USB/Audio Jack (AUX)/Bluetooth
Operation...................268
Voice Text Reply (Not Compatible With
iPhone)....................269
Apps — If Equipped............270
UCONNECT 4 WITH 7-INCH DIS-
PLAY.....................271
Uconnect 4 At A Glance.........271Drag & Drop Menu Bar...........272
Radio.....................273
Media Hub — USB/Audio Jack (AUX) — If
Equipped...................274
Android Auto — If Equipped.......276
Apple CarPlay Integration — If Equipped. .277
Apps — If Equipped............278
UCONNECT 4C/4C NAV WITH
8.4–INCH DISPLAY..........279
Uconnect 4/4C NAV At A Glance. . . .279
Drag & Drop Menu Bar...........280
Radio.....................281
Media Hub — USB/Audio Jack (AUX) — If
Equipped...................282
Android Auto.................284
Apple CarPlay Integration.........287
Apps — If Equipped............289
Jeep Skills..................289
UCONNECT SETTINGS.......290
NAVIGATION — IF EQUIPPED . .290
Changing The Navigation Voice Prompt
Volume....................290Finding Points Of Interest........292
Finding A Place By Spelling The
Name.....................292
One-Step Voice Destination Entry. . . .292
Setting Your Home Location.......292
Home.....................292
Adding A Stop................294
Taking A Detour...............294
Map Update.................294
UCONNECT PHONE.........295
Uconnect Phone (Bluetooth Hands Free
Calling)....................295
Pairing (Wirelessly Connecting) Your Mobile
Phone To The Uconnect System.....298
Common Phone Commands
(Examples)..................301
Mute (Or Unmute) Microphone During
Call......................301
Transfer Ongoing Call Between Handset
And Vehicle.................301
Phonebook..................301
Voice Command Tips............302
Changing The Volume...........302
MULTIMEDIA
261
Page 266 of 348
TIPS CONTROLS AND
GENERAL INFORMATION
Steering Wheel Audio Controls
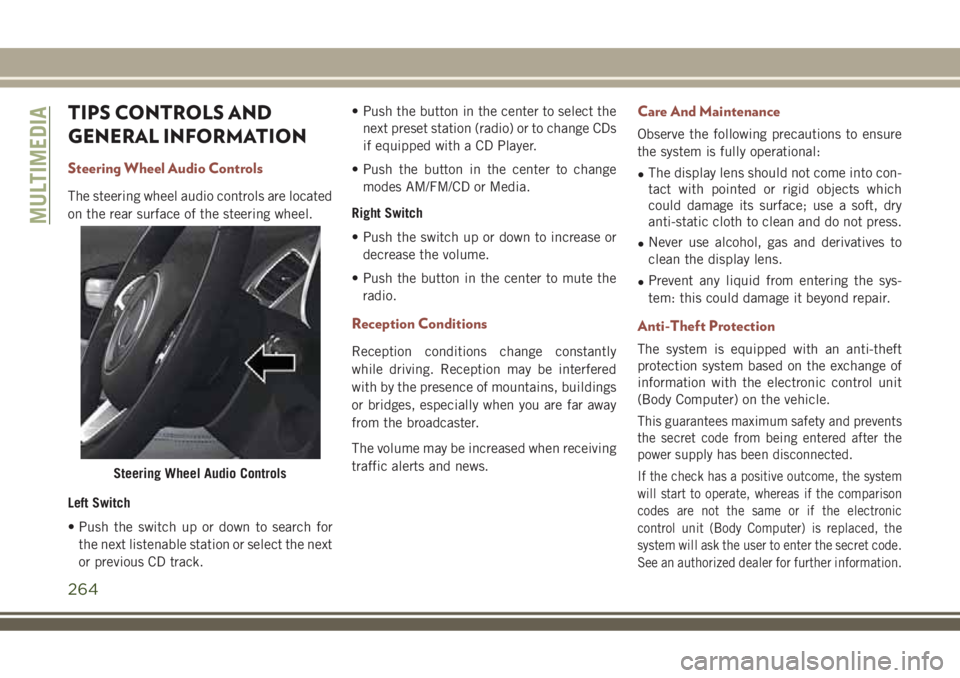
The steering wheel audio controls are located
on the rear surface of the steering wheel.
Left Switch
• Push the switch up or down to search for
the next listenable station or select the next
or previous CD track.• Push the button in the center to select the
next preset station (radio) or to change CDs
if equipped with a CD Player.
• Push the button in the center to change
modes AM/FM/CD or Media.
Right Switch
• Push the switch up or down to increase or
decrease the volume.
• Push the button in the center to mute the
radio.
Reception Conditions
Reception conditions change constantly
while driving. Reception may be interfered
with by the presence of mountains, buildings
or bridges, especially when you are far away
from the broadcaster.
The volume may be increased when receiving
traffic alerts and news.
Care And Maintenance
Observe the following precautions to ensure
the system is fully operational:
•The display lens should not come into con-
tact with pointed or rigid objects which
could damage its surface; use a soft, dry
anti-static cloth to clean and do not press.
•Never use alcohol, gas and derivatives to
clean the display lens.
•Prevent any liquid from entering the sys-
tem: this could damage it beyond repair.
Anti-Theft Protection
The system is equipped with an anti-theft
protection system based on the exchange of
information with the electronic control unit
(Body Computer) on the vehicle.
This guarantees maximum safety and prevents
the secret code from being entered after the
power supply has been disconnected.
If the check has a positive outcome, the system
will start to operate, whereas if the comparison
codes are not the same or if the electronic
control unit (Body Computer) is replaced, the
system will ask the user to enter the secret code.
See an authorized dealer for further information.Steering Wheel Audio Controls
MULTIMEDIA
264
Page 270 of 348
Store Radio Presets Manually
The Radio stores up to 12 presets in each of
the Radio modes. There are four visible pre-
sets at the top of the radio screen. Pressing
the “All” button on the touchscreen on the
radio home screen displays all of the preset
stations for that mode.
To store a radio preset manually, follow the
steps below:
1. Tune to the desired station.
2. Press and hold the desired numbered but-
ton on the touchscreen for more than two
seconds, or until you hear a confirmation
beep.
Seek Next/Previous Buttons
• Press the Seek up or Seek down button to
seek through radio stations in AM, FM or
DAB bands.
• Hold either button to bypass stations with-
out stopping.USB/Audio Jack (AUX)/Bluetooth
Operation
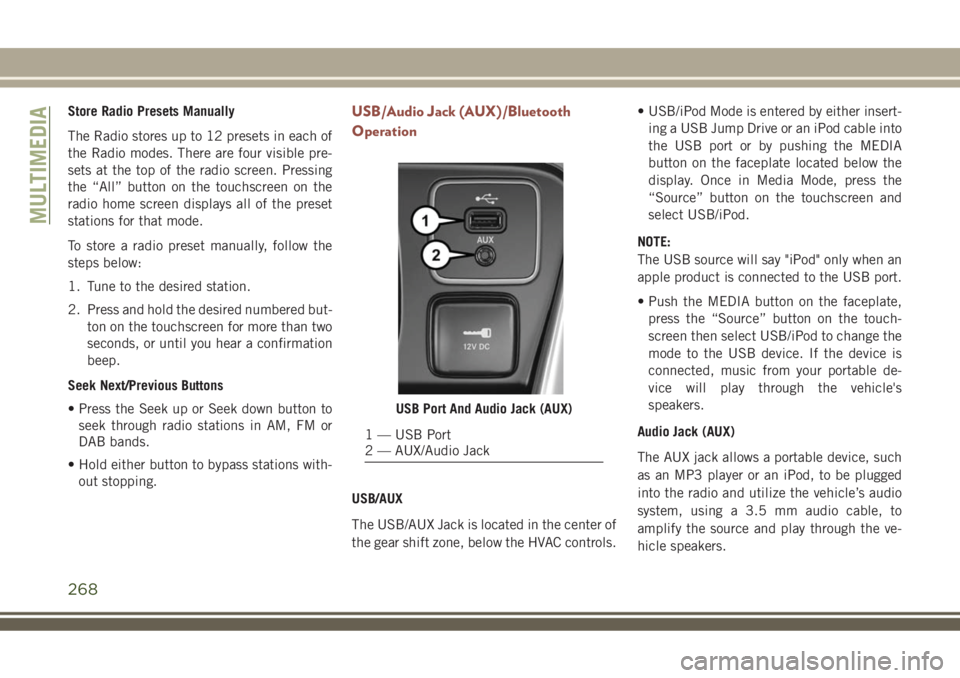
USB/AUX
The USB/AUX Jack is located in the center of
the gear shift zone, below the HVAC controls.• USB/iPod Mode is entered by either insert-
ing a USB Jump Drive or an iPod cable into
the USB port or by pushing the MEDIA
button on the faceplate located below the
display. Once in Media Mode, press the
“Source” button on the touchscreen and
select USB/iPod.
NOTE:
The USB source will say "iPod" only when an
apple product is connected to the USB port.
• Push the MEDIA button on the faceplate,
press the “Source” button on the touch-
screen then select USB/iPod to change the
mode to the USB device. If the device is
connected, music from your portable de-
vice will play through the vehicle's
speakers.
Audio Jack (AUX)
The AUX jack allows a portable device, such
as an MP3 player or an iPod, to be plugged
into the radio and utilize the vehicle’s audio
system, using a 3.5 mm audio cable, to
amplify the source and play through the ve-
hicle speakers.
USB Port And Audio Jack (AUX)
1 — USB Port
2 — AUX/Audio Jack
MULTIMEDIA
268
Page 277 of 348
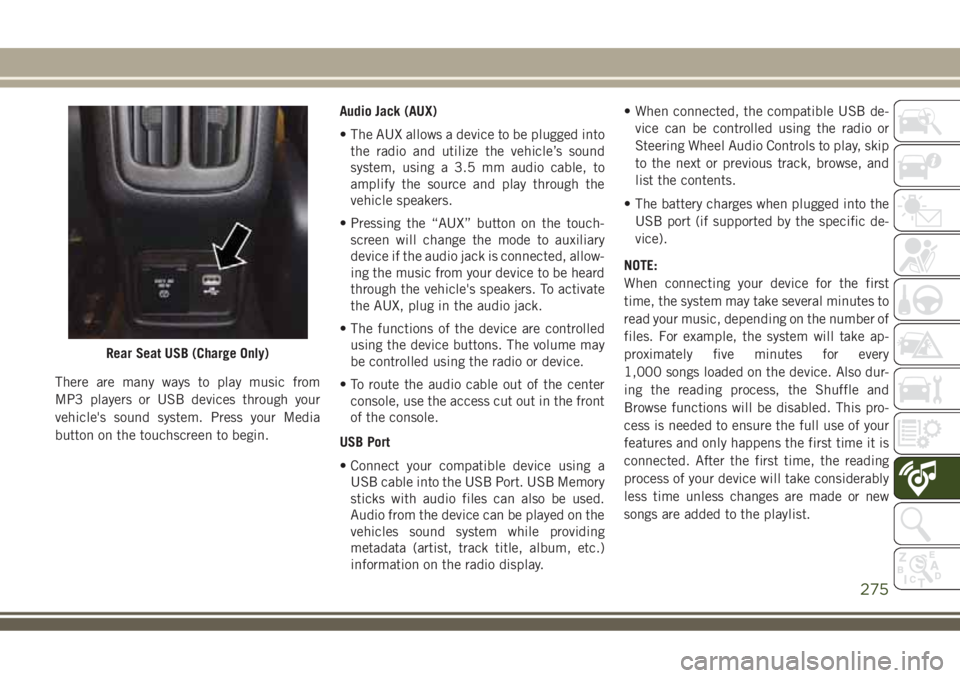
There are many ways to play music from
MP3 players or USB devices through your
vehicle's sound system. Press your Media
button on the touchscreen to begin.Audio Jack (AUX)
• The AUX allows a device to be plugged into
the radio and utilize the vehicle’s sound
system, using a 3.5 mm audio cable, to
amplify the source and play through the
vehicle speakers.
• Pressing the “AUX” button on the touch-
screen will change the mode to auxiliary
device if the audio jack is connected, allow-
ing the music from your device to be heard
through the vehicle's speakers. To activate
the AUX, plug in the audio jack.
• The functions of the device are controlled
using the device buttons. The volume may
be controlled using the radio or device.
• To route the audio cable out of the center
console, use the access cut out in the front
of the console.
USB Port
• Connect your compatible device using a
USB cable into the USB Port. USB Memory
sticks with audio files can also be used.
Audio from the device can be played on the
vehicles sound system while providing
metadata (artist, track title, album, etc.)
information on the radio display.• When connected, the compatible USB de-
vice can be controlled using the radio or
Steering Wheel Audio Controls to play, skip
to the next or previous track, browse, and
list the contents.
• The battery charges when plugged into the
USB port (if supported by the specific de-
vice).
NOTE:
When connecting your device for the first
time, the system may take several minutes to
read your music, depending on the number of
files. For example, the system will take ap-
proximately five minutes for every
1,000 songs loaded on the device. Also dur-
ing the reading process, the Shuffle and
Browse functions will be disabled. This pro-
cess is needed to ensure the full use of your
features and only happens the first time it is
connected. After the first time, the reading
process of your device will take considerably
less time unless changes are made or new
songs are added to the playlist.
Rear Seat USB (Charge Only)
275
Page 278 of 348
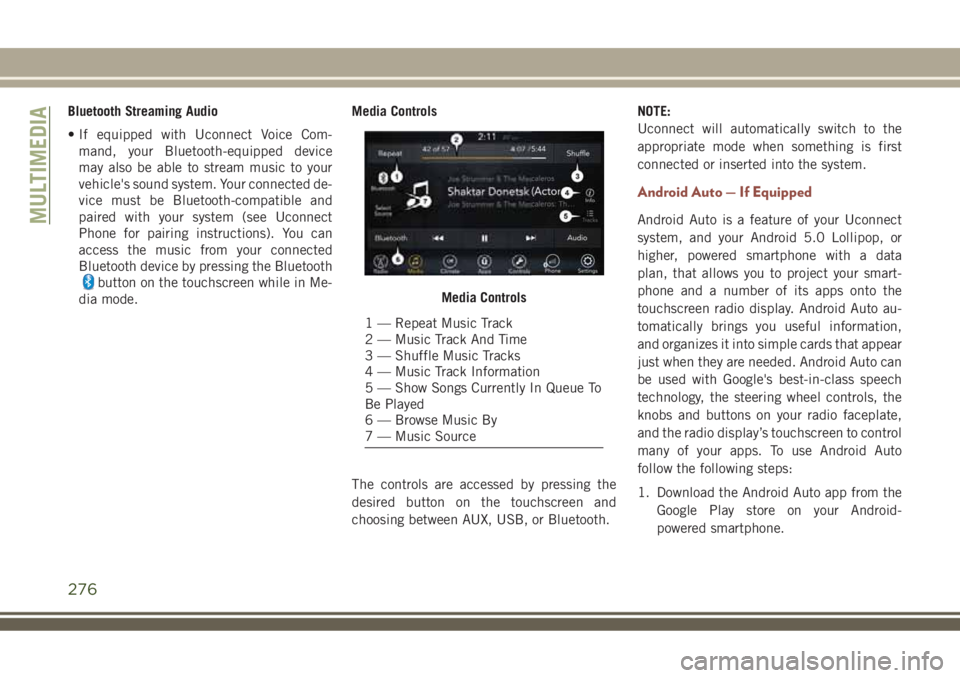
Bluetooth Streaming Audio
• If equipped with Uconnect Voice Com-
mand, your Bluetooth-equipped device
may also be able to stream music to your
vehicle's sound system. Your connected de-
vice must be Bluetooth-compatible and
paired with your system (see Uconnect
Phone for pairing instructions). You can
access the music from your connected
Bluetooth device by pressing the Bluetooth
button on the touchscreen while in Me-
dia mode.Media Controls
The controls are accessed by pressing the
desired button on the touchscreen and
choosing between AUX, USB, or Bluetooth.NOTE:
Uconnect will automatically switch to the
appropriate mode when something is first
connected or inserted into the system.
Android Auto — If Equipped
Android Auto is a feature of your Uconnect
system, and your Android 5.0 Lollipop, or
higher, powered smartphone with a data
plan, that allows you to project your smart-
phone and a number of its apps onto the
touchscreen radio display. Android Auto au-
tomatically brings you useful information,
and organizes it into simple cards that appear
just when they are needed. Android Auto can
be used with Google's best-in-class speech
technology, the steering wheel controls, the
knobs and buttons on your radio faceplate,
and the radio display’s touchscreen to control
many of your apps. To use Android Auto
follow the following steps:
1. Download the Android Auto app from the
Google Play store on your Android-
powered smartphone.
Media Controls
1 — Repeat Music Track
2 — Music Track And Time
3 — Shuffle Music Tracks
4 — Music Track Information
5 — Show Songs Currently In Queue To
Be Played
6 — Browse Music By
7 — Music Source
MULTIMEDIA
276
Page 279 of 348
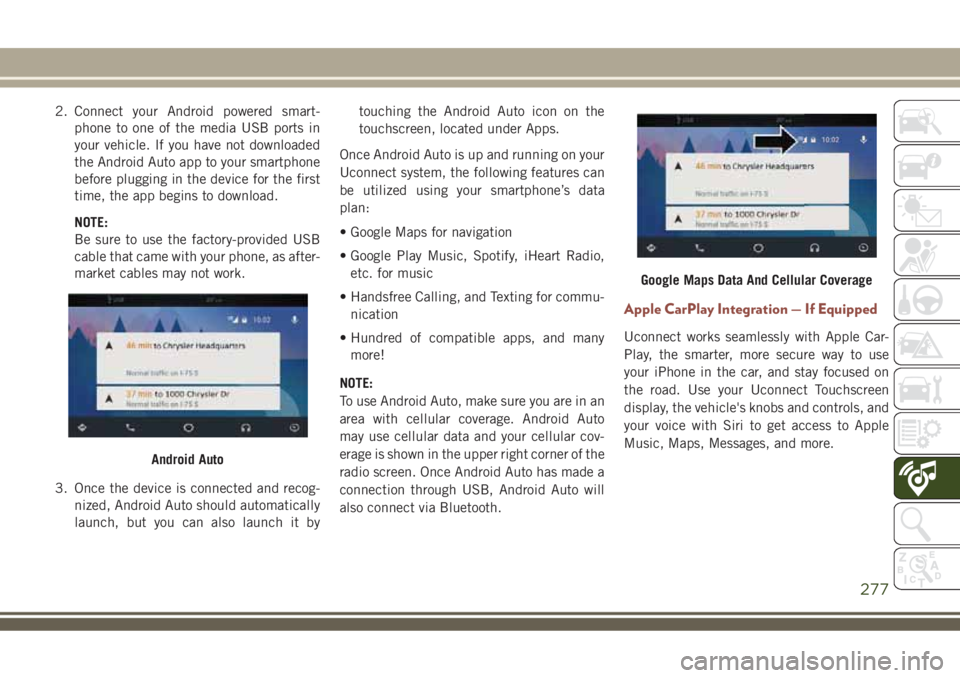
2. Connect your Android powered smart-
phone to one of the media USB ports in
your vehicle. If you have not downloaded
the Android Auto app to your smartphone
before plugging in the device for the first
time, the app begins to download.
NOTE:
Be sure to use the factory-provided USB
cable that came with your phone, as after-
market cables may not work.
3. Once the device is connected and recog-
nized, Android Auto should automatically
launch, but you can also launch it bytouching the Android Auto icon on the
touchscreen, located under Apps.
Once Android Auto is up and running on your
Uconnect system, the following features can
be utilized using your smartphone’s data
plan:
• Google Maps for navigation
• Google Play Music, Spotify, iHeart Radio,
etc. for music
• Handsfree Calling, and Texting for commu-
nication
• Hundred of compatible apps, and many
more!
NOTE:
To use Android Auto, make sure you are in an
area with cellular coverage. Android Auto
may use cellular data and your cellular cov-
erage is shown in the upper right corner of the
radio screen. Once Android Auto has made a
connection through USB, Android Auto will
also connect via Bluetooth.
Apple CarPlay Integration — If Equipped
Uconnect works seamlessly with Apple Car-
Play, the smarter, more secure way to use
your iPhone in the car, and stay focused on
the road. Use your Uconnect Touchscreen
display, the vehicle's knobs and controls, and
your voice with Siri to get access to Apple
Music, Maps, Messages, and more.
Android Auto
Google Maps Data And Cellular Coverage
277
Page 285 of 348
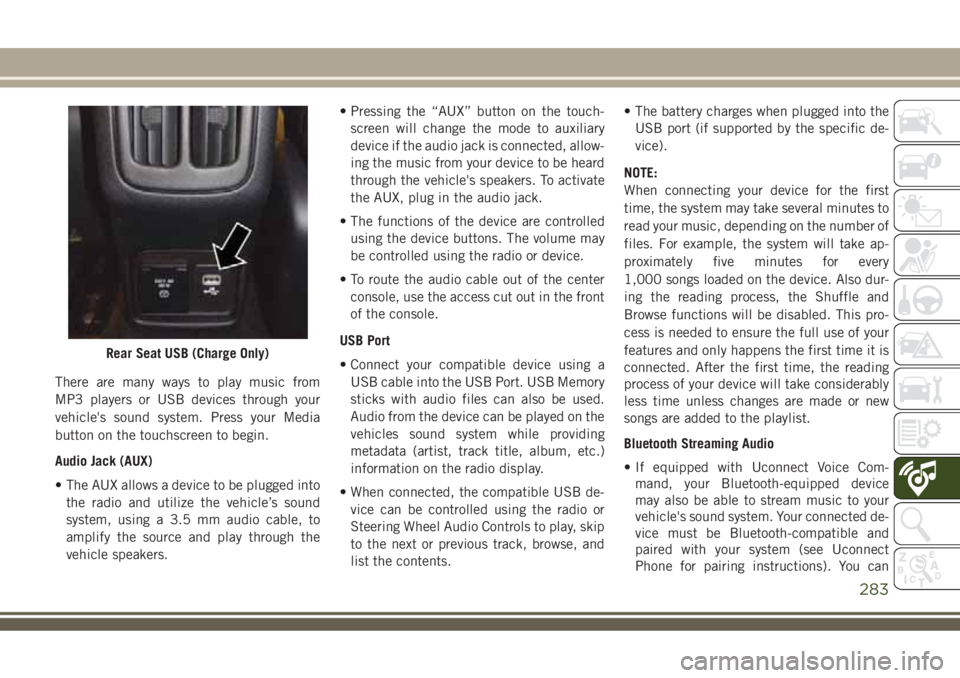
There are many ways to play music from
MP3 players or USB devices through your
vehicle's sound system. Press your Media
button on the touchscreen to begin.
Audio Jack (AUX)
• The AUX allows a device to be plugged into
the radio and utilize the vehicle’s sound
system, using a 3.5 mm audio cable, to
amplify the source and play through the
vehicle speakers.• Pressing the “AUX” button on the touch-
screen will change the mode to auxiliary
device if the audio jack is connected, allow-
ing the music from your device to be heard
through the vehicle's speakers. To activate
the AUX, plug in the audio jack.
• The functions of the device are controlled
using the device buttons. The volume may
be controlled using the radio or device.
• To route the audio cable out of the center
console, use the access cut out in the front
of the console.
USB Port
• Connect your compatible device using a
USB cable into the USB Port. USB Memory
sticks with audio files can also be used.
Audio from the device can be played on the
vehicles sound system while providing
metadata (artist, track title, album, etc.)
information on the radio display.
• When connected, the compatible USB de-
vice can be controlled using the radio or
Steering Wheel Audio Controls to play, skip
to the next or previous track, browse, and
list the contents.• The battery charges when plugged into the
USB port (if supported by the specific de-
vice).
NOTE:
When connecting your device for the first
time, the system may take several minutes to
read your music, depending on the number of
files. For example, the system will take ap-
proximately five minutes for every
1,000 songs loaded on the device. Also dur-
ing the reading process, the Shuffle and
Browse functions will be disabled. This pro-
cess is needed to ensure the full use of your
features and only happens the first time it is
connected. After the first time, the reading
process of your device will take considerably
less time unless changes are made or new
songs are added to the playlist.
Bluetooth Streaming Audio
• If equipped with Uconnect Voice Com-
mand, your Bluetooth-equipped device
may also be able to stream music to your
vehicle's sound system. Your connected de-
vice must be Bluetooth-compatible and
paired with your system (see Uconnect
Phone for pairing instructions). You can
Rear Seat USB (Charge Only)
283
Page 286 of 348
access the music from your connected
Bluetooth device by pressing the Bluetooth
button on the touchscreen while in Me-
dia mode.
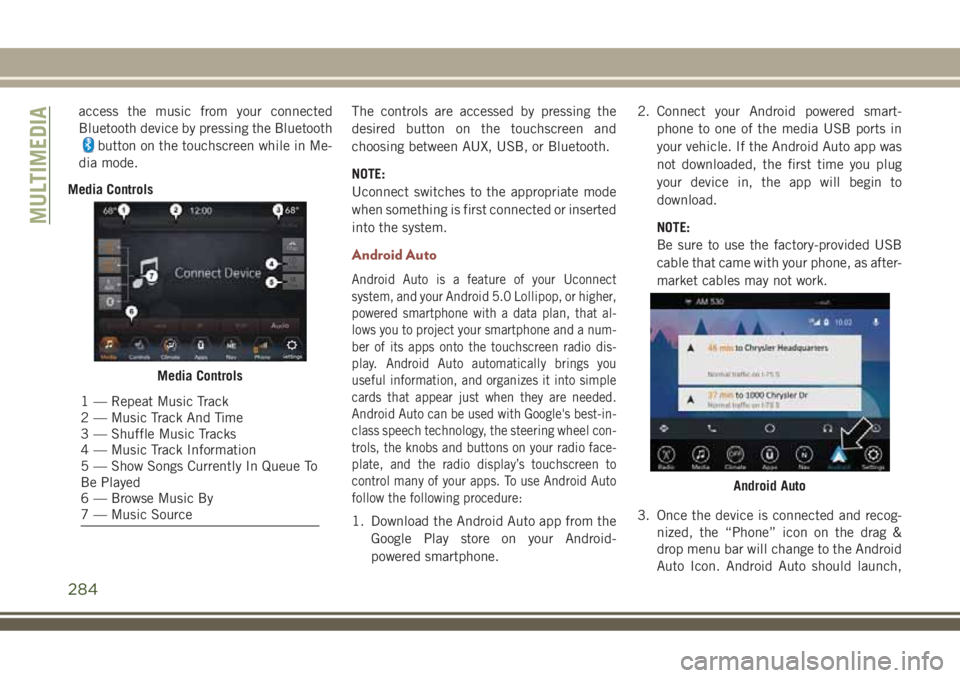
Media ControlsThe controls are accessed by pressing the
desired button on the touchscreen and
choosing between AUX, USB, or Bluetooth.
NOTE:
Uconnect switches to the appropriate mode
when something is first connected or inserted
into the system.
Android Auto
Android Auto is a feature of your Uconnect
system, and your Android 5.0 Lollipop, or higher,
powered smartphone with a data plan, that al-
lows you to project your smartphone and a num-
ber of its apps onto the touchscreen radio dis-
play. Android Auto automatically brings you
useful information, and organizes it into simple
cards that appear just when they are needed.
Android Auto can be used with Google's best-in-
class speech technology, the steering wheel con-
trols, the knobs and buttons on your radio face-
plate, and the radio display’s touchscreen to
control many of your apps. To use Android Auto
follow the following procedure:
1. Download the Android Auto app from the
Google Play store on your Android-
powered smartphone.2. Connect your Android powered smart-
phone to one of the media USB ports in
your vehicle. If the Android Auto app was
not downloaded, the first time you plug
your device in, the app will begin to
download.
NOTE:
Be sure to use the factory-provided USB
cable that came with your phone, as after-
market cables may not work.
3. Once the device is connected and recog-
nized, the “Phone” icon on the drag &
drop menu bar will change to the Android
Auto Icon. Android Auto should launch,
Media Controls
1 — Repeat Music Track
2 — Music Track And Time
3 — Shuffle Music Tracks
4 — Music Track Information
5 — Show Songs Currently In Queue To
Be Played
6 — Browse Music By
7 — Music Source
Android Auto
MULTIMEDIA
284
Page 340 of 348
Adjustable Shoulder Belt.......102
Adjustable Upper Shoulder
Anchorage................102
Front Seat...........98, 99, 101
Inspection................137
Operating Instructions.........101
Pregnant Women............105
Rear Seat.................99
Reminder.................64
Untwisting Procedure.........101
Seats....................25, 28
Adjustment................25
Easy Entry..............25, 27
Head Restraints.............30
Heated................25, 28
Memory..................25
Rear Folding.............25, 29
Seatback Release..........25, 29
Tilting...................25
Vented.................25, 28
Ventilated..............25, 28
Security Alarm...........19, 21, 64
Arm The System.............20
Disarm The System............20
Selection Of Coolant (Antifreeze).....259
Sentry Key
Key Programming............19Sentry Key Replacement........14, 19
Service Assistance.............316
Shifting
Automatic Transmission........152
Manual Transmission.........147
Shift Lever Override.............214
Shoulder Belts.................99
Side View Mirror Adjustment........34
Signals, Turn.........34, 36, 70, 138
Siri.......................311
Snow Chains (Tire Chains).........244
Snow Tires..................242
Sound Systems (Radio)......
.274, 282
Spare
Tire ...............243, 244
Spark Plugs.................259
Specifications
Fuel (Gasoline).............259
Oil .....................259
Speed Control
Accel/Decel............162, 164
Accel/Decel (ACC Only). . . .164, 165
Cancel...............162, 164
Distance Setting (ACC Only) .164, 166
Mode Setting (ACC Only) . . .164, 166
Resume..............162, 164
Speed Control (Cruise Control)......162
Starting.................17, 141Automatic Transmission........141
Remote..................17
Starting And Operating...........141
Starting Procedures.............141
Steering
Column Controls..........34, 36
Tilt Column................33
Wheel, Heated..............33
Wheel Lock.............16, 17
Wheel, Tilt.................33
Steering Wheel Mounted Sound System
Controls..................264
Storage, Vehicle................47
Stuck, Freeing................215
Sunroof
Closing................50, 51
Opening..................50
Sun Roof....................50
Supplemental Restraint System - Air
Bag.....................107
Sway Control, Trailer.............85
System, Remote Starting..........17
Telescoping Steering Column........33
Temperature Control, Automatic (ATC) . .46
Text Messaging............269, 302
Tilt Steering Column.............33
INDEX
338