seat memory JEEP COMPASS 2018 Owner handbook (in English)
[x] Cancel search | Manufacturer: JEEP, Model Year: 2018, Model line: COMPASS, Model: JEEP COMPASS 2018Pages: 348, PDF Size: 6.03 MB
Page 13 of 348
GETTING TO KNOW YOUR VEHICLE
KEYS .....................13
Key Fobs....................13
IGNITION SWITCH............14
Keyless Enter-N-Go — Ignition.......14
Integrated/Manual Ignition — If
Equipped....................15
Vehicle On Message.............16
Mechanical Steering Wheel Lock — If
Equipped....................16
Electronic Steering Wheel Lock — If
Equipped....................17
REMOTE STARTING SYSTEM — IF
EQUIPPED.................17
How To Use Remote Start — If
Equipped....................17
To Enter Remote Start Mode........18
To Exit Remote Start Mode Without
Driving The Vehicle.............18
To Exit Remote Start Mode And Drive
The Vehicle...................18
SENTRY KEY................19
Replacement Keys..............19Customer Key Programming........19
VEHICLE SECURITY ALARM — IF
EQUIPPED.................19
Rearming Of The System..........20
To Arm The System.............20
To Disarm The System............20
Security System Manual Override.....21
PREMIUM VEHICLE SECURITY
ALARM — IF EQUIPPED........21
To Arm The System..............21
To Disarm The System............22
Security System Manual Override.....22
DOORS...................22
Keyless Enter-N-Go — Passive Entry . . .22
Child-Protection Door Lock System —
Rear Doors...................25
SEATS ....................25
Driver Memory Seat — If Equipped....25
Front Heated Seats — If Equipped....28
Front Ventilated Seats — If Equipped. . .2860/40 Split Folding Rear Seat With
Fold-Flat Feature...............29
40/20/40 Rear Seat Armrest— If
Equipped....................30
HEAD RESTRAINTS...........30
Front Head Restraint Adjustment.....31
Rear Head Restraints.............32
STEERING WHEEL...........33
Tilt/Telescoping Steering Column.....33
Heated Steering Wheel............33
MIRRORS..................34
Folding Mirrors................34
Heated Mirrors — If Equipped.......34
EXTERIOR LIGHTS...........34
Headlight Switch...............34
Daytime Running Lights (DRL) — If
Equipped...................35
High/Low Beam Switch...........35
Flash-To-Pass.................35
Automatic Headlights — If Equipped . .35
Headlight Time Delay............36
GETTING TO KNOW YOUR VEHICLE
11
Page 27 of 348
• If Passive Entry is disabled using the
Uconnect System, the key protection de-
scribed in "Preventing Inadvertent Locking
of Passive Entry key fob in Vehicle" remains
active/functional.
• The Passive Entry system will not operate if
the key fob battery is dead.
The vehicle doors can also be locked by using
the lock button located on the vehicle’s inte-
rior door panel.
Child-Protection Door Lock System —
Rear Doors
To provide a safer environment for small chil-
dren riding in the rear seats, the rear doors
are equipped with a Child-Protection Door
Lock system.
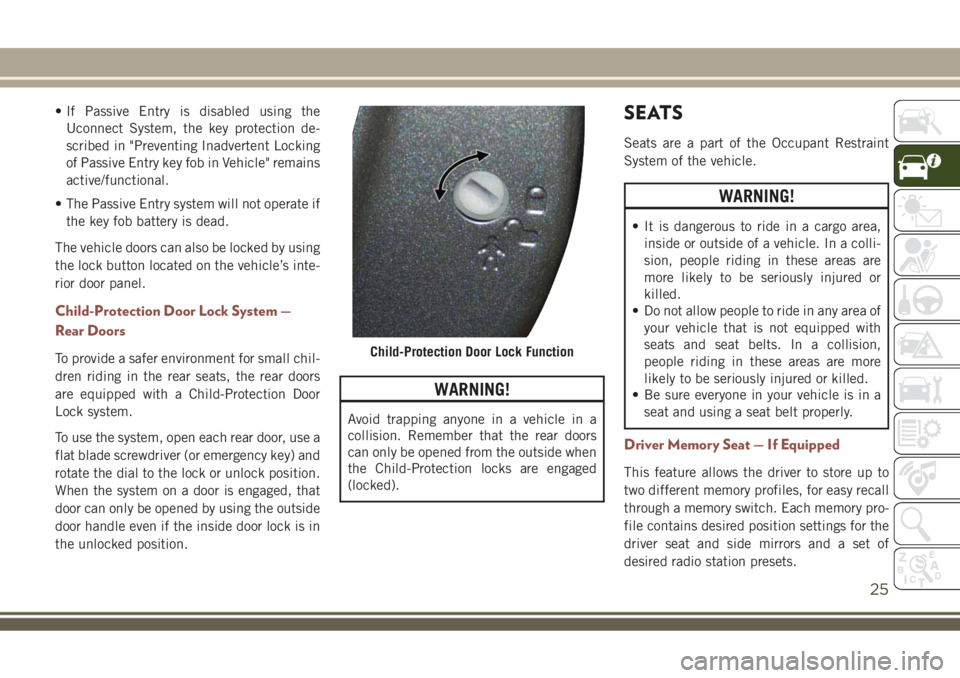
To use the system, open each rear door, use a
flat blade screwdriver (or emergency key) and
rotate the dial to the lock or unlock position.
When the system on a door is engaged, that
door can only be opened by using the outside
door handle even if the inside door lock is in
the unlocked position.
WARNING!
Avoid trapping anyone in a vehicle in a
collision. Remember that the rear doors
can only be opened from the outside when
the Child-Protection locks are engaged
(locked).
SEATS
Seats are a part of the Occupant Restraint
System of the vehicle.
WARNING!
• It is dangerous to ride in a cargo area,
inside or outside of a vehicle. In a colli-
sion, people riding in these areas are
more likely to be seriously injured or
killed.
• Do not allow people to ride in any area of
your vehicle that is not equipped with
seats and seat belts. In a collision,
people riding in these areas are more
likely to be seriously injured or killed.
• Be sure everyone in your vehicle is in a
seat and using a seat belt properly.
Driver Memory Seat — If Equipped
This feature allows the driver to store up to
two different memory profiles, for easy recall
through a memory switch. Each memory pro-
file contains desired position settings for the
driver seat and side mirrors and a set of
desired radio station presets.
Child-Protection Door Lock Function
25
Page 28 of 348
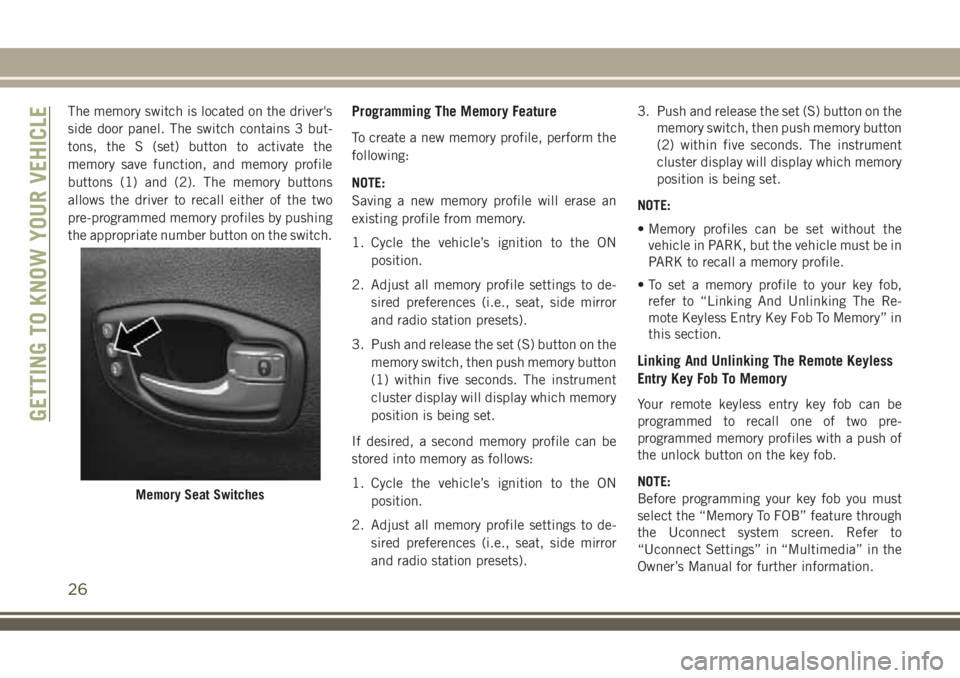
The memory switch is located on the driver's
side door panel. The switch contains 3 but-
tons, the S (set) button to activate the
memory save function, and memory profile
buttons (1) and (2). The memory buttons
allows the driver to recall either of the two
pre-programmed memory profiles by pushing
the appropriate number button on the switch.Programming The Memory Feature
To create a new memory profile, perform the
following:
NOTE:
Saving a new memory profile will erase an
existing profile from memory.
1. Cycle the vehicle’s ignition to the ON
position.
2. Adjust all memory profile settings to de-
sired preferences (i.e., seat, side mirror
and radio station presets).
3. Push and release the set (S) button on the
memory switch, then push memory button
(1) within five seconds. The instrument
cluster display will display which memory
position is being set.
If desired, a second memory profile can be
stored into memory as follows:
1. Cycle the vehicle’s ignition to the ON
position.
2. Adjust all memory profile settings to de-
sired preferences (i.e., seat, side mirror
and radio station presets).3. Push and release the set (S) button on the
memory switch, then push memory button
(2) within five seconds. The instrument
cluster display will display which memory
position is being set.
NOTE:
• Memory profiles can be set without the
vehicle in PARK, but the vehicle must be in
PARK to recall a memory profile.
• To set a memory profile to your key fob,
refer to “Linking And Unlinking The Re-
mote Keyless Entry Key Fob To Memory” in
this section.
Linking And Unlinking The Remote Keyless
Entry Key Fob To Memory
Your remote keyless entry key fob can be
programmed to recall one of two pre-
programmed memory profiles with a push of
the unlock button on the key fob.
NOTE:
Before programming your key fob you must
select the “Memory To FOB” feature through
the Uconnect system screen. Refer to
“Uconnect Settings” in “Multimedia” in the
Owner’s Manual for further information.
Memory Seat Switches
GETTING TO KNOW YOUR VEHICLE
26
Page 29 of 348
To program your key fob, perform the follow-
ing:
1. Cycle the vehicle’s ignition to the OFF
position.
2. Select the desired memory profile (1) or
(2).
NOTE:
If a memory profile has not already been
set, refer to "Programming The Memory
Feature" in this section for instructions on
how to set a memory profile.
3. Push and release the set (S) button on the
memory switch, then within five seconds
push and release the button labeled (1) or
(2) accordingly. “Memory Profile Set”
(1 or 2) will display in the instrument
cluster display.
4. Push and release the lock button on the
key fob within 10 seconds.
NOTE:
Your key fob can be unlinked to your memory
settings by pushing the set (S) button, fol-
lowed by pushing the unlock button on the
key fob within 10 seconds.Memory Position Recall
NOTE:
The vehicle must be in PARK to recall
memory positions. If a recall is attempted
when the vehicle is not in PARK, a message
will display in the instrument cluster display.
• To recall the memory settings for driver one,
push memory button (1) or the unlock but-
ton on the key fob linked to memory posi-
tion 1.
• To recall the memory settings for driver two,
push memory button (2) or the unlock but-
ton on the key fob linked to memory posi-
tion 2.
A recall can be canceled by pushing any of
the memory buttons (S, 1, or 2) during a
recall. When a recall is canceled, the driver
seat will stop moving. A delay of one second
will occur before another recall can be se-
lected.
Easy Entry/Exit Seat
This feature provides automatic driver seat
positioning to enhance driver mobility when
entering and exiting the vehicle.The distance the driver seat moves depends
on where you have the driver seat positioned
when you cycle the vehicle’s ignition to the
OFF position.
• When you cycle the vehicle’s ignition to the
OFF position, the driver seat will move
about 2.4 inches (60 mm) rearward if the
driver seat position is greater than or equal
to 2.7 inches (67.7 mm) forward of the rear
stop. The seat will return to its previously
set position when you cycle the vehicle’s
ignition to the ACC or RUN position.
• The Easy Entry/Easy Exit feature is disabled
when the driver seat position is less than
0.9 of an inch (22.7 mm) forward of the
rear stop. At this position, there is no ben-
efit to the driver by moving the seat for Easy
Exit or Easy Entry.
Each stored memory setting will have an
associated Easy Entry and Easy Exit position.
27
Page 199 of 348
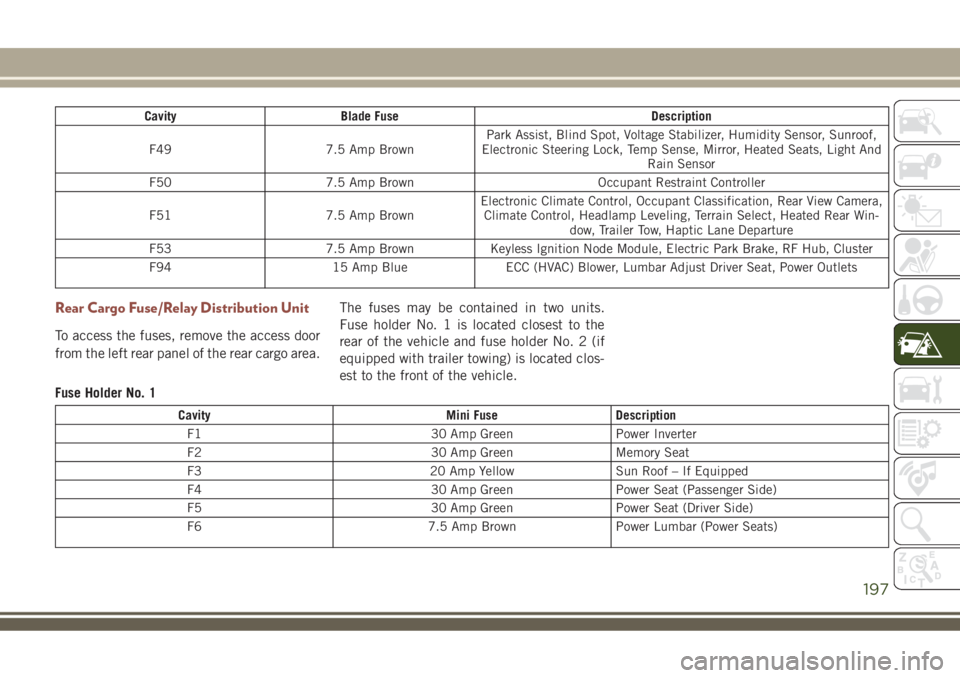
Cavity Blade Fuse Description
F49 7.5 Amp BrownPark Assist, Blind Spot, Voltage Stabilizer, Humidity Sensor, Sunroof,
Electronic Steering Lock, Temp Sense, Mirror, Heated Seats, Light And
Rain Sensor
F50 7.5 Amp Brown Occupant Restraint Controller
F51 7.5 Amp BrownElectronic Climate Control, Occupant Classification, Rear View Camera,
Climate Control, Headlamp Leveling, Terrain Select, Heated Rear Win-
dow, Trailer Tow, Haptic Lane Departure
F53 7.5 Amp Brown Keyless Ignition Node Module, Electric Park Brake, RF Hub, Cluster
F94 15 Amp Blue ECC (HVAC) Blower, Lumbar Adjust Driver Seat, Power Outlets
Rear Cargo Fuse/Relay Distribution Unit
To access the fuses, remove the access door
from the left rear panel of the rear cargo area.The fuses may be contained in two units.
Fuse holder No. 1 is located closest to the
rear of the vehicle and fuse holder No. 2 (if
equipped with trailer towing) is located clos-
est to the front of the vehicle.
Fuse Holder No. 1
Cavity Mini Fuse Description
F1 30 Amp Green Power Inverter
F2 30 Amp Green Memory Seat
F3 20 Amp Yellow Sun Roof – If Equipped
F4 30 Amp Green Power Seat (Passenger Side)
F5 30 Amp Green Power Seat (Driver Side)
F6 7.5 Amp Brown Power Lumbar (Power Seats)
197
Page 277 of 348
There are many ways to play music from
MP3 players or USB devices through your
vehicle's sound system. Press your Media
button on the touchscreen to begin.Audio Jack (AUX)
• The AUX allows a device to be plugged into
the radio and utilize the vehicle’s sound
system, using a 3.5 mm audio cable, to
amplify the source and play through the
vehicle speakers.
• Pressing the “AUX” button on the touch-
screen will change the mode to auxiliary
device if the audio jack is connected, allow-
ing the music from your device to be heard
through the vehicle's speakers. To activate
the AUX, plug in the audio jack.
• The functions of the device are controlled
using the device buttons. The volume may
be controlled using the radio or device.
• To route the audio cable out of the center
console, use the access cut out in the front
of the console.
USB Port
• Connect your compatible device using a
USB cable into the USB Port. USB Memory
sticks with audio files can also be used.
Audio from the device can be played on the
vehicles sound system while providing
metadata (artist, track title, album, etc.)
information on the radio display.• When connected, the compatible USB de-
vice can be controlled using the radio or
Steering Wheel Audio Controls to play, skip
to the next or previous track, browse, and
list the contents.
• The battery charges when plugged into the
USB port (if supported by the specific de-
vice).
NOTE:
When connecting your device for the first
time, the system may take several minutes to
read your music, depending on the number of
files. For example, the system will take ap-
proximately five minutes for every
1,000 songs loaded on the device. Also dur-
ing the reading process, the Shuffle and
Browse functions will be disabled. This pro-
cess is needed to ensure the full use of your
features and only happens the first time it is
connected. After the first time, the reading
process of your device will take considerably
less time unless changes are made or new
songs are added to the playlist.
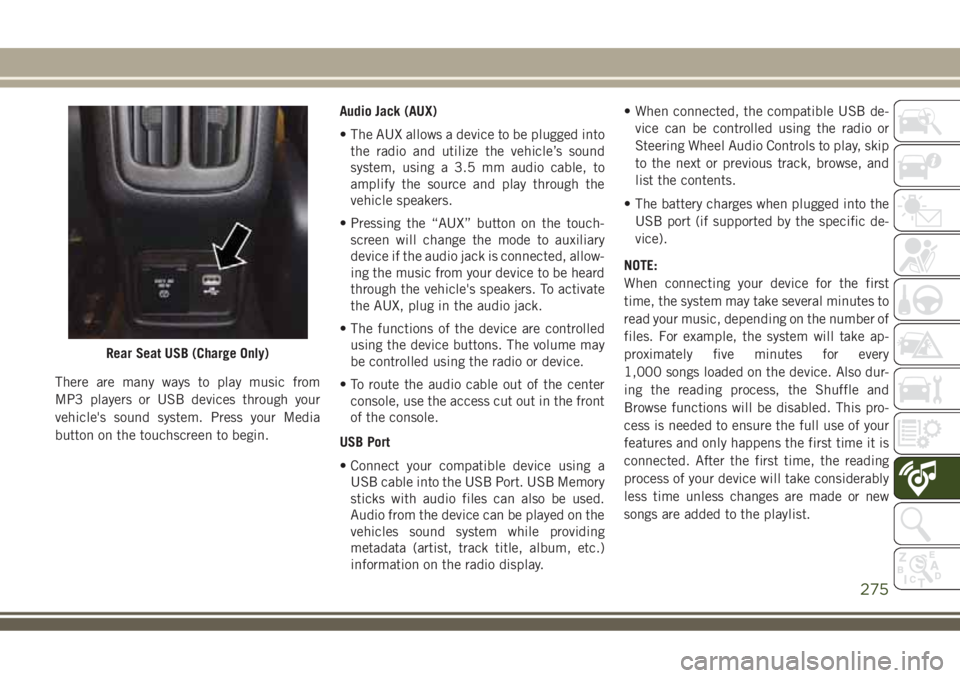
Rear Seat USB (Charge Only)
275
Page 285 of 348
There are many ways to play music from
MP3 players or USB devices through your
vehicle's sound system. Press your Media
button on the touchscreen to begin.
Audio Jack (AUX)
• The AUX allows a device to be plugged into
the radio and utilize the vehicle’s sound
system, using a 3.5 mm audio cable, to
amplify the source and play through the
vehicle speakers.• Pressing the “AUX” button on the touch-
screen will change the mode to auxiliary
device if the audio jack is connected, allow-
ing the music from your device to be heard
through the vehicle's speakers. To activate
the AUX, plug in the audio jack.
• The functions of the device are controlled
using the device buttons. The volume may
be controlled using the radio or device.
• To route the audio cable out of the center
console, use the access cut out in the front
of the console.
USB Port
• Connect your compatible device using a
USB cable into the USB Port. USB Memory
sticks with audio files can also be used.
Audio from the device can be played on the
vehicles sound system while providing
metadata (artist, track title, album, etc.)
information on the radio display.
• When connected, the compatible USB de-
vice can be controlled using the radio or
Steering Wheel Audio Controls to play, skip
to the next or previous track, browse, and
list the contents.• The battery charges when plugged into the
USB port (if supported by the specific de-
vice).
NOTE:
When connecting your device for the first
time, the system may take several minutes to
read your music, depending on the number of
files. For example, the system will take ap-
proximately five minutes for every
1,000 songs loaded on the device. Also dur-
ing the reading process, the Shuffle and
Browse functions will be disabled. This pro-
cess is needed to ensure the full use of your
features and only happens the first time it is
connected. After the first time, the reading
process of your device will take considerably
less time unless changes are made or new
songs are added to the playlist.
Bluetooth Streaming Audio
• If equipped with Uconnect Voice Com-
mand, your Bluetooth-equipped device
may also be able to stream music to your
vehicle's sound system. Your connected de-
vice must be Bluetooth-compatible and
paired with your system (see Uconnect
Phone for pairing instructions). You can
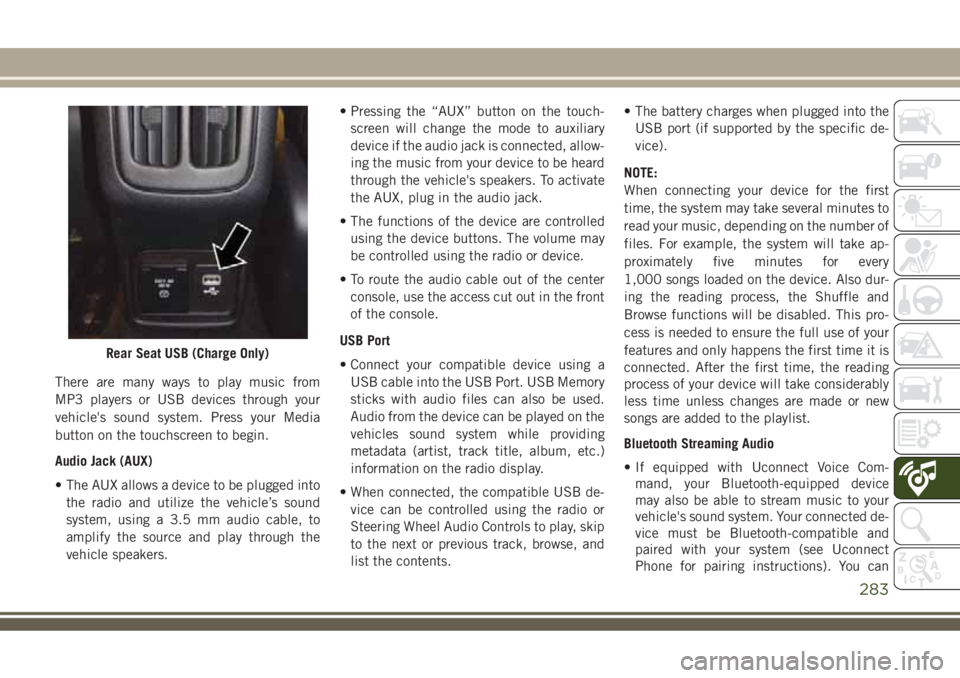
Rear Seat USB (Charge Only)
283
Page 338 of 348
Key-In Reminder...............16
Keyless Enter-N-Go..............22
Keyless Entry System............13
Key, Replacement............14, 19
Keys.......................13
Lane Change And Turn Signals. . . .34, 36
Lane Change Assist...........34, 37
LaneSense..................173
Lap/Shoulder Belts..............99
Latches....................138
Hood....................53
Leaks, Fluid.................138
Leveling, Headlight..............37
Life Of Tires.................241
Liftgate.....................54
Liftgate Window Wiper/Washer. . . .37, 39
Light Bulbs..................138
Lights.....................138
AirBag ............61, 106, 137
Automatic Headlights..........35
Battery Saver...............34
Brake Assist Warning..........81
Bulb Replacement...........186
Cruise..............69, 70, 71
Daytime Running..........34, 35
Dimmer Switch, Headlight . .34, 35, 36Engine Temperature Warning.....63
Exterior..................138
Fog .....................69
Hazard Warning Flasher........186
Headlight Leveling............37
Headlights.................34
Headlights On Reminder........34
Headlight Switch.............34
High Beam..............34, 35
High Beam/Low Beam Select . . .34, 35
Hill Descent Control Indicator.....82
Instrument Cluster............34
Lights On Reminder...........34
Low Fuel..................66
Malfunction Indicator (Check Engine) .66
Park....................69
Passing................34, 35
Seat Belt Reminder...........64
Security Alarm..............64
Service.................
.186
Tire Pressure Monitoring (TPMS) .67, 91
T
raction Control.............81
Turn Signal.......34, 36, 70, 138
Warning (Instrument Cluster
Description).............63, 70
Locks
Child Protection.............25Steering Wheel...........16, 17
Low Tire Pressure System..........91
Lug Nuts...................255
Maintenance Free Battery.........233
Maintenance Schedule...........222
Malfunction Indicator Light (Check
Engine)...................66
Manual Transmission........147, 237
Fluid Level Check...........237
Shift Speeds..............148
Master Cylinder (Brakes)..........236
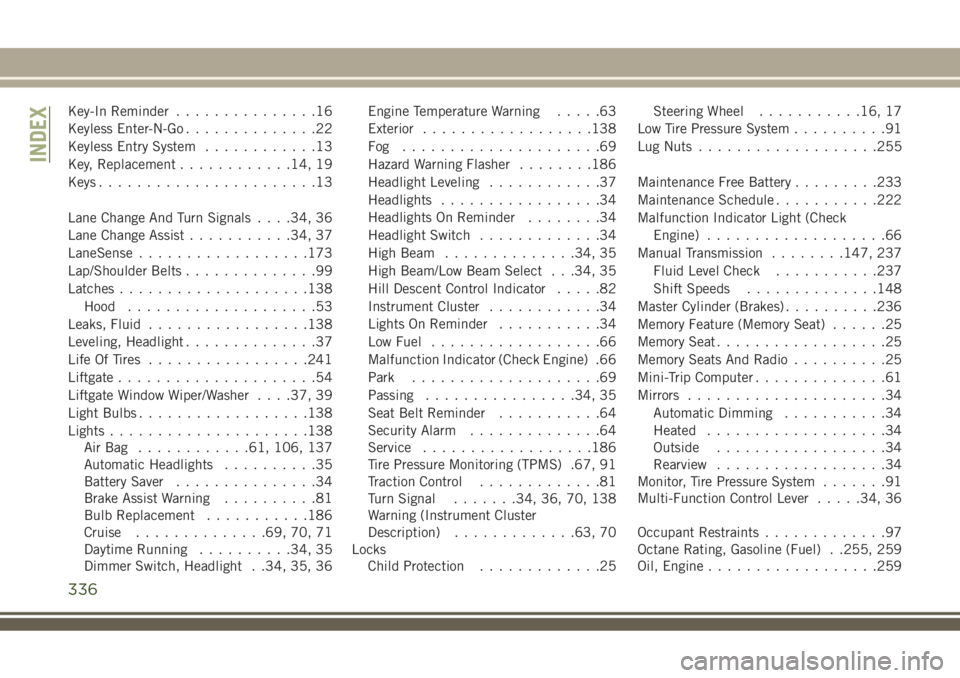
Memory Feature (Memory Seat)......25
Memory Seat..................25
Memory Seats And Radio..........25
Mini-Trip Computer..............61
Mirrors.....................34
Automatic Dimming...........34
Heated...................34
Outside..................34
Rearview..................34
Monitor, Tire Pressure System.......91
Multi-Function Control Lever.....34, 36
Occupant Restraints.............97
Octane Rating, Gasoline (Fuel) . .255, 259
Oil, Engine..................259
INDEX
336
Page 340 of 348
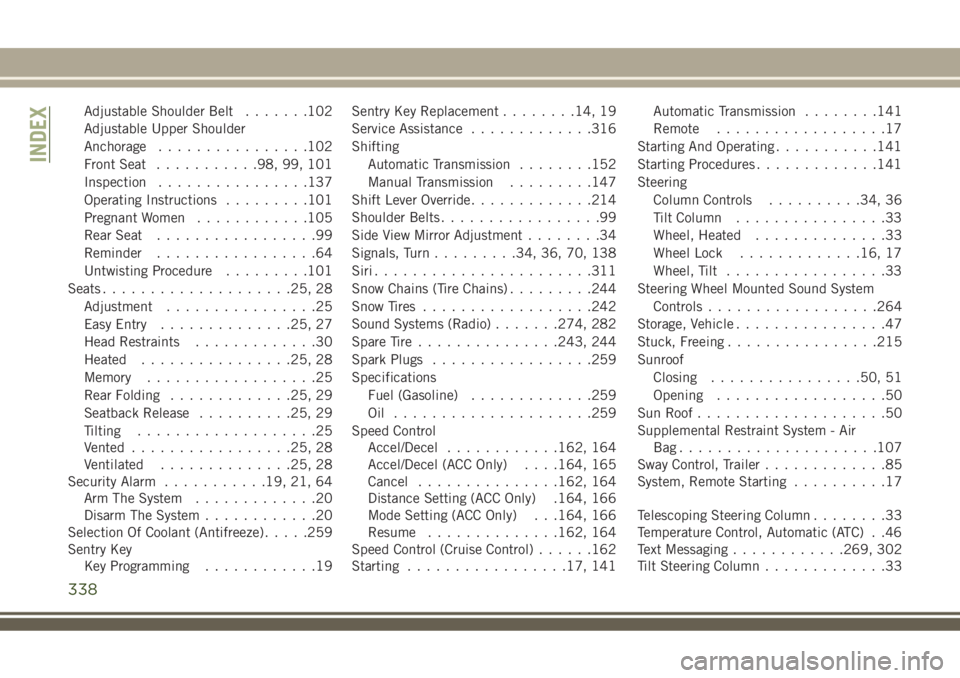
Adjustable Shoulder Belt.......102
Adjustable Upper Shoulder
Anchorage................102
Front Seat...........98, 99, 101
Inspection................137
Operating Instructions.........101
Pregnant Women............105
Rear Seat.................99
Reminder.................64
Untwisting Procedure.........101
Seats....................25, 28
Adjustment................25
Easy Entry..............25, 27
Head Restraints.............30
Heated................25, 28
Memory..................25
Rear Folding.............25, 29
Seatback Release..........25, 29
Tilting...................25
Vented.................25, 28
Ventilated..............25, 28
Security Alarm...........19, 21, 64
Arm The System.............20
Disarm The System............20
Selection Of Coolant (Antifreeze).....259
Sentry Key
Key Programming............19Sentry Key Replacement........14, 19
Service Assistance.............316
Shifting
Automatic Transmission........152
Manual Transmission.........147
Shift Lever Override.............214
Shoulder Belts.................99
Side View Mirror Adjustment........34
Signals, Turn.........34, 36, 70, 138
Siri.......................311
Snow Chains (Tire Chains).........244
Snow Tires..................242
Sound Systems (Radio)......
.274, 282
Spare
Tire ...............243, 244
Spark Plugs.................259
Specifications
Fuel (Gasoline).............259
Oil .....................259
Speed Control
Accel/Decel............162, 164
Accel/Decel (ACC Only). . . .164, 165
Cancel...............162, 164
Distance Setting (ACC Only) .164, 166
Mode Setting (ACC Only) . . .164, 166
Resume..............162, 164
Speed Control (Cruise Control)......162
Starting.................17, 141Automatic Transmission........141
Remote..................17
Starting And Operating...........141
Starting Procedures.............141
Steering
Column Controls..........34, 36
Tilt Column................33
Wheel, Heated..............33
Wheel Lock.............16, 17
Wheel, Tilt.................33
Steering Wheel Mounted Sound System
Controls..................264
Storage, Vehicle................47
Stuck, Freeing................215
Sunroof
Closing................50, 51
Opening..................50
Sun Roof....................50
Supplemental Restraint System - Air
Bag.....................107
Sway Control, Trailer.............85
System, Remote Starting..........17
Telescoping Steering Column........33
Temperature Control, Automatic (ATC) . .46
Text Messaging............269, 302
Tilt Steering Column.............33
INDEX
338