set JEEP COMPASS 2023 Owners Manual
[x] Cancel search | Manufacturer: JEEP, Model Year: 2023, Model line: COMPASS, Model: JEEP COMPASS 2023Pages: 344, PDF Size: 18.8 MB
Page 4 of 344
2
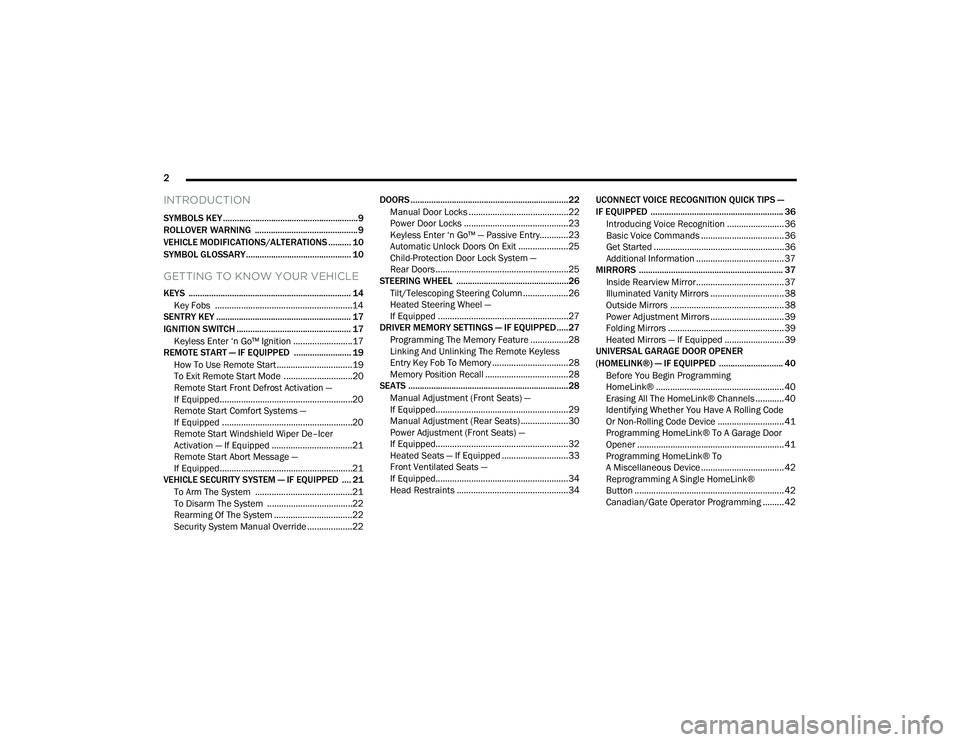
INTRODUCTION
SYMBOLS KEY ...........................................................9
ROLLOVER WARNING ............................................. 9
VEHICLE MODIFICATIONS/ALTERATIONS .......... 10
SYMBOL GLOSSARY.............................................. 10
GETTING TO KNOW YOUR VEHICLE
KEYS ....................................................................... 14 Key Fobs ..........................................................14
SENTRY KEY ........................................................... 17
IGNITION SWITCH .................................................. 17
Keyless Enter ‘n Go™ Ignition .........................17
REMOTE START — IF EQUIPPED ......................... 19
How To Use Remote Start ................................19
To Exit Remote Start Mode .............................20
Remote Start Front Defrost Activation —
If Equipped........................................................20
Remote Start Comfort Systems —
If Equipped .......................................................20
Remote Start Windshield Wiper De–Icer
Activation — If Equipped ..................................21
Remote Start Abort Message —
If Equipped........................................................21
VEHICLE SECURITY SYSTEM — IF EQUIPPED .... 21
To Arm The System .........................................21
To Disarm The System ....................................22
Rearming Of The System .................................22
Security System Manual Override ...................22 DOORS .....................................................................22
Manual Door Locks ..........................................22
Power Door Locks ............................................23
Keyless Enter ‘n Go™ — Passive Entry............23
Automatic Unlock Doors On Exit .....................25
Child-Protection Door Lock System —
Rear Doors ........................................................25
STEERING WHEEL .................................................26
Tilt/Telescoping Steering Column ...................26
Heated Steering Wheel —
If Equipped .......................................................27
DRIVER MEMORY SETTINGS — IF EQUIPPED .....27
Programming The Memory Feature ................28
Linking And Unlinking The Remote Keyless
Entry Key Fob To Memory ................................28
Memory Position Recall ...................................28
SEATS ......................................................................28
Manual Adjustment (Front Seats) —
If Equipped........................................................29
Manual Adjustment (Rear Seats) ....................30
Power Adjustment (Front Seats) —
If Equipped........................................................32
Heated Seats — If Equipped ............................33
Front Ventilated Seats —
If Equipped........................................................34
Head Restraints ...............................................34 UCONNECT VOICE RECOGNITION QUICK TIPS —
IF EQUIPPED .......................................................... 36
Introducing Voice Recognition ........................ 36
Basic Voice Commands ................................... 36
Get Started .......................................................36
Additional Information ..................................... 37
MIRRORS ............................................................... 37
Inside Rearview Mirror..................................... 37
Illuminated Vanity Mirrors ............................... 38
Outside Mirrors ................................................ 38
Power Adjustment Mirrors ............................... 39
Folding Mirrors .................................................39
Heated Mirrors — If Equipped ......................... 39
UNIVERSAL GARAGE DOOR OPENER
(HOMELINK®) — IF EQUIPPED ............................ 40
Before You Begin Programming
HomeLink® ...................................................... 40
Erasing All The HomeLink® Channels ............ 40
Identifying Whether You Have A Rolling Code
Or Non-Rolling Code Device ............................ 41
Programming HomeLink® To A Garage Door
Opener ..............................................................41
Programming HomeLink® To
A Miscellaneous Device ................................... 42
Reprogramming A Single HomeLink®
Button ............................................................... 42
Canadian/Gate Operator Programming ......... 42
22_MP_OM_EN_USC_t.book Page 2
Page 5 of 344
3
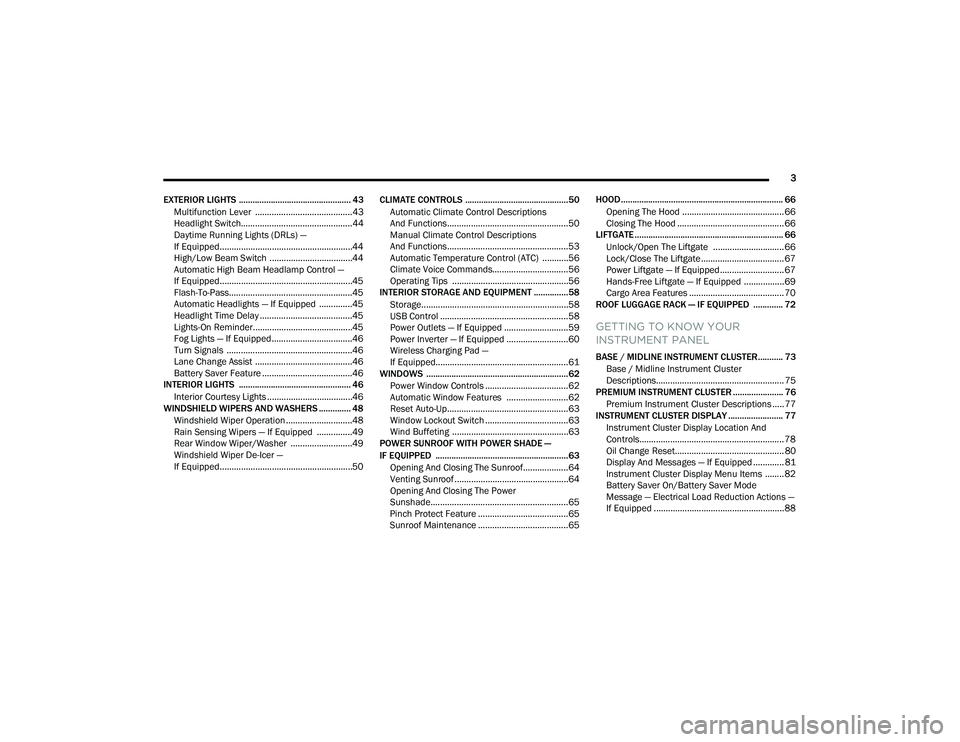
EXTERIOR LIGHTS ................................................. 43 Multifunction Lever .........................................43
Headlight Switch...............................................44
Daytime Running Lights (DRLs) —
If Equipped........................................................44
High/Low Beam Switch ...................................44
Automatic High Beam Headlamp Control —
If Equipped........................................................45
Flash-To-Pass....................................................45
Automatic Headlights — If Equipped ..............45
Headlight Time Delay .......................................45
Lights-On Reminder..........................................45
Fog Lights — If Equipped ..................................46
Turn Signals .....................................................46
Lane Change Assist .........................................46
Battery Saver Feature ......................................46
INTERIOR LIGHTS ................................................. 46
Interior Courtesy Lights ....................................46
WINDSHIELD WIPERS AND WASHERS .............. 48
Windshield Wiper Operation ............................48
Rain Sensing Wipers — If Equipped ...............49
Rear Window Wiper/Washer ..........................49
Windshield Wiper De-Icer —
If Equipped........................................................50 CLIMATE CONTROLS .............................................50
Automatic Climate Control Descriptions
And Functions ...................................................50
Manual Climate Control Descriptions
And Functions ...................................................53
Automatic Temperature Control (ATC) ...........56
Climate Voice Commands................................56
Operating Tips .................................................56
INTERIOR STORAGE AND EQUIPMENT ............... 58
Storage..............................................................58
USB Control ......................................................58
Power Outlets — If Equipped ...........................59
Power Inverter — If Equipped ..........................60
Wireless Charging Pad —
If Equipped........................................................61
WINDOWS ..............................................................62
Power Window Controls ...................................62
Automatic Window Features ..........................62
Reset Auto-Up...................................................63
Window Lockout Switch ...................................63
Wind Buffeting .................................................63
POWER SUNROOF WITH POWER SHADE —
IF EQUIPPED .......................................................... 63
Opening And Closing The Sunroof...................64
Venting Sunroof................................................64
Opening And Closing The Power
Sunshade..........................................................65
Pinch Protect Feature ......................................65
Sunroof Maintenance ......................................65 HOOD....................................................................... 66
Opening The Hood ........................................... 66
Closing The Hood ............................................. 66
LIFTGATE ................................................................. 66
Unlock/Open The Liftgate .............................. 66
Lock/Close The Liftgate................................... 67
Power Liftgate — If Equipped........................... 67
Hands-Free Liftgate — If Equipped ................. 69
Cargo Area Features ........................................ 70
ROOF LUGGAGE RACK — IF EQUIPPED ............. 72
GETTING TO KNOW YOUR
INSTRUMENT PANEL
BASE / MIDLINE INSTRUMENT CLUSTER........... 73
Base / Midline Instrument Cluster
Descriptions...................................................... 75
PREMIUM INSTRUMENT CLUSTER ...................... 76
Premium Instrument Cluster Descriptions ..... 77
INSTRUMENT CLUSTER DISPLAY ........................ 77
Instrument Cluster Display Location And
Controls............................................................. 78
Oil Change Reset.............................................. 80
Display And Messages — If Equipped ............. 81
Instrument Cluster Display Menu Items ........ 82
Battery Saver On/Battery Saver Mode
Message — Electrical Load Reduction Actions —
If Equipped .......................................................88
22_MP_OM_EN_USC_t.book Page 3
Page 7 of 344
5
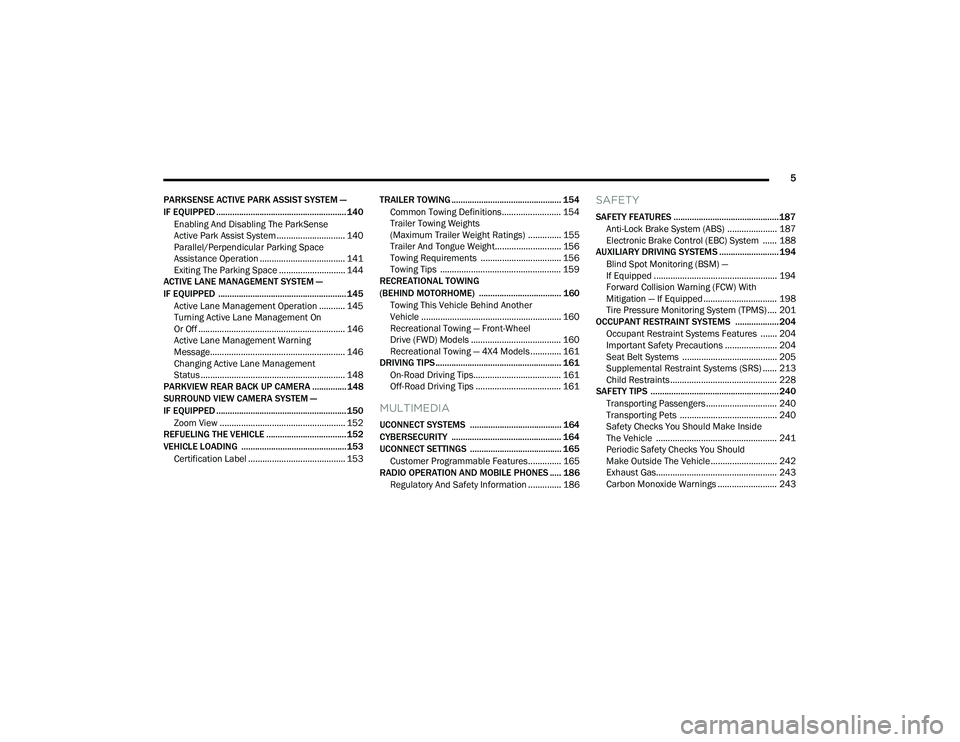
PARKSENSE ACTIVE PARK ASSIST SYSTEM —
IF EQUIPPED ......................................................... 140 Enabling And Disabling The ParkSense
Active Park Assist System ............................. 140
Parallel/Perpendicular Parking Space
Assistance Operation .................................... 141
Exiting The Parking Space ............................ 144
ACTIVE LANE MANAGEMENT SYSTEM —
IF EQUIPPED ........................................................ 145
Active Lane Management Operation ........... 145
Turning Active Lane Management On
Or Off .............................................................. 146
Active Lane Management Warning
Message......................................................... 146
Changing Active Lane Management
Status ............................................................. 148
PARKVIEW REAR BACK UP CAMERA ............... 148
SURROUND VIEW CAMERA SYSTEM —
IF EQUIPPED ......................................................... 150
Zoom View ..................................................... 152
REFUELING THE VEHICLE ................................... 152
VEHICLE LOADING .............................................. 153
Certification Label ......................................... 153 TRAILER TOWING ................................................ 154
Common Towing Definitions......................... 154
Trailer Towing Weights
(Maximum Trailer Weight Ratings) .............. 155Trailer And Tongue Weight............................ 156
Towing Requirements .................................. 156
Towing Tips ................................................... 159
RECREATIONAL TOWING
(BEHIND MOTORHOME) .................................... 160
Towing This Vehicle Behind Another
Vehicle ........................................................... 160
Recreational Towing — Front-Wheel
Drive (FWD) Models ...................................... 160
Recreational Towing — 4X4 Models ............. 161
DRIVING TIPS ....................................................... 161
On-Road Driving Tips..................................... 161
Off-Road Driving Tips .................................... 161
MULTIMEDIA
UCONNECT SYSTEMS ........................................ 164
CYBERSECURITY ................................................ 164
UCONNECT SETTINGS ........................................ 165Customer Programmable Features.............. 165
RADIO OPERATION AND MOBILE PHONES ..... 186
Regulatory And Safety Information .............. 186
SAFETY
SAFETY FEATURES .............................................. 187 Anti-Lock Brake System (ABS) ..................... 187Electronic Brake Control (EBC) System ...... 188
AUXILIARY DRIVING SYSTEMS .......................... 194
Blind Spot Monitoring (BSM) —
If Equipped .................................................... 194
Forward Collision Warning (FCW) With
Mitigation — If Equipped ............................... 198
Tire Pressure Monitoring System (TPMS) .... 201
OCCUPANT RESTRAINT SYSTEMS ................... 204
Occupant Restraint Systems Features ....... 204
Important Safety Precautions ...................... 204
Seat Belt Systems ........................................ 205
Supplemental Restraint Systems (SRS) ...... 213Child Restraints ............................................. 228
SAFETY TIPS ........................................................ 240
Transporting Passengers.............................. 240
Transporting Pets ......................................... 240
Safety Checks You Should Make Inside
The Vehicle ................................................... 241
Periodic Safety Checks You Should
Make Outside The Vehicle ............................ 242
Exhaust Gas................................................... 243
Carbon Monoxide Warnings ......................... 243
22_MP_OM_EN_USC_t.book Page 5
Page 15 of 344
13
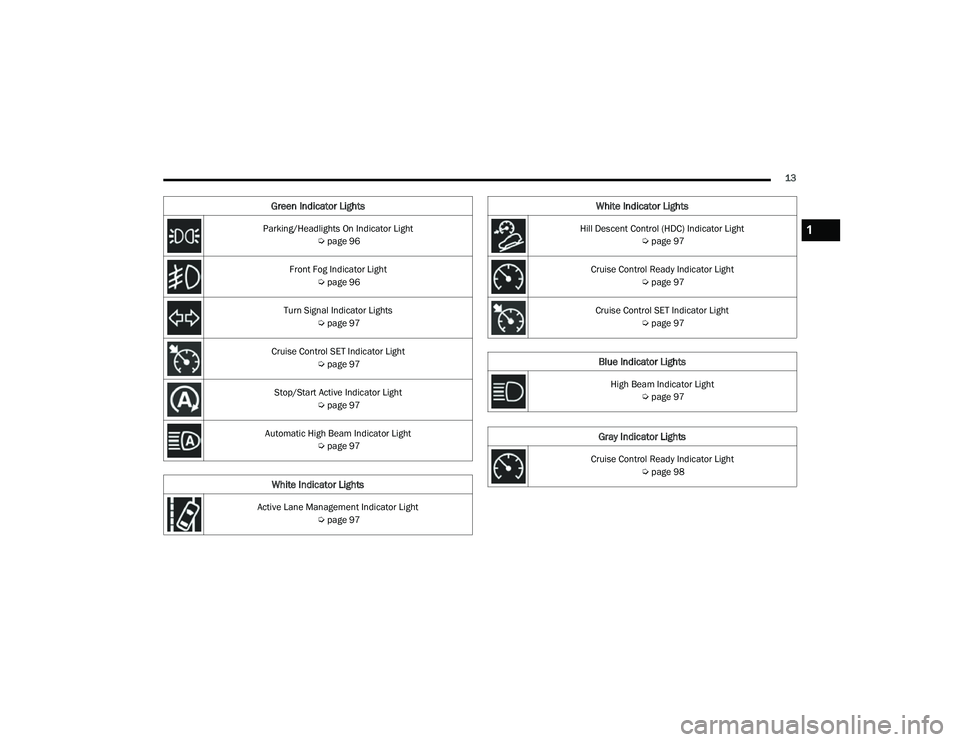
Parking/Headlights On Indicator Light Úpage 96
Front Fog Indicator Light Úpage 96
Turn Signal Indicator Lights Úpage 97
Cruise Control SET Indicator Light Úpage 97
Stop/Start Active Indicator Light Úpage 97
Automatic High Beam Indicator Light Úpage 97
White Indicator Lights
Active Lane Management Indicator Light
Úpage 97
Green Indicator Lights
Hill Descent Control (HDC) Indicator Light
Úpage 97
Cruise Control Ready Indicator Light Úpage 97
Cruise Control SET Indicator Light Úpage 97
Blue Indicator Lights
High Beam Indicator Light
Úpage 97
Gray Indicator Lights
Cruise Control Ready Indicator Light
Úpage 98
White Indicator Lights
1
22_MP_OM_EN_USC_t.book Page 13
Page 17 of 344
GETTING TO KNOW YOUR VEHICLE15
NOTE:In case the ignition switch does not change with
the push of a button, the key fob may have a low or
fully depleted battery. A low key fob battery can be
verified by referring to the instrument cluster,
which will display directions to follow Úpage 328.
To Unlock/Lock The Doors And Liftgate
Push and release the unlock button on the key fob
once to unlock the driver’s door. If selected within
Uconnect Settings, pushing the unlock button
twice within five seconds will unlock all the doors
and the liftgate. To lock all the doors and the
liftgate, push the lock button once Ú page 165.
When the doors are unlocked, the turn signals will
flash and the illuminated entry system will be
activated. When the doors are locked, the turn
signals will flash and the horn will chirp.
Key Left Vehicle Feature
If a valid key fob is no longer detected inside the
vehicle while the vehicle’s ignition system is in the
ON/RUN or START position, the message “Key Left
Vehicle” will be shown in the instrument cluster
display along with an interior chime. An exterior
audible and visual alert will also be activated to
warn the driver. The vehicle’s horn will rapidly chirp three times
along with a single flash of the vehicle’s exterior
lights.
NOTE:
The doors have to be open and then closed in
order for the vehicle to check for the presence of
a key fob; the Key Left Vehicle feature will not
activate until all of the doors are closed.
These alerts will not be activated in situations
where the vehicle’s engine is left running with
the key fob inside.
Replacing The Battery In The Key Fob
The replacement battery is one CR2032 battery.
NOTE:
Customers are recommended to use a battery
obtained from Mopar®. Aftermarket coin
battery dimensions may not meet the original
OEM coin battery dimensions.
Perchlorate Material — special handling may
apply. See www.dtsc.ca.gov/hazard
-
ouswaste/perchlorate for further information.
Do not touch the battery terminals that are on
the back housing or the printed circuit board. Key Fob:
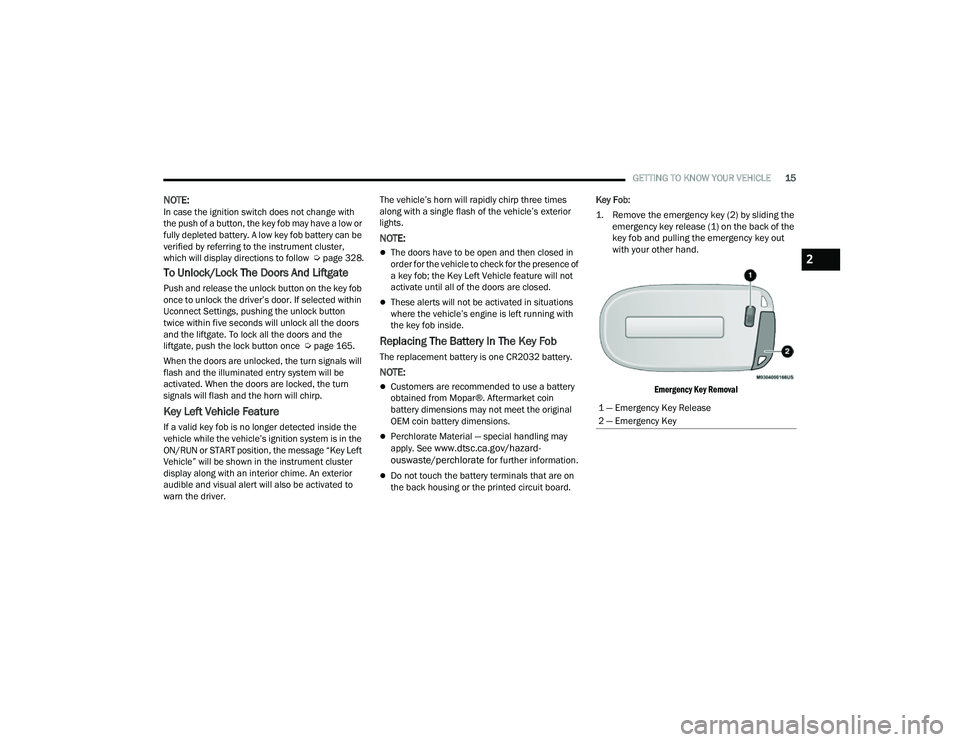
1. Remove the emergency key (2) by sliding the
emergency key release (1) on the back of the
key fob and pulling the emergency key out
with your other hand.
Emergency Key Removal
1 — Emergency Key Release
2 — Emergency Key
2
22_MP_OM_EN_USC_t.book Page 15
Page 22 of 344
20GETTING TO KNOW YOUR VEHICLE
TO EXIT REMOTE START MODE
To drive the vehicle after starting the Remote Start
system, push and release the START/STOP ignition
button prior to the end of the 15 minute cycle.
The Remote Start system will turn the engine off if
the Remote Start button on the key fob is pushed
again, or if the engine is allowed to run for the
entire 15 minute cycle. Once the ignition is placed
in the ON/RUN position, the climate controls will
resume previously set operations (temperature,
blower control, etc.).
NOTE:
For vehicles not equipped with the Keyless
Enter ‘n Go™ — Passive Entry feature, the igni -
tion switch must be in the ON/RUN position in
order to drive the vehicle.
For vehicles equipped with the Keyless
Enter ‘n Go™ — Passive Entry feature, the
message “Remote Start Active — Push Start
Button” will show in the instrument cluster
display until you push the START/STOP ignition
button.
To avoid unintentional shutdowns, the system
will disable for two seconds after receiving a
valid Remote Start request.
REMOTE START FRONT DEFROST
A
CTIVATION — IF EQUIPPED
When Remote Start is active, and the outside
ambient temperature is 40°F (4.5°C) or below, the
system will automatically activate front defrost for
15 minutes or less. The timing is dependent on the
ambient temperature. Once the timer expires, the
system will automatically adjust the settings
depending on ambient conditions. See “Remote
Start Comfort Systems — If Equipped” in the next
section for detailed operation.
REMOTE START COMFORT SYSTEMS —
I
F EQUIPPED
When Remote Start is activated, the front and rear
defrost will automatically turn on in cold weather.
The heated steering wheel and driver heated seat
feature will turn on if programmed in the comfort
menu screen within Uconnect Settings
Ú page 165. In warm weather, the driver vented
seat feature will automatically turn on when
Remote Start is activated, if programmed in the
comfort menu screen. The vehicle will adjust the
climate control settings depending on the outside
ambient temperature. Automatic Temperature Control (ATC) —
If Equipped
The climate controls will automatically adjust to
the optimal temperature and mode settings
depending on the outside ambient temperature.
This will occur until the ignition is placed in the
ON/RUN position where the climate controls will
resume their previous settings.
Manual Temperature Control (MTC) — If Equipped
In ambient temperatures of 40°F (4.5°C) or
below, the climate settings will default to
maximum heat, with fresh air entering the
cabin. If the front defrost timer expires, the
vehicle will enter Mix mode.
In ambient temperatures from 40°F (4.5°C) to
78°F (26°C), the climate settings will be based
on the last settings selected by the driver.
In ambient temperatures of 78°F (26°C) or
above, the climate settings will default to
MAX A/C, Bi-Level mode, with Recirculation on.
For more information on ATC, MTC, and climate
control settings, see Ú page 50.
NOTE:
These features will stay on through the duration of
Remote Start, or until the ignition is placed in the
ON/RUN position. The climate control settings will
change, and exit the automatic defaults, if manually
Keep key fobs away from children. Operation
of the Remote Start system, windows, door
locks or other controls could cause serious
injury or death.
WARNING!
22_MP_OM_EN_USC_t.book Page 20
Page 23 of 344
GETTING TO KNOW YOUR VEHICLE21
adjusted by the driver while the vehicle is in Remote
Start mode. This includes turning the climate
controls off using the OFF button.
REMOTE START WINDSHIELD WIPER
D
E–ICER ACTIVATION — IF EQUIPPED
When Remote Start is active and the outside
ambient temperature is less than 33°F (0.6°C),
the Windshield Wiper De-Icer will activate. Exiting
Remote Start will resume its previous operation. If
the Windshield Wiper De-Icer was active, the timer
and operation will continue.
REMOTE START ABORT MESSAGE —
I
F EQUIPPED
The following messages will display in the
instrument cluster display if the vehicle fails to
remote start or exits Remote Start prematurely:
Remote Start Aborted — Door Open
Remote Start Aborted — Hood Open
Remote Start Aborted — Fuel Low
Remote Start Aborted — Liftgate Open
Remote Start Disabled — Start Vehicle To Reset
Remote Start Aborted — Too Cold
Remote Start Aborted — Time Expired
Remote Start Disabled — Start Vehicle To Reset
The message will stay active until the ignition is
placed in the ON/RUN position.
VEHICLE SECURITY SYSTEM — IF EQUIPPED
The Vehicle Security system monitors the vehicle
doors, hood, liftgate, and the Keyless Enter ‘n Go™
Ignition for unauthorized operation. While the
Vehicle Security system is armed, interior switches
for door locks and liftgate release are disabled. If
something triggers the system, the Vehicle Security
system will provide the following audible and
visible signals:
The horn will pulse
The turn signals will flash
The Vehicle Security Light in the instrument
cluster will flash
NOTE:
The Vehicle Security system is factory adjusted
to standards from different countries.
The Vehicle Security system is a complementary
security system developed to hinder the occur -
rence of vehicle theft and prevent vandalism. It
does not prevent the theft of your vehicle; the
system is a deterrent.
The Vehicle Security system does not monitor
glass breakage or the movement of objects or
people inside the vehicle. The alarm does not
intervene in the case of vehicle tilt variations
when it is parked.
TO ARM THE SYSTEM
Follow these steps to arm the Vehicle Security
system:
1. Make sure the vehicle’s ignition is placed in the OFF position.
For vehicles equipped with Keyless Entry,
make sure the vehicle’s keyless ignition
system is OFF.
2. Perform one of the following methods to lock the vehicle:
Push the lock button on the interior power
door lock switch with the driver and/or
passenger door open.
Push the lock button on the exterior Passive
Entry door handle with a valid key fob avail -
able in the same exterior zone Ú page 23.
Push the lock button on the key fob.
3. If any doors are open, close them.
When the Vehicle Security system is armed, the
Vehicle Security Light (located in the lower left
portion of the instrument cluster display) will begin
to flash every three seconds until it is disarmed.
2
22_MP_OM_EN_USC_t.book Page 21
Page 25 of 344
GETTING TO KNOW YOUR VEHICLE23
(Continued)
NOTE:
Manually locking the vehicle will not arm the
Vehicle Security system.
The manual door locks will not lock or unlock the
liftgate.
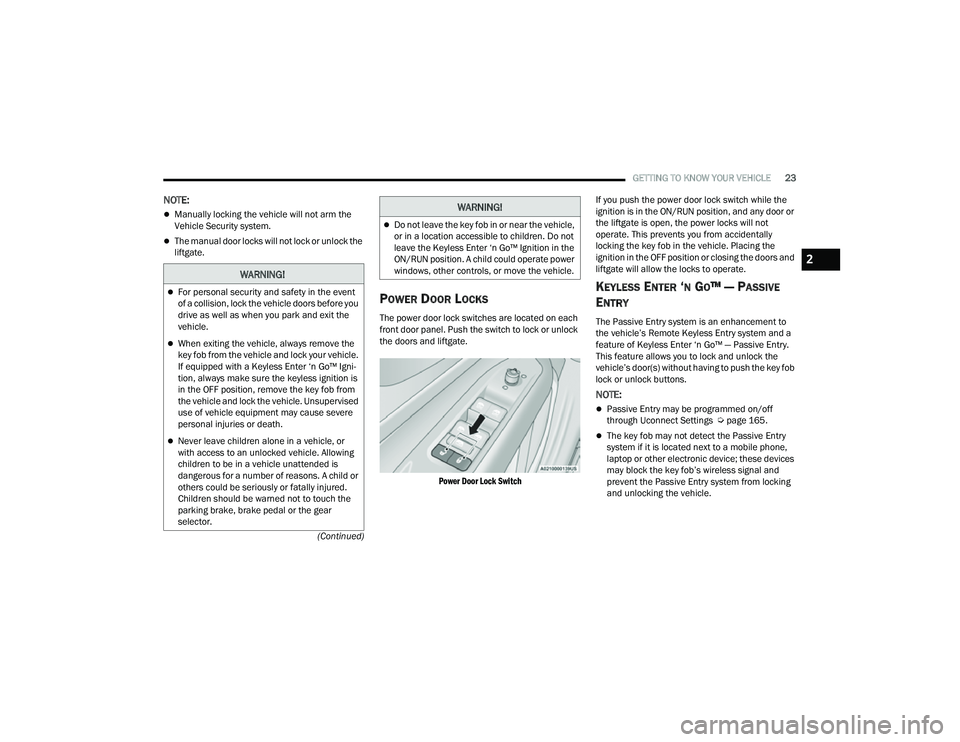
POWER DOOR LOCKS
The power door lock switches are located on each
front door panel. Push the switch to lock or unlock
the doors and liftgate.
Power Door Lock Switch
If you push the power door lock switch while the
ignition is in the ON/RUN position, and any door or
the liftgate is open, the power locks will not
operate. This prevents you from accidentally
locking the key fob in the vehicle. Placing the
ignition in the OFF position or closing the doors and
liftgate will allow the locks to operate.
KEYLESS ENTER ‘N GO™ — PASSIVE
E
NTRY
The Passive Entry system is an enhancement to
the vehicle’s Remote Keyless Entry system and a
feature of Keyless Enter ‘n Go™ — Passive Entry.
This feature allows you to lock and unlock the
vehicle’s door(s) without having to push the key fob
lock or unlock buttons.
NOTE:
Passive Entry may be programmed on/off
through Uconnect Settings Ú page 165.
The key fob may not detect the Passive Entry
system if it is located next to a mobile phone,
laptop or other electronic device; these devices
may block the key fob’s wireless signal and
prevent the Passive Entry system from locking
and unlocking the vehicle.
WARNING!
For personal security and safety in the event
of a collision, lock the vehicle doors before you
drive as well as when you park and exit the
vehicle.
When exiting the vehicle, always remove the
key fob from the vehicle and lock your vehicle.
If equipped with a Keyless Enter ‘n Go™ Igni -
tion, always make sure the keyless ignition is
in the OFF position, remove the key fob from
the vehicle and lock the vehicle. Unsupervised
use of vehicle equipment may cause severe
personal injuries or death.
Never leave children alone in a vehicle, or
with access to an unlocked vehicle. Allowing
children to be in a vehicle unattended is
dangerous for a number of reasons. A child or
others could be seriously or fatally injured.
Children should be warned not to touch the
parking brake, brake pedal or the gear
selector.
Do not leave the key fob in or near the vehicle,
or in a location accessible to children. Do not
leave the Keyless Enter ‘n Go™ Ignition in the
ON/RUN position. A child could operate power
windows, other controls, or move the vehicle.
WARNING!
2
22_MP_OM_EN_USC_t.book Page 23
Page 26 of 344
24GETTING TO KNOW YOUR VEHICLE
If wearing gloves, or if it has been raining/
snowing on the Passive Entry door handle, the
unlock sensitivity can be affected, resulting in a
slower response time.
If the vehicle is unlocked by Passive Entry and
no door is opened within 60 seconds, the
vehicle will relock and, if equipped, will arm the
Vehicle Security system.
To Unlock From The Driver's Side Or Passenger’s
Side
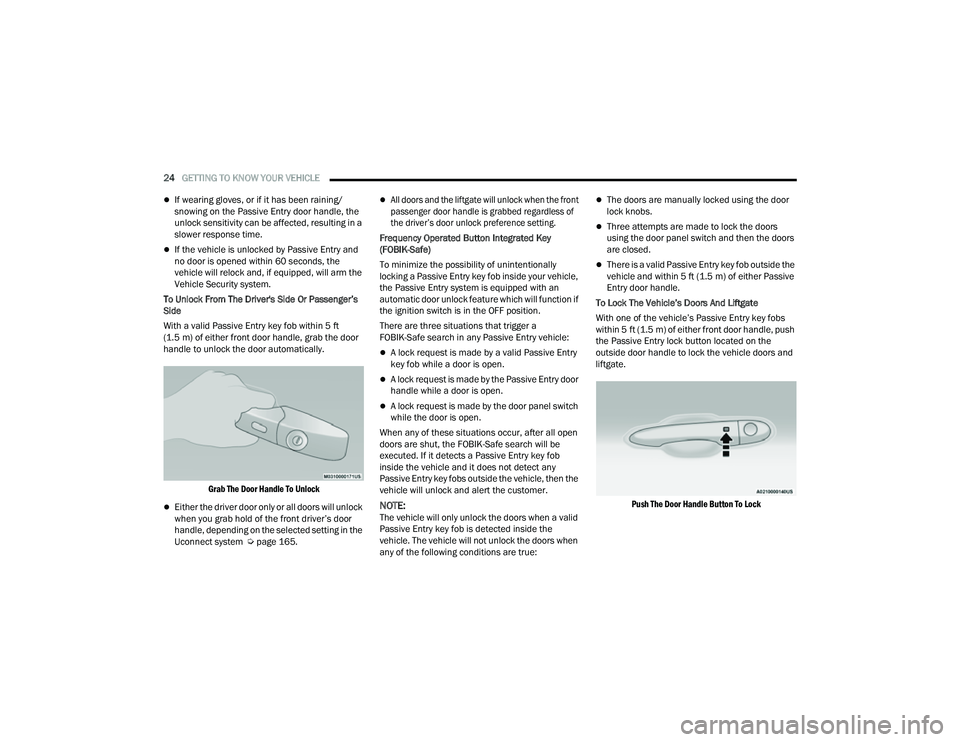
With a valid Passive Entry key fob within 5 ft
(1.5 m) of either front door handle, grab the door
handle to unlock the door automatically.
Grab The Door Handle To Unlock
Either the driver door only or all doors will unlock
when you grab hold of the front driver’s door
handle, depending on the selected setting in the
Uconnect system Ú page 165.
All doors and the liftgate will unlock when the front
passenger door handle is grabbed regardless of
the driver’s door unlock preference setting.
Frequency Operated Button Integrated Key
(FOBIK-Safe)
To minimize the possibility of unintentionally
locking a Passive Entry key fob inside your vehicle,
the Passive Entry system is equipped with an
automatic door unlock feature which will function if
the ignition switch is in the OFF position.
There are three situations that trigger a
FOBIK-Safe search in any Passive Entry vehicle:
A lock request is made by a valid Passive Entry
key fob while a door is open.
A lock request is made by the Passive Entry door
handle while a door is open.
A lock request is made by the door panel switch
while the door is open.
When any of these situations occur, after all open
doors are shut, the FOBIK-Safe search will be
executed. If it detects a Passive Entry key fob
inside the vehicle and it does not detect any
Passive Entry key fobs outside the vehicle, then the
vehicle will unlock and alert the customer.
NOTE:The vehicle will only unlock the doors when a valid
Passive Entry key fob is detected inside the
vehicle. The vehicle will not unlock the doors when
any of the following conditions are true:
The doors are manually locked using the door
lock knobs.
Three attempts are made to lock the doors
using the door panel switch and then the doors
are closed.
There is a valid Passive Entry key fob outside the
vehicle and within 5 ft (1.5 m) of either Passive
Entry door handle.
To Lock The Vehicle’s Doors And Liftgate
With one of the vehicle’s Passive Entry key fobs
within 5 ft (1.5 m) of either front door handle, push
the Passive Entry lock button located on the
outside door handle to lock the vehicle doors and
liftgate.
Push The Door Handle Button To Lock
22_MP_OM_EN_USC_t.book Page 24
Page 27 of 344
GETTING TO KNOW YOUR VEHICLE25
NOTE:
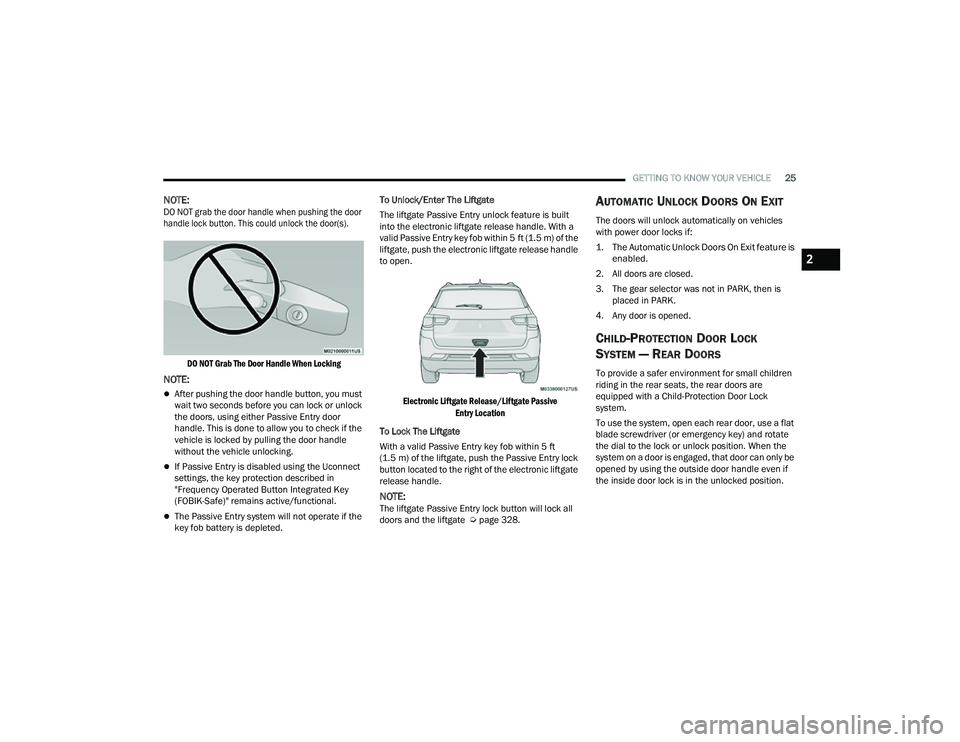
DO NOT grab the door handle when pushing the door
handle lock button. This could unlock the door(s).
DO NOT Grab The Door Handle When Locking
NOTE:
After pushing the door handle button, you must
wait two seconds before you can lock or unlock
the doors, using either Passive Entry door
handle. This is done to allow you to check if the
vehicle is locked by pulling the door handle
without the vehicle unlocking.
If Passive Entry is disabled using the Uconnect
settings, the key protection described in
"Frequency Operated Button Integrated Key
(FOBIK-Safe)" remains active/functional.
The Passive Entry system will not operate if the
key fob battery is depleted. To Unlock/Enter The Liftgate
The liftgate Passive Entry unlock feature is built
into the electronic liftgate release handle. With a
valid Passive Entry key fob within 5 ft (1.5 m) of the
liftgate, push the electronic liftgate release handle
to open.
Electronic Liftgate Release/Liftgate Passive Entry Location
To Lock The Liftgate
With a valid Passive Entry key fob within 5 ft
(1.5 m) of the liftgate, push the Passive Entry lock
button located to the right of the electronic liftgate
release handle.
NOTE:The liftgate Passive Entry lock button will lock all
doors and the liftgate Ú page 328.
AUTOMATIC UNLOCK DOORS ON EXIT
The doors will unlock automatically on vehicles
with power door locks if:
1. The Automatic Unlock Doors On Exit feature is
enabled.
2. All doors are closed.
3. The gear selector was not in PARK, then is placed in PARK.
4. Any door is opened.
CHILD-PROTECTION DOOR LOCK
S
YSTEM — REAR DOORS
To provide a safer environment for small children
riding in the rear seats, the rear doors are
equipped with a Child-Protection Door Lock
system.
To use the system, open each rear door, use a flat
blade screwdriver (or emergency key) and rotate
the dial to the lock or unlock position. When the
system on a door is engaged, that door can only be
opened by using the outside door handle even if
the inside door lock is in the unlocked position.
2
22_MP_OM_EN_USC_t.book Page 25