turn signal JEEP GRAND CHEROKEE 2008 WK / 3.G SRT User Guide
[x] Cancel search | Manufacturer: JEEP, Model Year: 2008, Model line: GRAND CHEROKEE, Model: JEEP GRAND CHEROKEE 2008 WK / 3.GPages: 405, PDF Size: 2.93 MB
Page 175 of 405
INSTRUMENT CLUSTER DESCRIPTION
1. Speedometer
Indicates vehicle speed.
2. Brake Warning Light
The BRAKE warning light will come on when
the ignition is first turned on, and stay on
briefly as a bulb check. If the bulb does not
come on during starting, have the bulb re-
paired promptly. If the light stays on longer, it may be an
indication that the parking brake has not been released.
If the light remains on when the parking brake is off, it
indicates a possible brake hydraulic system malfunction
or low fluid level. In this case, the BRAKE warning light
will remain on until the cause is corrected. If a brake
malfunction is indicated, immediate repair is necessary
and continued operation of the vehicle in this condition is
dangerous.3. Turn Signal Indicator Light
The arrow will flash with the exterior turn signal
when the turn signal lever is operated.
If the vehicle electronics sense that the vehicle has
traveled about one mile with the turn signals on, a chime
will sound to alert you to turn the signals off. If either
indicator flashes at a rapid rate, check for a defective
outside light bulb.
4. High Beam Indicator Light
Indicates that headlights are on high beam.
5. Malfunction Indicator Light
This light is part of an onboard diagnostic system
called OBD II that monitors engine and auto-
matic transmission control systems. The light will
illuminate when the key is in the ON position
174 UNDERSTANDING YOUR INSTRUMENT PANEL
Page 184 of 405
The system allows the driver to select information by
pressing the following buttons mounted on the steering
wheel:
MENU Button
Press and release the MENU button and the
mode displayed will change between Trip
Functions, Personal Settings, and System Sta-
tus.
FUNCTION SELECT Button
Press the FUNCTION SELECT button to select
the displayed function (YES (Y) or NO (N).
SCROLL Button
Press the SCROLL button to scroll through Trip
Functions, Personal Settings (Customer Pro-
grammable Features), and System Status Mes-
sages.COMPASS/TEMPERATURE Button
Press and release the COMPASS/
TEMPERATURE button to display one of eight
compass readings and the outside temperature.
Electronic Vehicle Information Center (EVIC)
Displays
When the appropriate conditions exist, the Electronic
Vehicle Information Center (EVIC) displays the following
messages:
²TURN SIGNAL ON
²PERFORM SERVICE
²KEY NOT PROGRAMMED Ð DAMAGED KEY
²KEY NOT PROGRAMMED Ð INVALID KEY
²KEY NOT PROGRAMMED Ð EXCEEDED KEY PRO-
GRAM LIMIT
UNDERSTANDING YOUR INSTRUMENT PANEL 183
4
Page 192 of 405
Auto Door Locks
When Y (YES) is selected, all of the doors will lock
automatically when the vehicle reaches a speed of 15
mph (24 km/h). To make your selection, press and
release the FUNCTION SELECT button until ªY (YES)º
or ªN (NO)º appears.
Auto Unlock On Exit
When Y (YES) is selected, all of the doors will unlock
when the vehicle is stopped and the transmission is in the
P (Park) or N (Neutral) position and the driver's door is
opened. To make your selection, press and release the
FUNCTION SELECT button until ªY (YES)º or ªN (NO)º
appears.
Remote Key Unlock
WhenDriver Door 1st Pressis selected, only the driver's
door will unlock on the first press of the remote keyless
entry unlock button. When Driver Door 1st Press is
selected, you must press of the remote keyless entryunlock button twice to unlock the passenger's doors.
WhenAll Doors 1st Pressis selected, all of the doors will
unlock on the first press of the remote keyless entry
unlock button. To make your selection, press and release
the FUNCTION SELECT button until ªDriver Door 1st
Pressº or ªAll Doors 1st Pressº appears.
Sound Horn with Lock
When Y (YES) is selected, a short horn sound will occur
when the remote keyless entry ªLockº button is pressed.
This feature may be selected with or without the flash
lights on lock/unlock feature. To make your selection,
press and release the FUNCTION SELECT button until
ªY (YES)º or ªN (NO)º appears.
Flash Lamps with Lock
When Y (YES) is selected, the front and rear turn signals
will flash when the doors are locked or unlocked with the
remote keyless entry transmitter. This feature may be
selected with or without the sound horn on lock feature
UNDERSTANDING YOUR INSTRUMENT PANEL 191
4
Page 197 of 405
Two Types of Signals
There are two basic types of radio signals... AM or
Amplitude Modulation, in which the transmitted sound
causes the amplitude, or height, of the radio waves to
vary... and FM or Frequency Modulation, in which the
frequency of the wave is varied to carry the sound.
Electrical Disturbances
Radio waves may pick up electrical disturbances during
transmission. They mainly affect the wave amplitude,
and thus remain a part of the AM reception. They
interfere very little with the frequency variations that
carry the FM signal.
AM Reception
AM sound is based on wave amplitude, so AM reception
can be disrupted by such things as lightning, power lines
and neon signs.
FM Reception
Because FM transmission is based on frequency varia-
tions, interference that consists of amplitude variations
can be filtered out, leaving the reception relatively clear,
which is the major feature of FM radio.
NOTE:The radio, steering wheel radio controls (if
equipped), and 6 disc CD/DVD changer (if equipped)
will remain active for up to 10 minutes after the ignition
switch has been turned off. Opening a vehicle front door
will cancel this feature.
SALES CODE REQ Ð AM/FM STEREO RADIO
AND 6±DISC CD/DVD CHANGER (MP3/WMA AUX
JACK)
NOTE:The radio sales code is located on the lower right
side of your radio faceplate.
196 UNDERSTANDING YOUR INSTRUMENT PANEL
Page 255 of 405
WARNING!
²Always fully apply the parking brake when leav-
ing your vehicle, or it may roll and cause damage
or injury. Also, be certain to leave the transmis-
sion in P (Park). Failure to do so may allow the
vehicle to roll and cause damage or injury.
²Leaving children in a vehicle unattended is dan-
gerous for a number of reasons. A child or others
could be injured. Children should be warned not
to touch the parking brake or the gear selector
lever. Don't leave the keys in the ignition. A child
could operate power windows, other controls, or
move the vehicle.
²Be sure the parking brake is fully disengaged
before driving, failure to do so can lead to brake
problems due to excessive heating of the rear
brakes.
When parking on a hill, turn the front wheels toward the
curb on a downhill grade and away from the curb on an
uphill grade.
The parking brake should always be applied whenever
the driver is not in the vehicle.
ANTI-LOCK BRAKE SYSTEM
The Anti-Lock Brake System (ABS) is designed to aid the
driver in maintaining vehicle control under adverse
braking conditions. The system operates with a separate
computer to modulate hydraulic pressure to prevent
wheel lock-up and help avoid skidding on slippery
surfaces.
All vehicle wheels and tires must be the same size and
type and tires must be properly inflated to produce
accurate signals for the computer.
254 STARTING AND OPERATING
Page 278 of 405
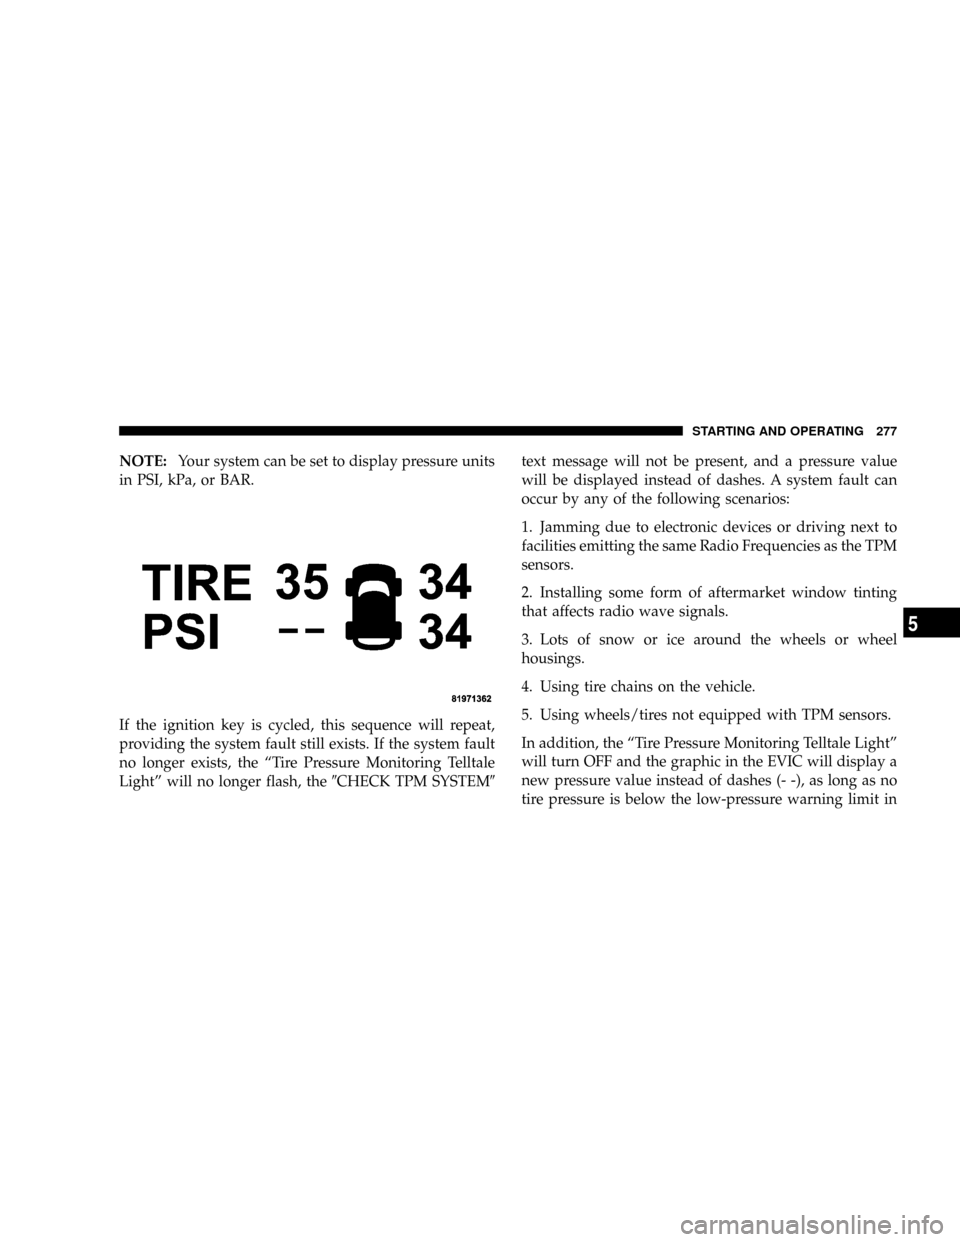
NOTE:Your system can be set to display pressure units
in PSI, kPa, or BAR.
If the ignition key is cycled, this sequence will repeat,
providing the system fault still exists. If the system fault
no longer exists, the ªTire Pressure Monitoring Telltale
Lightº will no longer flash, the9CHECK TPM SYSTEM9text message will not be present, and a pressure value
will be displayed instead of dashes. A system fault can
occur by any of the following scenarios:
1. Jamming due to electronic devices or driving next to
facilities emitting the same Radio Frequencies as the TPM
sensors.
2. Installing some form of aftermarket window tinting
that affects radio wave signals.
3. Lots of snow or ice around the wheels or wheel
housings.
4. Using tire chains on the vehicle.
5. Using wheels/tires not equipped with TPM sensors.
In addition, the ªTire Pressure Monitoring Telltale Lightº
will turn OFF and the graphic in the EVIC will display a
new pressure value instead of dashes (- -), as long as no
tire pressure is below the low-pressure warning limit in
STARTING AND OPERATING 277
5
Page 299 of 405

HAZARD WARNING FLASHERS
Your vehicle's hazard warning flasher is an emergency
warning system. When you activate it, all front and rear
directional signals will flash intermittently. Use it when
your vehicle is disabled on or near the road. It warns
other drivers to steer clear of you and your vehicle. This
is an emergency warning system, not to be used when the
vehicle is in motion.
To activate the warning flashers, press the button on the
upper switch bank. To turn the warning flashers off,
press the button again.
NOTE:With extended use, the flasher may run down
your battery.
Hazard Warning Switch
298 WHAT TO DO IN EMERGENCIES
Page 306 of 405
NFront Turn Signal.....................349
NFront Fog Light......................350
NRear Tail, Stop, Turn Signal, And Back-Up
Lights.............................350
NCenter High Mounted Stop Light (CHMSL) . . . 351mFluid Capacities........................352
mFluids, Lubricants, And Genuine Parts........353
NEngine.............................353
NChassis............................354
MAINTAINING YOUR VEHICLE 305
7
Page 350 of 405
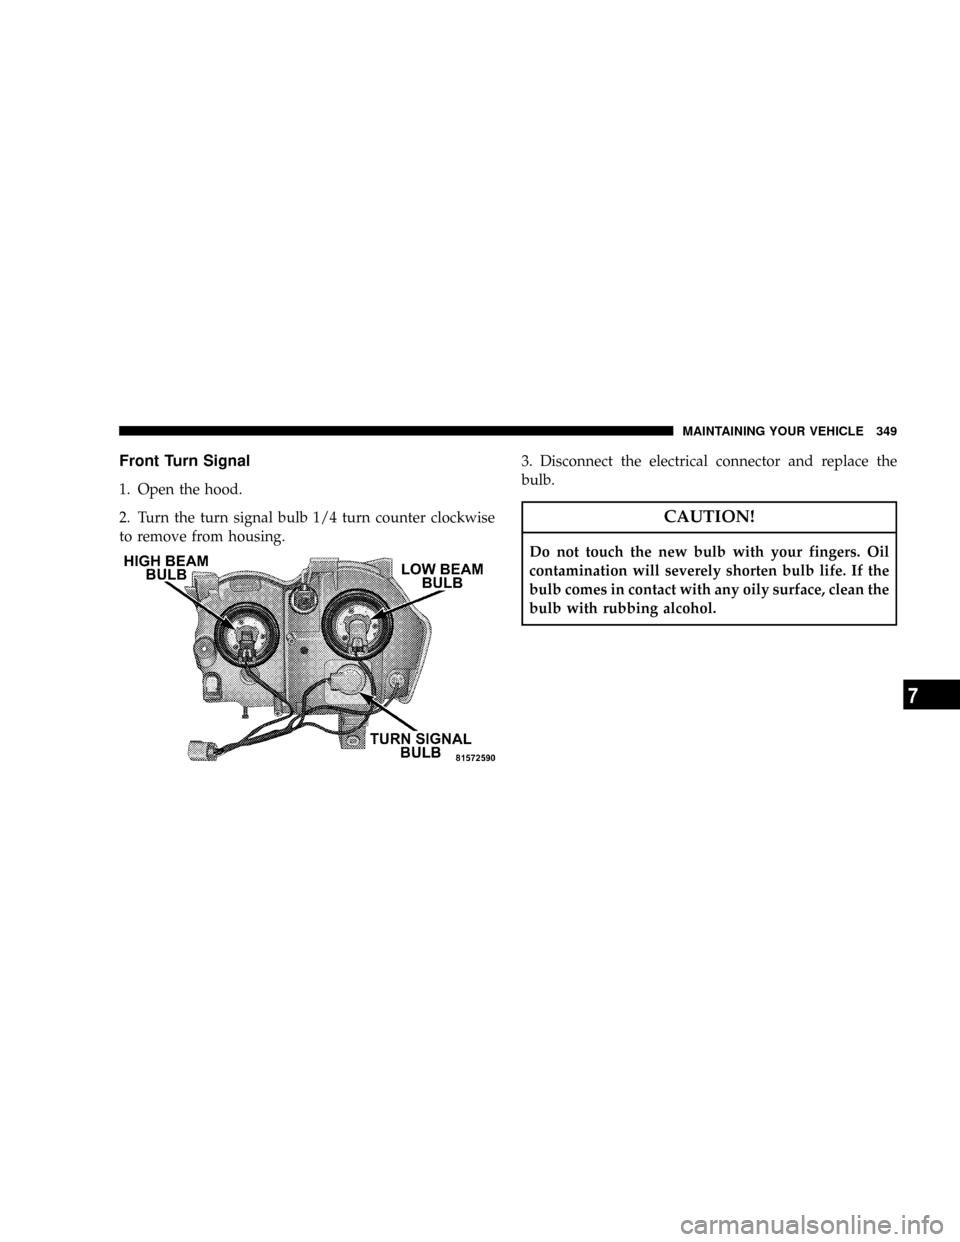
Front Turn Signal
1. Open the hood.
2. Turn the turn signal bulb 1/4 turn counter clockwise
to remove from housing.3. Disconnect the electrical connector and replace the
bulb.
CAUTION!
Do not touch the new bulb with your fingers. Oil
contamination will severely shorten bulb life. If the
bulb comes in contact with any oily surface, clean the
bulb with rubbing alcohol.
MAINTAINING YOUR VEHICLE 349
7
Page 351 of 405
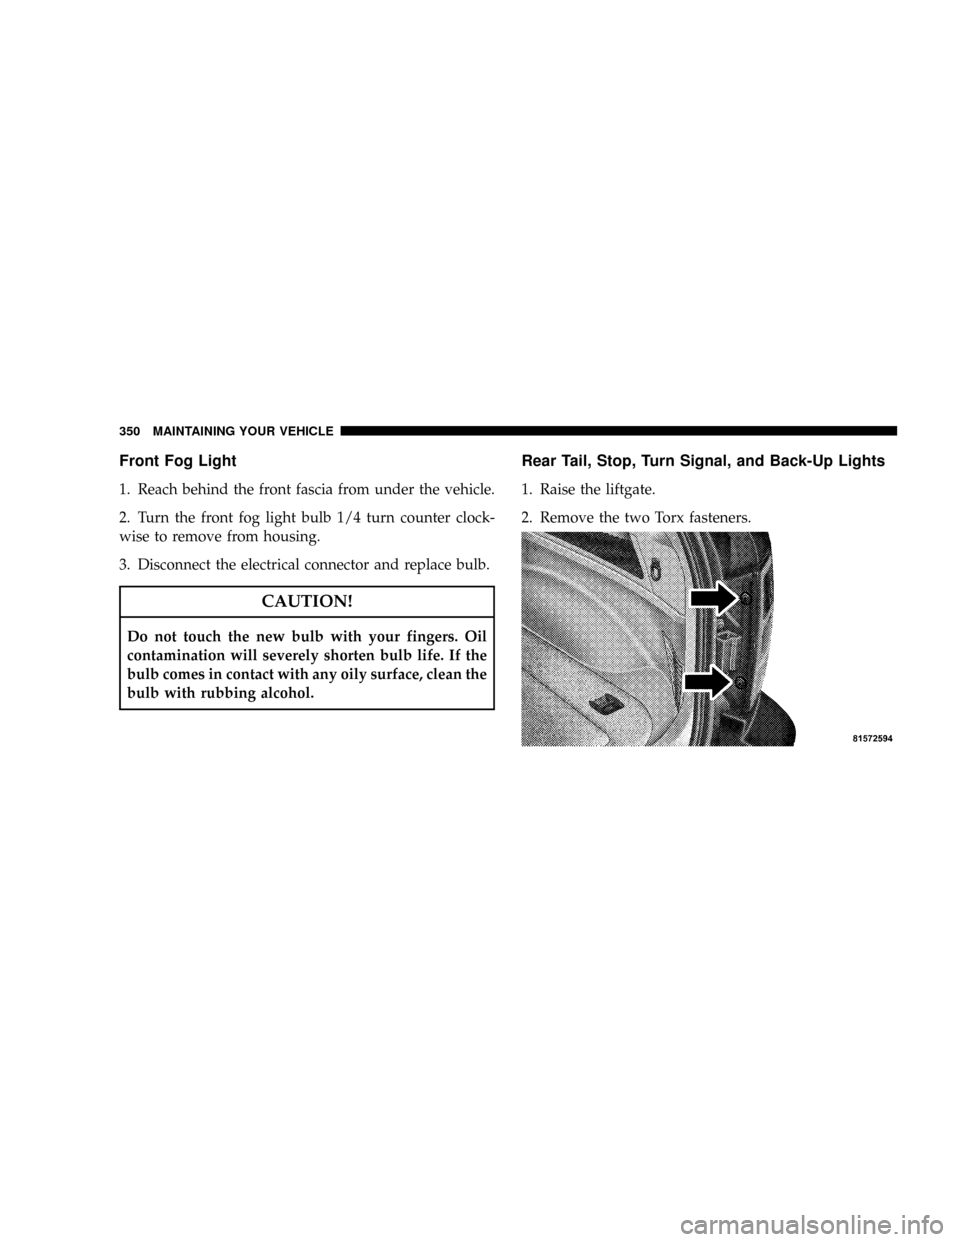
Front Fog Light
1. Reach behind the front fascia from under the vehicle.
2. Turn the front fog light bulb 1/4 turn counter clock-
wise to remove from housing.
3. Disconnect the electrical connector and replace bulb.
CAUTION!
Do not touch the new bulb with your fingers. Oil
contamination will severely shorten bulb life. If the
bulb comes in contact with any oily surface, clean the
bulb with rubbing alcohol.
Rear Tail, Stop, Turn Signal, and Back-Up Lights
1. Raise the liftgate.
2. Remove the two Torx fasteners.
350 MAINTAINING YOUR VEHICLE