change time JEEP GRAND CHEROKEE 2008 WK / 3.G SRT Owners Manual
[x] Cancel search | Manufacturer: JEEP, Model Year: 2008, Model line: GRAND CHEROKEE, Model: JEEP GRAND CHEROKEE 2008 WK / 3.GPages: 405, PDF Size: 2.93 MB
Page 22 of 405
Flash Lights with Remote Key Lock
This feature will cause the turn signal lights to flash when
the doors are locked or unlocked with the transmitter.
This feature can be turned on or off. To change the
current setting, proceed as follows:
²For vehicles equipped with the Electronic Vehicle
Information Center (EVIC), refer to ªFlash Lights with
Remote Key Lock,º under9Personal Settings (Cus-
tomer Programmable Features),º under ªElectronic
Vehicle Information Center (EVIC)º in Section 4 of this
manual for details.
Turn Headlights On with Remote Key Unlock
This feature activates the headlights for up to 90 seconds
when the doors are unlocked with the transmitter. The
time for this feature is programmable on vehicles
equipped with the Electronic Vehicle Information Center
(EVIC). For details, refer to ªTurn Headlights On withRemote Key Unlock,º under ªPersonal Settings (Cus-
tomer Programmable Features),º under ªElectronic Ve-
hicle Information Center (EVIC)º in Section 4 of this
manual.
To Lock the Doors
Press and release the ªLockº button on the transmitter to
lock all doors. The turn signal lights will flash and the
horn will chirp to acknowledge the signal.
Sound Horn with Remote Key Lock
This feature will cause the horn to chirp when the doors
are locked with the transmitter. This feature can be
turned on or off. To change the current setting, proceed as
follows:
²For vehicles equipped with the Electronic Vehicle
Information Center (EVIC), refer to ªSound Horn with
THINGS TO KNOW BEFORE STARTING YOUR VEHICLE 21
2
Page 99 of 405
²Even though international dialing for most number
combinations is supported, some shortcut dialing
number combinations may not be supported.
²In a convertible vehicle, system performance may be
compromised with the convertible top down.
Far End Audio Performance
²
Audio quality is maximized under:
²low-to-medium blower setting,
²low-to-medium vehicle speed,
²low road noise,
²smooth road surface,
²fully closed windows, and
²dry weather condition.
²operation from driver seat.
²Performance, such as audio clarity, echo, and loudness
to a large degree rely on the phone and network, and
not the UConnecttsystem.
²Echo at far end can sometime be reduced by lowering
the in-vehicle audio volume.
²In a convertible vehicle, system performance may be
compromised with the convertible top down.
Bluetooth Communication Link
Cellular phones have been found to lose connection to
the UConnecttsystem. When this happens, the connec-
tion can generally be re-established by switching the
phone off/on. Your cell phone is recommended to remain
in Bluetooth9on9mode.
Power-Up
After switching the ignition key from OFF to either ON
or ACC position, or after a language change, you must
wait at least five (5) seconds prior to using the system.
98 UNDERSTANDING THE FEATURES OF YOUR VEHICLE
Page 109 of 405
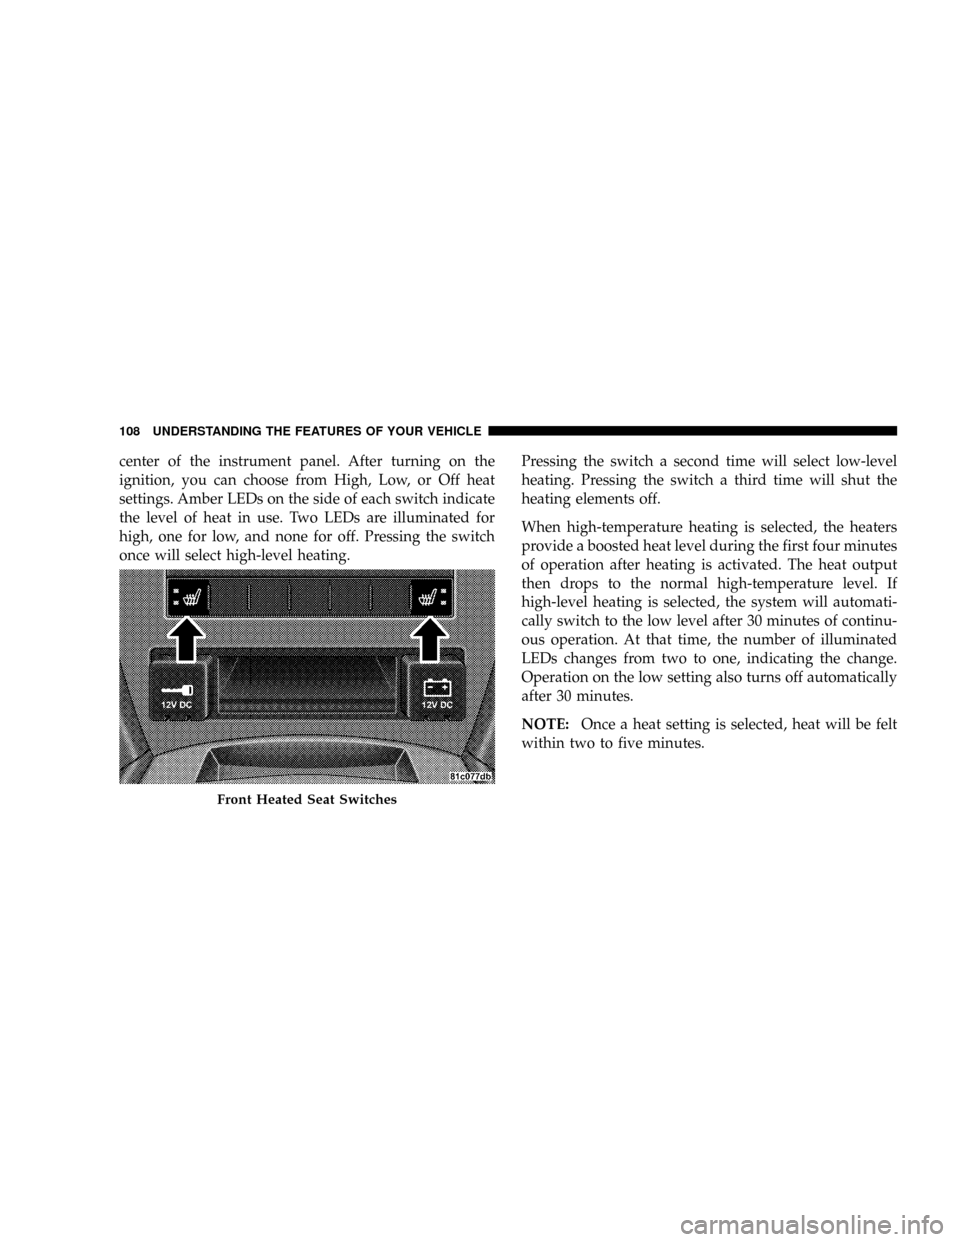
center of the instrument panel. After turning on the
ignition, you can choose from High, Low, or Off heat
settings. Amber LEDs on the side of each switch indicate
the level of heat in use. Two LEDs are illuminated for
high, one for low, and none for off. Pressing the switch
once will select high-level heating.Pressing the switch a second time will select low-level
heating. Pressing the switch a third time will shut the
heating elements off.
When high-temperature heating is selected, the heaters
provide a boosted heat level during the first four minutes
of operation after heating is activated. The heat output
then drops to the normal high-temperature level. If
high-level heating is selected, the system will automati-
cally switch to the low level after 30 minutes of continu-
ous operation. At that time, the number of illuminated
LEDs changes from two to one, indicating the change.
Operation on the low setting also turns off automatically
after 30 minutes.
NOTE:Once a heat setting is selected, heat will be felt
within two to five minutes.
Front Heated Seat Switches
108 UNDERSTANDING THE FEATURES OF YOUR VEHICLE
Page 111 of 405
Two LEDs are illuminated for high, one for low, and none
for off. Pressing the switch once will select high-level
heating. Pressing the switch a second time will select
low-level heating. Pressing the switch a third time will
shut the heating elements off.
When high-temperature heating is selected, the heaters
provide a boosted heat level during the first four minutes
of operation after heating is activated. The heat output
then drops to the normal high-temperature level. If
high-level heating is selected, the system will automati-
cally switch to the low level after 30 minutes of continu-
ous operation. At that time, the number of illuminated
LEDs changes from two to one, indicating the change.
Operation on the low setting also turns off automatically
after 30 minutes.
NOTE:Once a heat setting is selected, heat will be felt
within two to five minutes.WARNING!
Persons who are unable to feel pain to the skin
because of advanced age, chronic illness, diabetes,
spinal cord injury, medication, alcohol use, exhaus-
tion or other physical condition must exercise care
when using the seat heater. It may cause burns even
at low temperatures, especially if used for long
periods of time.
Do not place anything on the seat that insulates
against heat, such as a blanket or cushion. This may
cause the seat heater to overheat.
110 UNDERSTANDING THE FEATURES OF YOUR VEHICLE
Page 124 of 405
even when the doors and liftgate are open. While in the
ªOffº position the instrument panel lighting is at the
lowest light level and may not be suitable for night
driving.
Daytime Running Lights Ð If Equipped
The high beam headlights come on at a low intensity
level whenever the engine is running, and the transmis-
sion in not in the P (Park) position. The lights will remain
on until the ignition switch is turned to LOCK/ACC, or
the parking brake is engaged. The headlight switch must
be used for normal night time driving.
Automatic Headlight Leveling Ð HID Headlights
Only
This feature prevents the headlights from interfering
with the vision of oncoming drivers. Headlight leveling
automatically adjusts the height of the headlight beam in
reaction to changes in vehicle pitch.
Lights-On Reminder
If the headlights or parking lights are on after the ignition
switch has been turned to LOCK/ACC, a chime will
sound when the driver's door is opened.
Fog Lights Ð If Equipped
The fog light switch is located in the multi-
function control lever. To activate the fog lights,
turn on the park/turn lights, low beam headlights,
or ªAutoº headlights and pull out the end of the multi-
function control lever. A light in the instrument cluster
shows when the fog lights are on.
NOTE:Turning on the high beam headlights turns off
the fog lights.
A front fog light is a lighting device providing illumina-
tion forward of the vehicle under conditions of fog, rain,
snow, or dust. Principally, the front fog light supplements
the lower beam of a standard headlight system.
UNDERSTANDING THE FEATURES OF YOUR VEHICLE 123
3
Page 125 of 405
NOTE:Proper aim and adjustments of the front fog
lights should be made to prevent excessive glare for other
drivers.
Turn Signals
Move the multi-function control lever up or down and
the arrows on each side of the instrument cluster will
flash to show proper operation of the front and rear turn
signal lights. You can signal a lane change by moving the
lever partially up or down.
Turn Signal Auto-Mode
Tap the multi-function control lever once and the turn
signal (left or right) will flash 3 times, and automatically
turn off.
High Beam Switch
Push the multi-function control lever away from you to
switch the headlights to high beam. Pull the lever to-
wards you to switch the headlights back to low beam.
Passing Light
You can signal another vehicle with your headlights by
lightly pulling the multi-function control lever toward
the steering wheel. This will cause the headlights to turn
on at high beam and remain on until the lever is released.
Headlight Time Delay
There is also a feature that delays turning off the vehicle
lights for 30, 60, or 90 seconds after the ignition switch is
turned OFF. To activate the headlight delay, the multi-
function control lever must be rotated to the ªOffº
position after the ignition switch is turned to LOCK/
ACC. Only the headlights will illuminate during this
124 UNDERSTANDING THE FEATURES OF YOUR VEHICLE
Page 153 of 405
7. Return to the vehicle and press the programmed
HomeLinktbutton twice (holding the button for 2 sec-
onds each time). If the device is plugged in and activates,
programming is complete.
If the device does not activate, press the button a third
time (for 2 seconds) to complete the training.
If you are have any problems, or require assistance,
please call toll-free 1±800±355±3515 or, on the Internet at
www.HomeLink.com for information or assistance.
To program the remaining two HomeLinktbuttons,
repeat each step for each remaining button. DO NOT
erase the channels.
Gate Operator/Canadian Programming
Canadian radio-frequency laws require transmitter sig-
nals to ªtime-outº (or quit) after several seconds of
transmission ± which may not be long enough for
HomeLinktto pick up the signal during programming.Similar to this Canadian law, some U.S. gate operators are
designed to ªtime-outº in the same manner.
It may be helpful to unplug the device during the cycling
process to prevent possible overheating of the garage
door or gate motor.
If you are having difficulties programming a garage door
opener or a gate operator, replace ªProgramming
HomeLinkº Step 3 with the following:
3. Continue to press and hold the HomeLinktbutton
while you press and release - every two seconds
(ªcycleº) your hand-held transmitter until HomeLinkt
has successfully accepted the frequency signal. The
EVIC display will change from ªCHANNEL # TRAIN-
INGº to ªCHANNEL # TRAINED.º
If you unplugged the device for training, plug it back in
at this time.
152 UNDERSTANDING THE FEATURES OF YOUR VEHICLE
Page 187 of 405
²LEFT REAR LOW PRESSURE (Premium TPM System
Only)
²RIGHT REAR LOW PRESSURE (Premium TPM Sys-
tem Only)
Trip Functions
Press and release the MENU button until one of the
following Trip Functions displays in the EVIC:
²Distance To Empty
²Trip A
²Trip B
²Elapsed Time
²Service Distance
²Engine Oil Pressure
²Engine Oil Temperature
²Display Units of Measure in
Press the SCROLL button to cycle through all the Trip
Computer functions.
The Trip Functions mode displays the following informa-
tion:
²Distance To Empty (DTE)
Shows the estimated distance that can be traveled with
the fuel remaining in the tank. This estimated distance is
determined by a weighted average of the instantaneous
and average fuel economy, according to the current fuel
tank level. DTE cannot be reset through the FUNCTION
SELECT button.
NOTE:Significant changes in driving style or vehicle
loading will greatly affect the actual drivable distance of
the vehicle, regardless of the DTE displayed value.
186 UNDERSTANDING YOUR INSTRUMENT PANEL
Page 188 of 405
²When the DTE value is less than 30 miles (48 km)
estimated driving distance, the DTE display will
change to a text display of9LOW FUEL.9This display
will continue until the vehicle runs out of fuel. Adding
a significant amount of fuel to the vehicle will turn off
the9LOW FUEL9text and a new DTE value will
display.
²Trip A
Shows the total distance traveled for trip A since the last
reset.
²Trip B
Shows the total distance traveled for trip B since the last
reset.
²Elapsed Time
Shows the total elapsed time of travel since the last reset
when the ignition switch is in the ACC position. Elapsed
time will increment when the ignition switch is in the ON
or START position.
²Engine Oil Pressure
Shows the current engine oil pressure. The scale will read
from 0±100 psi (0±689 kPa).
²Engine Oil Temperature
Shows the current engine oil temperature. The scale will
read from 140É ± 300ÉF (60É ± 149ÉC).
²Display Units of Measure in:
To make your selection, press and release the FUNC-
TION SELECT button until ªUSº or ªMETRICº appears.
To Reset The Display
Reset will only occur while a resettable function is being
displayed. Press and release the FUNCTION SELECT
button once to clear the resettable function being dis-
played. To reset all resettable functions, press and release
the FUNCTION SELECT button a second time within 3
seconds of resetting the currently displayed function
(>Reset ALL will display during this 3 second window).
UNDERSTANDING YOUR INSTRUMENT PANEL 187
4
Page 200 of 405
3. After adjusting the hours, press the right side TUNE
control knob to set the minutes. The minutes will begin to
blink.
4. Adjust the minutes using the right side TUNE control
knob. Press the TUNE control knob to save time change.
5. To exit, press any button/knob or wait 5 seconds.
The clock can also be set by pressing the SETUP button
and selecting the ªSET HOME CLOCKº entry. Once in
this display follow the above procedure, starting at step
2.
INFO Button (Radio Mode)
Press the INFO button for an RDS station (one with call
letters displayed). The radio will return a Radio Text
message broadcast from an FM station (FM mode only).
RW/FF (Radio Mode)
Pressing the rewind or fast forward button causes the
tuner to search for the next frequency in the direction of
the arrows. This feature operates in either AM, FM or
Satellite (if equipped) frequencies.
TUNE Control (Radio Mode)
Turn the right side rotary control clockwise to increase or
counter-clockwise to decrease the frequency.
Setting the Tone, Balance, and Fade
Press the rotary TUNE control knob and BASS will
display. Turn the TUNE control knob to the right or left to
increase or decrease the Bass tones.
Press the rotary TUNE control knob a second time and
MID will display. Turn the TUNE control knob to the
right or left to increase or decrease the Mid Range tones.
UNDERSTANDING YOUR INSTRUMENT PANEL 199
4