Automatic transmission JEEP GRAND CHEROKEE 2012 WK2 / 4.G User Guide
[x] Cancel search | Manufacturer: JEEP, Model Year: 2012, Model line: GRAND CHEROKEE, Model: JEEP GRAND CHEROKEE 2012 WK2 / 4.GPages: 148, PDF Size: 5.91 MB
Page 17 of 148
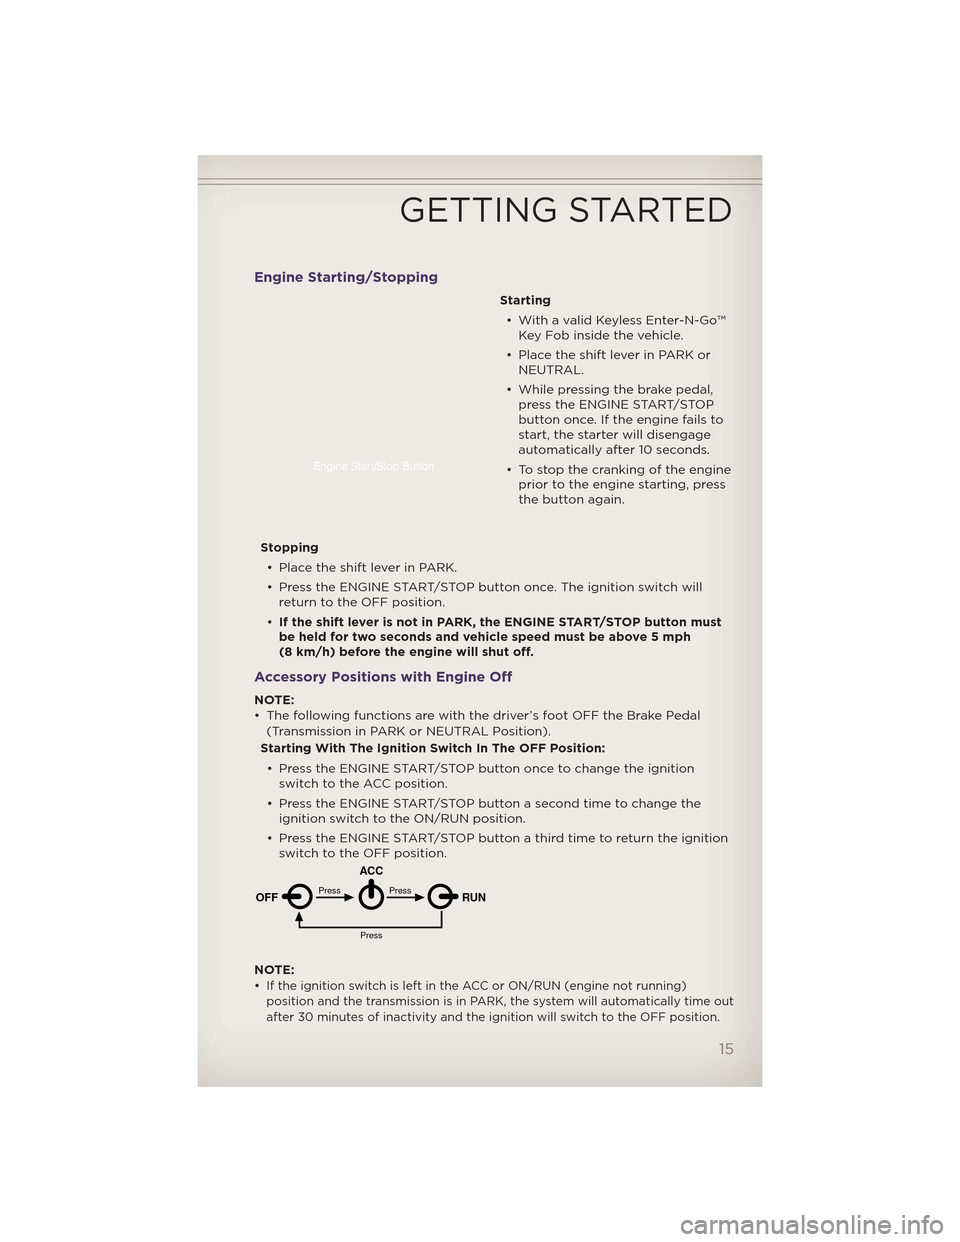
Engine Starting/Stopping
Starting• With a valid Keyless Enter-N-Go™ Key Fob inside the vehicle.
• Place the shift lever in PARK or NEUTRAL.
• While pressing the brake pedal, press the ENGINE START/STOP
button once. If the engine fails to
start, the starter will disengage
automatically after 10 seconds.
• To stop the cranking of the engine prior to the engine starting, press
the button again.
Stopping • Place the shift lever in PARK.
• Press the ENGINE START/STOP button once. The ignition switch will return to the OFF position.
• If the shift lever is not in PARK, the ENGINE START/STOP button must
be held for two seconds and vehicle speed must be above 5 mph
(8 km/h) before the engine will shut off.
Accessory Positions with Engine Off
NOTE:
• The following functions are with the driver’s foot OFF the Brake Pedal
(Transmission in PARK or NEUTRAL Position).
Starting With The Ignition Switch In The OFF Position:
• Press the ENGINE START/STOP button once to change the ignition switch to the ACC position.
• Press the ENGINE START/STOP button a second time to change the ignition switch to the ON/RUN position.
• Press the ENGINE START/STOP button a third time to return the ignition switch to the OFF position.
NOTE:
•
If the ignition switch is left in the ACC or ON/RUN (engine not running)
position and the transmission is in PARK, the system will automatically time out
after 30 minutes of inactivity and the ignition will switch to the OFF position.
OFF RUN
ACCPress
Press
Press
GETTING STARTED
15
Page 92 of 148
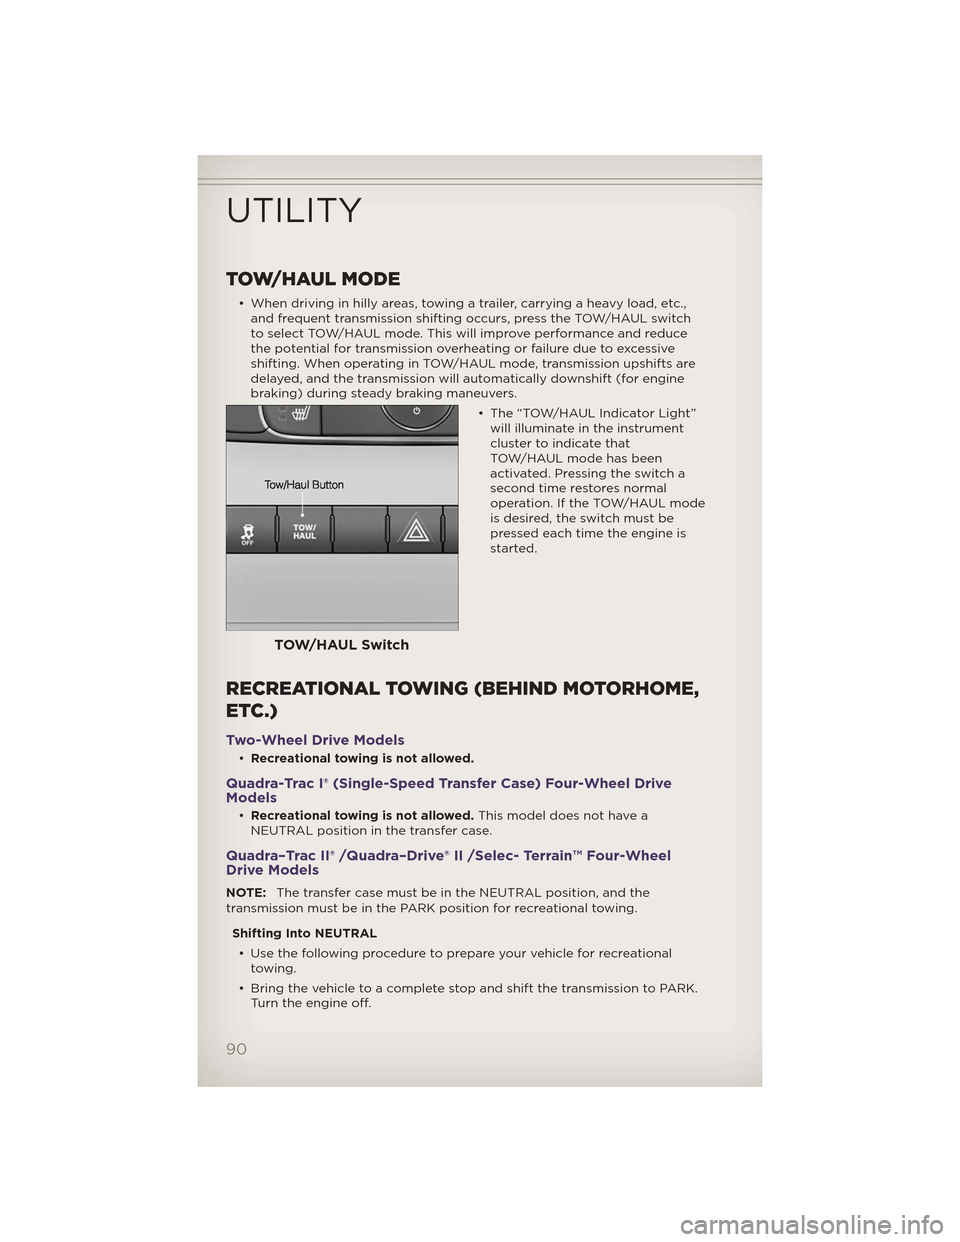
TOW/HAUL MODE
• When driving in hilly areas, towing a trailer, carrying a heavy load, etc.,and frequent transmission shifting occurs, press the TOW/HAUL switch
to select TOW/HAUL mode. This will improve performance and reduce
the potential for transmission overheating or failure due to excessive
shifting. When operating in TOW/HAUL mode, transmission upshifts are
delayed, and the transmission will automatically downshift (for engine
braking) during steady braking maneuvers.
• The “TOW/HAUL Indicator Light”will illuminate in the instrument
cluster to indicate that
TOW/HAUL mode has been
activated. Pressing the switch a
second time restores normal
operation. If the TOW/HAUL mode
is desired, the switch must be
pressed each time the engine is
started.
RECREATIONAL TOWING (BEHIND MOTORHOME,
ETC.)
Two-Wheel Drive Models
•Recreational towing is not allowed.
Quadra-Trac I® (Single-Speed Transfer Case) Four-Wheel Drive
Models
•Recreational towing is not allowed. This model does not have a
NEUTRAL position in the transfer case.
Quadra–Trac II® /Quadra–Drive® II /Selec- Terrain™ Four-Wheel
Drive Models
NOTE: The transfer case must be in the NEUTRAL position, and the
transmission must be in the PARK position for recreational towing.
Shifting Into NEUTRAL• Use the following procedure to prepare your vehicle for recreational towing.
• Bring the vehicle to a complete stop and shift the transmission to PARK. Turn the engine off.
TOW/HAUL Switch
UTILITY
90
Page 93 of 148
• For vehicles with Keyless Enter-N-Go™, remove the Keyless Enter-N-Go™button and use the Key Fob to complete this procedure.
• Turn the ignition switch to the ON/RUN position, but do not start the engine.
• Press and hold the brake pedal and shift the transmission into NEUTRAL.
• Using a ballpoint pen or similar object, press and hold the recessed transfer case N (Neutral) button for four seconds, until the light next to
the N symbol starts to blink, indicating shift in progress. The light will
stop blinking (stay on solid) when the shift to N (Neutral) is complete. A
“FOUR WHEEL DRIVE SYSTEM IN NEUTRAL” message will display on
the EVIC (Electronic Vehicle Information Center).
• Start the engine and shift the transmission into REVERSE.
• Release the brake pedal for five seconds and ensure that there is no vehicle movement.
• Turn the engine off and firmly apply the parking brake.
• Shift the transmission into PARK and remove the Key Fob.
• Attach the vehicle to the tow vehicle using a suitable tow bar and release the parking brake.
NOTE: Vehicles equipped with Quadra-Lift™ must be lowered to the “Park”
(lowest) level, and have automatic leveling disabled, before tying them down
(from the body) on a trailer or a flatbed truck. Refer to “Quadra-Lift™” in
“Off-Road Capabilities” for more information. If the vehicle cannot be
lowered to the “Park” level (for example, engine will not run), tie-downs must
be fastened to the axles (not the body). Failure to follow these instructions
may cause fault codes to be set and/or loss of proper tie-down tension.
CAUTION!
• Towing with the rear wheels on the ground will cause severe transmission damage. Damage from improper towing is not covered
under the New Vehicle Limited Warranty.
• Front or rear wheel lifts should not be used. Internal damage to the transmission or transfer case will occur if a front or rear wheel lift is
used when recreational towing.
• It is necessary to follow these steps to be certain that the transfer case is fully in NEUTRAL before recreational towing to prevent
damage to internal parts.
UTILITY
91
Page 95 of 148
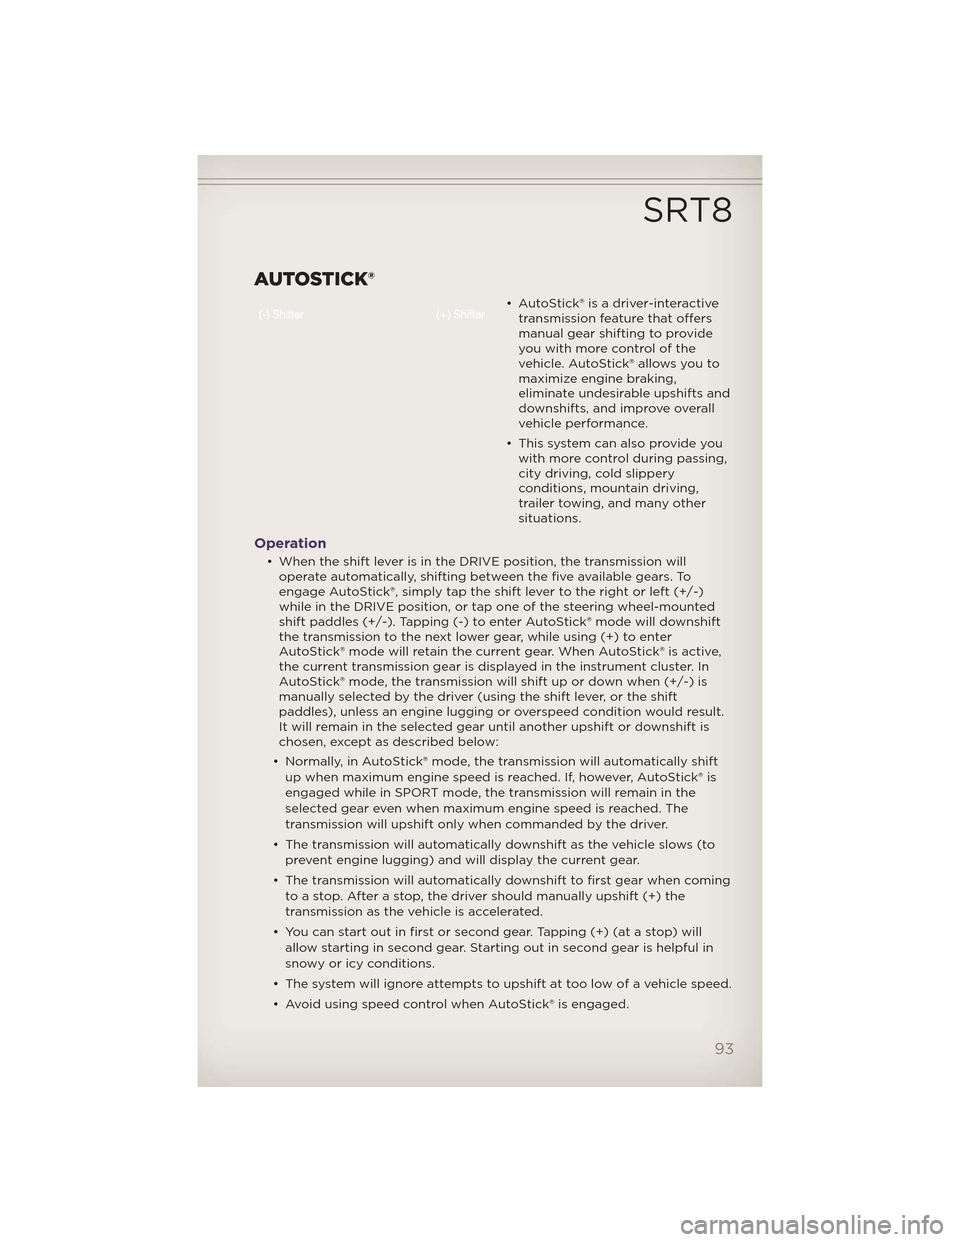
AUTOSTICK®
• AutoStick® is a driver-interactivetransmission feature that offers
manual gear shifting to provide
youwithmorecontrolofthe
vehicle. AutoStick® allows you to
maximize engine braking,
eliminate undesirable upshifts and
downshifts, and improve overall
vehicle performance.
• This system can also provide you with more control during passing,
city driving, cold slippery
conditions, mountain driving,
trailer towing, and many other
situations.
Operation
• When the shift lever is in the DRIVE position, the transmission willoperate automatically, shifting between the five available gears. To
engage AutoStick®, simply tap the shift lever to the right or left (+/-)
while in the DRIVE position, or tap one of the steering wheel-mounted
shift paddles (+/-). Tapping (-) to enter AutoStick® mode will downshift
the transmission to the next lower gear, while using (+) to enter
AutoStick® mode will retain the current gear. When AutoStick® is active,
the current transmission gear is displayed in the instrument cluster. In
AutoStick® mode, the transmission will shift up or down when (+/-) is
manually selected by the driver (using the shift lever, or the shift
paddles), unless an engine lugging or overspeed condition would result.
It will remain in the selected gear until another upshift or downshift is
chosen, except as described below:
• Normally, in AutoStick® mode, the transmission will automatically shift up when maximum engine speed is reached. If, h owever, AutoStick® is
engaged while in SPORT mode, the transmission will remain in the
selected gear even when maximum engine speed is reached. The
transmission will upshift only when commanded by the driver.
• The transmission will automatically downshift as the vehicle slows (to prevent engine lugging) and will display the current gear.
• The transmission will automatically downshift to first gear when coming to a stop. After a stop, the driver should manually upshift (+) the
transmission as the vehicle is accelerated.
• You can start out in first or second gear. Tapping (+) (at a stop) will allow starting in second gear. Starting out in second gear is helpful in
snowy or icy conditions.
• The system will ignore attempts to upshift at too low of a vehicle speed.
• Avoid using speed control when AutoStick® is engaged.
SRT8
93
Page 96 of 148
• Transmission shifting will be more noticeable when AutoStick® isengaged.
• To disengage AutoStick® mode, hold the shift lever to the right or press and hold the (+) shift paddle until “D” is once again displayed in the
instrument cluster. You can shift in or out of the AutoStick® mode at any
time without taking your foot off the accelerator pedal.
WARNING!
Do not downshift for additional engine braking on a slippery surface.
The drive wheels could lose their grip and the vehicle could skid,
causing a collision or personal injury.
SELEC-TRACK™
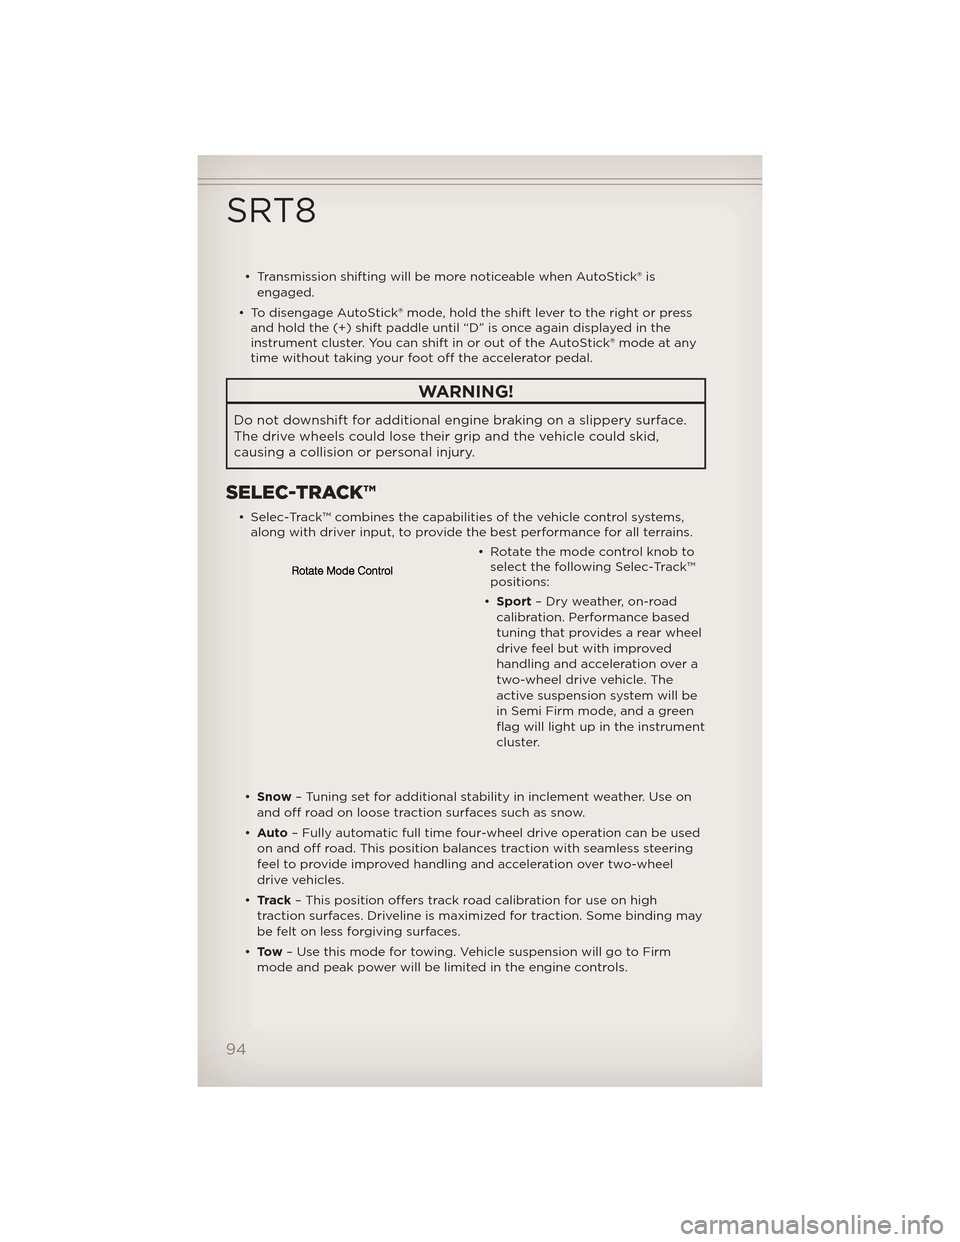
• Selec-Track™ combines the capabilities of the vehicle control systems,along with driver input, to provide the best performance for all terrains.
• Rotate the mode control knob toselect the following Selec-Track™
positions:
• Sport – Dry weather, on-road
calibration. Performance based
tuning that provides a rear wheel
drive feel but with improved
handling and acceleration over a
two-wheel drive vehicle. The
active suspension system will be
in Semi Firm mode, and a green
flag will light up in the instrument
cluster.
• Snow – Tuning set for additional stability in inclement weather. Use on
and off road on loose traction surfaces such as snow.
• Auto – Fully automatic full time four-wheel drive operation can be used
on and off road. This position balances traction with seamless steering
feel to provide improved handling and acceleration over two-wheel
drive vehicles.
• Track – This position offers track road calibration for use on high
traction surfaces. Driveline is maximized for traction. Some binding may
be felt on less forgiving surfaces.
• To w – Use this mode for towing. Vehicle suspension will go to Firm
mode and peak power will be limited in the engine controls.
SRT8
94
Page 109 of 148
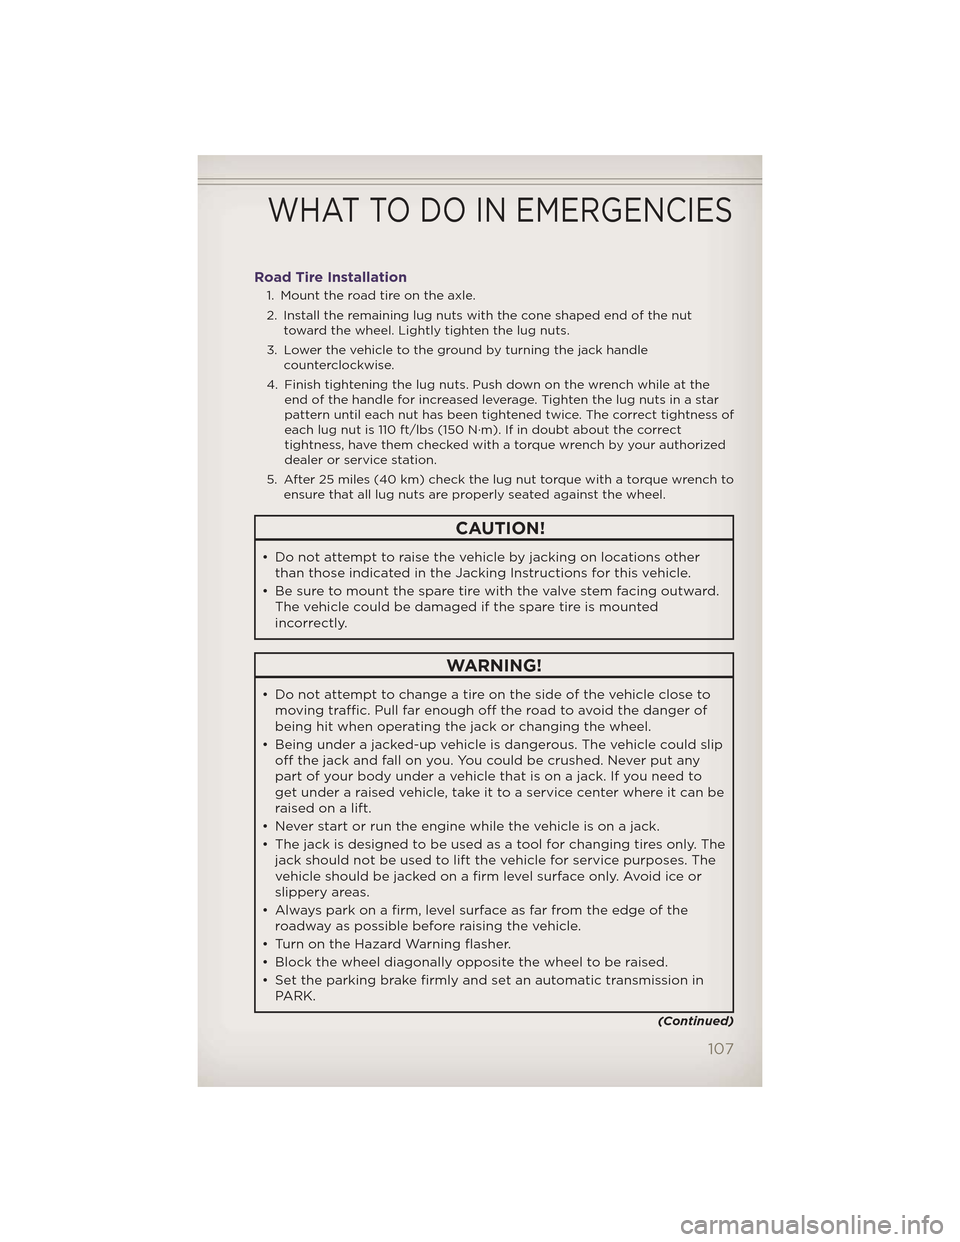
Road Tire Installation
1. Mount the road tire on the axle.
2. Install the remaining lug nuts with the cone shaped end of the nuttoward the wheel. Lightly tighten the lug nuts.
3. Lower the vehicle to the ground by turning the jack handle counterclockwise.
4. Finish tightening the lug nuts. Push down on the wrench while at the end of the handle for increased leverage. Tighten the lug nuts in a star
pattern until each nut has been tightened twice. The correct tightness of
each lug nut is 110 ft/lbs (150 N·m). If in doubt about the correct
tightness, have them checked with a torque wrench by your authorized
dealer or service station.
5. After 25 miles (40 km) check the lug nut torque with a torque wrench to ensure that all lug nuts are properly seated against the wheel.
CAUTION!
• Do not attempt to raise the vehicle by jacking on locations otherthan those indicated in the Jacking Instructions for this vehicle.
• Be sure to mount the spare tire with the valve stem facing outward. The vehicle could be damaged if the spare tire is mounted
incorrectly.
WARNING!
• Do not attempt to change a tire on the side of the vehicle close tomoving traffic. Pull far enough off the road to avoid the danger of
being hit when operating the jack or changing the wheel.
• Being under a jacked-up vehicle is dangerous. The vehicle could slip off the jack and fall on you. You could be crushed. Never put any
part of your body under a vehicle that is on a jack. If you need to
get under a raised vehicle, take it to a service center where it can be
raised on a lift.
• Never start or run the engine while the vehicle is on a jack.
• The jack is designed to be used as a tool for changing tires only. The jack should not be used to lift the vehicle for service purposes. The
vehicle should be jacked on a firm level surface only. Avoid ice or
slippery areas.
• Always park on a firm, level surface as far from the edge of the
roadway as possible before raising the vehicle.
• Turn on the Hazard Warning flasher.
• Block the wheel diagonally opposite the wheel to be raised.
• Set the parking brake firmly and set an automatic transmission in PARK.
(Continued)
WHAT TO DO IN EMERGENCIES
107
Page 111 of 148
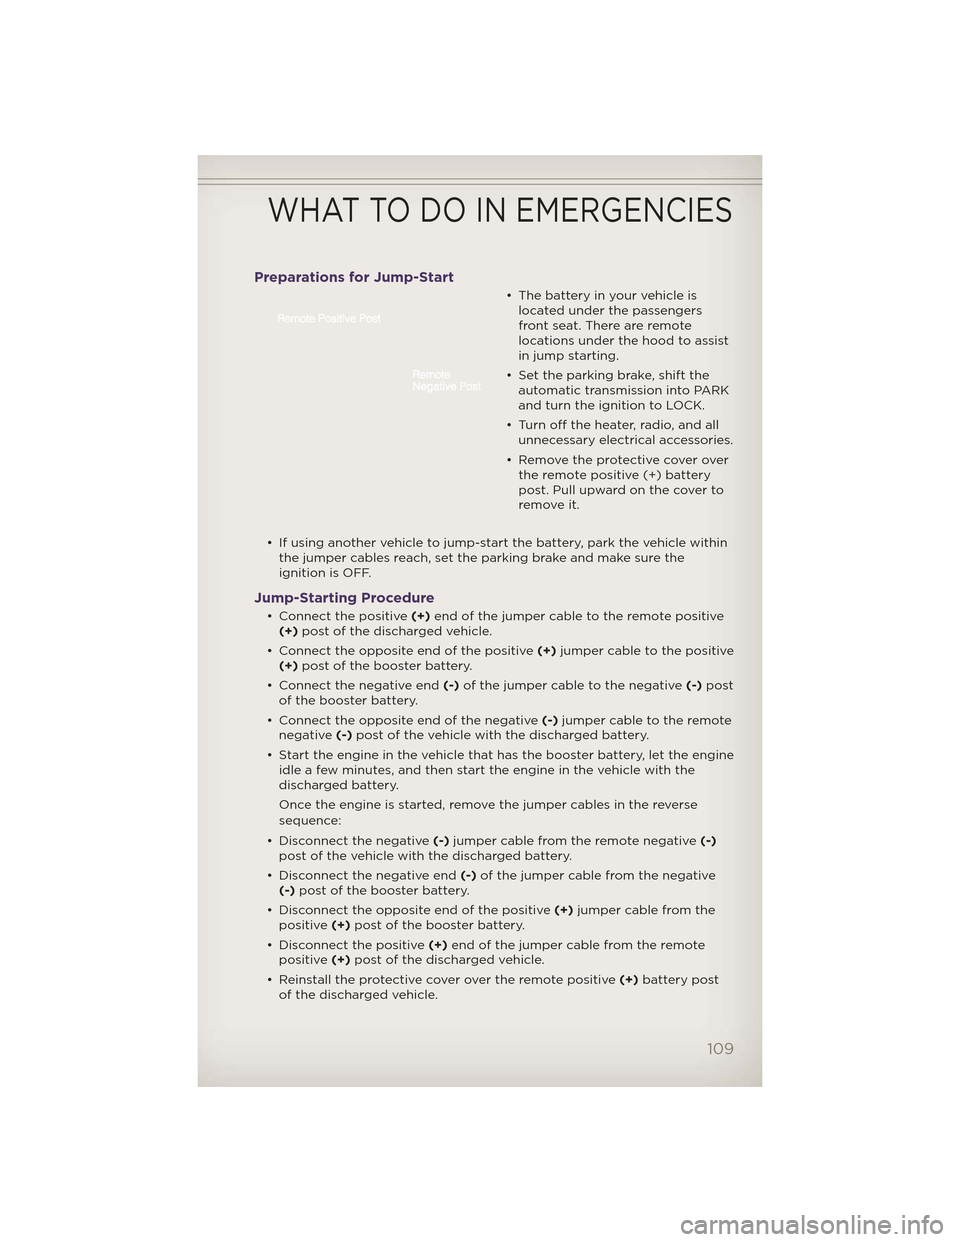
Preparations for Jump-Start
• The battery in your vehicle islocated under the passengers
front seat. There are remote
locations under the hood to assist
in jump starting.
• Set the parking brake, shift the automatic transmission into PARK
and turn the ignition to LOCK.
• Turn off the heater, radio, and all unnecessary electrical accessories.
• Remove the protective cover over the remote positive (+) battery
post. Pull upward on the cover to
remove it.
• If using another vehicle to jump-start the battery, park the vehicle within the jumper cables reach, set the parking brake and make sure the
ignition is OFF.
Jump-Starting Procedure
• Connect the positive (+)end of the jumper cable to the remote positive
(+) post of the discharged vehicle.
• Connect the opposite end of the positive (+)jumper cable to the positive
(+) post of the booster battery.
• Connect the negative end (-)of the jumper cable to the negative (-)post
of the booster battery.
• Connect the opposite end of the negative (-)jumper cable to the remote
negative (-)post of the vehicle with the discharged battery.
• Start the engine in the vehicle that has the booster battery, let the engine idle a few minutes, and then start the engine in the vehicle with the
discharged battery.
Once the engine is started, remove the jumper cables in the reverse
sequence:
• Disconnect the negative (-)jumper cable from the remote negative (-)
post of the vehicle with the discharged battery.
• Disconnect the negative end (-)of the jumper cable from the negative
(-) post of the booster battery.
• Disconnect the opposite end of the positive (+)jumper cable from the
positive (+)post of the booster battery.
• Disconnect the positive (+)end of the jumper cable from the remote
positive (+)post of the discharged vehicle.
• Reinstall the protective cover over the remote positive (+)battery post
of the discharged vehicle.
WHAT TO DO IN EMERGENCIES
109
Page 121 of 148
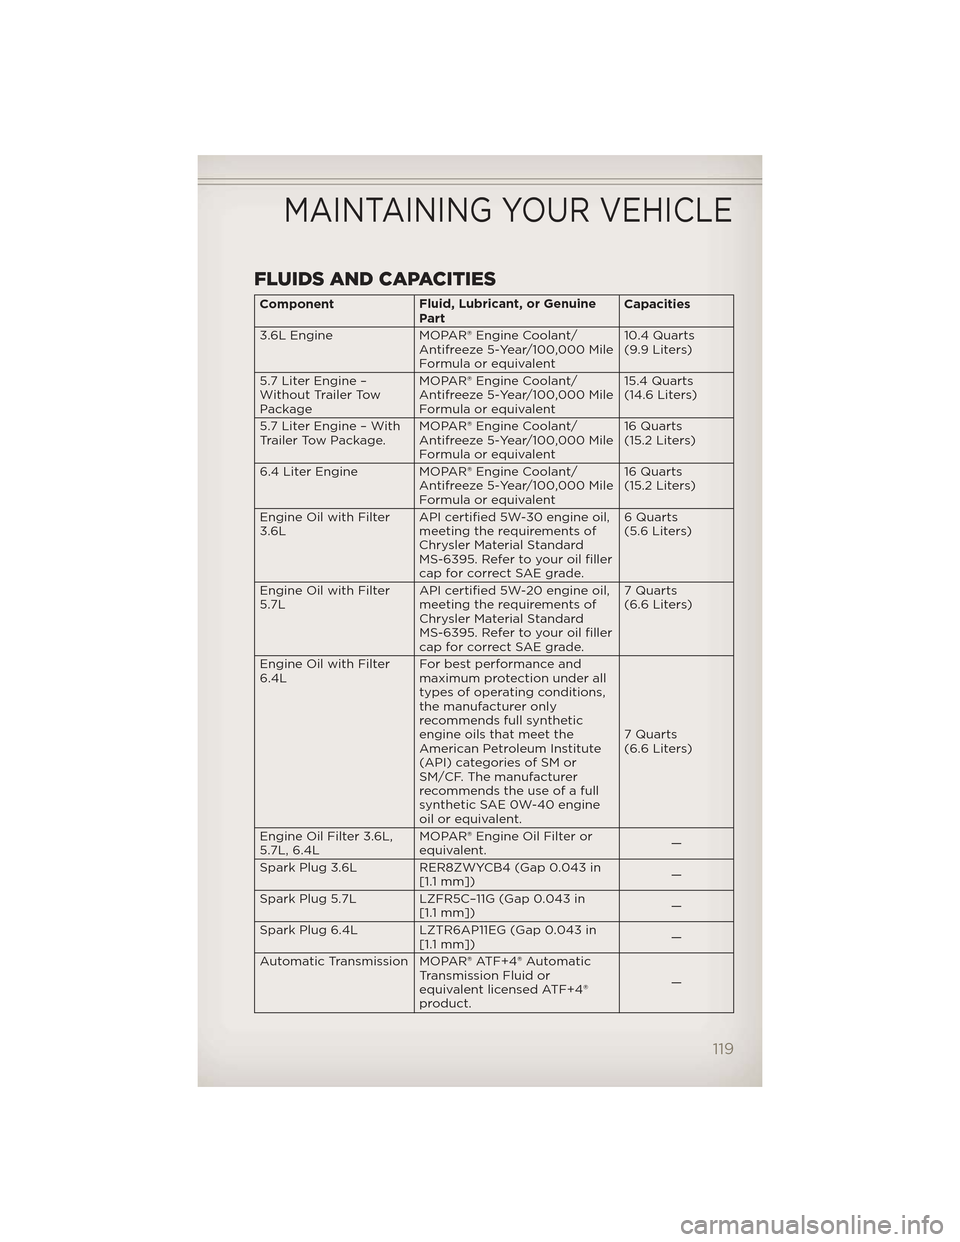
FLUIDS AND CAPACITIES
ComponentFluid, Lubricant, or Genuine
Part Capacities
3.6L Engine MOPAR® Engine Coolant/ Antifreeze 5-Year/100,000 Mile
Formula or equivalent 10.4 Quarts
(9.9 Liters)
5.7 Liter Engine –
Without Trailer Tow
Package MOPAR® Engine Coolant/
Antifreeze 5-Year/100,000 Mile
Formula or equivalent 15.4 Quarts
(14.6 Liters)
5.7 Liter Engine – With
Trailer Tow Package. MOPAR® Engine Coolant/
Antifreeze 5-Year/100,000 Mile
Formula or equivalent 16 Quarts
(15.2 Liters)
6.4 Liter Engine MOPAR® Engine Coolant/ Antifreeze 5-Year/100,000 Mile
Formula or equivalent 16 Quarts
(15.2 Liters)
Engine Oil with Filter
3.6L API certified 5W-30 engine oil,
meeting the requirements of
Chrysler Material Standard
MS-6395. Refer to your oil filler
cap for correct SAE grade. 6 Quarts
(5.6 Liters)
Engine Oil with Filter
5.7L API certified 5W-20 engine oil,
meeting the requirements of
Chrysler Material Standard
MS-6395. Refer to your oil filler
cap for correct SAE grade. 7 Quarts
(6.6 Liters)
Engine Oil with Filter
6.4L For best performance and
maximum protection under all
types of operating conditions,
the manufacturer only
recommends full synthetic
engine oils that meet the
American Petroleum Institute
(API) categories of SM or
SM/CF. The manufacturer
recommends the use of a full
synthetic SAE 0W-40 engine
oil or equivalent. 7 Quarts
(6.6 Liters)
Engine Oil Filter 3.6L,
5.7L, 6.4L MOPAR® Engine Oil Filter or
equivalent.
—
Spark Plug 3.6L RER8ZWYCB4 (Gap 0.043 in [1.1 mm]) —
Spark Plug 5.7L LZFR5C–11G (Gap 0.043 in [1.1 mm]) —
Spark Plug 6.4L LZTR6AP11EG (Gap 0.043 in [1.1 mm]) —
Automatic Transmission MOPAR® ATF+4® Automatic Transmission Fluid or
equivalent licensed ATF+4®
product. —
MAINTAINING YOUR VEHICLE
119
Page 122 of 148
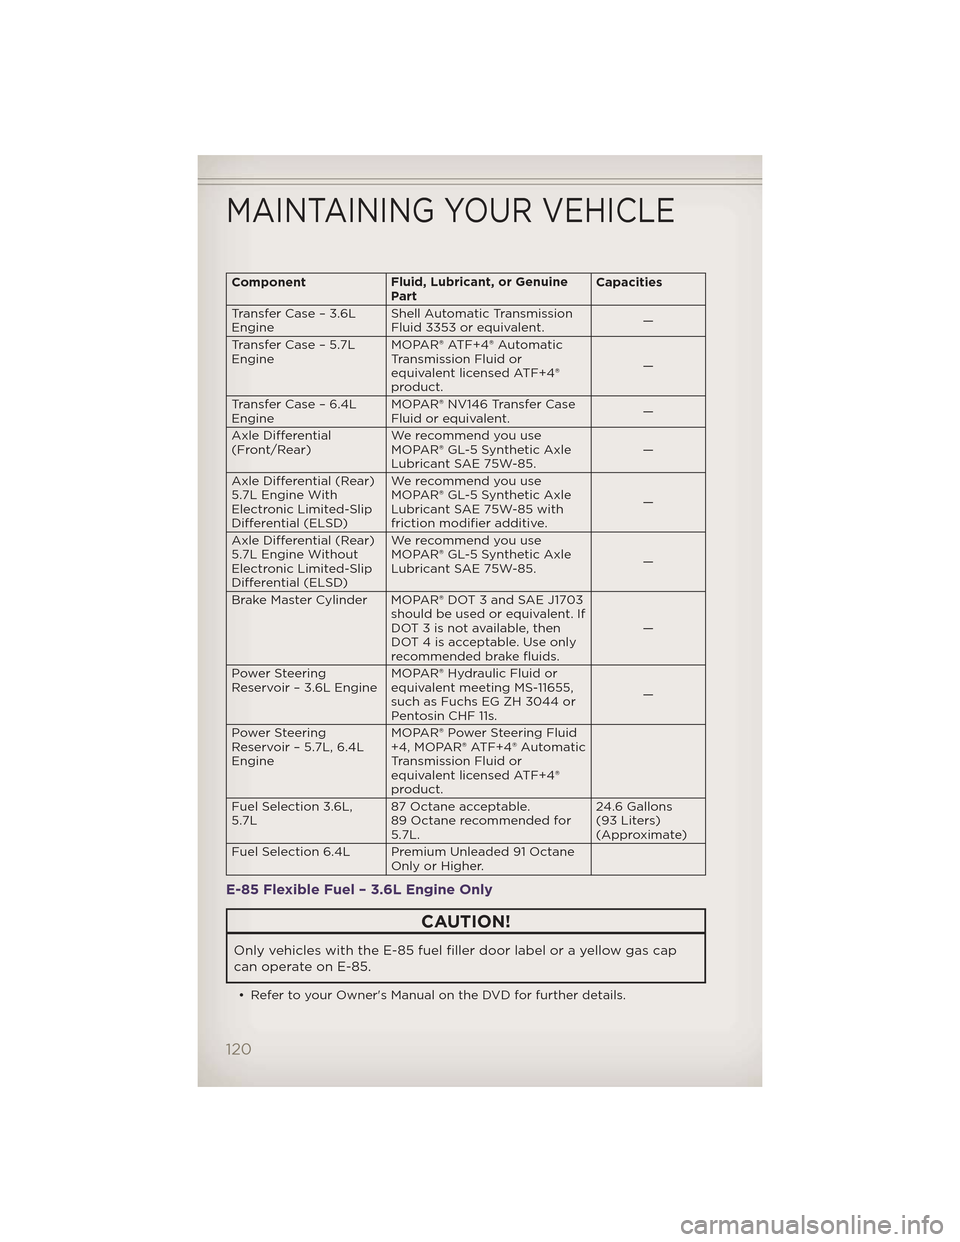
ComponentFluid, Lubricant, or Genuine
Part Capacities
Transfer Case – 3.6L
Engine Shell Automatic Transmission
Fluid 3353 or equivalent.
—
Transfer Case – 5.7L
Engine MOPAR® ATF+4® Automatic
Transmission Fluid or
equivalent licensed ATF+4®
product. —
Transfer Case – 6.4L
Engine MOPAR® NV146 Transfer Case
Fluid or equivalent.
—
Axle Differential
(Front/Rear) We recommend you use
MOPAR® GL-5 Synthetic Axle
Lubricant SAE 75W-85. —
Axle Differential (Rear)
5.7L Engine With
Electronic Limited-Slip
Differential (ELSD) We recommend you use
MOPAR® GL-5 Synthetic Axle
Lubricant SAE 75W-85 with
friction modifier additive.
—
Axle Differential (Rear)
5.7L Engine Without
Electronic Limited-Slip
Differential (ELSD) We recommend you use
MOPAR® GL-5 Synthetic Axle
Lubricant SAE 75W-85.
—
Brake Master Cylinder MOPAR® DOT 3 and SAE J1703 should be used or equivalent. If
DOT 3 is not available, then
DOT 4 is acceptable. Use only
recommended brake fluids. —
Power Steering
Reservoir – 3.6L Engine MOPAR® Hydraulic Fluid or
equivalent meeting MS-11655,
such as Fuchs EG ZH 3044 or
Pentosin CHF 11s. —
Power Steering
Reservoir – 5.7L, 6.4L
Engine MOPAR® Power Steering Fluid
+4, MOPAR® ATF+4® Automatic
Transmission Fluid or
equivalent licensed ATF+4®
product.
Fuel Selection 3.6L,
5.7L 87 Octane acceptable.
89 Octane recommended for
5.7L. 24.6 Gallons
(93 Liters)
(Approximate)
Fuel Selection 6.4L Premium Unleaded 91 Octane Only or Higher.
E-85 Flexible Fuel – 3.6L Engine Only
CAUTION!
Only vehicles with the E-85 fuel filler door label or a yellow gas cap
can operate on E-85.
• Refer to your Owner's Manual on the DVD for further details.
MAINTAINING YOUR VEHICLE
120
Page 123 of 148
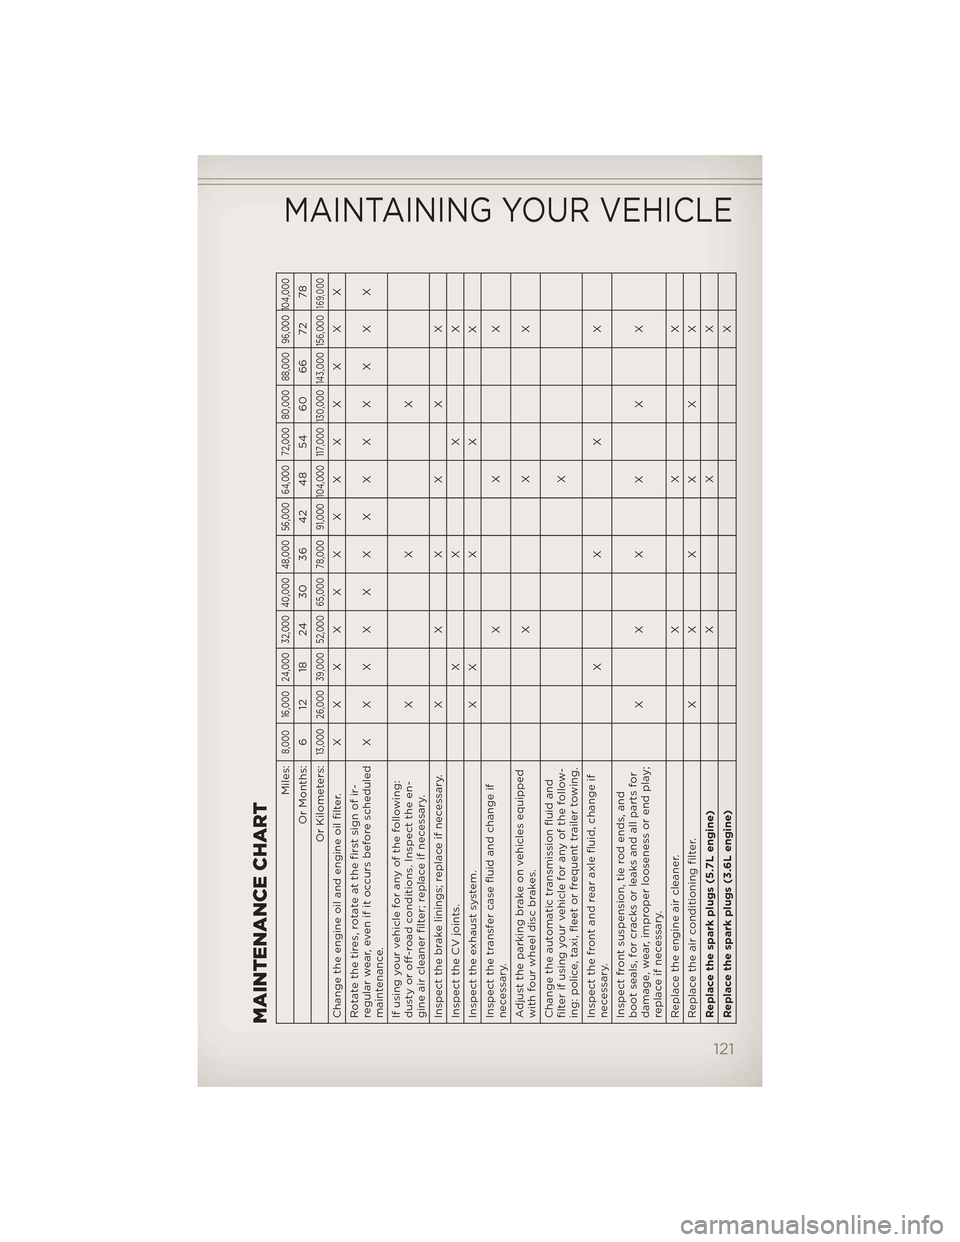
MAINTENANCE CHART
Miles:
8,000 16,000 24,000 32,000 40,000 48,000 56,000 64,000 72,000 80,000 88,000 96,000 104,000
Or Months: 6 12 18 24 30 36 42 48 54 60 66 72 78
Or Kilometers:
13,000 26,000 39,000 52,000 65,000 78,000 91,000 104,000 117,000 130,000 143,000 156,000
169,000
Change the engine oil and engine oil filter. XXXXXXXXXXXXX
Rotate the tires, rotate at the first sign of ir-
regular wear, even if it occurs before scheduled
maintenance. XXXXXXXXXXXXX
If using your vehicle for any of the following:
dusty or off-road conditions. Inspect the en-
gine air cleaner filter; replace if necessary. XXX
Inspect the brake linings; replace if necessary. XXXXXX
InspecttheCVjoints. XXXX
Inspecttheexhaustsystem. XXXXX
Inspect the transfer case fluid and change if
necessary. XXX
Adjust the parking brake on vehicles equipped
with four wheel disc brakes. XXX
Change the automatic transmission fluid and
filter if using your vehicle for any of the follow-
ing: police, taxi, fleet or frequent trailer towing. X
Inspect the front and rear axle fluid, change if
necessary. XXXX
Inspect front suspension, tie rod ends, and
boot seals, for cracks or leaks and all parts for
damage, wear, improper looseness or end play;
replace if necessary. XXXXXX
Replace the engine air cleaner. X X X
Replace the air conditioning filter. XXXXXX
Replace the spark plugs (5.7L engine) XXX
Replace the spark plugs (3.6L engine) X
MAINTAINING YOUR VEHICLE
121