warning JEEP GRAND CHEROKEE 2014 WK2 / 4.G Owner's Manual
[x] Cancel search | Manufacturer: JEEP, Model Year: 2014, Model line: GRAND CHEROKEE, Model: JEEP GRAND CHEROKEE 2014 WK2 / 4.GPages: 220, PDF Size: 6.12 MB
Page 23 of 220
WARNING!
• In a collision, an unrestrained child, even a tiny baby, can become a projectile
inside the vehicle. The force required to hold even an infant on your lap could
become so great that you could not hold the child, no matter how strong you
are. The child and others could be severely injured or killed. Any child riding in
your vehicle should be in a proper restraint for the child's size.
• Rearward-facing child seats must never be used in the front seat of a vehicle
with a front passenger air bag. An air bag deployment could cause severe injury
or death to infants in this position.
• Only use a rearward-facing child restraint in a vehicle with a rear seat.
• Improper installation of a child restraint to the LATCH anchorages can lead to
failure of an infant or child restraint. The child could be severely injured or
killed. Follow the manufacturer’s directions exactly when installing an infant or
child restraint.
• An incorrectly anchored tether strap could lead to increased head motion and
possible injury to the child. Use only the anchor positions directly behind the
child seat to secure a child restraint top tether strap.
• If your vehicle is equipped with a split rear seat, make sure the tether strap
does not slip into the opening between the seatbacks as you remove slack in
the strap.
FRONT SEATS
Power Seats
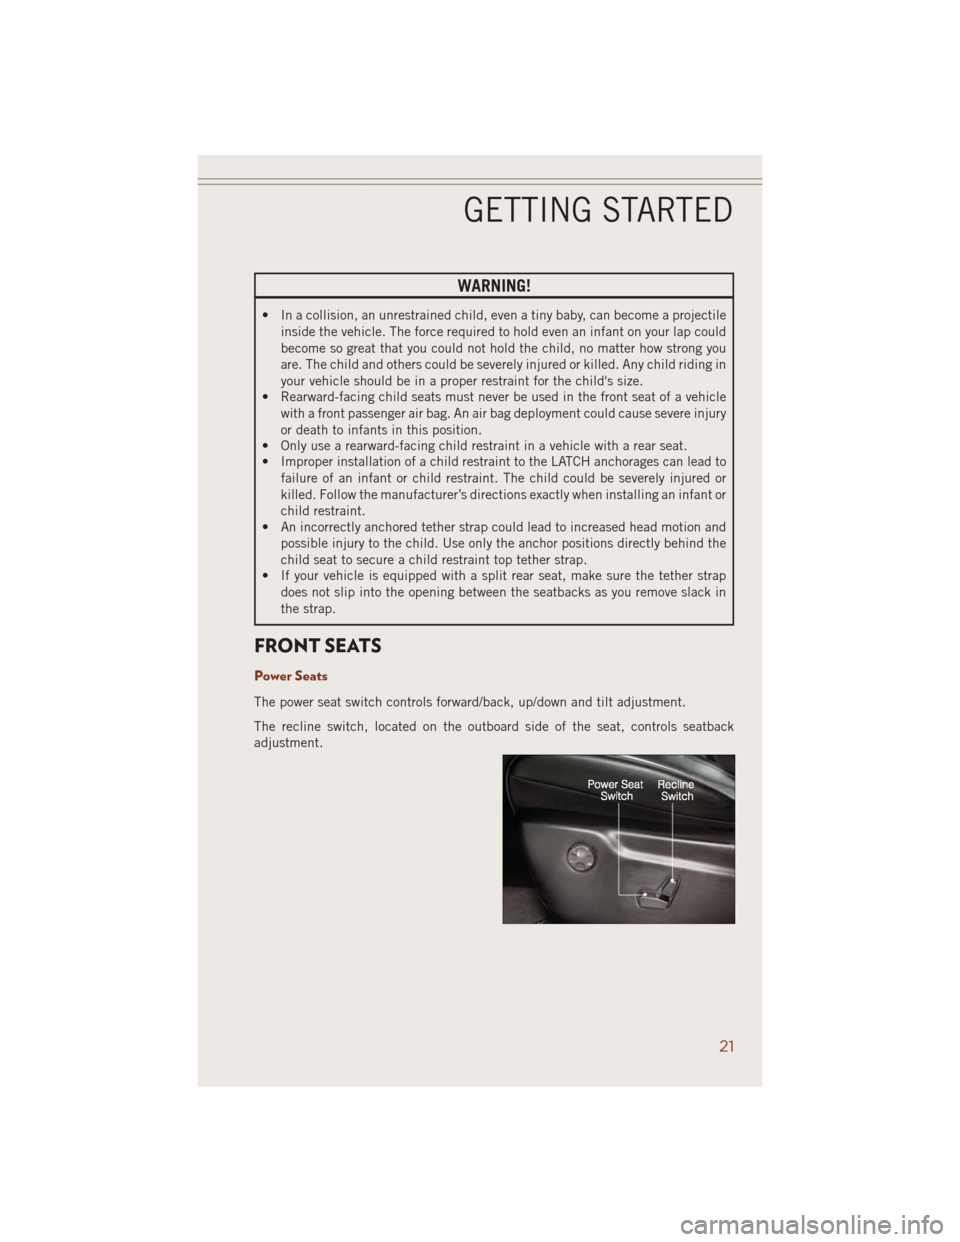
The power seat switch controls forward/back, up/down and tilt adjustment.
The recline switch, located on the outboard side of the seat, controls seatback
adjustment.
GETTING STARTED
21
Page 26 of 220
WARNING!
• Adjusting a seat while the vehicle is moving is dangerous. The sudden
movement of the seat could cause you to lose control. The seat belt might not
be properly adjusted, and you could be severely injured or killed. Only adjust a
seat while the vehicle is parked.
• Do not ride with the seatback reclined so that the seat belt is no longer resting
against your chest. In a collision, you could slide under the seat belt and be
severely injured or killed. Use the recliner only when the vehicle is parked.
REAR SEATS
60/40 Split Rear Seat
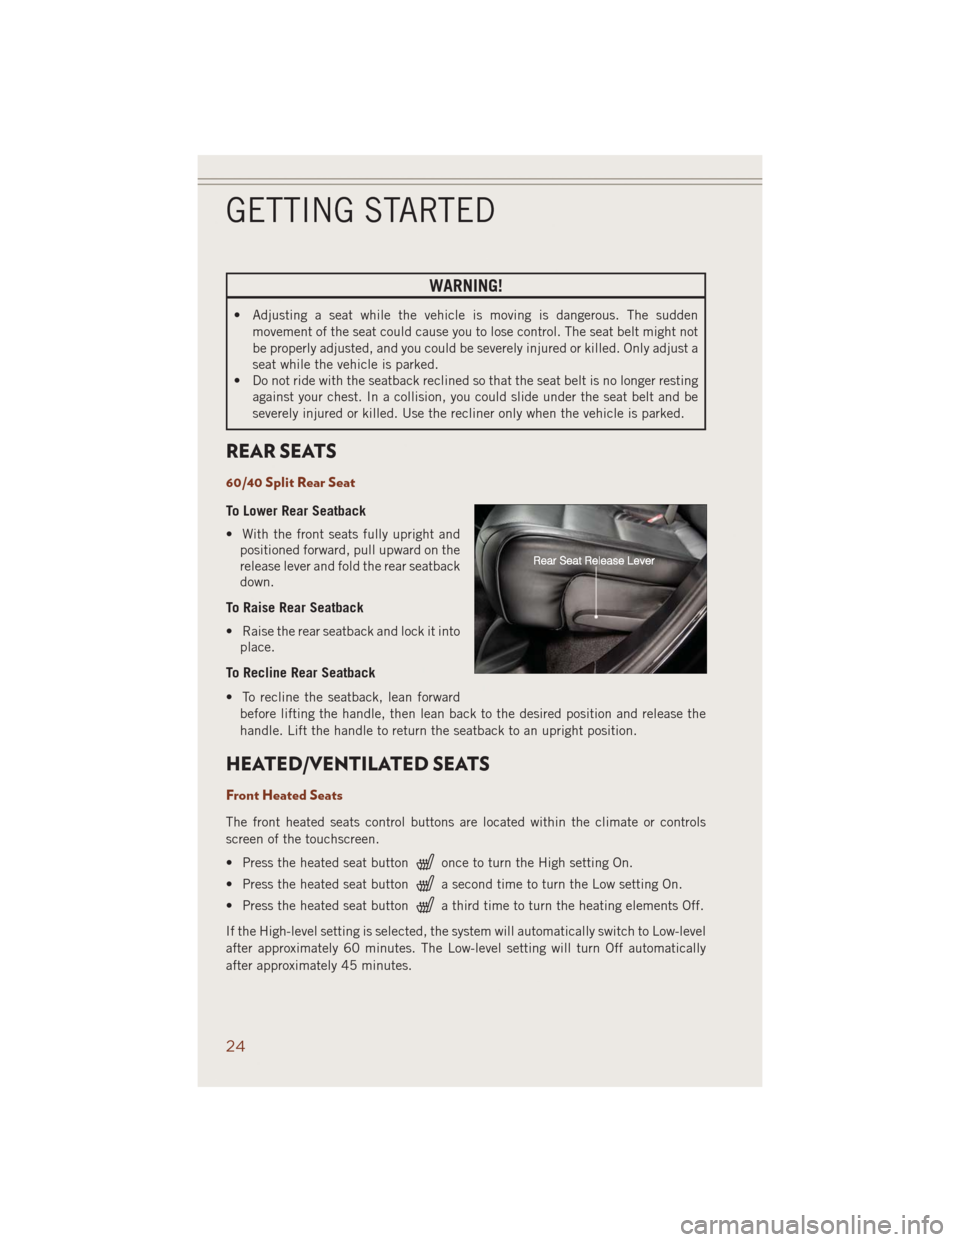
To Lower Rear Seatback
• With the front seats fully upright and
positioned forward, pull upward on the
release lever and fold the rear seatback
down.
To Raise Rear Seatback
• Raise the rear seatback and lock it into
place.
To Recline Rear Seatback
• To recline the seatback, lean forward
before lifting the handle, then lean back to the desired position and release the
handle. Lift the handle to return the seatback to an upright position.
HEATED/VENTILATED SEATS
Front Heated Seats
The front heated seats control buttons are located within the climate or controls
screen of the touchscreen.
• Press the heated seat button
once to turn the High setting On.
• Press the heated seat button
a second time to turn the Low setting On.
• Press the heated seat button
a third time to turn the heating elements Off.
If the High-level setting is selected, the system will automatically switch to Low-level
after approximately 60 minutes. The Low-level setting will turn Off automatically
after approximately 45 minutes.
GETTING STARTED
24
Page 28 of 220
WARNING!
• Persons who are unable to feel pain to the skin because of advanced age,
chronic illness, diabetes, spinal cord injury, medication, alcohol use, exhaus-
tion or other physical conditions must exercise care when using the seat heater.
It may cause burns even at low temperatures, especially if used for long periods
of time.
• Do not place anything on the seat that insulates against heat, such as a blanket
or cushion. This may cause the seat heater to overheat. Sitting in a seat that
has been overheated could cause serious burns due to the increased surface
temperature of the seat.
HEATED STEERING WHEEL
The steering wheel contains a heating element that heats the steering wheel to one
temperature setting.
The heated steering wheel control button is located within the climate or controls
screen of the touchscreen.
• Press the heated steering wheel button
once to turn the heating element On.
• Press the heated steering wheel button
a second time to turn the heating
element Off.
Once the heated steering wheel has been turned on, it will operate for approximately
58 to 70 minutes before automatically shutting off. The heated steering wheel can
shut off early or may not turn on when the steering wheel is already warm.
NOTE:
Vehicle Equipped With Remote Start
On models that are equipped with remote start, this feature can be programmed to come
on during a remote start through the Uconnect®system. Refer to “Uconnect®Settings”
in “Understanding Your Instrument Panel” in the Owner's Manual on the DVD.
WARNING!
• Persons who are unable to feel pain to the skin because of advanced age,
chronic illness, diabetes, spinal cord injury, medication, alcohol use, exhaus-
tion, or other physical conditions must exercise care when using the steering
wheel heater. It may cause burns even at low temperatures, especially if used
for long periods.
• Do not place anything on the steering wheel that insulates against heat, such
as a blanket or steering wheel covers of any type and material. This may cause
the steering wheel heater to overheat.
GETTING STARTED
26
Page 29 of 220
TILT/TELESCOPING STEERING COLUMN
Manual Tilt/Telescoping Steering Column
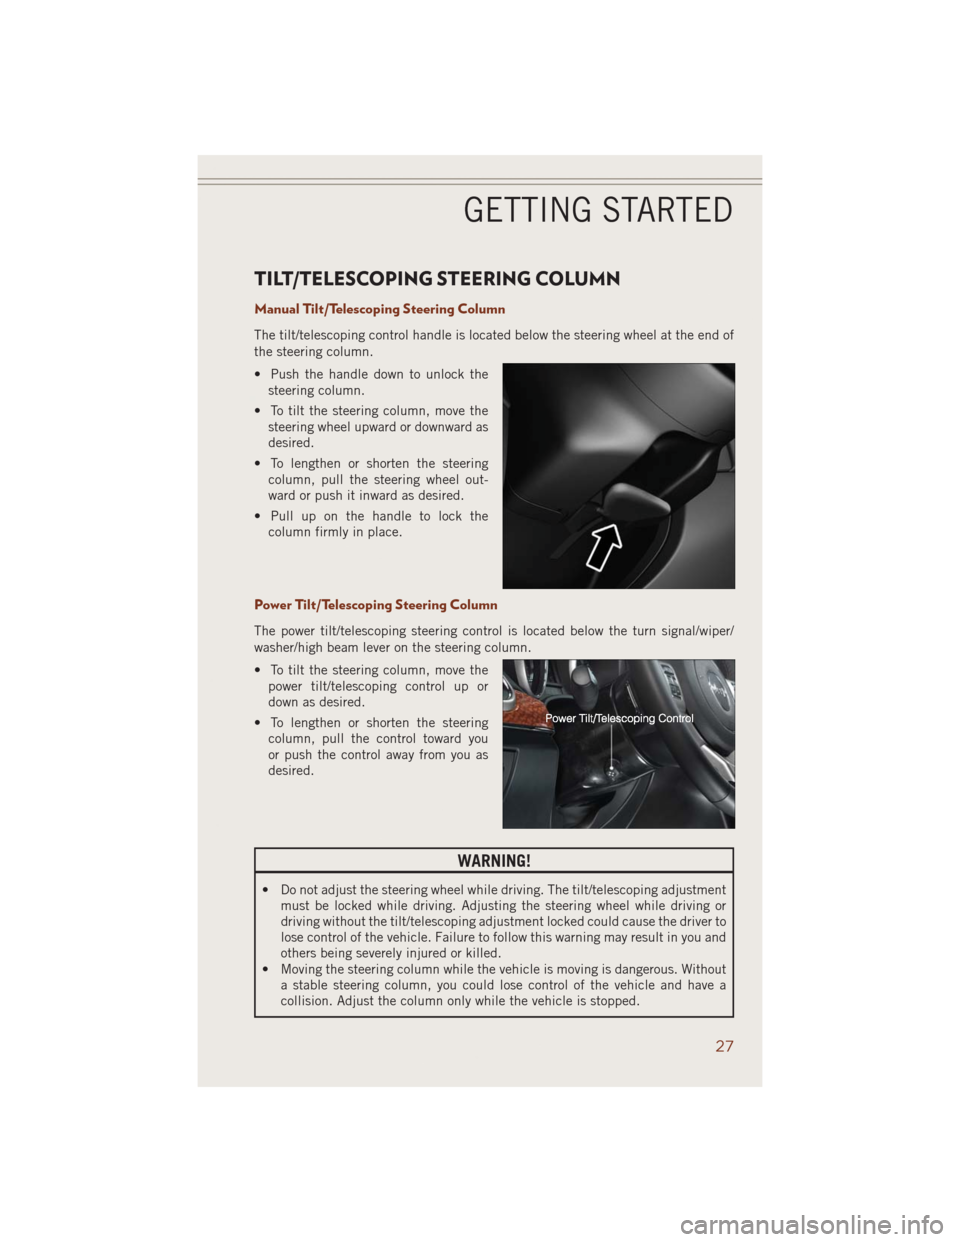
The tilt/telescoping control handle is located below the steering wheel at the end of
the steering column.
• Push the handle down to unlock the
steering column.
• To tilt the steering column, move the
steering wheel upward or downward as
desired.
• To lengthen or shorten the steering
column, pull the steering wheel out-
ward or push it inward as desired.
• Pull up on the handle to lock the
column firmly in place.
Power Tilt/Telescoping Steering Column
The power tilt/telescoping steering control is located below the turn signal/wiper/
washer/high beam lever on the steering column.
• To tilt the steering column, move the
power tilt/telescoping control up or
down as desired.
• To lengthen or shorten the steering
column, pull the control toward you
or push the control away from you as
desired.
WARNING!
• Do not adjust the steering wheel while driving. The tilt/telescoping adjustment
must be locked while driving. Adjusting the steering wheel while driving or
driving without the tilt/telescoping adjustment locked could cause the driver to
lose control of the vehicle. Failure to follow this warning may result in you and
others being severely injured or killed.
• Moving the steering column while the vehicle is moving is dangerous. Without
a stable steering column, you could lose control of the vehicle and have a
collision. Adjust the column only while the vehicle is stopped.
GETTING STARTED
27
Page 35 of 220
Metric Speed (km/h)
• Pressing the SET+button once will result in a 1 km/h increase in set speed. Each
subsequent tap of the button results in an increase of 1 km/h.
• If the button is continually pressed, the set speed will continue to increase until
the button is released, then the new set speed will be established.
To Decrease Speed
• When the Electronic Speed Control is set, you can decrease speed by pushing the
SET-button.
The speed decrement shown is dependant on the speed of U.S. (mph) or Metric
(km/h) units:
U.S. Speed (mph)
• Pressing the SET-button once will result in a 1 mph decrease in set speed. Each
subsequent tap of the button results in a decrease of 1 mph.
• If the button is continually pressed, the set speed will continue to decrease until
the button is released, then the new set speed will be established.
Metric Speed (km/h)
• Pressing the SET-button once will result in a 1 km/h decrease in set speed. Each
subsequent tap of the button results in a decrease of 1 km/h.
• If the button is continually pressed, the set speed will continue to decrease until
the button is released, then the new set speed will be established.
Resume
• To resume a previously selected set speed in memory, push the RES button and
release.
Cancel
• Push the CANCEL button, or apply the brakes to cancel the set speed and
maintain the set speed memory.
• Push the ON/OFF button to turn the system off and erase the set speed memory.
WARNING!
Leaving the Electronic Speed Control system on when not in use is dangerous. You
could accidentally set the system or cause it to go faster than you want. You could
lose control and have an accident. Always leave the system OFF when you are not
using it.
OPERATING YOUR VEHICLE
33
Page 38 of 220
FORWARD COLLISION WARNING (FCW) WITH
MITIGATION
The Forward Collision Warning (FCW) system with mitigation provides the driver with
audible warnings, visual warnings within the EVIC, and may apply a brake jerk to
warn the driver when it detects a potential frontal collision. The warnings and limited
braking are intended to provide the driver with enough time to react, avoid or mitigate
the potential collision.
NOTE:
FCW monitors the information from the forward looking sensors as well as the
Electronic Brake Controller (EBC), to calculate the probability of a forward collision.
When the system determines that a forward collision is probable, the driver will be
provided with audible and visual warnings and may provide a brake jerk warning.
If the driver does not take action based upon these progressive warnings, then the
system will provide a limited level of active braking to help slow the vehicle and
mitigate the potential forward collision. If the driver reacts to the warnings by braking
and the system determines that the driver intends to avoid the collision by braking
but has not applied sufficient brake force, the system will compensate and provide
additional brake force as required.
Turning FCW ON Or OFF
NOTE:
The default status of FCW is “On”, this allows the system to warn you of a possible
collision with the vehicle in front of you when you are farther away and it applies
limited braking. This gives you the most reaction time to avoid a possible collision.
The forward collision button is on the switch panel that is located in the center of the
instrument panel.
•
To turn the FCW system OFF, press the forward collision button once (LED turns on).
• To turn the FCW system back ON, press the forward collision button again (LED
turns off).
Changing FCW Status
The FCW feature has two settings and can be changed within the Uconnect
®System
Screen:
• Far
• Near
NOTE:
The FCW and active braking settings can only be changed when the vehicle is in
PARK.
OPERATING YOUR VEHICLE
36
Page 39 of 220
Far
The default status of FCW is the “Far” setting.
The far setting provides warnings for potential collisions more distant in front of the
vehicle, allowing the driver to have the most reaction time to avoid a collision.
This setting is designed to provide early warnings per NHTSA (National Highway
Traffic Safety Administration) recommendations.
More cautious drivers that do not mind frequent warnings may prefer this setting.
NOTE:
This setting gives you the most reaction time.
Near
Changing the FCW status to the “Near” setting, allows the system to warn you of a
potential frontal collision when you are much closer.
This setting provides less reaction time than the “Far” setting, which allows for a
more dynamic driving experience.
More dynamic or aggressive drivers that want to avoid frequent warnings may prefer
this setting.
Off
Changing the FCW status to “Off” prevents the system from warning you of a possible
collision with the vehicle in front of you.
Turning Active Braking ON Or OFF
The Active Braking feature has two settings and can be changed within the
Uconnect
®System Screen:
•On
• Off
Changing the Active Braking status to “Off” prevents the system from providing
limited autonomous braking, or additional brake support if the driver is not braking
adequately in the event of a potential frontal collision.
NOTE:
If FCW is set to “Off”, “FCW OFF” will be displayed in the EVIC.
Refer to the Owner's Manual on the DVD for further details.
WARNING!
Forward Collision Warning (FCW) is not intended to avoid a collision on its own, nor
can FCW detect every type of potential collision. The driver has the responsibility
to avoid a collision by controlling the vehicle via braking and steering. Failure to
follow this warning could lead to serious injury or death.
OPERATING YOUR VEHICLE
37
Page 44 of 220
SYNC Temperature Soft-Key
• Touch the “SYNC” soft-key on the Uconnect®radio to control the driver and
passenger temperatures simultaneously. Touch the “SYNC” soft-key a second time
to control the temperatures individually.
Air Recirculation
• Use Recirculation for maximum A/C operation.
• For window defogging, turn the recirculation button off.
• If the recirculation button is pushed while in the AUTO mode, the indicator light
may flash three times to indicate the cabin air is being controlled automatically.
Heated Mirrors
The mirrors are heated to melt frost or ice. This feature is activated whenever you turn
on the rear window defroster.
PARKSENSE® FRONT AND REAR PARK ASSIST
ParkSense®can be enabled and disabled by pressing the ParkSense®switch located
below the climate controls, on the switch panel.
The four ParkSense
®sensors, located in the rear fascia/bumper, monitor the area
behind the vehicle that is within the sensors’ field of view. The sensors can detect
obstacles from approximately 12 in (30 cm) up to 79 in (200 cm) from the rear
fascia/bumper in the horizontal direction, depending on the location, type and
orientation of the obstacle.
The six ParkSense
®sensors, located in the front fascia/bumper, monitor the area in
front of the vehicle that is within the sensors’ field of view. The sensors can detect
obstacles from approximately 12 in (30 cm) up to 47 in (120 cm) from the front
fascia/bumper in the horizontal direction, depending on the location, type and
orientation of the obstacle.
When an object is detected within 6.5 ft (2 m) behind the rear bumper while the
vehicle is in REVERSE, a warning will display in the Electronic Vehicle Information
Center (EVIC) and a chime will sound (when Sound and Display is selected from the
Customer Programmable Features section of the Uconnect
®System screen). As the
vehicle moves closer to the object, the chime rate will change from single 1/2 second
tone (for rear only), to slow (for rear only), to fast, to continuous.
Refer to your Owner's Manual on the DVD for further details.
OPERATING YOUR VEHICLE
42
Page 45 of 220
Cleaning The ParkSense® Sensors
If “CLEAN PARK ASSIST SENSORS” appears in the Electronic Vehicle Information
Center (EVIC), clean the ParkSense®sensors with water, car wash soap and a soft
cloth. Do not use rough or hard cloths. Do not scratch or poke the sensors. Otherwise,
you could damage the sensors.
NOTE:
When the Instrument Cluster reads either Clean Sensor or Blinded, please clean off
the bumper sensors to see if the condition is corrected.
PARKVIEW® REAR BACK-UP CAMERA
You can see an on-screen image of the rear of your vehicle whenever the shift lever is
put into REVERSE. The ParkView®Rear Back-Up Camera image will be displayed on
the radio display screen, located on the center stack of the instrument panel.
If the radio display screen appears foggy, clean the camera lens located on the rear
of the vehicle above the rear license plate.
Refer to your Owner's Manual on the DVD for further details.
WARNING!
Drivers must be careful when backing up; even when using the ParkView®Rear
Back-Up Camera. Always check carefully behind your vehicle, and be sure to
check for pedestrians, animals, other vehicles, obstructions, or blind spots before
backing up. You must continue to pay attention while backing up. Failure to do so
can result in serious injury or death.
OPERATING YOUR VEHICLE
43
Page 46 of 220
BLIND SPOT MONITORING
The Blind Spot Monitoring (BSM) system uses two radar-based sensors, located
inside the rear bumper fascia, to detect Highway licensable vehicles (automobiles,
trucks, motorcycles etc.) that enter the blind spot zones from the rear/front/side of
the vehicle.
The Blind Spot Monitoring (BSM) system warning light, located in the outside
mirrors, will illuminate if a vehicle moves into a blind spot zone.
The BSM system can also be configured to sound an audible (chime) alert and mute
the radio to notify you of objects that have entered the detection zones.
Refer to your Owner's Manual on the DVD for further details.
POWER SUNROOF
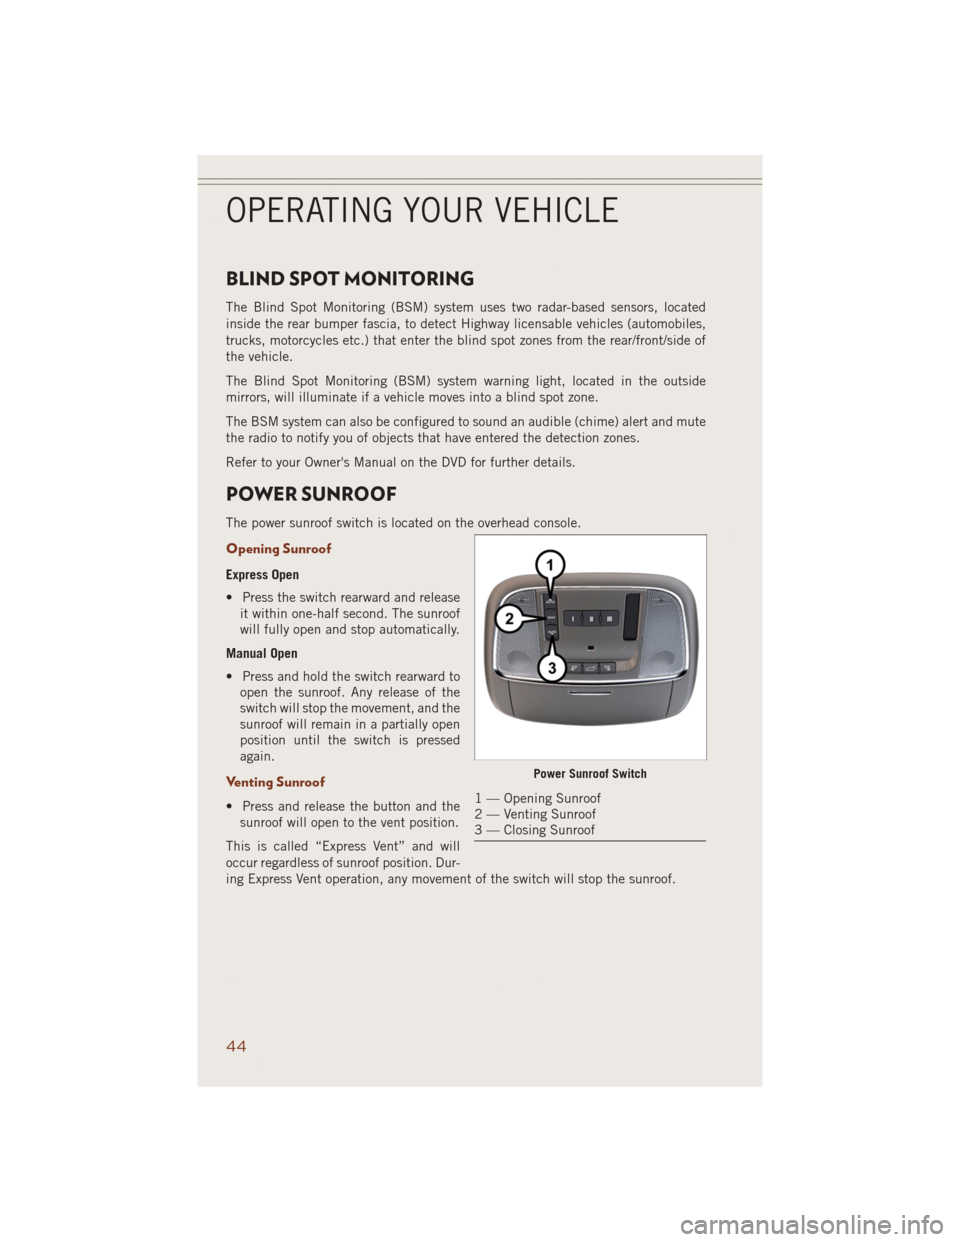
The power sunroof switch is located on the overhead console.
Opening Sunroof
Express Open
• Press the switch rearward and release
it within one-half second. The sunroof
will fully open and stop automatically.
Manual Open
• Press and hold the switch rearward to
open the sunroof. Any release of the
switch will stop the movement, and the
sunroof will remain in a partially open
position until the switch is pressed
again.
Venting Sunroof
• Press and release the button and the
sunroof will open to the vent position.
This is called “Express Vent” and will
occur regardless of sunroof position. Dur-
ing Express Vent operation, any movement of the switch will stop the sunroof.
Power Sunroof Switch
1 — Opening Sunroof
2 — Venting Sunroof
3 — Closing Sunroof
OPERATING YOUR VEHICLE
44