window JEEP GRAND CHEROKEE 2015 WK2 / 4.G Owner's Manual
[x] Cancel search | Manufacturer: JEEP, Model Year: 2015, Model line: GRAND CHEROKEE, Model: JEEP GRAND CHEROKEE 2015 WK2 / 4.GPages: 717, PDF Size: 18.54 MB
Page 126 of 717
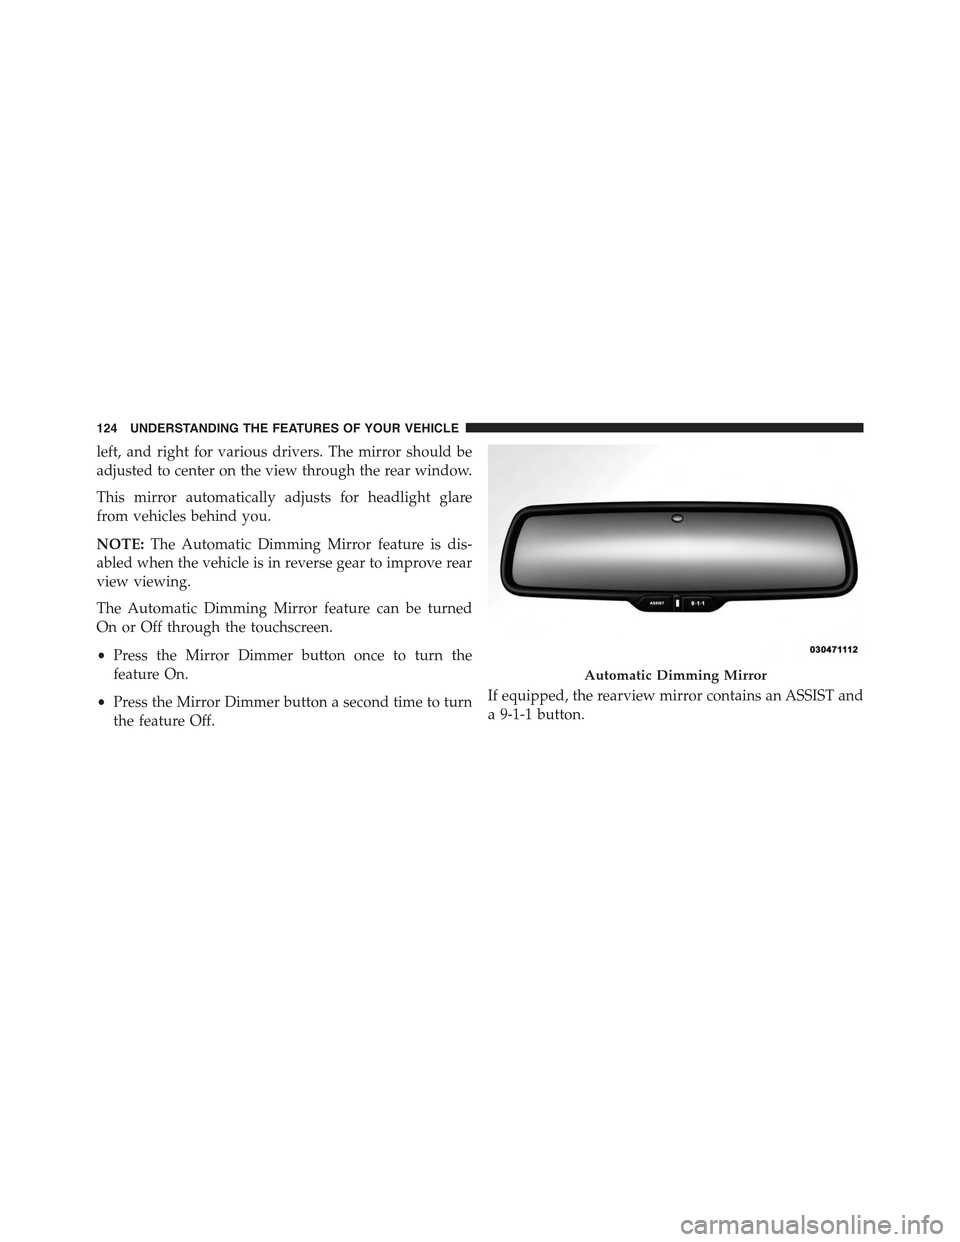
left, and right for various drivers. The mirror should be
adjusted to center on the view through the rear window.
This mirror automatically adjusts for headlight glare
from vehicles behind you.
NOTE:The Automatic Dimming Mirror feature is dis-
abled when the vehicle is in reverse gear to improve rear
view viewing.
The Automatic Dimming Mirror feature can be turned
On or Off through the touchscreen.
•Press the Mirror Dimmer button once to turn the
feature On.
•Press the Mirror Dimmer button a second time to turn
the feature Off.
If equipped, the rearview mirror contains an ASSIST and
a 9-1-1 button.
Automatic Dimming Mirror
124 UNDERSTANDING THE FEATURES OF YOUR VEHICLE
Page 135 of 717
Power mirror preselected positions can be controlled by
the optional Memory Seat Feature. Refer to “Driver
Memory Seat” in “Understanding The Features Of Your
Vehicle” for further information.
Outside Automatic Dimming Mirrors — If
Equipped
The outside mirrors will automatically adjust for glare
from vehicles behind you. This feature is controlled by
the inside automatic dimming mirror. The mirrors will
automatically adjust for headlight glare when the inside
mirror adjusts.
Heated Mirrors — If Equipped
These mirrors are heated to melt frost or ice. This
feature can be activated whenever you turn on the
rear window defroster (if equipped). Refer to “Rear
Window Features” in “Understanding The Features Of
Your Vehicle” for further information.
Tilt Mirrors In Reverse (Available With Memory
Seat Only) — If Equipped
Tilt Mirrors in Reverse provides automatic outside mirror
positioning which will aid the drivers view of the ground
rearward of the front doors. Outside mirrors will move
slightly downward from the present position when the
vehicle is shifted into REVERSE. Outside mirrors will
then return to the original position when the vehicle is
shifted out of REVERSE position. Each stored memory
seat setting will have an associated Tilt Mirrors in Re-
verse position.
NOTE:The Tilt Mirrors in Reverse feature is not turned
on when delivered from the factory. The Tilt Mirrors in
Reverse feature can be turned on and off using the
Uconnect® System. Refer to “Uconnect® Settings/
Customer Programmable Features” in “Understanding
Your Instrument Panel” for further information.
3
UNDERSTANDING THE FEATURES OF YOUR VEHICLE 133
Page 180 of 717
WINDSHIELD WIPERS AND WASHERS
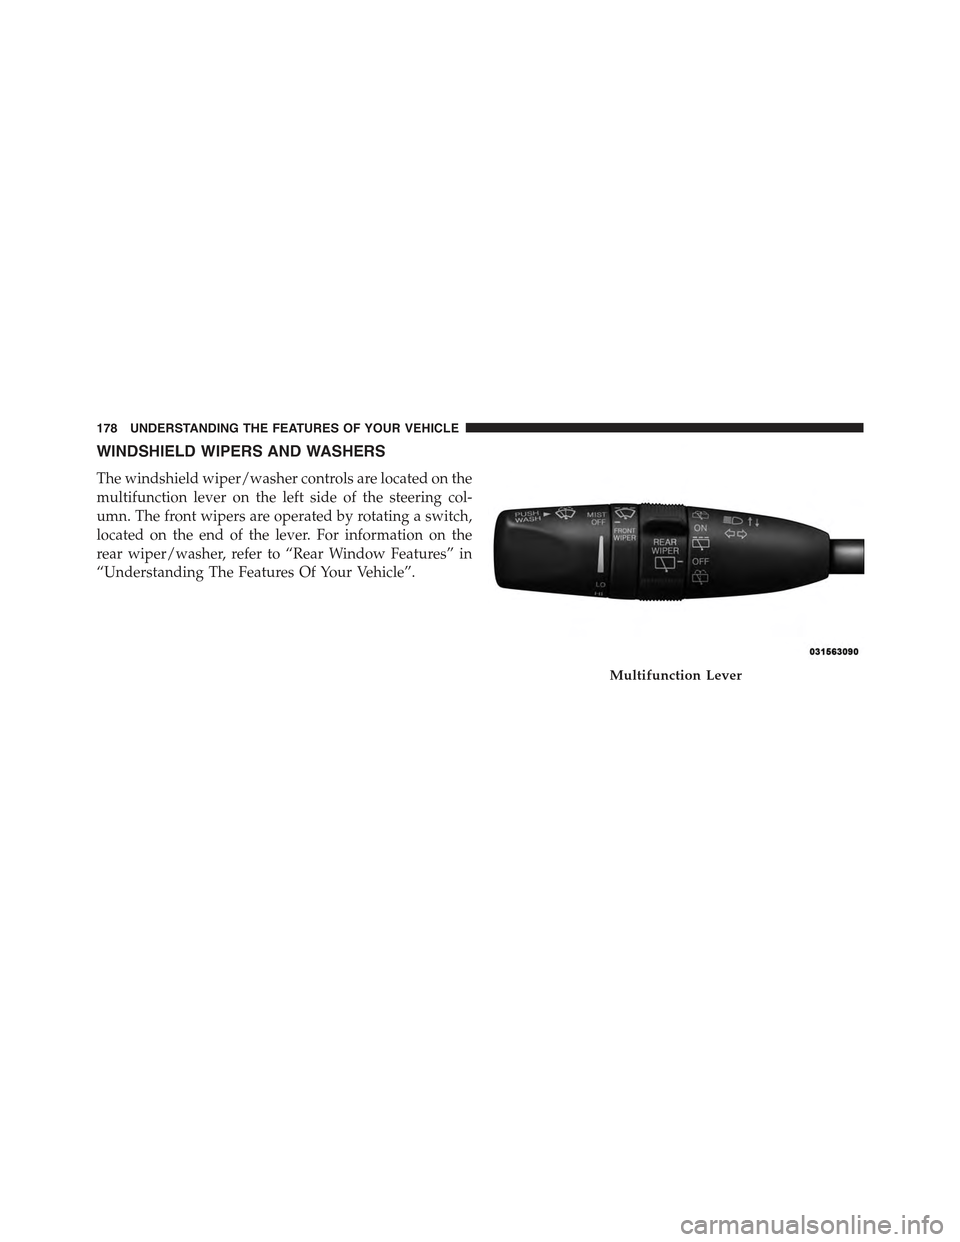
The windshield wiper/washer controls are located on the
multifunction lever on the left side of the steering col-
umn. The front wipers are operated by rotating a switch,
located on the end of the lever. For information on the
rear wiper/washer, refer to “Rear Window Features” in
“Understanding The Features Of Your Vehicle”.
Multifunction Lever
178 UNDERSTANDING THE FEATURES OF YOUR VEHICLE
Page 261 of 717
Pinch Protect Feature
This feature will detect an obstruction in the opening of
the sunroof during Express Close operation. If an ob-
struction in the path of the sunroof is detected, the
sunroof will automatically retract. Remove the obstruc-
tion if this occurs. Next, press the switch forward and
release to Express Close.
NOTE:If three consecutive sunroof close attempts result
in Pinch Protect reversals, the fourth close attempt will be
a Manual Close movement with Pinch Protect disabled.
Venting Sunroof — Express
Press and release the Vent button within one half second
and the sunroof will open to the vent position. This is
called “Express Vent” and it will occur regardless of
sunroof position. During Express Vent operation, any
movement of the switch will stop the sunroof.
Sunshade Operation
The sunshade can be opened manually. However, the
sunshade will open automatically as the sunroof opens.
NOTE:The sunshade cannot be closed if the sunroof is
open.
Wind Buffeting
Wind buffeting can be described as the perception of
pressure on the ears or a helicopter-type sound in the
ears. Your vehicle may exhibit wind buffeting with the
windows down, or the sunroof (if equipped) in certain
open or partially open positions. This is a normal occur-
rence and can be minimized. If the buffeting occurs with
the rear windows open, open the front and rear windows
together to minimize the buffeting. If the buffeting occurs
with the sunroof open, adjust the sunroof opening to
minimize the buffeting or open any window.
3
UNDERSTANDING THE FEATURES OF YOUR VEHICLE 259
Page 266 of 717
sunroof will automatically retract. Remove the obstruc-
tion if this occurs. Next, press the switch forward and
release to Express Close.
NOTE:If three consecutive sunroof close attempts result
in Pinch Protect reversals, the fourth close attempt will be
a Manual Close movement with Pinch Protect disabled.
Wind Buffeting
Wind buffeting can be described as the perception of
pressure on the ears or a helicopter-type sound in the
ears. Your vehicle may exhibit wind buffeting with the
windows down, or the sunroof (if equipped) in certain
open or partially open positions. This is a normal occur-
rence and can be minimized. If the buffeting occurs with
the rear windows open, open the front and rear windows
together to minimize the buffeting. If the buffeting occurs
with the sunroof open, adjust the sunroof opening to
minimize the buffeting or open any window.
Sunroof Maintenance
Use only a non-abrasive cleaner and a soft cloth to clean
the glass panel.
Ignition Off Operation
NOTE:
•The power sunroof switch can remain active for up to
approximately ten minutes after the vehicles ignition is
cycled to the Off position. Opening either front door
will cancel this feature.
•This feature is programmable using the Uconnect®
System. Refer to “Uconnect® Settings” in “Under-
standing Your Instrument Panel” for further informa-
tion.
Sunroof Fully Closed
Press the switch forward and release to ensure that the
sunroof is fully closed.
264 UNDERSTANDING THE FEATURES OF YOUR VEHICLE
Page 284 of 717
REAR WINDOW FEATURES
Rear Window Wiper/Washer
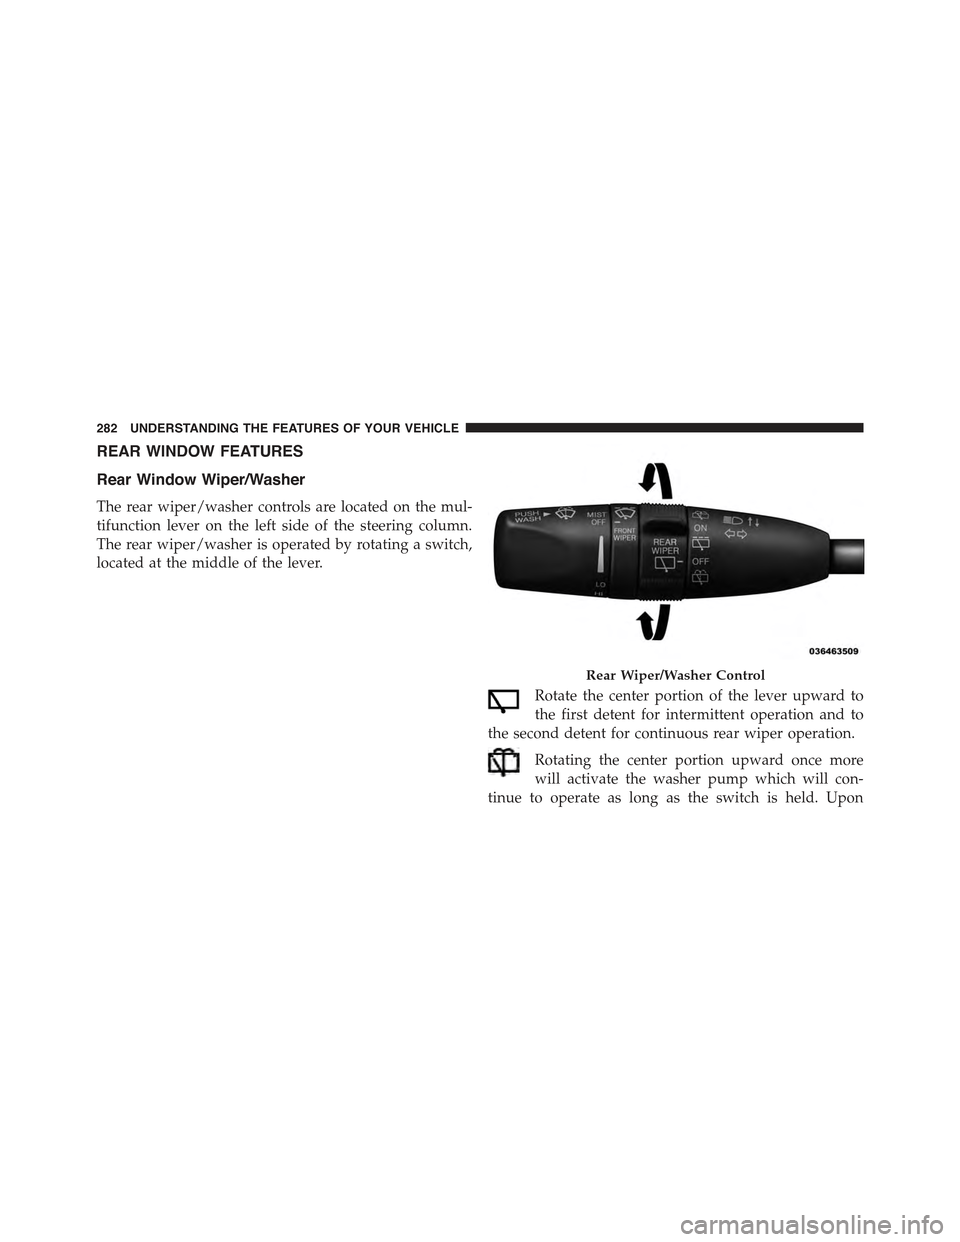
The rear wiper/washer controls are located on the mul-
tifunction lever on the left side of the steering column.
The rear wiper/washer is operated by rotating a switch,
located at the middle of the lever.
Rotate the center portion of the lever upward to
the first detent for intermittent operation and to
the second detent for continuous rear wiper operation.
Rotating the center portion upward once more
will activate the washer pump which will con-
tinue to operate as long as the switch is held. Upon
Rear Wiper/Washer Control
282 UNDERSTANDING THE FEATURES OF YOUR VEHICLE
Page 285 of 717
release of the switch, the wipers will resume the continu-
ous rear wiper operation. When this rotary control is in
the OFF position, rotating it downward will activate the
rear washer pump which will continue to operate as long
as the switch is held. Once the switch is released it will
return to the OFF position and the wipers will cycle
several times before returning to the parked position.
NOTE:As a protective measure, the pump will stop if the
switch is held for more than 20 seconds. Once the switch
is released the pump will resume normal operation.
If the rear wiper is operating when the ignition is turned
OFF, the wiper will automatically return to the “park”
position.
Rear Window Defroster
The rear window defroster button is located on
the climate control panel. Press this button to turn
on the rear window defroster and the heated outside
mirrors (if equipped). An indicator in the button will
illuminate when the rear window defroster is on. The
rear window defroster automatically turns off after ap-
proximately 10 minutes. For an additional five minutes of
operation, press the button a second time.
NOTE:To prevent excessive battery drain, use the rear
window defroster only when the engine is operating.
CAUTION!
Failure to follow these cautions can cause damage to
the heating elements:
•Use care when washing the inside of the rear
window. Do not use abrasive window cleaners on
the interior surface of the window. Use a soft cloth
and a mild washing solution, wiping parallel to the
heating elements. Labels can be peeled off after
soaking with warm water.
(Continued)
3
UNDERSTANDING THE FEATURES OF YOUR VEHICLE 283
Page 286 of 717
CAUTION!(Continued)
•Do not use scrapers, sharp instruments, or abrasive
window cleaners on the interior surface of the
window.
•Keep all objects a safe distance from the window.
ROOF LUGGAGE RACK — IF EQUIPPED
The crossbars and siderails are designed to carry the
weight on vehicles equipped with a luggage rack. The
load must not exceed 150 lbs (68 kg), and should be
uniformly distributed over the luggage rack crossbars.
NOTE:If not equipped with crossbars, your authorized
dealer can order and install MOPAR® crossbars built
specifically for this roof rack system.
Distribute cargo weight evenly on the roof rack crossbars.
The roof rack does not increase the total load carrying
capacity of the vehicle. Be sure the total load of cargo
inside the vehicle plus that on the external rack does not
exceed the maximum vehicle load capacity.
To move the crossbars, loosen the attachments, located at
the upper edge of each crossbar, approximately eight
turns using the anti-theft wrench provided with the
MOPAR® crossbars. Then, move the crossbar to the
desired position, keeping the crossbars parallel to the
rack frame. Once the crossbar is in the desired position,
retighten the with the wrench to lock the crossbar into
position.
NOTE:
•To help control wind noise when the crossbars are not
in use, place the front and rear crossbars approxi-
mately 24 in (61 cm) apart. Optimal noise reduction
can then be achieved by adjusting the front crossbar
forward or aft using increments of 1 in (2.5 cm).
284 UNDERSTANDING THE FEATURES OF YOUR VEHICLE
Page 335 of 717
“60,” or “90” seconds to select your desired time interval.
Press the back arrow button on the touchscreen to return
to the previous menu.
•Engine Off Power Delay
When this feature is selected, the power window
switches, radio, Uconnect® phone system (if equipped),
DVD video system (if equipped), power sunroof (if
equipped), and power outlets will remain active for up to
10 minutes after the ignition is cycled to OFF. Opening
either front door will cancel this feature. Press the “En-
gine Off Power Delay” button on the touchscreen and
choose from “0 sec,” “45 sec,” “5 min” or “10 min” to
select your desired time interval. Then press the arrow
back button on the touchscreen.
•Auto Entry/Exit — If Equipped
When this feature is selected, it automatically lowers the
vehicle ride height position when shifted into park. Press
the “Auto Entry/Exit” button on the touchscreen and
choose from “On” or “Off.” Press the back arrow button
on the touchscreen to return to the previous menu.
Suspension — If Equipped
After pressing the “Suspension” button on the touch-
screen the following settings will be available:
•Auto Entry/Exit Suspension
When this feature is selected, the vehicle automatically
lowers from ride height position when vehicle shifted to
park for easy entry/exit. To make your selection, press
the “Auto Entry/Exit” button on the touchscreen, select
“On” or “Off” followed by pressing the back arrow
button on the touchscreen.
•Display Suspension Messages
When “All” is selected, all the Air Suspension Alerts will
be displayed. When “Warning Only” is selected only the
Air Suspension Warnings will be displayed.
4
UNDERSTANDING YOUR INSTRUMENT PANEL 333
Page 356 of 717
Engine Off Options
After pressing the Engine Off Options button on the
touchscreen the following settings will be available.
•Easy Exit Seat — If Equipped
This feature provides automatic driver seat positioning to
enhance driver mobility when entering and exiting the
vehicle. To make your selection, press the “Easy Exit
Seat” button on the touchscreen until a check-mark
appears next to setting, showing that setting has been
selected. Press the back arrow button on the touchscreen
to return to the previous menu.
•Engine Off Power Delay
When this feature is selected, the power window
switches, radio, Uconnect® phone system (if equipped),
DVD video system (if equipped), power sunroof (if
equipped), and power outlets will remain active for up to
10 minutes after the ignition is cycled to OFF. Opening
either front door will cancel this feature. To change the
Engine Off Power Delay status press the press the “+” or
“-” button to choose from “0 seconds,” “45 seconds,” “5
minutes,” or “10 minutes.” Press the back arrow button
on the touchscreen to return to the previous menu.
•Headlight Off Delay
When this feature is selected, the driver can choose to
have the headlights remain on for 0, 30, 60, or 90 seconds
when exiting the vehicle. To change the Headlight Off
Delay status press the “+” or “-” button on the touch-
screen to select your desired time interval. Press the back
arrow button on the touchscreen to return to the previous
menu.
•Auto Entry/Exit Suspension — If Equipped
When this feature is selected, the driver can choose to
automatically lower the vehicle from ride height position
when the vehicle is shifted to park. To change the mode
status press the “Auto Entry/Exit Suspension” button on
354 UNDERSTANDING YOUR INSTRUMENT PANEL