belt JEEP GRAND CHEROKEE 2017 WK2 / 4.G Service Manual
[x] Cancel search | Manufacturer: JEEP, Model Year: 2017, Model line: GRAND CHEROKEE, Model: JEEP GRAND CHEROKEE 2017 WK2 / 4.GPages: 372
Page 151 of 372
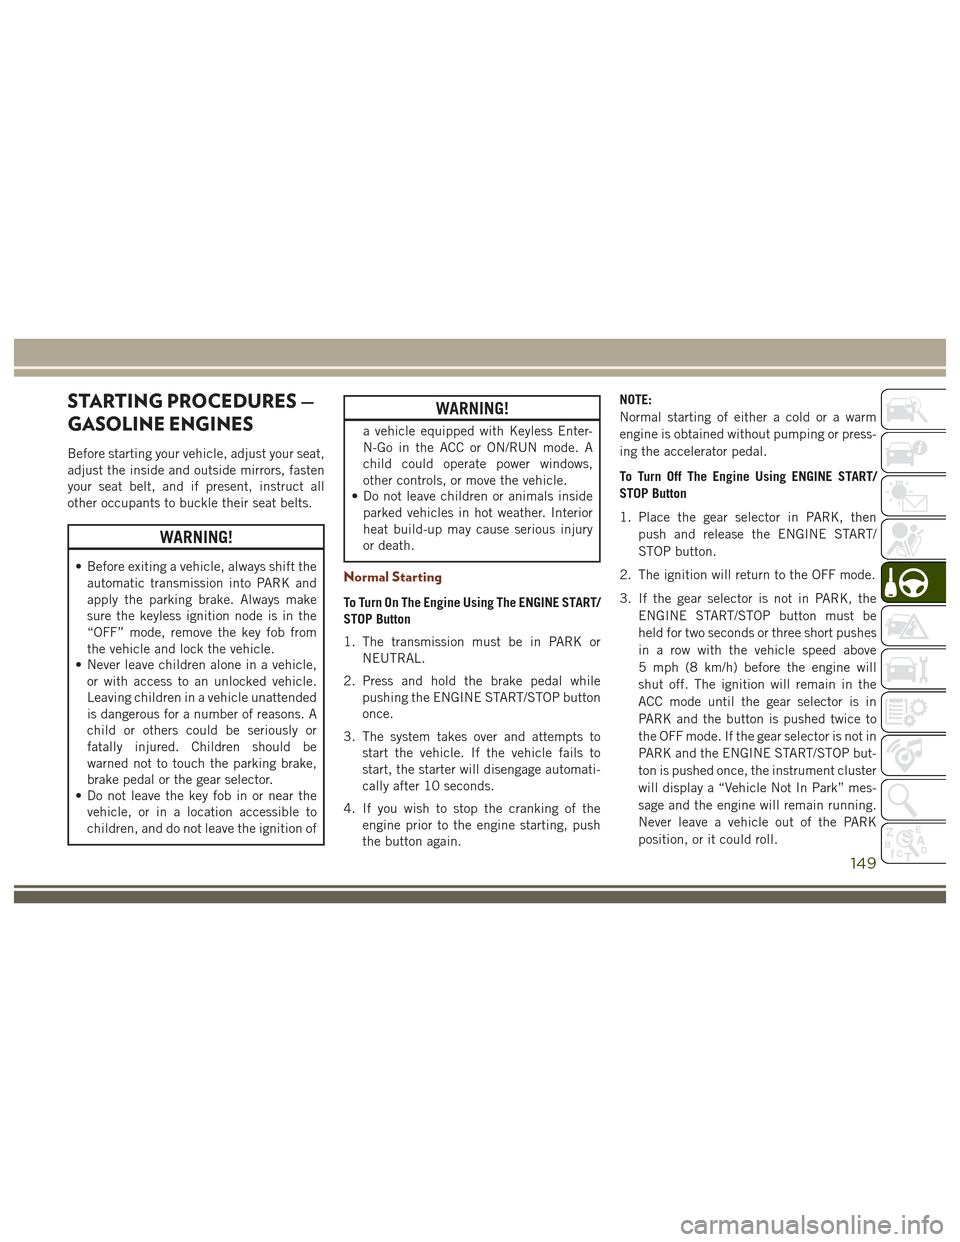
STARTING PROCEDURES —
GASOLINE ENGINES
Before starting your vehicle, adjust your seat,
adjust the inside and outside mirrors, fasten
your seat belt, and if present, instruct all
other occupants to buckle their seat belts.
WARNING!
• Before exiting a vehicle, always shift theautomatic transmission into PARK and
apply the parking brake. Always make
sure the keyless ignition node is in the
“OFF” mode, remove the key fob from
the vehicle and lock the vehicle.
• Never leave children alone in a vehicle,
or with access to an unlocked vehicle.
Leaving children in a vehicle unattended
is dangerous for a number of reasons. A
child or others could be seriously or
fatally injured. Children should be
warned not to touch the parking brake,
brake pedal or the gear selector.
• Do not leave the key fob in or near the
vehicle, or in a location accessible to
children, and do not leave the ignition of
WARNING!
a vehicle equipped with Keyless Enter-
N-Go in the ACC or ON/RUN mode. A
child could operate power windows,
other controls, or move the vehicle.
• Do not leave children or animals inside
parked vehicles in hot weather. Interior
heat build-up may cause serious injury
or death.
Normal Starting
To Turn On The Engine Using The ENGINE START/
STOP Button
1. The transmission must be in PARK or NEUTRAL.
2. Press and hold the brake pedal while pushing the ENGINE START/STOP button
once.
3. The system takes over and attempts to start the vehicle. If the vehicle fails to
start, the starter will disengage automati-
cally after 10 seconds.
4. If you wish to stop the cranking of the engine prior to the engine starting, push
the button again. NOTE:
Normal starting of either a cold or a warm
engine is obtained without pumping or press-
ing the accelerator pedal.
To Turn Off The Engine Using ENGINE START/
STOP Button
1. Place the gear selector in PARK, then
push and release the ENGINE START/
STOP button.
2. The ignition will return to the OFF mode.
3. If the gear selector is not in PARK, the ENGINE START/STOP button must be
held for two seconds or three short pushes
in a row with the vehicle speed above
5 mph (8 km/h) before the engine will
shut off. The ignition will remain in the
ACC mode until the gear selector is in
PARK and the button is pushed twice to
the OFF mode. If the gear selector is not in
PARK and the ENGINE START/STOP but-
ton is pushed once, the instrument cluster
will display a “Vehicle Not In Park” mes-
sage and the engine will remain running.
Never leave a vehicle out of the PARK
position, or it could roll.
149
Page 152 of 372
NOTE:
If the ignition is left in the ACC or RUN
(engine not running) mode and the transmis-
sion is in PARK, the system will automatically
time out after 30 minutes of inactivity and
the ignition will cycle to the OFF mode.
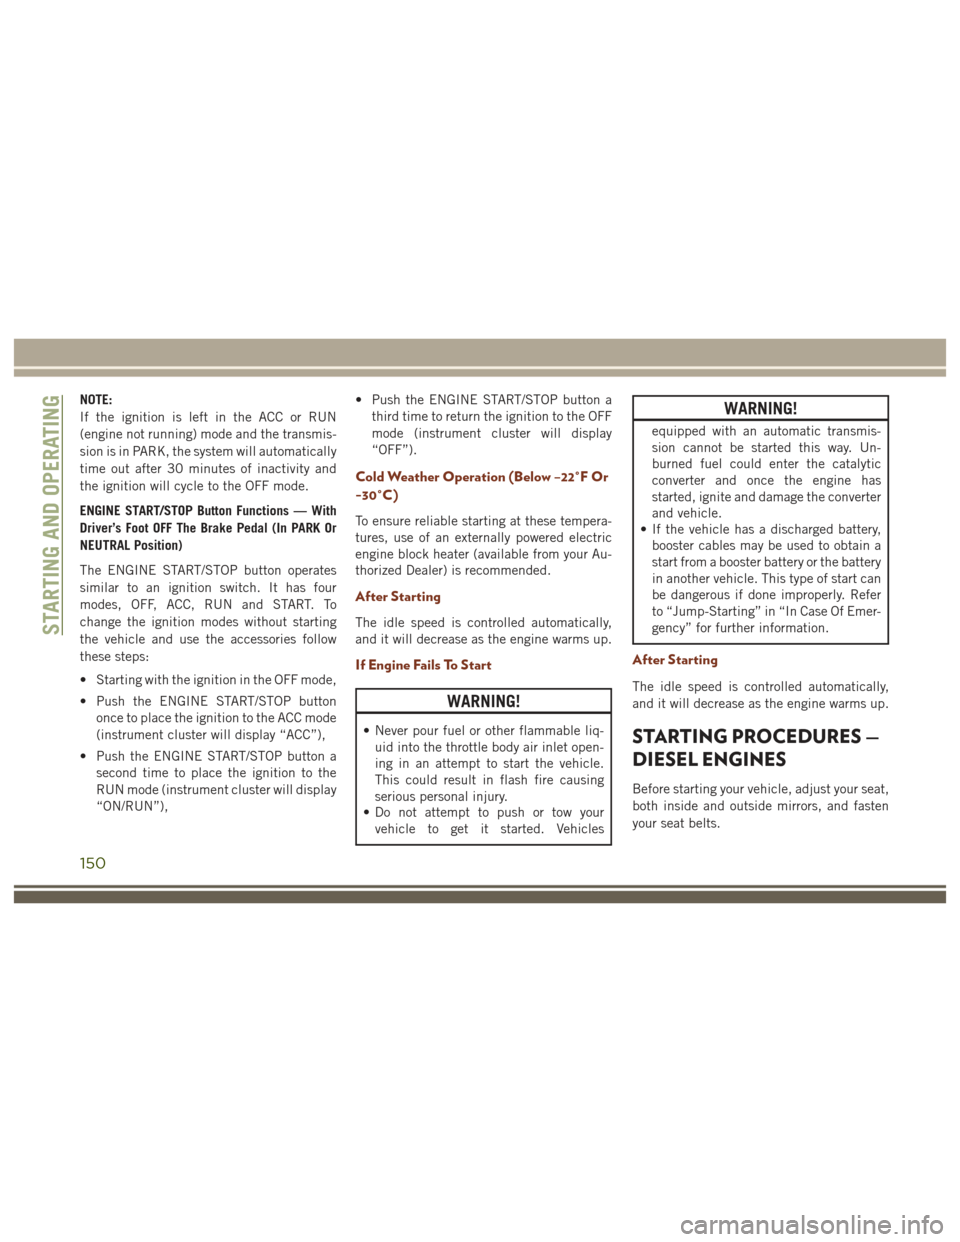
ENGINE START/STOP Button Functions — With
Driver’s Foot OFF The Brake Pedal (In PARK Or
NEUTRAL Position)
The ENGINE START/STOP button operates
similar to an ignition switch. It has four
modes, OFF, ACC, RUN and START. To
change the ignition modes without starting
the vehicle and use the accessories follow
these steps:
• Starting with the ignition in the OFF mode,
• Push the ENGINE START/STOP buttononce to place the ignition to the ACC mode
(instrument cluster will display “ACC”),
• Push the ENGINE START/STOP button a second time to place the ignition to the
RUN mode (instrument cluster will display
“ON/RUN”), • Push the ENGINE START/STOP button a
third time to return the ignition to the OFF
mode (instrument cluster will display
“OFF”).
Cold Weather Operation (Below –22°F Or
−30°C)
To ensure reliable starting at these tempera-
tures, use of an externally powered electric
engine block heater (available from your Au-
thorized Dealer) is recommended.
After Starting
The idle speed is controlled automatically,
and it will decrease as the engine warms up.
If Engine Fails To Start
WARNING!
• Never pour fuel or other flammable liq-uid into the throttle body air inlet open-
ing in an attempt to start the vehicle.
This could result in flash fire causing
serious personal injury.
• Do not attempt to push or tow your
vehicle to get it started. Vehicles
WARNING!
equipped with an automatic transmis-
sion cannot be started this way. Un-
burned fuel could enter the catalytic
converter and once the engine has
started, ignite and damage the converter
and vehicle.
• If the vehicle has a discharged battery,
booster cables may be used to obtain a
start from a booster battery or the battery
in another vehicle. This type of start can
be dangerous if done improperly. Refer
to “Jump-Starting” in “In Case Of Emer-
gency” for further information.
After Starting
The idle speed is controlled automatically,
and it will decrease as the engine warms up.
STARTING PROCEDURES —
DIESEL ENGINES
Before starting your vehicle, adjust your seat,
both inside and outside mirrors, and fasten
your seat belts.
STARTING AND OPERATING
150
Page 155 of 372
WARNING!
• Do not leave the key fob in or near thevehicle, or in a location accessible to
children, and do not leave the ignition of
a vehicle equipped with Keyless Enter-
N-Go in the ACC or ON/RUN mode. A
child could operate power windows,
other controls, or move the vehicle.
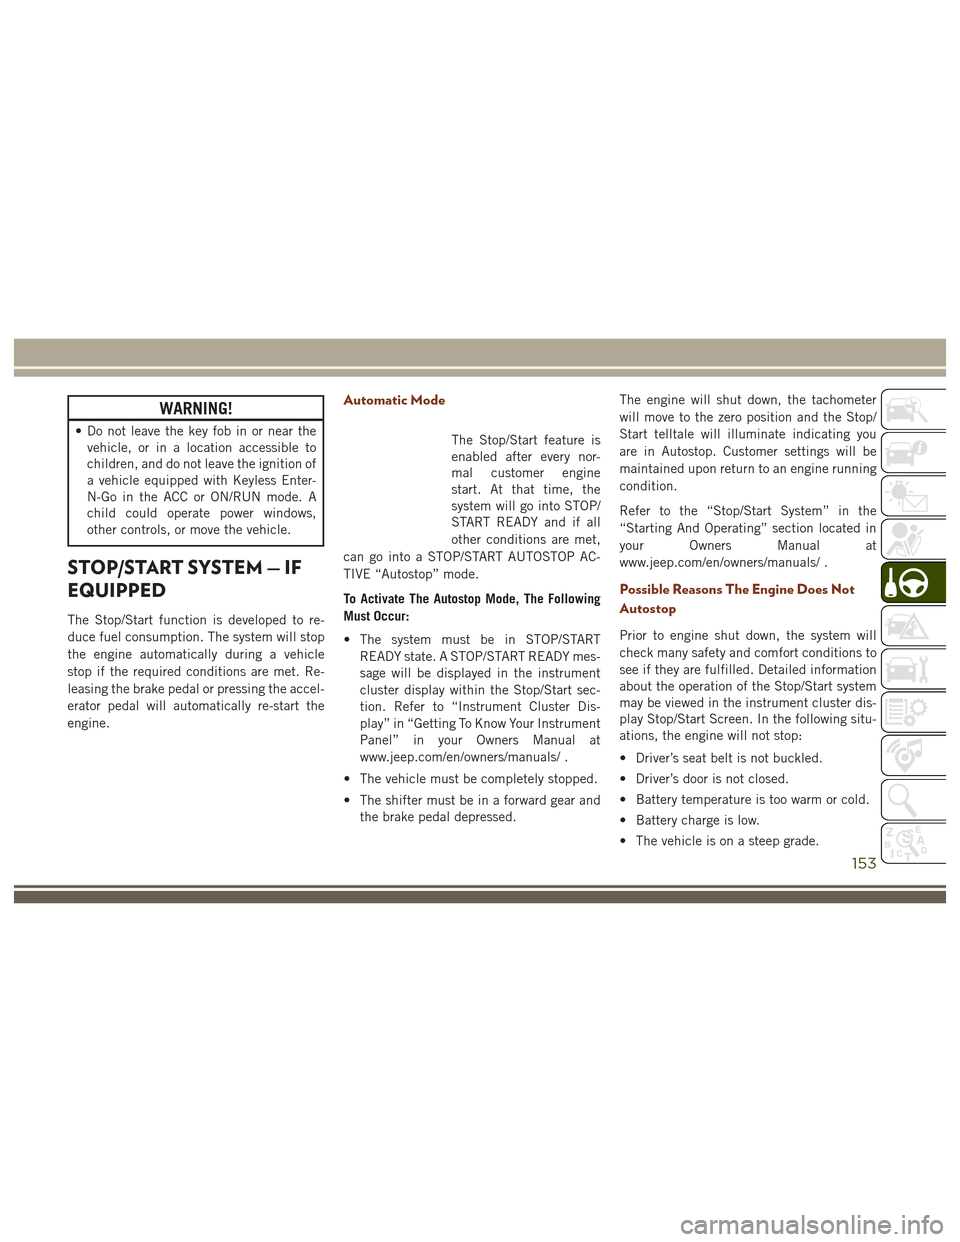
STOP/START SYSTEM — IF
EQUIPPED
The Stop/Start function is developed to re-
duce fuel consumption. The system will stop
the engine automatically during a vehicle
stop if the required conditions are met. Re-
leasing the brake pedal or pressing the accel-
erator pedal will automatically re-start the
engine.
Automatic Mode
The Stop/Start feature is
enabled after every nor-
mal customer engine
start. At that time, the
system will go into STOP/
START READY and if all
other conditions are met,
can go into a STOP/START AUTOSTOP AC-
TIVE “Autostop” mode.
To Activate The Autostop Mode, The Following
Must Occur:
• The system must be in STOP/START READY state. A STOP/START READY mes-
sage will be displayed in the instrument
cluster display within the Stop/Start sec-
tion. Refer to “Instrument Cluster Dis-
play” in “Getting To Know Your Instrument
Panel” in your Owners Manual at
www.jeep.com/en/owners/manuals/ .
• The vehicle must be completely stopped.
• The shifter must be in a forward gear and the brake pedal depressed. The engine will shut down, the tachometer
will move to the zero position and the Stop/
Start telltale will illuminate indicating you
are in Autostop. Customer settings will be
maintained upon return to an engine running
condition.
Refer to the “Stop/Start System” in the
“Starting And Operating” section located in
your Owners Manual at
www.jeep.com/en/owners/manuals/ .
Possible Reasons The Engine Does Not
Autostop
Prior to engine shut down, the system will
check many safety and comfort conditions to
see if they are fulfilled. Detailed information
about the operation of the Stop/Start system
may be viewed in the instrument cluster dis-
play Stop/Start Screen. In the following situ-
ations, the engine will not stop:
• Driver’s seat belt is not buckled.
• Driver’s door is not closed.
• Battery temperature is too warm or cold.
• Battery charge is low.
• The vehicle is on a steep grade.
153
Page 238 of 372
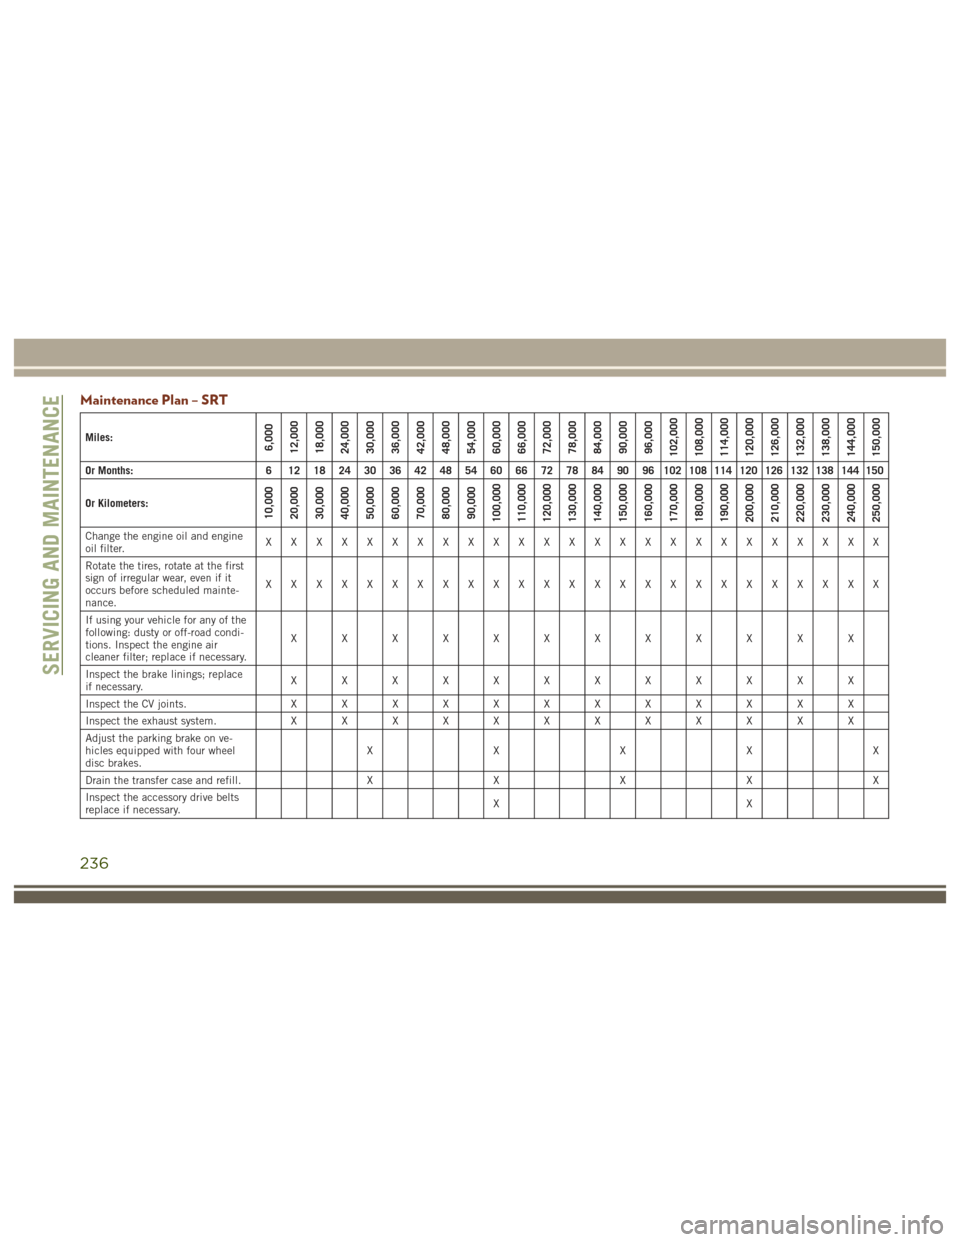
Maintenance Plan – SRT
Miles:6,000
12,000
18,000
24,000
30,000
36,000
42,000
48,000
54,000
60,000
66,000
72,000
78,000
84,000
90,000
96,000
102,000
108,000
114,000
120,000
126,000
132,000
138,000
144,000
150,000
Or Months: 6 12 18 24 30 36 42 48 54 60 66 72 78 84 90 96 102 108 114 120 126 132 138 144 150
Or Kilometers:
10,000
20,000
30,000
40,000
50,000
60,000
70,000
80,000
90,000
100,000
110,000
120,000
130,000
140,000
150,000
160,000
170,000
180,000
190,000
200,000
210,000
220,000
230,000
240,000
250,000
Change the engine oil and engine
oil filter. XXXXXXXXXXXXXXXXXXXXXXXXX
Rotate the tires, rotate at the first
sign of irregular wear, even if it
occurs before scheduled mainte-
nance. XXXXXXXXXXXXXXXXXXXXXXXXX
If using your vehicle for any of the
following: dusty or off-road condi-
tions. Inspect the engine air
cleaner filter; replace if necessary. XXXXXXXXXXXX
Inspect the brake linings; replace
if necessary. XXXXXXXXXXXX
Inspect the CV joints. X X X X X X X X X X X X
Inspect the exhaust system. X X X X X X X X X X X X
Adjust the parking brake on ve-
hicles equipped with four wheel
disc brakes. XXXXX
Drain the transfer case and refill. X X X X X
Inspect the accessory drive belts
replace if necessary. XX
SERVICING AND MAINTENANCE
236
Page 244 of 372
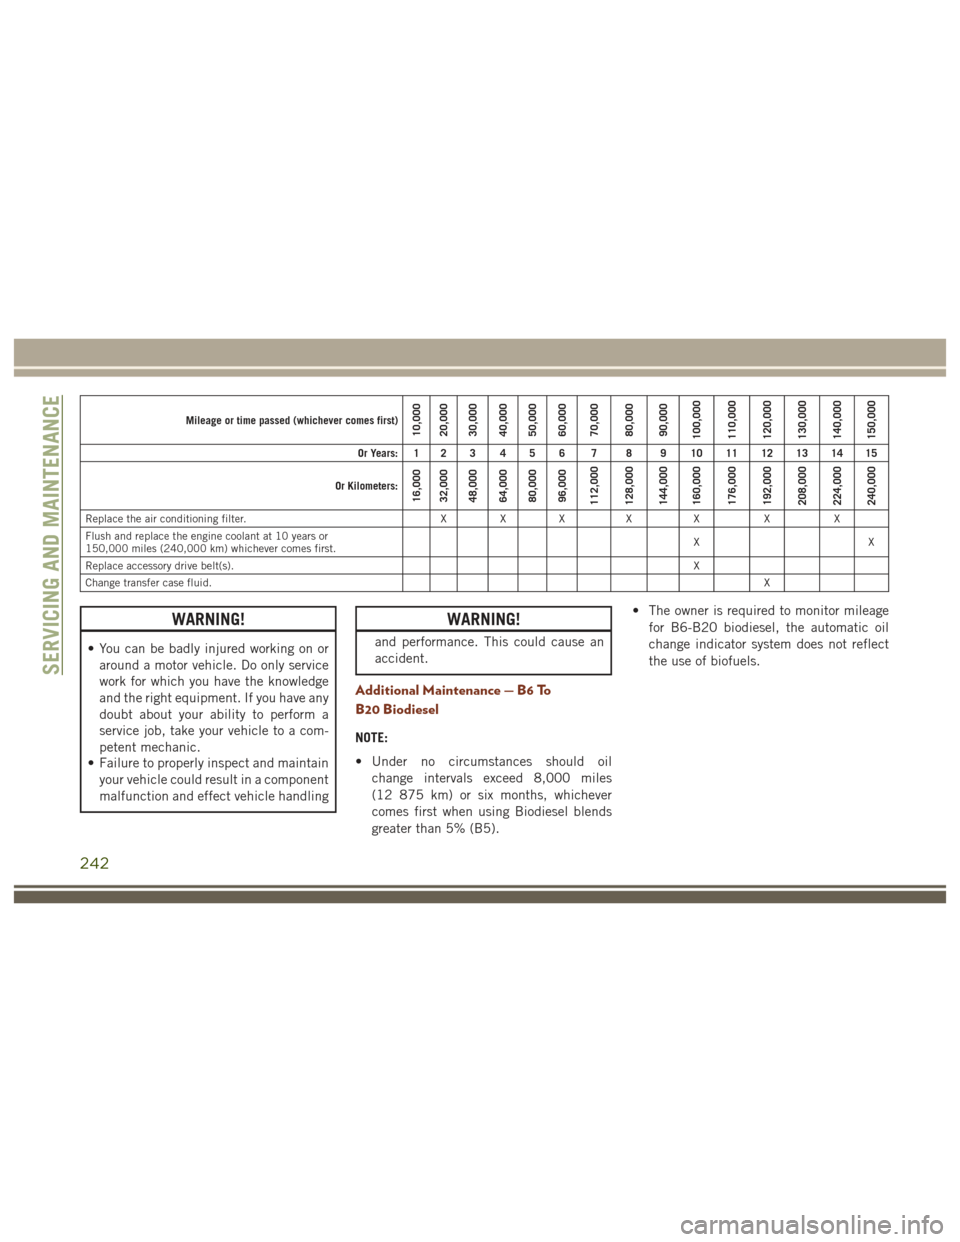
Mileage or time passed (whichever comes first)10,000
20,000
30,000
40,000
50,000
60,000
70,000
80,000
90,000
100,000
110,000
120,000
130,000
140,000
150,000
Or Years: 1 2 3 4 5 6 7 8 9 10 11 12 13 14 15
Or Kilometers:
16,000
32,000
48,000
64,000
80,000
96,000
112,000
128,000
144,000
160,000
176,000
192,000
208,000
224,000
240,000
Replace the air conditioning filter. X X XXX XX
Flush and replace the engine coolant at 10 years or
150,000 miles (240,000 km) whichever comes first. XX
Replace accessory drive belt(s). X
Change transfer case fluid. X
WARNING!
• You can be badly injured working on or
around a motor vehicle. Do only service
work for which you have the knowledge
and the right equipment. If you have any
doubt about your ability to perform a
service job, take your vehicle to a com-
petent mechanic.
• Failure to properly inspect and maintain
your vehicle could result in a component
malfunction and effect vehicle handling
WARNING!
and performance. This could cause an
accident.
Additional Maintenance — B6 To
B20 Biodiesel
NOTE:
• Under no circumstances should oil
change intervals exceed 8,000 miles
(12 875 km) or six months, whichever
comes first when using Biodiesel blends
greater than 5% (B5). • The owner is required to monitor mileage
for B6-B20 biodiesel, the automatic oil
change indicator system does not reflect
the use of biofuels.
SERVICING AND MAINTENANCE
242
Page 253 of 372
CAUTION!
“fast charger” to provide starting volt-
age.
DEALER SERVICE
Your authorized dealer has the qualified ser-
vice personnel, special tools, and equipment
to perform all service operations in an expert
manner. Service Manuals are available which
include detailed service information for your
vehicle. Refer to these Service Manuals be-
fore attempting any procedure yourself.
NOTE:
Intentional tampering with emissions control
systems may void your warranty and could
result in civil penalties being assessed
against you.
WARNING!
You can be badly injured working on or
around a motor vehicle. Only do service
work for which you have the knowledge
and the proper equipment. If you have any
WARNING!
doubt about your ability to perform a ser-
vice job, take your vehicle to a competent
mechanic.
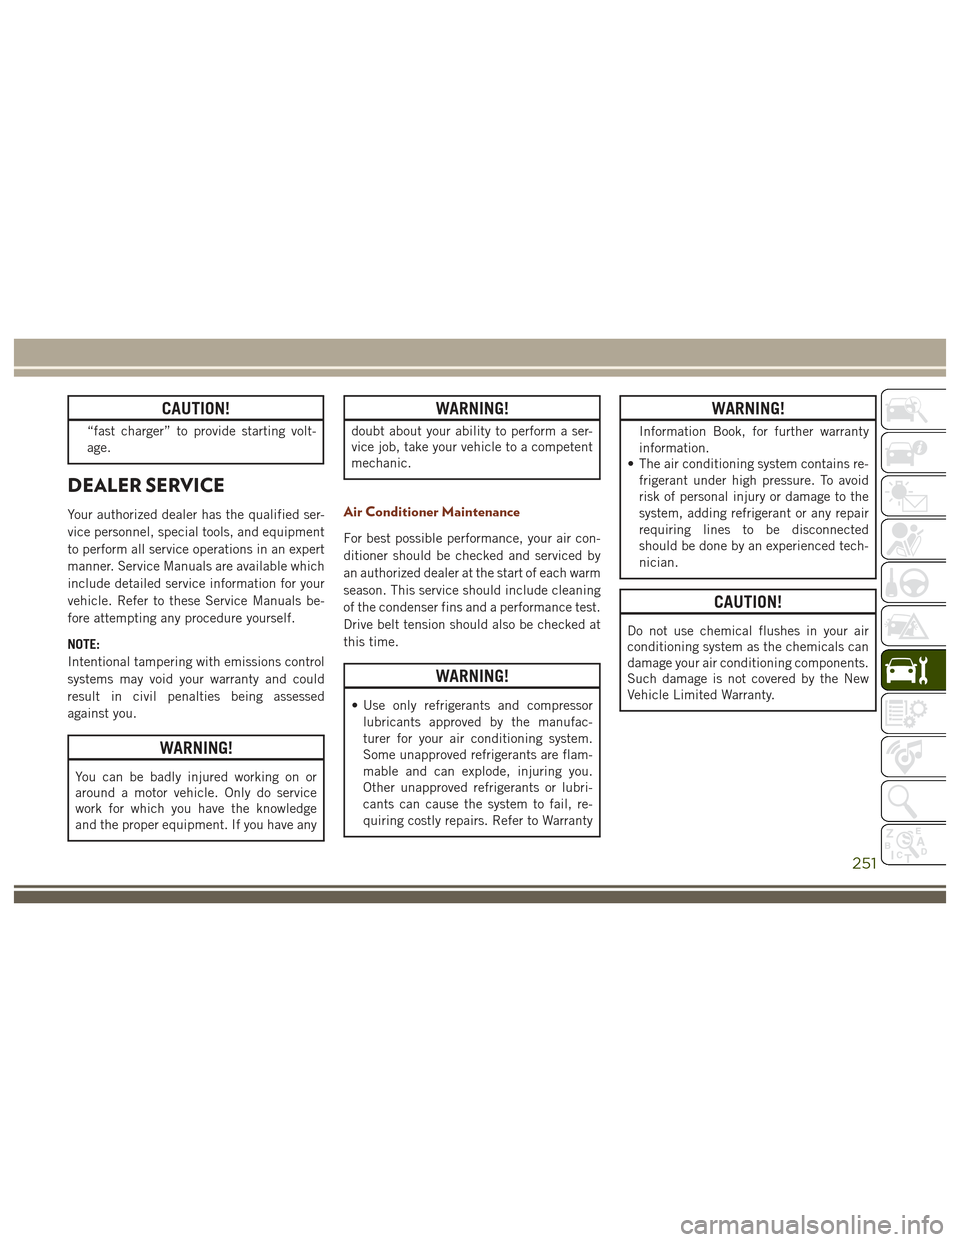
Air Conditioner Maintenance
For best possible performance, your air con-
ditioner should be checked and serviced by
an authorized dealer at the start of each warm
season. This service should include cleaning
of the condenser fins and a performance test.
Drive belt tension should also be checked at
this time.
WARNING!
• Use only refrigerants and compressorlubricants approved by the manufac-
turer for your air conditioning system.
Some unapproved refrigerants are flam-
mable and can explode, injuring you.
Other unapproved refrigerants or lubri-
cants can cause the system to fail, re-
quiring costly repairs. Refer to Warranty
WARNING!
Information Book, for further warranty
information.
• The air conditioning system contains re-
frigerant under high pressure. To avoid
risk of personal injury or damage to the
system, adding refrigerant or any repair
requiring lines to be disconnected
should be done by an experienced tech-
nician.
CAUTION!
Do not use chemical flushes in your air
conditioning system as the chemicals can
damage your air conditioning components.
Such damage is not covered by the New
Vehicle Limited Warranty.
251
Page 271 of 372
CAUTION!
• Do not use abrasive or strong cleaningmaterials such as steel wool or scouring
powder that will scratch metal and
painted surfaces.
• Use of power washers exceeding
1,200 psi (8 274 kPa) can result in
damage or removal of paint and decals.
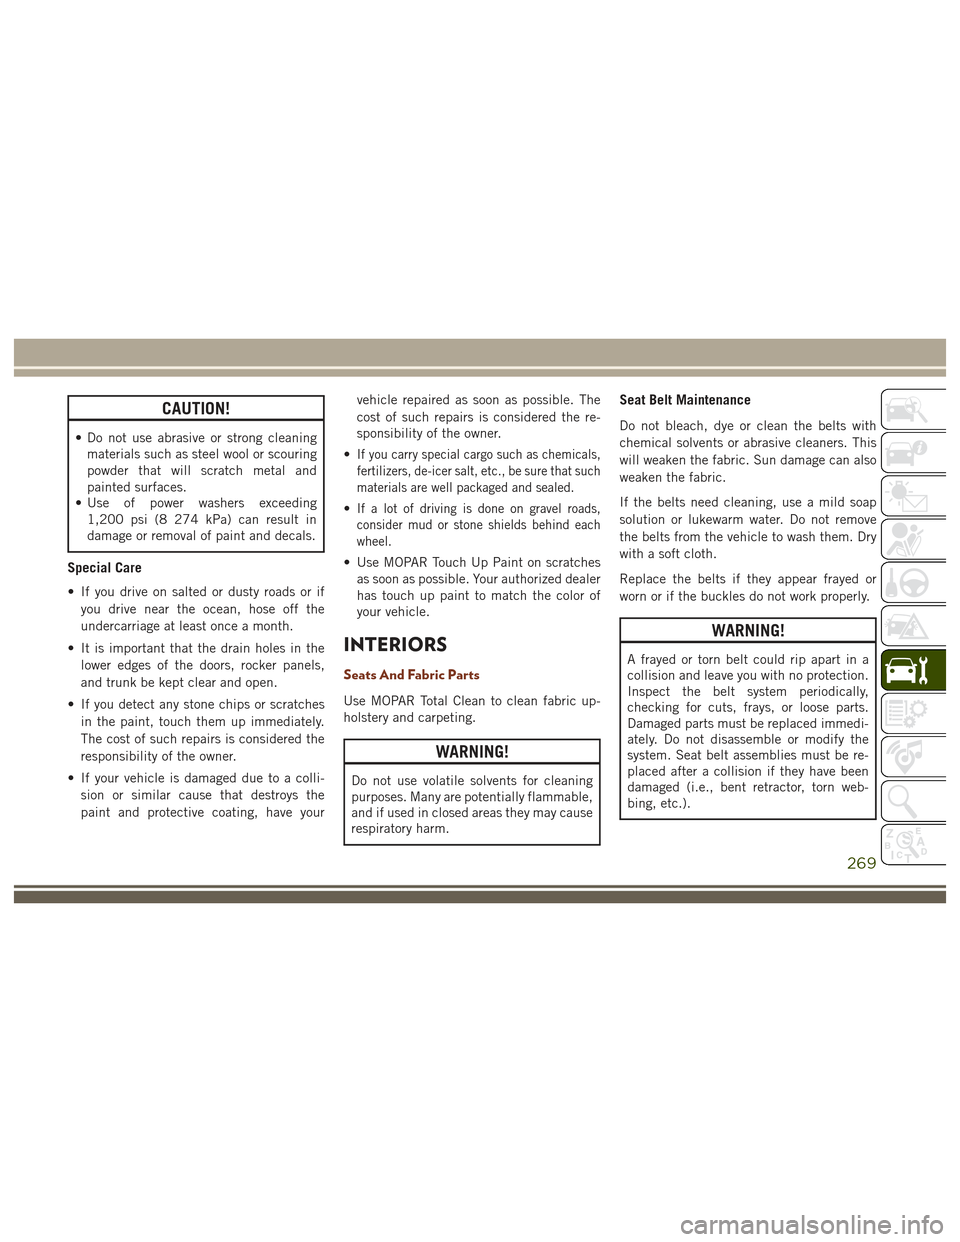
Special Care
• If you drive on salted or dusty roads or if
you drive near the ocean, hose off the
undercarriage at least once a month.
• It is important that the drain holes in the lower edges of the doors, rocker panels,
and trunk be kept clear and open.
• If you detect any stone chips or scratches in the paint, touch them up immediately.
The cost of such repairs is considered the
responsibility of the owner.
• If your vehicle is damaged due to a colli- sion or similar cause that destroys the
paint and protective coating, have your vehicle repaired as soon as possible. The
cost of such repairs is considered the re-
sponsibility of the owner.
•
If you carry special cargo such as chemicals,
fertilizers, de-icer salt, etc., be sure that such
materials are well packaged and sealed.
•If a lot of driving is done on gravel roads,
consider mud or stone shields behind each
wheel.
• Use MOPAR Touch Up Paint on scratches as soon as possible. Your authorized dealer
has touch up paint to match the color of
your vehicle.
INTERIORS
Seats And Fabric Parts
Use MOPAR Total Clean to clean fabric up-
holstery and carpeting.
WARNING!
Do not use volatile solvents for cleaning
purposes. Many are potentially flammable,
and if used in closed areas they may cause
respiratory harm.
Seat Belt Maintenance
Do not bleach, dye or clean the belts with
chemical solvents or abrasive cleaners. This
will weaken the fabric. Sun damage can also
weaken the fabric.
If the belts need cleaning, use a mild soap
solution or lukewarm water. Do not remove
the belts from the vehicle to wash them. Dry
with a soft cloth.
Replace the belts if they appear frayed or
worn or if the buckles do not work properly.
WARNING!
A frayed or torn belt could rip apart in a
collision and leave you with no protection.
Inspect the belt system periodically,
checking for cuts, frays, or loose parts.
Damaged parts must be replaced immedi-
ately. Do not disassemble or modify the
system. Seat belt assemblies must be re-
placed after a collision if they have been
damaged (i.e., bent retractor, torn web-
bing, etc.).
269
Page 361 of 372
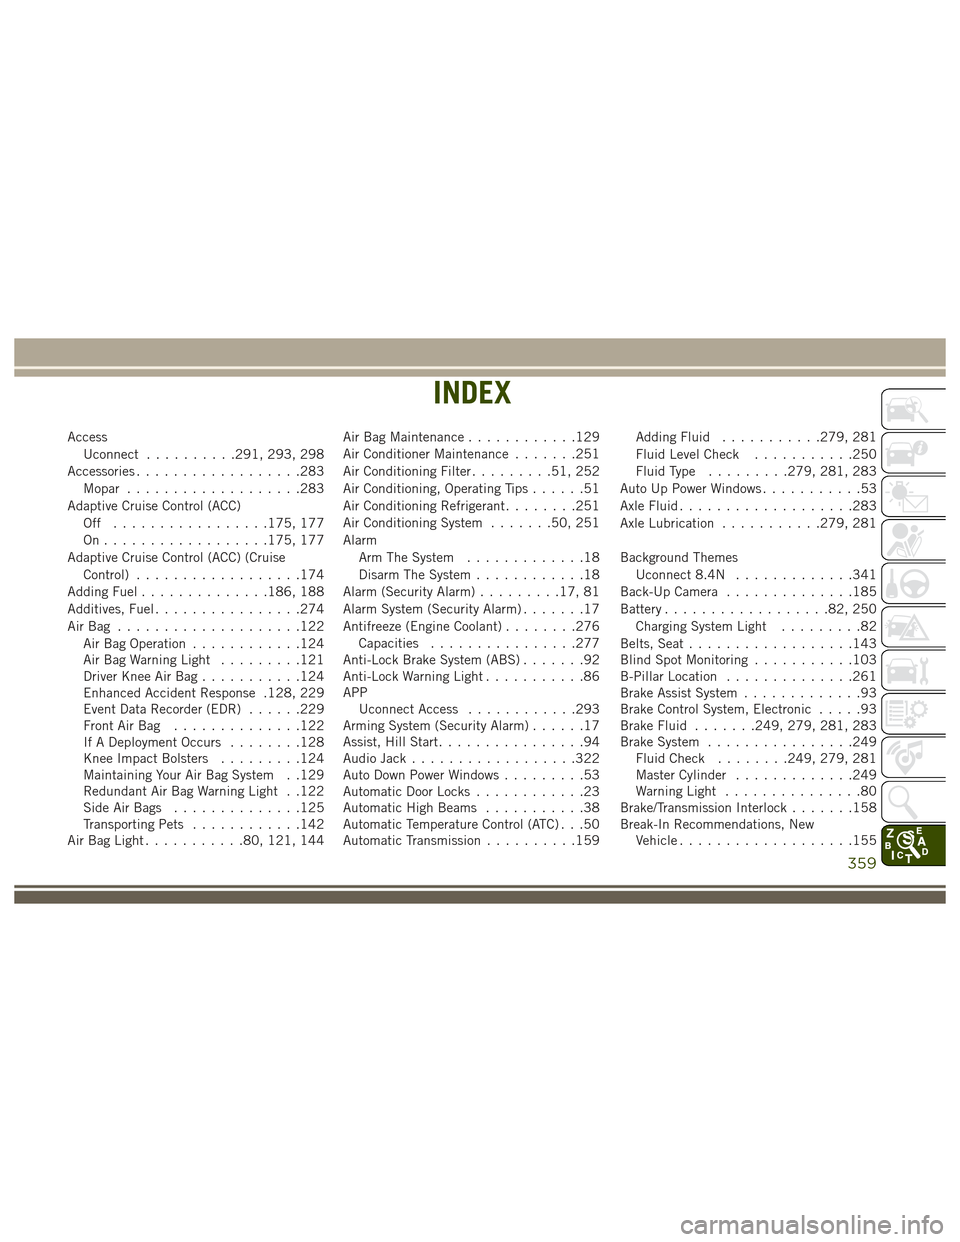
AccessUconnect ..........291, 293, 298
Accessories ..................283
Mopar ...................283
Adaptive Cruise Control (ACC) Off .................175, 177
On..................175, 177
Adaptive Cruise Control (ACC) (Cruise Control) ..................174
Adding Fuel ..............186, 188
Additives, Fuel ................274
AirBag ....................122 Air Bag Operation ............124
Air Bag Warning Light .........121
Driver Knee Air Bag ...........124
Enhanced Accident Response .128, 229
Event Data Recorder (EDR) ......229
Front Air Bag ..............122
If A Deployment Occurs ........128
Knee Impact Bolsters .........124
Maintaining Your Air Bag System . .129
Redundant Air Bag Warning Light . .122
Side Air Bags ..............125
Transporting Pets ............142
Air Bag Light ...........80, 121, 144 Air Bag Maintenance
............129
Air Conditioner Maintenance .......251
Air Conditioning Filter .........51, 252
Air Conditioning, Operating Tips ......51
Air Conditioning Refrigerant ........251
Air Conditioning System .......50, 251
Alarm Arm The System .............18
Disarm The System ............18
Alarm (Security Alarm) .........17, 81
Alarm System (Security Alarm) .......17
Antifreeze (Engine Coolant) ........276
Capacities ................277
Anti-Lock Brake System (ABS) .......92
Anti-Lock Warning Light ...........86
APP Uconnect Access ............293
Arming System (Security Alarm) ......17
Assist, Hill Start ................94
Audio
Jack ..................322
Auto Down Power Windows .........53
Automatic Door Locks ............23
Automatic High Beams ...........38
Automatic Temperature Control (ATC) . . .50
Automatic Transmission ..........159 Adding Fluid
...........279, 281
Fluid Level Check ...........250
Fluid Type .........279, 281, 283
Auto Up Power Windows ...........53
Axle Fluid ...................283
Axle Lubrication ...........279, 281
Background Themes Uconnect 8.4N .............341
Back-Up Camera ..............185
Battery ..................82, 250
Charging System Light .........82
Belts, Seat ..................143
Blind Spot Monitoring ...........103
B-Pillar Location ..............261
Brake Assist System .............93
Brake Control System, Electronic .....93
Brake Fluid .......249, 279, 281, 283
Brake System ................249
Fluid Check ........249, 279, 281
Master Cylinder .............249
Warning Light ...............80
Brake/Transmission Interlock .......158
Break-In Recommendations, New Vehicle ...................155
INDEX
359
Page 362 of 372
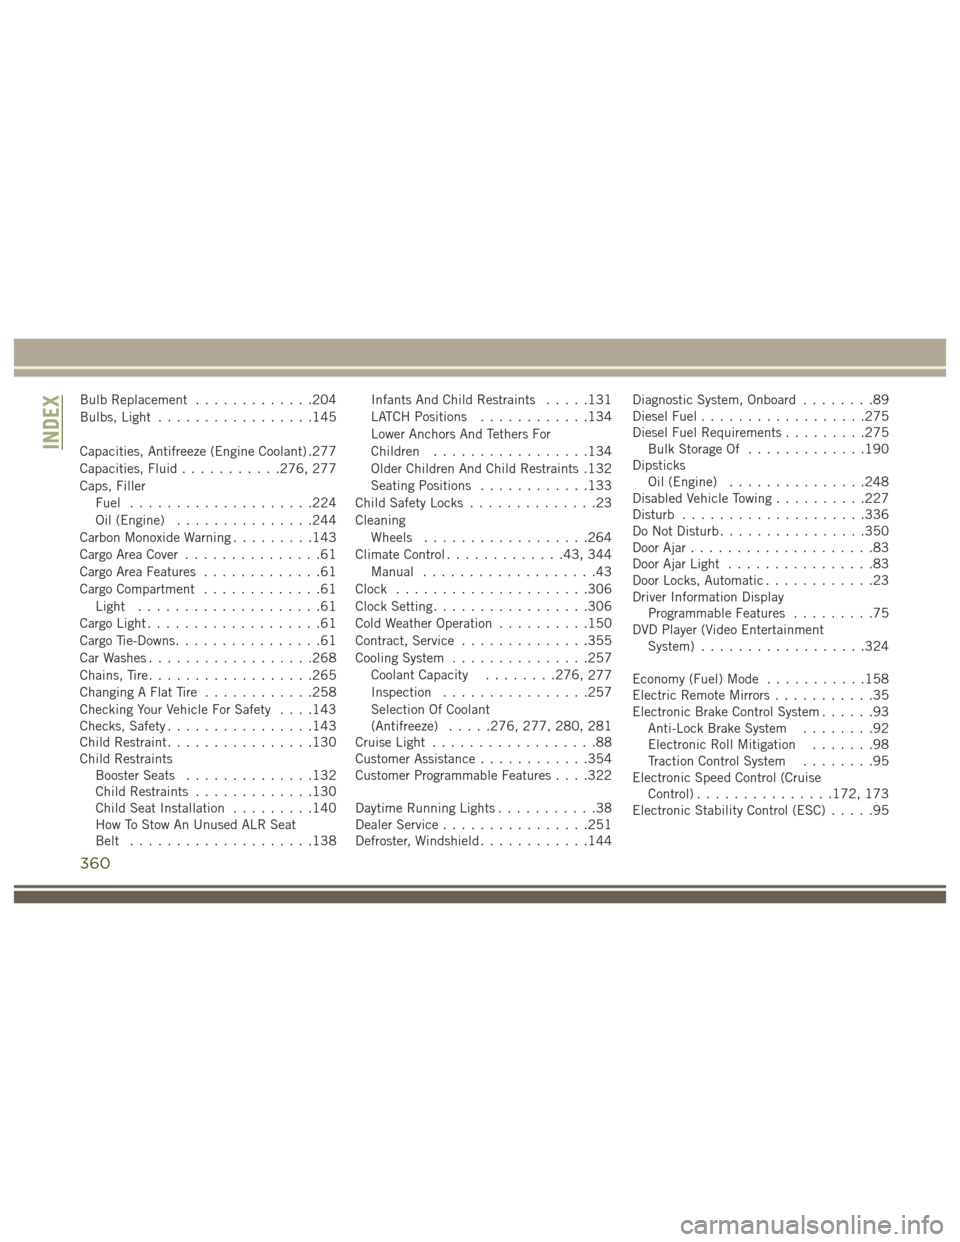
Bulb Replacement.............204
Bulbs, Light .................145
Capacities, Antifreeze (Engine Coolant) .277
Capacities, Fluid ...........276, 277
Caps, Filler Fuel ....................224
Oil (Engine) ...............244
Carbon Monoxide Warning .........143
Cargo Area Cover ...............61
Cargo Area Features .............61
Cargo Compartment .............61
Light ....................61
Cargo Light ...................61
Cargo Tie-Downs ................61
Car Washes ..................268
Chains, Tire ..................265
Changing A Flat Tire ............258
Checking Your Vehicle For Safety . . . .143
Checks, Safety ................143
Child Restraint ................130
Child Restraints Booster Seats ..............132
Child Restraints .............130
Child Seat Installation .........140
How To Stow An Unused ALR Seat
Belt ....................138 Infants And Child Restraints
.....131
LATCH Positions ............134
Lower Anchors And Tethers For
Children .................134
Older Children And Child Restraints .132
Seating Positions ............133
Child Safety Locks ..............23
Cleaning Wheels ..................264
Climate Control .............43, 344
Manual ...................43
Clock .....................306
Clock Setting .................306
Cold Weather Operation ..........150
Contract, Service ..............355
Cooling System ...............257
Coolant Capacity ........276,
277
Inspection ................257
Selection Of Coolant
(Antifreeze) .....276, 277, 280, 281
Cruise Light ..................88
Customer Assistance ............354
Customer Programmable Features . . . .322
Daytime Running Lights ...........38
Dealer Service ................251
Defroster, Windshield ............144 Diagnostic System, Onboard
........89
Diesel Fuel ..................275
Diesel Fuel Requirements .........275
Bulk Storage Of .............190
Dipsticks Oil (Engine) ...............248
Disabled Vehicle Towing ..........227
Disturb ....................336
Do Not Disturb ................350
Door Ajar ....................83
Door Ajar Light ................83
Door Locks, Automatic ............23
Driver Information Display Programmable Features .........75
DVD Player (Video Entertainment System) ..................324
Economy (Fuel) Mode ...........158
Electric Remote Mirrors ...........35
Electronic Brake Control System ......93
Anti-Lock Brake System ........92
Electronic Roll Mitigation .......98
Traction Control System ........95
Electronic Speed Control (Cruise Control) ...............172, 173
Electronic Stability Control (ESC) .....95
INDEX
360
Page 364 of 372
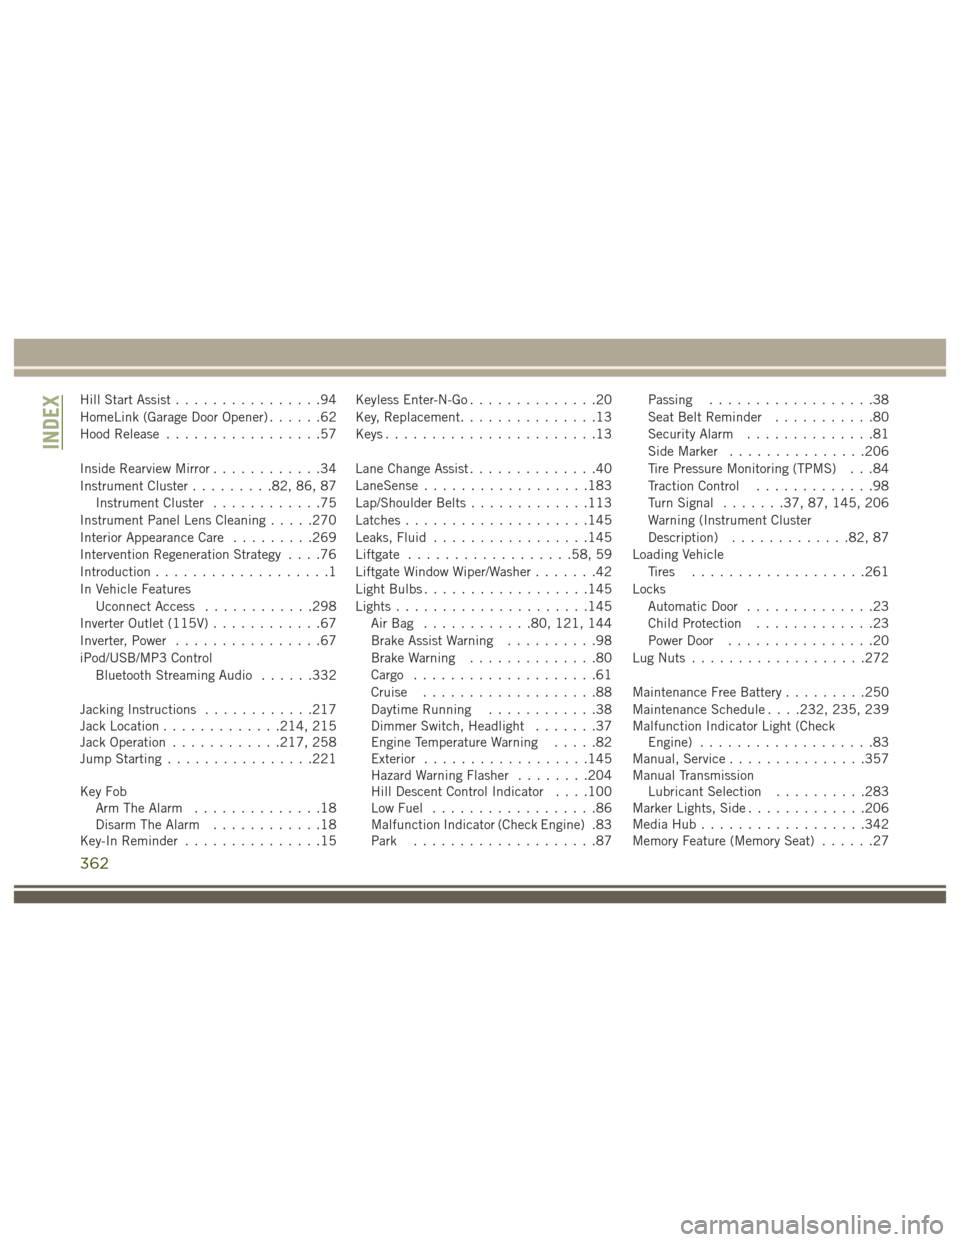
Hill Start Assist................94
HomeLink (Garage Door Opener) ......62
Hood Release .................57
Inside Rearview Mirror ............34
Instrument Cluster .........82, 86, 87
Instrument Cluster ............75
Instrument Panel Lens Cleaning .....270
Interior Appearance Care .........269
Intervention Regeneration Strategy ....76
Introduction ...................1
In Vehicle Features Uconnect Access ............298
Inverter Outlet (115V) ............67
Inverter, Power ................67
iPod/USB/MP3 Control Bluetooth Streaming Audio ......332
Jacking Instructions ............217
Jack Location .............214, 215
Jack Operation ............217, 258
Jump Starting ................221
Key Fob Arm The Alarm ..............18
Disarm The Alarm ............18
Key-In Reminder ...............15 Keyless Enter-N-Go
..............20
Key, Replacement ...............13
Keys .......................13
Lane Change Assist ..............40
LaneSense ..................183
Lap/Shoulder Belts .............113
Latches ....................145
Leaks, Fluid .................145
Liftgate ..................58, 59
Liftgate Window Wiper/Washer .......42
Light Bulbs ..................145
Lights .....................145
AirBag ............80, 121, 144
Brake Assist Warning ..........98
Brake Warning ..............80
Cargo ....................61
Cruise ...................88
Daytime Running ............38
Dimmer Switch, Headlight .......37
Engine Temperature Warning .....82
Exterior ..................145
Hazard
Warning Flasher ........204
Hill Descent Control Indicator . . . .100
Low Fuel ..................86
Malfunction Indicator (Check Engine) .83
Park ....................87 Passing
..................38
Seat Belt Reminder ...........80
Security Alarm ..............81
Side Marker ...............206
Tire Pressure Monitoring (TPMS) . . .84
Traction Control .............98
Turn Signal .......37, 87, 145, 206
Warning (Instrument Cluster
Description) .............82, 87
Loading Vehicle Tires ...................261
Locks Automatic Door ..............23
Child Protection .............23
Power Door ................20
Lug Nuts ...................272
Maintenance Free Battery .........250
Maintenance Schedule . . . .232, 235, 239
Malfunction Indicator Light (Check Engine) ...................83
Manual, Service ...............357
Manual Transmission Lubricant Selection ..........283
Marker Lights, Side .............206
Media Hub ..................342
Memory Feature (Memory Seat) ......27
INDEX
362