spare tire JEEP GRAND CHEROKEE 2018 Owner handbook (in English)
[x] Cancel search | Manufacturer: JEEP, Model Year: 2018, Model line: GRAND CHEROKEE, Model: JEEP GRAND CHEROKEE 2018Pages: 368, PDF Size: 5.72 MB
Page 74 of 368
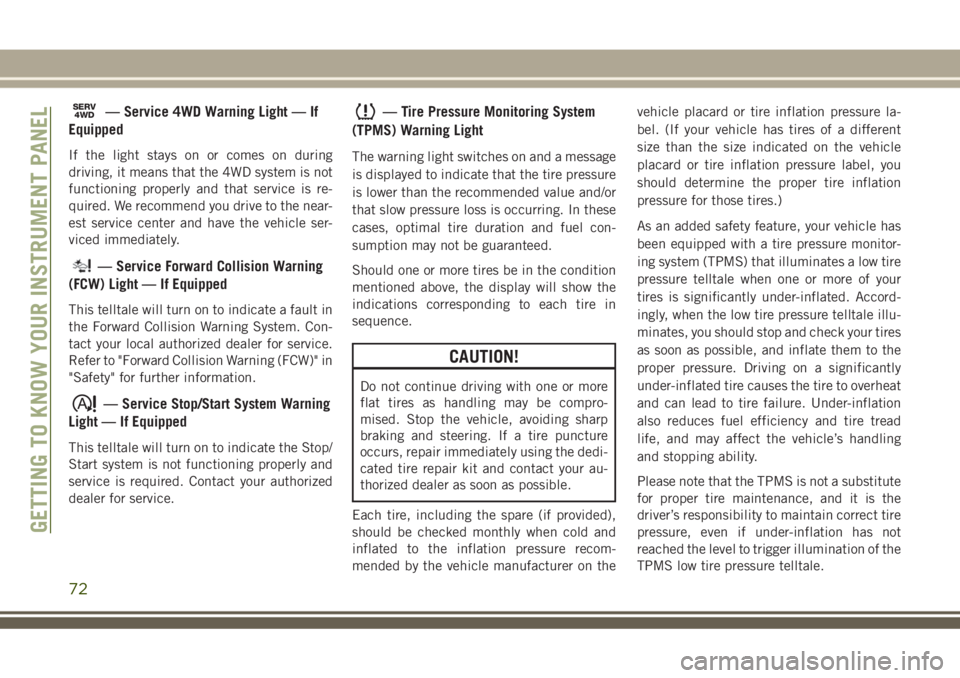
SERV4WD— Service 4WD Warning Light — If
Equipped
If the light stays on or comes on during
driving, it means that the 4WD system is not
functioning properly and that service is re-
quired. We recommend you drive to the near-
est service center and have the vehicle ser-
viced immediately.
— Service Forward Collision Warning
(FCW) Light — If Equipped
This telltale will turn on to indicate a fault in
the Forward Collision Warning System. Con-
tact your local authorized dealer for service.
Refer to "Forward Collision Warning (FCW)" in
"Safety" for further information.
— Service Stop/Start System Warning
Light — If Equipped
This telltale will turn on to indicate the Stop/
Start system is not functioning properly and
service is required. Contact your authorized
dealer for service.
— Tire Pressure Monitoring System
(TPMS) Warning Light
The warning light switches on and a message
is displayed to indicate that the tire pressure
is lower than the recommended value and/or
that slow pressure loss is occurring. In these
cases, optimal tire duration and fuel con-
sumption may not be guaranteed.
Should one or more tires be in the condition
mentioned above, the display will show the
indications corresponding to each tire in
sequence.
CAUTION!
Do not continue driving with one or more
flat tires as handling may be compro-
mised. Stop the vehicle, avoiding sharp
braking and steering. If a tire puncture
occurs, repair immediately using the dedi-
cated tire repair kit and contact your au-
thorized dealer as soon as possible.
Each tire, including the spare (if provided),
should be checked monthly when cold and
inflated to the inflation pressure recom-
mended by the vehicle manufacturer on thevehicle placard or tire inflation pressure la-
bel. (If your vehicle has tires of a different
size than the size indicated on the vehicle
placard or tire inflation pressure label, you
should determine the proper tire inflation
pressure for those tires.)
As an added safety feature, your vehicle has
been equipped with a tire pressure monitor-
ing system (TPMS) that illuminates a low tire
pressure telltale when one or more of your
tires is significantly under-inflated. Accord-
ingly, when the low tire pressure telltale illu-
minates, you should stop and check your tires
as soon as possible, and inflate them to the
proper pressure. Driving on a significantly
under-inflated tire causes the tire to overheat
and can lead to tire failure. Under-inflation
also reduces fuel efficiency and tire tread
life, and may affect the vehicle’s handling
and stopping ability.
Please note that the TPMS is not a substitute
for proper tire maintenance, and it is the
driver’s responsibility to maintain correct tire
pressure, even if under-inflation has not
reached the level to trigger illumination of the
TPMS low tire pressure telltale.
GETTING TO KNOW YOUR INSTRUMENT PANEL
72
Page 100 of 368
NOTE:
When filling warm tires, the tire pressure may
need to be increased up to an additional 4 psi
(28 kPa) above the recommended cold plac-
ard pressure in order to turn the Tire Pressure
Monitoring Telltale Light off.
The system will automatically update, the
graphic display of the pressure value(s) will
return to its original color and the Tire Pres-
sure Monitoring Telltale Light will extinguish
once the updated tire pressure(s) have been
received. The vehicle may need to be driven
for up to 10 minutes above 15 mph
(24 km/h) to receive this information.
Service TPM System Warning
The Tire Pressure Monitoring Telltale Light
will flash on and off for 75 seconds, and
remain on solid when a system fault is de-
tected. The system fault will also sound a
chime. The instrument cluster display will
display a “SERVICE TPM SYSTEM” message
for a minimum of five seconds. This message
is then followed by a graphic display, with “-
-“ in place of the pressure value(s), indicat-
ing which Tire Pressure Monitoring Sensor(s)
is not being received.If the ignition switch is cycled, this sequence
will repeat, providing the system fault still
exists. If the system fault no longer exists, the
Tire Pressure Monitoring Telltale Light will no
longer flash, the "SERVICE TPM SYSTEM"
message will not be present, and a pressure
value will be displayed instead of dashes. A
system fault can occur by any of the follow-
ing:
• Jamming due to electronic devices or driv-
ing next to facilities emitting the same
Radio Frequencies as the TPM sensors.
• Installing some form of aftermarket window
tinting that affects radio wave signals.
• Lots of snow or ice around the wheels or
wheel housings.
• Using tire chains on the vehicle.
• Using wheels/tires not equipped with TPM
sensors.
NOTE:
There is no tire pressure monitoring sensor in
the spare tire. The TPMS will not be able to
monitor the tire pressure. If you install the
spare tire in place of a road tire that has a
pressure below the low-pressure warninglimit, upon the next ignition switch cycle, the
Tire Pressure Monitoring Telltale Light will
remain on, a chime will sound, and the in-
strument cluster display will still display a
pressure value in the different color graphic
display. After driving the vehicle for up to
10 minutes above 15 mph (24 km/h), the
Tire Pressure Monitoring Telltale Light will
flash on and off for 75 seconds and then
remain on solid. In addition, the instrument
cluster display will display a “SERVICE TPM
SYSTEM" message for five seconds and then
display dashes (- -) in place of the pressure
value. For each subsequent ignition switch
cycle, a chime will sound, the Tire Pressure
Monitoring Telltale Light will flash on and off
for 75 seconds and then remain on solid, and
the instrument cluster display will display a
"SERVICE TPM SYSTEM" message for five
seconds and then display dashes (- -) in place
of the pressure value. Once you repair or
replace the original road tire, and reinstall it
on the vehicle in place of the spare tire, the
TPMS will update automatically.
In addition, the Tire Pressure Monitoring Tell-
tale Light will turn off and the graphic in the
instrument cluster display will display a new
SAFETY
98
Page 135 of 368
WARNING!
clutch pedal (if present) to check for
interference. If your floor mat interferes
with the operation of any pedal, or is not
secure to the floor, remove the floor mat
from the vehicle and place the floor mat
in your trunk.
• ONLY use the passenger’s side floor mat
on the passenger’s side floor area.
• ALWAYS make sure objects cannot fall
or slide into the driver’s side floor area
when the vehicle is moving. Objects can
become trapped under accelerator,
brake, or clutch pedals and could cause
a loss of vehicle control.
• NEVER place any objects under the floor
mat (e.g., towels, keys, etc.). These ob-
jects could change the position of the
floor mat and may cause interference
with the accelerator, brake, or clutch
pedals.
• If the vehicle carpet has been removed
and re-installed, always properly attach
WARNING!
carpet to the floor and check the floor
mat fasteners are secure to the vehicle
carpet. Fully depress each pedal to
check for interference with the accelera-
tor, brake, or clutch pedals then re-
install the floor mats.
• It is recommended to only use mild soap
and water to clean your floor mats. After
cleaning, always check your floor mat
has been properly installed and is se-
cured to your vehicle using the floor mat
fasteners by lightly pulling mat.
Periodic Safety Checks You Should Make
Outside The Vehicle
Tires
Examine tires for excessive tread wear and
uneven wear patterns. Check for stones,
nails, glass, or other objects lodged in the
tread or sidewall. Inspect the tread for cuts
and cracks. Inspect sidewalls for cuts,cracks, and bulges. Check the wheel nuts for
tightness. Check the tires (including spare)
for proper cold inflation pressure.
Lights
Have someone observe the operation of brake
lights and exterior lights while you work the
controls. Check turn signal and high beam
indicator lights on the instrument panel.
Door Latches
Check for proper closing, latching, and lock-
ing.
Fluid Leaks
Check area under the vehicle after overnight
parking for fuel, coolant, oil, or other fluid
leaks. Also, if gasoline fumes are detected or
if fuel, or brake fluid leaks are suspected. The
cause should be located and corrected
immediately.
133
Page 158 of 368
To assist with changing a spare tire, the
Quadra-Lift air suspension system has a fea-
ture which allows the automatic leveling to
be disabled. Refer to “Uconnect Settings” in
“Multimedia” for further information.
For further information refer to “Driving Tips”
in “Starting And Operating” in the Owner’s
Manual.
NOTE:
If equipped with a touch screen radio all
enabling/disabling of air suspension features
must be done through the radio. Refer to
“Uconnect Settings” in “Multimedia” for fur-
ther information.
WARNING!
The air suspension system uses a high
pressure volume of air to operate the sys-
tem. To avoid personal injury or damage to
the system, see your authorized dealer for
service.
Air Suspension Modes
The Air Suspension system has multiple
modes to protect the system in unique situa-
tions:
Tire/Jack Mode
To assist with changing a spare tire, the air
suspension system has a feature which al-
lows the automatic leveling to be disabled.
Refer to “Uconnect Settings” in “Multime-
dia” for further information.
NOTE:
This mode is intended to be enabled with
engine running.
Auto Entry/Exit Mode
To assist in entering and exiting the vehicle,
the air suspension system has a feature
which automatically lowers the vehicle to
entry/exit ride height. Refer to “Uconnect
Settings” in “Multimedia” for further infor-
mation.
NOTE:
This mode is intended to be enabled with
engine running.Transport Mode
To assist with flat bed towing, the air suspen-
sion system has a feature which will put the
vehicle into Entry/Exit height and disable the
automatic load leveling system. Refer to
“Uconnect Settings” in “Multimedia” for fur-
ther information.
NOTE:
This mode is intended to be enabled with
engine running.
Suspension Display Messages Mode
The “Suspension Display Messages” setting
allows you to only display suspension warn-
ings. Refer to “Uconnect Settings” in “Mul-
timedia” for further information.
NOTE:
This mode is intended to be enabled with
engine running.
Wheel Alignment Mode
Before performing a wheel alignment this
mode must be enabled. Refer to “Uconnect
Settings” in “Multimedia” for further infor-
mation.
STARTING AND OPERATING
156
Page 179 of 368
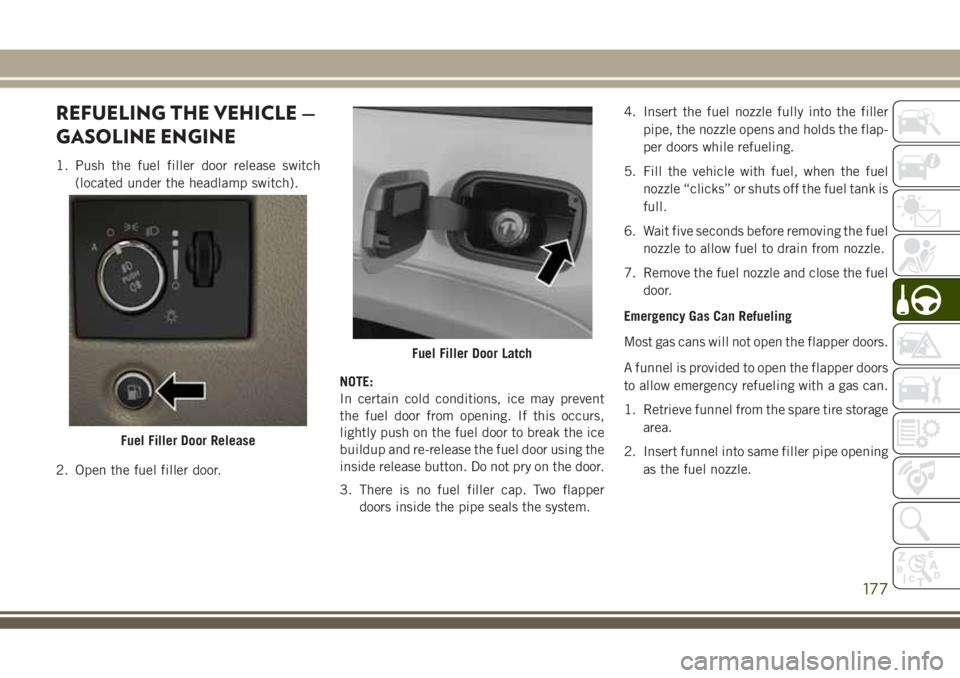
REFUELING THE VEHICLE —
GASOLINE ENGINE
1. Push the fuel filler door release switch
(located under the headlamp switch).
2. Open the fuel filler door.NOTE:
In certain cold conditions, ice may prevent
the fuel door from opening. If this occurs,
lightly push on the fuel door to break the ice
buildup and re-release the fuel door using the
inside release button. Do not pry on the door.
3. There is no fuel filler cap. Two flapper
doors inside the pipe seals the system.4. Insert the fuel nozzle fully into the filler
pipe, the nozzle opens and holds the flap-
per doors while refueling.
5. Fill the vehicle with fuel, when the fuel
nozzle “clicks” or shuts off the fuel tank is
full.
6. Wait five seconds before removing the fuel
nozzle to allow fuel to drain from nozzle.
7. Remove the fuel nozzle and close the fuel
door.
Emergency Gas Can Refueling
Most gas cans will not open the flapper doors.
A funnel is provided to open the flapper doors
to allow emergency refueling with a gas can.
1. Retrieve funnel from the spare tire storage
area.
2. Insert funnel into same filler pipe opening
as the fuel nozzle.
Fuel Filler Door Release
Fuel Filler Door Latch
177
Page 180 of 368
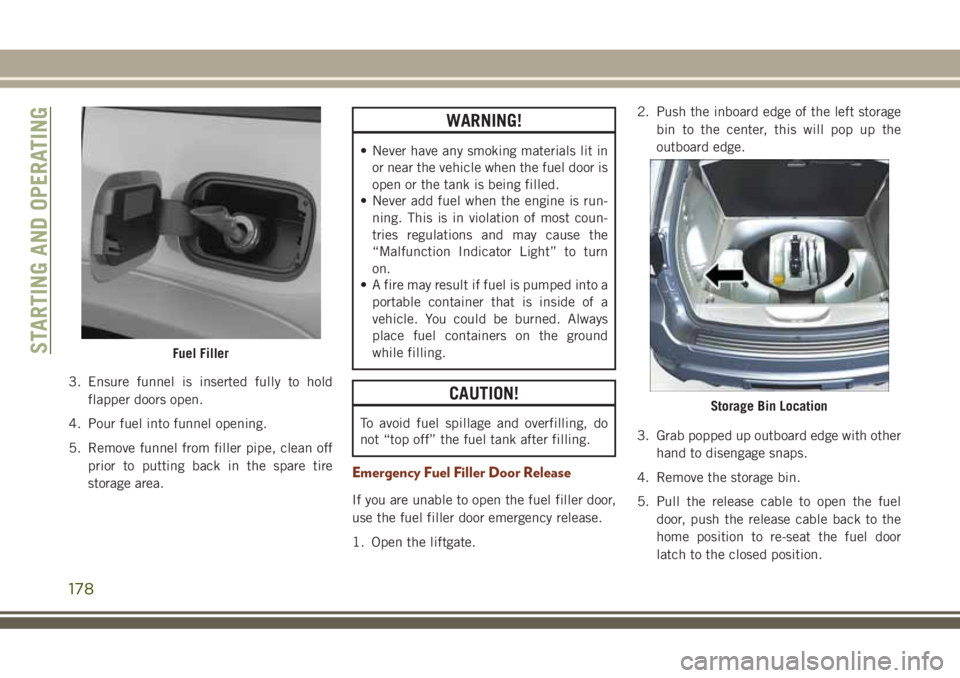
3. Ensure funnel is inserted fully to hold
flapper doors open.
4. Pour fuel into funnel opening.
5. Remove funnel from filler pipe, clean off
prior to putting back in the spare tire
storage area.
WARNING!
• Never have any smoking materials lit in
or near the vehicle when the fuel door is
open or the tank is being filled.
• Never add fuel when the engine is run-
ning. This is in violation of most coun-
tries regulations and may cause the
“Malfunction Indicator Light” to turn
on.
• A fire may result if fuel is pumped into a
portable container that is inside of a
vehicle. You could be burned. Always
place fuel containers on the ground
while filling.
CAUTION!
To avoid fuel spillage and overfilling, do
not “top off” the fuel tank after filling.
Emergency Fuel Filler Door Release
If you are unable to open the fuel filler door,
use the fuel filler door emergency release.
1. Open the liftgate.2. Push the inboard edge of the left storage
bin to the center, this will pop up the
outboard edge.
3. Grab popped up outboard edge with other
hand to disengage snaps.
4. Remove the storage bin.
5. Pull the release cable to open the fuel
door, push the release cable back to the
home position to re-seat the fuel door
latch to the closed position.
Fuel Filler
Storage Bin Location
STARTING AND OPERATING
178
Page 182 of 368
3. Insert the fuel nozzle fully into the filler
pipe – the nozzle opens and holds the
flapper door while refueling.
4. Fill the vehicle with fuel – when the fuel
nozzle “clicks” or shuts off the fuel tank is
full.
5. Wait five seconds before removing the
nozzle to allow fuel to drain from the
nozzle.
6. Remove the fuel nozzle and close the fuel
door.
Emergency Fuel Can Refueling
Most fuel cans will not open the flapper door.
A funnel is provided to open the flapper door
to allow emergency refueling with a fuel can.
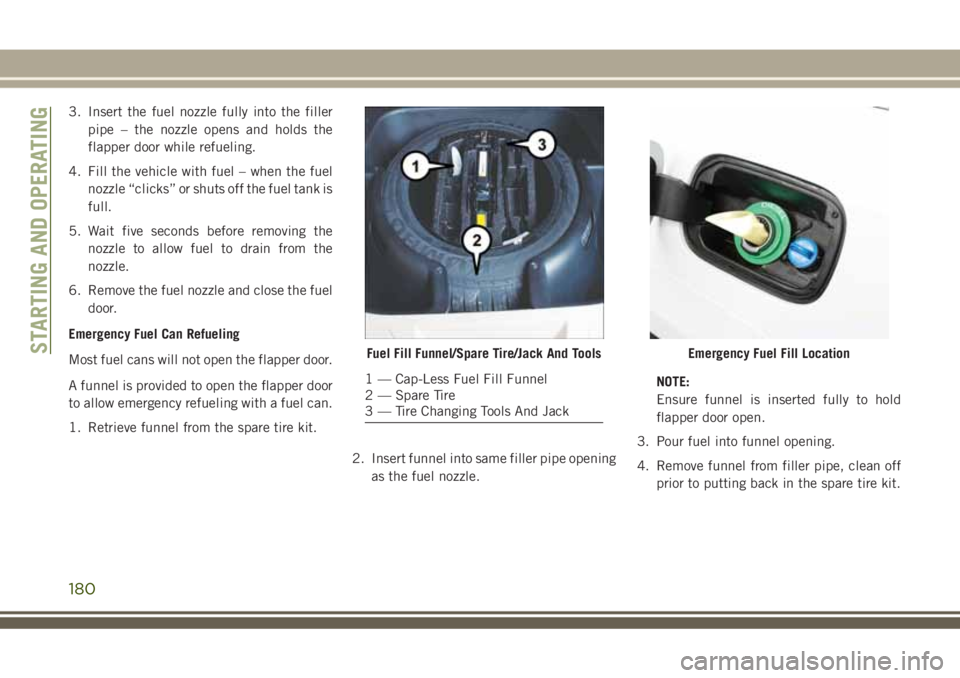
1. Retrieve funnel from the spare tire kit.
2. Insert funnel into same filler pipe opening
as the fuel nozzle.NOTE:
Ensure funnel is inserted fully to hold
flapper door open.
3. Pour fuel into funnel opening.
4. Remove funnel from filler pipe, clean off
prior to putting back in the spare tire kit.
Fuel Fill Funnel/Spare Tire/Jack And Tools
1 — Cap-Less Fuel Fill Funnel
2 — Spare Tire
3 — Tire Changing Tools And Jack
Emergency Fuel Fill LocationSTARTING AND OPERATING
180
Page 211 of 368
CAUTION!
• When replacing a blown fuse, it is impor-
tant to use only a fuse having the correct
amperage rating. The use of a fuse with
a rating other than indicated may result
in a dangerous electrical system over-
load. If a properly rated fuse continues
to blow, it indicates a problem in the
circuit that must be corrected.
JACKING AND TIRE
CHANGING
Run Flat Tires — SRT Models
SRT models are equipped with “run flat”
tires. Run flat tires allow the vehicle to be
driven approximately 50 miles (80 km) at
55 mph (88 km/h). Tire service should be
obtained to avoid prolonged run flat feature
usage.
WARNING!
Do not exceed 50 mph (80 km/h) if the
“Tire Pressure Monitoring Telltale Light” is
illuminated. Vehicle handling and braking
may be reduced. You could have a collision
and be severely or fatally injured.
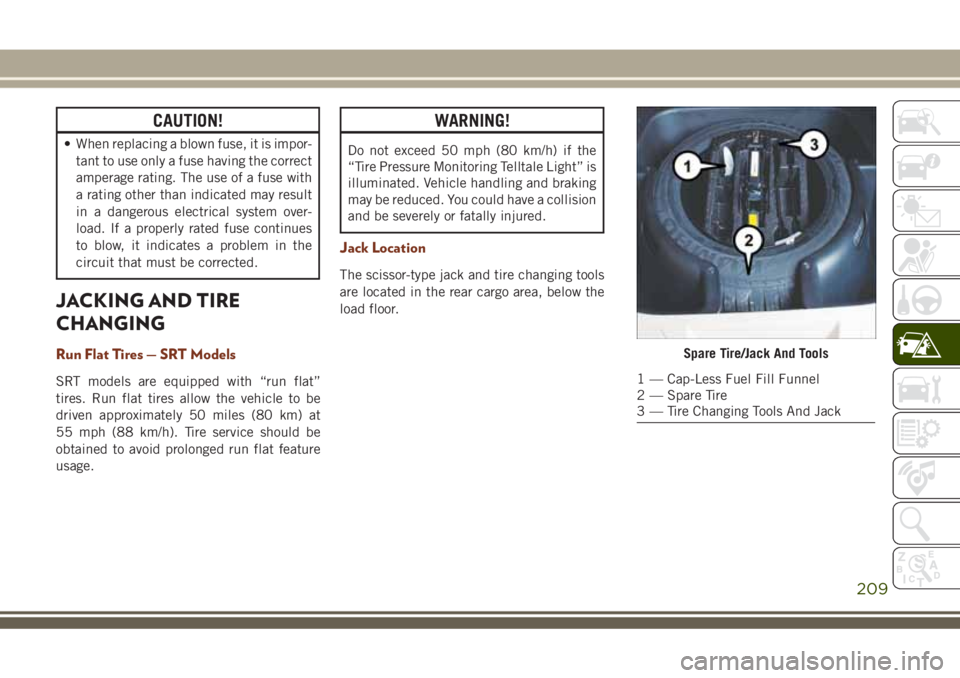
Jack Location
The scissor-type jack and tire changing tools
are located in the rear cargo area, below the
load floor.
Spare Tire/Jack And Tools
1 — Cap-Less Fuel Fill Funnel
2 — Spare Tire
3 — Tire Changing Tools And Jack
209
Page 212 of 368
Preparations For Jacking
CAUTION!
Always lift or jack the vehicle from the
correct jacking points. Failure to follow
this information could cause damage to
the vehicle or underbody components.
NOTE:
To assist with changing a spare tire, the air
suspension system (if equipped) has a fea-
ture which allows the automatic leveling to
be disabled.
1. Park the vehicle on a firm, level surface.
Avoid ice or slippery surfaces.
WARNING!
Do not attempt to change a tire on the side
of the vehicle closest to moving traffic,
pull far enough off the road to avoid being
hit when operating the jack or changing
the wheel.
2. Turn on the Hazard Warning flasher.
3. Apply the parking brake.4. Place the gear selector into PARK.
5. Turn the ignition OFF.
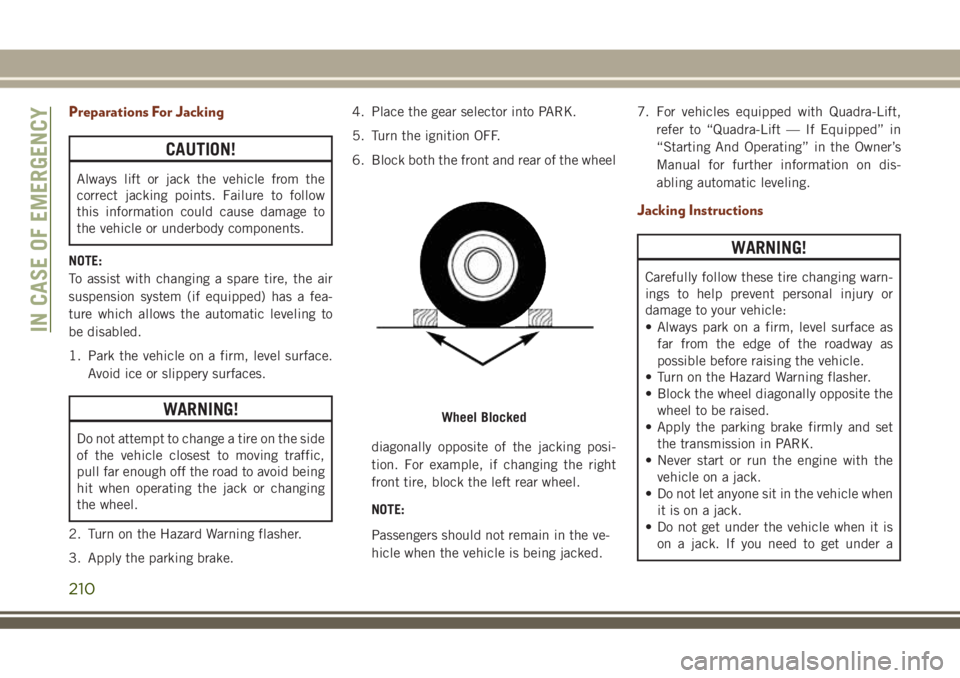
6. Block both the front and rear of the wheel
diagonally opposite of the jacking posi-
tion. For example, if changing the right
front tire, block the left rear wheel.
NOTE:
Passengers should not remain in the ve-
hicle when the vehicle is being jacked.7. For vehicles equipped with Quadra-Lift,
refer to “Quadra-Lift — If Equipped” in
“Starting And Operating” in the Owner’s
Manual for further information on dis-
abling automatic leveling.
Jacking Instructions
WARNING!
Carefully follow these tire changing warn-
ings to help prevent personal injury or
damage to your vehicle:
• Always park on a firm, level surface as
far from the edge of the roadway as
possible before raising the vehicle.
• Turn on the Hazard Warning flasher.
• Block the wheel diagonally opposite the
wheel to be raised.
• Apply the parking brake firmly and set
the transmission in PARK.
• Never start or run the engine with the
vehicle on a jack.
• Do not let anyone sit in the vehicle when
it is on a jack.
• Do not get under the vehicle when it is
on a jack. If you need to get under a
Wheel Blocked
IN CASE OF EMERGENCY
210
Page 213 of 368
WARNING!
raised vehicle, take it to a service center
where it can be raised on a lift.
• Only use the jack in the positions indi-
cated and for lifting this vehicle during a
tire change.
• If working on or near a roadway, be
extremely careful of motor traffic.
• To assure that spare tires, flat or in-
flated, are securely stowed, spares must
be stowed with the valve stem facing the
ground.
• The jack should be used on level firm
ground wherever possible.
• It is recommended that the wheels of
the vehicle be chocked, and that no
person should be remain in a vehicle
that is being jacked.
• No person should place any portion of
their body under a vehicle that is sup-
ported by a jack.
CAUTION!
Do not attempt to raise the vehicle by
jacking on locations other than those indi-
cated in the Jacking Instructions for this
vehicle.
1. Remove the spare tire, jack, and tools
from storage.2. Loosen (but do not remove) the wheel lug
nuts by turning them to the left, one turn,
while the wheel is still on the ground.
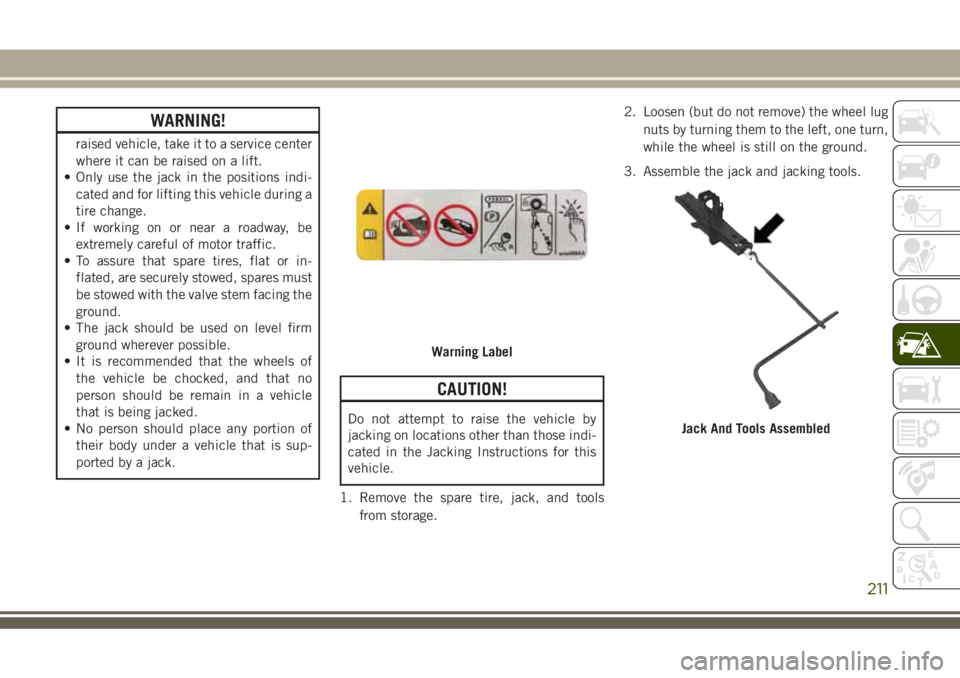
3. Assemble the jack and jacking tools.
Warning Label
Jack And Tools Assembled
211