height adjustment JEEP GRAND CHEROKEE 2020 Owner handbook (in English)
[x] Cancel search | Manufacturer: JEEP, Model Year: 2020, Model line: GRAND CHEROKEE, Model: JEEP GRAND CHEROKEE 2020Pages: 378, PDF Size: 6.88 MB
Page 34 of 378

WARNING!
could cause personal injury if the Active
Head Restraint is deployed.
Adjustment — Rear Seats
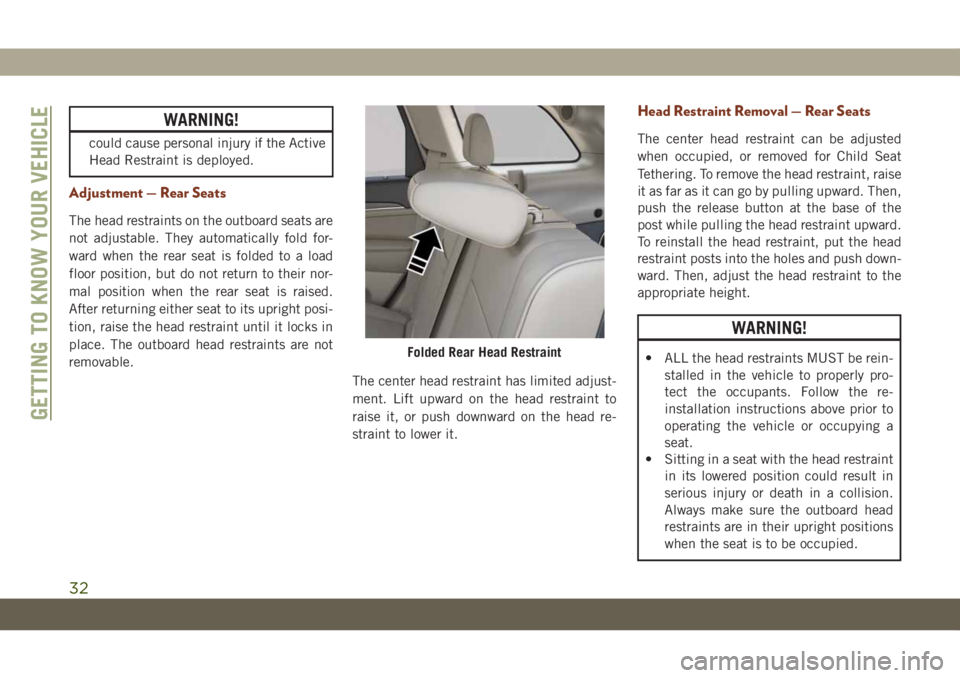
The head restraints on the outboard seats are
not adjustable. They automatically fold for-
ward when the rear seat is folded to a load
floor position, but do not return to their nor-
mal position when the rear seat is raised.
After returning either seat to its upright posi-
tion, raise the head restraint until it locks in
place. The outboard head restraints are not
removable.
The center head restraint has limited adjust-
ment. Lift upward on the head restraint to
raise it, or push downward on the head re-
straint to lower it.
Head Restraint Removal — Rear Seats
The center head restraint can be adjusted
when occupied, or removed for Child Seat
Tethering. To remove the head restraint, raise
it as far as it can go by pulling upward. Then,
push the release button at the base of the
post while pulling the head restraint upward.
To reinstall the head restraint, put the head
restraint posts into the holes and push down-
ward. Then, adjust the head restraint to the
appropriate height.
WARNING!
• ALL the head restraints MUST be rein-
stalled in the vehicle to properly pro-
tect the occupants. Follow the re-
installation instructions above prior to
operating the vehicle or occupying a
seat.
• Sitting in a seat with the head restraint
in its lowered position could result in
serious injury or death in a collision.
Always make sure the outboard head
restraints are in their upright positions
when the seat is to be occupied.Folded Rear Head Restraint
GETTING TO KNOW YOUR VEHICLE
32
Page 115 of 378

NOTE:
The adjustable upper shoulder belt anchor-
age is equipped with an Easy Up feature. This
feature allows the shoulder belt anchorage to
be adjusted in the upward position without
pushing or squeezing the release button. To
verify the shoulder belt anchorage is latched,
pull downward on the shoulder belt anchor-
age until it is locked into position.
WARNING!
• Wearing your seat belt incorrectly could
make your injuries in a collision much
worse. You might suffer internal injuries,
or you could even slide out of the seat
belt. Follow these instructions to wear
your seat belt safely and to keep your
passengers safe, too.
• Position the shoulder belt across the
shoulder and chest with minimal, if any
slack so that it is comfortable and not
resting on your neck. The retractor will
withdraw any slack in the shoulder belt.
• Misadjustment of the seat belt could
reduce the effectiveness of the safety
belt in a crash.
WARNING!
• Always make all seat belt height adjust-
ments when the vehicle is stationary.
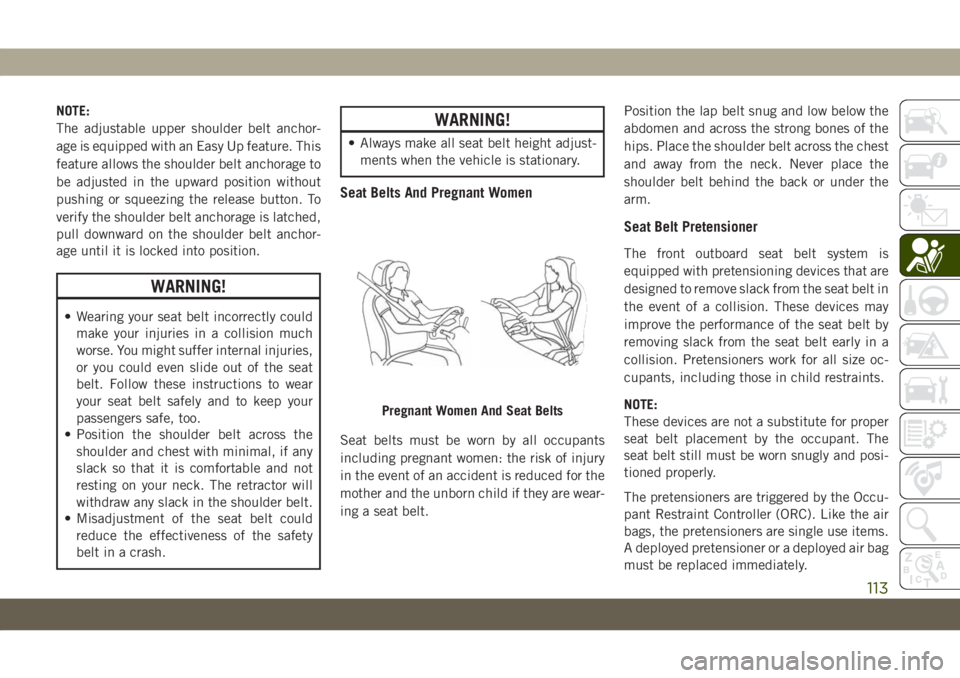
Seat Belts And Pregnant Women
Seat belts must be worn by all occupants
including pregnant women: the risk of injury
in the event of an accident is reduced for the
mother and the unborn child if they are wear-
ing a seat belt.Position the lap belt snug and low below the
abdomen and across the strong bones of the
hips. Place the shoulder belt across the chest
and away from the neck. Never place the
shoulder belt behind the back or under the
arm.
Seat Belt Pretensioner
The front outboard seat belt system is
equipped with pretensioning devices that are
designed to remove slack from the seat belt in
the event of a collision. These devices may
improve the performance of the seat belt by
removing slack from the seat belt early in a
collision. Pretensioners work for all size oc-
cupants, including those in child restraints.
NOTE:
These devices are not a substitute for proper
seat belt placement by the occupant. The
seat belt still must be worn snugly and posi-
tioned properly.
The pretensioners are triggered by the Occu-
pant Restraint Controller (ORC). Like the air
bags, the pretensioners are single use items.
A deployed pretensioner or a deployed air bag
must be replaced immediately.
Pregnant Women And Seat Belts
113
Page 165 of 378

7. When the NEUTRAL (N) indicator light
turns off, release the NEUTRAL (N)
button.
8. After the NEUTRAL (N) button has been
released, the transfer case will shift to the
position indicated by the selector switch.
Quadra-Drive II System — If Equipped
The optional Quadra-Drive II System features
two torque transfer couplings. The couplings
include an Electronic Limited-Slip Differen-
tial (ELSD) rear axle and the Quadra-Trac II
transfer case. The optional ELSD axle is fully
automatic and requires no driver input to
operate. Under normal driving conditions,
the unit functions as a standard axle, balanc-
ing torque evenly between left and rightwheels. With a traction difference between
left and right wheels, the coupling will sense
a speed difference. As one wheel begins to
spin faster than the other, torque will auto-
matically transfer from the wheel that has
less traction, to the wheel that has traction.
While the transfer case and axle coupling
differ in design, their operation is similar.
Follow the Quadra-Trac II transfer case shift-
ing information, preceding this section, for
shifting this system.
QUADRA-LIFT — IF
EQUIPPED
Description
The Quadra-Lift air suspension system pro-
vides full time load leveling capability along
with the benefit of vehicle height adjustment
by the push of a button. The vehicle will
automatically raise and lower the ride height
to adapt to the appropriate driving condi-
tions. At higher speeds, the vehicle will lower
to an aerodynamic ride height and when op-
erating in off-road modes, the vehicle will
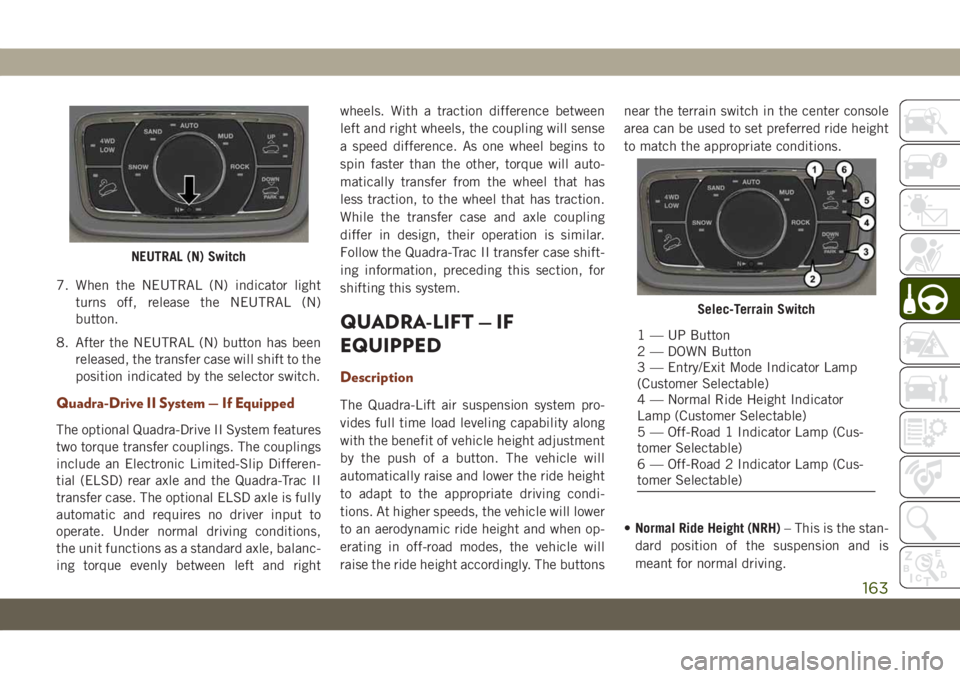
raise the ride height accordingly. The buttonsnear the terrain switch in the center console
area can be used to set preferred ride height
to match the appropriate conditions.
•Normal Ride Height (NRH)– This is the stan-
dard position of the suspension and is
meant for normal driving.
NEUTRAL (N) Switch
Selec-Terrain Switch
1 — UP Button
2 — DOWN Button
3 — Entry/Exit Mode Indicator Lamp
(Customer Selectable)
4 — Normal Ride Height Indicator
Lamp (Customer Selectable)
5 — Off-Road 1 Indicator Lamp (Cus-
tomer Selectable)
6 — Off-Road 2 Indicator Lamp (Cus-
tomer Selectable)
163