key JEEP GRAND CHEROKEE 2023 Owner's Manual
[x] Cancel search | Manufacturer: JEEP, Model Year: 2023, Model line: GRAND CHEROKEE, Model: JEEP GRAND CHEROKEE 2023Pages: 424, PDF Size: 15.48 MB
Page 38 of 424
36GETTING TO KNOW YOUR VEHICLE
(Continued)
MEMORY POSITION RECALL
NOTE:Memory Recall is available when not in PARK, if the
vehicle speed is below 5 mph (8 km/h).
To recall a memory settings profile using the
memory switches, push memory button (1) or
(2) on the memory switch.
To recall the driver’s side memory settings using
the key fob, push the unlock button on the key
fob linked to memory position 1 or 2.
A recall can be canceled by pushing any of the
memory buttons during a recall (S, 1, or 2), or by
pushing any of the seat adjustment switches.
When a recall is canceled, the seat and power tilt/
telescopic steering column (if equipped) will stop
moving. A delay of one second will occur before
another recall can be selected.
SEATS
Seats are a part of the Occupant Restraint system
of the vehicle.
MANUAL ADJUSTMENT (FRONT SEATS) —
I
F EQUIPPED
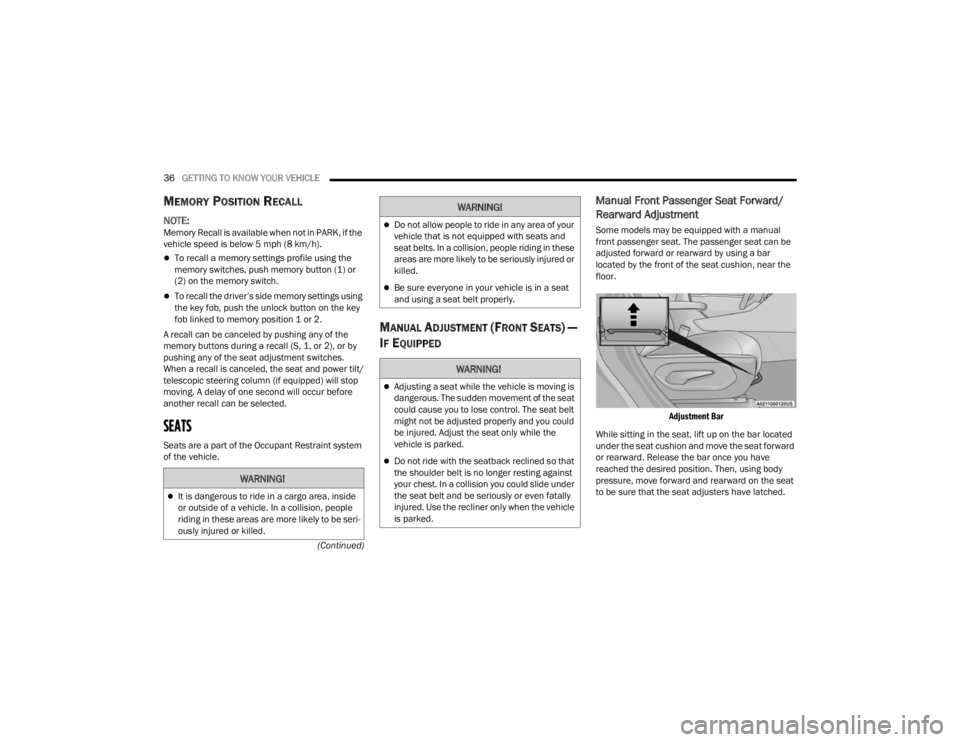
Manual Front Passenger Seat Forward/
Rearward Adjustment
Some models may be equipped with a manual
front passenger seat. The passenger seat can be
adjusted forward or rearward by using a bar
located by the front of the seat cushion, near the
floor.
Adjustment Bar
While sitting in the seat, lift up on the bar located
under the seat cushion and move the seat forward
or rearward. Release the bar once you have
reached the desired position. Then, using body
pressure, move forward and rearward on the seat
to be sure that the seat adjusters have latched.
WARNING!
It is dangerous to ride in a cargo area, inside
or outside of a vehicle. In a collision, people
riding in these areas are more likely to be seri -
ously injured or killed.
Do not allow people to ride in any area of your
vehicle that is not equipped with seats and
seat belts. In a collision, people riding in these
areas are more likely to be seriously injured or
killed.
Be sure everyone in your vehicle is in a seat
and using a seat belt properly.
WARNING!
Adjusting a seat while the vehicle is moving is
dangerous. The sudden movement of the seat
could cause you to lose control. The seat belt
might not be adjusted properly and you could
be injured. Adjust the seat only while the
vehicle is parked.
Do not ride with the seatback reclined so that
the shoulder belt is no longer resting against
your chest. In a collision you could slide under
the seat belt and be seriously or even fatally
injured. Use the recliner only when the vehicle
is parked.
WARNING!
23_WL_OM_EN_USC_t.book Page 36
Page 53 of 424

GETTING TO KNOW YOUR VEHICLE51
Lift Cover On Vanity Mirror
Sun Visor Slide-On-Rod Feature —
If Equipped
The sun visor Slide-On-Rod feature allows for
additional flexibility in positioning the sun visor to
block out the sun.
1. Fold down the sun visor.
2. Unclip the visor from the center clip.
3. Pivot the sun visor toward the side window.
4. Extend the sun visor blade for additional sun blockage.
NOTE:The sun visor blade can also be extended while the
sun visor is against the windshield for additional
sun blockage through the front of the vehicle.
OUTSIDE MIRRORS
To receive maximum benefit, adjust the outside
mirror(s) to center on the adjacent lane of traffic
with a slight overlap of the view obtained on the
inside mirror.
Outside Mirrors Folding Feature
All outside mirrors are hinged and may be moved
either forward or rearward to resist damage. The
hinges have three detent positions:
Full forward position
Full rearward position
Normal position
Outside Mirrors With Turn Signal And
Approach Lighting — If Equipped
Driver and passenger outside mirrors with turn
signal and approach lighting contain four LEDs,
which are located in the upper outer corner of each
mirror.
Three of the LEDs are turn signal indicators, which
flash with the corresponding turn signal lights in
the front and rear of the vehicle. Turning on the
Hazard Warning flashers will also activate these
LEDs.
The fourth LED supplies illuminated entry lighting,
which turns on in both mirrors when you use the
key fob or open any door. This LED shines outward
to illuminate the front and rear door handles. It
also shines downward to illuminate the area in
front of the doors.
The illuminated entry lighting fades to off after
about 30 seconds or it will fade to off immediately
once the ignition is placed into the ON/RUN
position.
NOTE:The approach lighting will not function when the
gear selector is moved out of the PARK position.
WARNING!
Vehicles and other objects seen in an outside
convex mirror will look smaller and farther away
than they really are. Relying too much on side
convex mirrors could cause you to collide with
another vehicle or other object. Use your inside
mirror when judging the size or distance of a
vehicle seen in a side convex mirror.
2
23_WL_OM_EN_USC_t.book Page 51
Page 55 of 424

GETTING TO KNOW YOUR VEHICLE53
AUTOMATIC POWER FOLDING MIRRORS —
I
F EQUIPPED
When enabled within Uconnect Settings
Ú page 204, the exterior mirrors will automatically
fold when the vehicle’s ignition is placed in the OFF
position, and after the doors are locked and
closed.
The exterior mirrors will auto-fold in the following
situations after the ignition is placed in the OFF
position:
Pushing the lock button on the door panel
before the door is opened.
NOTE:If the doors are already locked, push the lock
button again.
Opening the door, then pushing the lock button
on the door panel, followed by closing the door.
After exiting the vehicle, close the doors then
push the lock button on the key fob.
After exiting the vehicle, close the doors then
touch the lock icon on the Passive Entry door
handle.
If the exterior mirrors were folded automatically,
they will unfold when the ignition is placed in the
ON/RUN position.
NOTE:If the mirrors were folded manually, by using the
power folding mirror switch on the driver’s door
panel, they will not automatically unfold.
HEATED MIRRORS — IF EQUIPPED
These mirrors are heated to melt frost or
ice. This feature will be activated
whenever you turn on the rear window
defroster (if equipped) Ú page 66.
TILT SIDE MIRRORS IN REVERSE —
I
F EQUIPPED
Tilt Side Mirrors In Reverse provides automatic
outside mirror positioning which will aid the
driver’s view of the ground rearward of the front
doors. Outside mirrors will move slightly downward
from the present position when the vehicle is
shifted into REVERSE. Outside mirrors will then
return to the original position when the vehicle is
shifted out of REVERSE position. Each stored
memory setting will have an associated Tilt Side
Mirrors In Reverse position.
NOTE:The Tilt Side Mirrors In Reverse feature can be
turned on and off using the Uconnect system
Ú page 204.
UNIVERSAL GARAGE DOOR OPENER
(HOMELINK®) — IF EQUIPPED
HomeLink® Buttons And Indicator Light
Use this QR code to access your
digital experience.
HomeLink® replaces up to
three hand-held transmitters
that operate devices such as
garage door openers, motor -
ized gates, lighting or home
security systems. The HomeLink® unit is
powered by your vehicle’s 12 Volt battery.
The HomeLink® buttons that are located in the
overhead console or sun visor designate the
three different HomeLink® channels.
2
23_WL_OM_EN_USC_t.book Page 53
Page 58 of 424
56GETTING TO KNOW YOUR VEHICLE
REPROGRAMMING A SINGLE
H
OMELINK® BUTTON
To reprogram a single HomeLink® button that has
been previously trained, without erasing all the
channels, proceed as follows. Be sure to
determine whether the new device you want to
program the HomeLink® button to has a rolling
code, or non-rolling code.
1. Place the ignition to the ON/RUN position,
without starting the engine.
2. Push and hold the desired HomeLink® button until the HomeLink® indicator light begins to
flash after 20 seconds. Do not release the
button.
3. Without releasing the button , proceed with
Step 2 in “Programming HomeLink® To A
Garage Door Opener” and follow all remaining
steps.
CANADIAN/GATE OPERATOR
P
ROGRAMMING
For programming transmitters in Canada/United
States that require the transmitter signals to
“time-out” after several seconds of transmission:
Canadian Radio Frequency (RF) laws require
transmitter signals to time-out (or quit) after
several seconds of transmission, which may not be
long enough for HomeLink® to pick up the signal during programming. Similar to this Canadian law,
some U.S. gate operators are designed to time-out
in the same manner.
It may be helpful to unplug the device during the
cycling process to prevent possible overheating of
the garage door or gate motor.
1. Place the ignition in the ON/RUN position.
NOTE:For vehicles equipped with Keyless Enter ‘n Go™,
place the ignition in the ON/RUN position. Make
sure while programming HomeLink® with the
engine on that your vehicle is outside of your
garage, or that the garage door remains open at all
times.
2. Place the hand-held transmitter 1 to 3 inches
(3 to 8 cm) away from the HomeLink® button
you wish to program while keeping the
HomeLink® indicator light in view.
3. Continue to push and hold the HomeLink® button while you push and release (cycle) your
hand-held transmitter every two seconds until
HomeLink® has successfully accepted the
frequency signal. The indicator light will flash
slowly and then rapidly when fully trained.
4. Watch for the HomeLink® indicator to change flash rates. When it changes, it is
programmed. It may take up to 30 seconds or
longer in rare cases. The garage door may
open and close while you are programming. 5. Push and hold the programmed HomeLink®
button and observe the indicator light.
NOTE:
If the indicator light stays on constantly,
programming is complete and the garage
door/device should activate when the
HomeLink® button is pushed.
To program the two remaining HomeLink®
buttons, repeat each step for each
remaining button. DO NOT erase the chan -
nels.
If you unplugged the garage door opener/device
for programming, plug it back in at this time.
Reprogramming A Single HomeLink® Button
(Canadian/Gate Operator)
To reprogram a channel that has been previously
trained, follow these steps:
1. Place the ignition in the ON/RUN position.
2. Press and hold the desired HomeLink® button until the indicator light begins to flash after 20
seconds. Do not release the button.
3. Without releasing the button, proceed with “Canadian/Gate Operator Programming” Step
2 and follow all remaining steps.
23_WL_OM_EN_USC_t.book Page 56
Page 62 of 424
60GETTING TO KNOW YOUR VEHICLE
HEADLIGHTS ON AUTOMATICALLY WITH
W
IPERS
If your vehicle is equipped with Automatic
Headlights, it also has this
customer-programmable feature. When your
headlights are in the automatic mode and the
engine is running, they will automatically turn on
when the wiper system is on. This feature is
programmable through the Uconnect system
Ú page 204.
NOTE:When your headlights come on during the daytime,
the vehicle will monitor outside brightness and
decide if the instrument panel needs to be dimmed
Úpage 62.
HEADLIGHT ILLUMINATION ON
A
PPROACH
When enabled, the headlights, exterior door
handle pocket lights (if equipped), and interior
lights will illuminate when the unlock button on the
key fob is pushed as the operator is approaching
the vehicle. This feature can be turned on/off, and
the length of time the headlights stay on can be
programmed for up to 90 seconds within Uconnect
Settings Ú page 204. Proximity Wake-Up — If Equipped
This feature is enabled/disabled within the
Uconnect system, and is activated when the
operator approaches the driver’s door,
passenger’s door, or liftgate with a valid key fob on
their person. Some exterior and interior lights will
illuminate in order to provide an increased sense
of welcome and security as the operator
approaches the vehicle in the dark. “Headlight
Illumination On Approach” must be selected and
set to a time value other than zero within Uconnect
Settings for Proximity Wake-Up to activate.
The doors may be locked or unlocked for this
feature to activate, as long as the ignition is in the
OFF position, or during a Remote Start event. It will
not activate if the doors are locked and the ignition
was placed in the ON/RUN position.
NOTE:Proximity Wake-Up may not activate under the
following conditions:
After numerous consecutive activations, in
order to conserve the vehicle’s battery
After the vehicle’s engine has been off for
several days
Headlight Animation — If Equipped
When “Headlight Illumination On Approach” is
turned on, and set to a time value above zero, the
exterior lights illuminate in a theatrical manner
during approach to the vehicle. This feature is
activated in the following situations:
Proximity Wake-Up (if equipped) is activated
Remote Start is activated
The unlock button on the key fob is pushed
NOTE:For Headlight Animation to activate with Remote
Start or with the push of the unlock button,
“Greeting Lights” must also be selected within the
Uconnect system.
HEADLIGHT DELAY
To aid in your exit, your vehicle is equipped with a
headlight delay that will leave the headlights on for
approximately 90 seconds. This delay is initiated
when the ignition is placed in the OFF position
while the headlight switch is on, and then the
headlight switch is cycled off. Headlight delay can
be canceled by either turning the headlight switch
on then off, or by placing the ignition in the ON/
RUN position.
NOTE:The headlight delay time is programmable through
Uconnect Settings Ú
page 204.
23_WL_OM_EN_USC_t.book Page 60
Page 64 of 424
62GETTING TO KNOW YOUR VEHICLE
BATTERY SAVER
To protect the life of your vehicle’s battery, load
shedding is provided for both the interior and
exterior lights.
If the ignition is placed in the OFF position and any
door is left ajar for 10 minutes or the overhead
console Dome On switch is left on for 10 minutes,
the interior lights will automatically turn off.
NOTE:Battery saver mode is canceled if the ignition is in
the ON/RUN position.
If the headlights remain on while the ignition is
placed in the OFF position, the exterior lights will
automatically turn off after eight minutes. If the
headlights are turned on and left on for eight
minutes while the ignition is in the OFF position,
the exterior lights will automatically turn off.
INTERIOR LIGHTS
COURTESY LIGHTS
Courtesy and dome lights are turned on when the
front doors are opened or the Dome ON button is
pushed on the overhead console. If your vehicle is
equipped with Remote Keyless Entry and the
unlock button is pushed on the key fob, the
courtesy and dome lights will turn on. When a door
is open and the interior lights are on, pressing the Dome Defeat button on the overhead console will
cause all of the interior lights to turn off.
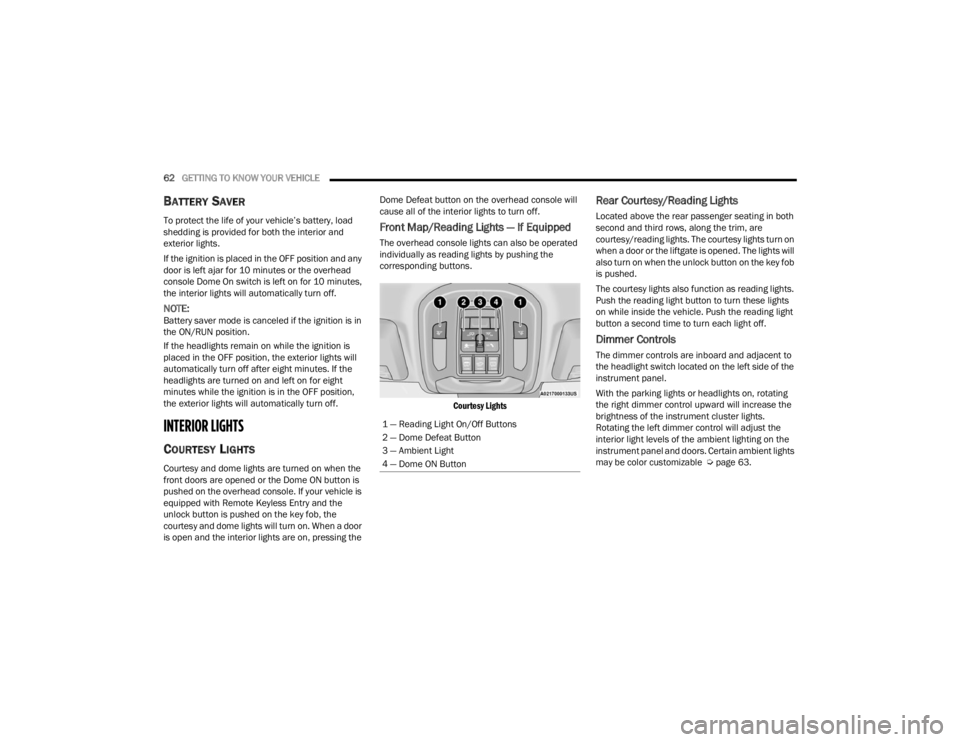
Front Map/Reading Lights — If Equipped
The overhead console lights can also be operated
individually as reading lights by pushing the
corresponding buttons.
Courtesy Lights
Rear Courtesy/Reading Lights
Located above the rear passenger seating in both
second and third rows, along the trim, are
courtesy/reading lights. The courtesy lights turn on
when a door or the liftgate is opened. The lights will
also turn on when the unlock button on the key fob
is pushed.
The courtesy lights also function as reading lights.
Push the reading light button to turn these lights
on while inside the vehicle. Push the reading light
button a second time to turn each light off.
Dimmer Controls
The dimmer controls are inboard and adjacent to
the headlight switch located on the left side of the
instrument panel.
With the parking lights or headlights on, rotating
the right dimmer control upward will increase the
brightness of the instrument cluster lights.
Rotating the left dimmer control will adjust the
interior light levels of the ambient lighting on the
instrument panel and doors. Certain ambient lights
may be color customizable Ú page 63.
1 — Reading Light On/Off Buttons
2 — Dome Defeat Button
3 — Ambient Light
4 — Dome ON Button
23_WL_OM_EN_USC_t.book Page 62
Page 80 of 424
78GETTING TO KNOW YOUR VEHICLE
Using This Feature
By using a USB cable to connect an external
device:
The device can be played on the vehicle’s sound
system, and provides the artist, track title, and
album information on the radio display.
NOTE:Depending on track configuration, track infor -
mation may not be present on the radio display.
The device can be controlled using the radio
buttons to play and browse the contents of the
device.
The audio device battery charges when plugged
into the USB port.
By using an auxiliary cable to connect an external
device:
The audio device can be played on the vehicle’s
sound system. The Uconnect system will not
display information related to the artist, track
title, and album information.
NOTE:When using the AUX port, the external device
cannot be controlled using the radio buttons. The
device will not charge.
For further information, refer to the Uconnect
Radio Instruction Manual.
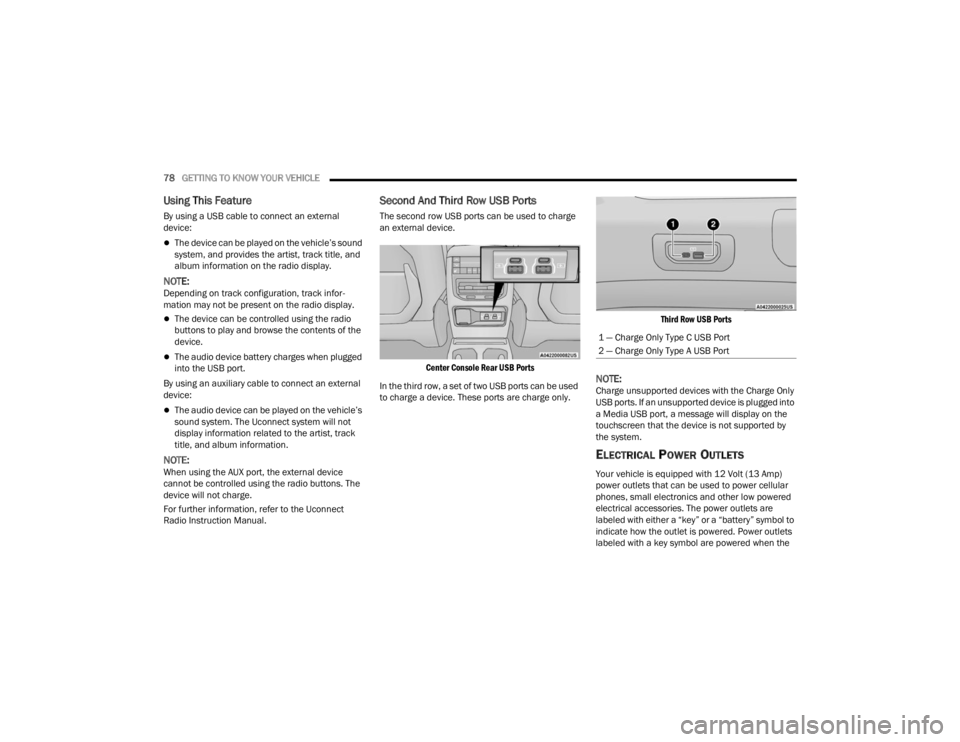
Second And Third Row USB Ports
The second row USB ports can be used to charge
an external device.
Center Console Rear USB Ports
In the third row, a set of two USB ports can be used
to charge a device. These ports are charge only.
Third Row USB Ports
NOTE:Charge unsupported devices with the Charge Only
USB ports. If an unsupported device is plugged into
a Media USB port, a message will display on the
touchscreen that the device is not supported by
the system.
ELECTRICAL POWER OUTLETS
Your vehicle is equipped with 12 Volt (13 Amp)
power outlets that can be used to power cellular
phones, small electronics and other low powered
electrical accessories. The power outlets are
labeled with either a “key” or a “battery” symbol to
indicate how the outlet is powered. Power outlets
labeled with a key symbol are powered when the
1 — Charge Only Type C USB Port
2 — Charge Only Type A USB Port
23_WL_OM_EN_USC_t.book Page 78
Page 83 of 424
GETTING TO KNOW YOUR VEHICLE81
The wireless charging pad is equipped with an
anti-slip mat to hold your mobile phone in place,
and an LED indicator light.
LED Indicator Status:
No Light: Charging pad is idle or searching for a
device.
Blue Light: Device is detected and is charging.
Red Light/Flashing: Internal error or foreign
object is detected.
Important Notes Regarding This Vehicle’s Wireless
Charging Pad:
All vehicle doors must be closed for the wireless
charging pad to operate.
If the phone moves on the pad causing the red
light to illuminate, the phone will have to be
picked up and placed back on the charging pad
to resume charging.
Wireless charging is not as fast as when the
phone is connected to a wired charger.
The phone’s protective case must be removed
when placed on the wireless charging pad.
iPhone® 12 (including iPod®) is equipped with
software to protect the device from overheating.
When the software is active, the rate of charge
is slowed down to protect the device.
Phones must always be placed on the wireless
charging pad within the outline shown on the
pad so that its charging parts connect with the charging coils of the system. Movement of the
phone during charging may prevent or slow the
rate of charge.
Having multiple applications open on the phone
while charging will reduce the charging effi
-
ciency, and may even shut down an application
that is actively running (i.e. Apple CarPlay®).
This may also cause the phone to overheat.
Wireless chargers may implement certain
methods to prevent the phone from overheating
during charging such as slowing down the rate
of charge. In certain instances, the device may
shut down for a brief period of time (when the
device reaches a certain temperature). If this
happens, it does not mean there is a fault with
the wireless charing pad. This may just be a
protective measure to prevent damage to the
phone.
WINDOWS
POWER WINDOW CONTROLS
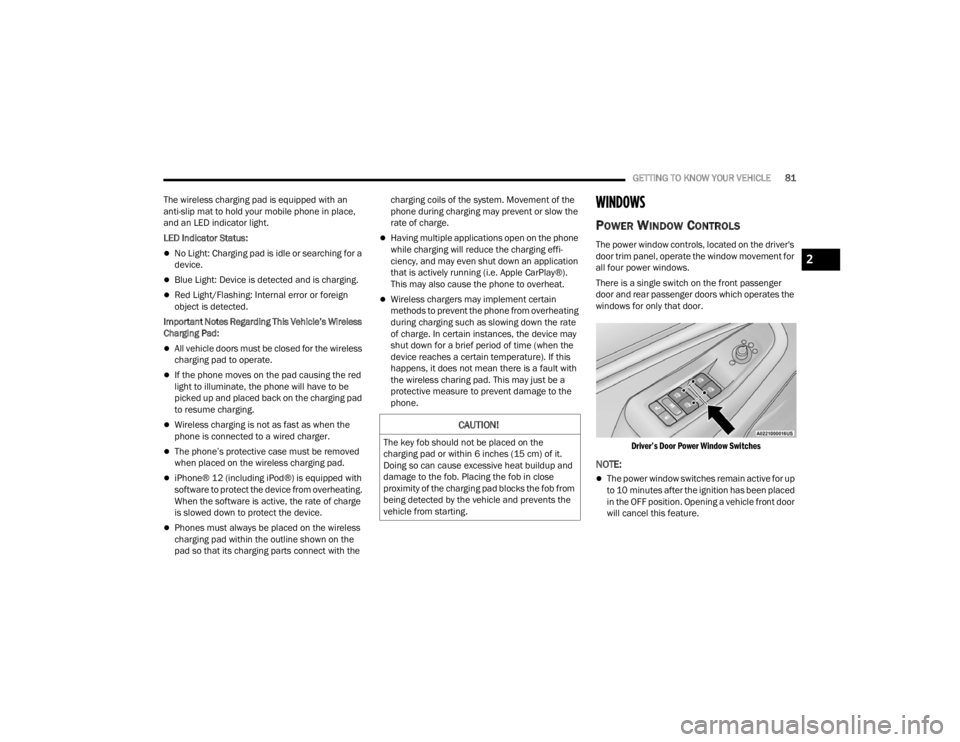
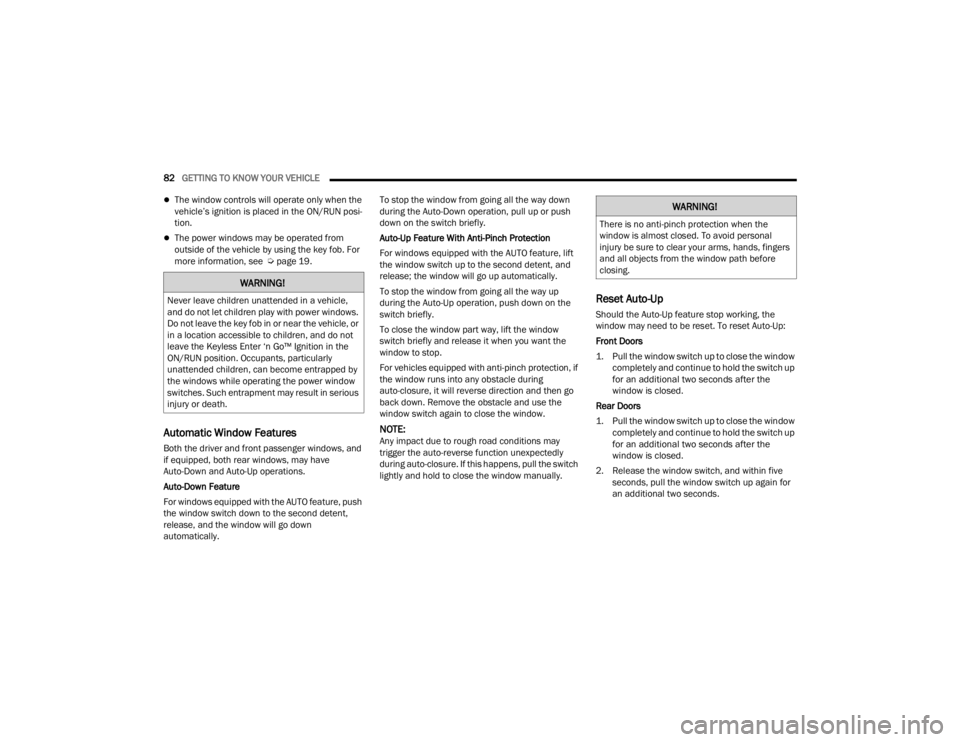
The power window controls, located on the driver's
door trim panel, operate the window movement for
all four power windows.
There is a single switch on the front passenger
door and rear passenger doors which operates the
windows for only that door.
Driver’s Door Power Window Switches
NOTE:
The power window switches remain active for up
to 10 minutes after the ignition has been placed
in the OFF position. Opening a vehicle front door
will cancel this feature.
CAUTION!
The key fob should not be placed on the
charging pad or within 6 inches (15 cm) of it.
Doing so can cause excessive heat buildup and
damage to the fob. Placing the fob in close
proximity of the charging pad blocks the fob from
being detected by the vehicle and prevents the
vehicle from starting.
2
23_WL_OM_EN_USC_t.book Page 81
Page 84 of 424
82GETTING TO KNOW YOUR VEHICLE
The window controls will operate only when the
vehicle’s ignition is placed in the ON/RUN posi -
tion.
The power windows may be operated from
outside of the vehicle by using the key fob. For
more information, see Ú page 19.
Automatic Window Features
Both the driver and front passenger windows, and
if equipped, both rear windows, may have
Auto-Down and Auto-Up operations.
Auto-Down Feature
For windows equipped with the AUTO feature, push
the window switch down to the second detent,
release, and the window will go down
automatically. To stop the window from going all the way down
during the Auto-Down operation, pull up or push
down on the switch briefly.
Auto-Up Feature With Anti-Pinch Protection
For windows equipped with the AUTO feature, lift
the window switch up to the second detent, and
release; the window will go up automatically.
To stop the window from going all the way up
during the Auto-Up operation, push down on the
switch briefly.
To close the window part way, lift the window
switch briefly and release it when you want the
window to stop.
For vehicles equipped with anti-pinch protection, if
the window runs into any obstacle during
auto-closure, it will reverse direction and then go
back down. Remove the obstacle and use the
window switch again to close the window.
NOTE:Any impact due to rough road conditions may
trigger the auto-reverse function unexpectedly
during auto-closure. If this happens, pull the switch
lightly and hold to close the window manually.
Reset Auto-Up
Should the Auto-Up feature stop working, the
window may need to be reset. To reset Auto-Up:
Front Doors
1. Pull the window switch up to close the window
completely and continue to hold the switch up
for an additional two seconds after the
window is closed.
Rear Doors
1. Pull the window switch up to close the window completely and continue to hold the switch up
for an additional two seconds after the
window is closed.
2. Release the window switch, and within five seconds, pull the window switch up again for
an additional two seconds.
WARNING!
Never leave children unattended in a vehicle,
and do not let children play with power windows.
Do not leave the key fob in or near the vehicle, or
in a location accessible to children, and do not
leave the Keyless Enter ‘n Go™ Ignition in the
ON/RUN position. Occupants, particularly
unattended children, can become entrapped by
the windows while operating the power window
switches. Such entrapment may result in serious
injury or death.
WARNING!
There is no anti-pinch protection when the
window is almost closed. To avoid personal
injury be sure to clear your arms, hands, fingers
and all objects from the window path before
closing.
23_WL_OM_EN_USC_t.book Page 82
Page 85 of 424
GETTING TO KNOW YOUR VEHICLE83
Window Lockout Switch
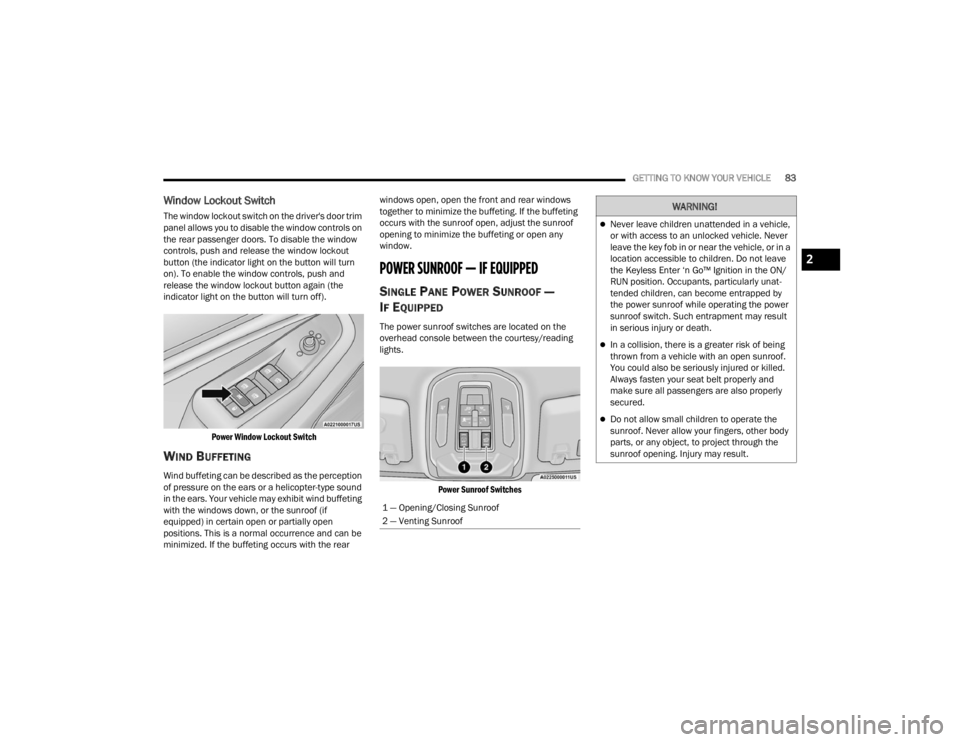
The window lockout switch on the driver's door trim
panel allows you to disable the window controls on
the rear passenger doors. To disable the window
controls, push and release the window lockout
button (the indicator light on the button will turn
on). To enable the window controls, push and
release the window lockout button again (the
indicator light on the button will turn off).
Power Window Lockout Switch
WIND BUFFETING
Wind buffeting can be described as the perception
of pressure on the ears or a helicopter-type sound
in the ears. Your vehicle may exhibit wind buffeting
with the windows down, or the sunroof (if
equipped) in certain open or partially open
positions. This is a normal occurrence and can be
minimized. If the buffeting occurs with the rear windows open, open the front and rear windows
together to minimize the buffeting. If the buffeting
occurs with the sunroof open, adjust the sunroof
opening to minimize the buffeting or open any
window.
POWER SUNROOF — IF EQUIPPED
SINGLE PANE POWER SUNROOF —
I
F EQUIPPED
The power sunroof switches are located on the
overhead console between the courtesy/reading
lights.
Power Sunroof Switches
1 — Opening/Closing Sunroof
2 — Venting Sunroof
WARNING!
Never leave children unattended in a vehicle,
or with access to an unlocked vehicle. Never
leave the key fob in or near the vehicle, or in a
location accessible to children. Do not leave
the Keyless Enter ‘n Go™ Ignition in the ON/
RUN position. Occupants, particularly unat -
tended children, can become entrapped by
the power sunroof while operating the power
sunroof switch. Such entrapment may result
in serious injury or death.
In a collision, there is a greater risk of being
thrown from a vehicle with an open sunroof.
You could also be seriously injured or killed.
Always fasten your seat belt properly and
make sure all passengers are also properly
secured.
Do not allow small children to operate the
sunroof. Never allow your fingers, other body
parts, or any object, to project through the
sunroof opening. Injury may result.
2
23_WL_OM_EN_USC_t.book Page 83