remote start JEEP GRAND CHEROKEE 2023 Owner's Manual
[x] Cancel search | Manufacturer: JEEP, Model Year: 2023, Model line: GRAND CHEROKEE, Model: JEEP GRAND CHEROKEE 2023Pages: 424, PDF Size: 15.48 MB
Page 230 of 424
228MULTIMEDIA
STEERING WHEEL AUDIO CONTROLS
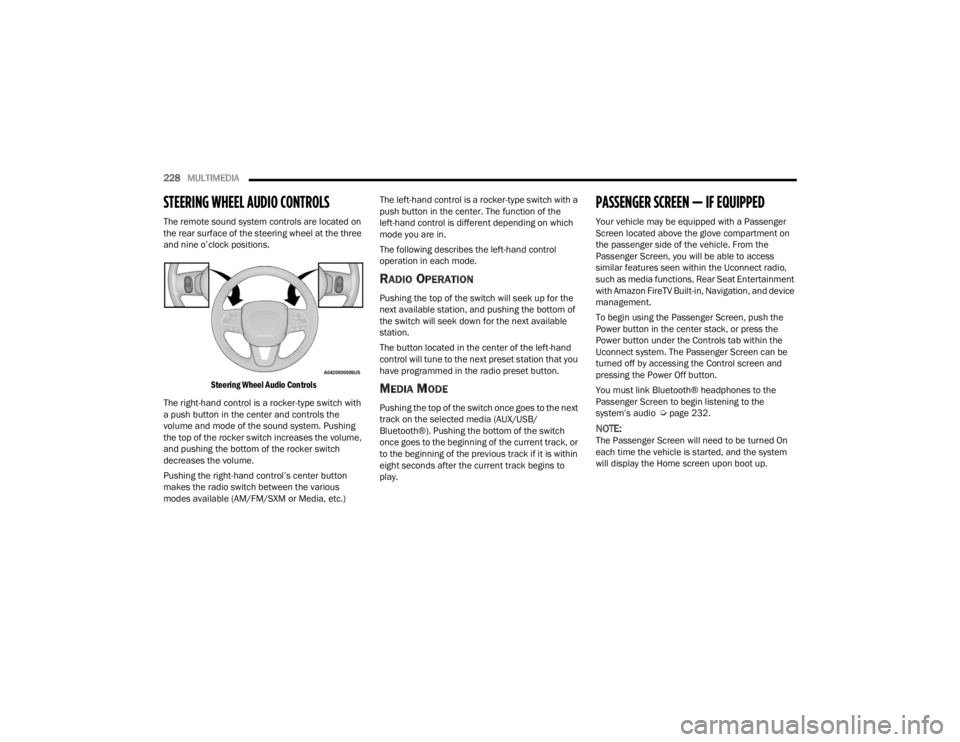
The remote sound system controls are located on
the rear surface of the steering wheel at the three
and nine o’clock positions.
Steering Wheel Audio Controls
The right-hand control is a rocker-type switch with
a push button in the center and controls the
volume and mode of the sound system. Pushing
the top of the rocker switch increases the volume,
and pushing the bottom of the rocker switch
decreases the volume.
Pushing the right-hand control’s center button
makes the radio switch between the various
modes available (AM/FM/SXM or Media, etc.) The left-hand control is a rocker-type switch with a
push button in the center. The function of the
left-hand control is different depending on which
mode you are in.
The following describes the left-hand control
operation in each mode.
RADIO OPERATION
Pushing the top of the switch will seek up for the
next available station, and pushing the bottom of
the switch will seek down for the next available
station.
The button located in the center of the left-hand
control will tune to the next preset station that you
have programmed in the radio preset button.
MEDIA MODE
Pushing the top of the switch once goes to the next
track on the selected media (AUX/USB/
Bluetooth®). Pushing the bottom of the switch
once goes to the beginning of the current track, or
to the beginning of the previous track if it is within
eight seconds after the current track begins to
play.
PASSENGER SCREEN — IF EQUIPPED
Your vehicle may be equipped with a Passenger
Screen located above the glove compartment on
the passenger side of the vehicle. From the
Passenger Screen, you will be able to access
similar features seen within the Uconnect radio,
such as media functions, Rear Seat Entertainment
with Amazon FireTV Built-in, Navigation, and device
management.
To begin using the Passenger Screen, push the
Power button in the center stack, or press the
Power button under the Controls tab within the
Uconnect system. The Passenger Screen can be
turned off by accessing the Control screen and
pressing the Power Off button.
You must link Bluetooth® headphones to the
Passenger Screen to begin listening to the
system’s audio Ú
page 232.
NOTE:The Passenger Screen will need to be turned On
each time the vehicle is started, and the system
will display the Home screen upon boot up.
23_WL_OM_EN_USC_t.book Page 228
Page 237 of 424
MULTIMEDIA235
music, get information, and watch downloaded
programs all while on the road. Two Voice Remotes
with Alexa are included with the system. Press the
Microphone button on the Voice Remote with Alexa
to easily find, launch, and control content. Check
sports scores, play music, control smart home
devices, or see your live camera feeds (compatible
smart home device required and sold separately).
In addition to streaming and downloaded content,
changing the input in Fire TV also enables you to:
Mirror what’s on your phone or tablet to Fire TV
via Miracast capable devices
Stream your favorite shows with Fire TV
Plug and play a variety of standard video games
or devices into the HDMI port
Listen to audio over wired or wireless head -
phones (not included, customer will have to
provide their own)
Plug and play a variety of devices into the front
seat Video USB port. USB ports located under
the rear screens are charge only
Watch content individually on each rear display
or mirror across both displays to watch together
NOTE:Vehicle must be in an active and usable cellular
range and properly equipped with a Uconnect
5 NAV system and Rear Seat Entertainment with
Fire TV package. Streaming requires a Wi-Fi
connection and registered Amazon account to run Fire TV in the vehicle. Streaming service subscrip
-
tions are not included. Services and features are
subject to change or withdrawal at any time, may
not be available in all areas and languages, and
may require separate subscriptions.
Please review this Owner's Manual to become
familiar with RSE features and operation.
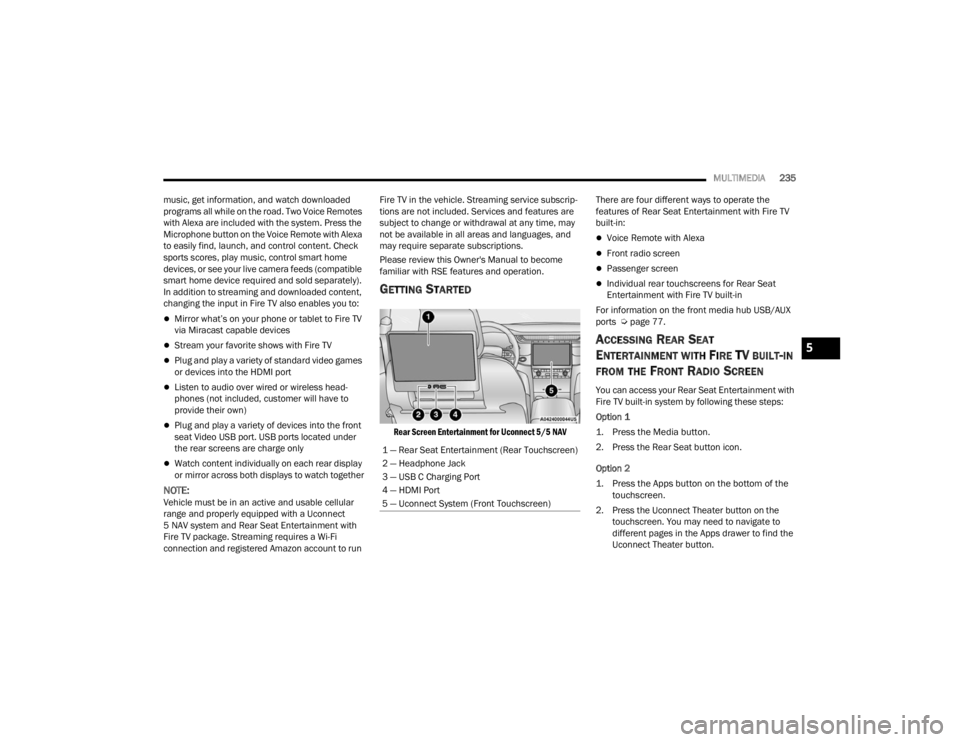
GETTING STARTED
Rear Screen Entertainment for Uconnect 5/5 NAV
There are four different ways to operate the
features of Rear Seat Entertainment with Fire TV
built-in:
Voice Remote with Alexa
Front radio screen
Passenger screen
Individual rear touchscreens for Rear Seat
Entertainment with Fire TV built-in
For information on the front media hub USB/AUX
ports Ú page 77.
ACCESSING REAR SEAT
E
NTERTAINMENT WITH FIRE TV BUILT-IN
FROM THE FRONT RADIO SCREEN
You can access your Rear Seat Entertainment with
Fire TV built-in system by following these steps:
Option 1
1. Press the Media button.
2. Press the Rear Seat button icon.
Option 2
1. Press the Apps button on the bottom of the
touchscreen.
2. Press the Uconnect Theater button on the touchscreen. You may need to navigate to
different pages in the Apps drawer to find the
Uconnect Theater button.
1 — Rear Seat Entertainment (Rear Touchscreen)
2 — Headphone Jack
3 — USB C Charging Port
4 — HDMI Port
5 — Uconnect System (Front Touchscreen)
5
23_WL_OM_EN_USC_t.book Page 235
Page 238 of 424
236MULTIMEDIA
ACCESSING REAR SEAT
E
NTERTAINMENT WITH FIRE TV BUILT-IN
FROM THE REAR SCREENS
You can also access your Rear Seat Entertainment
with Fire TV built-in by choosing one of the
following options:
Option 1
The system will automatically turn on when the
vehicle is started. Pushing the power button on
the Voice Remote with Alexa will turn the system
back on if it was manually shut off. If the screen
is inactive and goes to a screen saver, the
system can be woken up by either tapping the
screen or pushing any button on the Voice
Remote with Alexa.
Option 2
Swiping on either of the rear touchscreens.
NOTE:While accessing on the rear screens, the system
will launch with the integrated Fire TV.
ACCESSING REAR SEAT
E
NTERTAINMENT WITH FIRE TV BUILT-IN
FROM THE PASSENGER SCREEN —
I
F EQUIPPED
You can also access Rear Seat Entertainment with
Fire TV built-in content from the Passenger Screen.
Follow these steps:
1. Access the Home screen for the Passenger
Screen.
2. Swipe right on the Home screen and select Fire TV Rear Seat Entertainment Controls.
FIRST TIME STARTING UP (USING THE
R
EAR SCREENS)
Boot-up Screen
When turning on the system for the first time from
the rear screens, a boot-up screen will appear on
the system displaying the Fire TV logo.
During this boot-up sequence, language options
will be available for the system. Voice Remote with Alexa Pairing
After the boot-up sequence is complete, the
system will then give the option to pair a Voice
Remote with Alexa (two are included with the
system).
Follow the on-screen instructions for how to pair a
Voice Remote with Alexa to the system. Two Voice
Remotes with Alexa are included to be paired with
each rear screen.
A Voice Remote with Alexa can be paired to each
rear screen. It will function with the rear screen it
was paired with. The pairing steps will need to be
done for each rear screen.
NOTE:If the Voice Remote with Alexa pairing fails,
on-screen instructions will appear for trying to pair
again.
Connecting to a Network
During the start-up process, the system will need to
be connected to a network to function. Multiple
network sources can be options for the system.
23_WL_OM_EN_USC_t.book Page 236
Page 239 of 424
MULTIMEDIA237
Some options for a network connection are:
Wi-Fi Hotspot using a capable smartphone (if
activated, it will show as a possible network for
the system on the screen).
Outside connection like a home Wi-Fi network.
In-vehicle Wi-Fi.
NOTE:When a network is connected to the system for the
first time, an over-the-air-software update will take
place using the Wi-Fi connection. It is recom -
mended that an unlimited Wi-Fi connection, if
available, be used during this update. After this
first-time update, updates will only occur when one
is available.
Account Sign-in
The next step will be the option to sign in to your
Amazon account.
There are two options to sign into the system:
I already have an Amazon account: Sign in with
an already existing Amazon account
I am new to Amazon: Create a new Amazon
Account
If “I am new to Amazon” is selected, follow the
on-screen steps to set up an Amazon account with
the system. Parental Controls
Another feature that will appear during this first
time set up is parental controls.
When the parental controls page appears, it will
give the options “Enable Parental Controls” and
“No Parental Controls”. If “Enable Parental
Controls” is selected, follow the on-screen steps to
set up parental controls for the system.
ALEXA VOICE CONTROL
A feature with Rear Seat Entertainment with Fire
TV built-in that enhances your experience is Alexa.
It is simple to get started using this feature. Push
the Microphone button at the top of the Voice
Remote with Alexa to activate Alexa and get
started.
LISTEN VIA VEHICLE SPEAKERS
A feature within Rear Seat Entertainment with Fire
TV built-in is the front radio Listen feature. On the
front radio Home screen for Fire TV, select the
Listen button in the top right corner on either card
for Screen 1 or 2. This will allow you to have either
rear screen play audio through all the speakers in
the vehicle.
QUICK MENU
Accessing the quick menu will give you more
options for Fire TV.
To access the quick menu, tap the screen and it
will appear. The quick menu is also accessible by
pushing the Gear/Settings button on the Voice
Remote with Alexa.
Some options of the quick menu are:
Power — This will power the screen off.
On-Screen Remote
— This will bring up the
on-screen remote to use with the system.
Back — This will let you go back a page.
Home — This will take you to the Home screen.
Gear/Settings — This will let you access certain
settings in the system. For more setting options,
select “Settings” within the on-screen Gear/
Settings menu.
Vehicle — This will bring up the Vehicle menu.
From here you can adjust rear climate controls
and the Are We There Yet? app.
5
23_WL_OM_EN_USC_t.book Page 237
Page 240 of 424
238MULTIMEDIA
PARENTAL CONTROLS (USING THE REAR
S
CREENS)
If parental controls were not set during the first
time start up of the system, they can be set by
following these steps:
1. Push the Gear/Settings button on the Voice
Remote with Alexa or tap the screen to access
Settings in the “quick menu”.
2. Select the Gear/Settings icon on the screen.
3. Select “Settings” on the screen.
4. While in Settings, select “Preferences”.
5. Select “Parental Controls”; from here you can turn Parental Controls on or off and set up a
PIN for the controls using the Voice Remote
with Alexa.
VOICE REMOTE WITH ALEXA PAIRING
(U
SING THE REAR SCREENS)
If the Voice Remote with Alexa needs to be paired
again or a new remote is being paired, follow these
procedures:
1. Install batteries into the remote.
2. Tap the screen and Select the Gear/Settings
icon on the screen.
3. Select “Settings” on the screen.
4. In Settings, select “Controllers & Bluetooth® Devices”.
5. From this menu, select “Add New Remote”.
6. Follow the on-screen steps for Voice Remote with Alexa pairing.
A long press on the Home button can also re-pair a
Voice Remote with Alexa that has become
disconnected.
NOTE:Your vehicle is included with two Voice Remotes
with Alexa. A Voice Remote with Alexa can be
paired to each rear screen. It will function with the
rear screen it was paired with. The pairing steps
will need to be done for each rear screen.
MEDIA SOURCES INPUT (USING THE
F
RONT RADIO AND REAR SCREENS)
Front Radio Screen
Users can select inputs for each rear screen from
the front radio touchscreen by selecting the Rear
Seat tab and choosing the desired content by
selecting “Launch Source” on the Screen 1 or
Screen 2 tab.
Inputs available within Launch Source under
“Inputs” are “Fire TV”, “HDMI”, and “USB”.
Rear Screens
To select inputs on the rear screen, scroll down on
the Fire TV Home screen and select your desired
input under “Input”.
Inputs can also be selected from the Brand tab in
the top menu. While in this tab, scroll down to
“Inputs” for selection options.
NOTE:The Brand tab naming in the top menu will depend
on the naming of the vehicle’s brand.
23_WL_OM_EN_USC_t.book Page 238
Page 322 of 424
320IN CASE OF EMERGENCY
(Continued)
PREPARATIONS FOR JUMP START
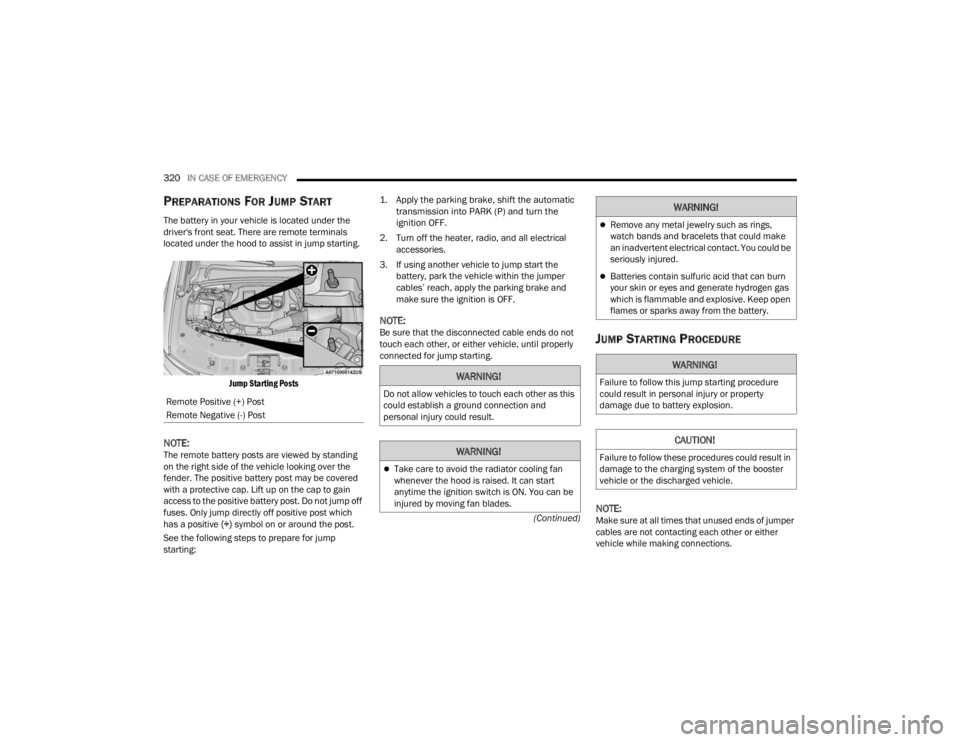
The battery in your vehicle is located under the
driver's front seat. There are remote terminals
located under the hood to assist in jump starting.
Jump Starting Posts
NOTE:The remote battery posts are viewed by standing
on the right side of the vehicle looking over the
fender. The positive battery post may be covered
with a protective cap. Lift up on the cap to gain
access to the positive battery post. Do not jump off
fuses. Only jump directly off positive post which
has a positive (+) symbol on or around the post.
See the following steps to prepare for jump
starting:
1. Apply the parking brake, shift the automatic
transmission into PARK (P) and turn the
ignition OFF.
2. Turn off the heater, radio, and all electrical accessories.
3. If using another vehicle to jump start the battery, park the vehicle within the jumper
cables’ reach, apply the parking brake and
make sure the ignition is OFF.
NOTE:Be sure that the disconnected cable ends do not
touch each other, or either vehicle, until properly
connected for jump starting.JUMP STARTING PROCEDURE
NOTE:Make sure at all times that unused ends of jumper
cables are not contacting each other or either
vehicle while making connections.
Remote Positive (+) Post
Remote Negative (-) Post
WARNING!
Do not allow vehicles to touch each other as this
could establish a ground connection and
personal injury could result.
WARNING!
Take care to avoid the radiator cooling fan
whenever the hood is raised. It can start
anytime the ignition switch is ON. You can be
injured by moving fan blades.
Remove any metal jewelry such as rings,
watch bands and bracelets that could make
an inadvertent electrical contact. You could be
seriously injured.
Batteries contain sulfuric acid that can burn
your skin or eyes and generate hydrogen gas
which is flammable and explosive. Keep open
flames or sparks away from the battery.
WARNING!
Failure to follow this jump starting procedure
could result in personal injury or property
damage due to battery explosion.
CAUTION!
Failure to follow these procedures could result in
damage to the charging system of the booster
vehicle or the discharged vehicle.
WARNING!
23_WL_OM_EN_USC_t.book Page 320
Page 323 of 424
IN CASE OF EMERGENCY321
Connecting The Jumper Cables
1. Connect the positive
(+) end of the jumper
cable to the remote positive (+)
post of the
discharged vehicle.
2. Connect the opposite end of the positive (+)
jumper cable to the positive (+) post of the
booster battery.
3. Connect the negative (-) end of the jumper
cable to the negative (-) post of the booster
battery.
4. Connect the opposite end of the negative (-)
jumper cable to the remote negative (-) post
(exposed metallic/unpainted post of the
discharge vehicle) located directly in front of
the underhood fuse box.
5. Start the engine in the vehicle that has the booster battery, let the engine idle a few
minutes, and then start the engine in the
vehicle with the discharged battery. 6. Once the engine is started, follow the discon
-
necting procedure.
Disconnecting The Jumper Cables
1. Disconnect the negative
(-) end of the jumper
cable from the remote negative (-)
post of the
discharged vehicle.
2. Disconnect the opposite end of the negative (-)
jumper cable from the negative (-) post of the
booster battery.
3. Disconnect the positive (+) end of the jumper
cable from the positive (+) post of the booster
battery.
4. Disconnect the opposite end of the positive (+)
jumper cable from the remote positive (+) post
of the discharged vehicle.
5. Reinstall the protective cover over the remote positive (+) post of the discharged vehicle.
If frequent jump starting is required to start your
vehicle have the battery and charging system
tested at an authorized dealer.
REFUELING IN EMERGENCY
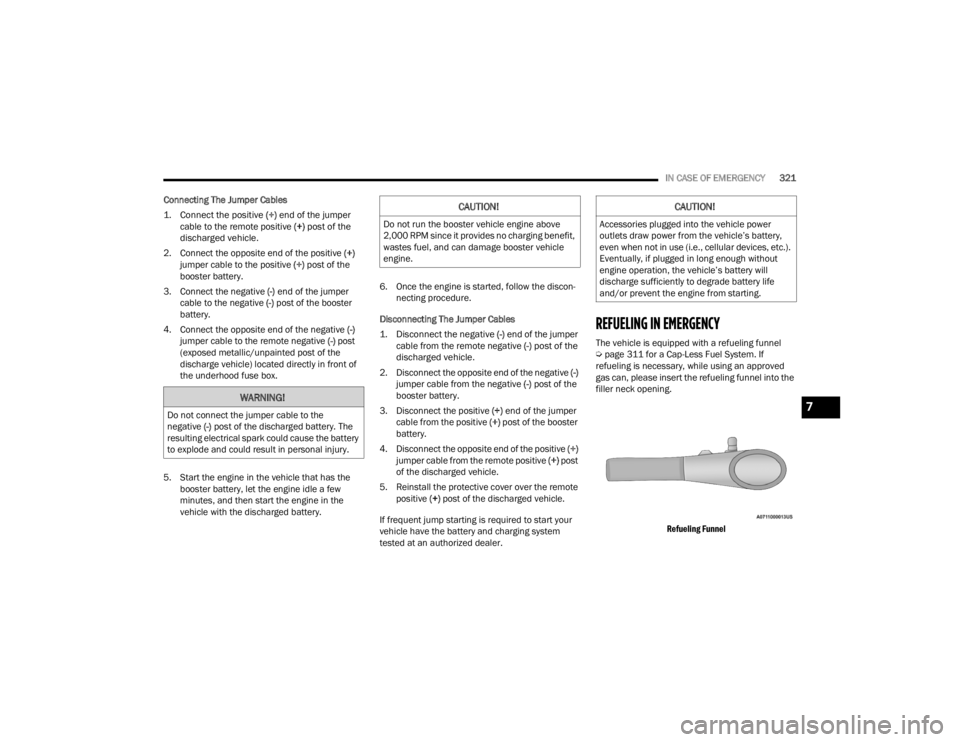
The vehicle is equipped with a refueling funnel
Ú page 311 for a Cap-Less Fuel System. If
refueling is necessary, while using an approved
gas can, please insert the refueling funnel into the
filler neck opening.
Refueling Funnel
WARNING!
Do not connect the jumper cable to the
negative (-) post of the discharged battery. The
resulting electrical spark could cause the battery
to explode and could result in personal injury.
CAUTION!
Do not run the booster vehicle engine above
2,000 RPM since it provides no charging benefit,
wastes fuel, and can damage booster vehicle
engine.
CAUTION!
Accessories plugged into the vehicle power
outlets draw power from the vehicle’s battery,
even when not in use (i.e., cellular devices, etc.).
Eventually, if plugged in long enough without
engine operation, the vehicle’s battery will
discharge sufficiently to degrade battery life
and/or prevent the engine from starting.
7
23_WL_OM_EN_USC_t.book Page 321
Page 413 of 424

411
Checking Your Vehicle For Safety
.................. 303Checks, Safety............................................... 303Child Restraint............................................... 289Child Restraints Booster Seats............................................ 291Child Seat Installation............................... 300How To Stow An unused ALR Seat Belt..... 297Infant And Child Restraints....................... 290Locating The LATCH Anchorages............... 295Lower Anchors And Tethers For Children.. 292Older Children And Child Restraints..........291Seating Positions...................................... 292Child Safety Locks........................................... 31Clean Air Gasoline......................................... 398CleaningWheels...................................................... 388Climate Control................................................ 66Automatic.................................................... 66Rear............................................................ 69CNG And LP Fuel System Modifications......... 398Cold Weather Operation................................ 122Compact Spare Tire....................................... 386Contract, Service........................................... 405Cooling Pressure Cap (Radiator Cap).............348
Cooling System............................................. 346Adding Coolant (Antifreeze)...................... 347Coolant Level................................... 348, 349Cooling Capacity....................................... 400Disposal Of Used Coolant......................... 348Drain, Flush, And Refill............................. 347Inspection............................... 347, 348, 349Points To Remember................................ 349Pressure Cap............................................ 348Radiator Cap............................................ 348Selection Of Coolant(Antifreeze)......................... 347, 400, 401Corrosion Protection..................................... 392Cruise Control (Speed Control)..................... 142Cruise Light.......................................... 115, 116Customer Assistance.................................... 403Customer Programmable Features............... 204Cybersecurity................................................ 203
D
Daytime Running Lights................................... 58Defroster, Windshield................................... 304De-Icer, Remote Start...................................... 26De-Icer, Windshield.......................................... 66Diagnostic System, Onboard......................... 117Digital Instrument Cluster ¹.............................. 96
DipsticksOil (Engine)............................................... 337DisposalAntifreeze (Engine Coolant)...................... 348Do Not Use E-85 In Non-Flex Fuel Vehicles... 398Door Ajar....................................................... 109Door Locks................................................27, 31Child-Protection Door Lock — Rear Doors....31Doors...............................................................27Driver’s Seat Back Tilt......................................36Driving........................................................... 199Tips........................................................... 199DrowsyDriverDetection................................. 249
E
Electric Brake Control System....................... 250Anti-Lock Brake System............................ 248Electronic Roll Mitigation................. 251, 257Electric Parking Brake................................... 123Electrical Outlet, Auxiliary (Power Outlet).........78
Electronic Stability Control (ESC)... 111, 112, 251
Electronic Sway Bar Disconnect.................... 133Electronic Throttle Control Warning Light...... 109
11
23_WL_OM_EN_USC_t.book Page 411
Page 416 of 424

414 J
Jack Location
................................................. 311Jack Operation............................................... 315Jacking And Tire Changing
b
....................... 310Jacking And Tire Changing Instructions......... 311Jacking Instructions....................................... 315Jump Starting................................................ 319
K
Key Fob Arm The System
.......................................... 26Disarm The System..................................... 27Programming Additional Key Fobs.............. 21Key Fob Battery Service
(Remote Keyless Entry)................................... 19
Key Fob Programming (Remote Keyless Entry).. 21
Keyless Enter 'n Go™..................................... 119Passive Entry............................................... 29Passive Entry Programming......................... 29Keys................................................................. 18Replacement............................................... 21Sentry (Immobilizer).................................... 22
L
Lane Change Assist......................................... 61Lane Management System............................ 171Lap/Shoulder Belts....................................... 271Latches.......................................................... 305Lead Free Gasoline........................................ 397Leaks, Fluid................................................... 305
Life Of Tires................................................... 384Liftgate...................................................88, 110Adjustable Height........................................ 89Closing......................................................... 88Hands-Free.................................................. 89Opening....................................................... 88Liftgate Window Wiper/Washer....................... 66Light Bulbs.................................................... 305Lighted Cupholders.......................................... 76Lights............................................................ 305Air Bag.................................... 108, 277, 303Ambient....................................................... 62Ambient, Mutlicolor..................................... 63Automatic Headlights.................................. 59Brake Assist Warning............................... 252Brake Warning.......................................... 108Bulb Replacement.................................... 374Cruise.............................................. 115, 116Daytime Running......................................... 58Dimmer Switch............................................ 62Dimmer Switch, Headlight........................... 57Electric Power Steering............................. 109Electronic Stability Control............... 111, 112Exterior...............................................57, 305Fog.....................................................61, 115Hazard Warning Flasher........................... 307Headlights On With Wipers.......................... 60High Beam................................................ 117
High Beam/Low Beam Select......................59Hill Descent Control Indicator.......... 116, 253Interior.........................................................62Lights On Reminder.....................................61Low Fuel................................................... 112Malfunction Indicator (Check Engine)....... 112NEUTRAL.................................................. 115Night Vision.............................110, 113, 116Oil Temperature........................................ 110Park................................................... 59, 116Passing........................................................59Reading.......................................................62Seat Belt Reminder.................................. 110Security Alarm.......................................... 111SelecSpeed Control.................................. 117Service...................................................... 374Sport Mode............................................... 116StopStart.................................................. 116Sway Bar................................................... 115Sway Bar Fault.......................................... 113Traction Control........................................ 252Transmission Temperature....................... 110Turn Signals.............................. 61, 116, 305Vanity Mirror................................................50Load Shed Battery Saver Mode..................... 106Load Shed Battery Saver On......................... 106Load Shed Electrical Load Reduction........... 106Load Shed Intelligent Battery Sensor............ 106
23_WL_OM_EN_USC_t.book Page 414
Page 418 of 424

416 Onboard Diagnostic System
.......................... 117Operating Precautions................................... 117Operator Manual Owner's Manual........................................ 407Outside Rearview Mirrors................................ 51
P
Paint Care...................................................... 392Panic Alarm..................................................... 19Parking Brake................................................ 123ParkSenseFront And Rear.......................................... 159ParkSense Active Park Assist........................ 166ParkSense System, Rear............................... 159Passenger Screen......................................... 228Passive Entry................................................... 29Pedestrian Warning System.......................... 263Permissions................................................... 228Pets............................................................... 303Pinch Protection....................................... 84, 86Placard, Tire And Loading Information........... 379PowerBrakes....................................................... 396Distribution Center (Fuses).... 353, 361, 367Door Locks.................................................. 28
Inverter........................................................ 80Mirrors......................................................... 52Outlet (Auxiliary Electrical Outlet)................ 78Seats........................................................... 41Steering.................................................... 139Sunroof................................................. 83, 85Tilt/Telescoping Steering Column................ 32Windows...................................................... 81Power SeatsDown........................................................... 42Forward....................................................... 42Rearward..................................................... 42Up................................................................ 42Power Seats, Third Row................................... 43Pregnant Women And Seat Belts.................. 275Preparation For Jacking................................ 311Pressure Washing......................................... 338PretensionersSeat Belts................................................. 275Profile........................................................... 207Programmable Features............................... 204
Q
Quadra-Lift........................................... 114, 136Quadra-Trac.................................................. 131
R
Radial Ply Tires.............................................. 383Radiator Cap (Coolant Pressure Cap)............ 348RadioOff Road Pages......................................... 245Settings.................................................... 204Sound Setting........................................... 223Radio Operation............................................ 247Radio Remote Controls................................. 228Rain Sensitive Wiper System...........................65Rear Air Conditioning.......................................71Rear Axle (Differential).................................. 351Rear Camera........................................ 174, 181Rear Camera, Washer................................... 174Rear Cross Path............................................ 260Rear ParkSense System................................ 159Rear Seat Entertainment.............................. 234Rear Wiper/Washer.........................................66Rear Seat Reminder Alert............................. 249Reclining Front Seats.......................................37Recreational Towing...................................... 195Reformulated Gasoline................................. 398Refrigerant.................................................... 341Release, Hood..................................................87Reminder, Seat Belt...................................... 270Remote ControlStarting System...........................................24
23_WL_OM_EN_USC_t.book Page 416