set clock JEEP GRAND CHEROKEE 2023 Owners Manual
[x] Cancel search | Manufacturer: JEEP, Model Year: 2023, Model line: GRAND CHEROKEE, Model: JEEP GRAND CHEROKEE 2023Pages: 424, PDF Size: 15.48 MB
Page 61 of 424

GETTING TO KNOW YOUR VEHICLE59
On some vehicles, the Daytime Running Lights
may deactivate, or reduce intensity, on one side
of the vehicle (when a turn signal is activated on
that side), or on both sides of the vehicle (when
the hazard warning lights are activated).
HIGH/LOW BEAM SWITCH
Push the multifunction lever toward the instrument
panel to switch the headlights to high beams.
Pulling the multifunction back toward the steering
wheel will turn the low beams back on, or shut the
high beams off.
AUTOMATIC HIGH BEAMS —
I
F EQUIPPED
The Automatic High Beam Headlight system
provides increased forward lighting at night by
automating high beam control through the use of a
digital camera mounted on the inside rearview
mirror. This camera detects vehicle specific light
and automatically switches from high beams to low
beams until the approaching vehicle is out of view.
NOTE:
The Automatic High Beam Headlight system can
be turned on or off by selecting or deselecting
“Auto Dim High Beams” within Uconnect
Settings Ú page 204.
The headlight switch must also be turned to the
AUTO position after Automatic High Beams is
enabled within Uconnect Settings for the
feature to activate.
Automatic High Beams will only activate when
the vehicle speed is above 22 mph (35 km/h).
Broken, muddy, or obstructed headlights and
taillights of vehicles in the field of view will
cause headlights to remain on longer (closer to
the vehicle). Also, dirt, film, and other obstruc -
tions on the windshield or camera lens will
cause the system to function improperly.
If the windshield or Automatic High Beam
Headlight Control mirror is replaced, the mirror
must be re-aimed to ensure proper performance.
See a local authorized dealer.
FLASH-TO-PASS
You can signal another vehicle with your headlights
by lightly pulling the multifunction lever toward you.
This will cause the high beam headlights to turn on,
and remain on, until the lever is released.
AUTOMATIC HEADLIGHTS
This system automatically turns the headlights on
or off according to ambient light levels. To turn the
system on, rotate the headlight switch
counterclockwise to the AUTO position. When the
system is on, the headlight time delay feature is
also on. This means the headlights will stay on for up to 90 seconds after you place the ignition into
the OFF position. The headlight time delay can be
programmed to 0/30/60/90 seconds within the
Uconnect system Ú
page 204.
To turn the automatic system off, move the
headlight switch out of the AUTO position.
NOTE:The engine must be running before the headlights
will come on in the automatic mode.
PARKING LIGHTS AND PANEL LIGHTS
To turn on the parking lights and instrument panel
lights, rotate the headlight switch clockwise. To
turn off the parking lights, rotate the headlight
switch back to the O (off) position.
NOTE:Vehicles sold in Canada are equipped with a head -
light switch with an AUTO and ON detent but
without an OFF detent. Headlights will be deacti -
vated when the headlight switch is placed in the
parking lights position. However, the Daytime
Running Lights (DRLs) will be activated along with
the front and rear marker lights. The DRLs may be
deactivated when the parking brake is engaged.
2
23_WL_OM_EN_USC_t.book Page 59
Page 215 of 424

MULTIMEDIA213
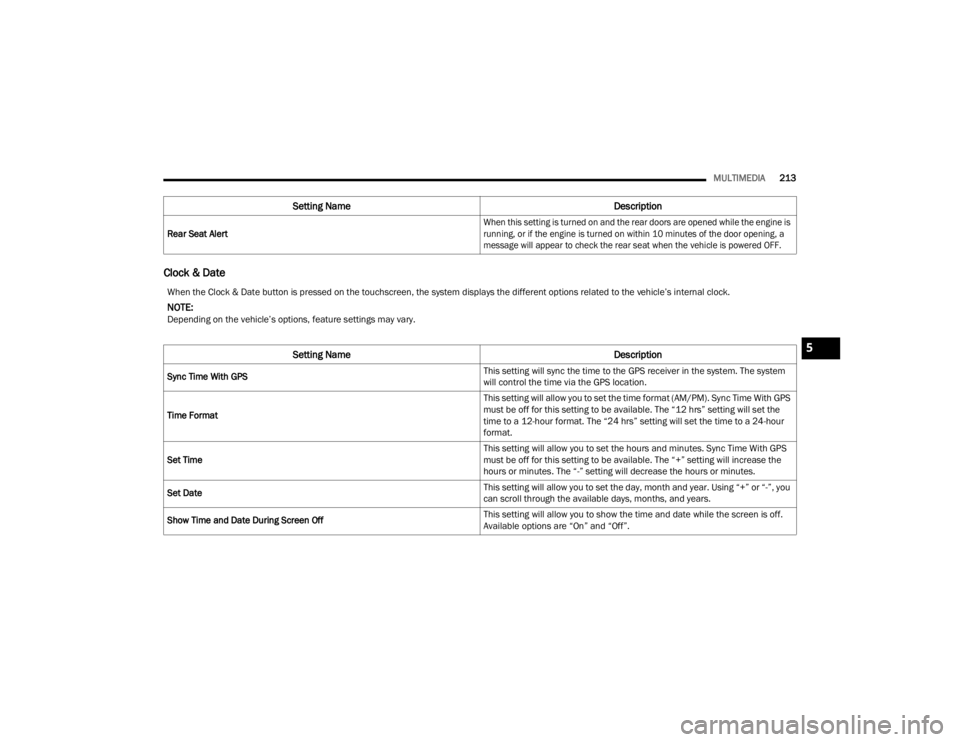
Clock & Date
Rear Seat Alert
When this setting is turned on and the rear doors are opened while the engine is
running, or if the engine is turned on within 10 minutes of the door opening, a
message will appear to check the rear seat when the vehicle is powered OFF.
Setting Name
Description
When the Clock & Date button is pressed on the touchscreen, the system displays the different options related to the vehicle’s internal clock.
NOTE:Depending on the vehicle’s options, feature settings may vary.
Setting NameDescription
Sync Time With GPS This setting will sync the time to the GPS receiver in the system. The system
will control the time via the GPS location.
Time Format This setting will allow you to set the time format (AM/PM). Sync Time With GPS
must be off for this setting to be available. The “12 hrs” setting will set the
time to a 12-hour format. The “24 hrs” setting will set the time to a 24-hour
format.
Set Time This setting will allow you to set the hours and minutes. Sync Time With GPS
must be off for this setting to be available. The “+” setting will increase the
hours or minutes. The “-” setting will decrease the hours or minutes.
Set Date This setting will allow you to set the day, month and year. Using “+” or “-”, you
can scroll through the available days, months, and years.
Show Time and Date During Screen Off This setting will allow you to show the time and date while the screen is off.
Available options are “On” and “Off”.
5
23_WL_OM_EN_USC_t.book Page 213
Page 230 of 424

228MULTIMEDIA
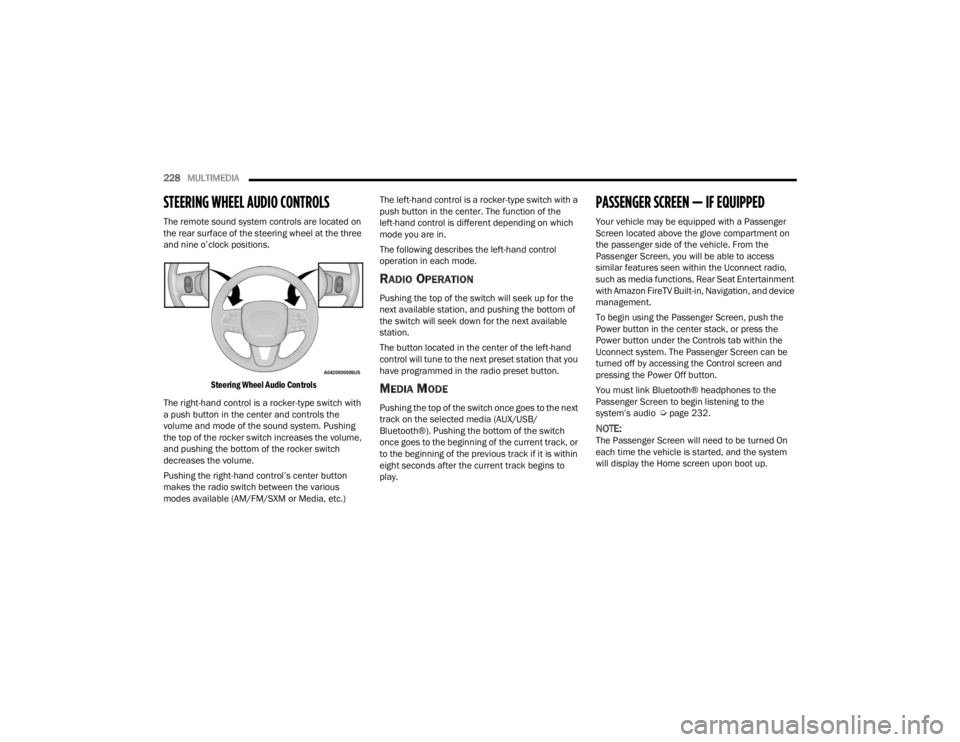
STEERING WHEEL AUDIO CONTROLS
The remote sound system controls are located on
the rear surface of the steering wheel at the three
and nine o’clock positions.
Steering Wheel Audio Controls
The right-hand control is a rocker-type switch with
a push button in the center and controls the
volume and mode of the sound system. Pushing
the top of the rocker switch increases the volume,
and pushing the bottom of the rocker switch
decreases the volume.
Pushing the right-hand control’s center button
makes the radio switch between the various
modes available (AM/FM/SXM or Media, etc.) The left-hand control is a rocker-type switch with a
push button in the center. The function of the
left-hand control is different depending on which
mode you are in.
The following describes the left-hand control
operation in each mode.
RADIO OPERATION
Pushing the top of the switch will seek up for the
next available station, and pushing the bottom of
the switch will seek down for the next available
station.
The button located in the center of the left-hand
control will tune to the next preset station that you
have programmed in the radio preset button.
MEDIA MODE
Pushing the top of the switch once goes to the next
track on the selected media (AUX/USB/
Bluetooth®). Pushing the bottom of the switch
once goes to the beginning of the current track, or
to the beginning of the previous track if it is within
eight seconds after the current track begins to
play.
PASSENGER SCREEN — IF EQUIPPED
Your vehicle may be equipped with a Passenger
Screen located above the glove compartment on
the passenger side of the vehicle. From the
Passenger Screen, you will be able to access
similar features seen within the Uconnect radio,
such as media functions, Rear Seat Entertainment
with Amazon FireTV Built-in, Navigation, and device
management.
To begin using the Passenger Screen, push the
Power button in the center stack, or press the
Power button under the Controls tab within the
Uconnect system. The Passenger Screen can be
turned off by accessing the Control screen and
pressing the Power Off button.
You must link Bluetooth® headphones to the
Passenger Screen to begin listening to the
system’s audio Ú
page 232.
NOTE:The Passenger Screen will need to be turned On
each time the vehicle is started, and the system
will display the Home screen upon boot up.
23_WL_OM_EN_USC_t.book Page 228
Page 321 of 424

IN CASE OF EMERGENCY319
Third Row Seating — If Equipped
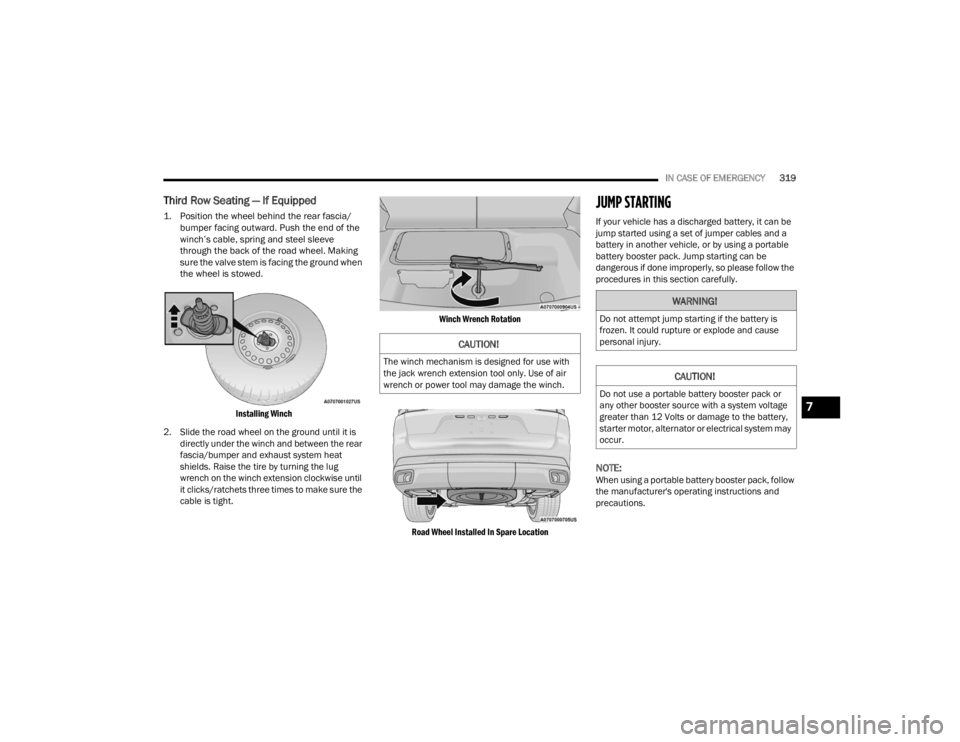
1. Position the wheel behind the rear fascia/
bumper facing outward. Push the end of the
winch’s cable, spring and steel sleeve
through the back of the road wheel. Making
sure the valve stem is facing the ground when
the wheel is stowed.
Installing Winch
2. Slide the road wheel on the ground until it is directly under the winch and between the rear
fascia/bumper and exhaust system heat
shields. Raise the tire by turning the lug
wrench on the winch extension clockwise until
it clicks/ratchets three times to make sure the
cable is tight.
Winch Wrench Rotation
Road Wheel Installed In Spare Location
JUMP STARTING
If your vehicle has a discharged battery, it can be
jump started using a set of jumper cables and a
battery in another vehicle, or by using a portable
battery booster pack. Jump starting can be
dangerous if done improperly, so please follow the
procedures in this section carefully.
NOTE:When using a portable battery booster pack, follow
the manufacturer's operating instructions and
precautions.
CAUTION!
The winch mechanism is designed for use with
the jack wrench extension tool only. Use of air
wrench or power tool may damage the winch.
WARNING!
Do not attempt jump starting if the battery is
frozen. It could rupture or explode and cause
personal injury.
CAUTION!
Do not use a portable battery booster pack or
any other booster source with a system voltage
greater than 12 Volts or damage to the battery,
starter motor, alternator or electrical system may
occur.
7
23_WL_OM_EN_USC_t.book Page 319
Page 326 of 424

324IN CASE OF EMERGENCY
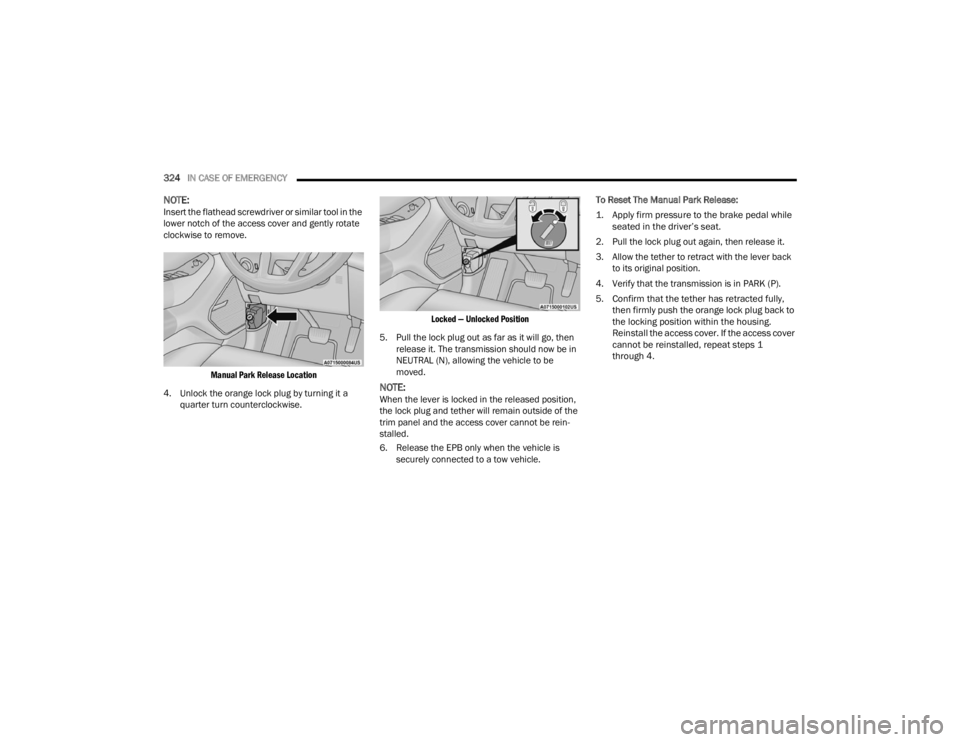
NOTE:Insert the flathead screwdriver or similar tool in the
lower notch of the access cover and gently rotate
clockwise to remove.
Manual Park Release Location
4. Unlock the orange lock plug by turning it a quarter turn counterclockwise.
Locked — Unlocked Position
5. Pull the lock plug out as far as it will go, then release it. The transmission should now be in
NEUTRAL (N), allowing the vehicle to be
moved.
NOTE:When the lever is locked in the released position,
the lock plug and tether will remain outside of the
trim panel and the access cover cannot be rein -
stalled.
6. Release the EPB only when the vehicle is securely connected to a tow vehicle. To Reset The Manual Park Release:
1. Apply firm pressure to the brake pedal while
seated in the driver’s seat.
2. Pull the lock plug out again, then release it.
3. Allow the tether to retract with the lever back to its original position.
4. Verify that the transmission is in PARK (P).
5. Confirm that the tether has retracted fully, then firmly push the orange lock plug back to
the locking position within the housing.
Reinstall the access cover. If the access cover
cannot be reinstalled, repeat steps 1
through 4.
23_WL_OM_EN_USC_t.book Page 324