towing JEEP GRAND CHEROKEE 2023 Owners Manual
[x] Cancel search | Manufacturer: JEEP, Model Year: 2023, Model line: GRAND CHEROKEE, Model: JEEP GRAND CHEROKEE 2023Pages: 424, PDF Size: 15.48 MB
Page 2 of 424

WARNING: Operating, servicing and maintaining a passenger vehicle or off-highway
motor vehicle can expose you to chemicals including engine exhaust, carbon monoxide,
phthalates, and lead, which are known to the State of California to cause cancer and
birth defects or other reproductive harm. To minimize exposure, avoid breathing exhaust,
do not idle the engine except as necessary, service your vehicle in a well-ventilated area
and wear gloves or wash your hands frequently when servicing your vehicle. For more
information go to www.P65Warnings.ca.gov/passenger-vehicle.
The driver’s primary responsibility is the safe operation of the vehicle. Driving while distracted can result in loss of vehicle control, resulting in an accident
and personal injury. FCA US LLC strongly recommends that the driver use extreme caution when using any device or feature that may take their attention
off the road. Use of any electrical devices, such as cellular telephones, computers, portable radios, vehicle navigation or other devices by the driver while
the vehicle is moving is dangerous and could lead to a serious accident. Texting while driving is also dangerous and should never be done while the vehicle
is moving. If you find yourself unable to devote your full attention to vehicle operation, pull off the road to a safe location and stop your vehicle. Some states
or provinces prohibit the use of cellular telephones or texting while driving. It is always the driver’s responsibility to comply with all local laws.
This Owner’s Manual has been prepared to help you get acquainted with your new Jeep
® brand vehicle and to provide a convenient reference source for
common questions.
Not all features shown in this manual may apply to your vehicle. For additional information, visit mopar.com/om (USA), owners.mopar.ca (Canada) or your
local Jeep
® brand dealer.
U.S. Residents: If you are the first registered retail owner of your vehicle, you may obtain a complimentary printed copy of the Warranty Booklet by calling
1-877-426-5337 or by contacting your dealer. Replacement kits can be purchased by visiting www.techauthority.com.
Canadian Residents: If you are the first registered retail owner of your vehicle, you may obtain a complimentary printed copy of the Warranty Booklet or
purchase a replacement kit by calling 1-800-387-1143 or by contacting your dealer.
DRIVING AND ALCOHOL
Drunk driving is one of the most frequent causes of accidents. Your driving ability can be seriously impaired with blood alcohol levels far below the legal
minimum. If you are drinking, don’t drive. Ride with a designated non-drinking driver, call a cab, a rideshare, a friend or use public transportation.
WARNING
Driving after drinking can lead to an accident. Your perceptions are less sharp, your reflexes are slower and your judgment is impaired when you have been
drinking. Never drink and then drive.
This Owner’s Manual illustrates and describes the operation of features and equipment that are either standard or optional on this vehicle. This manual may
also include a description of features and equipment that are no longer available or were not ordered on this vehicle. Please disregard any features and
equipment described in this manual that are not on this vehicle.
FCA US LLC reserves the right to make changes in design and specifications, and/or make
additions to or improvements to its products without imposing any obligation upon itself to install them on products previously manufactured.
With respect to any vehicles sold in Canada, the name FCA US LLC shall be deemed to be deleted and the name FCA Canada Inc. used in substitution
therefore.
This Owner’s Manual is intended to familiarize you with the important features of your vehicle. Your most up-to-date Owner’s Manual, Navigation/Uconnect
manuals and Warranty Booklet can be found by visiting the website on the back cover.
ROADSIDE ASSISTANCE
24 HOURS, 7 DAYS A WEEK AT YOUR SERVICE. CALL 1-800-521-2779 OR VISIT CHRYSLER.RSAHELP.COM (USA)
CALL 1-800-363-4869 OR VISIT FCA.ROADSIDEAID.COM (CANADA) SERVICES: Flat Tire Service, Out Of Gas/Fuel Delivery, Battery Jump Assistance, Lockout Service and Towing Service
Please see the Customer Assistance chapter in this Owner’s Manual for further information.
FCA US LLC reserves the right to modify the terms or discontinue the Roadside Assistance Program at any time. The Roadside Assistance Program is subject to restrictions and
conditions of use, that are determined solely by FCA US LLC.
Page 8 of 424
6
PARKVIEW REAR BACK UP CAMERA .............. 174 Zoom View ..................................................... 175
Viewing At Speed ........................................... 176
TRAILCAM SYSTEM — IF EQUIPPED ..................176
FAMCAM SYSTEM — IF EQUIPPED ................... 177
NIGHT VISION CAMERA SYSTEM —
IF EQUIPPED ......................................................... 177
Detection Range............................................ 179
Service The Night Vision System .................. 180
Night Vision System Limitations ................... 180
SURROUND VIEW CAMERA SYSTEM —
IF EQUIPPED ........................................................ 181
Zoom View ..................................................... 183
REFUELING THE VEHICLE .................................. 183
VEHICLE LOADING .............................................. 184
Gross Vehicle Weight Rating (GVWR) .......... 184
Payload .......................................................... 184
Gross Axle Weight Rating (GAWR) ................ 184
Tire Size.......................................................... 184
Rim Size ......................................................... 184
Inflation Pressure .......................................... 185
Curb Weight ................................................... 185Loading .......................................................... 185 TRAILER TOWING ................................................ 185
Common Towing Definitions......................... 185
Trailer Hitch Classification ............................ 188
Trailer Towing Weights (Maximum Trailer
Weight Ratings) ............................................ 189
Trailer Hitch Receiver Cover Removal —
If Equipped..................................................... 191Trailer And Tongue Weight ........................... 191Towing Requirements .................................. 192
Towing Tips ................................................... 194
RECREATIONAL TOWING
(BEHIND MOTORHOME) .................................... 195
Towing This Vehicle Behind Another Vehicle ..195
Recreational Towing — Two-Wheel
Drive Models.................................................. 196
Recreational Towing — Quadra-Trac I
(Single-Speed Transfer Case without 4WD
LOW Range) Four-Wheel Drive Models ........ 196
Recreational Towing — Quadra–Trac II with
4WD LOW Range ........................................... 196
DRIVING TIPS ...................................................... 199
On-Road Driving Tips..................................... 199
Off-Road Driving Tips .................................... 200
MULTIMEDIA
UCONNECT SYSTEMS ......................................... 203
CYBERSECURITY ................................................. 203
UCONNECT SETTINGS ......................................... 204 Customer Programmable Features ............ 204
STEERING WHEEL AUDIO CONTROLS .............. 228
Radio Operation ............................................ 228
Media Mode .................................................. 228
PASSENGER SCREEN — IF EQUIPPED ............. 228
Passenger Screen Permissions ................... 229Home Screen ................................................. 229
Audio And Video ............................................ 230
Rear Seat Entertainment With Amazon Fire TV
Built-In — If Equipped .................................... 232
HDMI Projecting ............................................ 232
Device Manager ............................................ 232
Navigation...................................................... 233
Camera .......................................................... 233
3RD PARTY APPS ................................................ 233
23_WL_OM_EN_USC_t.book Page 6
Page 10 of 424
8
IN CASE OF EMERGENCY
HAZARD WARNING FLASHERS ......................... 307
ASSIST AND SOS SYSTEM — IF EQUIPPED ...... 307
JACKING AND TIRE CHANGING ........................ 310 Preparations For Jacking .............................. 311Jack Location ................................................. 311
Spare Tire Stowage ...................................... 313Spare Tire Removal ....................................... 313
Jacking Instructions ...................................... 315
JUMP STARTING................................................... 319
Preparations For Jump Start......................... 320Jump Starting Procedure .............................. 320
REFUELING IN EMERGENCY .............................. 321
IF YOUR ENGINE OVERHEATS ............................ 322
MANUAL PARK RELEASE .................................. 323
FREEING A STUCK VEHICLE .............................. 325
TOWING A DISABLED VEHICLE .......................... 326
Rear-Wheel Drive Models ............................. 327
Four-Wheel Drive Models.............................. 328Emergency Tow Hooks — If Equipped .......... 328 ENHANCED ACCIDENT RESPONSE SYSTEM
(EARS) .................................................................. 329
EVENT DATA RECORDER (EDR) ........................ 329
SERVICING AND MAINTENANCE
SCHEDULED SERVICING ................................... 330
Maintenance Plan ......................................... 331
ENGINE COMPARTMENT .................................... 334
2.0L Engine .................................................. 334
3.6L Engine ................................................... 335
5.7L Engine ................................................... 336
Checking Oil Level ........................................ 337Adding Washer Fluid ..................................... 337
Maintenance-Free Battery ........................... 338Pressure Washing ......................................... 338
VEHICLE MAINTENANCE..................................... 338
Engine Oil ....................................................... 338
Engine Oil Filter ............................................. 339Engine Air Cleaner Filter ............................... 339
Air Conditioner Maintenance ....................... 340
Accessory Drive Belt Inspection ................... 342Body Lubrication ........................................... 343 Windshield Wiper Blades.............................. 343
Exhaust System ............................................ 345
Cooling System.............................................. 346
Brake System ............................................... 350
Automatic Transmission ............................... 351
Front/Rear Axle Fluid ................................... 351
Transfer Case ............................................... 352Fuses.............................................................. 352
Bulb Replacement ........................................ 374
TIRES ..................................................................... 374
Tire Safety Information ................................ 374Tires — General Information ......................... 382
Tire Types....................................................... 385Spare Tires — If Equipped ............................ 386
Wheel And Wheel Trim Care ........................ 388Snow Traction Devices ................................. 389
Tire Rotation Recommendations ................ 391
DEPARTMENT OF TRANSPORTATION UNIFORM
TIRE QUALITY GRADES ...................................... 391
Treadwear...................................................... 391
Traction Grades ............................................. 392Temperature Grades..................................... 392
23_WL_OM_EN_USC_t.book Page 8
Page 46 of 424

44GETTING TO KNOW YOUR VEHICLE
Rear Seat Power Folding Seatbacks —
If Equipped
If the vehicle is equipped with third row seating, the
second and third rows may be equipped with
power folding seatbacks.
A one-touch power folding seat switch is located in
the right rear trim panel inside the cargo area, as
part of a switch bank.
NOTE:
You may need to move the front seats forward to
allow the second row seats to fold properly, as
they may bump into the Rear Seat Entertain -
ment touchscreens (if equipped).
The third row seat belts may interfere with the
power folding of the seat. Place the seat belt
webbing behind the stow clip before stowing or
opening the seat. When the seat is in the
desired position, remove the webbing from the
stow clip so that it is ready for use. Never leave
the seat belt in the stow clip when it is used to
restrain an occupant.
The head restraints will lower automatically as
necessary when the power seat begins to move
when the vehicle is in PARK, and a rear door or
the liftgate is open.
The rear switch bank allows multiple power folding
positions for the second and third row seats. The
second row seats can be folded using these
switches, while the third row can be folded or
unfolded.
Rear Panel Power Switch Bank
There are also power folding switches for the third
row seats located on the C-pillar (just behind the
rear doors on the trim panels).
C-Pillar Power Folding Switches (Left Side Shown)
POWER SEATBACK MASSAGE —
I
F EQUIPPED
The driver’s and front passenger’s seatbacks may
be equipped with power massage.
The massage feature can be turned on/off through
the massage button located on the door panel
near the handle, or through the Comfort screen on
the radio.
CAUTION!
Do not place any article under a power seat or
impede its ability to move as it may cause
damage to the seat controls. Seat travel may
become limited if movement is stopped by an
obstruction in the seat's path.
1 — Second Row Left Side Fold
2 — Second Row Right Side Fold
3 — Third Row Left Side Fold/Unfold
4 — Third Row Right Side Fold/Unfold
1 — Third Row Left Side Fold/Unfold
2 — Third Row Right Side Fold/Unfold
23_WL_OM_EN_USC_t.book Page 44
Page 98 of 424
96GETTING TO KNOW YOUR INSTRUMENT PANEL
Use this QR code to access your
digital experience.
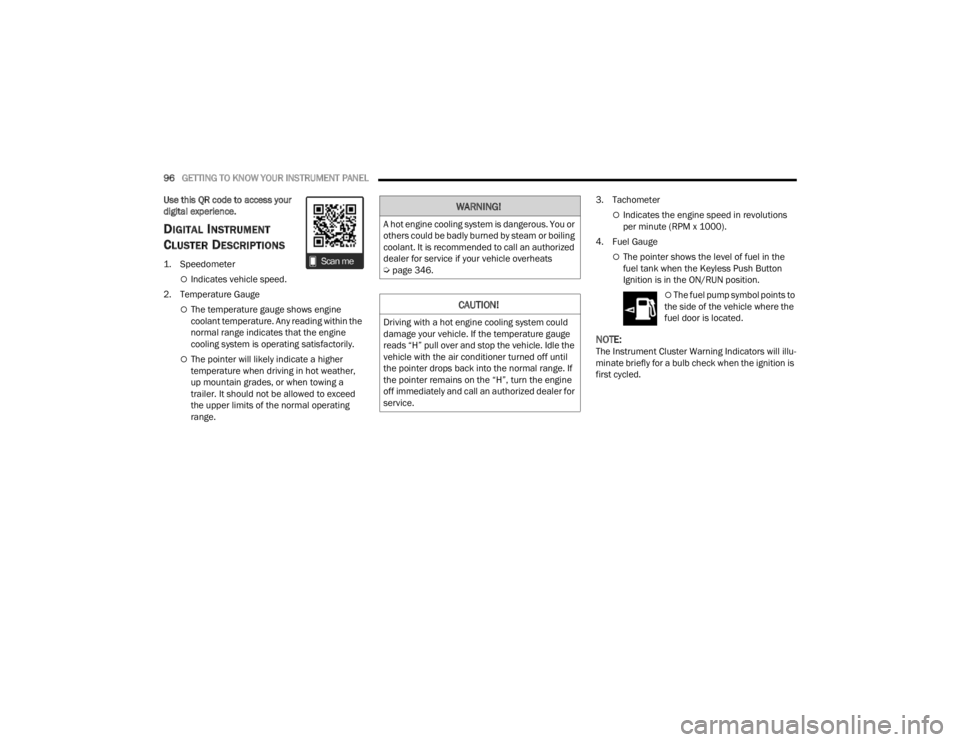
DIGITAL INSTRUMENT
C
LUSTER DESCRIPTIONS
1. Speedometer
Indicates vehicle speed.
2. Temperature Gauge
The temperature gauge shows engine
coolant temperature. Any reading within the
normal range indicates that the engine
cooling system is operating satisfactorily.
The pointer will likely indicate a higher
temperature when driving in hot weather,
up mountain grades, or when towing a
trailer. It should not be allowed to exceed
the upper limits of the normal operating
range. 3. Tachometer
Indicates the engine speed in revolutions
per minute (RPM x 1000).
4. Fuel Gauge
The pointer shows the level of fuel in the
fuel tank when the Keyless Push Button
Ignition is in the ON/RUN position.
The fuel pump symbol points to
the side of the vehicle where the
fuel door is located.
NOTE:The Instrument Cluster Warning Indicators will illu -
minate briefly for a bulb check when the ignition is
first cycled.
WARNING!
A hot engine cooling system is dangerous. You or
others could be badly burned by steam or boiling
coolant. It is recommended to call an authorized
dealer for service if your vehicle overheats
Ú page 346.
CAUTION!
Driving with a hot engine cooling system could
damage your vehicle. If the temperature gauge
reads “H” pull over and stop the vehicle. Idle the
vehicle with the air conditioner turned off until
the pointer drops back into the normal range. If
the pointer remains on the “H”, turn the engine
off immediately and call an authorized dealer for
service.
23_WL_OM_EN_USC_t.book Page 96
Page 100 of 424
98GETTING TO KNOW YOUR INSTRUMENT PANEL
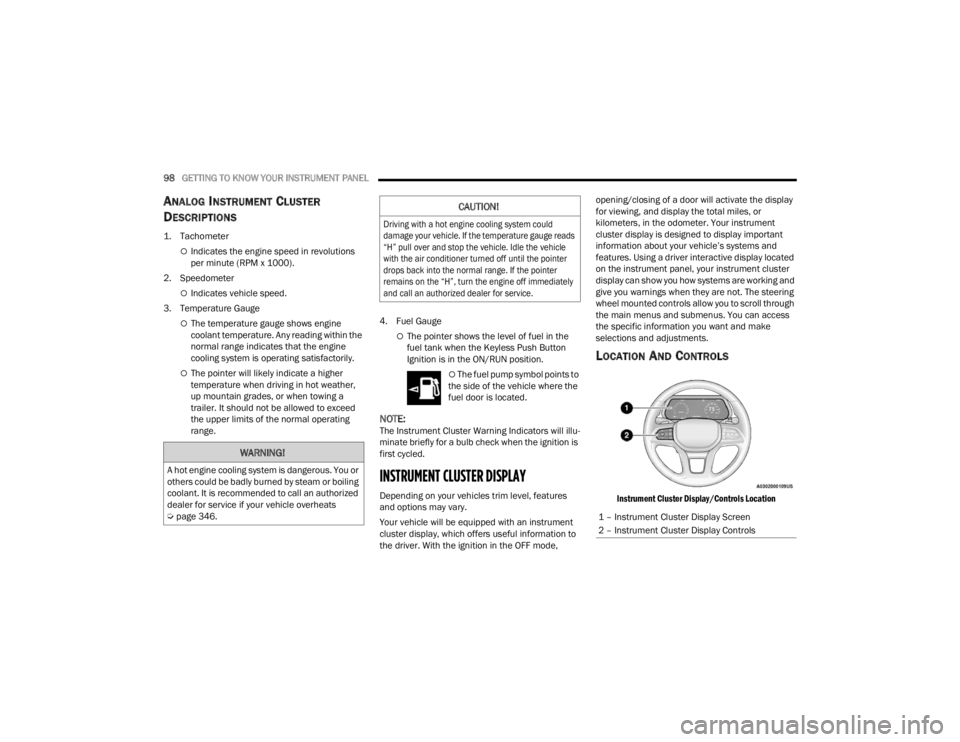
ANALOG INSTRUMENT CLUSTER
D
ESCRIPTIONS
1. Tachometer
Indicates the engine speed in revolutions
per minute (RPM x 1000).
2. Speedometer
Indicates vehicle speed.
3. Temperature Gauge
The temperature gauge shows engine
coolant temperature. Any reading within the
normal range indicates that the engine
cooling system is operating satisfactorily.
The pointer will likely indicate a higher
temperature when driving in hot weather,
up mountain grades, or when towing a
trailer. It should not be allowed to exceed
the upper limits of the normal operating
range. 4. Fuel Gauge
The pointer shows the level of fuel in the
fuel tank when the Keyless Push Button
Ignition is in the ON/RUN position.
The fuel pump symbol points to
the side of the vehicle where the
fuel door is located.
NOTE:The Instrument Cluster Warning Indicators will illu -
minate briefly for a bulb check when the ignition is
first cycled.
INSTRUMENT CLUSTER DISPLAY
Depending on your vehicles trim level, features
and options may vary.
Your vehicle will be equipped with an instrument
cluster display, which offers useful information to
the driver. With the ignition in the OFF mode, opening/closing of a door will activate the display
for viewing, and display the total miles, or
kilometers, in the odometer. Your instrument
cluster display is designed to display important
information about your vehicle’s systems and
features. Using a driver interactive display located
on the instrument panel, your instrument cluster
display can show you how systems are working and
give you warnings when they are not. The steering
wheel mounted controls allow you to scroll through
the main menus and submenus. You can access
the specific information you want and make
selections and adjustments.
LOCATION AND CONTROLS
Instrument Cluster Display/Controls Location
WARNING!
A hot engine cooling system is dangerous. You or
others could be badly burned by steam or boiling
coolant. It is recommended to call an authorized
dealer for service if your vehicle overheats
Ú
page 346.
CAUTION!
Driving with a hot engine cooling system could
damage your vehicle. If the temperature gauge reads
“H” pull over and stop the vehicle. Idle the vehicle
with the air conditioner turned off until the pointer
drops back into the normal range. If the pointer
remains on the “H”, turn the engine off immediately
and call an authorized dealer for service.
1 – Instrument Cluster Display Screen
2 – Instrument Cluster Display Controls
23_WL_OM_EN_USC_t.book Page 98
Page 109 of 424
GETTING TO KNOW YOUR INSTRUMENT PANEL107
When load reduction is activated, the message
“Battery Saver On” or “Battery Saver Mode” will
appear in the instrument cluster.
These messages indicate the vehicle battery has a
low state of charge and continues to lose electrical
charge at a rate that the charging system cannot
sustain.
NOTE:
The charging system is independent from load
reduction. The charging system performs a diag -
nostic on the charging system continuously.
If the Battery Charge Warning Light is on it may
indicate a problem with the charging system
Ú page 109.
The electrical loads that may be switched off (if
equipped), and vehicle functions which can be
affected by load reduction:
Heated Seat/Vented Seats/Heated Wheel
Rear Defroster And Heated Mirrors
HVAC System
115 Volt AC Power Inverter System
Audio and Telematics System Loss of the battery charge may indicate one or
more of the following conditions:
The charging system cannot deliver enough
electrical power to the vehicle system because
the electrical loads are larger than the capability
of the charging system. The charging system is
still functioning properly.
Turning on all possible vehicle electrical loads
(e.g. HVAC to max settings, exterior and interior
lights, overloaded power outlets +12 Volt, 115
Volt AC, USB ports) during certain driving condi
-
tions (city driving, towing, frequent stopping,
etc.).
Installing options like additional lights, upfitter
electrical accessories, audio systems, alarms
and similar devices.
Unusual driving cycles (short trips separated by
long parking periods).
The vehicle was parked for an extended period
of time (weeks, months).
The battery was recently replaced and was not
charged completely.
The battery was discharged by an electrical load
left on when the vehicle was parked.
The battery was used for an extended period
with the engine not running to supply radio,
lights, chargers, +12 Volt portable appliances
like vacuum cleaners, game consoles and
similar devices. What to do when an electrical load reduction
action message is present (“Battery Saver On” or
“Battery Saver Mode”)
During a trip:
Reduce power to unnecessary loads if possible:
Turn off redundant lights (interior or exte
-
rior)
Check what may be plugged in to power
outlets +12 Volt, 115 Volt AC, USB ports
Check HVAC settings (blower, temperature)
Check the audio settings (volume)
After a trip:
Check if any aftermarket equipment was
installed (additional lights, upfitter electrical
accessories, audio systems, alarms) and review
specifications if any (load and Ignition Off Draw
currents).
Evaluate the latest driving cycles (distance,
driving time and parking time).
The vehicle should have service performed if
the message is still present during consecutive
trips, and if the evaluation and driving pattern of
the vehicle did not help to identify the cause.
3
23_WL_OM_EN_USC_t.book Page 107
Page 111 of 424
GETTING TO KNOW YOUR INSTRUMENT PANEL109
applied or a brake fault is detected. If the light does
not illuminate, have the light inspected by an
authorized dealer.
The light also will turn on when the parking brake
is applied with the ignition switch in the ON/RUN
position.
NOTE:This light shows only that the parking brake is
applied. It does not show the degree of brake appli -
cation.
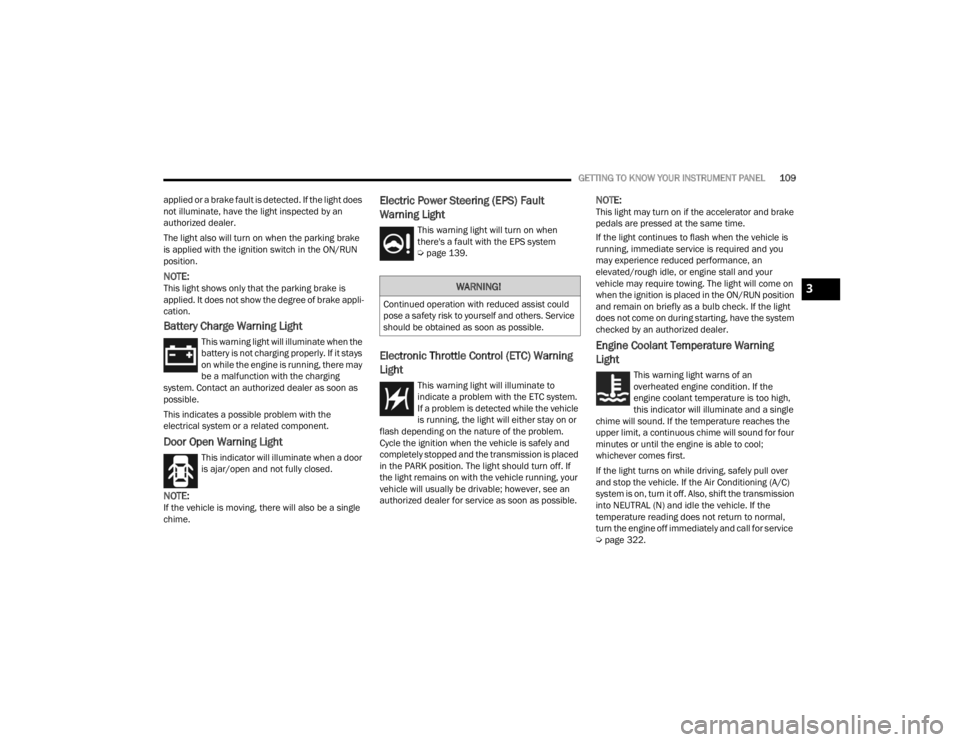
Battery Charge Warning Light
This warning light will illuminate when the
battery is not charging properly. If it stays
on while the engine is running, there may
be a malfunction with the charging
system. Contact an authorized dealer as soon as
possible.
This indicates a possible problem with the
electrical system or a related component.
Door Open Warning Light
This indicator will illuminate when a door
is ajar/open and not fully closed.
NOTE:If the vehicle is moving, there will also be a single
chime.
Electric Power Steering (EPS) Fault
Warning Light
This warning light will turn on when
there's a fault with the EPS system
Ú page 139.
Electronic Throttle Control (ETC) Warning
Light
This warning light will illuminate to
indicate a problem with the ETC system.
If a problem is detected while the vehicle
is running, the light will either stay on or
flash depending on the nature of the problem.
Cycle the ignition when the vehicle is safely and
completely stopped and the transmission is placed
in the PARK position. The light should turn off. If
the light remains on with the vehicle running, your
vehicle will usually be drivable; however, see an
authorized dealer for service as soon as possible.
NOTE:This light may turn on if the accelerator and brake
pedals are pressed at the same time.
If the light continues to flash when the vehicle is
running, immediate service is required and you
may experience reduced performance, an
elevated/rough idle, or engine stall and your
vehicle may require towing. The light will come on
when the ignition is placed in the ON/RUN position
and remain on briefly as a bulb check. If the light
does not come on during starting, have the system
checked by an authorized dealer.
Engine Coolant Temperature Warning
Light
This warning light warns of an
overheated engine condition. If the
engine coolant temperature is too high,
this indicator will illuminate and a single
chime will sound. If the temperature reaches the
upper limit, a continuous chime will sound for four
minutes or until the engine is able to cool;
whichever comes first.
If the light turns on while driving, safely pull over
and stop the vehicle. If the Air Conditioning (A/C)
system is on, turn it off. Also, shift the transmission
into NEUTRAL (N) and idle the vehicle. If the
temperature reading does not return to normal,
turn the engine off immediately and call for service
Ú page 322.
WARNING!
Continued operation with reduced assist could
pose a safety risk to yourself and others. Service
should be obtained as soon as possible.
3
23_WL_OM_EN_USC_t.book Page 109
Page 112 of 424
110GETTING TO KNOW YOUR INSTRUMENT PANEL
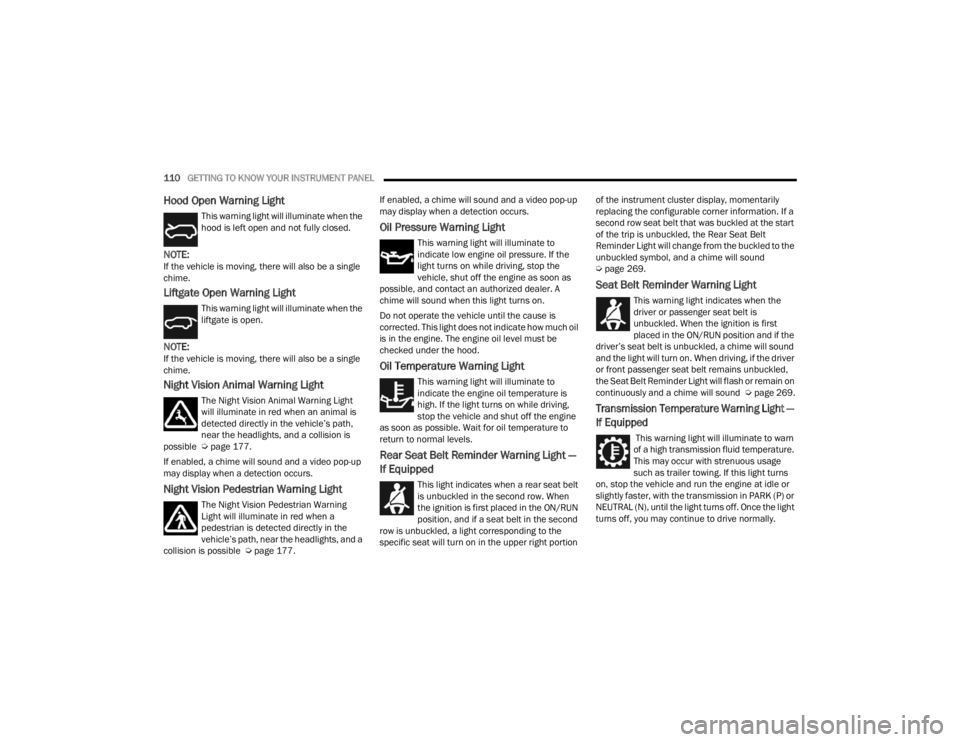
Hood Open Warning Light
This warning light will illuminate when the
hood is left open and not fully closed.
NOTE:If the vehicle is moving, there will also be a single
chime.
Liftgate Open Warning Light
This warning light will illuminate when the
liftgate is open.
NOTE:If the vehicle is moving, there will also be a single
chime.
Night Vision Animal Warning Light
The Night Vision Animal Warning Light
will illuminate in red when an animal is
detected directly in the vehicle’s path,
near the headlights, and a collision is
possible Ú page 177.
If enabled, a chime will sound and a video pop-up
may display when a detection occurs.
Night Vision Pedestrian Warning Light
The Night Vision Pedestrian Warning
Light will illuminate in red when a
pedestrian is detected directly in the
vehicle’s path, near the headlights, and a
collision is possible Ú page 177. If enabled, a chime will sound and a video pop-up
may display when a detection occurs.
Oil Pressure Warning Light
This warning light will illuminate to
indicate low engine oil pressure. If the
light turns on while driving, stop the
vehicle, shut off the engine as soon as
possible, and contact an authorized dealer. A
chime will sound when this light turns on.
Do not operate the vehicle until the cause is
corrected. This light does not indicate how much oil
is in the engine. The engine oil level must be
checked under the hood.
Oil Temperature Warning Light
This warning light will illuminate to
indicate the engine oil temperature is
high. If the light turns on while driving,
stop the vehicle and shut off the engine
as soon as possible. Wait for oil temperature to
return to normal levels.
Rear Seat Belt Reminder Warning Light —
If Equipped
This light indicates when a rear seat belt
is unbuckled in the second row. When
the ignition is first placed in the ON/RUN
position, and if a seat belt in the second
row is unbuckled, a light corresponding to the
specific seat will turn on in the upper right portion of the instrument cluster display, momentarily
replacing the configurable corner information. If a
second row seat belt that was buckled at the start
of the trip is unbuckled, the Rear Seat Belt
Reminder Light will change from the buckled to the
unbuckled symbol, and a chime will sound
Ú
page 269.
Seat Belt Reminder Warning Light
This warning light indicates when the
driver or passenger seat belt is
unbuckled. When the ignition is first
placed in the ON/RUN position and if the
driver’s seat belt is unbuckled, a chime will sound
and the light will turn on. When driving, if the driver
or front passenger seat belt remains unbuckled,
the Seat Belt Reminder Light will flash or remain on
continuously and a chime will sound Ú page 269.
Transmission Temperature Warning Light —
If Equipped
This warning light will illuminate to warn
of a high transmission fluid temperature.
This may occur with strenuous usage
such as trailer towing. If this light turns
on, stop the vehicle and run the engine at idle or
slightly faster, with the transmission in PARK (P) or
NEUTRAL (N), until the light turns off. Once the light
turns off, you may continue to drive normally.
23_WL_OM_EN_USC_t.book Page 110
Page 114 of 424
112GETTING TO KNOW YOUR INSTRUMENT PANEL
Electronic Stability Control (ESC) OFF
Warning Light — If Equipped
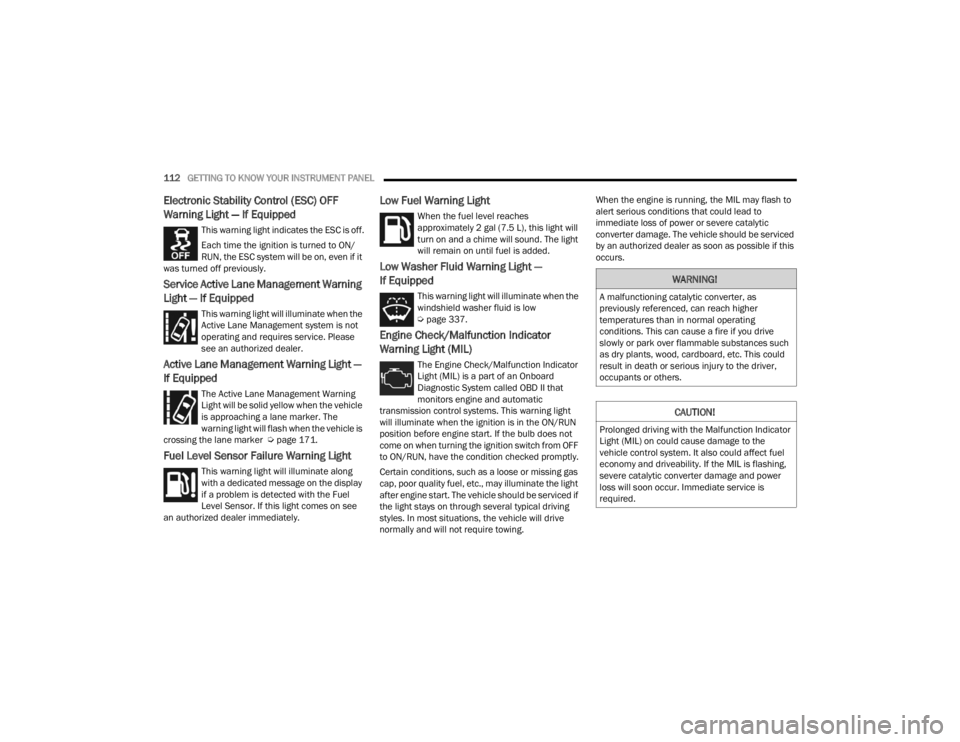
This warning light indicates the ESC is off.
Each time the ignition is turned to ON/
RUN, the ESC system will be on, even if it
was turned off previously.
Service Active Lane Management Warning
Light — If Equipped
This warning light will illuminate when the
Active Lane Management system is not
operating and requires service. Please
see an authorized dealer.
Active Lane Management Warning Light —
If Equipped
The Active Lane Management Warning
Light will be solid yellow when the vehicle
is approaching a lane marker. The
warning light will flash when the vehicle is
crossing the lane marker Ú page 171.
Fuel Level Sensor Failure Warning Light
This warning light will illuminate along
with a dedicated message on the display
if a problem is detected with the Fuel
Level Sensor. If this light comes on see
an authorized dealer immediately.
Low Fuel Warning Light
When the fuel level reaches
approximately 2 gal (7.5 L), this light will
turn on and a chime will sound. The light
will remain on until fuel is added.
Low Washer Fluid Warning Light —
If Equipped
This warning light will illuminate when the
windshield washer fluid is low
Ú page 337.
Engine Check/Malfunction Indicator
Warning Light (MIL)
The Engine Check/Malfunction Indicator
Light (MIL) is a part of an Onboard
Diagnostic System called OBD II that
monitors engine and automatic
transmission control systems. This warning light
will illuminate when the ignition is in the ON/RUN
position before engine start. If the bulb does not
come on when turning the ignition switch from OFF
to ON/RUN, have the condition checked promptly.
Certain conditions, such as a loose or missing gas
cap, poor quality fuel, etc., may illuminate the light
after engine start. The vehicle should be serviced if
the light stays on through several typical driving
styles. In most situations, the vehicle will drive
normally and will not require towing. When the engine is running, the MIL may flash to
alert serious conditions that could lead to
immediate loss of power or severe catalytic
converter damage. The vehicle should be serviced
by an authorized dealer as soon as possible if this
occurs.
WARNING!
A malfunctioning catalytic converter, as
previously referenced, can reach higher
temperatures than in normal operating
conditions. This can cause a fire if you drive
slowly or park over flammable substances such
as dry plants, wood, cardboard, etc. This could
result in death or serious injury to the driver,
occupants or others.
CAUTION!
Prolonged driving with the Malfunction Indicator
Light (MIL) on could cause damage to the
vehicle control system. It also could affect fuel
economy and driveability. If the MIL is flashing,
severe catalytic converter damage and power
loss will soon occur. Immediate service is
required.
23_WL_OM_EN_USC_t.book Page 112