fuel pressure JEEP GRAND CHEROKEE LIMITED 2019 Owners Manual
[x] Cancel search | Manufacturer: JEEP, Model Year: 2019, Model line: GRAND CHEROKEE LIMITED, Model: JEEP GRAND CHEROKEE LIMITED 2019Pages: 626, PDF Size: 3.77 MB
Page 141 of 626
Secondary Method For Oil Change Reset Procedure
1. Without pushing the brake pedal, place the ignition inthe ON/RUN position (do not start the engine).
2. Fully press the accelerator pedal, slowly, three times within ten seconds.
3. Without pushing the brake pedal, place the ignition in the OFF/LOCK position.
NOTE: If the indicator message illuminates when you
start the vehicle, the oil change indicator system did not
reset. If necessary, repeat this procedure.
Instrument Cluster Display Messages
Includes the following, but not limited to:
• Front Seatbelts Unbuckled
• Driver Seat Belt Unbuckled
• Passenger Seat Belt Unbuckled
• Traction Control Off
• Washer Fluid Low
• Oil Pressure Low
• Oil Change Due •
Fuel Low
• Service Anti-lock Brake System
• Service Electronic Throttle Control
• Service Power Steering
• Cruise Control Off
• Cruise Control Ready
• ACC Driver Override
• Cruise Control Set To XXX MPH
• Tire Pressure Screen With Low Tire(s) “Inflate Tire to
XX”
• Service Tire Pressure System
• Speed Warning Set To XXX MPH
• Speed Warning Exceeded
• Parking Brake Engaged
• Brake Fluid Low
• Service Electronic Braking System
• Engine Temperature Hot
• Lights On
4
GETTING TO KNOW YOUR INSTRUMENT PANEL 139
Page 159 of 626
CAUTION!
Do not continue driving with one or more flat tires as
handling may be compromised. Stop the vehicle,
avoiding sharp braking and steering. If a tire puncture
occurs, repair immediately using the dedicated tire
repair kit and contact an authorized dealer as soon as
possible.
Each tire, including the spare (if provided), should be
checked monthly when cold and inflated to the inflation
pressure recommended by the vehicle manufacturer on the
vehicle placard or tire inflation pressure label. (If your
vehicle has tires of a different size than the size indicated
on the vehicle placard or tire inflation pressure label, you
should determine the proper tire inflation pressure for
those tires.)
As an added safety feature, your vehicle has been
equipped with a Tire Pressure Monitoring System (TPMS)
that illuminates a low tire pressure telltale when one or
more of your tires is significantly under-inflated. Accord-
ingly, when the low tire pressure telltale illuminates, you
should stop and check your tires as soon as possible, and
inflate them to the proper pressure. Driving on a signifi-
cantly under-inflated tire causes the tire to overheat and can lead to tire failure. Under-inflation also reduces fuel
efficiency and tire tread life, and may affect the vehicle’s
handling and stopping ability.
Please note that the TPMS is not a substitute for proper tire
maintenance, and it is the driver ’s responsibility to main-
tain correct tire pressure, even if under-inflation has not
reached the level to trigger illumination of the TPMS low
tire pressure telltale.
Your vehicle has also been equipped with a TPMS malfunc-
tion indicator to indicate when the system is not operating
properly. The TPMS malfunction indicator is combined
with the low tire pressure telltale. When the system detects
a malfunction, the telltale will flash for approximately one
minute and then remain continuously illuminated. This
sequence will continue upon subsequent vehicle start-ups
as long as the malfunction exists. When the malfunction
indicator is illuminated, the system may not be able to
detect or signal low tire pressure as intended. TPMS
malfunctions may occur for a variety of reasons, including
the installation of replacement or alternate tires or wheels
on the vehicle that prevent the TPMS from functioning
properly. Always check the TPMS malfunction telltale after
replacing one or more tires or wheels on your vehicle to
ensure that the replacement or alternate tires and wheels
allow the TPMS to continue to function properly.
4
GETTING TO KNOW YOUR INSTRUMENT PANEL 157
Page 196 of 626
NOTE:
•The TPMS is not intended to replace normal tire care and
maintenance, or to provide warning of a tire failure or
condition.
• The TPMS should not be used as a tire pressure gauge
while adjusting your tire pressure.
• Driving on a significantly under-inflated tire causes the
tire to overheat and can lead to tire failure. Under-
inflation also reduces fuel efficiency and tire tread life,
and may affect the vehicle’s handling and stopping
ability.
• The TPMS is not a substitute for proper tire mainte-
nance, and it is the driver ’s responsibility to maintain
correct tire pressure using an accurate tire gauge, even if
under-inflation has not reached the level to trigger
illumination of the TPMS Warning Light.
• Seasonal temperature changes will affect tire pressure,
and the TPMS will monitor the actual tire pressure in the
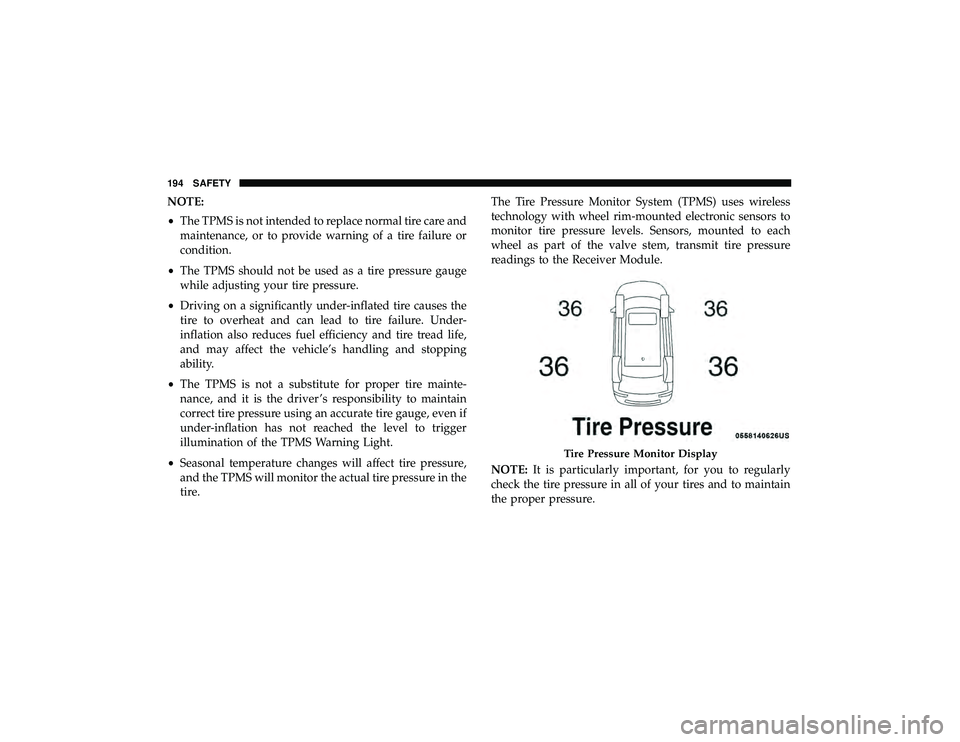
tire. The Tire Pressure Monitor System (TPMS) uses wireless
technology with wheel rim-mounted electronic sensors to
monitor tire pressure levels. Sensors, mounted to each
wheel as part of the valve stem, transmit tire pressure
readings to the Receiver Module.
NOTE:
It is particularly important, for you to regularly
check the tire pressure in all of your tires and to maintain
the proper pressure.
Page 250 of 626
WARNING!(Continued)
•If the vehicle carpet has been removed and re-
installed, always properly attach carpet to the floor
and check the floor mat fasteners are secure to the
vehicle carpet. Fully depress each pedal to check for
interference with the accelerator, brake, or clutch
pedals then re-install the floor mats.
• It is recommended to only use mild soap and water
to clean your floor mats. After cleaning, always check
your floor mat has been properly installed and is
secured to your vehicle using the floor mat fasteners
by lightly pulling mat.
Periodic Safety Checks You Should Make Outside
The Vehicle
Tires
Examine tires for excessive tread wear and uneven wear
patterns. Check for stones, nails, glass, or other objects
lodged in the tread or sidewall. Inspect the tread for cuts
and cracks. Inspect sidewalls for cuts, cracks, and bulges.
Check the wheel nuts for tightness. Check the tires (includ-
ing spare) for proper cold inflation pressure.
Lights
Have someone observe the operation of brake lights and
exterior lights while you work the controls. Check turn
signal and high beam indicator lights on the instrument
panel.
Door Latches
Check for proper closing, latching, and locking.
Fluid Leaks
Check area under the vehicle after overnight parking for
fuel, coolant, oil, or other fluid leaks. Also, if gasoline
fumes are detected or if fuel, or brake fluid leaks are
suspected. The cause should be located and corrected
immediately.
248 SAFETY
Page 365 of 626
Rim Size
This is the rim size that is appropriate for the tire size
listed.
Inflation Pressure
This is the cold tire inflation pressure for your vehicle for
all loading conditions up to full GAWR.
Curb Weight
The curb weight of a vehicle is defined as the total weight
of the vehicle with all fluids, including vehicle fuel, at full
capacity conditions, and with no occupants or cargo loaded
into the vehicle. The front and rear curb weight values are
determined by weighing your vehicle on a commercial
scale before any occupants or cargo are added.
Loading
The actual total weight and the weight of the front and rear
of your vehicle at the ground can best be determined by
weighing it when it is loaded and ready for operation.The entire vehicle should first be weighed on a commercial
scale to insure that the GVWR has not been exceeded. The
weight on the front and rear of the vehicle should then be
determined separately to be sure that the load is properly
distributed over the front and rear axle. Weighing the
vehicle may show that the GAWR of either the front or rear
axles has been exceeded but the total load is within the
specified GVWR. If so, weight must be shifted from front to
rear or rear to front as appropriate until the specified
weight limitations are met. Store the heavier items down
low and be sure that the weight is distributed equally. Stow
all loose items securely before driving.
Improper weight distributions can have an adverse effect
on the way your vehicle steers and handles and the way
the brakes operate.
Page 439 of 626
SCHEDULED SERVICING
Scheduled Servicing — Gasoline Engine
Your vehicle is equipped with an automatic oil change
indicator system. The oil change indicator system will
remind you that it is time to take your vehicle in for
scheduled maintenance.
Based on engine operation conditions, the oil change
indicator message will illuminate. This means that service
is required for your vehicle. Operating conditions such as
frequent short-trips, trailer tow, extremely hot or cold
ambient temperatures, and E85 fuel usage will influence
when the “Oil Change Required” message is displayed.
Severe operating conditions can cause the change oil
message to illuminate as early as 3,500 miles (5,600 km)
since last reset. Have your vehicle serviced as soon as
possible, within the next 500 miles (805 km).
Your authorized dealer will reset the oil change indicator
message after completing the scheduled oil change.
NOTE:Under no circumstances should oil change inter-
vals exceed 10,000 miles (16,000 km), twelve months or 350
hours of engine run time, whichever comes first. The 350
hours of engine run or idle time is generally only a concern
for fleet customers. Severe Duty All Models
Change Engine Oil at 4,000 miles (6,500 km) or 350 hours of
engine run time if the vehicle is operated in a dusty and
off-road environment, or is operated predominantly at idle
or only very low engine RPM’s. This type of vehicle use is
considered Severe Duty.
Once A Month Or Before A Long Trip:
•
Check engine oil level.
• Check windshield washer fluid level.
• Check the tire inflation pressures and look for unusual
wear or damage.
• Check the fluid levels of the coolant reservoir, brake
master cylinder and fill as needed.
• Check function of all interior and exterior lights
Maintenance Plan
Required Maintenance
Refer to the Maintenance Plans on the following pages for
required maintenance.
8
SERVICING AND MAINTENANCE 437
Page 480 of 626
WARNING!(Continued)
•Overinflated or underinflated tires can affect vehicle
handling and can fail suddenly, resulting in loss of
vehicle control.
• Unequal tire pressures can cause steering problems.
You could lose control of your vehicle.
• Unequal tire pressures from one side of the vehicle
to the other can cause the vehicle to drift to the right
or left.
• Always drive with each tire inflated to the recom-
mended cold tire inflation pressure.
Both under-inflation and over-inflation affect the stability
of the vehicle and can produce a feeling of sluggish
response or over responsiveness in the steering.
NOTE:
• Unequal tire pressures from side to side may cause
erratic and unpredictable steering response.
• Unequal tire pressure from side to side may cause the
vehicle to drift left or right.
Fuel Economy
Underinflated tires will increase tire rolling resistance
resulting in higher fuel consumption. Tread Wear
Improper cold tire inflation pressures can cause abnormal
wear patterns and reduced tread life, resulting in the need
for earlier tire replacement.
Ride Comfort And Vehicle Stability
Proper tire inflation contributes to a comfortable ride.
Over-inflation produces a jarring and uncomfortable ride.
Tire Inflation Pressures
The proper cold tire inflation pressure is listed on the
driver’s side B-Pillar or rear edge of the driver’s side door.
At least once a month:
•
Check and adjust tire pressure with a good quality
pocket-type pressure gauge. Do not make a visual
judgement when determining proper inflation. Tires
may look properly inflated even when they are under-
inflated.
• Inspect tires for signs of tire wear or visible damage.
478 SERVICING AND MAINTENANCE
Page 610 of 626
About Your Brakes........................ .499
Adaptive Cruise Control (ACC) (Cruise Control) . . . .293
Adding Engine Coolant (Antifreeze) .............464
Adding Fuel ............................. .359
Additives, Fuel ........................... .502
Adjust Forward ................................49
Rearward ...............................49
Air Bag Air Bag Operation ....................... .216
Air Bag Warning Light .....................212
Driver Knee Air Bag ..................... .217
Enhanced Accident Response .............222, 433
Event Data Recorder (EDR) .................433
FrontAirBag .......................... .214
If Deployment Occurs .....................221
Knee Impact Bolsters ..................... .216
Maintaining Your Air Bag System .............224
Maintenance ........................... .224
Redundant Air Bag Warning Light ............213
Side Air Bags .......................... .217
Transporting Pets ....................... .244
Air Bag Light .......................149, 212, 246
Air Cleaner, Engine (Engine Air Cleaner Filter) ......448
Air Conditioner Maintenance ..................450 Air Conditioner Refrigerant
................450, 451
Air Conditioner System ..................... .450
Air Conditioning ............................92
Air Conditioning Filter .................95, 448, 451
Air Conditioning, Operating Tips ................94
Air Filter ............................... .448
Air Pressure Tires................................. .478
Alarm Arm The System .......................34, 35
Disarm The System ........................34
Rearm The System ........................35
Security Alarm....................... .33, 153
Alterations/Modifications Vehicle .................................6
Ambient Light .............................78
Andr oid
Auto ............................ .595
Antifreeze (Engine Coolant) ................463, 505
Disposal .............................. .465
Anti-Lock Brake System (ABS) .................166
Anti-Lock Warning Light .....................153
Apple CarPlay ........................... .597
Assist, Hill Start .......................... .168
Audio Systems (Radio) .......................511
Auto Down Power Windows ...................97
608 INDEX
Page 611 of 626
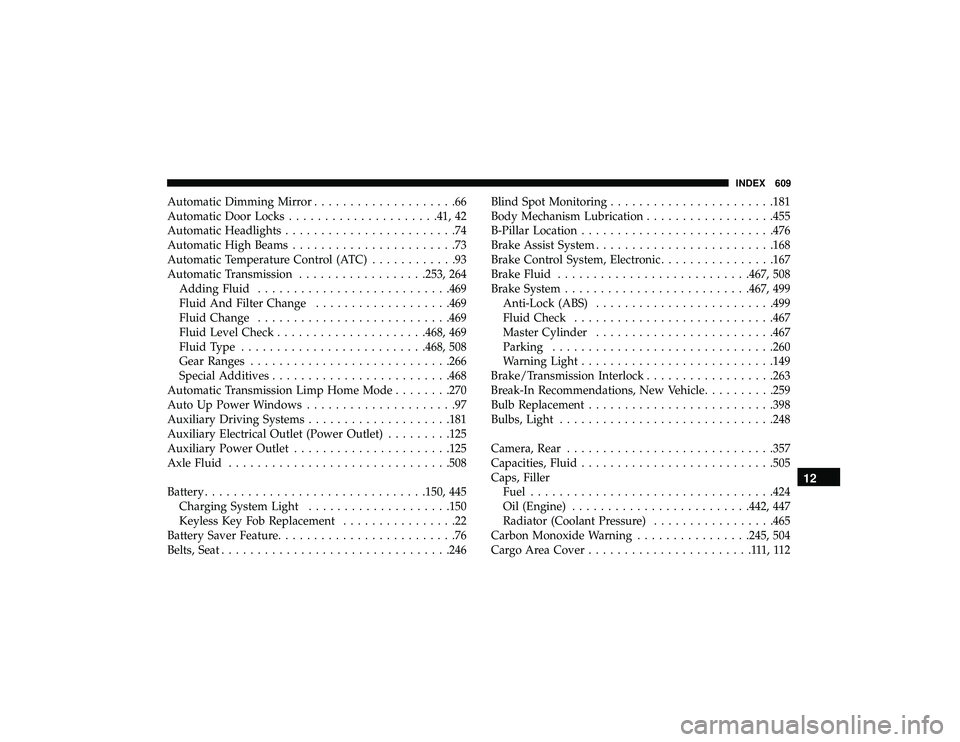
Automatic Dimming Mirror....................66
Automatic Door Locks .....................41, 42
Automatic Headlights ........................74
Automatic High Beams .......................73
Automatic Temperature Control (ATC) ............93
Automatic Transmission ..................253, 264
Adding Fluid .......................... .469
Fluid And Filter Change ...................469
Fluid Change .......................... .469
Fluid Level Check .....................468, 469
Fluid Type ......................... .468, 508
Gear Ranges ........................... .266
Special Additives ........................ .468
Automatic Transmission Limp Home Mode ........270
Auto Up Power Windows .....................97
Auxiliary Driving Systems ....................181
Auxiliary Electrical Outlet (Power Outlet) .........125
Auxiliary Power Outlet ..................... .125
Axle Fluid .............................. .508
Battery .............................. .150, 445
Charging System Light ................... .150
Keyless Key Fob Replacement ................22
Battery Saver Feature .........................76
Belts, Seat ............................... .246Blind Spot Monitoring
.......................181
Body Mechanism Lubrication ..................455
B-Pillar Location .......................... .476
Brake Assist System ........................ .168
Brake Control System, Electronic ................167
Brake Fluid .......................... .467, 508
Brake System ......................... .467, 499
Anti-Lock (ABS) ........................ .499
Fluid Check ........................... .467
Master Cylinder ........................ .467
Parking .............................. .260
Warning Light .......................... .149
Brake/Transmission Interlock ..................263
Br eak-In
Recommendations, New Vehicle ..........259
Bulb Replacement ......................... .398
Bulbs, Light ............................. .248
Camera, Rear ............................ .357
Capacities, Fluid .......................... .505
Caps, Filler Fuel ................................. .424
Oil (Engine) ........................ .442, 447
Radiator (Coolant Pressure) .................465
Carbon Monoxide Warning ................245, 504
Cargo Area Cover .......................111,112
12
INDEX 609
Page 618 of 626
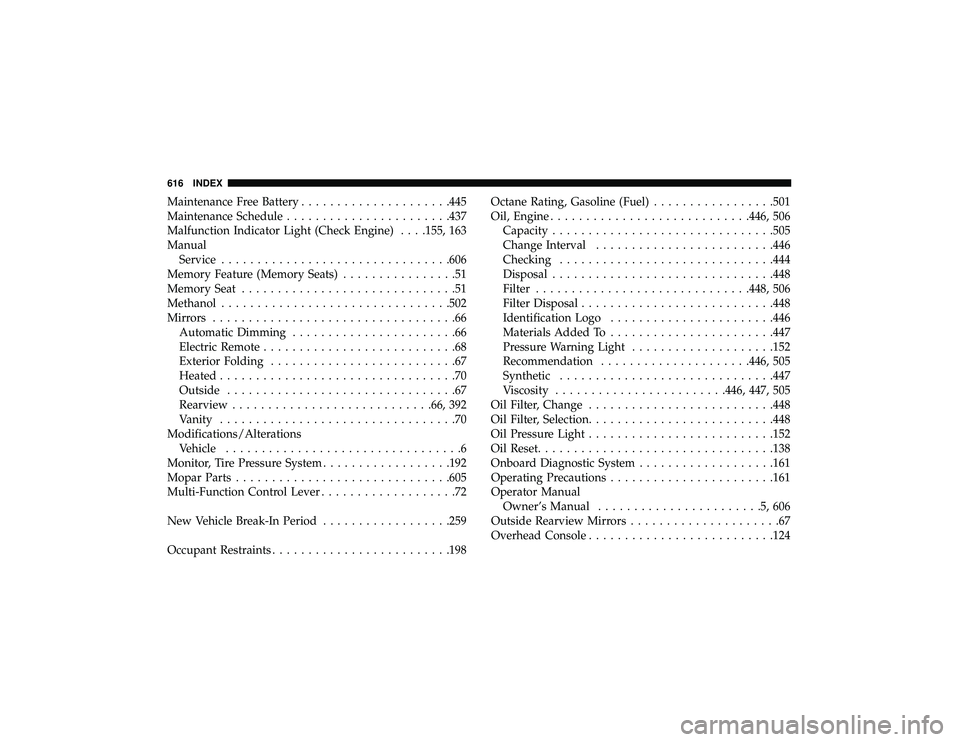
Maintenance Free Battery.....................445
Maintenance Schedule .......................437
Malfunction Indicator Light (Check Engine) . . . .155, 163
Manual Service ............................... .606
Memory Feature (Memory Seats) ................51
Memory Seat ..............................51
Methanol ............................... .502
Mirrors ..................................66
Automatic Dimming .......................66
Electric Remote ...........................68
Exterior Folding ..........................67
Heated .................................70
Outside ................................67
Rearview ........................... .66, 392
Vanity .................................70
Modifications/Alterations Vehicle .................................6
Monitor, Tire Pressure System ..................192
Mopar Parts ............................. .605
Multi-Function Control Lever ...................72
New Vehicle Break-In Period ..................259
Occupant Restraints ........................ .198Octane Rating, Gasoline (Fuel)
.................501
Oil, Engine ........................... .446, 506
Capacity .............................. .505
Change Interval ........................ .446
Checking ............................. .444
Disposal .............................. .448
Filter ............................. .448, 506
Filter Disposal .......................... .448
Identification Logo .......................446
Materials Added To .......................447
Pressure Warning Light ................... .152
Recommendation .....................446, 505
Synthetic ............................. .447
Viscosity ....................... .446, 447, 505
Oil Filter, Change ......................... .448
Oil Filter, Selection ......................... .448
Oil Pressure Light ......................... .152
Oil Reset ................................ .138
Onboar
d Diagnostic System .................. .161
Operating Precautions .......................161
Operator Manual Owner’s Manual .......................5,606
Outside Rearview Mirrors .....................67
Overhead Console ......................... .124
616 INDEX