child lock JEEP LIBERTY 2004 KJ / 1.G Owners Manual
[x] Cancel search | Manufacturer: JEEP, Model Year: 2004, Model line: LIBERTY, Model: JEEP LIBERTY 2004 KJ / 1.GPages: 374, PDF Size: 5.71 MB
Page 9 of 374

THINGS TO KNOW BEFORE STARTING YOUR VEHICLE
CONTENTS
mA Word About Your Keys..................12
NIgnition Key..........................12
NKey-In-Ignition Reminder................14
mSentry Key Immobilizer System Ð If Equipped . .14
NImportant Note About Service.............15
NReplacement Keys......................15
NCustomer Key Programming..............16
NGeneral Information....................16
mSteering Wheel Lock Ð If Equipped..........17NTo Manually Lock The Steering Wheel.......17
NTo Release The Steering Wheel Lock.........17
mIlluminated Entry........................17
mDoors And Door Locks....................18
NManual Door Locks.....................19
NPower Door Locks Ð If Equipped..........21
NAutomatic Door Locks Ð If Equipped.......21
NChild Protection Locks..................22
mRemote Keyless Entry.....................23
2
Page 13 of 374
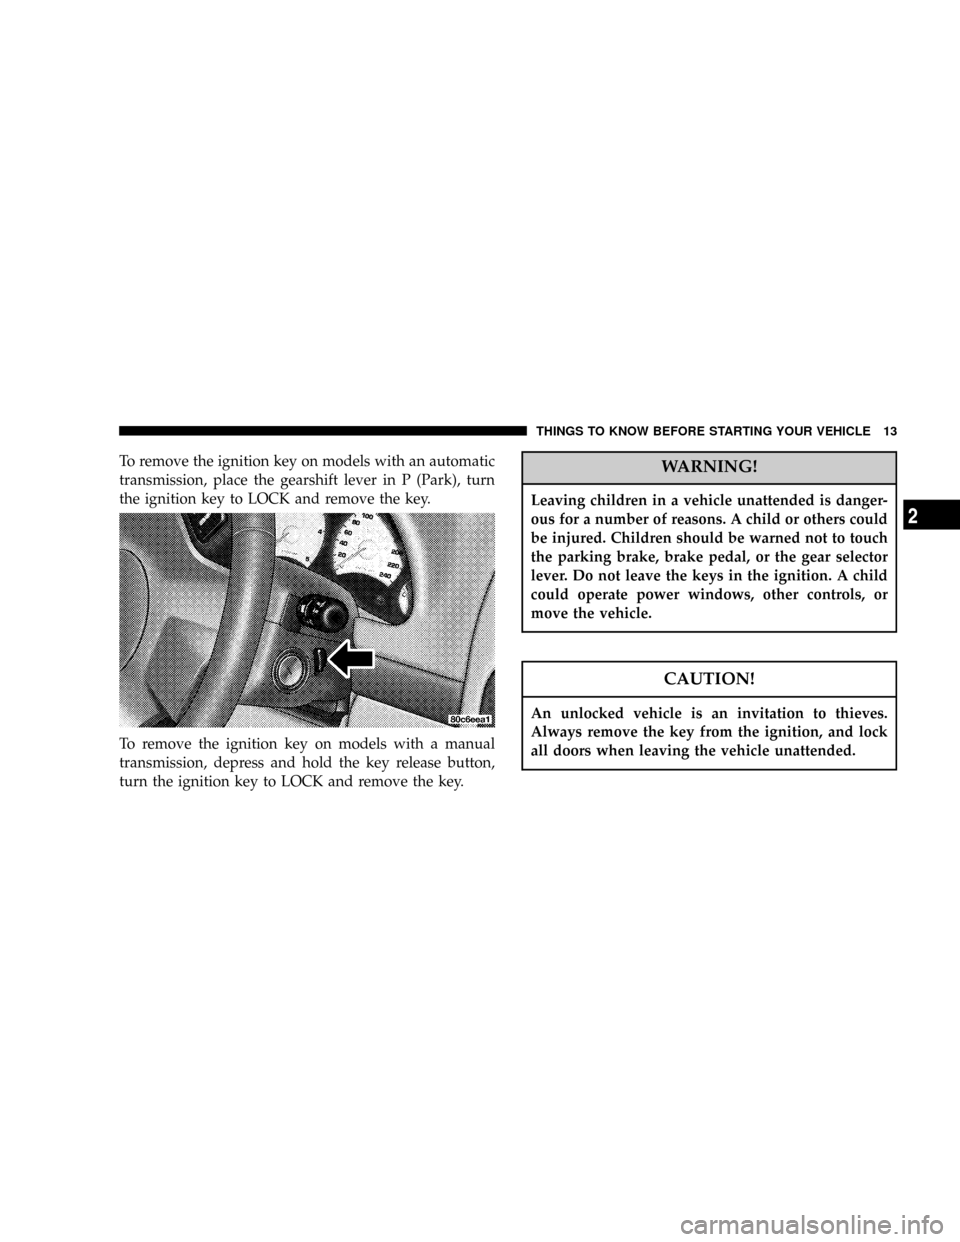
To remove the ignition key on models with an automatic
transmission, place the gearshift lever in P (Park), turn
the ignition key to LOCK and remove the key.
To remove the ignition key on models with a manual
transmission, depress and hold the key release button,
turn the ignition key to LOCK and remove the key.WARNING!
Leaving children in a vehicle unattended is danger-
ous for a number of reasons. A child or others could
be injured. Children should be warned not to touch
the parking brake, brake pedal, or the gear selector
lever. Do not leave the keys in the ignition. A child
could operate power windows, other controls, or
move the vehicle.
CAUTION!
An unlocked vehicle is an invitation to thieves.
Always remove the key from the ignition, and lock
all doors when leaving the vehicle unattended.
THINGS TO KNOW BEFORE STARTING YOUR VEHICLE 13
2
Page 20 of 374

WARNING!
²For personal security, and safety in the event of an
accident, lock the vehicle doors as you drive as
well as when you park and leave the vehicle.
²When leaving the vehicle always remove the key
from the ignition lock, and lock your vehicle. Do
not leave children unattended in the vehicle, or
with access to an unlocked vehicle. Unsupervised
use of vehicle equipment may cause severe per-
sonal injuries and death.
CAUTION!
An unlocked vehicle is an invitation to thieves.
Always remove the key from the ignition and lock
all of the doors when leaving the vehicle unattended.
20 THINGS TO KNOW BEFORE STARTING YOUR VEHICLE
Page 22 of 374
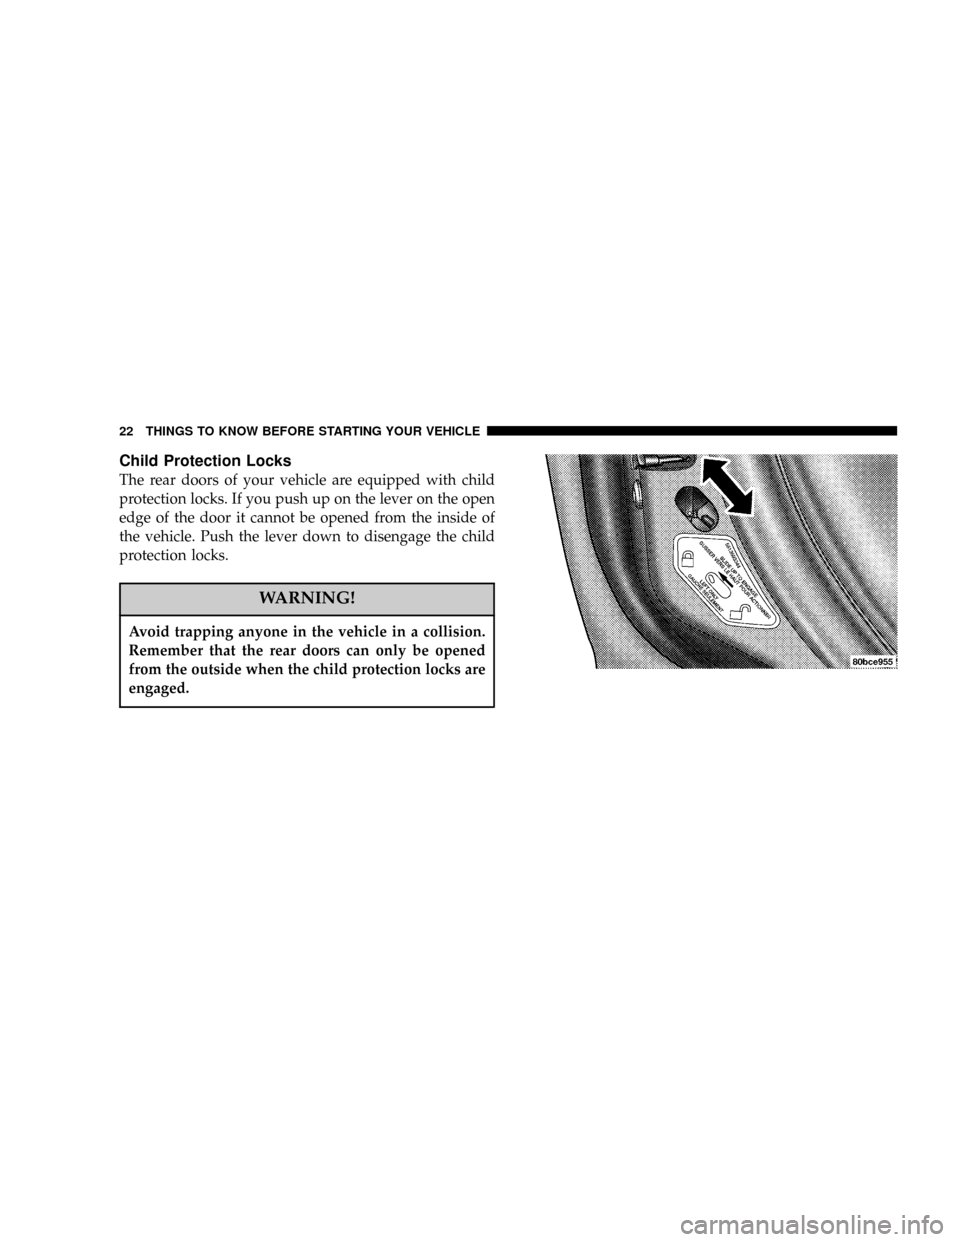
Child Protection Locks
The rear doors of your vehicle are equipped with child
protection locks. If you push up on the lever on the open
edge of the door it cannot be opened from the inside of
the vehicle. Push the lever down to disengage the child
protection locks.
WARNING!
Avoid trapping anyone in the vehicle in a collision.
Remember that the rear doors can only be opened
from the outside when the child protection locks are
engaged.
22 THINGS TO KNOW BEFORE STARTING YOUR VEHICLE
Page 42 of 374

When To Use The Automatic Locking Mode
Anytime a child safety seat is installed in a passenger
front or outboard rear seating position (if equipped).
Children 12 years old and under should be properly
restrained in the rear seat whenever possible.
How To Use The Automatic Locking Mode
1. Buckle the combination lap and shoulder belt.
2. Grasp the shoulder portion and pull downward until
the entire belt is extracted.
3. Allow the belt to retract. As the belt retracts, you will
hear a clicking sound. This indicates the safety belt is
now in the automatic locking mode.
How to Disengage The Automatic Locking Mode
Disconnect the combination lap/shoulder belt and allow
it to retract completely to disengage the automatic lock-
ing mode and activate the vehicle sensitive (emergency)
locking mode.
Energy Management Feature
This vehicle has a safety belt system with an energy
management feature at the driver and front passenger
seating positions to help further reduce the risk of injury
in the event of a head-on collision.
This safety belt system has a retractor assembly that is
designed to pay out webbing in a controlled manner. This
feature is designed to help reduce the belt force acting on
the occupant's chest.
42 THINGS TO KNOW BEFORE STARTING YOUR VEHICLE
Page 43 of 374
WARNING!
²After a vehicle collision, the driver and front
passenger outboard seat belt system must be
checked by a qualified technician to verify that
the ªautomatic locking retractorº feature for child
seats is still functioning properly. In addition, all
seat belts should be checked for proper function.
²The belt and retractor assembly must be replaced
if the seat belt assembly ªautomatic locking re-
tractorº feature or any other seat belt function is
not working properly when checked according to
the procedures in the Service Manual.
²Failure to replace the belt and retractor assembly
could increase the risk of injury in collisions.
Seat Belt Pretensioners
The driver and front passenger seat belts are equipped
with a pretensioning device that is designed to remove
any slack from the seat belt systems in the event of a
collision. This device improves the performance of the
seat belt by assuring that the belt is tight around the
occupant early in a collision. Pretensioners work for all
size occupants, including those in child restraints.
NOTE:These devices are not a substitute for proper seat
belt placement by the occupant. The seat belt must still be
worn snugly and positioned properly.
The pretensioners are triggered by the front Airbag
Control Module. Like the front airbags, the pretensioners
are a single use item. After a collision that is severe
enough to deploy the airbags and pretensioners, they
must be replaced.
THINGS TO KNOW BEFORE STARTING YOUR VEHICLE 43
2
Page 61 of 374

Here are some tips for getting the most out of your child
restraint:
²Before buying any restraint system, make sure that it
has a label certifying that it meets all applicable Safety
Standards. The manufacturer recommends that you
try a child restraint in the vehicle seats where you will
use it before you buy it.
²The restraint must be appropriate for your child's
weight and height. Check the label on the restraint for
weight and height limits.
²Carefully follow the instructions that come with the
restraint. If you install the restraint improperly, it may
not work when you need it.
²The passenger seat belts are equipped with either
cinching latch plates or automatic locking retractors,
which are designed to keep the lap portion tight
around the child restraint so that it is not necessary touse a locking clip. If the seat belt has a cinching latch
plate, pulling up on the shoulder portion of the
lap/shoulder belt will tighten the belt. The cinching
latch plate will keep the belt tight, however, any seat
belt system will loosen with time, so check the belt
occasionally and pull it tight if necessary.
If the seat belt has a automatic locking retractor, it will
have a distinctive label. Pull the belt from the retractor
until there is enough to allow you to pass through the
child restraint and slide the latch plate into the buckle.
Then, pull the belt until it is all extracted from the
retractor. Allow the belt to return to the retractor,
pulling on the excess webbing to tighten the lap
portion about the child restraint. Refer to ªAutomatic
Locking Modeº earlier in this section.
²Buckle the child into the restraint exactly as the
manufacturer's instructions tell you.
THINGS TO KNOW BEFORE STARTING YOUR VEHICLE 61
2
Page 65 of 374
the seat, removing slack in the straps according to the
child restraint manufacturer's instructions.
WARNING!
Improper installation of a child restraint to the
LATCH anchorages can lead to failure of an infant or
child restraint. The child could be badly injured or
killed. Follow the manufacturer's directions exactly
when installing an infant or child restraint.
Installing Child Restraints Using the Vehicle Seat
Belt
The passenger seat belts are equipped with either cinch-
ing latch plates or automatic locking retractors, which are
designed to keep the lap portion tight around the child
restraint so that it is not necessary to use a locking clip. If
the seat belt has a cinching latch plate, pulling up on the
shoulder portion of the lap/shoulder belt will tighten thebelt. The cinching latch plate will keep the belt tight,
however, any seat belt system will loosen with time, so
check the belt occasionally and pull it tight if necessary.
If the seat belt has a automatic locking retractor, it will
have a distinctive label. Pull the belt from the retractor
until there is enough to allow you to pass through the
child restraint and slide the latch plate into the buckle.
Then, pull the belt until it is all extracted from the
retractor. Allow the belt to return to the retractor, pulling
on the excess webbing to tighten the lap portion about
the child restraint. Refer to ªAutomatic Locking Modeº
earlier in this section.
In the rear seat, you may have trouble tightening the
lap/shoulder belt on the child restraint because the
buckle or latch plate is too close to the belt path opening
on the restraint. Disconnect the latch plate from the
buckle and twist the short buckle-end belt several times
to shorten it. Insert the latch plate into the buckle with the
release button facing out.
THINGS TO KNOW BEFORE STARTING YOUR VEHICLE 65
2
Page 96 of 374
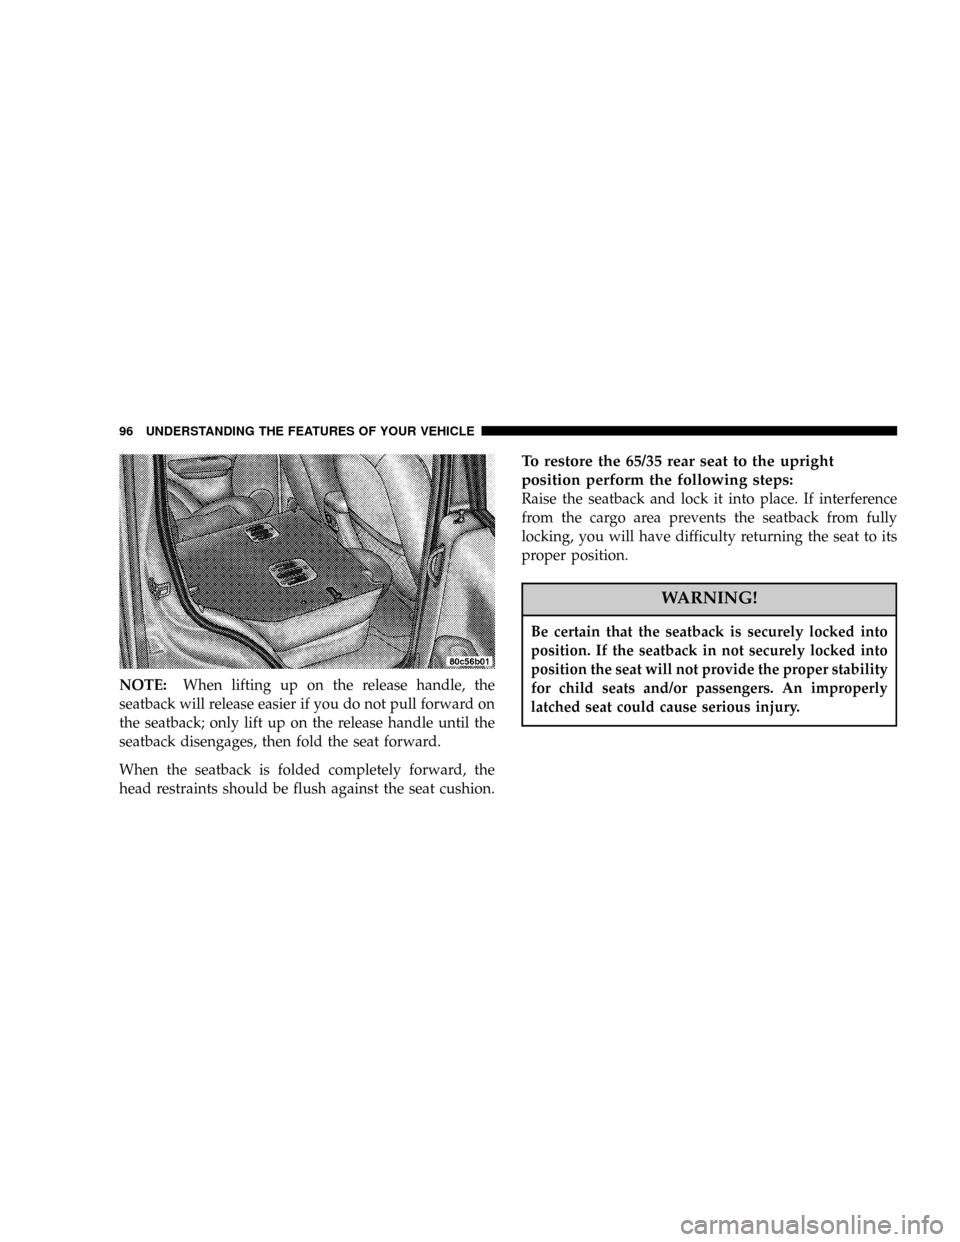
NOTE:When lifting up on the release handle, the
seatback will release easier if you do not pull forward on
the seatback; only lift up on the release handle until the
seatback disengages, then fold the seat forward.
When the seatback is folded completely forward, the
head restraints should be flush against the seat cushion.
To restore the 65/35 rear seat to the upright
position perform the following steps:
Raise the seatback and lock it into place. If interference
from the cargo area prevents the seatback from fully
locking, you will have difficulty returning the seat to its
proper position.
WARNING!
Be certain that the seatback is securely locked into
position. If the seatback in not securely locked into
position the seat will not provide the proper stability
for child seats and/or passengers. An improperly
latched seat could cause serious injury.
96 UNDERSTANDING THE FEATURES OF YOUR VEHICLE
Page 210 of 374
STARTING PROCEDURES
Before starting your vehicle, adjust your seat, adjust both
inside and outside mirrors, and fasten your seat belts.
WARNING!
Do not leave children or animals inside parked
vehicles in hot weather. Interior heat build up may
cause serious injury or death.
Manual Transmission
Apply the parking brake, place the gearshift control lever
in N (Neutral) and depress the clutch pedal before
starting vehicle. This vehicle is equipped with a clutch
interlocking ignition system.4WD Models Only
In 4L mode, this vehicle will start regardless of whether
or not the clutch pedal is pressed to the floor. This feature
enhances off-road performance by allowing the vehicle to
start when in 4L without having to depress the clutch
pedal. The 4 LO MODE indicator light will illuminate
when the transfer case has been shifted into this mode.
Automatic Transmission
Start the engine with the selector lever in the N (Neutral)
or P (Park) position. Apply the brake before shifting to
any driving range.
Normal Starting
Normal starting of either a cold or a warm engine is
obtained without pumping or depressing the accelerator
pedal. Turn the key to the START position and release
when the engine starts. If the engine fails to start within
10 seconds, turn the key to the OFF position, wait 5
seconds, then repeat the normal starting procedure.
210 STARTING AND OPERATING