tow JEEP LIBERTY 2011 KK / 2.G User Guide
[x] Cancel search | Manufacturer: JEEP, Model Year: 2011, Model line: LIBERTY, Model: JEEP LIBERTY 2011 KK / 2.GPages: 88, PDF Size: 3.24 MB
Page 3 of 88
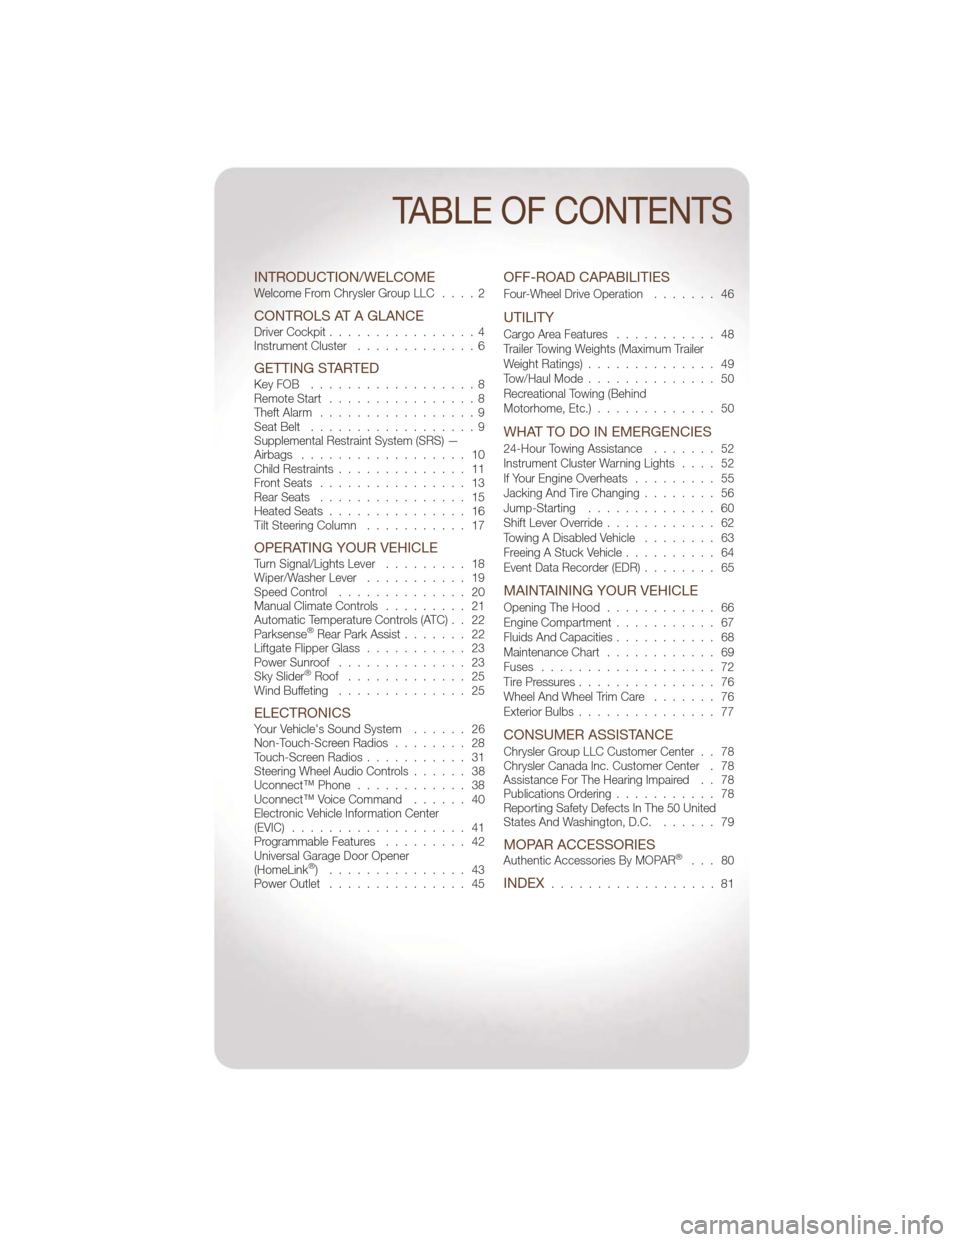
INTRODUCTION/WELCOMEWelcome From Chrysler Group LLC....2
CONTROLS AT A GLANCEDriver Cockpit................4
Instrument Cluster .............6
GETTING STARTEDKeyFOB ..................8
Remote Start................8
Theft Alarm .................9
Seat Belt ..................9
Supplemental Restraint System (SRS) —
Airbags .................. 10
Child Restraints .............. 11
Front Seats ................ 13
Rear Seats ................ 15
Heated Seats ............... 16
Tilt Steering Column ........... 17
OPERATING YOUR VEHICLETurn Signal/Lights Lever ......... 18
Wiper/Washer Lever ........... 19
Speed Control .............. 20
Manual Climate Controls ......... 21
Automatic Temperature Controls (ATC) . . 22
Parksense
®Rear Park Assist ....... 22
Liftgate Flipper Glass ........... 23
Power Sunroof .............. 23
Sky Slider
®Roof ............. 25
Wind Buffeting .............. 25
ELECTRONICSYour Vehicle's Sound System ...... 26
Non-Touch-Screen Radios ........ 28
Touch-Screen Radios ........... 31
Steering Wheel Audio Controls ...... 38
Uconnect™ Phone ............ 38
Uconnect™ Voice Command ...... 40
Electronic Vehicle Information Center
(EVIC) ................... 41
Programmable Features ......... 42
Universal Garage Door Opener
(HomeLink
®) ............... 43
Power Outlet ............... 45
OFF-ROAD CAPABILITIES
Four-Wheel Drive Operation ....... 46
UTILITY
Cargo Area Features........... 48
Trailer Towing Weights (Maximum Trailer
Weight Ratings) .............. 49
Tow/Haul Mode .............. 50
Recreational Towing (Behind
Motorhome, Etc.) ............. 50
WHAT TO DO IN EMERGENCIES
24-Hour Towing Assistance ....... 52
Instrument Cluster Warning Lights .... 52
If Your Engine Overheats ......... 55
Jacking And Tire Changing ........ 56
Jump-Starting .............. 60
Shift Lever Override ............ 62
Towing A Disabled Vehicle ........ 63
Freeing A Stuck Vehicle .......... 64
Event Data Recorder (EDR) ........ 65
MAINTAINING YOUR VEHICLE
Opening The Hood............ 66
Engine Compartment ........... 67
Fluids And Capacities ........... 68
Maintenance Chart ............ 69
Fuses ................... 72
Tire Pressures ............... 76
Wheel And Wheel Trim Care ....... 76
Exterior Bulbs ............... 77
CONSUMER ASSISTANCE
Chrysler Group LLC Customer Center . . 78
Chrysler Canada Inc. Customer Center . 78
Assistance For The Hearing Impaired . . 78
Publications Ordering ........... 78
Reporting Safety Defects In The 50 United
States And Washington, D.C. ...... 79
MOPAR ACCESSORIESAuthentic Accessories By MOPAR®... 80
INDEX.................. 81
TABLE OF CONTENTS
Page 9 of 88
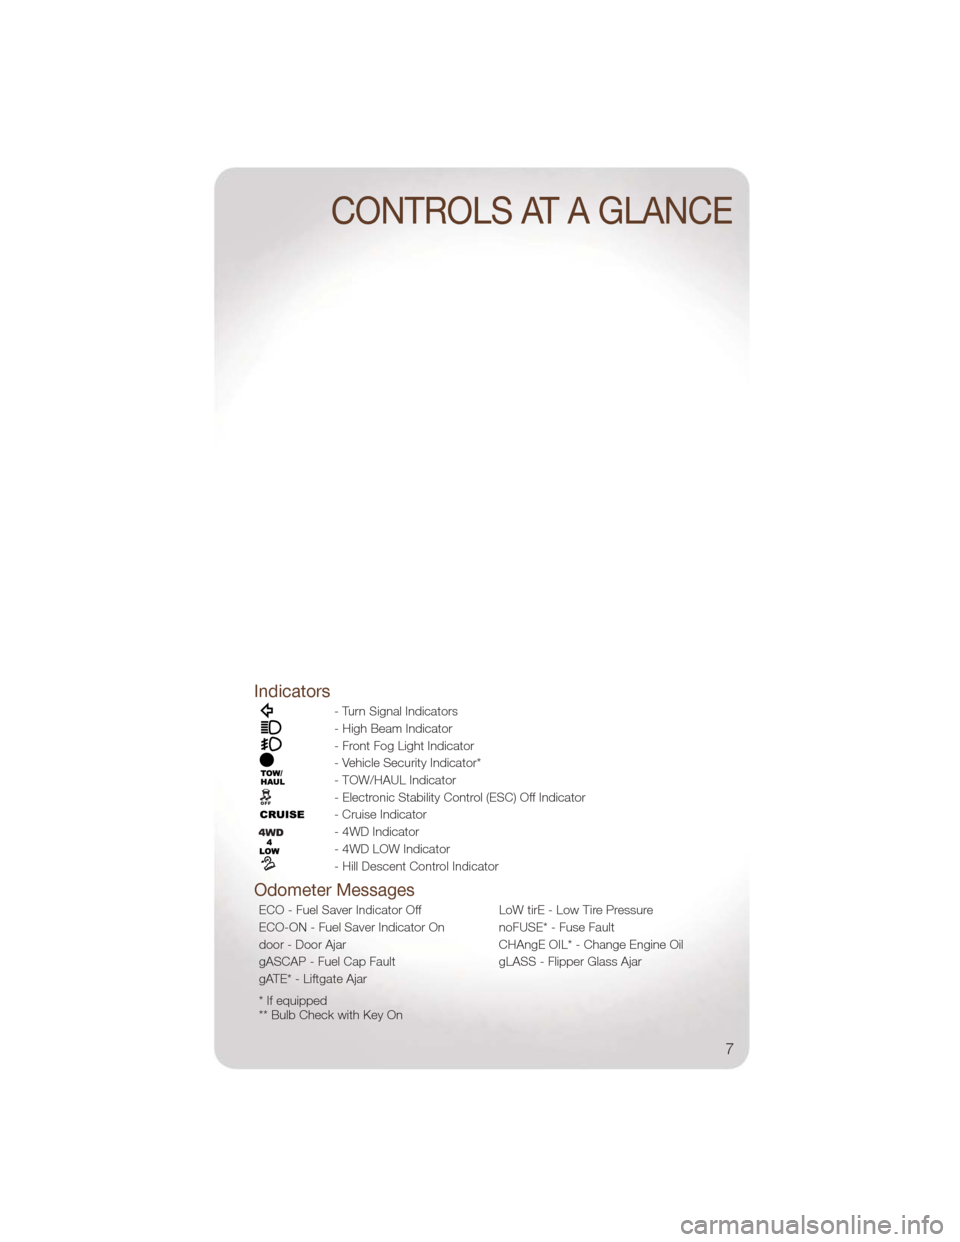
Indicators
- Turn Signal Indicators
- High Beam Indicator
- Front Fog Light Indicator
- Vehicle Security Indicator*
- TOW/HAUL Indicator
- Electronic Stability Control (ESC) Off Indicator
- Cruise Indicator
- 4WD Indicator
- 4WD LOW Indicator
- Hill Descent Control Indicator
Odometer Messages
ECO - Fuel Saver Indicator OffLoW tirE - Low Tire Pressure
ECO-ON - Fuel Saver Indicator On noFUSE* - Fuse Fault
door - Door Ajar CHAngE OIL* - Change Engine Oil
gASCAP - Fuel Cap Fault gLASS - Flipper Glass Ajar
gATE* - Liftgate Ajar
* If equipped
** Bulb Check with Key On
CONTROLS AT A GLANCE
7
Page 17 of 88
CAUTION!
Do not place any article under a power seat or impede its ability to move as it
may cause damage to the seat controls. Seat travel may become limited if
movement is stopped by an obstruction in the seat's path.
WARNING!
• Adjusting a seat while the vehicle is moving is dangerous. The suddenmovement of the seat could cause you to lose control. The seat belt might not
be properly adjusted, and you could be severely injured or killed. Only adjust a
seat while the vehicle is parked.
• Do not ride with the seatback reclined so that the seat belt is no longer resting against your chest. In a collision, you could slide under the seat belt and be
severely injured or killed. Use the recliner only when the vehicle is parked.
REAR SEATS
60/40 Split Folding Rear Seat With Fold-Flat Feature
• Each rear seatback can be folded flat or reclined.
To Lower Rear Seatback • With the front seats fully upright and positioned forward, pull the release strap toward the front of the vehicle and fold the rear seatback completely forward.
• Push down on the seatback to lock it in the folded position.
To Raise Rear Seatback• Pull the release strap toward the front of the vehicle.
• Raise the seatback and lock it into place.
Recliner Adjustment • Pull the release strap while sitting in the rear seat to recline the seatback,
release at the desired position.
GETTING STARTED
15
Page 20 of 88
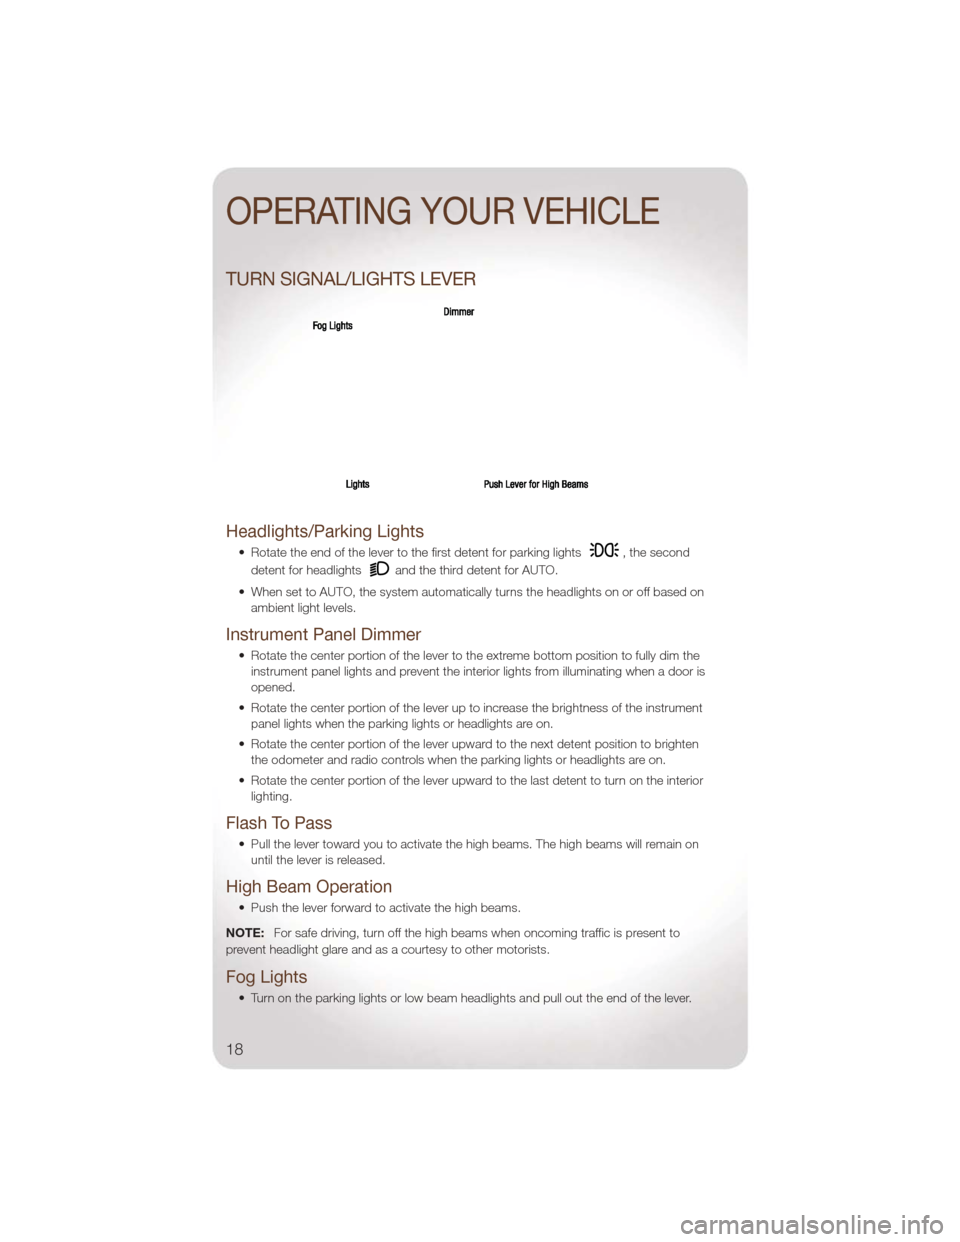
TURN SIGNAL/LIGHTS LEVER
Headlights/Parking Lights
• Rotate the end of the lever to the first detent for parking lights, the second
detent for headlights
and the third detent for AUTO.
• When set to AUTO, the system automatically turns the headlights on or off based on ambient light levels.
Instrument Panel Dimmer
• Rotate the center portion of the lever to the extreme bottom position to fully dim theinstrument panel lights and prevent the interior lights from illuminating when a door is
opened.
• Rotate the center portion of the lever up to increase the brightness of the instrument panel lights when the parking lights or headlights are on.
• Rotate the center portion of the lever upward to the next detent position to brighten the odometer and radio controls when the parking lights or headlights are on.
• Rotate the center portion of the lever upward to the last detent to turn on the interior lighting.
Flash To Pass
• Pull the lever toward you to activate the high beams. The high beams will remain onuntil the lever is released.
High Beam Operation
• Push the lever forward to activate the high beams.
NOTE: For safe driving, turn off the high beams when oncoming traffic is present to
prevent headlight glare and as a courtesy to other motorists.
Fog Lights
• Turn on the parking lights or low beam headlights and pull out the end of the lever.
OPERATING YOUR VEHICLE
18
Page 21 of 88
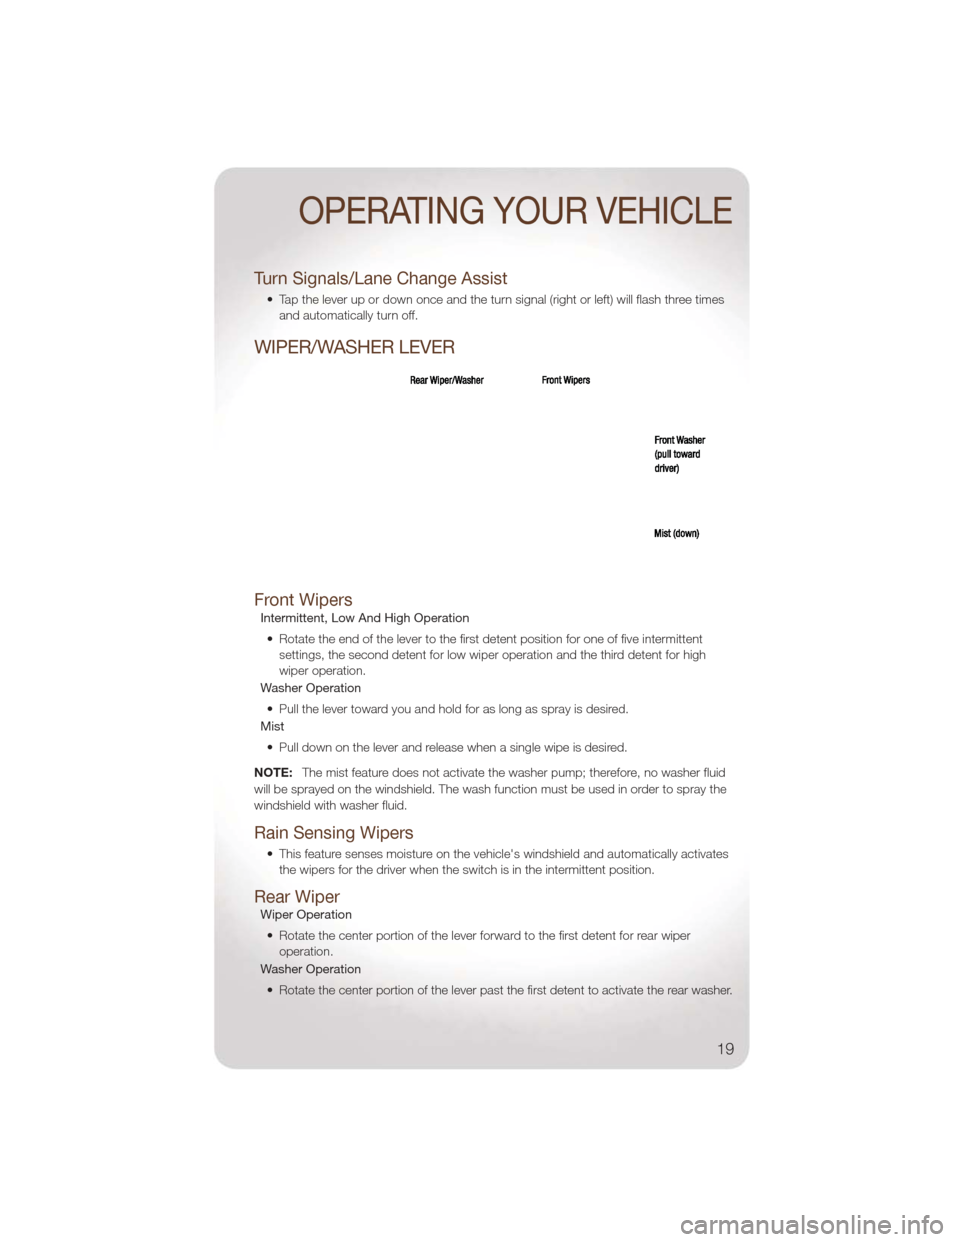
Turn Signals/Lane Change Assist
• Tap the lever up or down once and the turn signal (right or left) will flash three timesand automatically turn off.
WIPER/WASHER LEVER
Front Wipers
Intermittent, Low And High Operation
• Rotate the end of the lever to the first detent position for one of five intermittent settings, the second detent for low wiper operation and the third detent for high
wiper operation.
Washer Operation
• Pull the lever toward you and hold for as long as spray is desired.
Mist
• Pull down on the lever and release when a single wipe is desired.
NOTE: The mist feature does not activate the washer pump; therefore, no washer fluid
will be sprayed on the windshield. The wash function must be used in order to spray the
windshield with washer fluid.
Rain Sensing Wipers
• This feature senses moisture on the vehicle's windshield and automatically activates the wipers for the driver when the switch is in the intermittent position.
Rear Wiper
Wiper Operation
• Rotate the center portion of the lever forward to the first detent for rear wiper operation.
Washer Operation
• Rotate the center portion of the lever past the first detent to activate the rear washer.
OPERATING YOUR VEHICLE
19
Page 48 of 88
FOUR-WHEEL DRIVE
OPERATION
Command-Trac II®Transfer
Case
• The Command-TracII®transfer case
provides four positions:
• Two-wheel drive (2WD) high range
• Four-wheel drive (4WD LOCK) high
range
• Four-wheel drive (4WD LOW) low range
• NEUTRAL (N)
2WD To 4WD LOCK
• Move transfer case lever to the desired position.
• Shifts between 2WD and 4WD LOCK can be done with the vehicle stopped
or in motion. With the vehicle in
motion, the transfer case will
engage/disengage faster if you
momentarily release the accelerator
pedal after moving the transfer case
lever.
• If the vehicle is stopped, the key must be in the ON/RUN position.
• Shifts can not be completed if the key is in the ACC position.
4WD LOCK To 4WD LOW
• With the engine running, slow the vehicle speed to 2 to 3 mph (3 to
5 km/h) and shift the transmission
into NEUTRAL.
• While still rolling, move the transfer case lever to the 4WD LOW position.
• After the indicator light is ON (not flashing) shift the transmission into
gear.
• If the indicator light in the instrument cluster is flashing, the shift did not
occur and the current transfer case
position will be maintained. • This transfer case is intended to be
driven in the two-wheel drive position
(2WD) for normal street and highway
conditions such as dry, hard-surfaced
roads.
• When additional traction is required, select the transfer case 4WD LOCK
position or 4WD LOW position. This
position locks the front driveshaft and
rear driveshaft together and forces
the front and rear wheels to rotate at
the same speed.
• When operating in 4WD LOW, the engine speed is approximately three
times that of the 4WD LOCK position
at a given road speed. Take care not
to over-speed the engine and do not
exceed 25 mph (40 km/h).
• Use the transfer case NEUTRAL position for recreational towing only.
Selec-Trac II®Transfer Case
• The Selec-Trac II®active on-demand
transfer case provides four positions:
• Two-wheel drive (2WD) high range
• Four-wheel drive Auto (4WD AUTO)
high range
• NEUTRAL (N)
• Four-wheel drive (4WD LOW) low range
• This transfer case is intended to be driven in either the two-wheel drive
position (2WD) or the four-wheel drive
Auto position (4WD AUTO) for normal
street and highway conditions such
as dry, hard-surfaced roads.
• For added capability when traversing steep grades, rough terrain, or
extremely poor traction surfaces,
select the transfer case 4WD LOW
position. This position locks the front
driveshaft and rear driveshaft together
and forces the front and rear wheels
to rotate at the same speed while
multiplying engine torque.
OFF-ROAD CAPABILITIES
46
Page 49 of 88
• When operating in 4WD LOW, theengine speed is approximately three
times that of the 4WD LOCK position
at a given road speed. Take care not
to over-speed the engine and do not
exceed 25 mph (40 km/h).
• Use the transfer case NEUTRAL position for recreational towing only.
2WD To 4WD AUTO
• Move transfer case lever to the desired position.
• Shifts between 2WD and 4WD AUTO can be done with the vehicle stopped
or in motion. With the vehicle in
motion, the transfer case will
engage/disengage faster if you
momentarily release the accelerator
pedal after moving the transfer case
lever.
• If the vehicle is stopped, the key must be in the ON/RUN position.
• Shifts can not be completed if the key is in the ACC position.
4WD AUTO To 4WD LOW
• With the engine running, slow the vehicle speed to 2 to 3 mph (3 to
5 km/h) and shift the transmission
into NEUTRAL. • While still rolling, move the transfer
case lever to the 4WD LOW position.
• After the indicator light is ON (not flashing) shift the transmission into
gear.
• If the indicator light in the instrument cluster is flashing, the shift did not
occur and the current transfer case
position will be maintained.
WARNING!
• You or others could be injured ifyou leave the vehicle unattended
with the transfer case in the
NEUTRAL position without first
fully engaging the parking brake.
The transfer case NEUTRAL
position disengages both the front
driveshaft and rear driveshaft from
the powertrain, and it will allow the
vehicle to move even if the
transmission is in PARK. The
parking brake should always be
applied when the driver is not in
the vehicle.
OFF-ROAD CAPABILITIES
47
Page 51 of 88
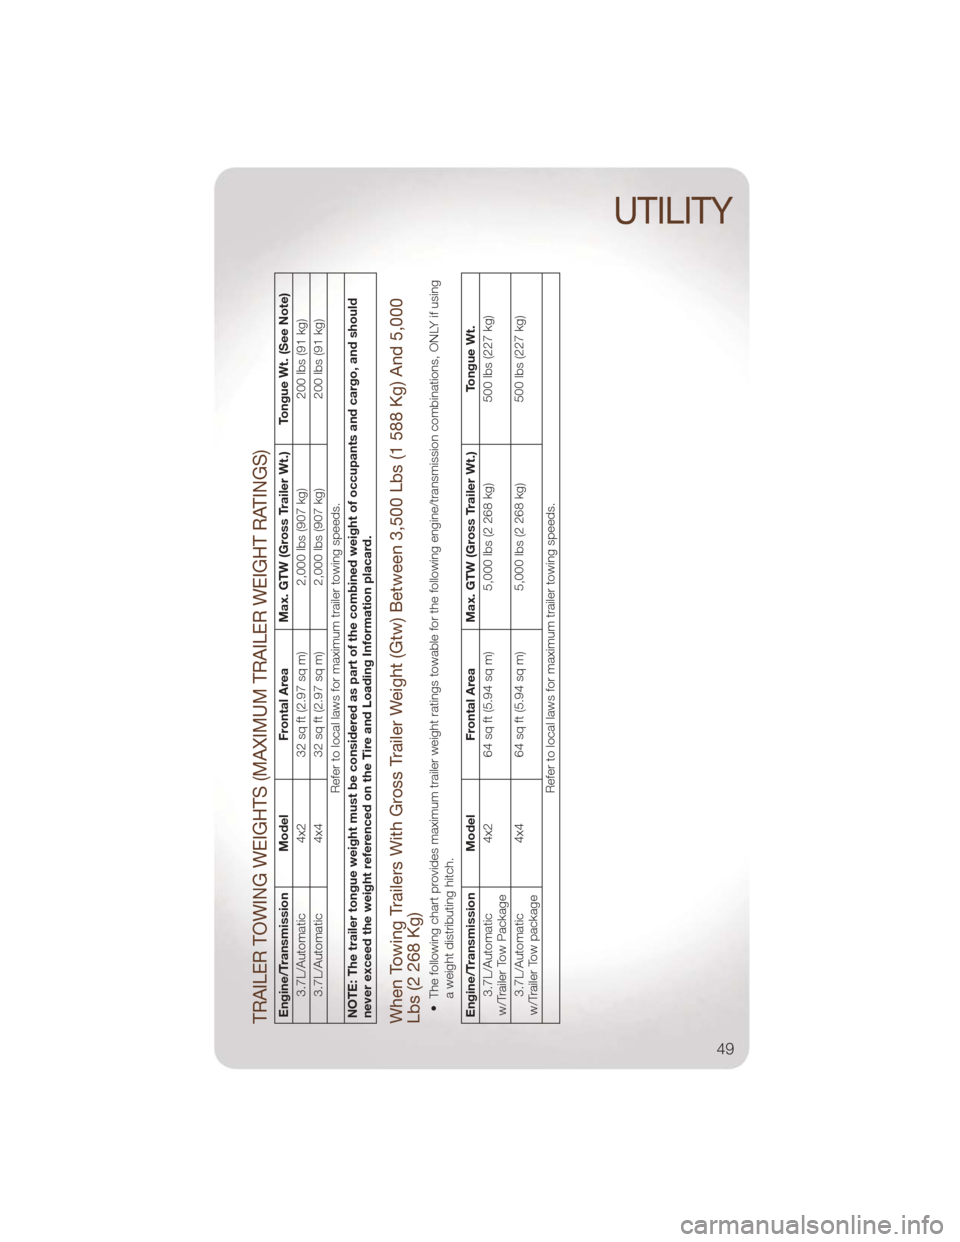
TRAILER TOWING WEIGHTS (MAXIMUM TRAILER WEIGHT RATINGS)Engine/Transmission ModelFrontal Area Max. GTW (Gross Trailer Wt.) Tongue Wt. (See Note)
3.7L/Automatic 4x232 sq ft (2.97 sq m) 2,000 lbs (907 kg) 200 lbs (91 kg)
3.7L/Automatic 4x432 sq ft (2.97 sq m) 2,000 lbs (907 kg) 200 lbs (91 kg)
Refer to local laws for maximum trailer towing speeds.
NOTE: The trailer tongue weight must be considered as part of the combined weight of occupants and cargo, and should
never exceed the weight referenced on the Tire and Loading Information placard.When Towing Trailers With Gross Trailer Weight (Gtw) Between 3,500 Lbs (1 588 Kg) And 5,000
Lbs (2 268 Kg)• The following chart provides maximum trailer weight ratings towable for the following engine/transmission combinations, ONLY if using a weight distributing hitch.Engine/Transmission Model Frontal Area Max. GTW (Gross Trailer Wt.) Tongue Wt.
3.7L/Automatic
w/Trailer Tow Package 4x2
64 sq ft (5.94 sq m) 5,000 lbs (2 268 kg) 500 lbs (227 kg)
3.7L/Automatic
w/Trailer Tow package 4x4
64 sq ft (5.94 sq m) 5,000 lbs (2 268 kg) 500 lbs (227 kg)
Refer to local laws for maximum trailer towing speeds.
UTILITY
49
Page 52 of 88
TOW/HAUL MODE
• When driving in hilly areas, towing atrailer, carrying a heavy load, etc., and
frequent transmission shifting occurs,
press the TOW/HAUL button. This will
improve performance and reduce the
potential for transmission overheating
or failure due to excessive shifting.
When operating in TOW/HAUL mode,
the transmission will shift into third
gear.
NOTE: The TOW/HAUL mode locks out
Overdrive.
• The “TOW/HAUL Indicator Light” willilluminate in the instrument cluster to
indicate when the switch has been
activated. Pressing the switch a
second time restores normal
operation. If the TOW/HAUL mode is
desired, the switch must be pressed
each time the engine is started.
RECREATIONAL TOWING
(BEHIND MOTORHOME,
ETC.)
Recreational Towing —
Two-Wheel Drive Models
• Recreational towing is allowed if therear wheels are OFFthe ground. This
may be accomplished using a tow
dolly or vehicle trailer. If using a tow
dolly, follow this procedure:
• Properly secure the dolly to the tow vehicle, following the dolly
manufacturer's instructions.
• Drive the rear wheels onto the tow dolly, firmly set the parking brake and
place the transmission in PARK.
• Turn the ignition switch to the unlocked OFF position.
• Install a suitable clamping device, designed for towing, to secure the
front wheels in the straight position.
• Disconnect the negative battery cable and secure it away from the battery
post.
• Flat towing (with all four wheels
on the ground) is allowed ONLY if
the driveshaft is removed. Towing
with the rear wheels on the ground
while the driveshaft is connected will
result in severe transmission damage.
• The parking brake mustbe firmly
engaged and the wheels chocked
during driveshaft removal and
installation. The parking brake must
remain engaged unless the vehicle is
securely and properly connected to
the tow vehicle, or the driveshaft is
completely reinstalled. See your
authorized dealer for proper driveshaft
removal and reinstallation procedures,
including flange orientation/alignment,
use of thread-locking compound,
proper bolt torque specifications, etc.
UTILITY
50
Page 53 of 88
Towing – Four-Wheel Drive
Models
• Depress the brake pedal and turn theignition switch to ON/RUN with the
engine shut off.
• Shift the transmission into NEUTRAL.
• Shift the transfer case into NEUTRAL by holding down the NEUTRAL Pin
switch for four seconds until the LED
starts to blink. The LED will stop
blinking and remain on when the shift
is complete.
• Start the engine and shift into DRIVE to ensure there is no vehicle
movement. • Shut the engine off and shift the
transmission into PARK.
• Place the ignition switch in the OFF position and remove the key.
• Apply the parking brake, attach the vehicle to the tow vehicle with a tow
bar and release the parking brake.
• Refer to your Owner's Manual on the DVD for further details.
CAUTION!
Towing with the rear wheels on the
ground (while the driveshaft is
connected) will cause severe
transmission damage. Damage from
improper towing is not covered under
the New Vehicle Limited Warranty.
WARNING!
• If the driveshaft is removed, thevehicle can roll even if the
transmission is in PARK, which
could cause serious injury or
death.
UTILITY
51