spare wheel JEEP PATRIOT 2007 1.G Owners Manual
[x] Cancel search | Manufacturer: JEEP, Model Year: 2007, Model line: PATRIOT, Model: JEEP PATRIOT 2007 1.GPages: 440, PDF Size: 7.26 MB
Page 72 of 440
Defroster
Check operation by selecting the defrost mode and place
the blower control on high speed. You should be able to
feel the air directed against the windshield.
Periodic Safety Checks You Should Make Outside
The Vehicle
Tires
Examine tires for excessive tread wear or uneven wear
patterns. Check for stones, nails, glass, or other objects
lodged in the tread. Inspect tread and sidewall for cuts or
cracks. Check wheel nuts for tightness, and tires (includ-
ing spare) for proper pressure.
Lights
Have someone observe the operation of exterior lights
while you work the controls. Check turn signal and high
beam indicator lights on the instrument panel.
Fluid Leaks
Check area under vehicle after overnight parking for fuel,
engine coolant, oil or other fluid leaks. Also, if gasoline
fumes are detected or fuel, power steering fluid, trans-
mission fluid or brake fluid leaks are suspected, the cause
should be located and corrected immediately.
THINGS TO KNOW BEFORE STARTING YOUR VEHICLE 71
2
Page 290 of 440
Radial-Ply Tires
WARNING!
Combining radial ply tires with other types of tires
on your vehicle will cause your vehicle to handle
poorly. The instability could cause an accident. Al-
ways use radial ply tires in sets of four (or 6, in case
of trucks with dual rear wheels). Never combine
them with other types of tires.
Cuts and punctures in radial tires are repairable only in
the tread area because of sidewall flexing. Consult your
authorized tire dealer for radial tire repairs.
Compact Spare Tire Ð If Equipped
The compact spare is for temporary emergency use with
radial tires. It is engineered to be used on your style
vehicle only. Since this tire has limited tread life, the
original tire should be repaired (or replaced) and rein-
stalled at the first opportunity.
WARNING!
Temporary use spare tires are for emergency use only.
With these tires, do not drive more than 50 mph (80
km/h). Temporary-use spare tires have limited tread
life. When the tread is worn to the tread wear
indicators, the temporary use spare tire needs to be
replaced. Be sure to follow the warnings, which
apply to your spare. Failure to do so could result in
spare tire failure and loss of vehicle control.
STARTING AND OPERATING 289
5
Page 291 of 440
Do not install a wheel cover or attempt to mount a
conventional tire on the compact spare wheel, since the
wheel is designed specifically for the compact spare.
Do not install more than one compact spare tire/wheel
on the vehicle at any given time.
CAUTION!
Because of the reduced ground clearance, do not take
your vehicle through an automatic car wash with the
compact spare installed. Damage to the vehicle may
result.
Limited Use Spare Ð If Equipped
The limited use spare tire is for temporary emergency use
on your vehicle. This tire is identified by a limited use
spare tire warning label located on the limited use spare
tire and wheel assembly. This tire may look like theoriginal equipped tire on the front or rear axle of your
vehicle, but it is not. Installation of this limited use spare
tire affects vehicle handling. Since it is not the same tire,
replace (or repair) the original tire and reinstall on the
vehicle at the first opportunity.
WARNING!
The limited use spare tires are for emergency use
only. Installation of this limited use spare tire affects
vehicle handling. With this tire, do not drive more
than 60 mph (100 km/h). Keep inflated to the cold tire
inflation pressure listed on either your tire placard or
limited use spare tire and wheel assembly. Replace
(or repair) the original tire at the first opportunity
and reinstall it on your vehicle. Failure to do so could
result in loss of vehicle control.
290 STARTING AND OPERATING
Page 300 of 440
Display Settings
²Your system can be set to display pressure units in PSI,
kPa, or BAR.
NOTE:These display settings may not be available due
to Regulatory Authorities. In this case, the display will
only show approved units.
NOTE:If your vehicle is equipped with a compact spare
wheel and tire assembly that does not have a tire pressure
monitoring sensor. Therefore, it will not be monitored by
the Tire Pressure Monitor System (TPMS). In the event
that the compact spare tire is swapped with a low
pressure road tire, the next ignition key cycle will still
show the ªTire Pressure Monitoring Lampº to be ON, a
chime to sound, and the Electronic Vehicle Information
Center (EVIC) will still show the low tire pressure value
flashing on the graphic display. However, driving the
vehicle for up to 10 minutes above 15 mph (25 km/h) will
display a ªCHECK TPM SYSTEMº text message on theEVIC. This text message will then be followed by a
graphic, with ª- -ª in place of the flashing low pressure
value. For every subsequent key cycle, the ªTire Pressure
Monitoring Lampº will be ON, a chime will sound, a
ªCHECK TPM SYSTEMº text message will be display in
the EVIC, and the graphic display will have ª- -ª in place
of the pressure value of the spare tire location. Once the
original road tire has been properly repaired, and put
back onto the vehicle in place of the compact spare tire.
The TPMS will update the graphic display on the EVIC
with a new tire pressure value instead of ª- -ª, and the
ªTire Pressure Monitoring Lampº will be OFF as long as
none of the road tire(s) are below the low pressure
warning threshold. The vehicle may need to be driven for
up to 10 minutes above 15 mph (25 km/h) to receive this
information.
STARTING AND OPERATING 299
5
Page 318 of 440
²Safety chains must always be used between your
vehicle and trailer. Always connect the chains to the
frame or hook retainers of the vehicle hitch. Cross the
chains under the trailer tongue and allow enough
slack for turning corners.
²Vehicles with trailers should not be parked on a grade.
When parking, apply the parking brake on the tow
vehicle. Put the tow vehicle automatic transmission in
P for Park. Always, block or9chock9the trailer wheels.
²GCWR must not be exceeded.
²Total weight must be distributed between the tow
vehicle and the trailer such that the following four
ratings are not exceeded:
1. GVWR
2. GTW
3. GAWR4. Tongue weight rating for the trailer hitch utilized
(This requirement may limit the ability to always
achieve the 10% to 15% range of tongue weight as a
percentage of total trailer weight).
Towing Requirements Ð Tires
þ
Do not attempt to tow a trailer while using a compact
spare tire.
þProper tire inflation pressures are essential to the safe
and satisfactory operation of your vehicle. Refer to the
Tires±General Information section of this manual on
Tire Pressures for proper tire inflation procedures.
þAlso, check the trailer tires for proper tire inflation
pressures before trailer usage.
þCheck for signs of tire wear or visible tire damage
before towing a trailer. Refer to the Tires±General
Information section of this manual on Tread Wear
Indicators for the proper inspection procedure.
STARTING AND OPERATING 317
5
Page 328 of 440
Jack Location
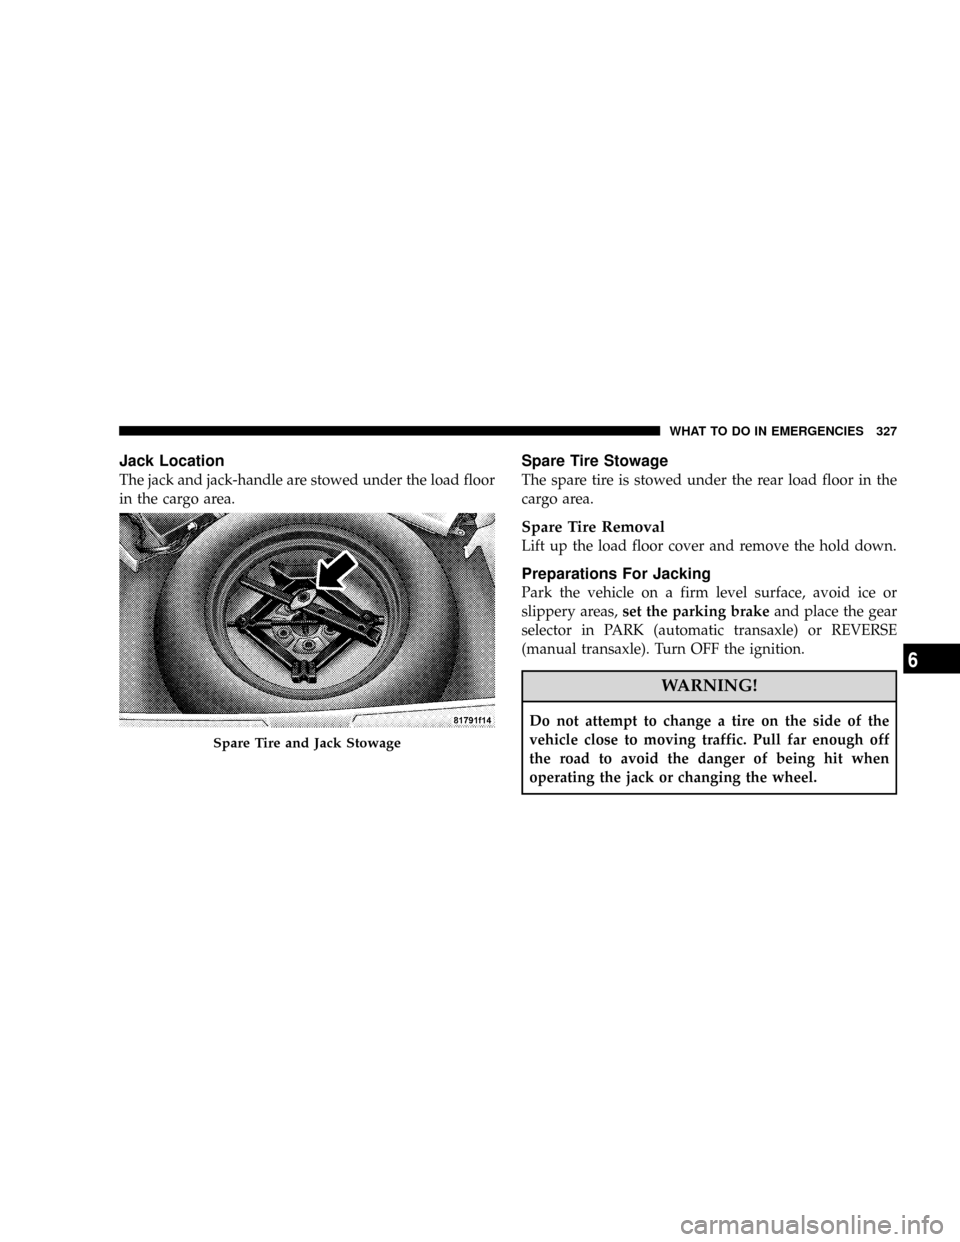
The jack and jack-handle are stowed under the load floor
in the cargo area.
Spare Tire Stowage
The spare tire is stowed under the rear load floor in the
cargo area.
Spare Tire Removal
Lift up the load floor cover and remove the hold down.
Preparations For Jacking
Park the vehicle on a firm level surface, avoid ice or
slippery areas,set the parking brakeand place the gear
selector in PARK (automatic transaxle) or REVERSE
(manual transaxle). Turn OFF the ignition.
WARNING!
Do not attempt to change a tire on the side of the
vehicle close to moving traffic. Pull far enough off
the road to avoid the danger of being hit when
operating the jack or changing the wheel.
Spare Tire and Jack Stowage
WHAT TO DO IN EMERGENCIES 327
6
Page 329 of 440
²Turn on the Hazard Warning Flasher.
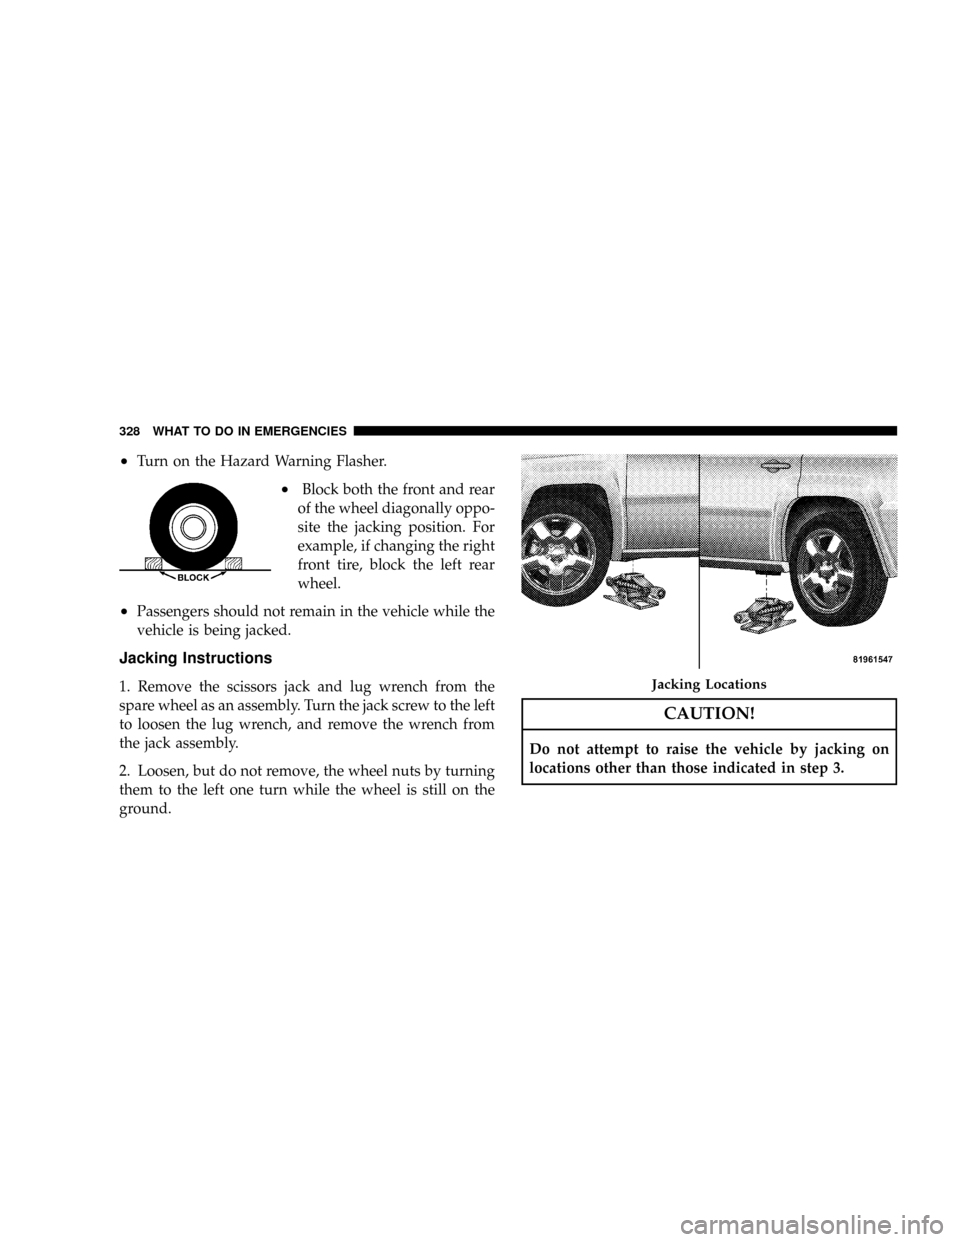
²Block both the front and rear
of the wheel diagonally oppo-
site the jacking position. For
example, if changing the right
front tire, block the left rear
wheel.
²Passengers should not remain in the vehicle while the
vehicle is being jacked.
Jacking Instructions
1. Remove the scissors jack and lug wrench from the
spare wheel as an assembly. Turn the jack screw to the left
to loosen the lug wrench, and remove the wrench from
the jack assembly.
2. Loosen, but do not remove, the wheel nuts by turning
them to the left one turn while the wheel is still on the
ground.
CAUTION!
Do not attempt to raise the vehicle by jacking on
locations other than those indicated in step 3.
Jacking Locations
328 WHAT TO DO IN EMERGENCIES
Page 330 of 440
3. There are two front jacking locations and two rear
jacking locations on each side of the body. The front
locations are outlined by two triangular cutouts, the rear
ones by two rectangular cutouts. For vehicles equipped
with plastic trim, the plastic has been cut away to expose
the jacking locations in the body.
Do not raise the vehicle until you are sure the jack is
securely engaged.
4. Turn the jack screw to the left until the jack can be
placed under the jacking location. Once the jack is
positioned, turn the jack screw to the right until the jack
head is properly engaged with the lift area closest to the
wheel to be changed. Do not raise the vehicle until you
are sure the jack is securely engaged.WARNING!
Raising the vehicle higher than necessary can make
the vehicle less stable. It could slip off the jack and
hurt someone near it. Raise the vehicle only enough
to remove the tire.
5. Raise the vehicle by turning the jack screw to the right,
using the swivel wrench. Raise the vehicle only until the
tire just clears the surface and enough clearance is
obtained to install the spare tire. Minimum tire lift
provides maximum stability.
6. Remove the wheel nuts and pull the wheel off the hub.
Install the spare wheel and wheel nuts with the cone
shaped end of the nuts toward the wheel. Lightly tighten
the nuts. To avoid the risk of forcing the vehicle off the
jack, do not tighten the nuts fully until the vehicle has
been lowered.
WHAT TO DO IN EMERGENCIES 329
6
Page 331 of 440
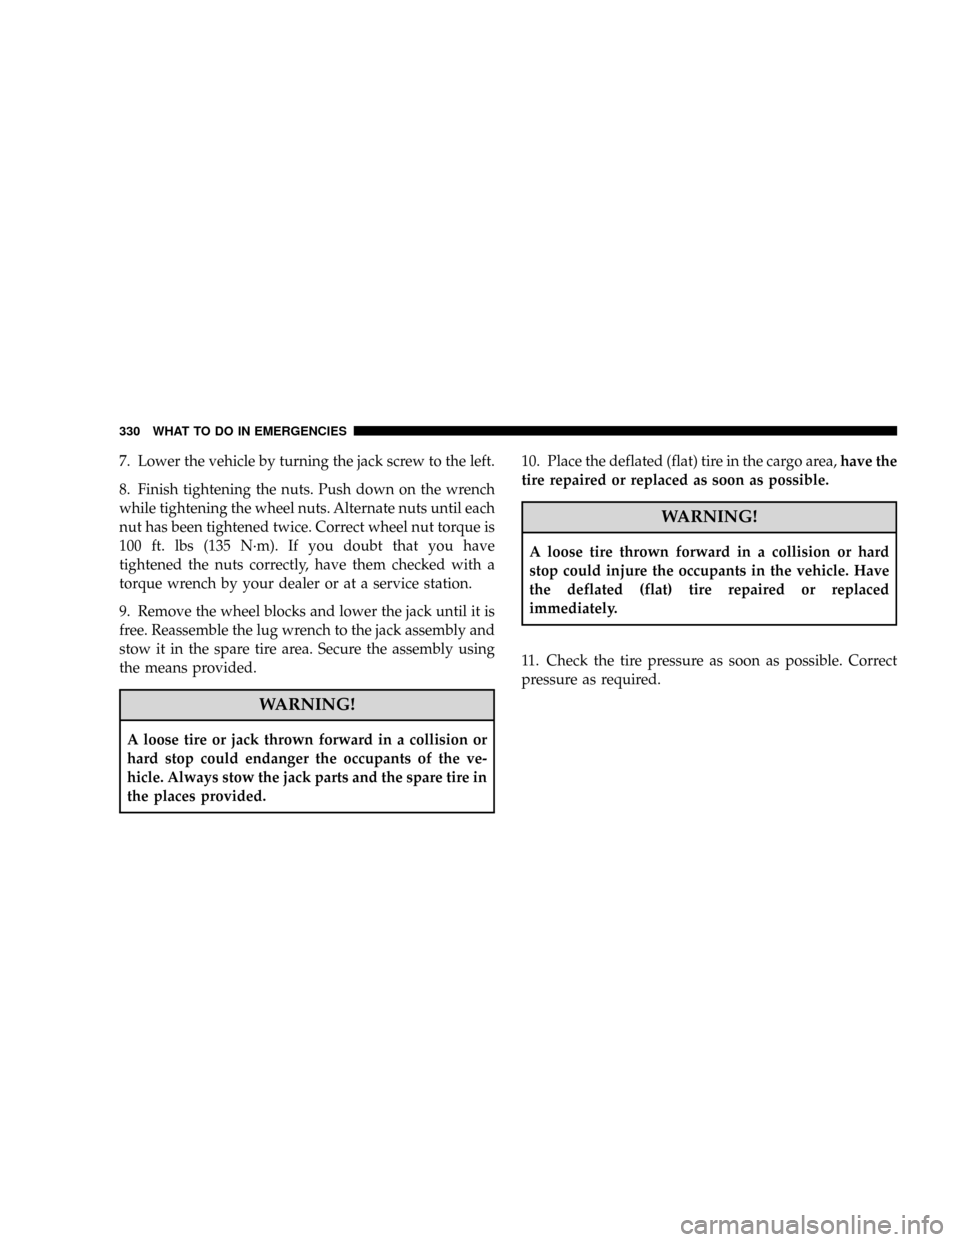
7. Lower the vehicle by turning the jack screw to the left.
8. Finish tightening the nuts. Push down on the wrench
while tightening the wheel nuts. Alternate nuts until each
nut has been tightened twice. Correct wheel nut torque is
100 ft. lbs (135 N´m). If you doubt that you have
tightened the nuts correctly, have them checked with a
torque wrench by your dealer or at a service station.
9. Remove the wheel blocks and lower the jack until it is
free. Reassemble the lug wrench to the jack assembly and
stow it in the spare tire area. Secure the assembly using
the means provided.
WARNING!
A loose tire or jack thrown forward in a collision or
hard stop could endanger the occupants of the ve-
hicle. Always stow the jack parts and the spare tire in
the places provided.10. Place the deflated (flat) tire in the cargo area,have the
tire repaired or replaced as soon as possible.
WARNING!
A loose tire thrown forward in a collision or hard
stop could injure the occupants in the vehicle. Have
the deflated (flat) tire repaired or replaced
immediately.
11. Check the tire pressure as soon as possible. Correct
pressure as required.
330 WHAT TO DO IN EMERGENCIES
Page 425 of 440
CD (Compact Disc) Player Maintenance........ 222
Cellular Phone........................82,223
Center High Mounted Stop Light............ 387
Chains, Tire............................ 301
Changing A Flat Tire..................... 326
Chart, Tire Sizing........................ 278
Check Engine Light (Malfunction Indicator Light) . 344
Child Restraint.......................... 60
Child Restraint Tether Anchors............... 64
Child Restraint with Automatic Belts........... 63
Child Safety Locks........................ 23
Child Seat.............................. 66
Clean Air Gasoline....................... 303
Cleaning
Wheels............................. 373
Climate Control......................... 223
Clock........................190,193,201,213
Clutch............................... 367
Clutch Fluid........................... 367Coin Holder........................... 151
Compact Disc (CD) Maintenance............. 222
Compact Spare Tire...................... 289
Compass.............................. 188
Compass Calibration..................... 188
Compass Variance....................... 186
Console.............................. 151
Contract, Service........................ 414
Coolant (Antifreeze)...................... 388
Cooling System......................... 360
Adding Coolant (Antifreeze).............. 362
Coolant Level......................360,363
Disposal of Used Coolant................ 363
Drain, Flush, and Refill.................. 360
Inspection........................... 363
Points to Remember.................362,364
Pressure Cap......................... 362
Selection of Coolant (Antifreeze)........... 361
Corrosion Protection..................... 371
424 INDEX