lock JEEP PATRIOT 2010 1.G Owner's Guide
[x] Cancel search | Manufacturer: JEEP, Model Year: 2010, Model line: PATRIOT, Model: JEEP PATRIOT 2010 1.GPages: 496, PDF Size: 6.45 MB
Page 62 of 496
The system includes side impact sensors adjacent to both
front and rear seat occupants that are calibrated to deploy
the SABIC airbags during impacts that require airbag
occupant protection.
WARNING!
•If your vehicle is equipped with left and right
Supplemental Side Airbag Inflatable Curtain
(SABIC), do not stack luggage or other cargo up
high enough to block the location of the SABIC.
The area where the SABIC is located should re-
main free from any obstructions.
•Do not use accessory seat covers or place objects
between you and the side airbags; the performance
could be adversely affected and/or objects could
be pushed into you, causing serious injury.
Knee Impact Bolsters
The Knee Impact Bolsters help protect the knees of the
driver and the front passenger, and position front occu-
pants for the best interaction with the Advanced Front
Airbags.
Along with seat belts and pretensioners, Advanced Front
Airbags work with the knee bolsters to provide improved
protection for the driver and front passenger. Side airbags
also work with seat belts to improve occupant protection.
Here are some simple steps you can take to minimize the
risk of harm from a deploying airbag:
1.Children 12 years old and under should always ride
buckled up in a rear seat.
2
THINGS TO KNOW BEFORE STARTING YOUR VEHICLE 61
Page 69 of 496
•Turn on the interior lights, which remain on as long as
the battery has power or until the ignition key is
removed.
•Unlock the doors automatically.
If a Deployment Occurs
The front airbags are designed to deflate immediately
after deployment.
NOTE:Front and/or side airbags will not deploy in all
collisions. This does not mean something is wrong with
the airbag system.
If you do have a collision, which deploys the airbags, any
or all of the following may occur:
•The nylon airbag material may sometimes cause abra-
sions and/or skin reddening to the driver and front
passenger as the airbags deploy and unfold. The
abrasions are similar to friction rope burns or those
you might get sliding along a carpet or gymnasium floor. They are not caused by contact with chemicals.
They are not permanent and normally heal quickly.
However, if you haven’t healed significantly within a
few days, or if you have any blistering, see your doctor
immediately.
•As the airbags deflate, you may see some smoke-like
particles. The particles are a normal by-product of the
process that generates the non-toxic gas used for
airbag inflation. These airborne particles may irritate
the skin, eyes, nose, or throat. If you have skin or eye
irritation, rinse the area with cool water. For nose or
throat irritation, move to fresh air. If the irritation
continues, see your doctor. If these particles settle on
your clothing, follow the garment manufacturer’s in-
structions for cleaning.
Do not drive your vehicle after the airbags have de-
ployed. If you are involved in another collision, the
airbags will not be in place to protect you.
68 THINGS TO KNOW BEFORE STARTING YOUR VEHICLE
Page 72 of 496
NOTE:If the speedometer, tachometer, or any engine
related gauges are not working, the Occupant Restraint
Controller (ORC) may also be disabled. The airbags may
not be ready to inflate for your protection. Promptly
check the fuse block for blown fuses. Refer to the label
located on the inside of the fuse block cover for the
proper airbag fuses. See your authorized dealer if the
fuse is good.
Event Data Recorder (EDR)
In the event of a collision, your vehicle is designed to
record up to five seconds of specific vehicle data param-
eters (see list below) in an event data recorder prior to the
moment of airbag deployment, or near deployment (if
applicable), and up to a quarter second of either high-
speed deceleration data or change in velocity during
and/or after airbag deployment or near-deployment.
EDR data is ONLY recorded if an airbag deploys, or
nearly deploys, and is otherwise unavailable. NOTE:
1. A near-deployment event occurs when the airbag
sensor detects severe vehicle deceleration usually indica-
tive of a crash, but not severe enough to warrant airbag
deployment.
2. Under certain circumstances, EDR data may not be
recorded (e.g., loss of battery power).
In conjunction with other data gathered during a com-
plete accident investigation, the electronic data may be
used by Chrysler Group LLC and others to learn more
about the possible causes of crashes and associated
injuries in order to assess and improve vehicle perfor-
mance. In addition to crash investigations initiated by
Chrysler Group LLC, such investigations may be re-
quested by customers, insurance carriers, government
officials, and professional crash researchers, such as those
associated with universities, and with hospital and insur-
ance organizations.
2
THINGS TO KNOW BEFORE STARTING YOUR VEHICLE 71
Page 77 of 496
•Carefully follow the instructions that come with the
restraint. If you install the restraint improperly, it may
not work when you need it.
Installing Child Restraints Using the Vehicle Seat
Belt
The seat belts in the passenger seating positions are
equipped with either an Automatic Locking Retractor
(ALR) or a cinching latch plate or both. Both types of
seatbelts are designed to keep the lap portion of the seat
belt tight around the child restraint so that it is not
necessary to use a locking clip. The ALR will make a
ratcheting noise if you extract the entire belt from the
retractor and then allow the belt to retract into the
retractor. For additional information on ALR, refer to
“Automatic Locking Mode”.
•Buckle the child into the seat according to the child
restraint manufacturer ’s directions.
•When your child restraint is not in use, secure it in the
vehicle with the seat belt or remove it from the vehicle.
Do not leave it loose in the vehicle. In a sudden stop or
collision, it could strike the occupants or seatbacks and
cause serious personal injury.
•To install a child restraint, first, pull enough of the seat
belt webbing from the retractor to route it through the
belt path of the child restraint and slide the latch plate
into the buckle. Next, extract all the seat belt webbing
out of the retractor and then allow the belt to retract
into the retractor. Finally, pull on any excess webbing
to tighten the lap portion around the child restraint.
Any seat belt system will loosen with time, so check
the belt occasionally, and pull it tight if necessary.
•In the rear seat, you may have trouble tightening the
lap/shoulder belt on the child restraint because the
buckle or latch plate is too close to the belt path
opening on the restraint. Disconnect the latch plate
76 THINGS TO KNOW BEFORE STARTING YOUR VEHICLE
Page 86 of 496
WARNING! (Continued)
•Check mounting of mats on a regular basis. Al-
ways properly reinstall and secure floor mats that
have been removed for cleaning.
•Always make sure that objects cannot fall into the
driver foot well while the vehicle is moving.
Objects can become trapped under the brake pedal
and accelerator pedal causing a loss of vehicle
control.
•If required, mounting posts must be properly
installed, if not equipped from the factory.
Failure to properly follow floor mat installation or
mounting can cause interference with the brake
pedal and accelerator pedal operation causing loss
of control of the vehicle.
Periodic Safety Checks You Should Make Outside
the Vehicle
Tires
Examine tires for excessive tread wear and uneven wear
patterns. Check for stones, nails, glass, or other objects
lodged in the tread. Inspect the tread and sidewall for
cuts and cracks. Check the wheel nuts for tightness.
Check the tires (including spare) for proper pressure.
Lights
Have someone observe the operation of exterior lights
while you work the controls. Check turn signal and high
beam indicator lights on the instrument panel.
Door Latches
Check for positive closing, latching, and locking.
2
THINGS TO KNOW BEFORE STARTING YOUR VEHICLE 85
Page 141 of 496
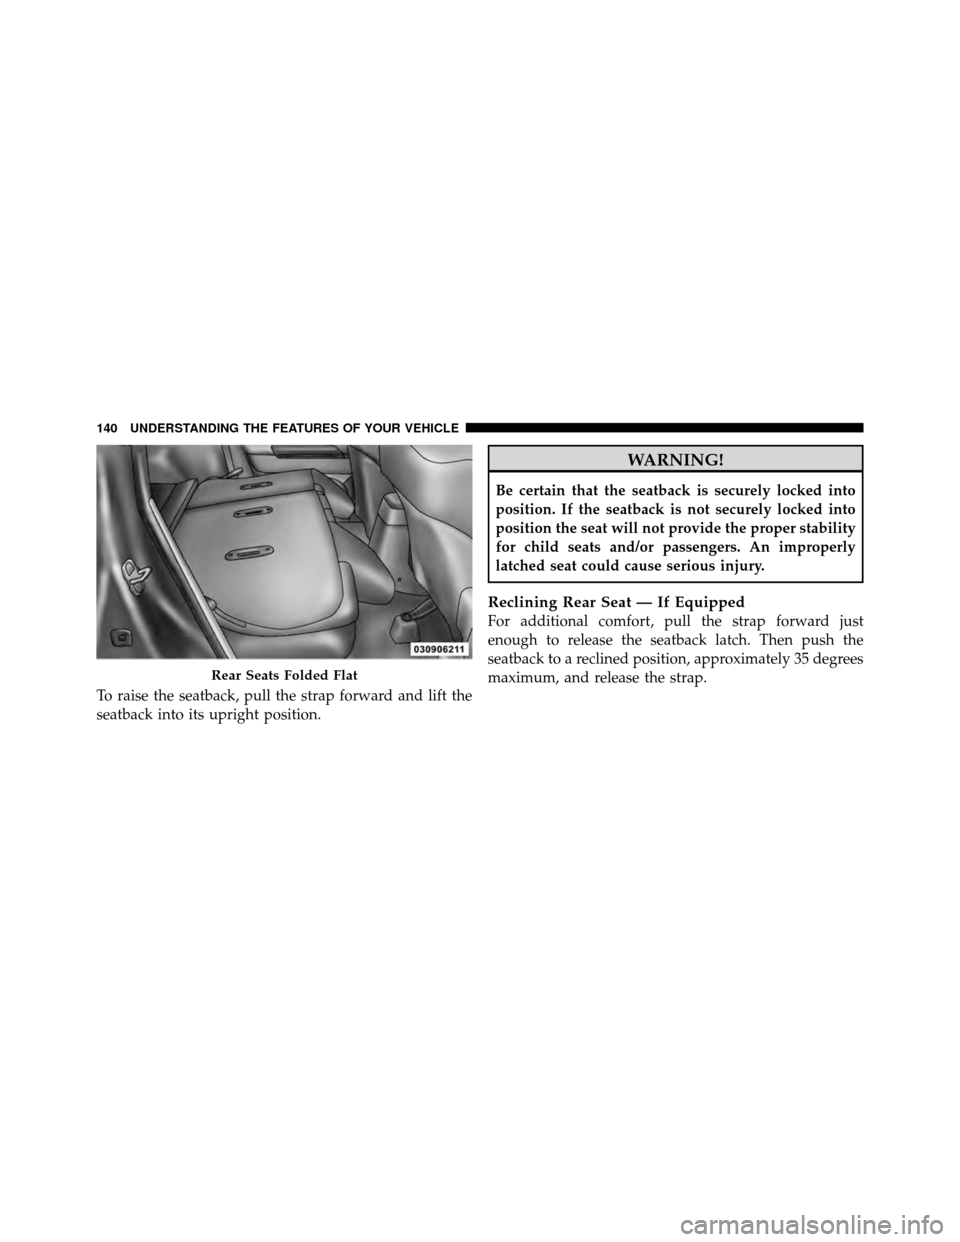
To raise the seatback, pull the strap forward and lift the
seatback into its upright position.
WARNING!
Be certain that the seatback is securely locked into
position. If the seatback is not securely locked into
position the seat will not provide the proper stability
for child seats and/or passengers. An improperly
latched seat could cause serious injury.
Reclining Rear Seat — If Equipped
For additional comfort, pull the strap forward just
enough to release the seatback latch. Then push the
seatback to a reclined position, approximately 35 degrees
maximum, and release the strap.
Rear Seats Folded Flat
140 UNDERSTANDING THE FEATURES OF YOUR VEHICLE
Page 143 of 496
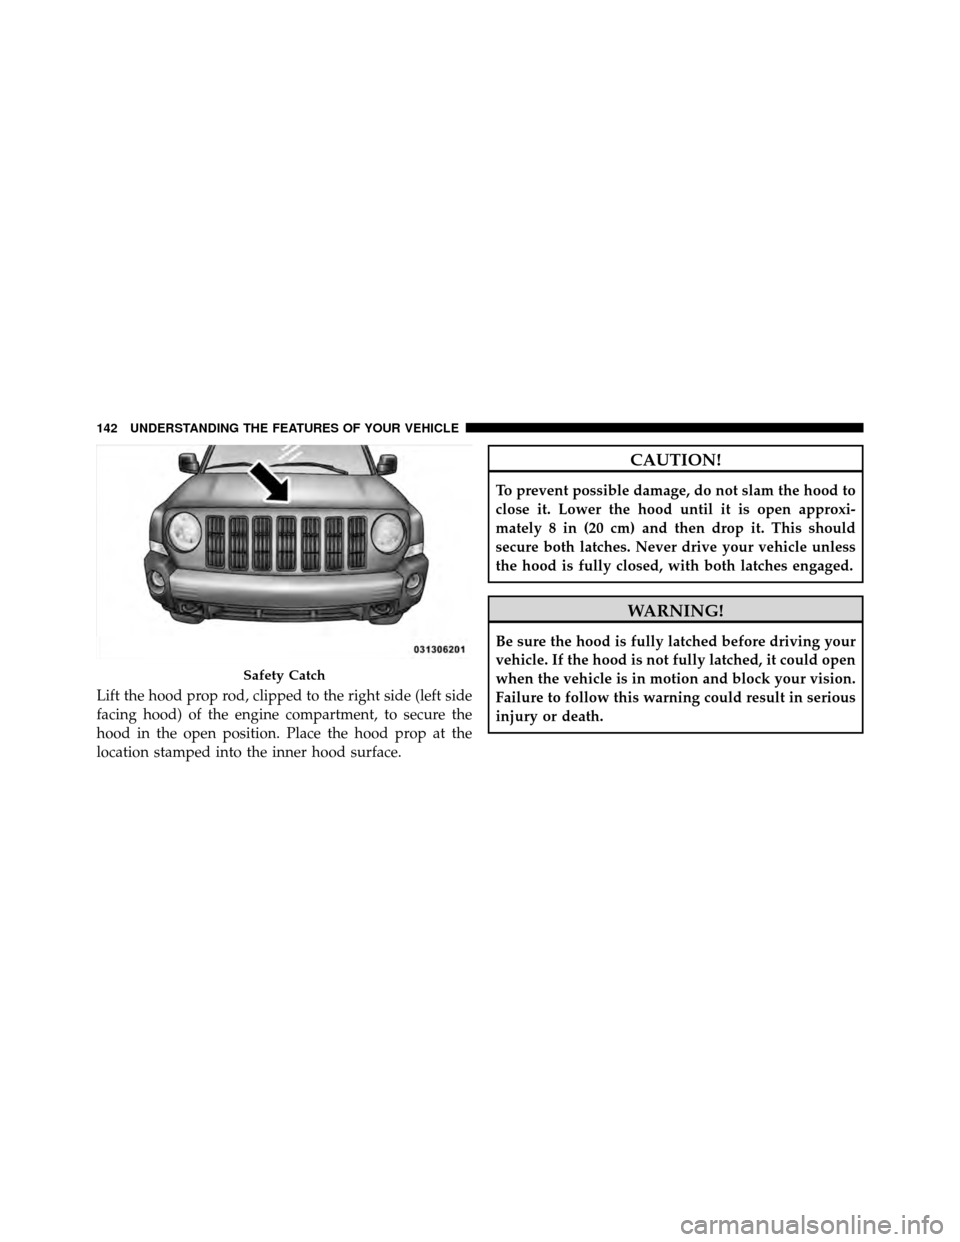
Lift the hood prop rod, clipped to the right side (left side
facing hood) of the engine compartment, to secure the
hood in the open position. Place the hood prop at the
location stamped into the inner hood surface.
CAUTION!
To prevent possible damage, do not slam the hood to
close it. Lower the hood until it is open approxi-
mately 8 in (20 cm) and then drop it. This should
secure both latches. Never drive your vehicle unless
the hood is fully closed, with both latches engaged.
WARNING!
Be sure the hood is fully latched before driving your
vehicle. If the hood is not fully latched, it could open
when the vehicle is in motion and block your vision.
Failure to follow this warning could result in serious
injury or death.
Safety Catch
142 UNDERSTANDING THE FEATURES OF YOUR VEHICLE
Page 150 of 496
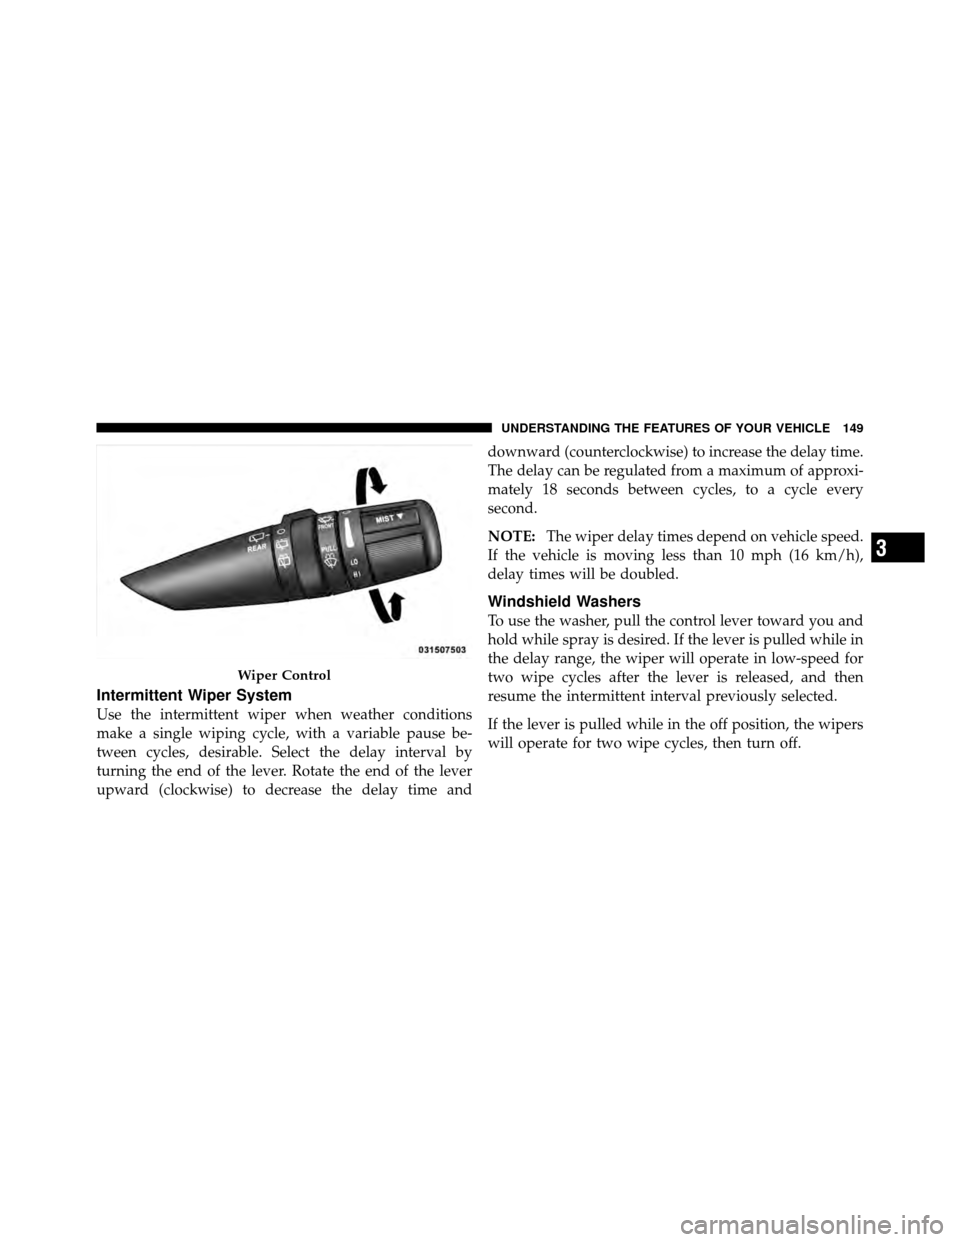
Intermittent Wiper System
Use the intermittent wiper when weather conditions
make a single wiping cycle, with a variable pause be-
tween cycles, desirable. Select the delay interval by
turning the end of the lever. Rotate the end of the lever
upward (clockwise) to decrease the delay time anddownward (counterclockwise) to increase the delay time.
The delay can be regulated from a maximum of approxi-
mately 18 seconds between cycles, to a cycle every
second.
NOTE:
The wiper delay times depend on vehicle speed.
If the vehicle is moving less than 10 mph (16 km/h),
delay times will be doubled.
Windshield Washers
To use the washer, pull the control lever toward you and
hold while spray is desired. If the lever is pulled while in
the delay range, the wiper will operate in low-speed for
two wipe cycles after the lever is released, and then
resume the intermittent interval previously selected.
If the lever is pulled while in the off position, the wipers
will operate for two wipe cycles, then turn off.
Wiper Control
3
UNDERSTANDING THE FEATURES OF YOUR VEHICLE 149
Page 152 of 496
CAUTION!
In cold weather, always turn off the wiper switch and
allow the wipers to return to the park position before
turning off the engine. If the wiper switch is left on
and the wipers freeze to the windshield, damage to
the wiper motor may occur when the vehicle is
restarted.
TILT STEERING COLUMN
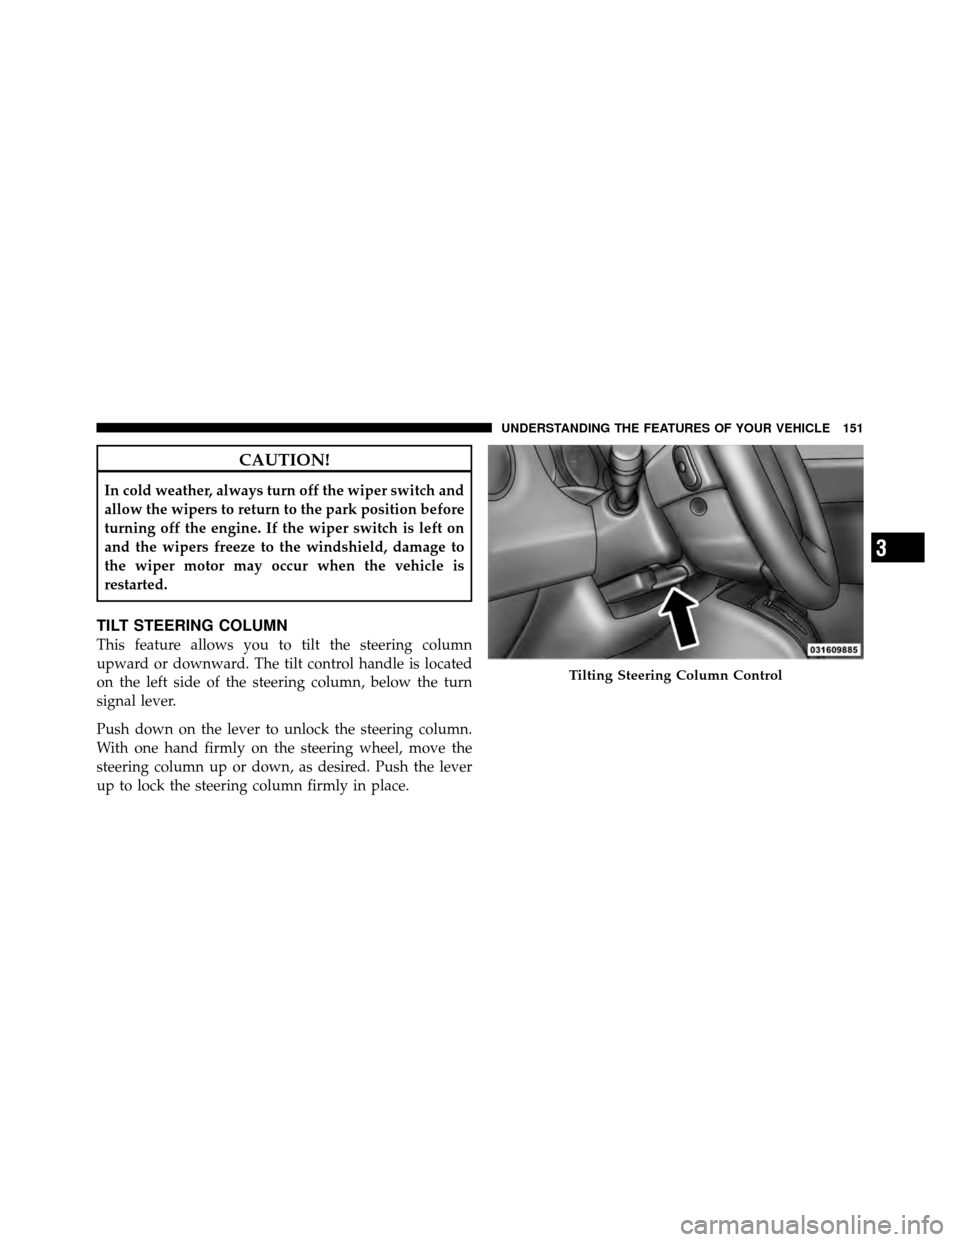
This feature allows you to tilt the steering column
upward or downward. The tilt control handle is located
on the left side of the steering column, below the turn
signal lever.
Push down on the lever to unlock the steering column.
With one hand firmly on the steering wheel, move the
steering column up or down, as desired. Push the lever
up to lock the steering column firmly in place.
Tilting Steering Column Control
3
UNDERSTANDING THE FEATURES OF YOUR VEHICLE 151
Page 153 of 496
WARNING!
Do not adjust the steering column while driving.
Adjusting the steering column while driving or driv-
ing with the steering column unlocked, could cause
the driver to lose control of the vehicle. Be sure the
steering column is locked before driving your ve-
hicle. Failure to follow this warning may result in
serious injury or death.
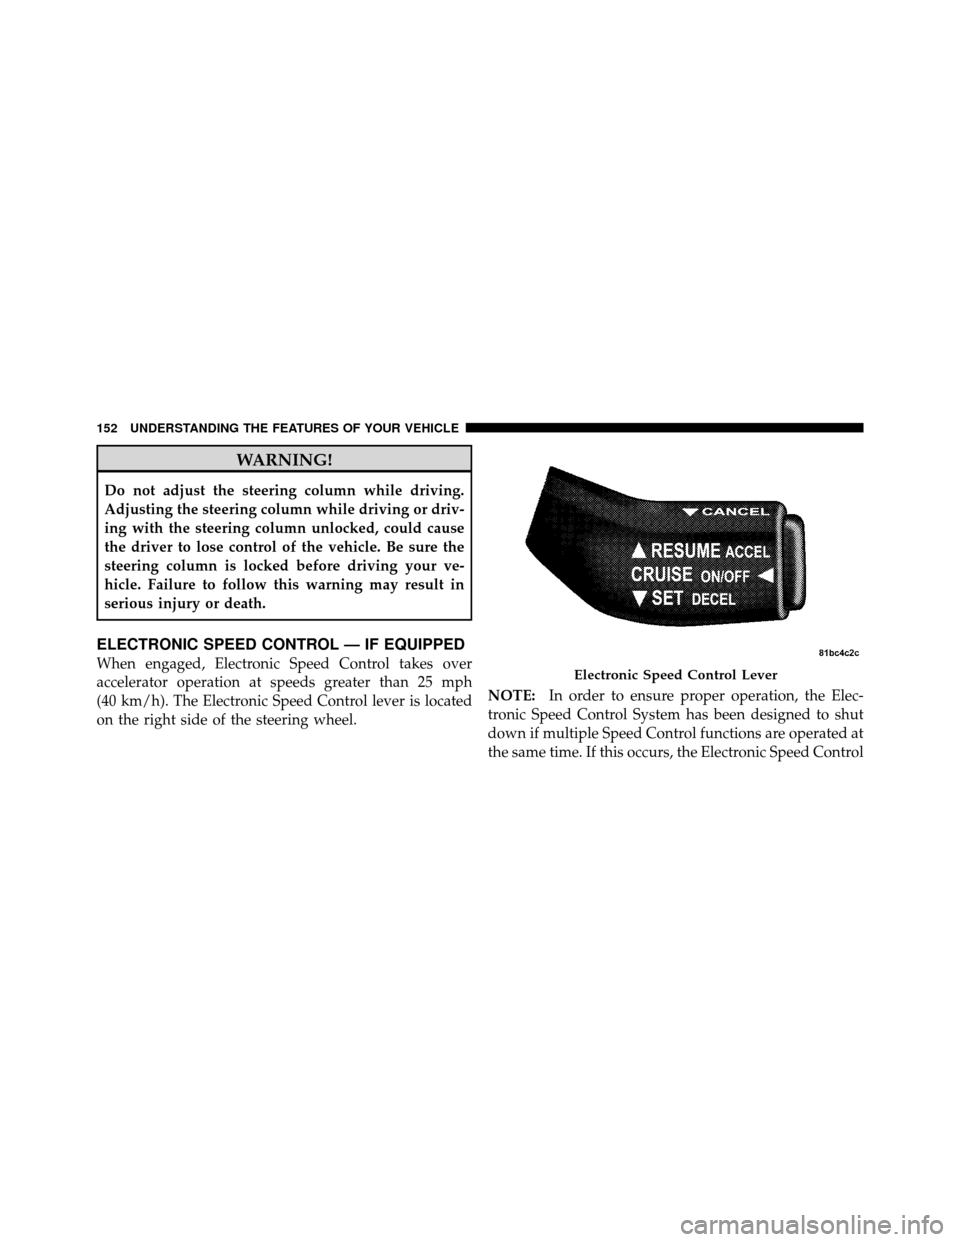
ELECTRONIC SPEED CONTROL — IF EQUIPPED
When engaged, Electronic Speed Control takes over
accelerator operation at speeds greater than 25 mph
(40 km/h). The Electronic Speed Control lever is located
on the right side of the steering wheel.NOTE:
In order to ensure proper operation, the Elec-
tronic Speed Control System has been designed to shut
down if multiple Speed Control functions are operated at
the same time. If this occurs, the Electronic Speed ControlElectronic Speed Control Lever
152 UNDERSTANDING THE FEATURES OF YOUR VEHICLE