air conditioning JEEP PATRIOT 2018 Owner handbook (in English)
[x] Cancel search | Manufacturer: JEEP, Model Year: 2018, Model line: PATRIOT, Model: JEEP PATRIOT 2018Pages: 332, PDF Size: 1.99 MB
Page 90 of 332
The system will best recognize your speech if
the windows are closed, and the heater/air
conditioning blower control is set to low.
At any point, if the system does not recognize
one of your commands, you will be prompted to
repeat it.
To hear the first available Menu, push the Voice
Command
button and say “Help” or “Main
Menu.”
CommandsThe Voice Command system understands two
types of commands, Universal commands and
Local commands. Universal commands are
available at all times. Local commands are
available if the supported radio mode is active.
Changing The Volume
To change the Voice Command volume:
1. Start a dialogue by pushing the Voice Com-
mand
button.
2. Say a command (e.g., “Help”).3.
Use the ON/OFF VOLUME rotary knob to
adjust the volume to a comfortable level while
the Voice Command system is speaking.
•Please note the volume setting for Voice
Command is different than the volume
setting for the audio system.
Main Menu
Start a dialogue by pushing the Voice Com-
mand
button. You may say “Main Menu” to
switch to the main menu.
In this mode, you can say the following com-
mands:
•“Radio AM” (to switch to the radio AM mode)
•“Radio FM” (to switch to radio FM mode)
•“Disc” (to switch to the disc mode)
•“USB” (to switch to USB mode)
•“Bluetooth Streaming” (to switch to Bluetooth
Streaming mode)
•“Memo” (to switch to the memo recorder)
•“System Setup” (to switch to system setup)Radio AM (Or Radio Long Wave Or Radio
Medium Wave — If Equipped)
To switch to the AM band, say “AM” or “Radio
AM.” In this mode, you may say the following
commands:
•“Frequency #” (to change the frequency)
•“Next Station” (to select the next station)
•“Previous Station” (to select the previous
station)
•“Menu Radio” (to switch to the radio menu)
•“Main Menu” (to switch to the main menu)
Radio FM
To switch to the FM band, say “FM” or “Radio
FM.” In this mode, you may say the following
commands:
•“Frequency #” (to change the frequency)
•“Next Station” (to select the next station)
•“Previous Station” (to select the previous
station)
•“Menu Radio” (to switch to the radio menu)
•“Main Menu” (to switch to the main menu)
86
Page 122 of 332
•Personal Settings (Customer-Programmable Features).......142•CYBERSECURITY . . . . . . . . . . . . . . . . . . . . . .. . . . . . . . .144
•SOUND SYSTEMS . . . . . .. . . . . . . . . . . . . . . . . . . . . . . .145
•iPod/USB/MP3 CONTROL — IF EQUIPPED . . . . . . . . . . . . . . .145
•Connecting The iPod Or External USB Device.............145
•Using This Feature.............................146
•Controlling The iPod Or External USB Device Using Radio
Buttons....................................146
•Play Mode..................................146
•List Or Browse Mode............................147
•Bluetooth Streaming Audio (BTSA)...................148
•NAVIGATION SYSTEM — IF EQUIPPED . . . . . . . . . . . . .. . . .149
•STEERING WHEEL AUDIO CONTROLS.................149
•Radio Operation...............................149
•CD Player...................................149
•CD/DVD DISC MAINTENANCE . . . . . . . . . . . . . . . ........150
•RADIO OPERATION AND MOBILE DEVICES . . . . . . . . ......150
•CLIMATE CONTROLS . . . . . . . . . . . . . . . .............150
•Manual Heating And Air Conditioning..................150
•Automatic Temperature Control (ATC) — If Equipped........153
•Operating Tips...............................157
11 8
Page 154 of 332
If you push the switch up or down twice, it plays
the second track; three times, it will play the
third, etc.
The center button on the left side rocker switch
has no function for a single-disc CD player.
However, when a multiple-disc CD player is
equipped on the vehicle, the center button will
select the next available CD in the player.
CD/DVD DISC MAINTENANCE
To keep a CD/DVD in good condition, take the
following precautions:
1. Handle the disc by its edge; avoid touching
the surface.
2. If the disc is stained, clean the surface with a
soft cloth, wiping from center to edge.
3. Do not apply paper or tape to the disc; avoid
scratching the disc.
4. Do not use solvents such as benzene, thin-
ner, cleaners, or anti-static sprays.
5. Store the disc in its case after playing.
6. Do not expose the disc to direct sunlight.7. Do not store the disc where temperatures
may become too high.
NOTE:
If you experience difficulty in playing a par-
ticular disc, it may be damaged (e.g.,
scratched, reflective coating removed, a
hair, moisture or dew on the disc) oversized,
or have protection encoding. Try a known
good disc before considering disc player
service.
RADIO OPERATION AND
MOBILE DEVICES
Under certain conditions, an “on” mobile device
in your vehicle can cause erratic or noisy per-
formance from your radio. This condition may
be lessened or eliminated by relocating the
mobile device antenna. This condition is not
harmful to the radio. If your radio performance
does not satisfactorily “clear” by the reposition-
ing of the antenna, it is recommended that the
radio volume be turned down or off during
mobile device operation when not using
Uconnect (if equipped).
CLIMATE CONTROLS
The air conditioning and heating system is
designed to make you comfortable in all types
of weather.
Manual Heating And Air
Conditioning
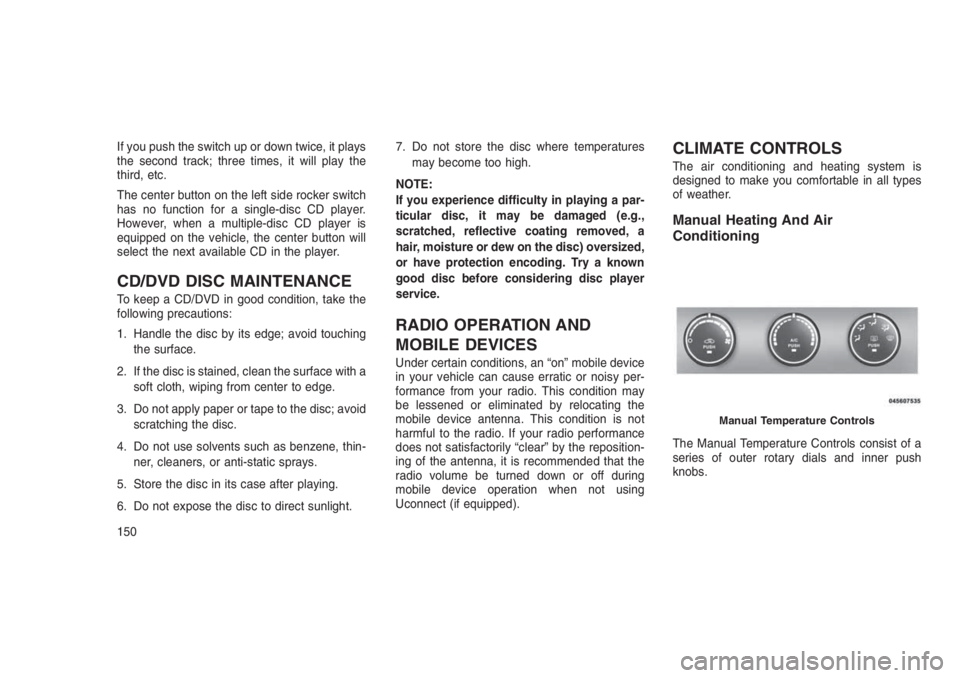
The Manual Temperature Controls consist of a
series of outer rotary dials and inner push
knobs.
Manual Temperature Controls
150
Page 155 of 332
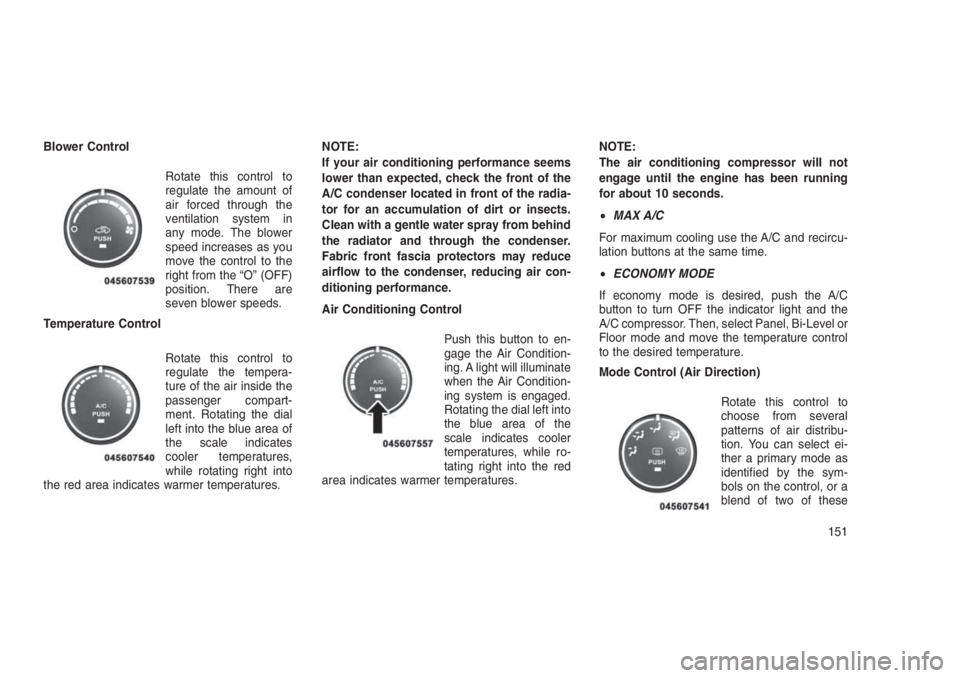
Blower Control
Rotate this control to
regulate the amount of
air forced through the
ventilation system in
any mode. The blower
speed increases as you
move the control to the
right from the “O” (OFF)
position. There are
seven blower speeds.
Temperature Control
Rotate this control to
regulate the tempera-
ture of the air inside the
passenger compart-
ment. Rotating the dial
left into the blue area of
the scale indicates
cooler temperatures,
while rotating right into
the red area indicates warmer temperatures.NOTE:
If your air conditioning performance seems
lower than expected, check the front of the
A/C condenser located in front of the radia-
tor for an accumulation of dirt or insects.
Clean with a gentle water spray from behind
the radiator and through the condenser.
Fabric front fascia protectors may reduce
airflow to the condenser, reducing air con-
ditioning performance.
Air Conditioning Control
Push this button to en-
gage the Air Condition-
ing. A light will illuminate
when the Air Condition-
ing system is engaged.
Rotating the dial left into
the blue area of the
scale indicates cooler
temperatures, while ro-
tating right into the red
area indicates warmer temperatures.NOTE:
The air conditioning compressor will not
engage until the engine has been running
for about 10 seconds.
•MAX A/C
For maximum cooling use the A/C and recircu-
lation buttons at the same time.
•ECONOMY MODE
If economy mode is desired, push the A/C
button to turn OFF the indicator light and the
A/C compressor. Then, select Panel, Bi-Level or
Floor mode and move the temperature control
to the desired temperature.
Mode Control (Air Direction)
Rotate this control to
choose from several
patterns of air distribu-
tion. You can select ei-
ther a primary mode as
identified by the sym-
bols on the control, or a
blend of two of these
151
Page 156 of 332
modes. The closer the setting is to a particular
symbol, the more air distribution you receive
from that mode.
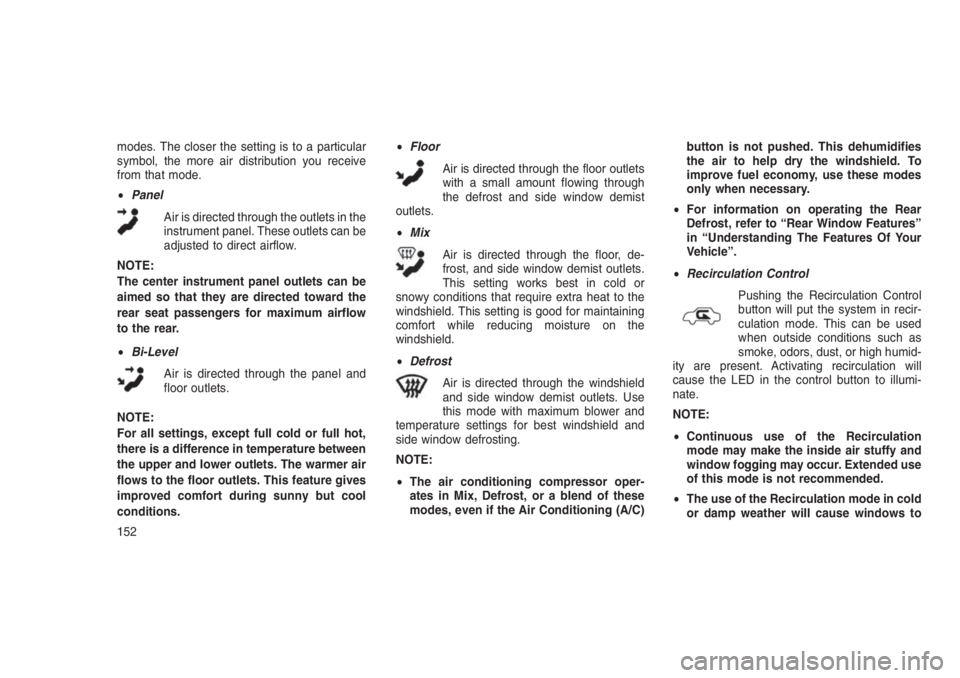
•Panel
Air is directed through the outlets in the
instrument panel. These outlets can be
adjusted to direct airflow.
NOTE:
The center instrument panel outlets can be
aimed so that they are directed toward the
rear seat passengers for maximum airflow
to the rear.
•Bi-Level
Air is directed through the panel and
floor outlets.
NOTE:
For all settings, except full cold or full hot,
there is a difference in temperature between
the upper and lower outlets. The warmer air
flows to the floor outlets. This feature gives
improved comfort during sunny but cool
conditions.•Floor
Air is directed through the floor outlets
with a small amount flowing through
the defrost and side window demist
outlets.
•Mix
Air is directed through the floor, de-
frost, and side window demist outlets.
This setting works best in cold or
snowy conditions that require extra heat to the
windshield. This setting is good for maintaining
comfort while reducing moisture on the
windshield.
•Defrost
Air is directed through the windshield
and side window demist outlets. Use
this mode with maximum blower and
temperature settings for best windshield and
side window defrosting.
NOTE:
•The air conditioning compressor oper-
ates in Mix, Defrost, or a blend of these
modes, even if the Air Conditioning (A/C)button is not pushed. This dehumidifies
the air to help dry the windshield. To
improve fuel economy, use these modes
only when necessary.
•For information on operating the Rear
Defrost, refer to “Rear Window Features”
in “Understanding The Features Of Your
Vehicle”.
•Recirculation Control
Pushing the Recirculation Control
button will put the system in recir-
culation mode. This can be used
when outside conditions such as
smoke, odors, dust, or high humid-
ity are present. Activating recirculation will
cause the LED in the control button to illumi-
nate.
NOTE:
•Continuous use of the Recirculation
mode may make the inside air stuffy and
window fogging may occur. Extended use
of this mode is not recommended.
•The use of the Recirculation mode in cold
or damp weather will cause windows to
152
Page 157 of 332
fog on the inside, because of moisture
buildup inside the vehicle. Select the out-
side air position for maximum defogging.
•The A/C will engage automatically to pre-
vent fogging when the recirculation but-
ton is pushed and the mode control is set
to panel or panel / floor.
•The A/C can be deselected manually with-
out disturbing the mode control selection.
•When the ignition switch is turned to the
LOCK position, the recirculation feature
will be cancelled.
Automatic Temperature Control
(ATC) — If Equipped
The Automatic Temperature Control system au-
tomatically maintains the climate in the cabin of
the vehicle at the comfort levels desired by the
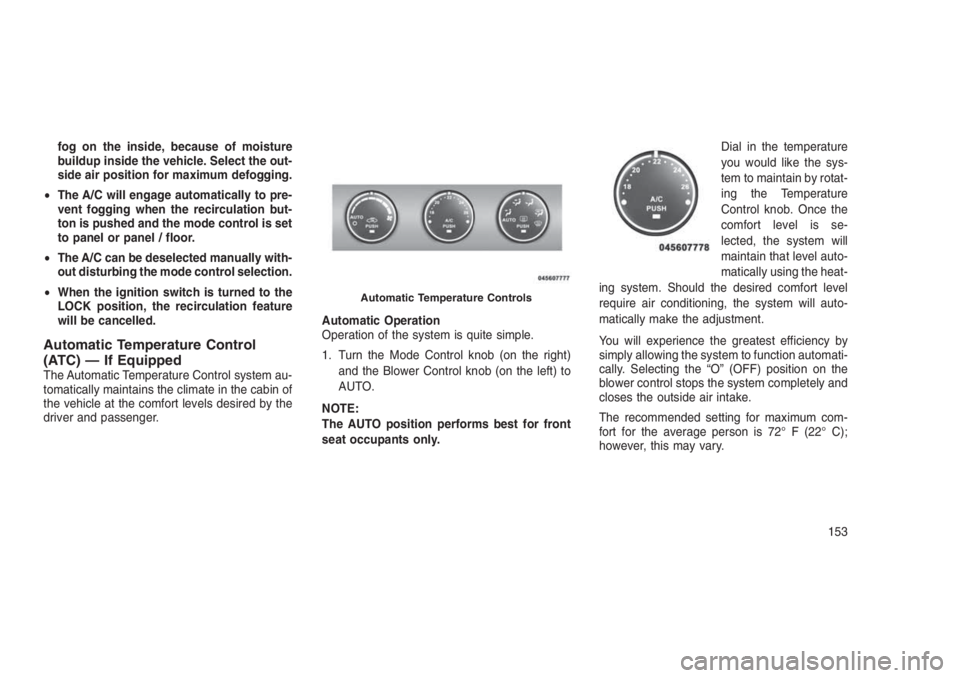
driver and passenger.Automatic Operation
Operation of the system is quite simple.
1. Turn the Mode Control knob (on the right)
and the Blower Control knob (on the left) to
AUTO.
NOTE:
The AUTO position performs best for front
seat occupants only.Dial in the temperature
you would like the sys-
tem to maintain by rotat-
ing the Temperature
Control knob. Once the
comfort level is se-
lected, the system will
maintain that level auto-
matically using the heat-
ing system. Should the desired comfort level
require air conditioning, the system will auto-
matically make the adjustment.
You will experience the greatest efficiency by
simply allowing the system to function automati-
cally. Selecting the “O” (OFF) position on the
blower control stops the system completely and
closes the outside air intake.
The recommended setting for maximum com-
fort for the average person is 72° F (22° C);
however, this may vary.
Automatic Temperature Controls
153
Page 158 of 332
NOTE:
•The temperature setting can be adjusted
at anytime without affecting automatic
operation.
•Pushing the Air Conditioning Control but-
ton while in AUTO mode will cause the
LED in the control button to flash three
times and then turn off. This indicatesthat the system is in AUTO mode and
requesting the air conditioning is not
necessary.
•If your air conditioning performance
seems lower than expected, check the
front of the A/C condenser located in front
of the radiator for an accumulation of dirt
or insects. Clean with a gentle water
spray from behind the radiator andthrough the condenser. Fabric front fas-
cia protectors may reduce airflow to the
condenser, reducing air conditioning
performance.
•Please read the Automatic Temperature
Control Operation Chart that follows for
details.
154
Page 161 of 332
•Air Conditioner Control
Push this button to turn
on the air conditioning
during manual opera-
tion only. When the air
conditioning is turned
on, cool dehumidified air
will flow through the out-
lets selected with the
Mode control dial. Push
this button a second time to turn OFF the air
conditioning. An LED in the button illuminates
when manual compressor operation is selected.
•Recirculation Control
The system will automatically con-
trol recirculation. However, pushing
the Recirculation Control button
will put the system in recirculation
mode. This can be used when out-
side conditions such as smoke, odors, dust, or
high humidity are present. Activating recircula-
tion will cause the LED in the control button to
illuminate.NOTE:
•When the ignition switch is turned to the
LOCK position, the recirculation feature
will be cancelled.
•In cold weather, use of the Recirculation
mode may lead to excessive window fog-
ging. The Recirculation mode is not al-
lowed in defrost mode in order to improve
window clearing. Recirculation will be
disabled automatically if these modes are
selected.
•Extended use of recirculation may cause
the windows to fog. If the interior of the
windows begins to fog, push the Recircu-
lation button to return to outside air.
Some temp/humidity conditions will
cause captured interior air to condense
on windows and hamper visibility. For
this reason, the system will not allow
Recirculation to be selected while in de-
frost mode. Attempting to use the recircu-
lation while in these modes will cause the
LED in the control button to blink and
then turn off.•Most of the time, when in Automatic Op-
eration, you can temporarily put the sys-
tem into Recirculation Mode by pushing
the Recirculation button. However, under
certain conditions, while in Automatic
Mode, the system is blowing air out the
defrost vents. When these conditions are
present, and the Recirculation button is
pushed, the indicator will flash and then
turn off. This tells you that you are unable
to go into Recirculation Mode at this time.
If you would like the system to go into
Recirculation Mode, you must first move
the Mode knob to Panel, Bi-Level and then
push the Recirculation button. This fea-
ture reduces the possibility of window
fogging.
Operating Tips
NOTE:
Refer to the chart at the end of this section
for suggested control settings for various
weather conditions.
157
Page 162 of 332
Summer Operation
The engine cooling system must be protected
with a high-quality antifreeze coolant to provide
proper corrosion protection and to protect
against engine overheating. A solution of 50%
OAT (Organic Additive Technology) coolant that
meets the requirements of FCA Material Stan-
dard MS.90032 and 50% water is recom-
mended. Refer to “Maintenance Procedures” in
“Maintaining Your Vehicle” for proper coolant
selection.
Winter Operation
Use of the air Recirculation Mode during winter
months is not recommended because it may
cause window fogging.
Vacation Storage
Anytime you store your vehicle, or keep it out of
service (i.e., vacation) for two weeks or more,
run the air conditioning system at idle for about
five minutes in the fresh air and high blower
settings. This will ensure adequate system lu-
brication to minimize the possibility of compres-
sor damage when the system is started again.Window Fogging
Interior fogging on the windshield can be quickly
removed by turning the mode selector to De-
frost. The Defrost/Floor mode can be used to
maintain a clear windshield and provide suffi-
cient heating. If side window fogging becomes a
problem, increase blower speed. Vehicle win-
dows tend to fog on the inside in mild but rainy
or humid weather.
NOTE:
Recirculate without A/C should not be used
for long periods as fogging may occur.
Side Window Demisters
A side window demister outlet is located at each
end of the instrument panel. These non-
adjustable outlets direct air toward the side
windows when the system is in the FLOOR,
MIX, or DEFROST mode. The air is directed at
the area of the windows through which you view
the outside mirrors.Outside Air Intake
Make sure the air intake, located directly in front
of the windshield, is free of obstructions such as
leaves. Leaves collected in the air intake may
reduce airflow, and if they enter the plenum,
they could plug the water drains. In winter
months, make sure the air intake is clear of ice,
slush, and snow.
A/C Air Filter — If Equipped
The A/C Filter prevents most dust and pollen
from entering the cabin. The filter acts on air
coming from outside the vehicle and recircu-
lated air within the passenger compartment.
Refer to “Maintenance Procedures” in “Main-
taining Your Vehicle” for A/C Air Filter service
information or see your authorized dealer for
service. Refer to “Maintenance Schedules” in
“Maintaining Your Vehicle” for filter service inter-
vals.
158
Page 226 of 332
Towing TipsBefore setting out on a trip, practice turning,
stopping and backing the trailer in an area away
from heavy traffic.
Manual Transmission — If Equipped
If using a manual transmission vehicle for trailer
towing, all starts must be in first gear to avoid
excessive clutch slippage.
Automatic Transmission — If Equipped
The DRIVE range can be selected when towing.
However, if frequent shifting or changes in
engine speed occur while in DRIVE, use the
AutoStick shift control to manually select a
lower gear ratio.
NOTE:
Using a lower gear ratio while operating the
vehicle under heavy loading conditions, will
improve performance and extend transmis-
sion life by reducing excessive shifting and
heat buildup. This action will also provide
better engine braking.
If you REGULARLY tow a trailer for more than
45 minutes of continuous operation, then
change the transmission fluid and filter asspecified for"police, taxi, fleet, or frequent
trailer towing."Refer to the “Maintenance
Schedule” for the proper maintenance intervals.
AutoStick
•When using the AutoStick shift control, select
the highest gear that allows for adequate
performance and avoids frequent downshifts.
For example, choose"4"if the desired speed
can be maintained. Choose"3"or"2"if
needed to maintain the desired speed.
•To prevent excess heat generation, avoid
continuous driving at high RPM. Reduce
vehicle speed as necessary to avoid ex-
tended driving at high RPM. Return to a
higher gear or vehicle speed when grade and
road conditions allow.
Electronic Speed Control — If Equipped
•Do not use in hilly terrain or with heavy loads.
•When using the speed control, if you experi-
ence speed drops greater than 10 mph
(16 km/h), disengage until you can get back
to cruising speed.•Use speed control in flat terrain and with light
loads to maximize fuel efficiency.
Cooling System
To reduce potential for engine and transmission
overheating, take the following actions:
City Driving
When stopped for short periods of time, shift the
transmission into NEUTRAL and increase en-
gine idle speed.
Highway Driving
Reduce speed.
Air Conditioning
Turn off temporarily.
222