change time JEEP PATRIOT 2018 Owner handbook (in English)
[x] Cancel search | Manufacturer: JEEP, Model Year: 2018, Model line: PATRIOT, Model: JEEP PATRIOT 2018Pages: 332, PDF Size: 1.99 MB
Page 9 of 332
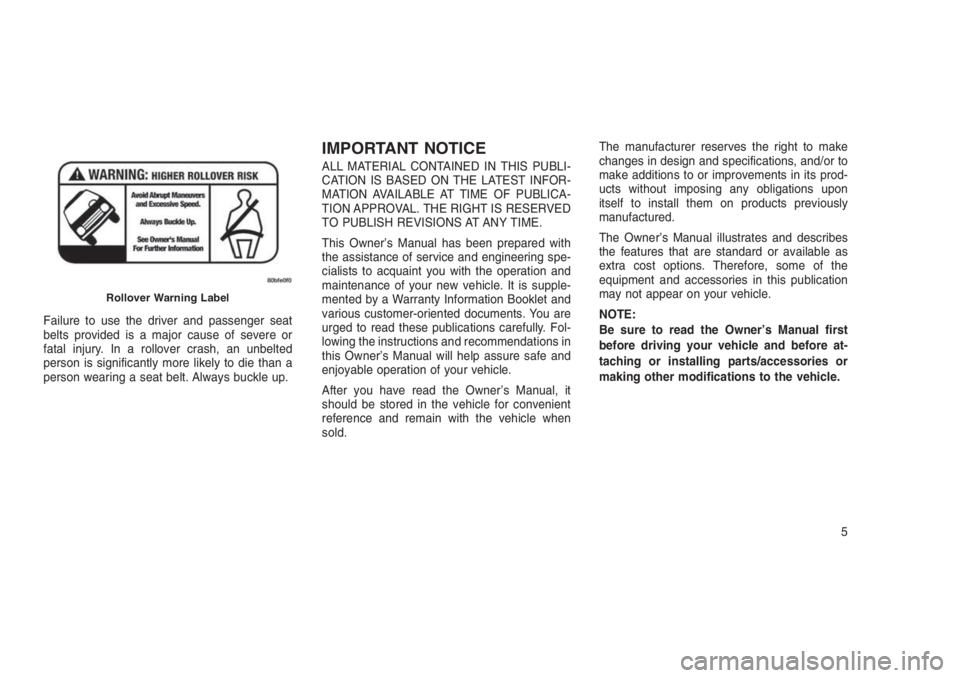
Failure to use the driver and passenger seat
belts provided is a major cause of severe or
fatal injury. In a rollover crash, an unbelted
person is significantly more likely to die than a
person wearing a seat belt. Always buckle up.
IMPORTANT NOTICE
ALL MATERIAL CONTAINED IN THIS PUBLI-
CATION IS BASED ON THE LATEST INFOR-
MATION AVAILABLE AT TIME OF PUBLICA-
TION APPROVAL. THE RIGHT IS RESERVED
TO PUBLISH REVISIONS AT ANY TIME.
This Owner’s Manual has been prepared with
the assistance of service and engineering spe-
cialists to acquaint you with the operation and
maintenance of your new vehicle. It is supple-
mented by a Warranty Information Booklet and
various customer-oriented documents. You are
urged to read these publications carefully. Fol-
lowing the instructions and recommendations in
this Owner’s Manual will help assure safe and
enjoyable operation of your vehicle.
After you have read the Owner’s Manual, it
should be stored in the vehicle for convenient
reference and remain with the vehicle when
sold.The manufacturer reserves the right to make
changes in design and specifications, and/or to
make additions to or improvements in its prod-
ucts without imposing any obligations upon
itself to install them on products previously
manufactured.
The Owner’s Manual illustrates and describes
the features that are standard or available as
extra cost options. Therefore, some of the
equipment and accessories in this publication
may not appear on your vehicle.
NOTE:
Be sure to read the Owner’s Manual first
before driving your vehicle and before at-
taching or installing parts/accessories or
making other modifications to the vehicle.
Rollover Warning Label
5
Page 21 of 332
NOTE:
The line of transmission must not be
blocked with metal objects.
To Unlock The Doors And LiftgatePush and release the UNLOCKbutton on
the RKE Key Fob once to unlock the driver’s
door or twice within five seconds to unlock all
doors and liftgate. The turn signal lights will
flash to acknowledge the unlock signal. The
illuminated entry system will also turn on.
RKE Key Fob Unlock, Driver
Door/All First Press
This feature lets you program the system to
unlock either the driver’s door or all doors on the
first push of the UNLOCK
button on the RKE
Key Fob. To change the current setting, proceed
as follows:
•For vehicles equipped with the Electronic
Vehicle Information Center (EVIC), refer to
“Electronic Vehicle Information Center
(EVIC)/Personal Settings (Customer-
Programmable Features)” in “Understanding
Your Instrument Panel” for further informa-
tion.
•For vehicles not equipped with the EVIC,
perform the following steps:
1. Push and hold the LOCK
button on a
programmed RKE Key Fob for at least 4
seconds but no longer than 10 seconds.
Then, push and hold the UNLOCK
button
while still holding the LOCKbutton.
2. Release both buttons at the same time.3. Test the feature while outside of the vehicle
by pushing the LOCK/UNLOCK buttons on
the RKE Key Fob with the ignition in the
LOCK position and the RKE Key removed.
4. Repeat these steps if you want to return this
feature to its previous setting.
NOTE:
Pushing the LOCK button on the RKE Key
Fob while you are inside the vehicle will
activate the Vehicle Security Alarm. Opening
a door with the Vehicle Security Alarm acti-
vated will cause the alarm to sound. Push
the UNLOCK button to deactivate the Ve-
hicle Security Alarm.
Illuminated Approach — If EquippedThis feature activates the headlights for up to 90
seconds when the doors are unlocked with the
RKE Key Fob. The time for this feature is
programmable on vehicles equipped with the
EVIC. Refer to “Electronic Vehicle Information
Center (EVIC)/Personal Settings (Customer-
Programmable Features)” in “Understanding
Your Instrument Panel” for further information.
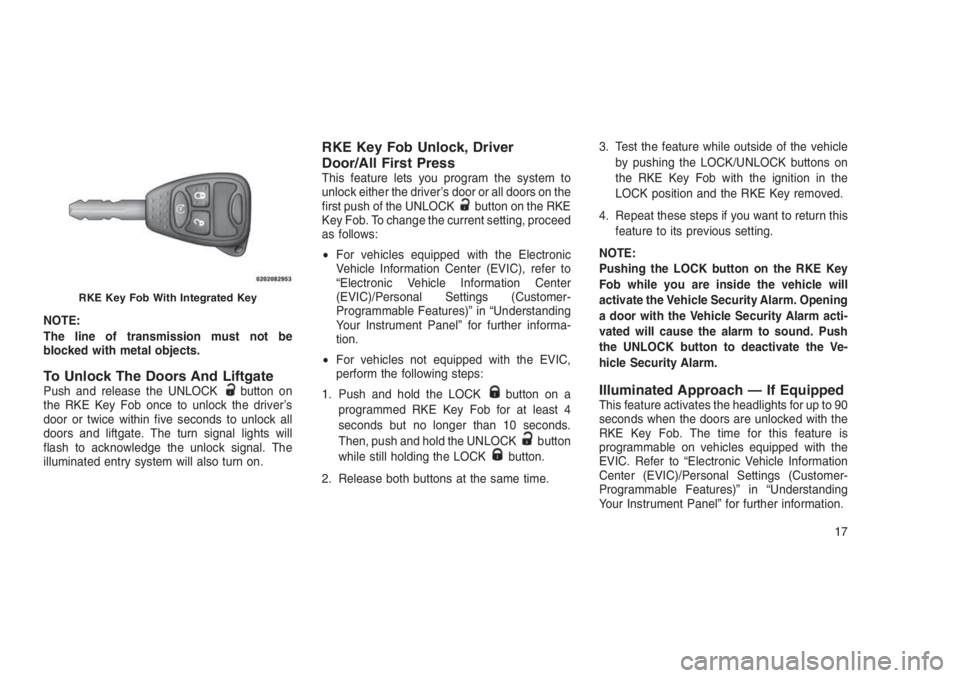
RKE Key Fob With Integrated Key
17
Page 22 of 332
To Lock The Doors And LiftgatePush and release the LOCK button on the RKE
Key Fob to lock all doors and liftgate. The turn
signal lights will flash to acknowledge the sig-
nal.
Flash Lights With Remote Key
Lock/Unlock
This feature will cause the turn signal lights to
flash when the doors are lockedor unlockedwith the RKE Key Fob. This feature can be
turned on or turned off. To change the current
setting, proceed as follows:
•For vehicles equipped with the EVIC, refer to
“Electronic Vehicle Information Center
(EVIC)/Personal Settings (Customer-
Programmable Features)” in “Understanding
Your Instrument Panel” for further informa-
tion.
•For vehicles not equipped with the EVIC,
perform the following steps:
1. Push and hold the UNLOCK
button on a
programmed RKE Key Fob for at least 4
seconds but no longer than 10 seconds.Then, push and hold the LOCK
button
while still holding the UNLOCKbutton.
2. Release both
buttons at the same
time.
3. Test the feature while outside of the vehicle
by pushing the LOCK
/UNLOCK
buttons on the RKE Key Fob with the ignition
in the LOCK position and the RKE Key
removed.
4. Repeat these steps if you want to return this
feature to its previous setting.
NOTE:
Pushing the LOCK
button on the RKE
Key Fob while you are in the vehicle will
activate the Vehicle Security Alarm. Opening
a door with the Vehicle Security Alarm acti-
vated will cause the alarm to sound. Push
the UNLOCK
button to deactivate the
Vehicle Security Alarm.
RKE Key Fob Battery ReplacementThe recommended replacement battery is
CR2032.NOTE:
Perchlorate Material — special handling
may apply.
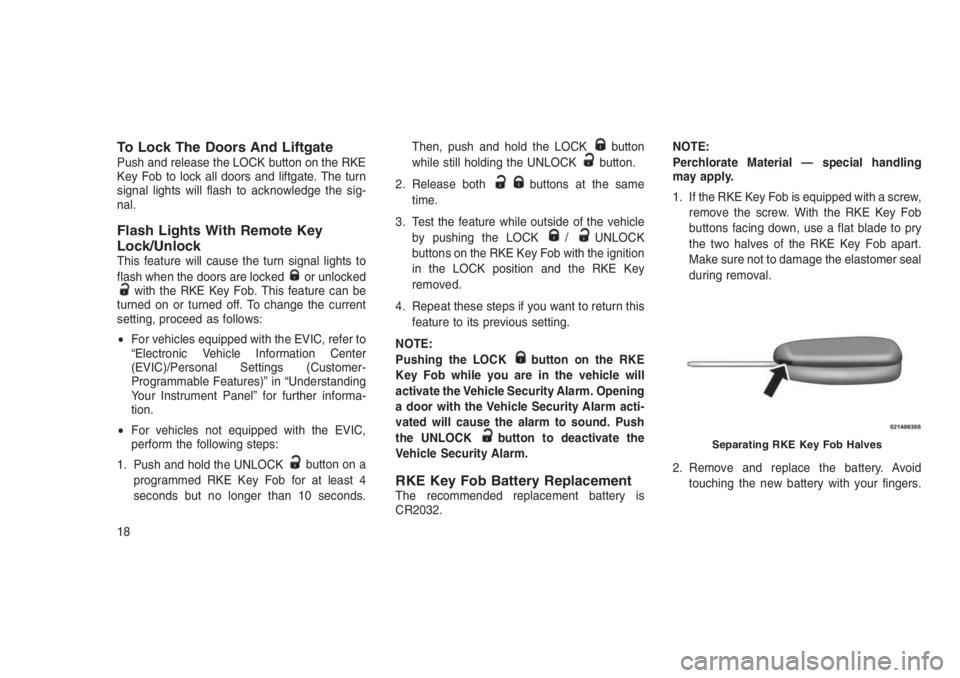
1. If the RKE Key Fob is equipped with a screw,
remove the screw. With the RKE Key Fob
buttons facing down, use a flat blade to pry
the two halves of the RKE Key Fob apart.
Make sure not to damage the elastomer seal
during removal.
2. Remove and replace the battery. Avoid
touching the new battery with your fingers.
Separating RKE Key Fob Halves
18
Page 61 of 332
room for the child seat. You may also move
the front seat forward to allow more room for
the child seat.
2. Pull enough of the seat belt webbing from
the retractor to pass it through the belt path
of the child restraint. Do not twist the belt
webbing in the belt path.
3. Slide the latch plate into the buckle until you
hear a “click.”
4. Pull on the webbing to make the lap portion
tight against the child seat.
5. To lock the seat belt, pull down on the
shoulder part of the belt until you have pulled
all the seat belt webbing out of the retractor.
Then, allow the webbing to retract back into
the retractor. As the webbing retracts, you
will hear a clicking sound. This means the
seat belt is now in the Automatic Locking
mode.6. Try to pull the webbing out of the retractor. If
it is locked, you should not be able to pull out
any webbing. If the retractor is not locked,
repeat step 5.
7.
Finally, pull up on any excess webbing to
tighten the lap portion around the child re-
straint while you push the child restraint rear-
ward and downward into the vehicle seat.
8. Test that the child restraint is installed tightly
by pulling back and forth on the child seat at
the belt path. It should not move more than
25 mm in any direction.
Any seat belt system will loosen with time, so
check the belt occasionally, and pull it tight if
necessary.
Transporting PetsAir Bags deploying in the front seat could harm
your pet. An unrestrained pet will be thrown
about and possibly injured, or injure a passen-
ger during panic braking or in a collision.
Pets should be restrained in the rear seat in pet
harnesses or pet carriers that are secured by
seat belts.
ENGINE BREAK-IN
RECOMMENDATIONS
A long break-in period is not required for the
engine and drivetrain (transmission and axle) in
your vehicle.
Drive moderately during the first 300 miles
(500 km). After the initial 60 miles (100 km),
speeds up to 50 or 55 mph (80 or 90 km/h) are
desirable.
While cruising, brief full-throttle acceleration
within the limits of local traffic laws contributes
to a good break-in. Wide-open throttle accelera-
tion in low gear can be detrimental and should
be avoided.
The engine oil installed in the engine at the
factory is a high-quality energy conserving type
lubricant. Oil changes should be consistent with
anticipated climate conditions under which ve-
hicle operations will occur. For the recom-
mended viscosity and quality grades, refer to
“Maintenance Procedures” in “Maintaining Your
Vehicle.”
57
Page 63 of 332
plete exhaust system and adjacent body areas
for broken, damaged, deteriorated, or misposi-
tioned parts. Open seams or loose connections
could permit exhaust fumes to seep into the
passenger compartment. In addition, inspect
the exhaust system each time the vehicle is
raised for lubrication or oil change. Replace as
required.
Safety Checks You Should Make
Inside The Vehicle
Seat Belts
Inspect the seat belt system periodically, check-
ing for cuts, frays, and loose parts. Damaged
parts must be replaced immediately. Do not
disassemble or modify the system.
Front seat belt assemblies must be replaced
after a collision. Rear seat belt assemblies must
be replaced after a collision if they have been
damaged (i.e., bent retractor, torn webbing,
etc.). If there is any question regarding seat belt
or retractor condition, replace the seat belt.
Air Bag Warning Light
The Air Bag warning light
will turn on for four
to eight seconds as a bulb check when theignition is first placed in the ON/RUN position. If
the light is either not on during starting, stays
on, or turns on while driving, have the system
inspected at an authorized dealer as soon as
possible. This light will illuminate with a single
chime when a fault with the Air Bag Warning
Light has been detected, it will stay on until the
fault is cleared. If the light comes on intermit-
tently or remains on while driving, have an
authorized dealer service the vehicle immedi-
ately. Refer to “Occupant Restraints” for further
information.
Defroster
Check operation by selecting the defrost mode
and place the blower control on high speed. You
should be able to feel the air directed against
the windshield. See your authorized dealer for
service if your defroster is inoperable.
Floor Mat Safety Information
Always use floor mats designed to fit the foot-
well of your vehicle. Use only floor mats that
leave the pedal area unobstructed and that are
firmly secured so that they cannot slip out of
position and interfere with the pedals or impair
safe operation of your vehicle in other ways.
WARNING!
Pedals that cannot move freely can cause
loss of vehicle control and increase the risk
of serious personal injury.
•Always make sure that floor mats are
properly attached to the floor mat fasten-
ers.
•Never place or install floor mats or other
floor coverings in the vehicle that cannot
be properly secured to prevent them from
moving and interfering with the pedals or
the ability to control the vehicle.
•Never put floor mats or other floor cover-
ings on top of already installed floor mats.
Additional floor mats and other coverings
will reduce the size of the pedal area and
interfere with the pedals.
•Check mounting of mats on a regular
basis. Always properly reinstall and secure
floor mats that have been removed for
cleaning.
(Continued)
59
Page 66 of 332
•Commands..................................86
•Voice Training.................................88
•SEATS ......................................88•Power Seats — If Equipped........................88
•Heated Seats — If Equipped........................89
•Manual Front Seat Adjustment.......................90
•Manual Seat Height Adjustment — If Equipped.............90
•Manual Lumbar — If Equipped......................91
•Driver’s Seatback Recline.........................91
•Fold-Flat Front Passenger Seat — If Equipped.............92
•Head Restraints...............................92
•Folding Rear Seat..............................94
•Reclining Rear Seat — If Equipped....................95
•TO OPEN AND CLOSE THE HOOD . ....................95
•LIGHTS......................................96
•Multifunction Lever.............................96
•Headlights And Parking Lights......................96
•Daytime Running Lights — If Equipped.................97
•Lights-On Reminder.............................97
•Front Fog Lights...............................97
•Rear Fog Lights................................97
•Turn Signals.................................97
•Lane Change Assist.............................98
•High/Low Beam Switch...........................98
•Flash-To-Pass................................98
•Instrument Panel Dimmer..........................98
•Headlight Leveling System — If Equipped................98
62
Page 74 of 332
•A maximum of 2,000 entries per phone will
be downloaded and updated every time a
phone is connected to the Uconnect Phone.
•Depending on the maximum number of en-
tries downloaded, there may be a short delay
before the latest downloaded names can be
used. Until then, if available, the previously
downloaded phonebook is available for use.
•Only the phonebook of the currently con-
nected mobile phone is accessible.
•Either the mobile phone’s phonebook or the
mobile phone’s SIM card phonebook is
downloaded.
•This downloaded phonebook cannot be ed-
ited or deleted on the Uconnect Phone.
These can only be edited on the mobile
phone. The changes are transferred and
updated to Uconnect Phone on the next
phone connection.
Add Names To Your Uconnect Phonebook
NOTE:
Adding names to the Uconnect Phonebook
is recommended when the vehicle is not in
motion.To add names to the Uconnect phonebook
using Voice Commands:
1. Push the Phone
button to begin.
2. After the “Ready” prompt and the following
beep, say “Phonebook New Entry.”
3. When prompted, say the name of the new
entry. Use of long names helps the Voice
Command and it is recommended. For ex-
ample, say “Robert Smith” or “Robert” in-
stead of “Bob.”
4. When prompted, enter the number designa-
tion (e.g., “Home,” “Work,” “Mobile,” or
“Other”). This will allow you to store multiple
numbers for each phonebook entry, if de-
sired.
5. When prompted, recite the phone number
for the phonebook entry that you are adding.
After you are finished adding an entry into the
phonebook, you will be given the opportunity to
add more phone numbers to the current entry or
to return to the main menu.The Uconnect Phone will allow you to enter up
to 32 names in the phonebook with each name
having up to four associated phone numbers
and designations. Each language has a sepa-
rate 32 name phonebook accessible only in that
language. In addition, if equipped and sup-
ported by your phone, Uconnect Phone auto-
matically downloads your mobile phone’s
phonebook.
Edit Uconnect Phonebook Entries
NOTE:
Editing phonebook entries is recommended
when the vehicle is not in motion. Automatic
downloaded phonebook entries cannot be
deleted or edited.
•Push the Phone
button to begin.
•After the “Ready” prompt and the following
beep, say “Phonebook Edit.”
•You will then be asked for the name of the
phonebook entry that you wish to edit.
•Next, choose the number designation (home,
work, mobile, or other) that you wish to edit.
70
Page 77 of 332
and hold status of the two calls have switched.
Only one call can be placed on hold at a time.
Conference Call
When two calls are in progress (one active and
one on hold):
1. Push and hold the Phone
button until you
hear a double beep, indicating that the two
calls have been joined into one conference
call.
Three-Way Calling
To initiate three-way calling, push the Voice
Command
button while a call is in progress,
and make a second phone call, as described
under “Making a Second Call While Current Call
is in Progress.” After the second call has estab-
lished, push and hold the Phone
button until
you hear a double beep, indicating that the two
calls have been joined into one conference call.
Call Termination
To end a call in progress:
1. Momentarily push the Phone
button.
•Only the active call(s) will be terminated
and if there is a call on hold, it will become
the new active call. If the active call isterminated by the phone far end, a call on
hold may not become active automatically.
This is cell phone-dependent.
2. To bring the call back from hold, push and
hold the Phone
button until you hear a
single beep.
Redial
To redial the last number called from your
mobile phone using Voice Command:
1. Push the Phone
button to begin.
2. After the “Ready” prompt and the following
beep, say “Redial.”
•The Uconnect Phone will call the last num-
ber that was dialed from your mobile
phone.
NOTE:
This may not be the last number dialed from
the Uconnect Phone.
Call Continuation
Call continuation is the progression of a phone
call on the Uconnect Phone after the vehicle
ignition has been switched to OFF. Call continu-ation functionality available on the vehicle can
be any one of three types:
1. After the ignition is switched to OFF, a call
can continue on the Uconnect Phone either
until the call ends, or until the vehicle battery
condition dictates cessation of the call on the
Uconnect Phone and transfer of the call to
the mobile phone.
2. After the ignition is cycled to OFF, a call can
continue on the Uconnect Phone for a cer-
tain duration, after which the call is automati-
cally transferred from the Uconnect Phone to
the mobile phone.
3. An active call is automatically transferred to
the mobile phone after the ignition is cycled
to OFF.
Uconnect Phone Features
Language Selection
To change the language that the Uconnect
Phone is using:
•Push the Phone
button to begin.
73
Page 89 of 332
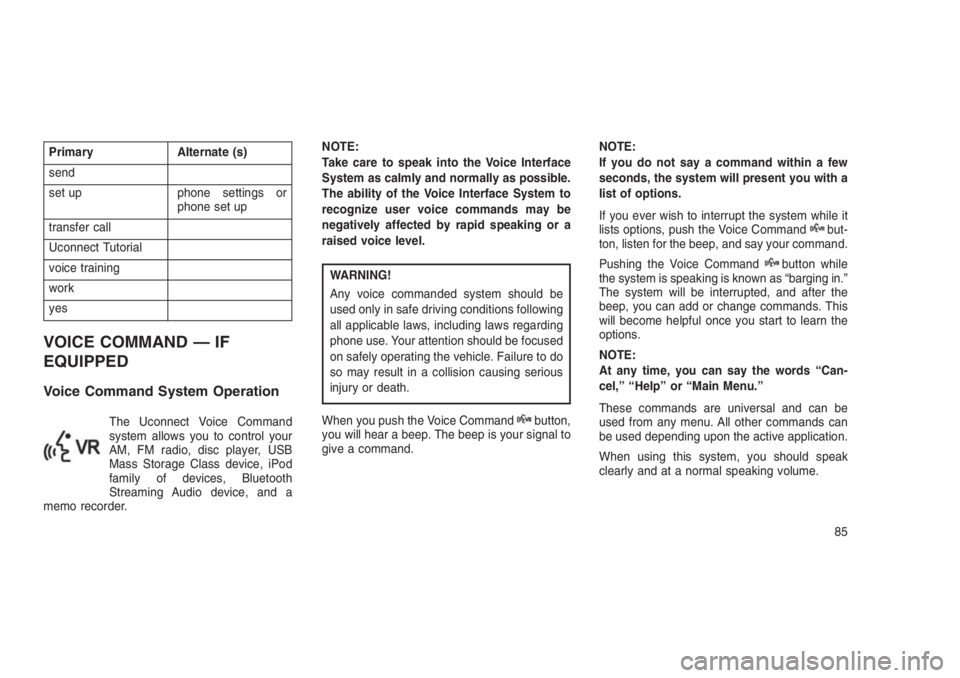
Primary Alternate (s)
send
set up phone settings or
phone set up
transfer call
Uconnect Tutorial
voice training
work
yes
VOICE COMMAND — IF
EQUIPPED
Voice Command System Operation
The Uconnect Voice Command
system allows you to control your
AM, FM radio, disc player, USB
Mass Storage Class device, iPod
family of devices, Bluetooth
Streaming Audio device, and a
memo recorder.NOTE:
Take care to speak into the Voice Interface
System as calmly and normally as possible.
The ability of the Voice Interface System to
recognize user voice commands may be
negatively affected by rapid speaking or a
raised voice level.
WARNING!
Any voice commanded system should be
used only in safe driving conditions following
all applicable laws, including laws regarding
phone use. Your attention should be focused
on safely operating the vehicle. Failure to do
so may result in a collision causing serious
injury or death.
When you push the Voice Command
button,
you will hear a beep. The beep is your signal to
give a command.NOTE:
If you do not say a command within a few
seconds, the system will present you with a
list of options.
If you ever wish to interrupt the system while it
lists options, push the Voice Command
but-
ton, listen for the beep, and say your command.
Pushing the Voice Command
button while
the system is speaking is known as “barging in.”
The system will be interrupted, and after the
beep, you can add or change commands. This
will become helpful once you start to learn the
options.
NOTE:
At any time, you can say the words “Can-
cel,” “Help” or “Main Menu.”
These commands are universal and can be
used from any menu. All other commands can
be used depending upon the active application.
When using this system, you should speak
clearly and at a normal speaking volume.
85
Page 90 of 332
The system will best recognize your speech if
the windows are closed, and the heater/air
conditioning blower control is set to low.
At any point, if the system does not recognize
one of your commands, you will be prompted to
repeat it.
To hear the first available Menu, push the Voice
Command
button and say “Help” or “Main
Menu.”
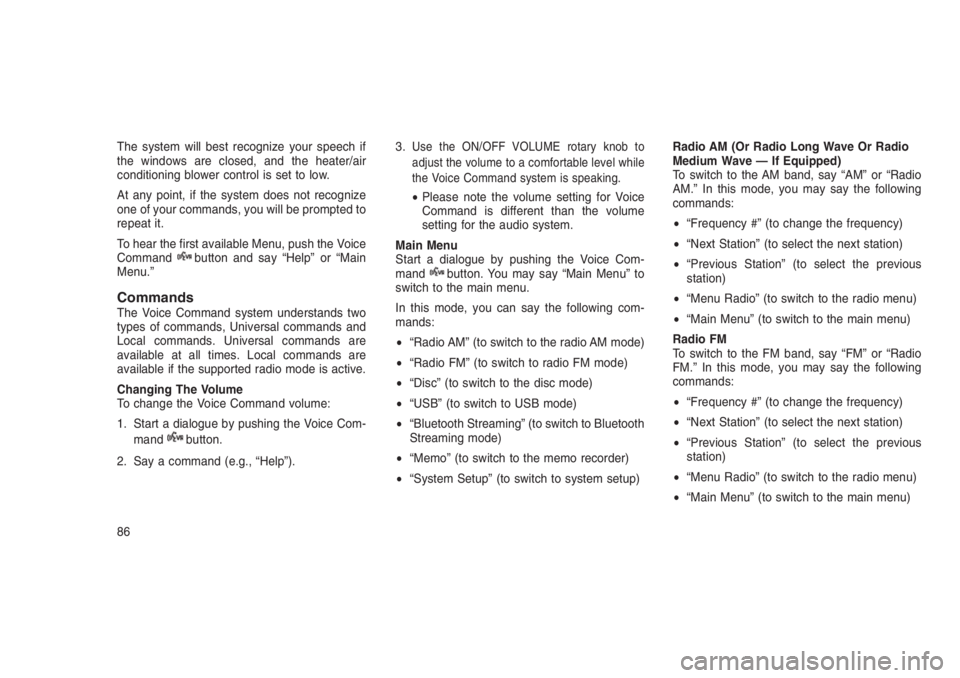
CommandsThe Voice Command system understands two
types of commands, Universal commands and
Local commands. Universal commands are
available at all times. Local commands are
available if the supported radio mode is active.
Changing The Volume
To change the Voice Command volume:
1. Start a dialogue by pushing the Voice Com-
mand
button.
2. Say a command (e.g., “Help”).3.
Use the ON/OFF VOLUME rotary knob to
adjust the volume to a comfortable level while
the Voice Command system is speaking.
•Please note the volume setting for Voice
Command is different than the volume
setting for the audio system.
Main Menu
Start a dialogue by pushing the Voice Com-
mand
button. You may say “Main Menu” to
switch to the main menu.
In this mode, you can say the following com-
mands:
•“Radio AM” (to switch to the radio AM mode)
•“Radio FM” (to switch to radio FM mode)
•“Disc” (to switch to the disc mode)
•“USB” (to switch to USB mode)
•“Bluetooth Streaming” (to switch to Bluetooth
Streaming mode)
•“Memo” (to switch to the memo recorder)
•“System Setup” (to switch to system setup)Radio AM (Or Radio Long Wave Or Radio
Medium Wave — If Equipped)
To switch to the AM band, say “AM” or “Radio
AM.” In this mode, you may say the following
commands:
•“Frequency #” (to change the frequency)
•“Next Station” (to select the next station)
•“Previous Station” (to select the previous
station)
•“Menu Radio” (to switch to the radio menu)
•“Main Menu” (to switch to the main menu)
Radio FM
To switch to the FM band, say “FM” or “Radio
FM.” In this mode, you may say the following
commands:
•“Frequency #” (to change the frequency)
•“Next Station” (to select the next station)
•“Previous Station” (to select the previous
station)
•“Menu Radio” (to switch to the radio menu)
•“Main Menu” (to switch to the main menu)
86