warning lights JEEP PATRIOT 2021 Owner handbook (in English)
[x] Cancel search | Manufacturer: JEEP, Model Year: 2021, Model line: PATRIOT, Model: JEEP PATRIOT 2021Pages: 332, PDF Size: 1.99 MB
Page 146 of 332
WARNINGS PRESENT” is displayed will dis-
play each stored warning for each button push.
Push and release theMENUbutton to return to
the Main Menu.
Personal Settings (Customer-
Programmable Features)
This allows the driver to set and recall features
when the transmission is in PARK (automatic
transmission) or the vehicle is stopped (manual
transmission).
Push and release theDOWN
arrow button
until “Personal Settings” is displayed in the
EVIC then push theRIGHT
arrow button.
Use theRIGHT
arrow button to display one
of the following choices:
Language
When in this display, you may select different
languages for all display nomenclature, includ-
ing the trip functions. Pushing theDOWN
ar-
row button while in this display selects English,
Espanol, Deutsch, Italiano, Francais, or NL
depending on availability. As you continue, the
displayed information will be shown in the se-
lected language.Auto Lock Doors — If Equipped
When ON is selected, all doors lock automati-
cally when the speed of the vehicle reaches 15
MPH (24 km/h). Push and hold theRIGHT
arrow button when in this display until “ON”
or “OFF” appears to make your selection.
Auto Unlock On Exit
When ON is selected, all the vehicle’s doors will
unlock when the driver’s door is opened if the
vehicle is stopped (manual transmission) or the
vehicle is stopped and the transmission is in
PARK or NEUTRAL position (automatic trans-
mission). Push and hold theRIGHT
arrow
button when in this display until “ON” or “OFF”
appears to make your selection.
RKE Unlock
When Driver’s Door 1st is selected, only the
driver’s door will unlock on the first push of the
RKE Key Fob UNLOCK button and require a
second push to unlock the remaining locked
doors. When Remote Unlock All Doors is se-
lected, all of the doors will unlock at the first
push of the RKE Key Fob UNLOCK button.
Push and hold theRIGHT
arrow button
when in this display until “Driver’s Door 1st” or
“All Doors” appears to make your selection.Flash Lights with Lock
When ON is selected, the front and rear turn
signals will flash when the doors are locked or
unlocked using the RKE Key Fob. Push and
hold theRIGHT
arrow button when in this
display until “ON” or “OFF” appears to make
your selection.
Headlamp Off Delay
When this feature is selected, the driver can
choose to have the headlamps remain on for 0,
30, 60, or 90 seconds when exiting the vehicle.
Push and hold theRIGHT
arrow button
when in this display until 0, 30, 60, or 90
appears to make your selection.
Key Off Power Delay
When this feature is selected, the power win-
dow switches, radio, Uconnect phone, power
sunroof, and power outlets will remain active for
up to 10 minutes after the ignition switch has
been turned off. Opening either front vehicle
door will cancel this feature. Push and hold the
RIGHT
arrow button when in this display
until “Off,” “45 sec,” “5 min,” or “10 min.” ap-
pears to make your selection.
142
Page 183 of 332
NOTE:
Refer to “Electronic Brake Control System/
Electronic Stability Control (ESC)” in “Start-
ing And Operating” for further information.
ON-ROAD DRIVING TIPS
Utility vehicles have higher ground clearance
and a narrower track to make them capable of
performing in a wide variety of off-road applica-
tions. Specific design characteristics give them
a higher center of gravity than ordinary vehicles.
An advantage of the higher ground clearance is
a better view of the road, allowing you to
anticipate problems. They are not designed for
cornering at the same speeds as conventional
two-wheel drive vehicles any more than low-
slung sports cars are designed to perform sat-
isfactorily in off-road conditions. If at all pos-
sible, avoid sharp turns or abrupt maneuvers.
As with other vehicles of this type, failure to
operate this vehicle correctly may result in loss
of control or vehicle rollover.
OFF-ROAD DRIVING TIPS
You will encounter many types of terrain driving
off-road. You should be familiar with the terrain
and area before proceeding. There are many
types of surface conditions: hard packed dirt,
gravel, rocks, grass, sand, mud, snow and ice.
Every surface has a different effect on your
vehicle’s steering, handling and traction. Con-
trolling your vehicle is one of the keys to suc-
cessful off-road driving, so always keep a firm
grip on the steering wheel and maintain a good
driving posture. Avoid sudden accelerations,
turns or braking. In most cases there are no
road signs, posted speed limits or signal lights.
Therefore you will need to use your own good
judgment on what is safe and what is not. When
on a trail, you should always be looking ahead
for surface obstacles and changes in terrain.
The key is to plan your future driving route while
remembering what you are currently driving
over.CAUTION!
Never park your vehicle over dry grass or
other combustible materials. The heat from
your vehicle exhaust system could cause a
fire.
WARNING!
Always wear your seat belt and firmly tie
down cargo. Unsecured cargo can become
projectiles in an off-road situation.
When To Use Low (L Off-Road) With
The 4WD Lock Lever Engaged — If
Equipped
When driving off-road, shift into low (L Off-Road
[if equipped] ) and activate the 4WD LOCK. This
will provide additional traction and activates the
numerous off-road features to improve handling
and control on slippery or difficult terrain. Due to
the sustained lower gearing, low (L Off-Road [if
equipped] ) with 4WD LOCK engaged will allow
the engine to operate in a higher power range.
179
Page 216 of 332
WARNING!(Continued)
•Guard against carbon monoxide with
proper maintenance. Have the exhaust
system inspected every time the vehicle is
raised. Have any abnormal conditions re-
paired promptly. Until repaired, drive with
all side windows fully open.
•Keep the liftgate closed when driving your
vehicle to prevent carbon monoxide and
other poisonous exhaust gases from en-
tering the vehicle.
ADDING FUEL
Locking Fuel Filler Cap (Gas Cap)The locking gas cap is inside the fuel filler door,
on the left side of the vehicle. If the gas cap is
lost or damaged, be sure the replacement cap
is for use with this vehicle.
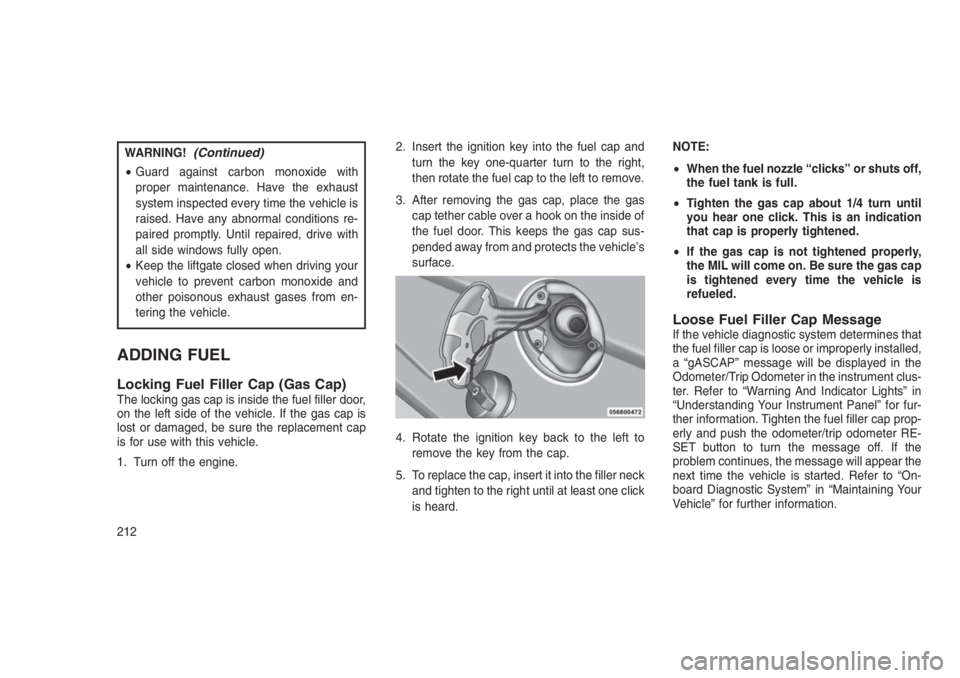
1. Turn off the engine.2. Insert the ignition key into the fuel cap and
turn the key one-quarter turn to the right,
then rotate the fuel cap to the left to remove.
3. After removing the gas cap, place the gas
cap tether cable over a hook on the inside of
the fuel door. This keeps the gas cap sus-
pended away from and protects the vehicle’s
surface.
4. Rotate the ignition key back to the left to
remove the key from the cap.
5. To replace the cap, insert it into the filler neck
and tighten to the right until at least one click
is heard.NOTE:
•When the fuel nozzle “clicks” or shuts off,
the fuel tank is full.
•Tighten the gas cap about 1/4 turn until
you hear one click. This is an indication
that cap is properly tightened.
•If the gas cap is not tightened properly,
the MIL will come on. Be sure the gas cap
is tightened every time the vehicle is
refueled.
Loose Fuel Filler Cap MessageIf the vehicle diagnostic system determines that
the fuel filler cap is loose or improperly installed,
a “gASCAP” message will be displayed in the
Odometer/Trip Odometer in the instrument clus-
ter. Refer to “Warning And Indicator Lights” in
“Understanding Your Instrument Panel” for fur-
ther information. Tighten the fuel filler cap prop-
erly and push the odometer/trip odometer RE-
SET button to turn the message off. If the
problem continues, the message will appear the
next time the vehicle is started. Refer to “On-
board Diagnostic System” in “Maintaining Your
Vehicle” for further information.
212
Page 222 of 332
Towing Requirements — Trailer Brakes
–Donotinterconnect the hydraulic brake sys-
tem or vacuum system of your vehicle with
that of the trailer. This could cause inad-
equate braking and possible personal injury.
– When towing a trailer equipped with a hy-
draulic surge actuated brake system, an
electronic brake controller is not required.
– Trailer brakes are recommended for trailers
over 1,000 lbs (453 kg) and required for
trailers in excess of 1,653 lbs (749 kg).
CAUTION!
If the trailer weighs more than 1,000 lbs
(453 kg) loaded, it should have its own
brakes and they should be of adequate
capacity. Failure to do this could lead to
accelerated brake lining wear, higher brake
pedal effort, and longer stopping distances.
WARNING!
•Do not connect trailer brakes to your vehi-
cle’s hydraulic brake lines. It can overload
your brake system and cause it to fail. You
might not have brakes when you need
them and could have an accident.
•Towing any trailer will increase your stop-
ping distance. When towing, you should
allow for additional space between your
vehicle and the vehicle in front of you.
Failure to do so could result in an accident.
Towing Requirements – Trailer Lights And
Wiring
Whenever you pull a trailer, regardless of the
trailer size, stop lights and turn signals on the
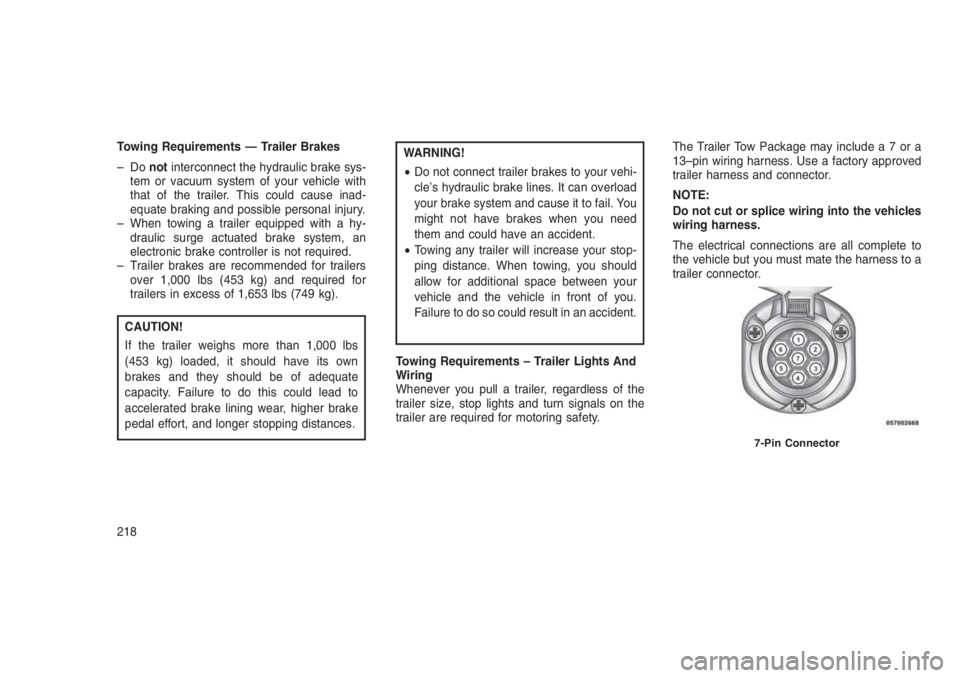
trailer are required for motoring safety.The Trailer Tow Package may includea7ora
13–pin wiring harness. Use a factory approved
trailer harness and connector.
NOTE:
Do not cut or splice wiring into the vehicles
wiring harness.
The electrical connections are all complete to
the vehicle but you must mate the harness to a
trailer connector.
7-Pin Connector
218
Page 277 of 332
Use MOPAR Total Clean to clean vinyl uphol-
stery.
MOPAR Total Clean is specifically recom-
mended for leather upholstery.
Your leather upholstery can be best preserved
by regular cleaning with a damp soft cloth.
Small particles of dirt can act as an abrasive
and damage the leather upholstery and should
be removed promptly with a damp cloth. Stub-
born soils can be removed easily with a soft
cloth and MOPAR Total Clean. Care should be
taken to avoid soaking your leather upholstery
with any liquid. Please do not use polishes, oils,
cleaning fluids, solvents, detergents, or
ammonia-based cleaners to clean your leather
upholstery. Application of a leather conditioner
is not required to maintain the original condition.
WARNING!
Do not use volatile solvents for cleaning
purposes. Many are potentially flammable,
and if used in closed areas they may cause
respiratory harm.
CAUTION!
Direct contact of air fresheners, insect repel-
lents, suntan lotions, or hand sanitizers to
the plastic, painted, or decorated surfaces of
the interior may cause permanent damage.
Wipe away immediately.
CAUTION!
Damage caused by these type of products
may not be covered by your New Vehicle
Limited Warranty.
CAUTION!
Do not use Alcohol and Alcohol-based and/or
Keton based cleaning products to clean
leather seats, as damage to the seat may
result.Cleaning Headlights
Your vehicle has plastic headlights that are
lighter and less susceptible to stone breakage
than glass headlights.
Plastic is not as scratch resistant as glass and
therefore different lens cleaning procedures
must be followed.
To minimize the possibility of scratching the
lenses and reducing light output, avoid wiping
with a dry cloth. To remove road dirt, wash with
a mild soap solution followed by rinsing.
Do not use abrasive cleaning components, sol-
vents, steel wool or other aggressive material to
clean the lenses.
Glass Surfaces
All glass surfaces should be cleaned on a
regular basis with MOPAR Glass Cleaner, or
any commercial household-type glass cleaner.
Never use an abrasive type cleaner. Use cau-
tion when cleaning the inside rear window
equipped with electric defrosters or windows
equipped with radio antennas. Do not use
scrapers or other sharp instrument that may
scratch the elements.
273
Page 324 of 332
Electronic Roll Mitigation........194
Traction Control System........191
Electronic Speed Control (Cruise Control) .102
Electronic Stability Control (ESC)......191
Electronic Throttle Control Warning Light. .128
Electronic Vehicle Information Center
(EVIC)...................139
Emergency, In Case Of
Jacking..................228
Jump Starting..............241
Towing..................247
Engine..................253, 254
Air Cleaner................258
Break-In Recommendations.......57
Checking Oil Level............256
Coolant (Antifreeze)...........263
Cooling..................263
Exhaust Gas Caution...........58
Fuel Requirements............210
Jump Starting..............241
Oil ..................256, 280
Oil Change Interval...........257
Oil Filler Cap.........253, 254, 257
Oil Filter.................258
Oil Selection...............257
Oil Synthetic...............258
Overheating...............227Enhanced Accident Response Feature . . .43
Event Data Recorder.............45
Exhaust Gas Caution.............58
Exhaust System.............58, 262
Exterior Lights.................60
Filters
Air Cleaner................258
Air Conditioning..........158, 260
Engine Oil................258
Engine Oil Disposal...........258
Flash-To-Pass.................98
Flashers
Hazard Warning.............227
Turn Signal...........60, 136, 280
Flooded Engine Starting...........166
Fluid Capacities...............280
Fluid Leaks...................60
Fluid Level Checks
Automatic Transaxle........268, 269
Cooling System.............263
Power Steering.............184
Fluid, Brake..................282
Fluids, Lubricants And Genuine Parts . . .281
Fog Lights................97, 279
Folding Rear Seat...............94
Four Wheel Drive............134, 178Systems.................178
Four Wheel Drive Operation.........178
Four-Way Hazard Flasher..........227
Freeing A Stuck Vehicle...........243
Fuel......................210
Adding..................212
Additives.................211
Capacity.................280
Filler Cap (Gas Cap)..........212
Gasoline.................210
Gauge..................133
Octane Rating..............210
Requirements..............210
Tank Capacity..............280
Fueling....................212
Fuses.....................274
Gas Cap (Fuel Filler Cap).......212, 256
Gasoline (Fuel).............210, 280
Gasoline, Clean Air..............211
Gauges
Fuel....................133
Gear Ranges..............170, 174
Gear Select Lever Override.........244
Glass Cleaning................273
Gross Axle Weight Rating..........213
320
Page 325 of 332
Gross Vehicle Weight Rating........213
Hands-Free Phone (Uconnect)........67
Hazard Warning Flasher...........227
Head Restraints................92
Headlights...................279
Cleaning.................273
High Beam/Low Beam Select Switch . .98
Leveling..................98
Passing..................98
Replacing................279
Switch...................96
Heated Mirrors.................66
Heated Seats.................89
Heater.....................150
High Beam/Low Beam Select (Dimmer)
Switch....................98
Hill Descent Control..........138, 195
Hill Start Assist................189
Hood Release.................95
Ignition.....................12
Key .....................12
Ignition Key Removal.............12
Immobilizer (Sentry Key)...........13
Information Center, Vehicle.........139
Inside Rearview Mirror............65Instrument Cluster........126, 127, 136
Instrument Panel And Controls.......119
Instrument Panel Cover...........274
Instrument Panel Lens Cleaning......274
Integrated Power Module (Fuses)......275
Interior Appearance Care..........272
Intermittent Wipers (Delay Wipers).....100
Introduction...................4
iPod/USB/MP3 Control
Bluetooth Streaming Audio.....87, 148
Jack Location.................229
Jack Operation.............228, 230
Jacking Instructions.............230
Jump Starting.................241
Key-In Reminder................13
Key, Programming...............14
Key, Replacement...............14
Key, Sentry (Immobilizer)
...........13
Keyless Entry System (Sedan)........16
Keys......................12
Lane Change And Turn Signals.......280
Lane Change Assist..............98
Lap/Shoulder Belts..............28
Latches.....................60Hood....................95
Lead Free Gasoline.............210
Leaks, Fluid..................60
Leveling, Headlight..............98
Life Of Tires..................201
Liftgate (Sedan)................25
Liftgate Window Wiper/Washer.......113
Light Bulbs................60, 279
Lights....................60, 96
AirBag ..............44, 59, 123
Back-Up.................280
Brake Assist Warning..........193
Brake Warning..............124
Bulb Replacement............279
Cargo...................111
Center Mounted Stop..........280
Daytime Running.............97
Dimmer Switch, Headlight......96, 98
Engine Temperature Warning......126
Exterior..................60
Fog ..................97, 279
Four-Wheel Drive Indicator.......134
Hazard Warning Flasher........227
Headlight Leveling............98
Headlight Switch.............96
Headlights.................96
High Beam................98
321
Page 326 of 332
High Beam/Low Beam Select......98
Instrument Cluster............96
License..................280
Lights On Reminder............97
Malfunction Indicator (Check Engine) .129
Map Reading...............99
Park...................136
Passing..................98
Seat Belt Reminder...........123
Security Alarm..........15, 16, 125
Service..................279
Side Repeater..............279
Tire Pressure Monitoring (TPMS) . . .130
Traction Control.............193
Turn Signal......60, 96, 97, 136, 280
Warning (Instrument Cluster
Description)............126, 136
Locks......................21
Automatic Door..............22
Child Protection..............23
Door....................21
Power Door................21
Steering Wheel..............13
Lubrication, Body...............261
Lug Nuts...................228
Luggage Rack (Roof Rack).........114Lumbar Support................91
Maintenance Free Battery..........258
Maintenance Procedures..........256
Maintenance Schedule.........284, 285
Malfunction Indicator Light
(Check Engine)..............129
Manual Transaxle..............165
Fluid Level Check............270
Lubricant Selection...........270
Manual Transmission..........166, 269
Fluid Level Check............270
Frequency Of Fluid Change......270
Lubricant Selection...........269
Map/Reading Lights..............99
Master Cylinder (Brakes)..........266
Methanol..................
.210
Methanol Fuel................210
Mirrors.....................65
Automatic Dimming............65
Electric Powered.............66
Exterior Folding..............66
Heated...................66
Outside..................65
Rearview..................65
Vanity...................66Modifications/Alterations, Vehicle.......8
Monitor, Tire Pressure System.......204
MOPAR Parts.................256
Multi-Function Control Lever.........96
Navigation System (Uconnect GPS). . . .149
New Vehicle Break-In Period.........57
Occupant Restraints..............26
Octane Rating, Gasoline (Fuel).......210
Oil Change Indicator.............140
Oil Change Indicator, Reset.........140
Oil Filter, Change...............258
Oil Filter, Selection..............258
Oil Pressure Light..............126
Oil, Engine...............256, 280
Capacity.................280
Change Interval.............257
Checking.................256
Disposal.................258
Filter...................258
Filter Disposal..............258
Identification Logo............257
Materials Added To...........258
Pressure Warning Light.........126
Recommendation.........257, 280
322
Page 327 of 332
Synthetic.................258
Viscosity.................257
Onboard Diagnostic System.........255
Operating Precautions............255
Operator Manual (Owner’s Manual)......6
Overheating, Engine.............227
Owner’s Manual (Operator Manual)......6
Paint Care..................271
Parking Brake.................185
Passing Light..................98
Personal Settings...............142
Pets.......................57
Phone, Cellular.................67
Phone, Hands-Free (Uconnect)........67
Power
Door Locks................21
Mirrors...................66
Outlet (Auxiliary Electrical Outlet) . . .108
Steering.................184
Sunroof..................106
Transfer Unit...............270
Windows..................24
Power Seats
Down....................89
Forward...................89
Rearward..................89Tilt......................89
Up......................89
Power Steering Fluid.............282
Power Transfer Unit.............270
Pregnant Women And Seat Belts......34
Preparation For Jacking...........229
Pretensioners
Seat Belts.................34
Programmable Electronic Features.....142
Radial Ply Tires................197
Radiator Cap (Coolant Pressure Cap) . . .264
Radio (Sound Systems)...........145
Radio Operation...............150
Rear Axle (Differential)............270
Rear Camera.................104
Rear Drive Assembly.............270
Rear Liftgate (Sedan).............25
Rear Seat, Folding...............94
Rear Window Defroster...........114
Rear Window Features............113
Rear Wiper/Washer.............113
Rearview Mirrors................65
Recorder, Event Data.............45
Recreational Towing.............223
Refrigerant..................260
Reminder, Seat Belt..............27Remote Control
Door Locks................16
Security Alarm...............14
Remote Keyless Entry (Sedan)........16
Remote Sound System (Radio) Controls . .149
Remote Starting System...........19
Repeater Lights, Side............279
Replacement Bulbs.............279
Replacement Keys...............14
Replacement Parts..............256
Replacement Tires..............201
Restraint, Head................92
Retractable Cargo Area Cover........111
Roll Over Warning................4
Roof Type Carrier...............114
Rotation, Tires................203
Safety Checks Inside Vehicle.........59
Safety Checks Outside Vehicle........60
Safety Tips...................58
Safety, Exhaust Gas..............58
Schedule, Maintenance........284, 285
Seat Belt
Adjustable Upper Shoulder Belt
Anchorage.................31
Automatic Locking Retractor (ALR) . . .34
Energy Management Feature.......34
323