audio JEEP PATRIOT 2021 Owner handbook (in English)
[x] Cancel search | Manufacturer: JEEP, Model Year: 2021, Model line: PATRIOT, Model: JEEP PATRIOT 2021Pages: 332, PDF Size: 1.99 MB
Page 71 of 332
UCONNECT PHONE — IF
EQUIPPED
Uconnect Phone is a voice-activated, hands-
free, in-vehicle communications system.
Uconnect Phone allows you to dial a phone
number with your mobile phone using simple
voice commands (e.g., “Call”…“Mike”…
“Work” or “Dial”…“151-1234-5555”). Your mo-
bile phone’s audio is transmitted through your
vehicle’s audio system; the system will auto-
matically mute your radio when using the
Uconnect Phone.
NOTE:
The Uconnect Phone requires a mobile
phone equipped with the Bluetooth “Hands-
Free Profile”, Version 0.96 or higher. See the
Uconnect website for supported phones.
For Uconnect Customer Support visit
UconnectPhone.com.
Uconnect Phone allows you to transfer calls
between the system and your mobile phone as
you enter or exit your vehicle and enables you
to mute the system’s microphone for private
conversation.The Uconnect Phone is driven through your
Bluetooth “Hands-Free Profile” mobile phone.
Uconnect features Bluetooth technology - the
global standard that enables different electronic
devices to connect to each other without wires
or a docking station, so Uconnect Phone works
no matter where you stow your mobile phone
(be it your purse, pocket, or briefcase), as long
as your phone is turned on and has been paired
to the vehicle’s Uconnect Phone. The Uconnect
Phone allows up to seven mobile phones to be
linked to the system. Only one linked (or paired)
mobile phone can be used with the system at a
time. The system is available in many lan-
guages.
WARNING!
Any voice commanded system should be
used only in safe driving conditions following
all applicable laws, including laws regarding
phone use. Your attention should be focused
on safely operating the vehicle. Failure to do
so may result in a collision causing serious
injury or death.Uconnect Phone Button
The radio or steering wheel con-
trols (if equipped) will contain the
two control buttons (Uconnect
Phone
button and Voice Com-
mandbutton) that will enable
you to access the system. When you push the
button you will hear the word Uconnect followed
by a BEEP. The beep is your signal to give a
command.
Voice Command Button
Actual button location may vary
with the radio. The individual but-
tons are described in the “Opera-
tion” section.
The Uconnect Phone can be used with any
Hands-Free Profile certified Bluetooth mobile
phone. See the Uconnect website for supported
phones. Refer to your mobile service provider
or the phone manufacturer for details.
The Uconnect Phone is fully integrated with the
vehicle’s audio system. The volume of the
Uconnect Phone can be adjusted either from
67
Page 76 of 332
2. After the “Ready” prompt and the following
beep, say “Phonebook List Names.”
•The Uconnect Phone will play the names
of all the phonebook entries, including the
downloaded phonebook entries, if avail-
able.
3. To call one of the names in the list, push the
Voice Command
button during the play-
ing of the desired name, and say “Call.”
NOTE:
The user can also exercise “Edit” or “De-
lete” operations at this point.
4. The Uconnect Phone will then prompt you as
to the number designation you wish to call.
•The selected number will be dialed.
Phone Call FeaturesThe following features can be accessed through
the Uconnect Phone if the feature(s) are avail-
able on your mobile service plan. For example,
if your mobile service plan provides three-way
calling, this feature can be accessed through
the Uconnect Phone. Check with your mobile
service provider for the features that you have.Answer Or Reject An Incoming Call — No
Call Currently In Progress
When you receive a call on your mobile phone,
the Uconnect Phone will interrupt the vehicle
audio system, if on, and will ask if you would like
to answer the call.
•Push the Phone
button to accept the call.
•To reject the call, push and hold the Phone
button until you hear a single beep, indi-
cating that the incoming call was rejected.
Answer Or Reject An Incoming Call — Call
Currently In Progress
If a call is currently in progress and you have
another incoming call, you will hear the same
network tones for call waiting that you normally
hear when using your mobile phone.
•
Push the Phonebutton to place the current
call on hold and answer the incoming call.
NOTE:
The Uconnect Phone compatible phones in
the market today do not support rejecting an
incoming call when another call is in prog-
ress. Therefore, the user can only answer an
incoming call or ignore it.Making A Second Call While Current Call Is
In Progress
To make a second call while you are currently
on a call, push the Voice Command
button
and say “Dial” or “Call” followed by the phone
number or phonebook entry you wish to call.
The first call will be on hold while the second call
is in progress. To go back to the first call, refer to
“Toggling Between Calls” in this section. To
combine two calls, refer to “Conference Call” in
this section.
Place/Retrieve A Call From Hold
To put a call on hold:
1. Push the Phone
button until you hear a
single beep.
•This indicates that the call is on hold.
•To bring the call back from hold, push and
hold the Phone
button until you hear a
single beep.
Toggling Between Calls
If two calls are in progress (one active and one
on hold), push the Phone
button until you
hear a single beep, indicating that the active
72
Page 80 of 332
Dialing Using The Mobile Phone Keypad
You can dial a phone number with your mobile
phone keypad and still use the Uconnect Phone
(while dialing via the mobile phone keypad, the
user must exercise caution and take precau-
tionary safety measures). By dialing a number
with your paired Bluetooth mobile phone, the
audio will be played through your vehicle’s
audio system. The Uconnect Phone will work
the same as if you dial the number using Voice
Command.
NOTE:
Certain brands of mobile phones do not
send the dial ring to the Uconnect Phone to
play it on the vehicle audio system, so you
will not hear it. Under this situation, after
successfully dialing a number the user may
feel that the call did not go through even
though the call is in progress. Once your call
is answered, you will hear the audio.
Mute/Un-Mute (Mute ON/OFF)
When you mute the Uconnect Phone, you will
still be able to hear the conversation comingfrom the other party, but the other party will not
be able to hear you. To mute the Uconnect
Phone:
•Push the Voice Command
button.
•Following the beep, say “Mute.”
To un-mute the Uconnect Phone:
•Push the Voice Command
button.
•Following the beep, say “Mute off.”
Advanced Phone Connectivity
Transfer Call To And From Mobile Phone
The Uconnect Phone allows ongoing calls to be
transferred from your mobile phone to the
Uconnect Phone without terminating the call.
To transfer an ongoing call from your Uconnect
Phone paired mobile phone to the Uconnect
Phone or vice versa using Voice Command:
1. Push the Voice Command
button and
say “Transfer Call.”Connect Or Disconnect Link Between The
Uconnect Phone And Mobile Phone
Your mobile phone can be paired with many
different electronic devices, but can only be
actively “connected” with one electronic device
at a time.
If you would like to connect or disconnect the
Bluetooth connection between your mobile
phone and the Uconnect Phone System, follow
the instructions described in your mobile phone
User’s Manual.
List Paired Mobile Phone Names
•Push the Phone
button to begin.
•After the “Ready” prompt and the following
beep, say “Setup Phone Pairing.”
•When prompted, say “List Phones.”
•The Uconnect Phone will play the phone
names of all paired mobile phones in order
from the highest to the lowest priority. To
“Select” or “Delete” a paired phone being
announced, push the Voice Command
button and say “Select” or “Delete.” Also,
see the next two sections for an alternate
way to “Select” or “Delete” a paired phone.
76
Page 82 of 332
Voice Command
•For best performance, adjust the rearview
mirror to provide at least ½ inch (1 cm) gap
between the overhead console (if equipped)
and the mirror.
•Always wait for the beep before speaking.
•Speak normally, without pausing, just as you
would speak to a person sitting a few feet/
meters away from you.
•Make sure that no one other than you is
speaking during a Voice Command period.
•Performance is maximized under:
•low-to-medium blower setting
•low-to-medium vehicle speed
•low road noise
•smooth road surface
•fully closed windows
•dry weather condition
•The system may not always work for some
accents.•When navigating through an automated sys-
tem such as voice mail, or when sending a
page, at the end of speaking the digit string,
make sure to say “Send.”
•Storing names in the phonebook when the
vehicle is not in motion is recommended.
•It is not recommended to store similar sound-
ing names in the Uconnect Phonebook.
•Phonebook (Downloaded and Uconnect
Phone Local) name recognition rate is opti-
mized when the entries are not similar.
•Numbers must be spoken in single digits.
“800” must be spoken “eight-zero-zero” not
“eight hundred.”
•You can say “O” (letter “O”) for “0” (zero).
•Even though international dialing for most
number combinations is supported, some
shortcut dialing number combinations may
not be supported.
•In a convertible vehicle, system performance
may be compromised with the convertible top
down.Far End Audio Performance
Audio quality is maximized under:
•Low-to-medium blower setting
•Low-to-medium vehicle speed
•Low road noise
•Smooth road surface
•Fully closed windows
•Dry weather conditions
•Operation from the driver’s seat
•Performance, such as audio clarity, echo,
and loudness to a large degree rely on the
phone and network, and not the Uconnect
Phone
•Echo at the phone far end can sometimes be
reduced by lowering the in-vehicle audio
volume
Recent Calls
If your phone supports “Automatic Phonebook
Download,” Uconnect Phone can list your Out-
going, Incoming and Missed Calls.
78
Page 89 of 332
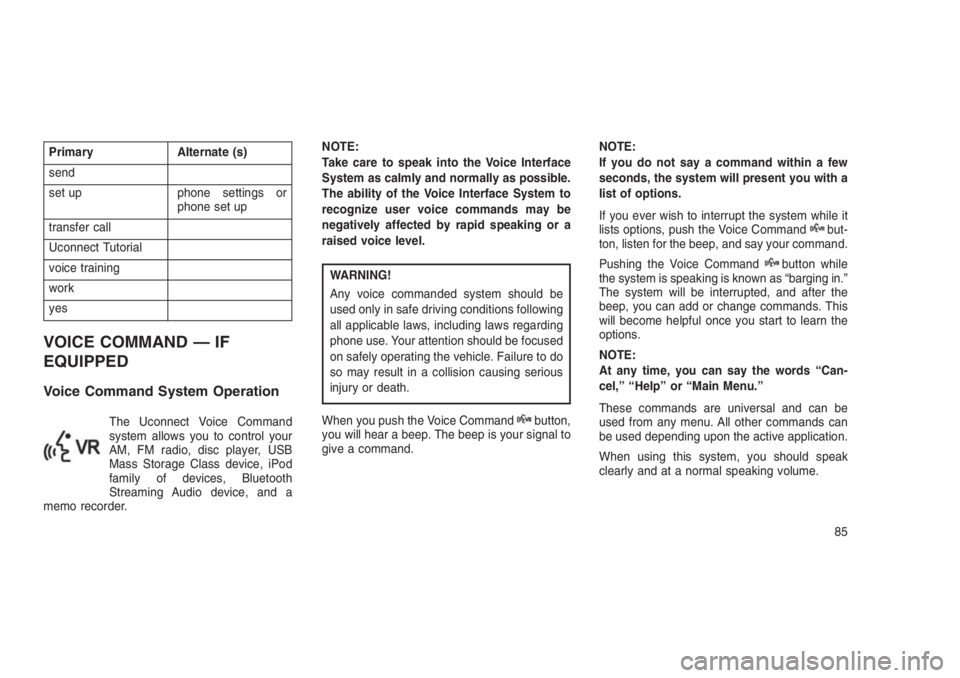
Primary Alternate (s)
send
set up phone settings or
phone set up
transfer call
Uconnect Tutorial
voice training
work
yes
VOICE COMMAND — IF
EQUIPPED
Voice Command System Operation
The Uconnect Voice Command
system allows you to control your
AM, FM radio, disc player, USB
Mass Storage Class device, iPod
family of devices, Bluetooth
Streaming Audio device, and a
memo recorder.NOTE:
Take care to speak into the Voice Interface
System as calmly and normally as possible.
The ability of the Voice Interface System to
recognize user voice commands may be
negatively affected by rapid speaking or a
raised voice level.
WARNING!
Any voice commanded system should be
used only in safe driving conditions following
all applicable laws, including laws regarding
phone use. Your attention should be focused
on safely operating the vehicle. Failure to do
so may result in a collision causing serious
injury or death.
When you push the Voice Command
button,
you will hear a beep. The beep is your signal to
give a command.NOTE:
If you do not say a command within a few
seconds, the system will present you with a
list of options.
If you ever wish to interrupt the system while it
lists options, push the Voice Command
but-
ton, listen for the beep, and say your command.
Pushing the Voice Command
button while
the system is speaking is known as “barging in.”
The system will be interrupted, and after the
beep, you can add or change commands. This
will become helpful once you start to learn the
options.
NOTE:
At any time, you can say the words “Can-
cel,” “Help” or “Main Menu.”
These commands are universal and can be
used from any menu. All other commands can
be used depending upon the active application.
When using this system, you should speak
clearly and at a normal speaking volume.
85
Page 90 of 332
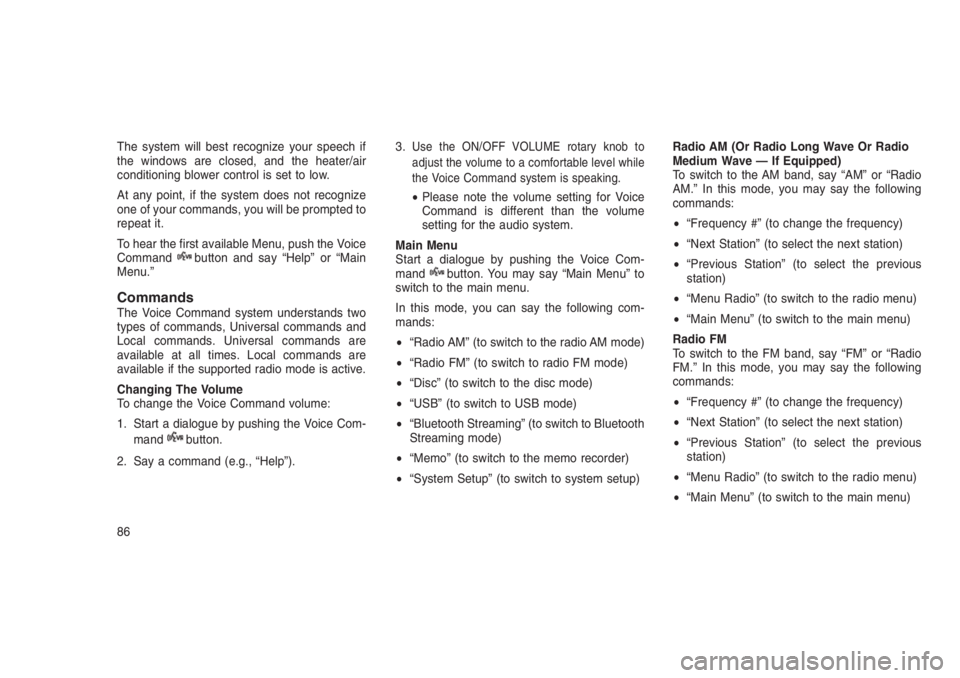
The system will best recognize your speech if
the windows are closed, and the heater/air
conditioning blower control is set to low.
At any point, if the system does not recognize
one of your commands, you will be prompted to
repeat it.
To hear the first available Menu, push the Voice
Command
button and say “Help” or “Main
Menu.”
CommandsThe Voice Command system understands two
types of commands, Universal commands and
Local commands. Universal commands are
available at all times. Local commands are
available if the supported radio mode is active.
Changing The Volume
To change the Voice Command volume:
1. Start a dialogue by pushing the Voice Com-
mand
button.
2. Say a command (e.g., “Help”).3.
Use the ON/OFF VOLUME rotary knob to
adjust the volume to a comfortable level while
the Voice Command system is speaking.
•Please note the volume setting for Voice
Command is different than the volume
setting for the audio system.
Main Menu
Start a dialogue by pushing the Voice Com-
mand
button. You may say “Main Menu” to
switch to the main menu.
In this mode, you can say the following com-
mands:
•“Radio AM” (to switch to the radio AM mode)
•“Radio FM” (to switch to radio FM mode)
•“Disc” (to switch to the disc mode)
•“USB” (to switch to USB mode)
•“Bluetooth Streaming” (to switch to Bluetooth
Streaming mode)
•“Memo” (to switch to the memo recorder)
•“System Setup” (to switch to system setup)Radio AM (Or Radio Long Wave Or Radio
Medium Wave — If Equipped)
To switch to the AM band, say “AM” or “Radio
AM.” In this mode, you may say the following
commands:
•“Frequency #” (to change the frequency)
•“Next Station” (to select the next station)
•“Previous Station” (to select the previous
station)
•“Menu Radio” (to switch to the radio menu)
•“Main Menu” (to switch to the main menu)
Radio FM
To switch to the FM band, say “FM” or “Radio
FM.” In this mode, you may say the following
commands:
•“Frequency #” (to change the frequency)
•“Next Station” (to select the next station)
•“Previous Station” (to select the previous
station)
•“Menu Radio” (to switch to the radio menu)
•“Main Menu” (to switch to the main menu)
86
Page 121 of 332
4
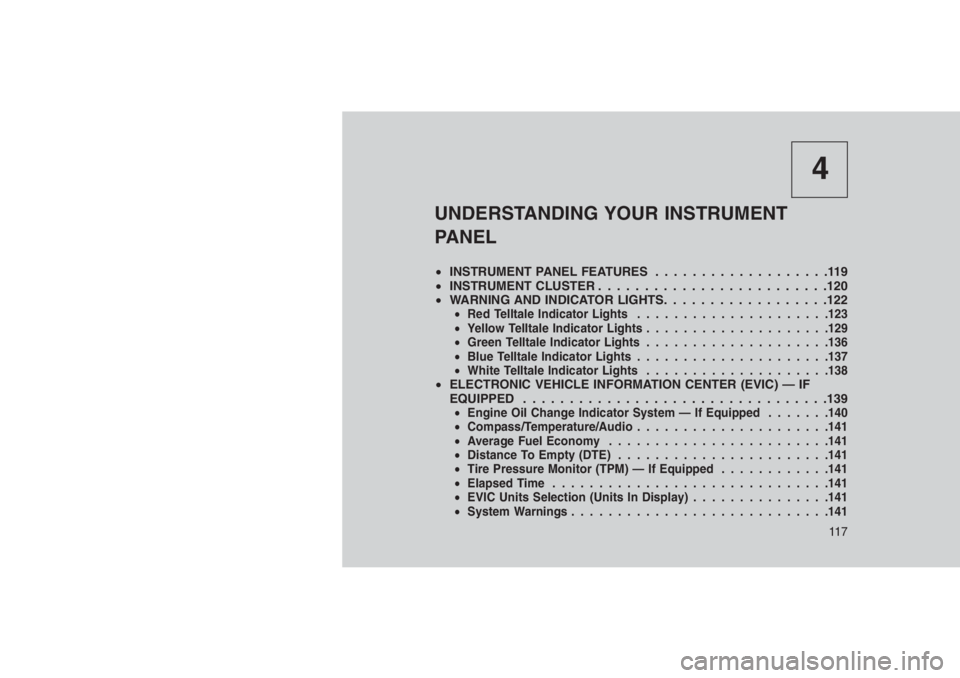
UNDERSTANDING YOUR INSTRUMENT
PANEL
•INSTRUMENT PANEL FEATURES...................119
•INSTRUMENT CLUSTER . . . . . . . . . . . . . . . . . . . . . . . . .120
•WARNING AND INDICATOR LIGHTS. . .. . . . . . . . . . . . . . .122
•Red Telltale Indicator Lights.....................123
•Yellow Telltale Indicator Lights....................129
•Green Telltale Indicator Lights....................136
•Blue Telltale Indicator Lights.....................137
•White Telltale Indicator Lights....................138
•ELECTRONIC VEHICLE INFORMATION CENTER (EVIC) — IF
EQUIPPED . . . . . . . ..........................139
•Engine Oil Change Indicator System — If Equipped.......140
•Compass/Temperature/Audio.....................141
•Average Fuel Economy........................141
•Distance To Empty (DTE).......................141
•Tire Pressure Monitor (TPM) — If Equipped............141
•Elapsed Time..............................141
•EVIC Units Selection (Units In Display)...............141
•System Warnings............................141
11 7
Page 122 of 332
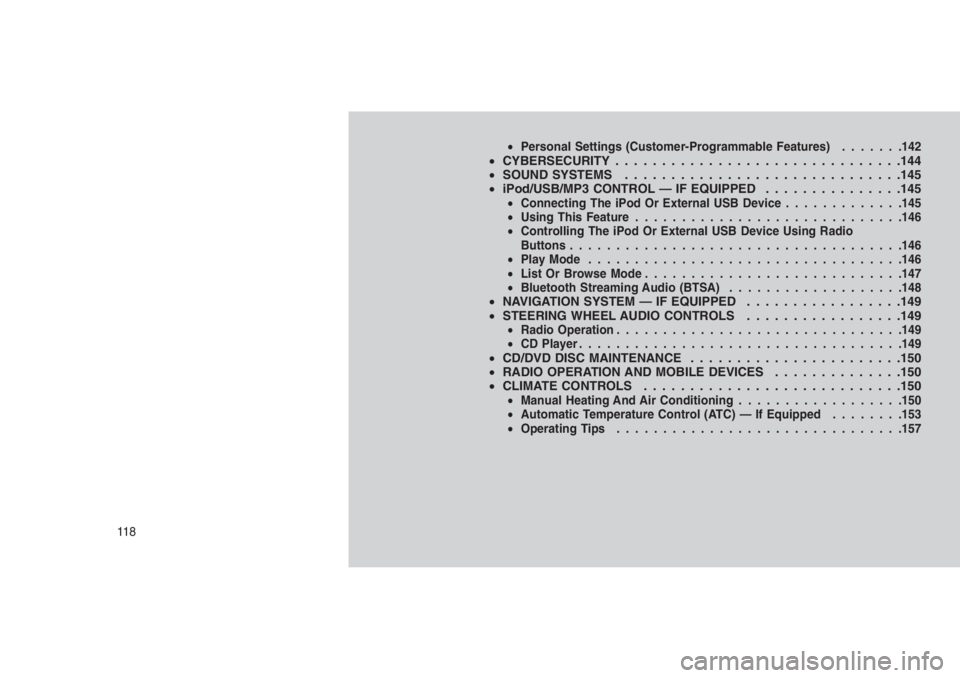
•Personal Settings (Customer-Programmable Features).......142•CYBERSECURITY . . . . . . . . . . . . . . . . . . . . . .. . . . . . . . .144
•SOUND SYSTEMS . . . . . .. . . . . . . . . . . . . . . . . . . . . . . .145
•iPod/USB/MP3 CONTROL — IF EQUIPPED . . . . . . . . . . . . . . .145
•Connecting The iPod Or External USB Device.............145
•Using This Feature.............................146
•Controlling The iPod Or External USB Device Using Radio
Buttons....................................146
•Play Mode..................................146
•List Or Browse Mode............................147
•Bluetooth Streaming Audio (BTSA)...................148
•NAVIGATION SYSTEM — IF EQUIPPED . . . . . . . . . . . . .. . . .149
•STEERING WHEEL AUDIO CONTROLS.................149
•Radio Operation...............................149
•CD Player...................................149
•CD/DVD DISC MAINTENANCE . . . . . . . . . . . . . . . ........150
•RADIO OPERATION AND MOBILE DEVICES . . . . . . . . ......150
•CLIMATE CONTROLS . . . . . . . . . . . . . . . .............150
•Manual Heating And Air Conditioning..................150
•Automatic Temperature Control (ATC) — If Equipped........153
•Operating Tips...............................157
11 8
Page 143 of 332
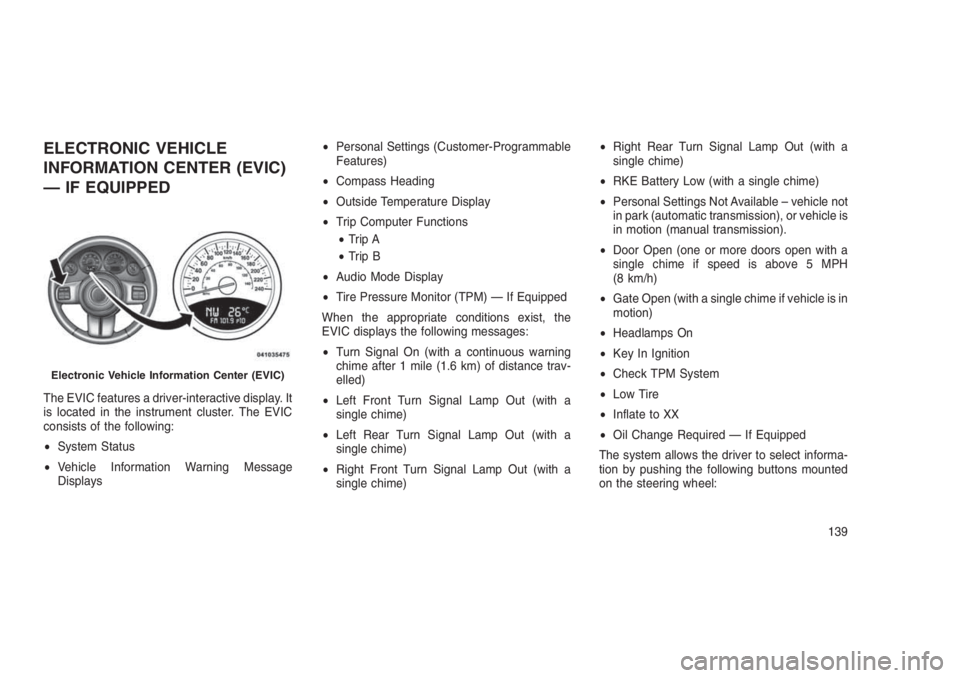
ELECTRONIC VEHICLE
INFORMATION CENTER (EVIC)
— IF EQUIPPED
The EVIC features a driver-interactive display. It
is located in the instrument cluster. The EVIC
consists of the following:
•System Status
•Vehicle Information Warning Message
Displays•Personal Settings (Customer-Programmable
Features)
•Compass Heading
•Outside Temperature Display
•Trip Computer Functions
•Trip A
•Trip B
•Audio Mode Display
•Tire Pressure Monitor (TPM) — If Equipped
When the appropriate conditions exist, the
EVIC displays the following messages:
•Turn Signal On (with a continuous warning
chime after 1 mile (1.6 km) of distance trav-
elled)
•Left Front Turn Signal Lamp Out (with a
single chime)
•Left Rear Turn Signal Lamp Out (with a
single chime)
•Right Front Turn Signal Lamp Out (with a
single chime)•Right Rear Turn Signal Lamp Out (with a
single chime)
•RKE Battery Low (with a single chime)
•Personal Settings Not Available – vehicle not
in park (automatic transmission), or vehicle is
in motion (manual transmission).
•Door Open (one or more doors open with a
single chime if speed is above 5 MPH
(8 km/h)
•Gate Open (with a single chime if vehicle is in
motion)
•Headlamps On
•Key In Ignition
•Check TPM System
•Low Tire
•Inflate to XX
•Oil Change Required — If Equipped
The system allows the driver to select informa-
tion by pushing the following buttons mounted
on the steering wheel:
Electronic Vehicle Information Center (EVIC)
139
Page 145 of 332
Compass/Temperature/AudioPush and release theCOMPASSbutton to dis-
play one of eight compass headings to indicate
the direction the vehicle is facing, the outside
temperature, and the current radio station.
Refer to “Personal Settings (Customer-
Programmable Features)” in this section for
additional information regarding the compass.
Average Fuel EconomyShows the average fuel economy since the last
reset (pushing and holding theRIGHTarrow
button as prompted in the EVIC display to
reset). When the fuel economy is reset, the
display will read “RESET” or show dashes for
two seconds. Then, the history information will
be erased, and the averaging will continue from
the last fuel reading before the reset.
Distance To Empty (DTE)Shows the estimated distance that can be trav-
elled with the fuel remaining in the tank. This
estimated distance is determined by a weighted
average of the instantaneous and average fuel
economy, according to the current fuel tank
level. This is not resettable.NOTE:
Significant changes in driving style or ve-
hicle loading will greatly affect the actual
drivable distance of the vehicle, regardless
of the DTE displayed value.
When the DTE value is less than 30 miles
(48 km) estimated driving distance, the DTE
display will change to a text display of"LOW
FUEL.” This display will continue until the ve-
hicle runs out of fuel. Adding a significant
amount of fuel to the vehicle will turn off the
"LOW FUEL"text and a new DTE value will be
displayed, based on the current values in the
DTE calculation and the current fuel tank level.
Tire Pressure Monitor (TPM) — If
Equipped
Refer to “Starting And Operating,” “Tire Pres-
sure Monitoring System (TPMS) for system
operation.
Elapsed TimeShows the total elapsed time of travel since the
last reset. Elapsed time will increment when the
ignition is placed in the RUN/START position.Elapsed time is displayed as follows:
hours: minutes: seconds
Elapsed time can be reset by pushing and
holding theRIGHT
arrow button (as
prompted in the EVIC display). Upon reset, all
digits will change to zeros, and time will start
again if the ignition is in the RUN or START
position.
EVIC Units Selection (Units In
Display)
Displays the units used for the Outside Tem-
perature, Average Fuel Economy, Distance to
Empty, and Tire Pressure features. Push and
release theRIGHT
arrow button to toggle
units between"U.S."and"METRIC."
System WarningsDisplays “SYSTEM OK” if there are no active
Warning Messages stored. Pushing and releas-
ing theDOWN
arrow button when “SYSTEM
OK” is displayed will do nothing. Displays “SYS-
TEM WARNINGS PRESENT” if there are active
Warning Messages stored. Pushing and releas-
ing theDOWN
arrow button when “SYSTEM
141